Work on Miho continues to progress. I made her a wig yesterday...

It's the first time I tried making a two-tone wig, using dark brown and purple mohair. It's interesting that the camera really highlights the difference in colour, since in real life they blend in together much more...
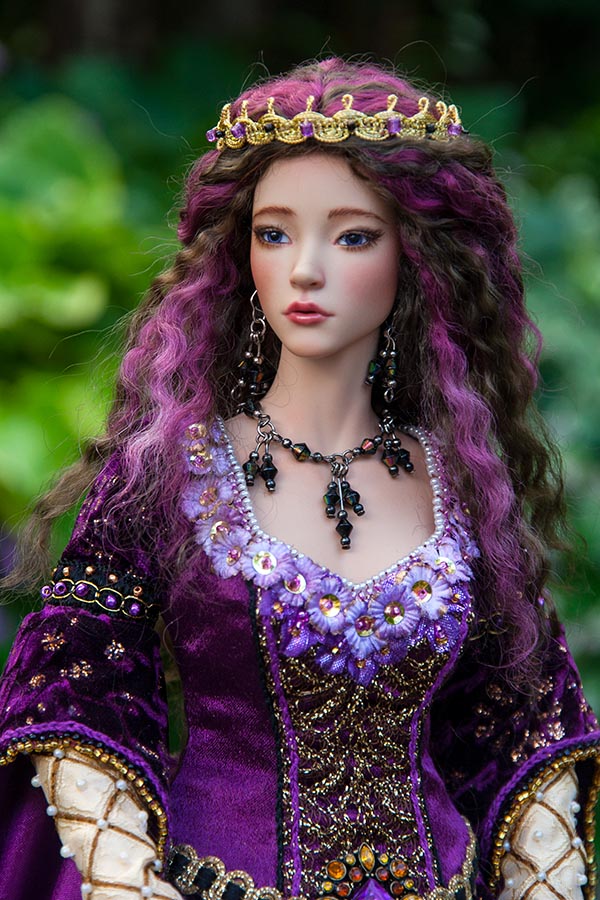
It still needs a bit of styling, but I'll wait a bit before I attempt that.I also haven't decided on a headdress. I saved a picture of one that I'd like to make, but I'm not sure that I can.
Her wings are also coming along nicely. I sewed pockets for wire along the top edge, and stitched the veins. I stuffed the top edge of the wings, which proved extremely challenging, especially on the very narrow ends. But I got it done. Then I drew the ragged edges and cut those out, then glued the edge layers together so they won't separate. The wing on the left has the first layer of paint added along the edge....
Her wings are also coming along nicely. I sewed pockets for wire along the top edge, and stitched the veins. I stuffed the top edge of the wings, which proved extremely challenging, especially on the very narrow ends. But I got it done. Then I drew the ragged edges and cut those out, then glued the edge layers together so they won't separate. The wing on the left has the first layer of paint added along the edge....
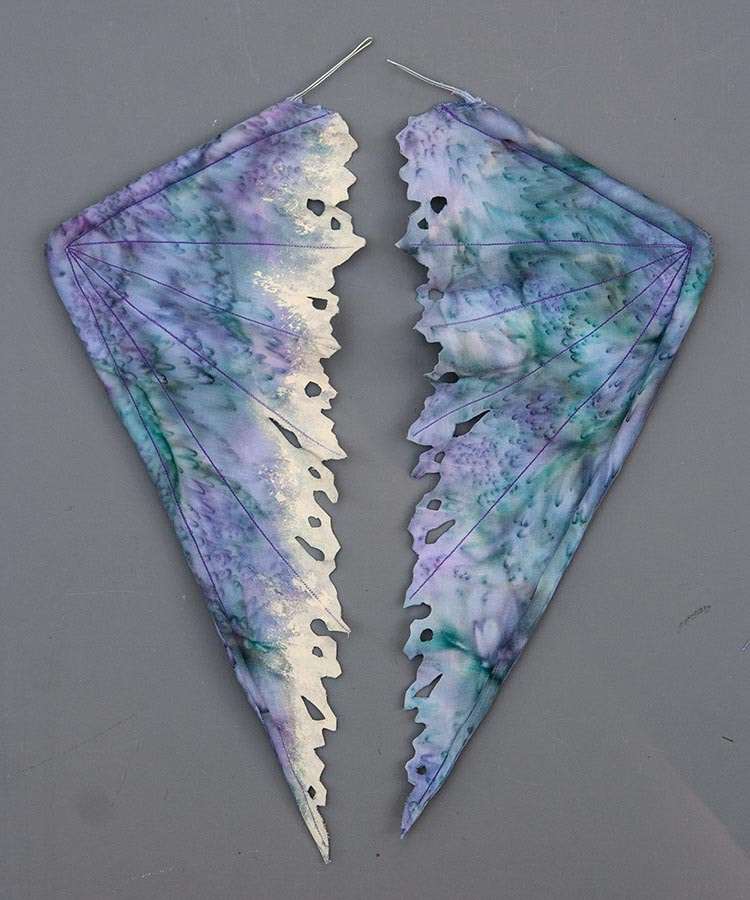
I wanted 'horns' on the wing joint, so sculpted them out of Aves Apoxie, and poked holes through the bottoms so they could get sewn on, since that would be a lot stronger than just gluing. After the horns cured I sewed them on the wings and covered the bases with more Apoxie....

Then today, after many layers of diluted paint, the wing on the left is ready for beading, and glitter paint. Note that even though most of the turquoise colour is now hidden, the texture of the salt dye pattern still shows through adding textural interest....something that would not have been possible if I'd used plain cotton fabric....

The wing on the right is finished. Well actually that one side is done. I still have to add the 3-D black veins on the other side, but they have to dry on this side first....
 RSS Feed
