Antique Lilac
  • Home
  • for Sale
  • Galleries
  • Favourite Photos
  • Tutorials
  • Blog
  • Links
  • Books

Finished Another Victorian Ballgown

7/31/2012

7 Comments

 
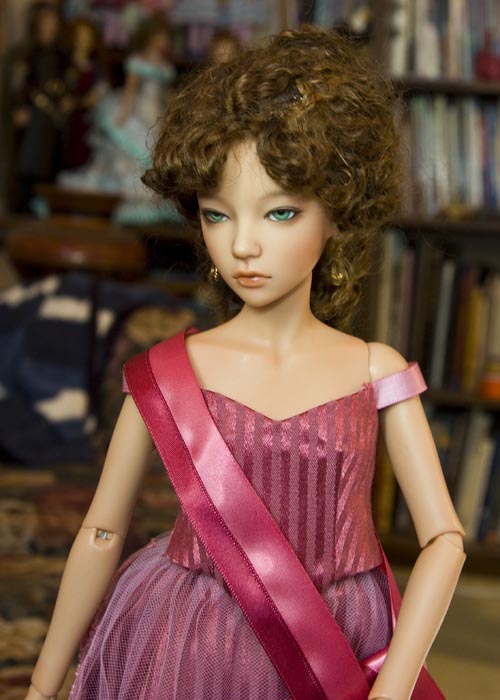
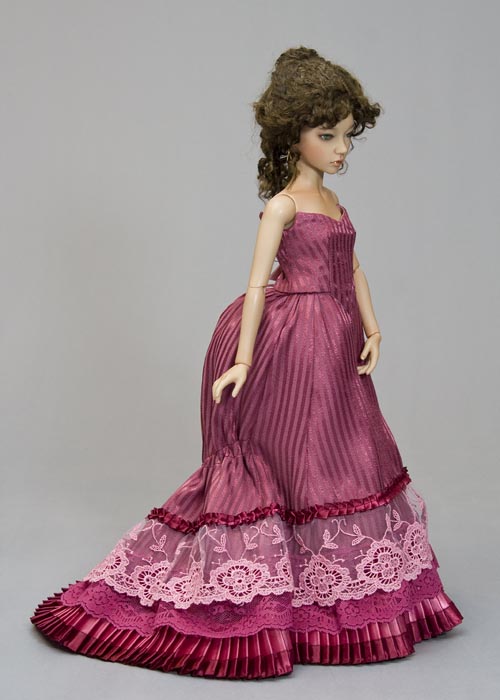
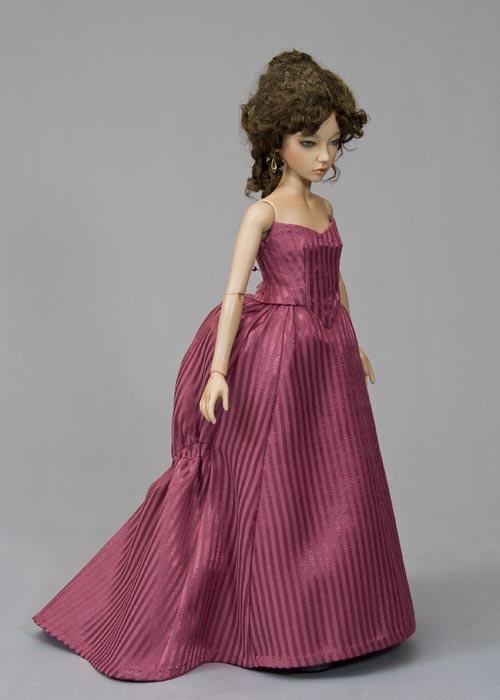
Yesterday I reworked and finished the bodice. It looks so much better now.
Picture
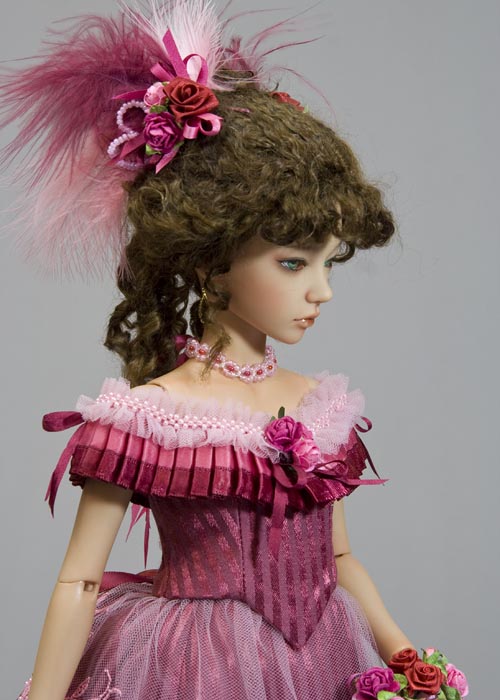
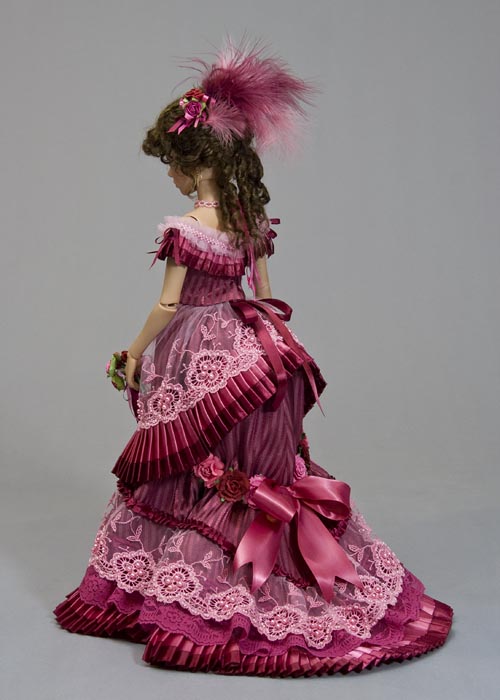
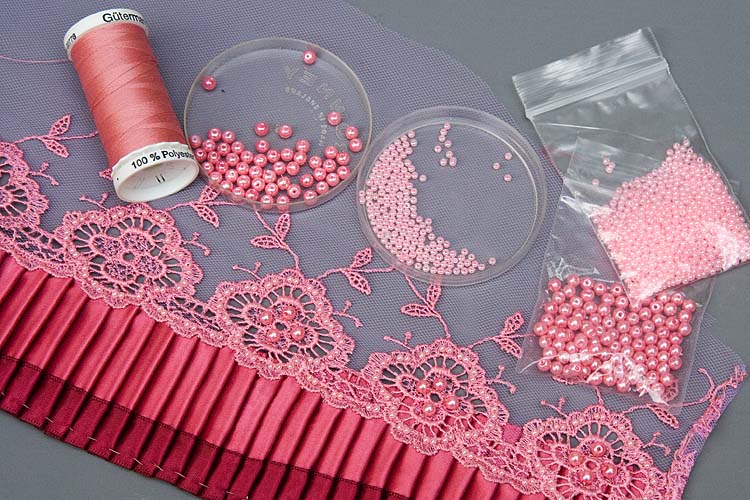
I also added the final embellishments - bows and flowers - to the back of the skirts. I also made a small choker necklace that ties in back with silk ribbons.  

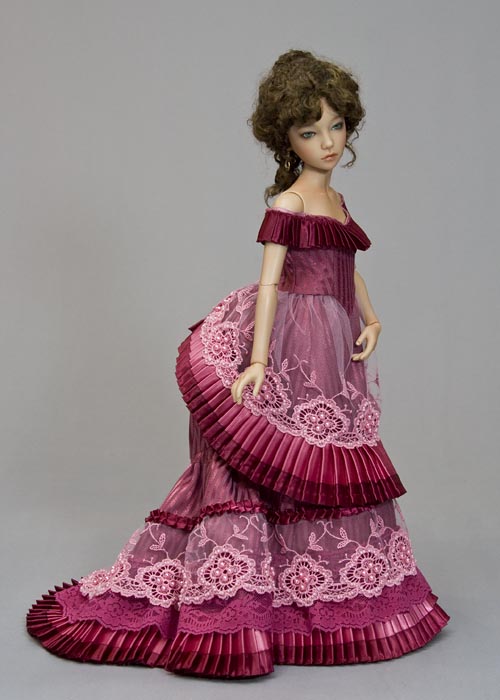
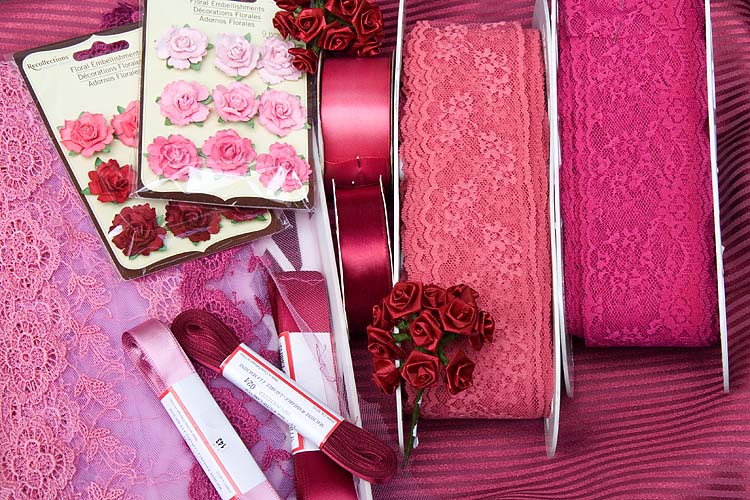
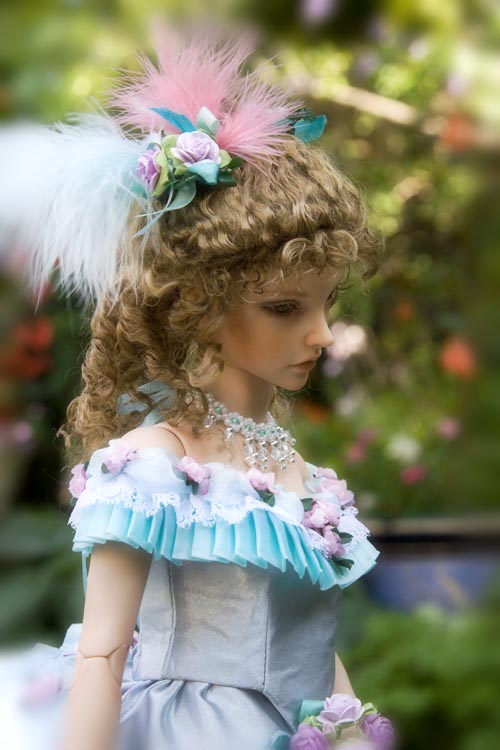
All the ornaments in her hair are separate so they can be inserted to create whatever look one wants.  I'm very pleased with how this dress turned out.  Of course it helps that red and pink are my favourite colours.  It looks amazing on Asa. Now I have to take all the final photos.....
Picture
7 Comments

Back to Square One

7/30/2012

1 Comment

 
I was halfway through sewing on the ruched tulle last night, when I decided it just wasn't working.  There was something missing. I had the pale dusty rose tulle, and the dark wine pleated ribbon, but there was no medium pink to tie into the pleating on the skirt. I would have liked to have used the medium pink ribbon with a narrower wine red on the edge, but I only had the medium pink in one very wide width. Maybe I could figure out a way to make the medium pink ribbon narrower.  So, off came the ruching, and off came the pleated wine ribbon.
Picture
So, this morning I drew a pen line 7/8" from the edge of the entire wide pink ribbon, cut the ribbon down, Fray Checked the edge. After it had dried I zig-zagged the Fray Checked edge, and sewed a narrow wine red ribbon over it. So now I'm right back where I started yesterday morning, but this time it should work out better. Like I said - this dress has a mind of it's own.
1 Comment

Beading Finished!

7/29/2012

3 Comments

 
The beading was a big job, although it didn't take quite as long as I thought it might. It looks amazing - much nicer in real than in the photo.  The beading adds a definite element of elegance, as does the sheer netting of the over-skirt.
Picture
I've sewn on the pleated wine ribbon around the neckline - it's not as dark in real life, especially not the bodice itself.  Now to finish off the neckline.  I can't use the pink lace at the neckline because it's way too large a scale, so will make a gathered ruche of the old rose tulle, and add decorative beading. Also, maybe a flower in the center front. Then I have to finish the back with ribbons and possibly some larger flowers below the bustle. Unlike the minty-gray gown where I knew what I was doing from the start, this gown has a mind of it's own, and the biggest challenge is trying to figure out what it wants.
3 Comments

Beading Lace

7/28/2012

0 Comments

 
I've decided that the overskirt will be just sheer lace with a pleated edge. Problem is it looked too plain for my taste, so I decided to "fancy it up" and bead the lace.
Picture
Of course that means I also have to go back and bead all that lace around the under-skirt too. That's going to be a BIG job, and hopefully it doesn't take longer than this weekend.  I wish I'd know I was going to do this before I sewed that lace onto the skirt - it would have been so much easier to bead then.
0 Comments

Back to My Gown

7/27/2012

0 Comments

 
It's been a rough week on several levels, and this gown isn't co-operating either. The first gown came together right away, but the dusty wine one is proving a struggle. It's not as simple as just remaking the first gown in different colours, as it's impossible to get similar sized trims, so I had to come up with a totally different embellishment plan. After considerable thinking, draping, pinning, looking, changing things around, thinking some more, I finally decided on a direction to go. I had drawn up a pattern for a separate train, and even made one out of test fabric. But the trims are all too wide to embellish the edges of a train, so I've dropped that idea. This gown is going to be "lacier".  Here is where I'm at so far......
Picture
0 Comments

"Hey Dude!! Where Are You Going With My Clothes?!?"

7/26/2012

4 Comments

 
I made a wig for my new boy - my Limhwa Mono, Adrian - and took a few quick photos outside - it's way too humid out there for more right now. I couldn't resist taking this photo......
Picture
The new Adrian is a pale, normal, French Resin, and he's a lot younger. He looked way too "girlie" with all the straight wigs I have, so I made him a wavy one from the same brown mohair I made Isar's upswept hairdo a few days ago. I think he's rather cute.
Picture
4 Comments

One of Those Days

7/25/2012

0 Comments

 
I'm having another one of those days where everything is a challenge - for every step forward there was at least one backwards. Every seam has to be picked out and redone a second time - or even a third.  And I already had a headache when I woke up. On days like this it's best not to be working on something that really matters, so I'm tackling Adrian's outfit instead of the dusty wine Victorian gown. The sleeves of Adrian's original outfit were too long so they needed shortening - but where?  I cut a bit off the shoulder area, then had to reduce the middle section by folding and hand-sewing to make it shorter. The original sleeves were sewn right onto the body, but that isn't an option with clothes that need to be removable. So I added facings along the bottom openings of a thin wine red fabric to match the cuffs. Then it dawned on me that the wine red might leave marks on the boy's resin wrists, so off it all had to come, and I redid everything with a light tan fabric. The lower sleeves will need to lace up, but the edges are way too thick to insert eyelets, so I'm sewing the "eyes" from hooks & eyes along the outside edges. All this redoing of handwork goes very slowly. I'm trying to decide whether or not to insert eyelets into the front edges of the hooded cape-let or leave it as is. I also need to make him a wig, but am not sure if it's wise to even try that today.
0 Comments

Dusty Wine

7/24/2012

3 Comments

 
The main under-skirt and the bodice of the dusty wine Victorian gown have been sewn. This fabric is a lot harder to work with. It slips and slides all over the place, and it frays a lot.
Picture
Now it's time to start embellishing. I've pulled out several different laces and ribbons. I don't know at this point which ones will get used and which ones won't - I know which ones I'd like to use, but it all depends on if the colour and motifs work. First I'll make a row of pleated ribbon for the bottom edge, and then I can decide on laces.  
Picture
This gown will be very different from the minty-gray one. For this dusty wine one I'm planning a separate train, and a pouffy over-skirt. This gown will have far less flowers - bigger ones. I bought some lovely mulberry paper roses at Michael's that I'm hoping will work.
3 Comments

Isar's Turn

7/23/2012

0 Comments

 
I finished Isar's upswept Victorian-style wig, and put the gown back on her. Her neckline was too bare, and she couldn't have earrings because I forgot to ask to have her ears pierced, so I made a necklace. It's so interesting how each doll looks so different in the same dress.
Picture
I'm "multi-tasking" today, working on several things at once. I've started the dusty wine under-skirt and bodice, and am also working on remaking Prince Adrian's clothes into a costume for my new Limhwa boy. So far, he has socks, pants and boots. I need to make him a shirt onto which to sew the fancy under-sleeves - which are a bit long - and then he's going to need a wig made. All the other parts of his costume can be used the way they are.
0 Comments

Making a Wig

7/22/2012

0 Comments

 
I tried the Victorian ball-gown on Isar, and to my surprise the bodice even fit - except the top snap wouldn't do up. So I guess "large" bust isn't all that much bigger than "small" bust after all. But I need to make Isar a wig, because her head is smaller than Asa's so she can't borrow her's,  so took the gown back off so it doesn't get covered with hair - it would be a total pain to pick mohair bits out of all those embellishments. Plus, I certainly wouldn't want any accidents with hot glue, water, or hairspray - not after all that work!
Picture
I chose a nice, curly, medium brown mohair, and have sewn the wefting. Next step is to hot-glue it onto the wig cap. Then tame and style it.
0 Comments
<<Previous

    Author

    Martha Boers is an award-winning Canadian doll maker and costumer specializing in fantasy and historical-style costumes.
    Read More... 

    Archives

    March 2023
    February 2023
    January 2023
    December 2022
    November 2022
    October 2022
    September 2022
    August 2022
    July 2022
    June 2022
    May 2022
    April 2022
    March 2022
    February 2022
    January 2022
    December 2021
    November 2021
    October 2021
    September 2021
    August 2021
    July 2021
    June 2021
    May 2021
    April 2021
    March 2021
    February 2021
    January 2021
    December 2020
    November 2020
    October 2020
    September 2020
    August 2020
    July 2020
    June 2020
    May 2020
    April 2020
    March 2020
    February 2020
    January 2020
    December 2019
    November 2019
    October 2019
    September 2019
    August 2019
    July 2019
    June 2019
    May 2019
    April 2019
    March 2019
    February 2019
    January 2019
    December 2018
    November 2018
    October 2018
    September 2018
    August 2018
    July 2018
    June 2018
    May 2018
    April 2018
    March 2018
    February 2018
    January 2018
    December 2017
    November 2017
    October 2017
    September 2017
    August 2017
    July 2017
    June 2017
    May 2017
    April 2017
    March 2017
    February 2017
    January 2017
    December 2016
    November 2016
    October 2016
    September 2016
    August 2016
    July 2016
    June 2016
    May 2016
    April 2016
    March 2016
    February 2016
    January 2016
    December 2015
    November 2015
    October 2015
    September 2015
    August 2015
    July 2015
    June 2015
    May 2015
    April 2015
    March 2015
    February 2015
    January 2015
    December 2014
    November 2014
    October 2014
    September 2014
    August 2014
    July 2014
    June 2014
    May 2014
    April 2014
    March 2014
    February 2014
    January 2014
    December 2013
    November 2013
    October 2013
    September 2013
    August 2013
    July 2013
    June 2013
    May 2013
    April 2013
    March 2013
    February 2013
    January 2013
    December 2012
    November 2012
    October 2012
    September 2012
    August 2012
    July 2012
    June 2012
    May 2012
    April 2012
    March 2012
    February 2012
    January 2012
    December 2011
    November 2011
    October 2011
    September 2011
    August 2011
    July 2011
    June 2011
    May 2011
    April 2011
    March 2011
    February 2011
    January 2011
    December 2010
    November 2010
    October 2010

    RSS Feed

Powered by Create your own unique website with customizable templates.