Antique Lilac
  • Home
  • for Sale
  • Galleries
  • Favourite Photos
  • Tutorials
  • Blog
  • Links
  • Books

Missing Him

2/28/2022

3 Comments

 
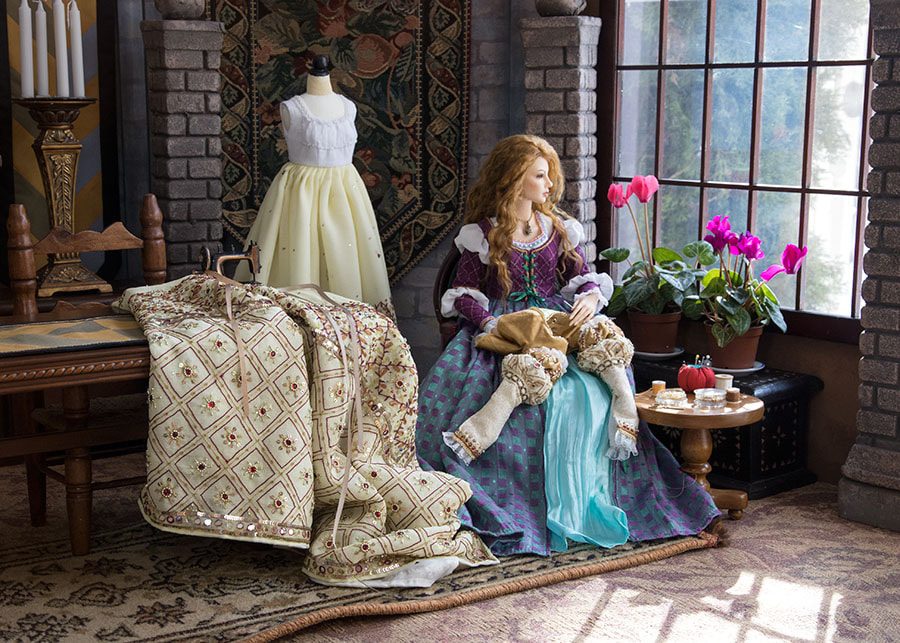
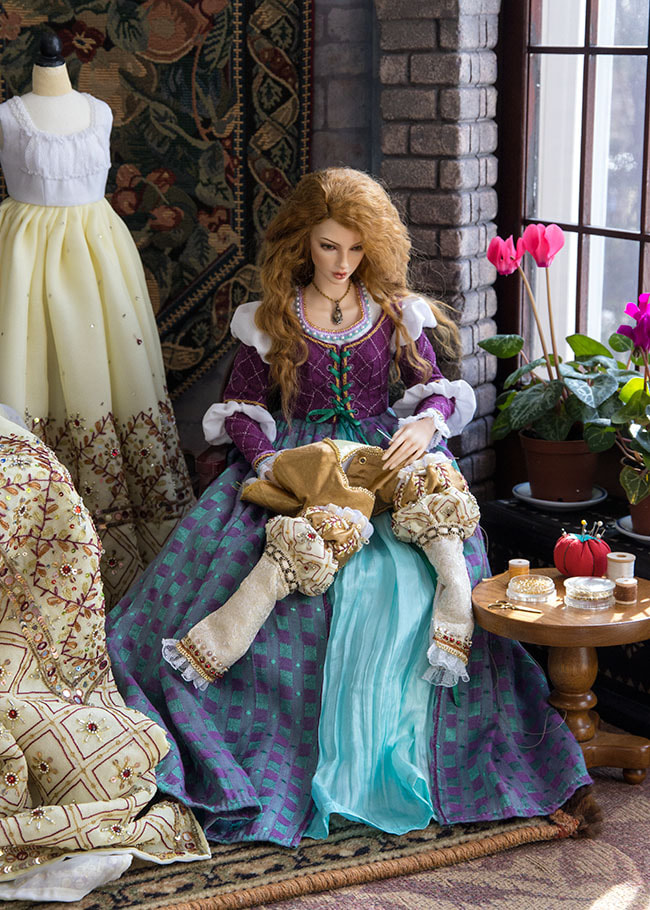
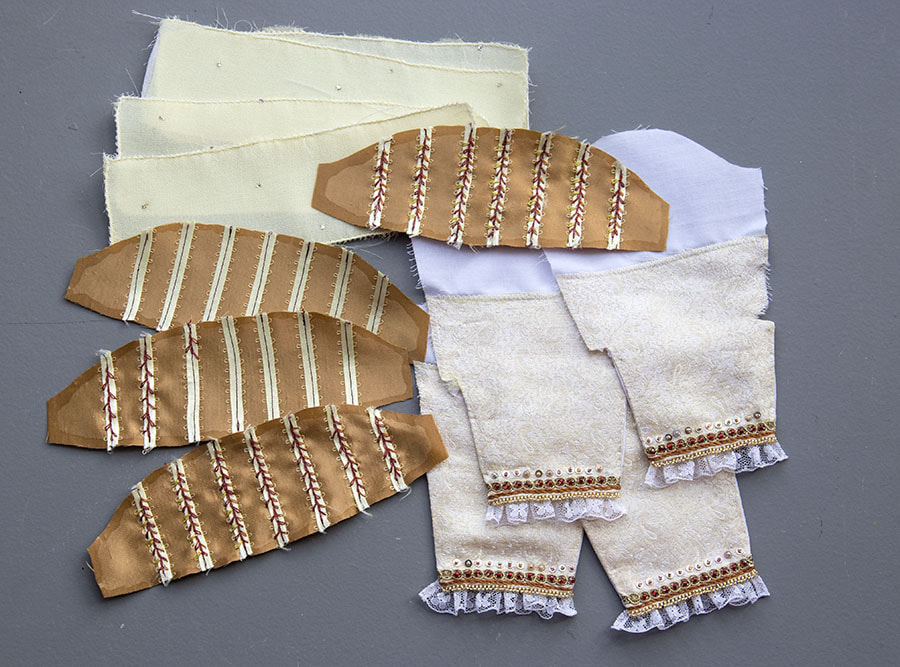
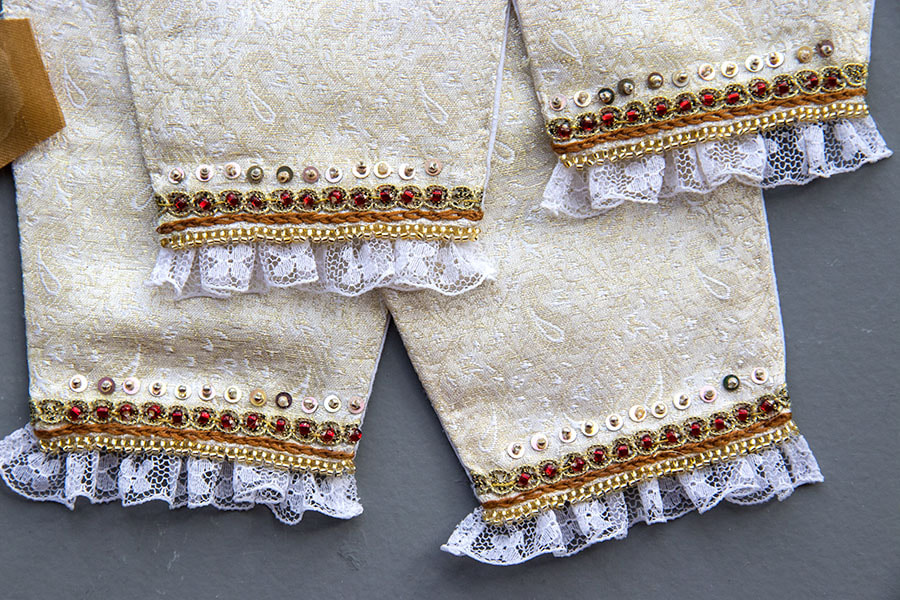
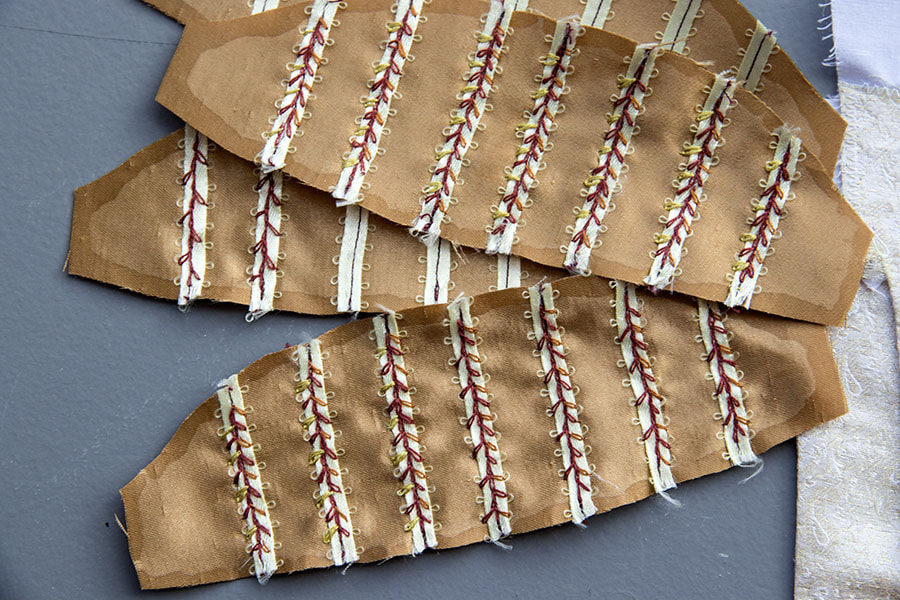
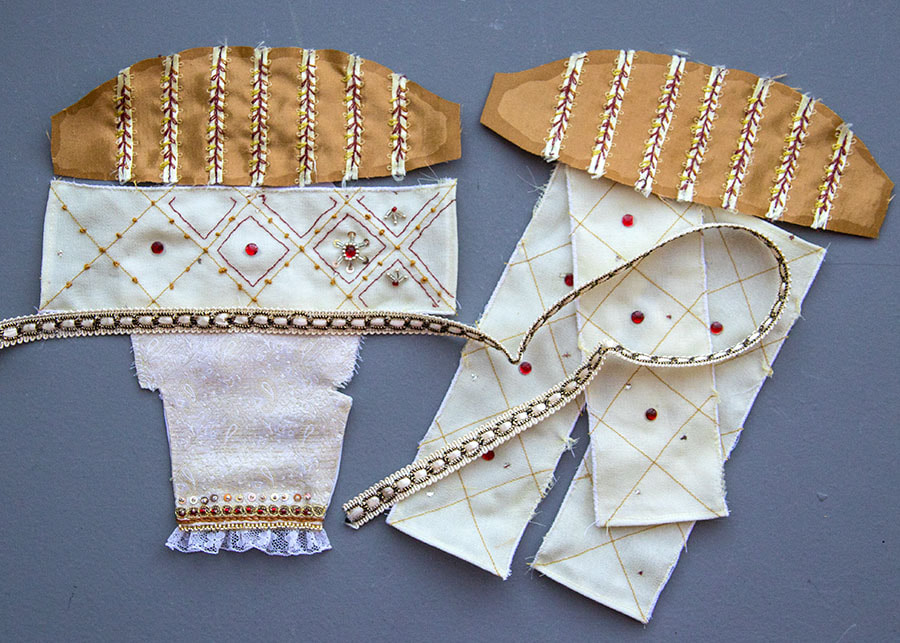
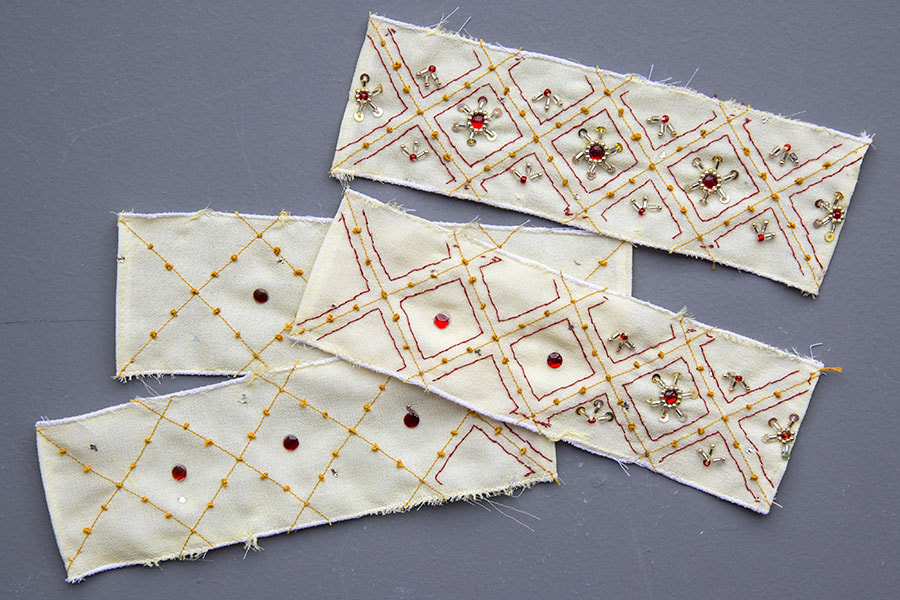
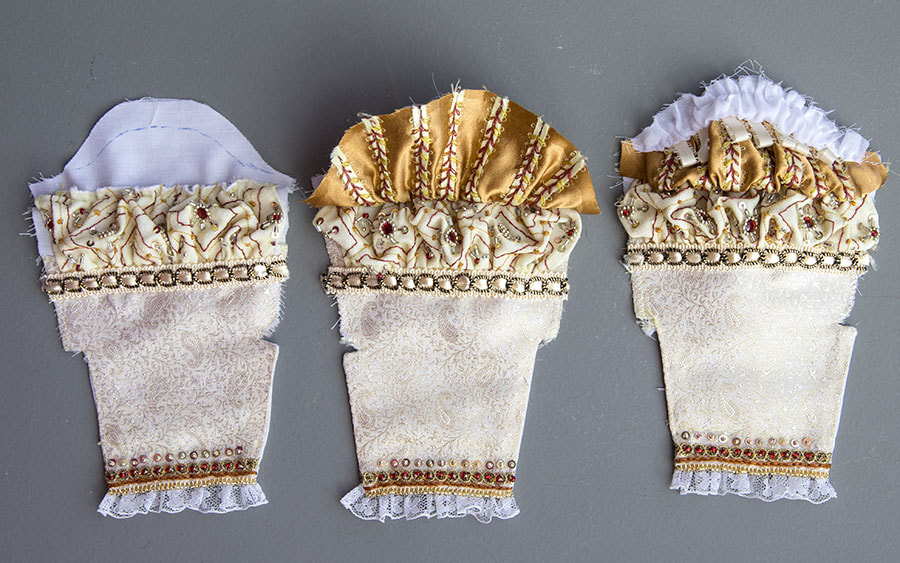
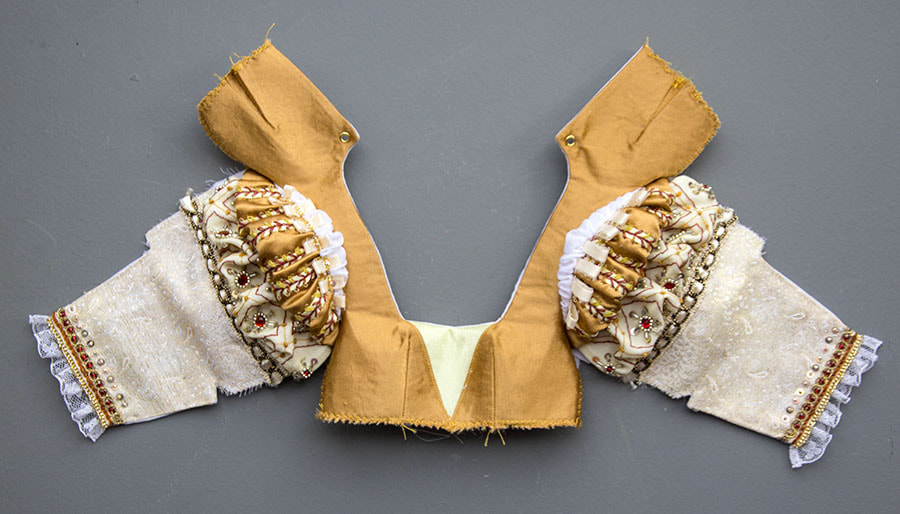
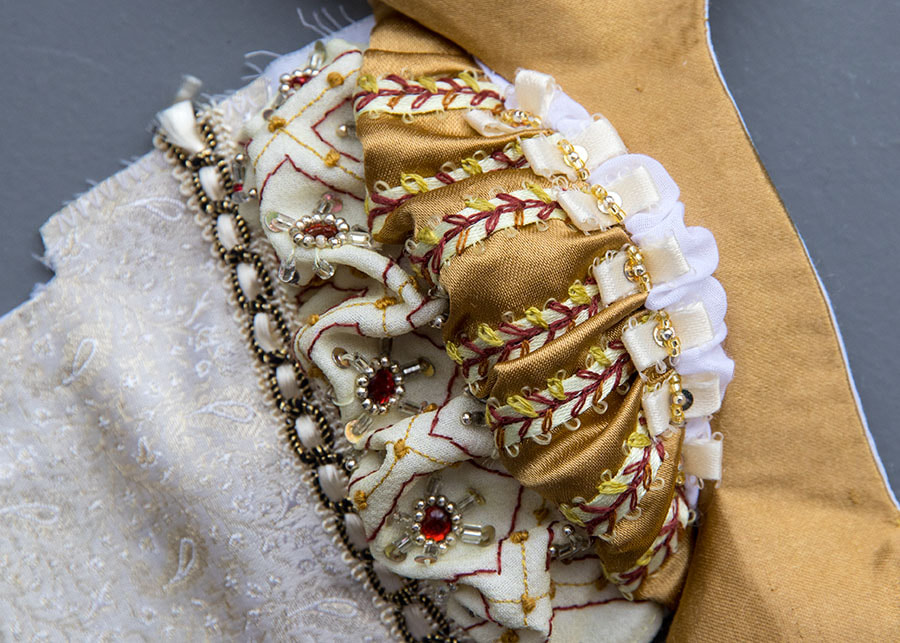
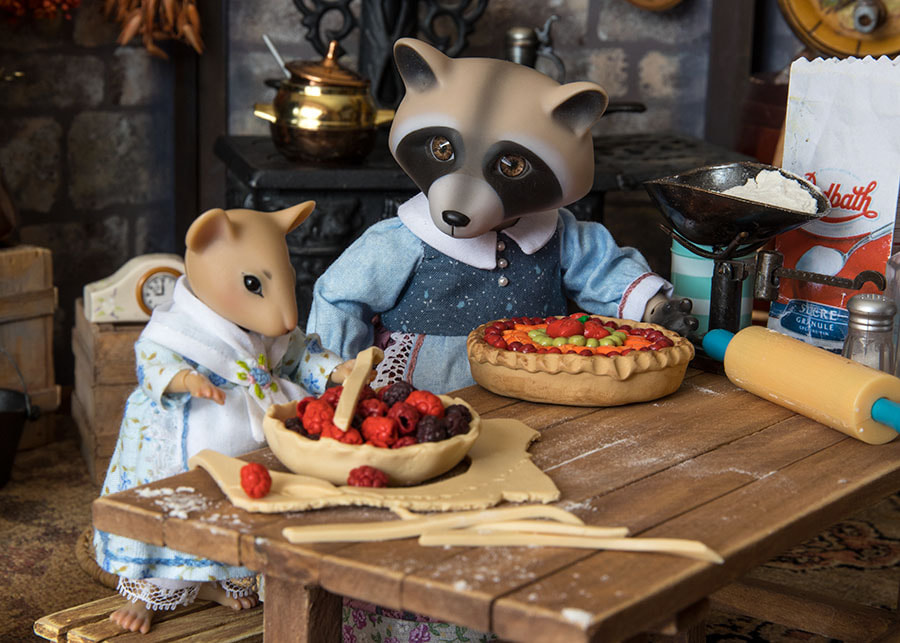
While Baron was away, Naomi busied herself working on her wedding gown....
Picture
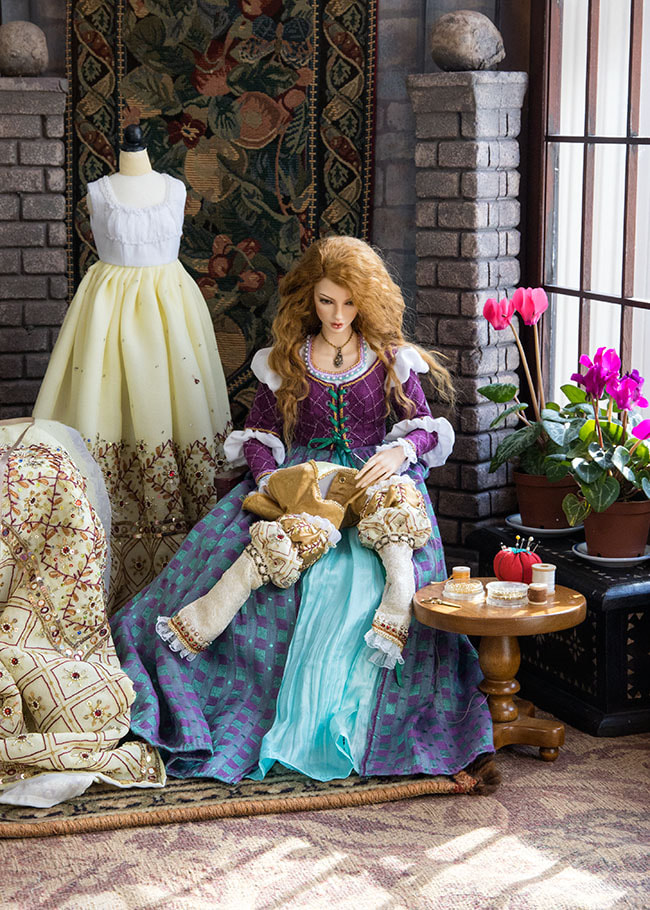
It was the perfect time to work on it, since there was no chance that he'd see it....
Picture
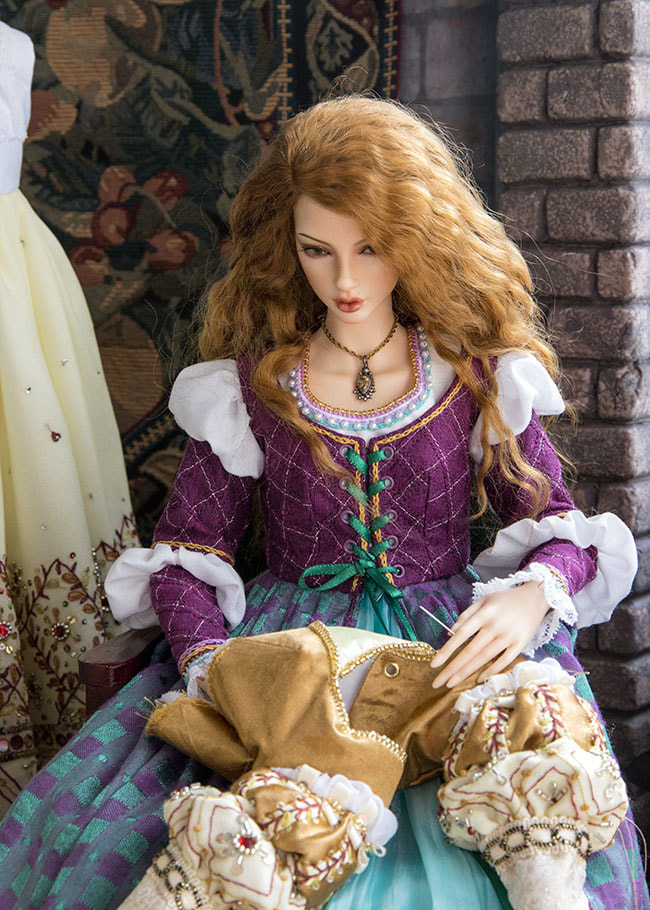
But she missed him terribly....
Picture
...and even more, missed not knowing where he was, or what he was doing...or when he was coming back....
Picture
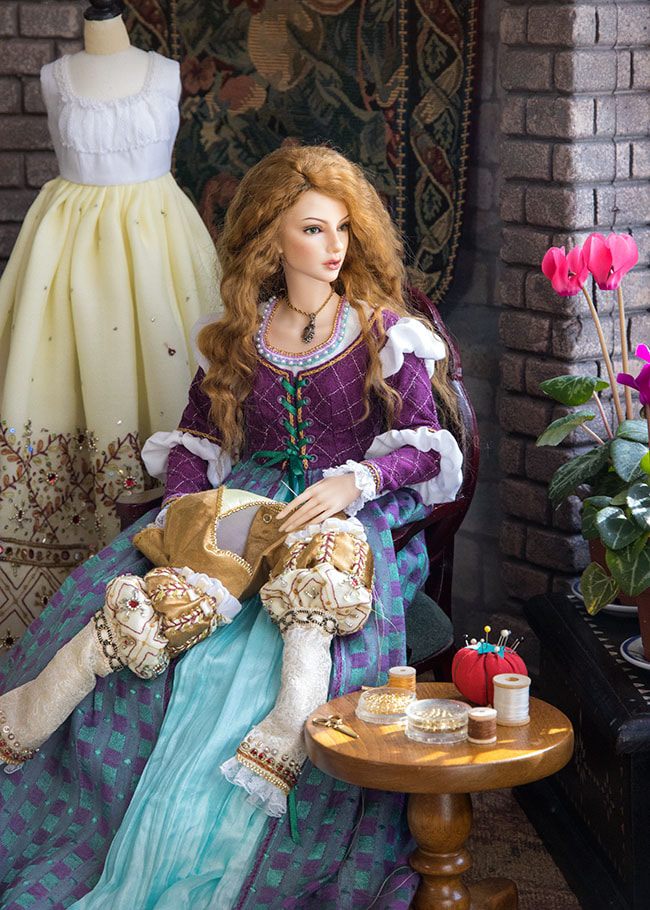
At least back in her own time, one could phone or text....
Picture
Picture
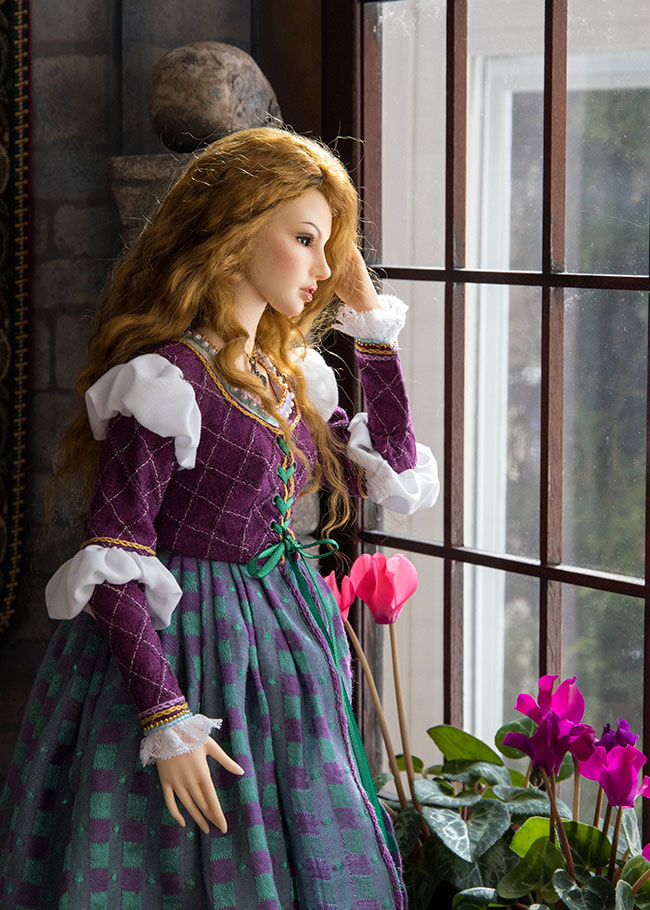
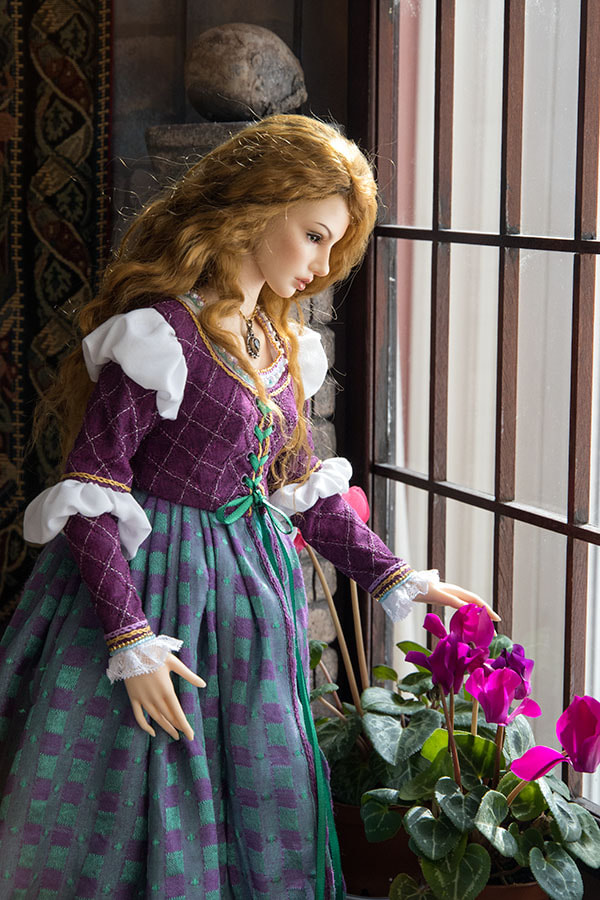
...but here there was nothing....
Picture
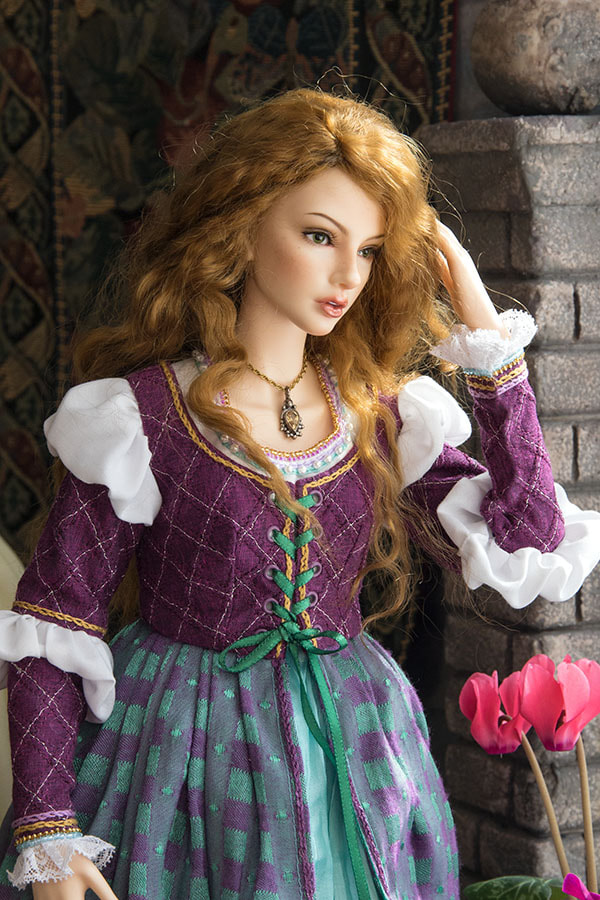
It was hard not to worry, so she tried to distract herself with her sewing....
Picture
3 Comments

Willie & Winston

2/27/2022

3 Comments

 
Baron and Rex continued on, and came across Winston and Willie walking down the road. The knights got down off their horses and after acknowledging Winston, Baron crouched down so he wouldn't tower over Willie...
Picture
"Good day Madam. I'm surprised - and pleased - to run into you on this snowy day?"
Picture
"Well sonny,  Winston and I are just out for a walk.."
Picture
Winston was feeling a bit awkward.
​"You do know that he is Sir Baron, Captain of the Royal Guard??"
Picture
Picture
"Yes, of course...."
Picture
 "I'm well acquainted with both of these young men. They are my favourite two knights..."
Picture
"It's such a lovely day, that Winston and I are just taking a nice walk down to the village."
Picture
"Well, then both of you are in good company..."
Picture
"It's nice to have run into you today. It's been a while."
Picture
3 Comments

Narin & Narae

2/26/2022

4 Comments

 
Baron and Rex were still out on their winter patrol of the kingdom...
​...when they came across two people on the road....
Picture
"Good day..."
Picture
Picture
"Good day, my Lord..."
Picture
"How are the two of you doing on this cold, wintery day?"
Picture
"We are doing well sir..."
Picture
"In fact we are heading to the castle...."
Picture
"We are going into service there..."
Picture
"Well, good luck to you then..."
Picture
"And we'll be on our way..."
Picture
4 Comments

Wedding Gown Progress

2/25/2022

5 Comments

 
I'm still working on Naomi's wedding gown - along with a duplicate for a friend. After making the underdresses, petticoats, and lining the overskirts, it was time to address the sleeves for the over bodice. Each sleeve would be made up of at least three parts; the basic sleeve, an embroidered gold satin puff, and an embroidered puff of the fine skirt fabric...
Picture
The wrist edges of the sleeves were finished first. I originally used a different gold trim, changed my mind about it, so had to pick everything apart in order to add the new trim and the narrow lace ruffles. The reworked version looked so much better....
Picture
The most time-consuming part was embroidering a vine motif along all the pale yellow satin ribbons I'd sewn onto the gold puffs. The embroidery was intended to mimic the vines embroidered on the sari fabric.  Each puff took three evenings to embroider...
Picture
I don't usually have a plan for exactly what I'm going to use, so will lay out the parts every now and then to decide what direction to go in.....
Picture
The pale yellow puffs are meant to mimic the pattern on the bottom of the skirts.  I made the first four out of the sari fabric, lined with a sheer cotton, and had hoped to use a fancy stitch on my sewing machine to do the diamond patterns, but it was a disaster and I had to throw them out and start all over from scratch.  This second set still has the pale yellow sari fabric, but it's lined with regular white cotton.  And all the lines had to be embroidered by hand....
Picture
Making progress on the embroidery and beading....
Picture
With all the puffs finally finished it was finally time to start building up the sleeves.  First the pale yellow puffs were basted in place, along with the cream trim, then it was stitched on the machine.  I like to baste every single row because I want everything to sew perfectly on my machine, and I don't trust only using pins.  It may be a lot of extra work, but the result is always worth it. 

​After gathering the gold puff near the top, I added seven loops of pale yellow picot ribbon, and then a row of gathered white muslin to represent the 'chemise puffs'....
Picture
A bodice with the sleeves sewn in....
Picture
Close up detail of upper sleeve....
Picture
And Bianca checking the fit of an unfinished bodice, over the underdress....
Picture
I prefer to do as much embellishing of the bodice before the skirt gets sewn on, as it's a lot easier to handle without all the skirt fabric getting in the way.  But I can only take beading so far, and keep it well back of the seam lines, because my machine hates sewing over beads.  Anyways,  even though things are finally starting to take shape, there's still lots to do
5 Comments

Behind the Scenes

2/24/2022

3 Comments

 
With the Forest Dweller Christmas story having come to an end, it's time to take a look at some Behind the Scenes secrets.

I started by creating a huge set with a living room at one end, and a kitchen at the other. I didn't have much in the way of furniture the correct scale, since the standard quarter scale would be too big, yet dollhouse scale would be too small. So, I tried to use in-between size furniture for tables and chairs, yet used some of the smaller, quarter scale stuff around the walls.  Fireplaces can be any size, so it was in the middle, with my 'Victorian' wall on the the living room side, and the 'Woodcutter's Cottage' wall on the kitchen end....
Picture
Taking a closer look at the living room. I included a piano and harp since I was originally intending to have everyone singing together, but changed my mind. They were never used.
Picture
I loved the kitchen end of the set. It was also a better scale.
Picture
I had been photographing my tiny gourds for another project and was fed up with all the holes. The gourds had come strung together as a garland, and each one had two big holes. So I decided to fill all the holes with Apoxy and then hide them with paint. Yes, it was quite a bit of work, but I was fed up, and with the way time flies they'd be done in no time anyways. So, worth the effort....
Picture
When I got to photographing the second set of guests travelling in the snow, I wanted to do something different, so asked Jan if he could make me a small wooden door - which he did.  I panted it, and added a doorknob and leather 'hinges'....
Picture
I placed the door against the base of our crabapple tree, and added some trees and props, to create the front entrance to Chip and Jo's home. ​​
Picture
In the kitchen scenes I mostly use existing food props, but sometimes I'll use unbaked polymer clay to help create more 'realism'.  Like when Muffy was making a pie. The rolled out dough and pie crust are unbaked polymer clay, while the raspberries are existing baked fruit. After the photo shoot, the unbaked polymer clay gets put back into my supply container.
Picture
For the story about Tiana's cookies, I started with a cookie cutter set from a doll accessory package from Walmart. It came with 'rolled out dough', a cutter, and the 'cookies' actually pop out.....
Picture
For the burnt cookies I rolled out some dark brown polymer clay and cut it with the same cookie cutter, then added a bit of brown paint to the cookie sheet, and added some 'smoke' in Photoshop.
Picture
Then another colour polymer clay for the properly baked cookies. I don't bother baking the various cookies, but just scrunch it up again afterwards and put it back in the storage containers.
Picture
I didn't have a complete story planned ahead in my mind, but just went along with whatever inspired me at the time. After the menfolk's games turned to strip poker, and they were all naked, I thought it would be fun to have them go take a sauna.  But that meant I'd have to make one.

I took a small, square, shipping box, and transformed it into a small hut.  Then took some calendar cardboard to fashion a roof. Then painted both, adding some fancy embellishment...
Picture
I varnished the roof and the base of the hut to help protect them against the snow.  I didn't varnish the walls, as the corrugated cardboard reacted to the varnish forming unsightly 'ripples', and I didn't want those all over the walls. But the base and roof would be in contact with the snow.
Picture
Then I used duct tape to attach the wooden door, took everything outside, and created the scene in the snow....
Picture
The inside of the sauna was another matter.  I really didn't feel like making a fake wooden interior, but then Jan brought a small wooden bookcase.  I'm always up for anything that doesn't require a lot of work on my part, and this was the perfect size.....
Picture
He'd just finished making a new table and benches, and the benches fit perfectly inside, and we found some smooth stones.  They were a bit big in my opinion but there was no choice since everything outside was buried under a deep layer of snow. So they had to do....
Picture
Then by taking a close up photo and adding some 'steam' in Photoshop, it looked perfect....
Picture
When it came time to shoot the dinner, I couldn't decide how or where to place the table.  I tried several layouts, but the set with the living room and kitchen just wasn't conducive to having a formal dinner.  So I took the entire set apart, and started from scratch and made a formal dining room instead.  This time I used both Victorian walls. I moved the Christmas tree to the other side of the room, added a different carpet, and some more formal furniture around the perimeter. 

The table was just the right size for all the characters, but it wasn't going to hold much 'food', so I added two sideboards for all the desserts....
Picture
With a set this big, the best photos are always the ones taken close up at the doll's eye level....
Picture
Picture
I wanted something more interesting after dinner, other than the guests just leaving, so came up with the idea of the ladies relaxing in a hot tub while the menfolk took care of cleaning up.  But how to make a hot tub?  I wasn't about to submerge all the ladies in real water.

So I took a cookie tin. I made a raised false bottom at a sitting depth for the larger ladies.  Then I took two sheets of plastic wrap, and crumpled a third layer between them, and taped it over the top of the cookie tin. Then I laid out a row of parquet flooring onto a strip of duct tape, and wrapped it, with tape on the inside, around the tin, securing it with two elastic bands.

​Then I cut small holes in the plastic wrap so I could slip in the dolls.  Then sprinkled some clear beads on top to simulate bubbles.
Picture
I took everything outside and set up the tub under the bridal wreath bush.  It had been a 'warm' sunny day, so the snow was very wet, and not very easy to work with. I had wanted soft fine snow that I could sprinkle on the tiny trees, but the snow was way too wet. 
Picture
I hung three little lights in the branches above them and took the photos. Then to make it look more like it was nighttime, I had to darken the images and add lens flares to the lights...and some add steam...
Picture
I had considered that it might be fun to photograph the menfolk cleaning up after dinner, but I didn't get the idea for the hot tub and cleanup until after I thought I was done with all the photography, and I'd already cleaned all that up so I could set up the formal dining room.  I really didn't want to have to set up that entire kitchen set again from scratch, so decided to just skip it. Making a hot tub was one thing, but forget redoing that entire kitchen! 

*Anyways, the whole story is now up in it's entirety in Favourite Photos 2022....
A Forest Dweller Christmas
3 Comments

Good-Bye

2/23/2022

4 Comments

 
Finally everything had been cleaned up.  The menfolk had divided up all the leftovers, each choosing their favourite desserts to take home with them, and put together a basket for everyone to take home with them...
Picture
Max and Maisie had had a really good time....
Picture
...as had Chip and Jo....
Picture
"Thank you again for hosting!"
Picture
"We all had a wonderful time..."
Picture
"You're all very welcome...."
Picture
"Good-bye, and good night!   Until next time!"
Picture
4 Comments

the Hot Tub

2/22/2022

3 Comments

 
With everyone having had their fill of all their favourite desserts, it was finally time for dinner to end, and like every year, it was the men's role to take care of the cleanup.  It had been their turn for fun and games while the ladies enjoyed working in the kitchen preparing dinner, and now they would do all the cleanup while their womenfolk had a chance to just relax.

​The garden lights were turned on as they climbed into the hot tub....
Picture
"This is the life!'
Picture
Picture
Picture
"I think we all outdid ourselves today.  That had to be the best dinner we've put together so far."
Picture
Picture
"Come on in....."
Picture
 "There's still plenty of room...."
Picture
Picture
Picture
3 Comments

Dessert

2/21/2022

3 Comments

 
With the main course finished, it was time for everyone's favourite part of the meal - dessert.  
Picture
Dessert was a much less formal course, and everyone was encouraged to get up and mingle....
Picture
Picture
Picture
Picture
Picture
Picture
Picture
Picture
Picture
Picture
Picture
Picture
Picture
Picture
Picture
With dinner almost over, the ladies were looking forward to their own special treat...
Picture
3 Comments

Dinner

2/20/2022

4 Comments

 
The menfolk rushed inside and got dressed as fast as they could, as they had developed quite the appetite out in the snow. Soon everyone was seated around the table....
Picture
Rhett rose to make a toast.  "I think I speak for everyone in saying that we all had a wonderful time today...."
Picture
Picture
"We certainly did!'
Picture
Picture
"Well, here's to good friends, good food, and a wonderful day!"
Picture
"To good friends!!"
Picture
Then Rhett sat down and dinner commenced....
Picture
Picture
Picture
Picture
Picture
Picture
Picture
4 Comments

Cooling Off

2/19/2022

1 Comment

 
It started to get way too hot in the sauna, and the guys decided they needed to cool off...
Picture
...so they ran out into the snow....
Picture
Picture
Picture
Picture
Picture
Picture
Picture
"So...here you all are!!"
Picture
"Dinner is ready....and on the table..."
Picture
"...so you better hurry inside, and get dressed. We are all waiting for you!"
Picture
1 Comment
<<Previous

    Author

    Martha Boers is an award-winning Canadian doll maker and costumer specializing in fantasy and historical-style costumes.
    Read More... 

    Archives

    March 2023
    February 2023
    January 2023
    December 2022
    November 2022
    October 2022
    September 2022
    August 2022
    July 2022
    June 2022
    May 2022
    April 2022
    March 2022
    February 2022
    January 2022
    December 2021
    November 2021
    October 2021
    September 2021
    August 2021
    July 2021
    June 2021
    May 2021
    April 2021
    March 2021
    February 2021
    January 2021
    December 2020
    November 2020
    October 2020
    September 2020
    August 2020
    July 2020
    June 2020
    May 2020
    April 2020
    March 2020
    February 2020
    January 2020
    December 2019
    November 2019
    October 2019
    September 2019
    August 2019
    July 2019
    June 2019
    May 2019
    April 2019
    March 2019
    February 2019
    January 2019
    December 2018
    November 2018
    October 2018
    September 2018
    August 2018
    July 2018
    June 2018
    May 2018
    April 2018
    March 2018
    February 2018
    January 2018
    December 2017
    November 2017
    October 2017
    September 2017
    August 2017
    July 2017
    June 2017
    May 2017
    April 2017
    March 2017
    February 2017
    January 2017
    December 2016
    November 2016
    October 2016
    September 2016
    August 2016
    July 2016
    June 2016
    May 2016
    April 2016
    March 2016
    February 2016
    January 2016
    December 2015
    November 2015
    October 2015
    September 2015
    August 2015
    July 2015
    June 2015
    May 2015
    April 2015
    March 2015
    February 2015
    January 2015
    December 2014
    November 2014
    October 2014
    September 2014
    August 2014
    July 2014
    June 2014
    May 2014
    April 2014
    March 2014
    February 2014
    January 2014
    December 2013
    November 2013
    October 2013
    September 2013
    August 2013
    July 2013
    June 2013
    May 2013
    April 2013
    March 2013
    February 2013
    January 2013
    December 2012
    November 2012
    October 2012
    September 2012
    August 2012
    July 2012
    June 2012
    May 2012
    April 2012
    March 2012
    February 2012
    January 2012
    December 2011
    November 2011
    October 2011
    September 2011
    August 2011
    July 2011
    June 2011
    May 2011
    April 2011
    March 2011
    February 2011
    January 2011
    December 2010
    November 2010
    October 2010

    RSS Feed

Powered by Create your own unique website with customizable templates.