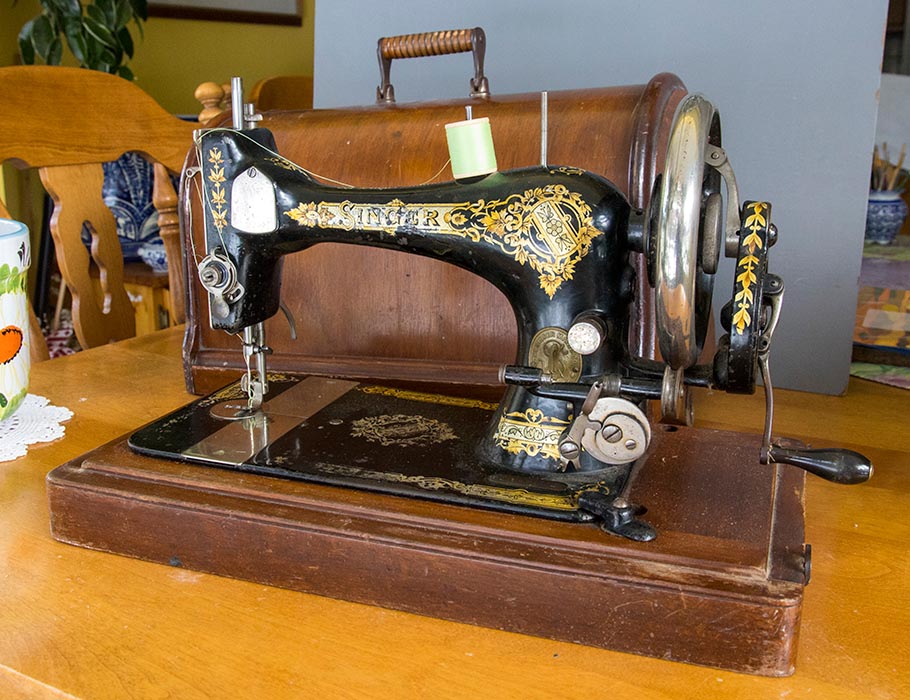
I've wanted to have a Victorian sewing machine for my dolls for a very long time. There's plenty for sale online, but they are all 1/12th scale, and that's way too small. I'd been using a brass pencil sharpener shaped like a vintage sewing machine in my photos in the past, but I wanted something better. Something like my Mom's vintage 1870's sewing machine....
Jan had shaped a couple of pieces of wood last summer - the main body, and the wooden base - but the thought of making a sewing machine just seemed way too intimidating, so the pieces had lingered in a bowl on the end of the kitchen table ever since. Then in February I finally decided it was time to attempt to finish it.
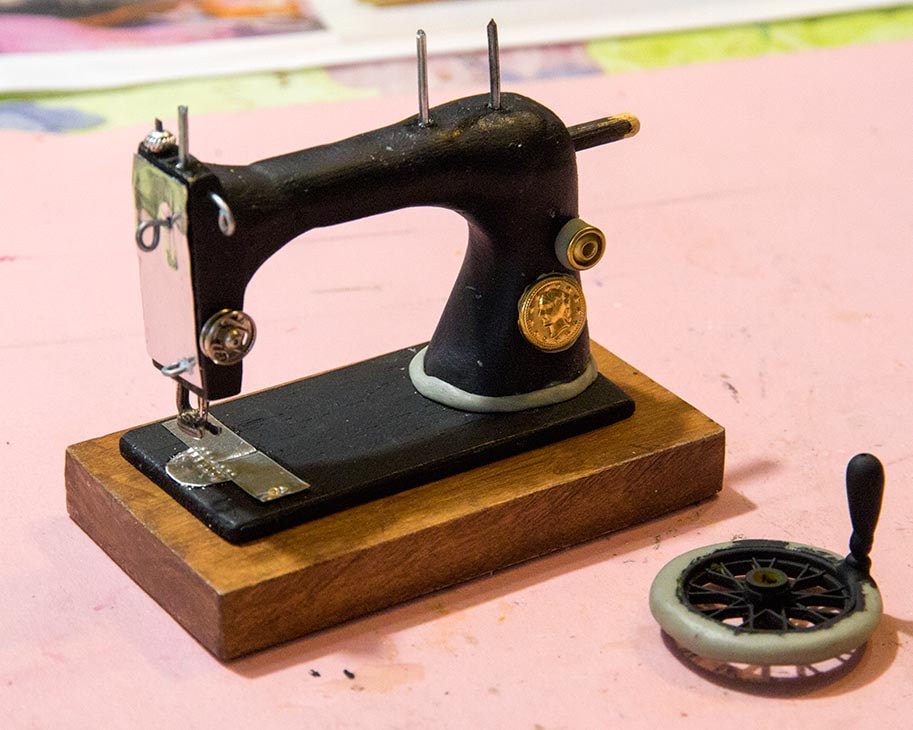
The wooden body was a bit irregular, so I added a layer of Apoxie to smooth it out. The biggest challenge was finding something for the fly wheel. Then I came across a bag of LEGO wheels at Value Village, and thought there was one in the bag that would be perfect, so bought it. I removed the tire, and built a rim of Apoxie around the outside. It had a thin wire inside so I could make a handle protrude out of it. The handle was made of three beads.
The wooden body was a bit irregular, so I added a layer of Apoxie to smooth it out. The biggest challenge was finding something for the fly wheel. Then I came across a bag of LEGO wheels at Value Village, and thought there was one in the bag that would be perfect, so bought it. I removed the tire, and built a rim of Apoxie around the outside. It had a thin wire inside so I could make a handle protrude out of it. The handle was made of three beads.
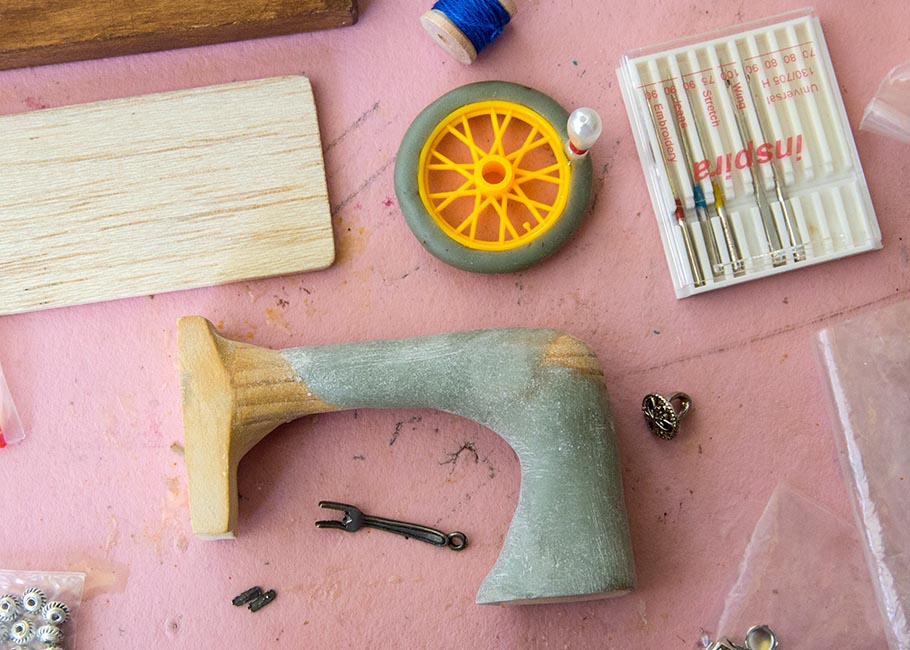
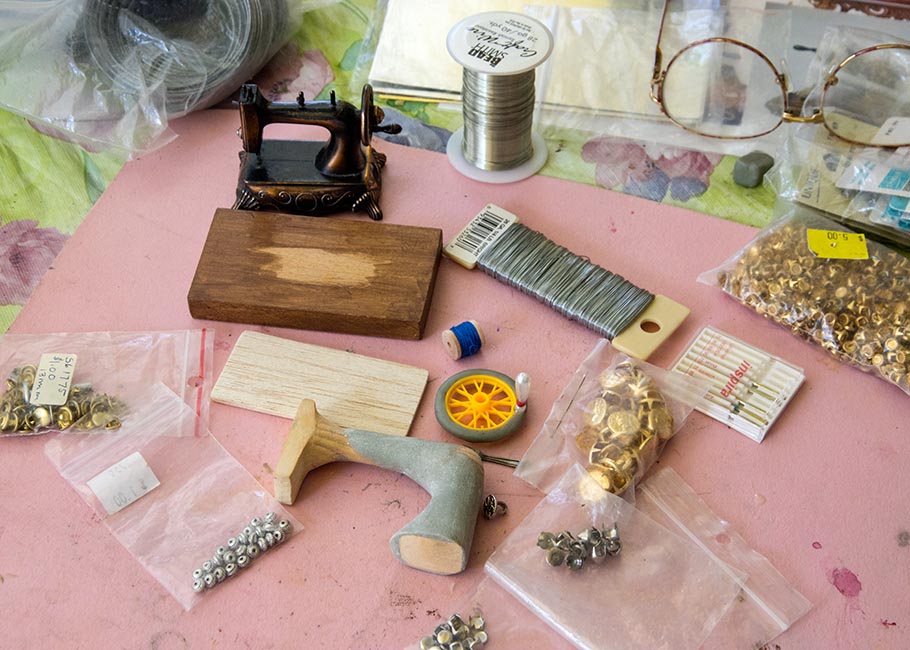
I wanted the sewing machine to look as realistic as possible, and I wanted to be able to thread it, so I wanted to use a real sewing machine needle cut in half. For the presser foot I took one of my tiny metal forks and broke out the middle two tines. Then gathered all kinds of bits and pieces - wire, studs, snaps, and some tiny beads - that might be useful for some of the machine parts.
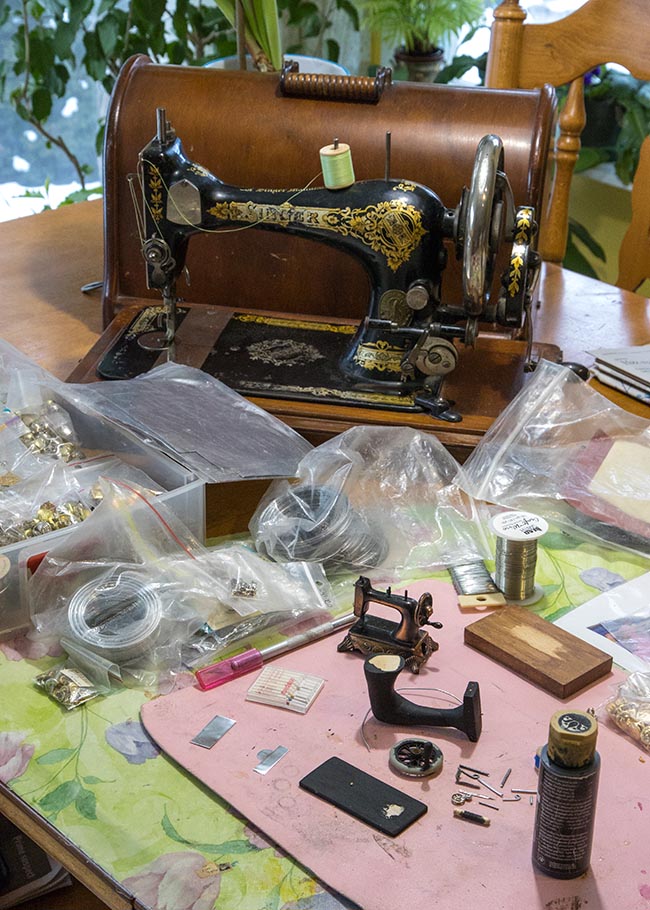
I had my Mom's machine and the tiny brass pencil sharpener for inspiration...
I painted the body and base plate black, and Jan drilled some holes for the needle and 'presser foot' and I glued them in...
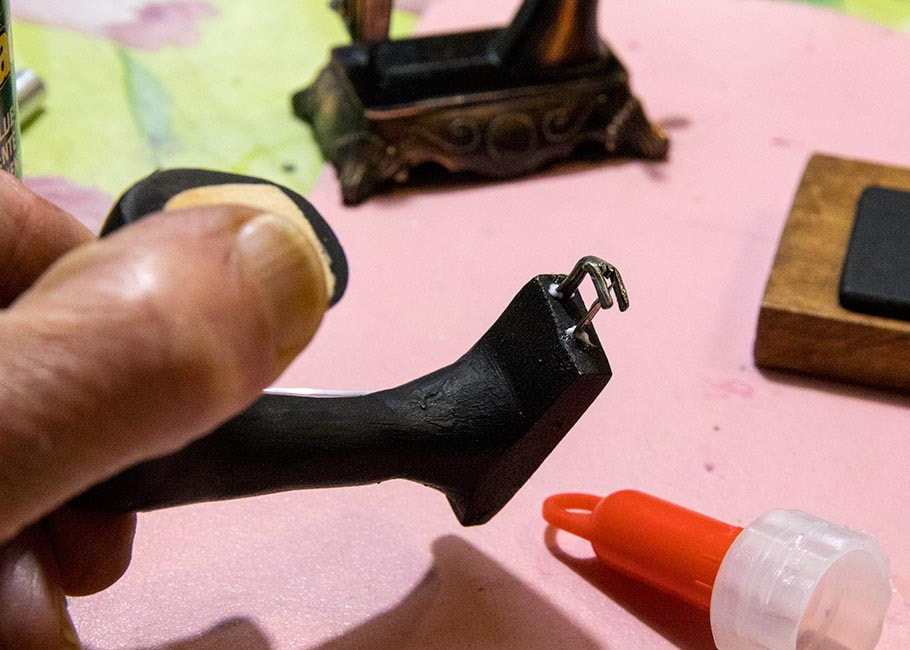
Jan drilled holes for the wires I'd cut and shaped.
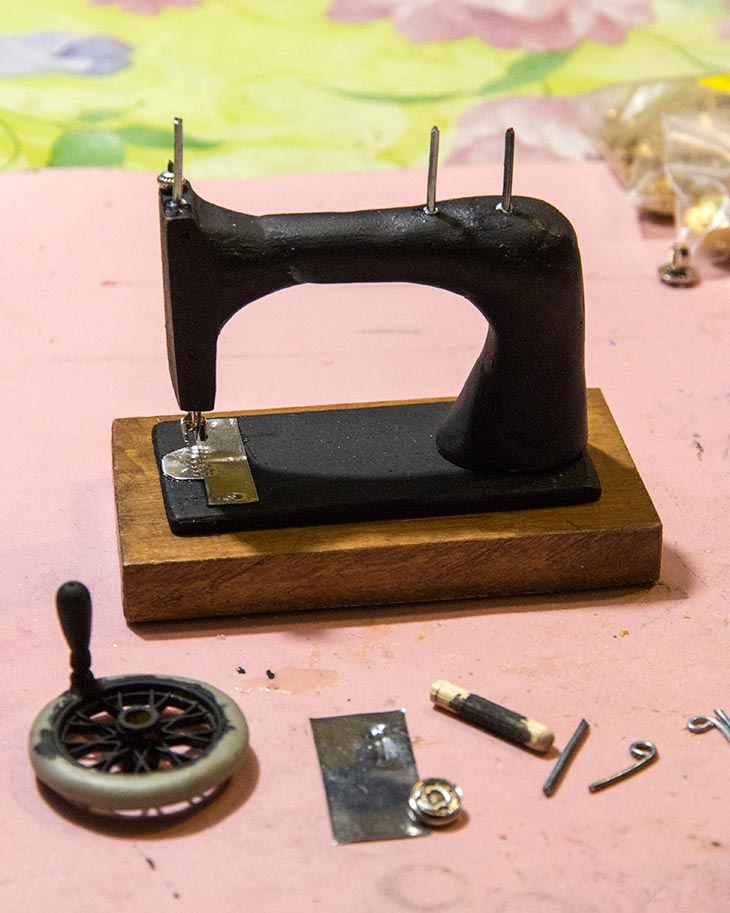
I had some thin silver metal, which I cut the bobbin plate and feed-dog out of. I glued them in place and used carving tools to press the indents suggesting the feed-dog into the metal.
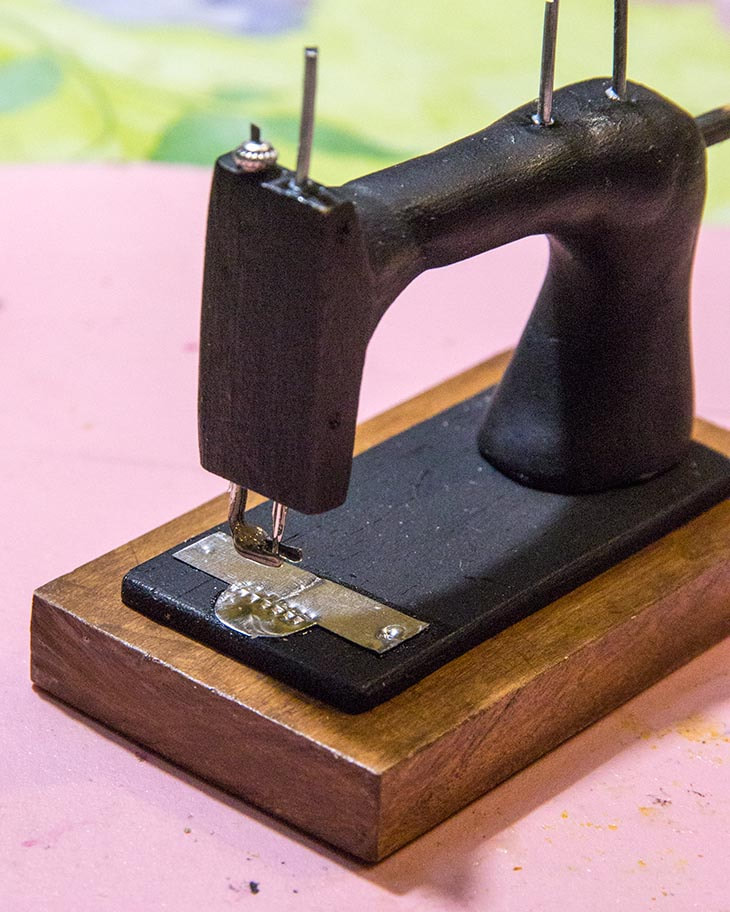
It also glued a metal plate on the end. Then Jan drilled holes into it for the wire loop 'take up levers' that I'd formed. I used a large snap fastener for the tension disk. I wasn't going to bother with the thread wind-up mechanism, so glued another snap and decorative stud to suggest the parts on the full size machine. A hole was drilled for the dowel which would hold the fly wheel, and it was glued in. Finally, the bottom of the main body as a bit uneven and there was a slight gap between it and the base plate, so I added a ring of Apoxie to cover and support it.
Then it was time to paint it.
 RSS Feed
