|
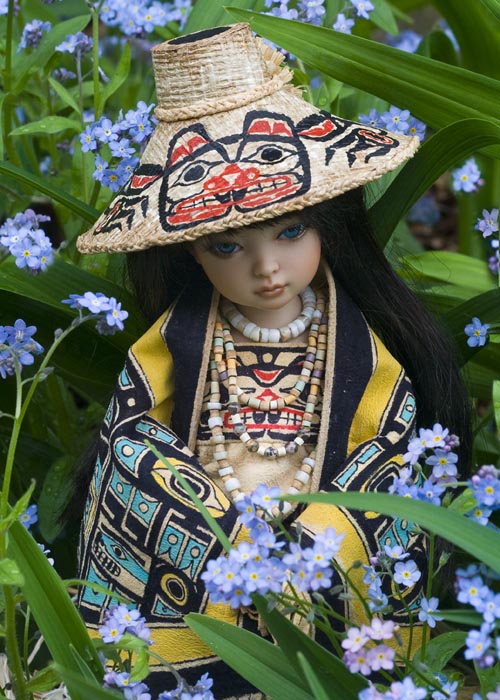
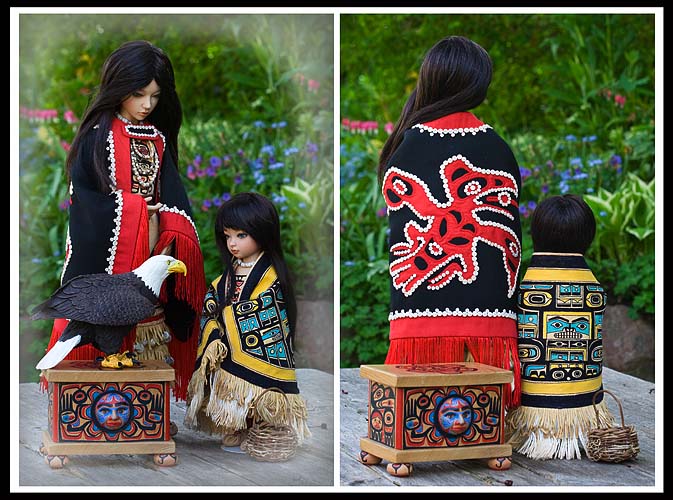
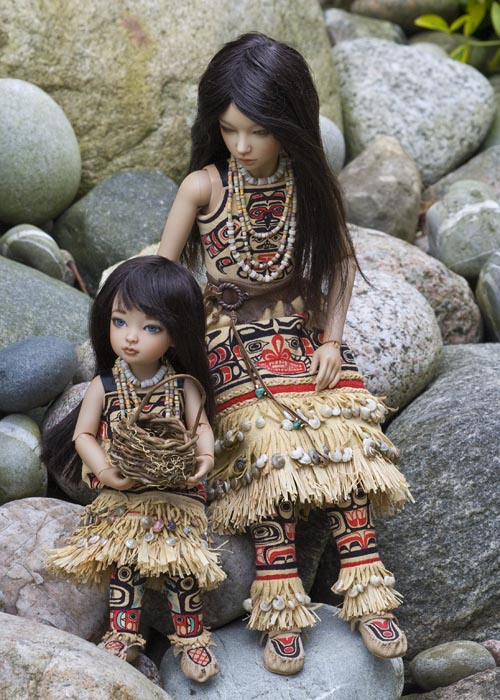
Well, Byuri's native-style costume is finally finished. The vinyl wallpaper I used to make the hat wouldn't take marker, so I actually had to paint the Beaver design. Not fun! Afterwards, we went out into the garden where the plants are rapidly getting too big for doll photography.
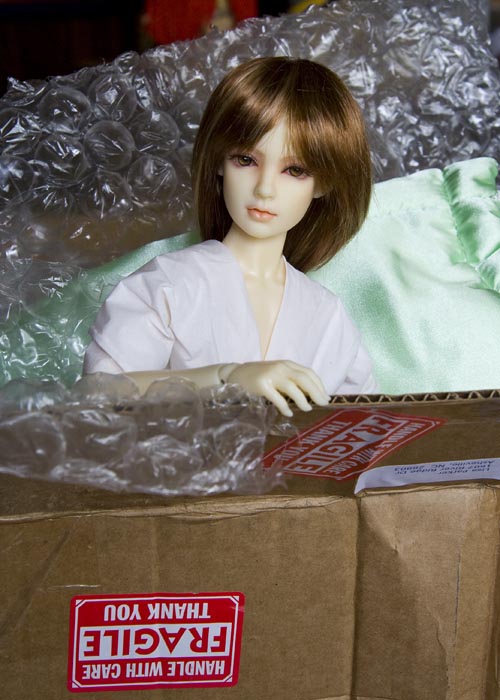
A new boy arrived today. He's a Limhwa Mono MSD-size, in normal French Resin. He came with bright green eyes, which I immediately replaced with hazel ones. He'll be getting a new, more masculine, faceup later this summer, and then I'll make him an appropriate wig, but for now this one will have to do. I'll need to think about a costume to make him. Maybe redo 'Prince Adrian'?
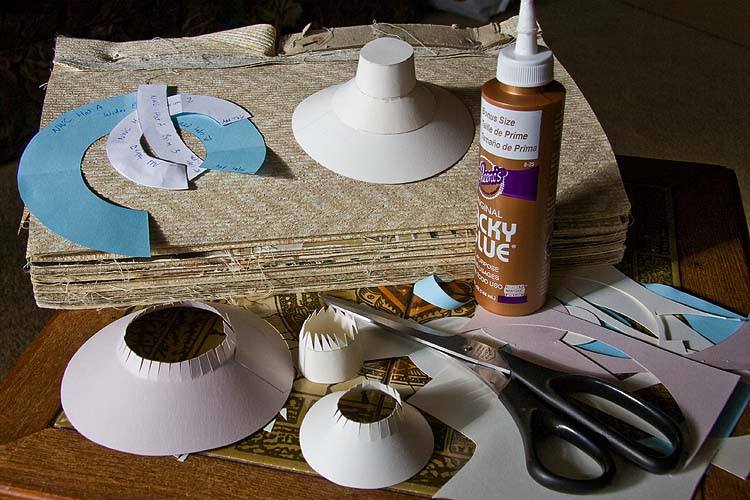
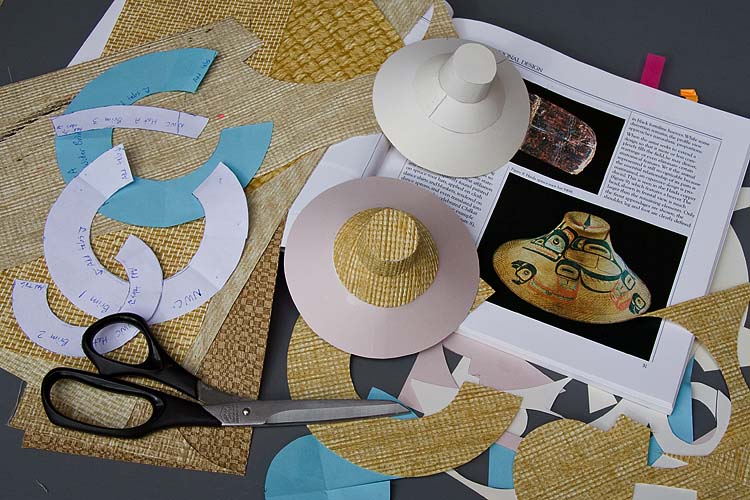
I've started on the basic traditional hats. The real ones were woven from finely-split spruce roots and had a traditional tapered shape. A woven hat was out of the question, so I'd have to simulate one using cardboard. I decided to make a three-part brim pattern to better get the slope of the hat. I traced the patterns onto bristol board and cut it out, but it wouldn't stick together when I tried to glue it. Then I discovered the bristol board had one shiny side and that was not letting the glue get any grip. So, I found some bristol board without any shiny sides and tried again. This time it worked. I have an old wallpaper sample book full of heavily textured "woven" patterns. The plan is to cut the hat pieces out of the textured wall-paper and glue it to both sides of the cardboard hat. Then trim raw edges with braided raffia, and draw on the native designs with marker. A bit of diluted paint to give it an "aged" look, and then some final embellishments.
Both Northwest Native-style blankets are finally finished! Just by chance, my son and his girlfriend, in Vancouver, sent me two children's books this week, and the books are beautifully illustrated Northwest Coast Native stories. I only had black and white references for the Chilkat blanket, and wasn't sure what areas to paint turquoise or yellow (yes, I could have looked it up on the Internet, but I like a hard copy in front of me) Anyway, one of the books had an Orca Chief who wears a Chilkat blanket, and I used that as inspiration for what areas to make turquoise. I'm so glad they are both done, that I had to take a quick photo - of the front, and the back. I thought it was also a good time to introduce Byuri to her soon-to-be friend, the Eagle. I'm very happy with how these two costumes are coming along. Now I have to figure out hats or headdresses. Hats were traditionally woven from fine spruce roots, and painted with animal designs, so now I have to figure out how to simulate that look.
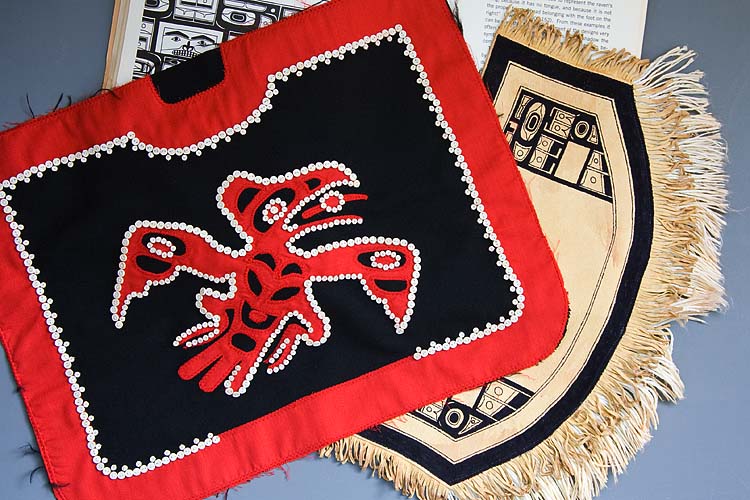
The two Native blankets are coming along slowly. I made another 200 buttons yesterday evening and they've all been sewn on as well. It's amazing just how many buttons it takes to go around everything on the design - there's over 500 already, and I'd never have guessed that just by looking at it. I figure I need another 150 to finish, so after breakfast it's back to button-making. The marker designs on the chamois blanket are coming along too - albeit very slowly. The design on the button blanket is Raven. You can always differentiate Raven from the other birds; first of all he has normal ears as opposed to the curly ones the mythical birds have, and Raven is usually depicted holding a circle in his beak - which represents the sun. In many legends Raven tricks an old Chief who has the Sun hidden in a wooden box, steals it, and puts it up in the sky bringing light to the whole world. I had originally wanted all the designs on both costumes to be Eagles, but I couldn't find enough good ones to fit into the various costume parts, so ended up mixing all kinds of different animals; Beaver, Eagle, Sisutyl, and now Raven as well.
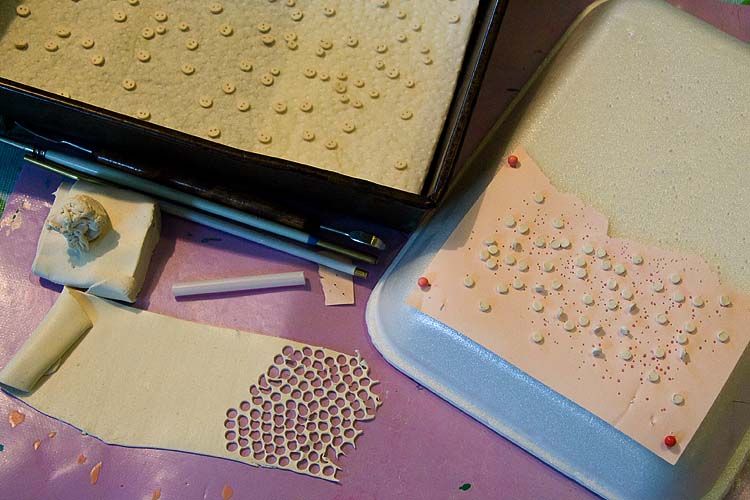
I just finished my second batch of polymer clay buttons. Last night I made the first batch and they have already all been sewn on. They didn't go very far. There's another 200 baking as I type this. I'm sure I'll need more, but I prefer to make them in several batches. The polymer clay buttons are very fiddly to make- you can't touch the cut-out buttons or they'll get deformed - they are no bigger than cake sprinkles and the clay is very thin and soft. Years ago I figured out a way to make buttons: cut them out, poke holes through them, and transfer them to a baking dish, all without ever touching them with my fingers. Anyway, it took two hours to make this 200 - and baking is always a gamble. I just have to keep an eye on the oven, because they can get too dark very quickly, and I'd hate to have to remake them. Well, looks like they survived the baking. Now to let them cool, and then sew them onto the blanket. I wonder how far 200 more buttons will get me - I hope at least halfway.
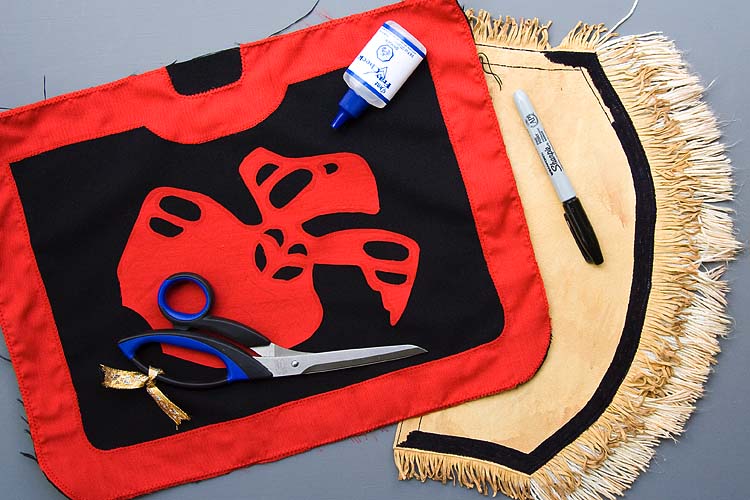
I'm working on the two native-style blankets (cloaks) and it's giving me a headache. Byuri will be getting one based on a Chilkat blanket design, but those were traditionally woven from mountain goat wool and cedar bark - neither of which I have - and with Byuri being just 11" tall I need a way to make it "look" like an authentic blanket without it actually being one. I've made a leather fringe, and one of cotton threads which I've sewn onto the chamois 'blanket', then combed and stained it. The design will be drawn on with marker, but the fumes are rather powerful, so I'm alternating working on Asa's button blanket. I've made button blankets in the past and used red felt for the edging and design on the back. But that made for a very stiff blanket, and I'd like this one to be more supple, so am using plain red cotton. Problem is it frays, and it seems too daunting too clip all the edges and fold them under. I need as few layers of fabric as possible. I figured out it works best if I cut out a few areas with a very sharp scissors and then go over the edges with Fray Check, then let it dry before cutting any more. Once the entire design has been cut out, I'll zig-zag it onto the blanket.
So, I'm alternating between Fray Check fumes and marker fumes, and going outside in between to prune all the winter-kill out of a favourite flowering bush. A bit of this, and a bit of that, and eventually all three tasks will get done. Of course, then it will be time to make all the tiny polymer clay buttons, and baking those gives off fumes too! I need some serious ventilation! Good thing it's getting warmer out - I better go open some windows and let the breeze in. It's amazing just how labour-intensive these native costumes are, but then I expected that. It took me all just day to make Asa's leggings - sewing a rafia fringe, cutting and staining a leather fringe, drawing the designs onto the leggings, sewing on the fringes, and then the snaps, then gluing on the shells. I broke my last leather needle for the sewing machine, and the normal needle was making a total mess, but fortunately I found a multi-use package with another stretch needle (leather gets sewn with the stretch needle) so I was able to finish. I love how these two photograph together. Next step is Byuri's cloak. I've cut it out of leather already and am in the process of cutting the fringe.
There's another boy doll headed this way - a Limhwa Limho Mono. I've always liked his sculpt and thought that he'd make a great addition to my MSD group, and when one was offered for a really good price I just had to go for it - even though I'd been telling myself "no more dolls for awhile". Yes, I know I shouldn't, but when such a great deal presents itself how can I resist? |
AuthorMartha Boers is an award-winning Canadian doll maker and costumer specializing in fantasy and historical-style costumes. Archives
July 2024
|
 RSS Feed
