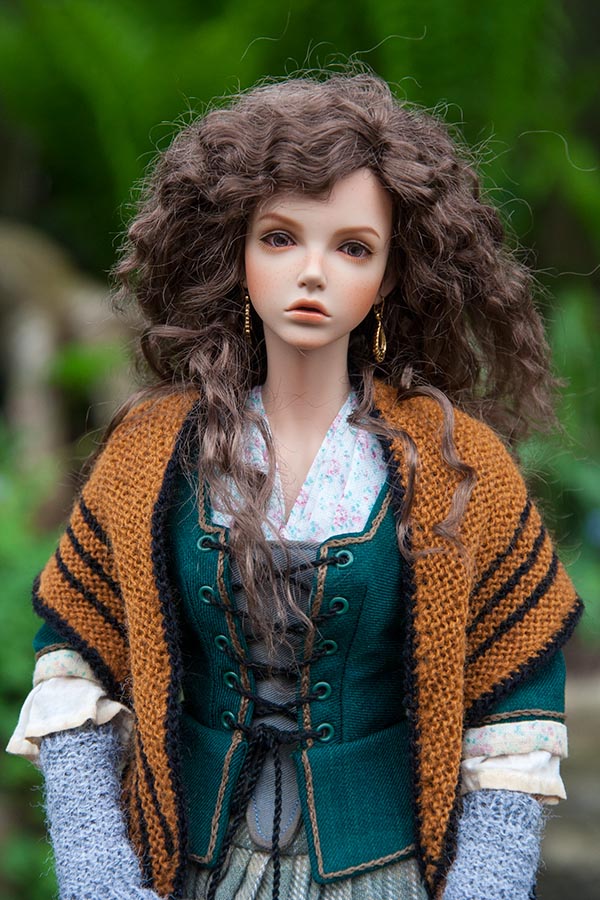
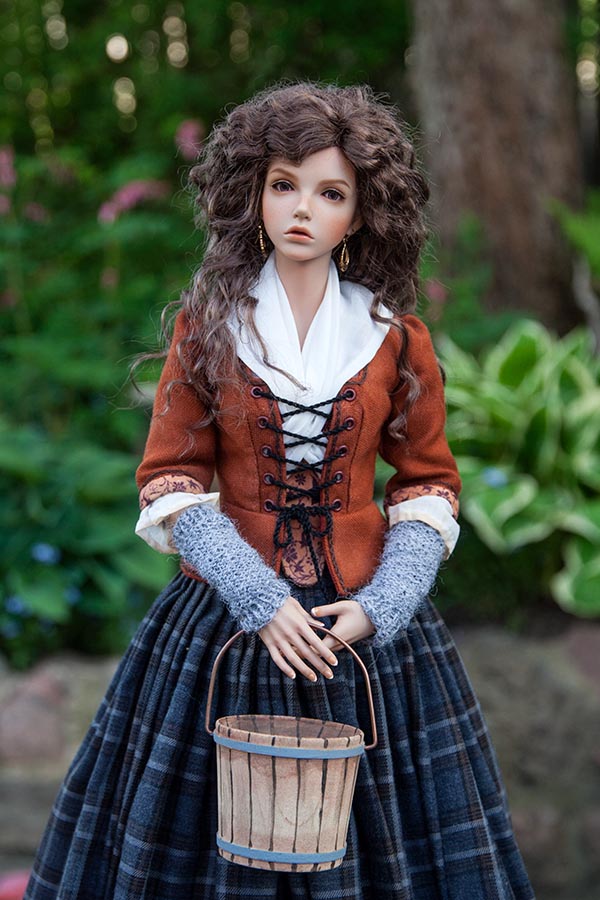
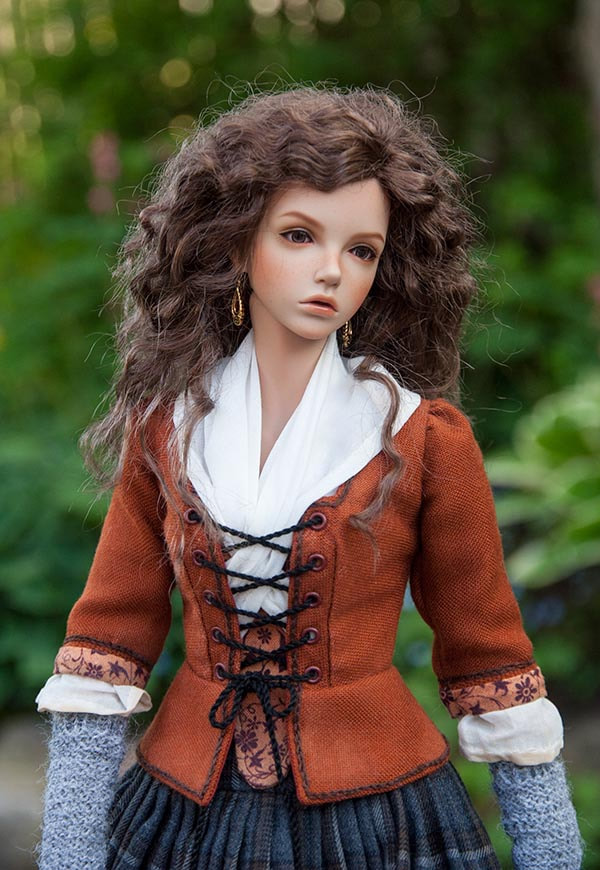
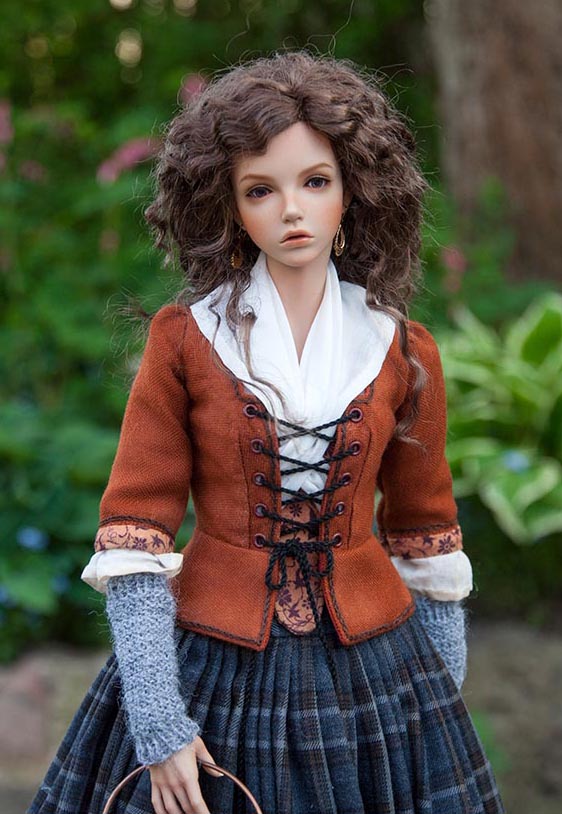
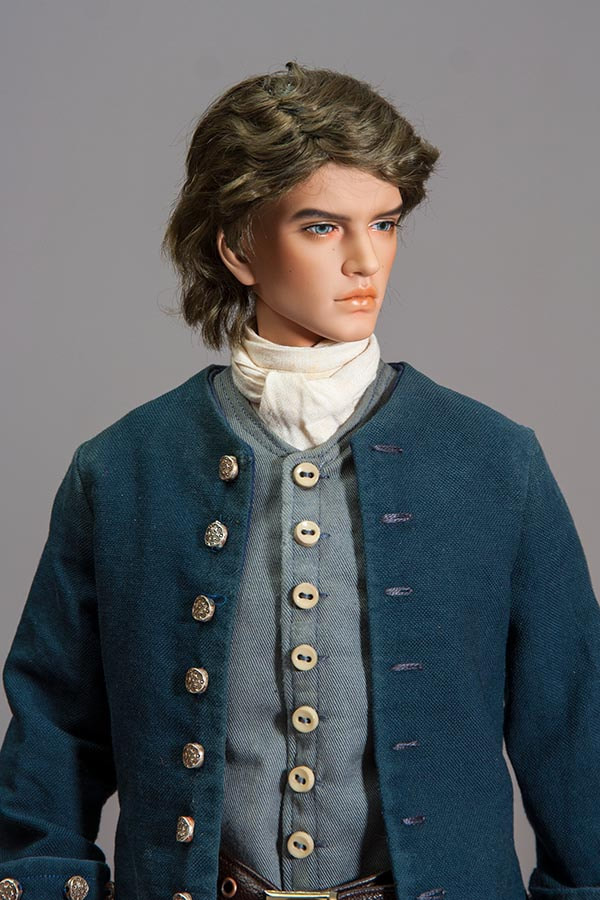
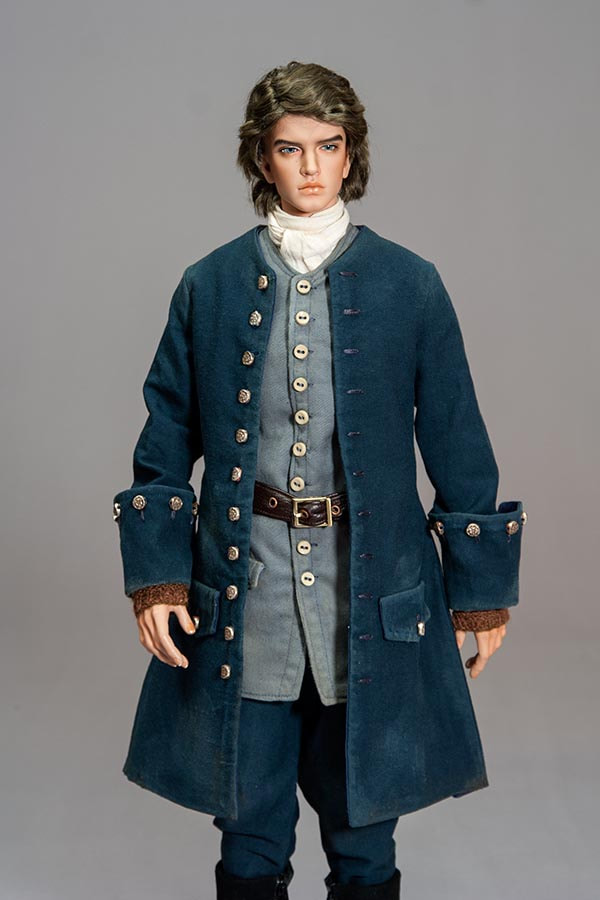
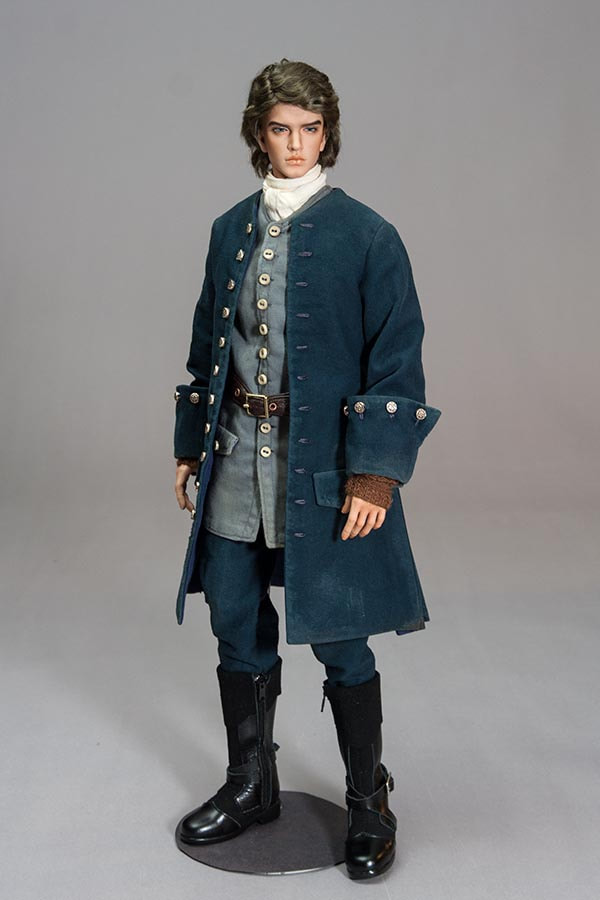
Outlander Inspired Costumes for FIDs
a creative Journey
In this 'Creative Journey' I share a bit of how I made the costumes for my dolls, and it is not meant as a detailed set of instructions on how to do it. Although some might find inspiration and ideas from my methods.
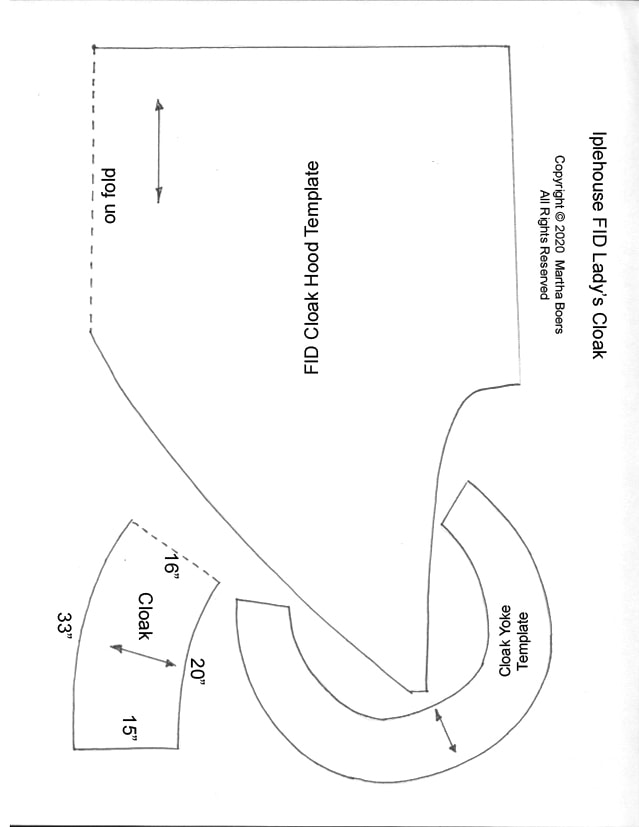
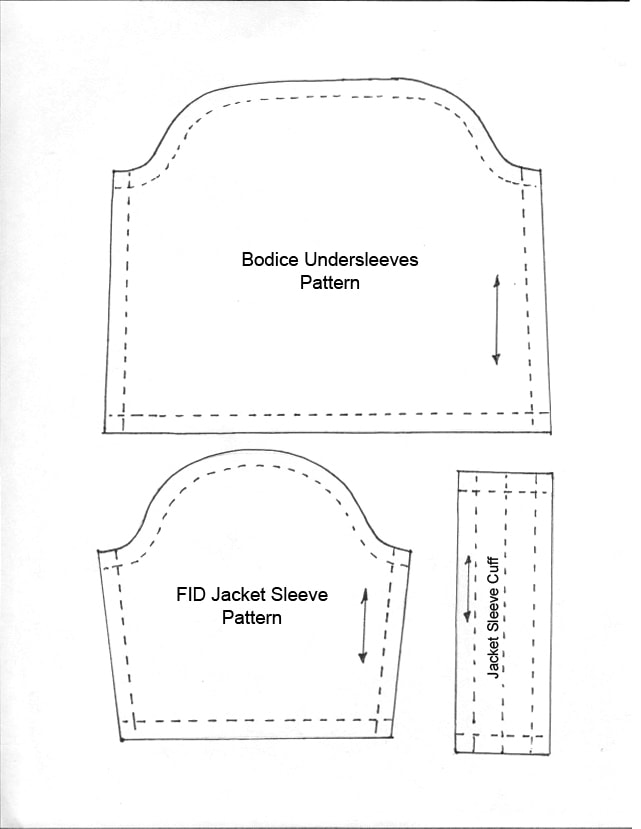
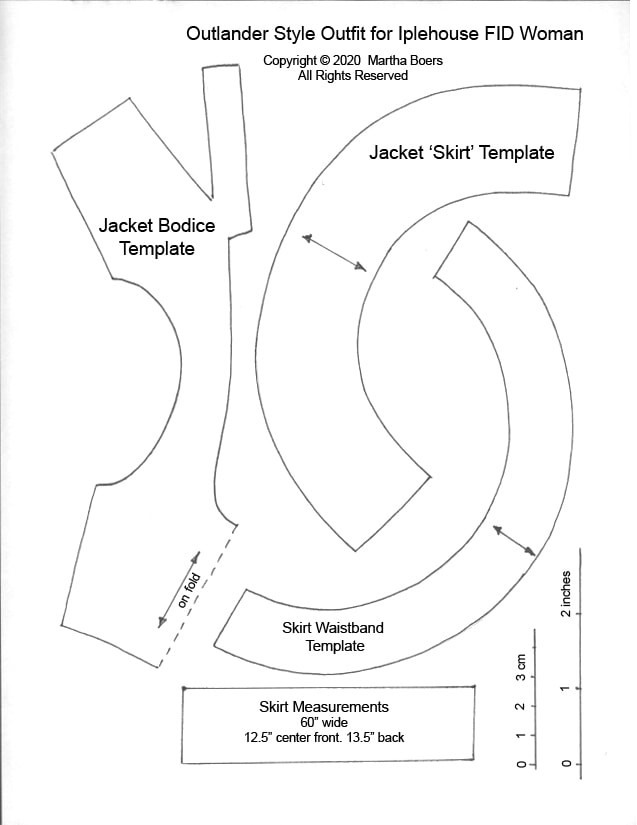
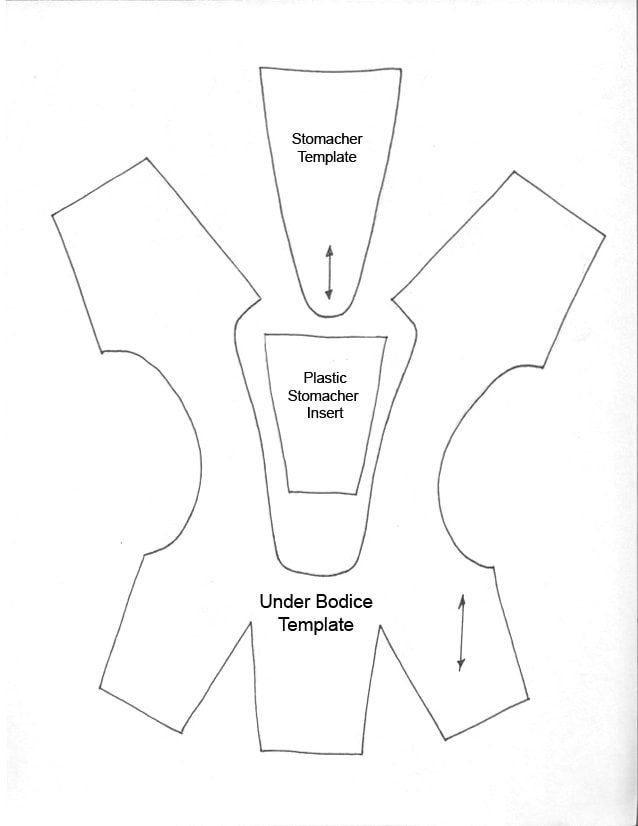
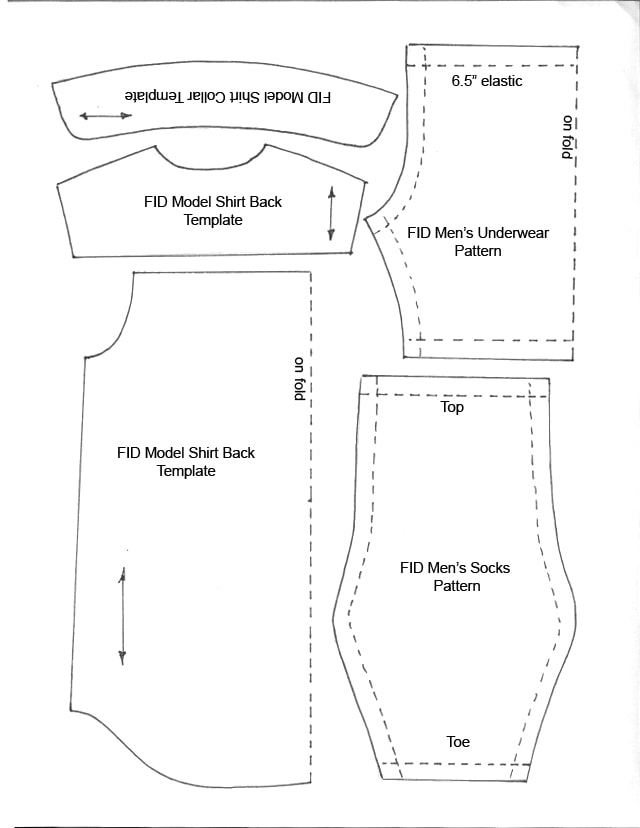
I am including a pdf with the patterns
The following is the pdf for Bianca's costume, and includes the following four pages. Just click on any one to download the pdf...
*the pdf for Rex's costume is further down
I am including a pdf with the patterns
The following is the pdf for Bianca's costume, and includes the following four pages. Just click on any one to download the pdf...
*the pdf for Rex's costume is further down
Bianca
In early May I decided to make costumes for Rex and Bianca inspired by the clothes worn by Jamie and Claire in the Outlander television series. The dolls were not going to BE them, they would just wear costumes inspired by them. We were planning trip to Newfoundland, and I thought that kind of costume would fit in perfectly there.
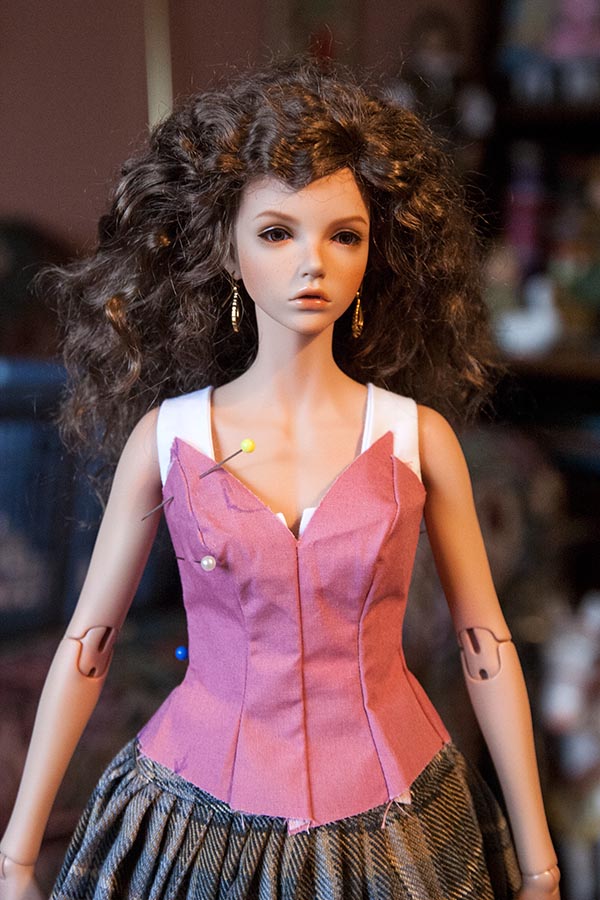
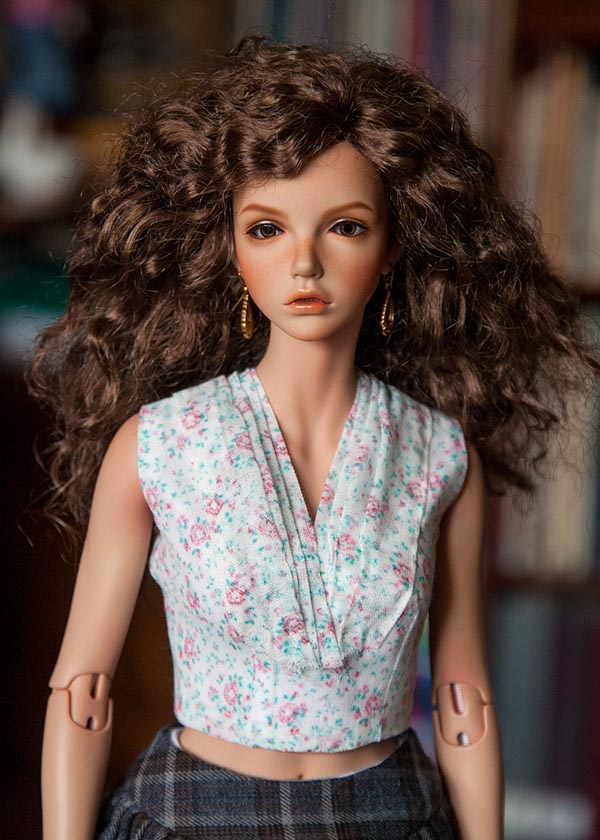
I thought I'd start with Bianca's outfit first. I'd already made stockings, underwear, and a petticoat, and it was time to start the bodice. I altered an existing pattern, made a sample, but it didn't fit the way I wanted (it's the white peaking out underneath the pink). So I pinned her strapless gown test bodice over top so I can draft new patterns to make another test....
I thought I'd start with Bianca's outfit first. I'd already made stockings, underwear, and a petticoat, and it was time to start the bodice. I altered an existing pattern, made a sample, but it didn't fit the way I wanted (it's the white peaking out underneath the pink). So I pinned her strapless gown test bodice over top so I can draft new patterns to make another test....
Gathered Skirts
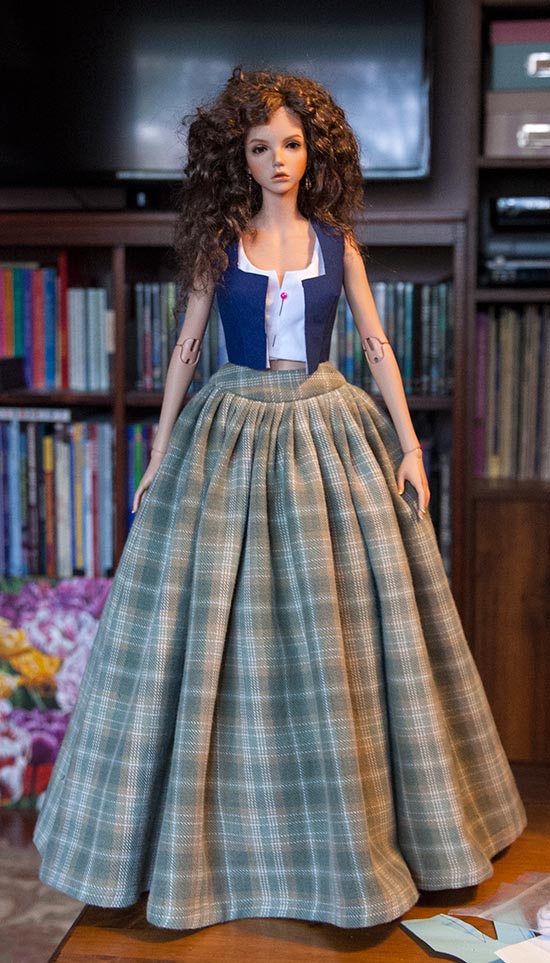
One of the most challenging things about making doll dresses, is getting the gathers to hang properly. The first thing to consider is the choice of fabric. My Iplehouse Fashion sized dolls are more or less one quarter scale. Which means that any fabrics used for their clothes should ideally also be one quarter scale. As in one quarter the thickness. But it's almost impossible to find quarter thickness fabric. It's hard enough finding them the right colour and/or pattern. So the best thing to look for is as thin a natural fibre fabric as possible.
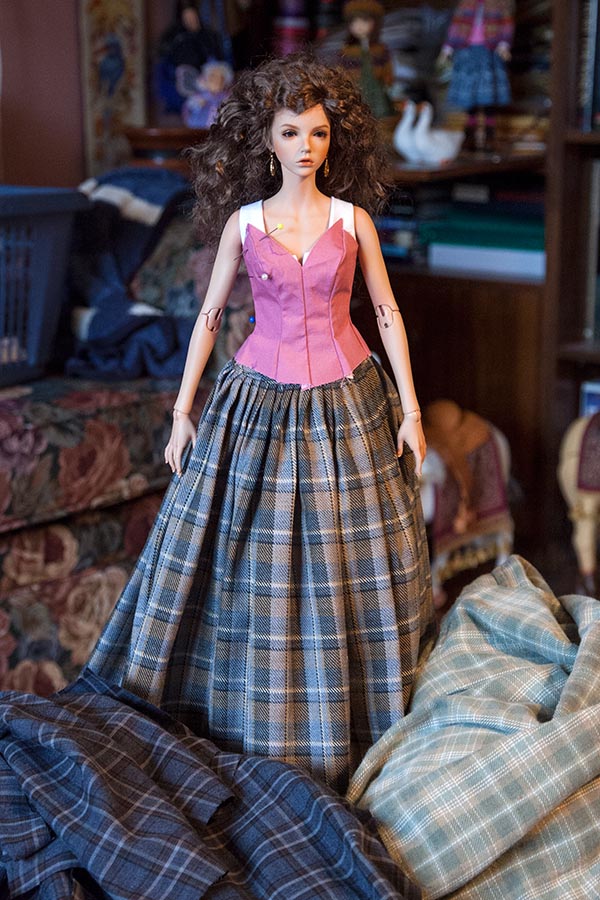
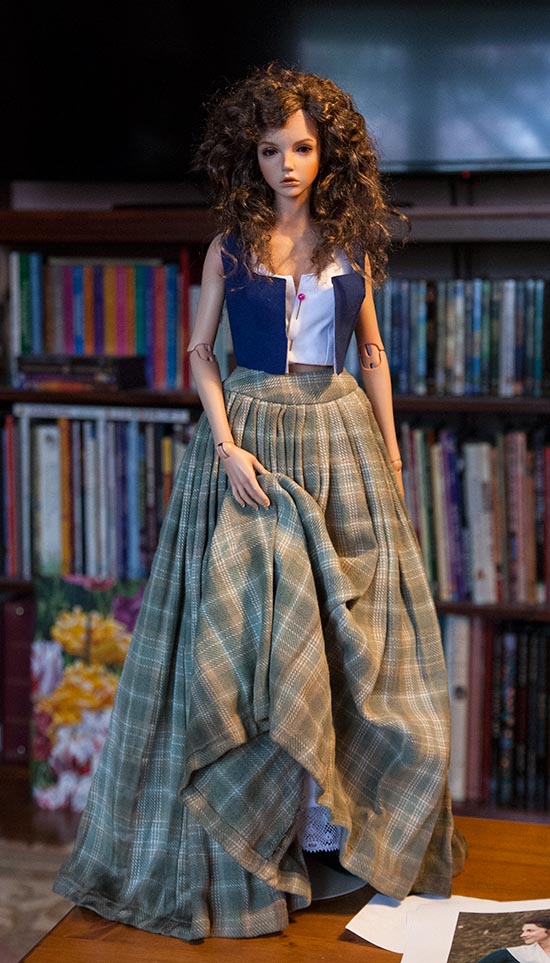
When I looked through my box of tartans and plaids, the best option was a nice gray plaid. Problem was, it was a relatively heavy synthetic fabric, and I was concerned that it wouldn't hang, or drape, well. But the only way to find out was to make it up. So I did. I made it with a 'yoke' at the waist to gather the huge skirt onto, that way it would reduce some of the bulk in her waist. These dolls already have disproportionately long legs, so I don't need skirts rising up making the waist look even higher. Anyways, I washed the skirt to remove any sizing, soaked it in fabric softener, and it didn't look too bad - as long as the doll was just standing around.
When I looked through my box of tartans and plaids, the best option was a nice gray plaid. Problem was, it was a relatively heavy synthetic fabric, and I was concerned that it wouldn't hang, or drape, well. But the only way to find out was to make it up. So I did. I made it with a 'yoke' at the waist to gather the huge skirt onto, that way it would reduce some of the bulk in her waist. These dolls already have disproportionately long legs, so I don't need skirts rising up making the waist look even higher. Anyways, I washed the skirt to remove any sizing, soaked it in fabric softener, and it didn't look too bad - as long as the doll was just standing around.
In the end, I decided that it wasn't really draping properly. It was screaming "doll dress"!!
I wanted something better, which meant a trip to Value Village. There I chose a blue plaid, man's shirt, and a pair of thin gray/green flannel pajama pants. I took them home, washed them, and cut them apart, so I'd have flat fabric to work with.
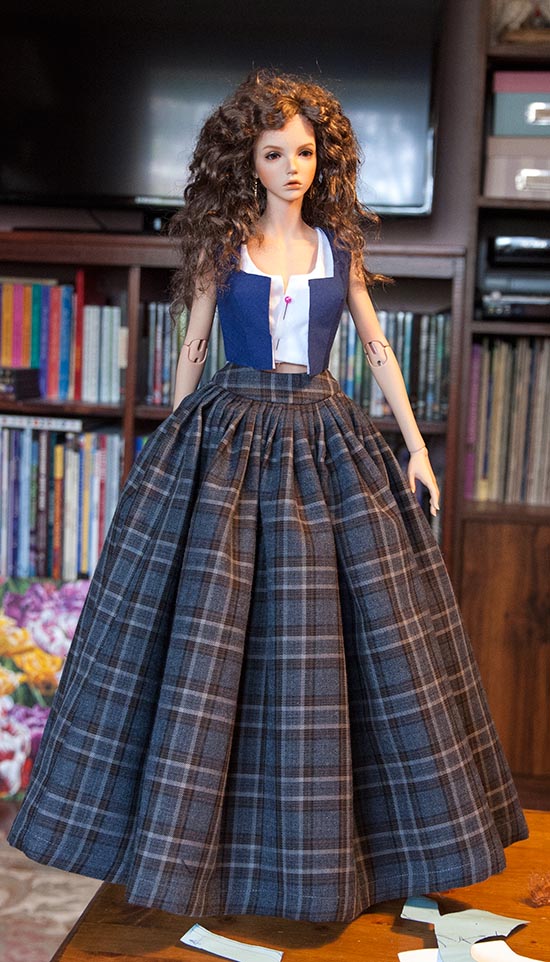
First I made up a skirt from the darker plaid. The skirt was gathered from a 60" length of fabric, and the gathers really stood out. It screamed "Doll Dress"!! I hadn't looked at the label to see what the fibre content was, and was hoping I'd not made a mistake. But the real test is what it looks like after I soak it and let it dry, laying it crinkled on a heat register. It looked much better.....
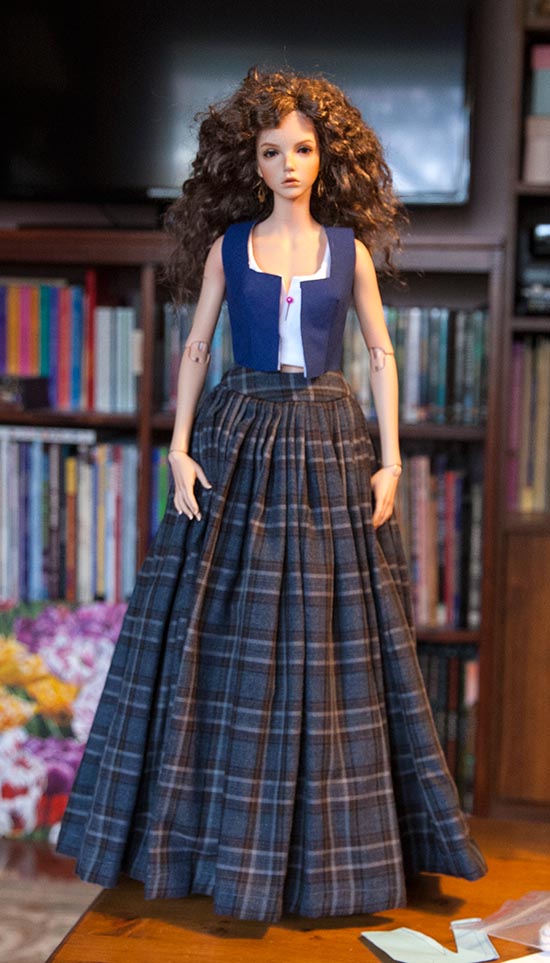
Then I made a skirt out of the lighter green/gray plaid. Again it was 60" of fabric gathered onto a yoke at the waist, so the gathers wouldn't all be crowded around the waist, making it look too high
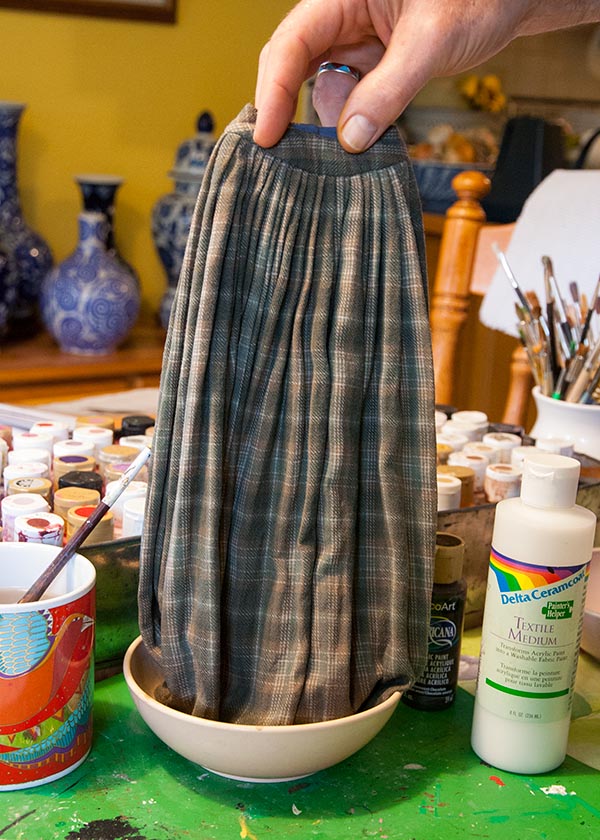
I knew this skirt would respond better to being wet, so decided to stain it right away. After all, if the skirt is being worn in the wilderness with no chance of ever getting washed, it's not going to be all pristine, like it was just made from brand new fabric. So I mixed up some diluted brown paint in textile medium, and dipped the bottom edge of the wet skirt into it....letting it soak in....
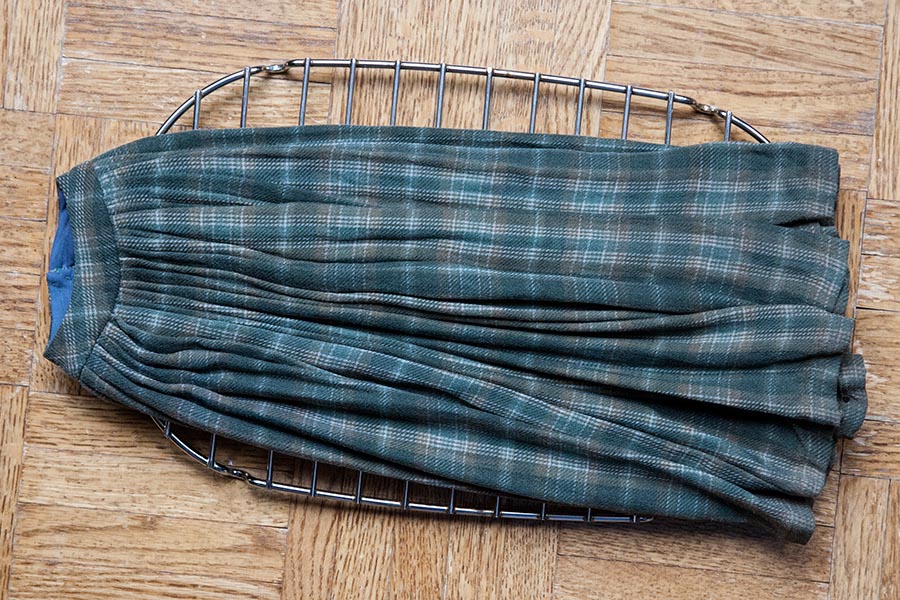
Squeezed out as much moisture as I could, then laid it over the heat register to dry....
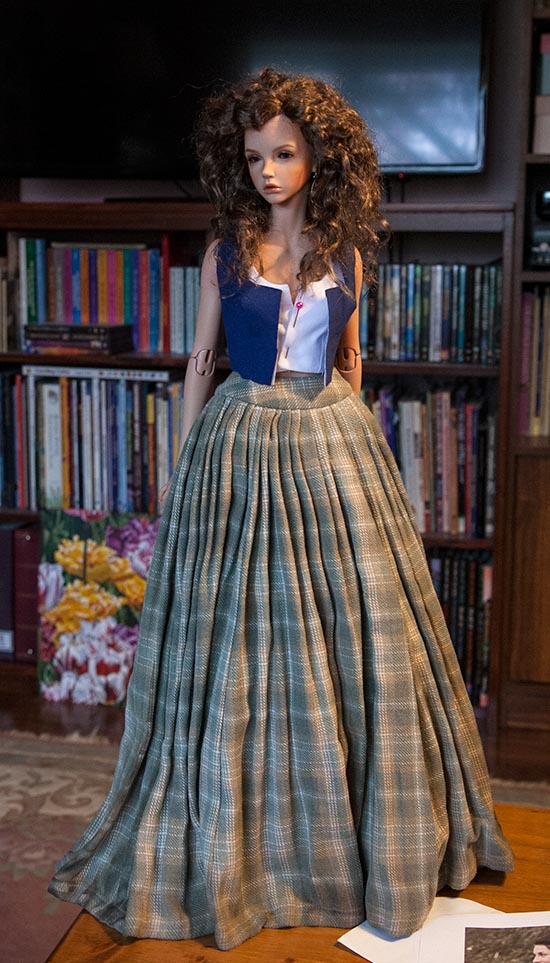
After it dried, I put it back on Bianca.....
The gathers were a much better scale now, and the dirty hemline added a touch of realism. I could even go a step further and lightly sand the bottom edge of her skirt, to really rough it up, but this looked good enough for now.
*Note - it really is better to AIR dry clothes that have been stained, since the colouring dries more evenly that way. For some reason the heat from the furnace heat register bakes the colour darker and more uneven. But I didn't care. I was impatient, and it was way too cold outside to hang anything to dry out there. In fact that day was the coldest it's been on that day since they started keeping records. So the heat register it was!
'Claire' Costumes
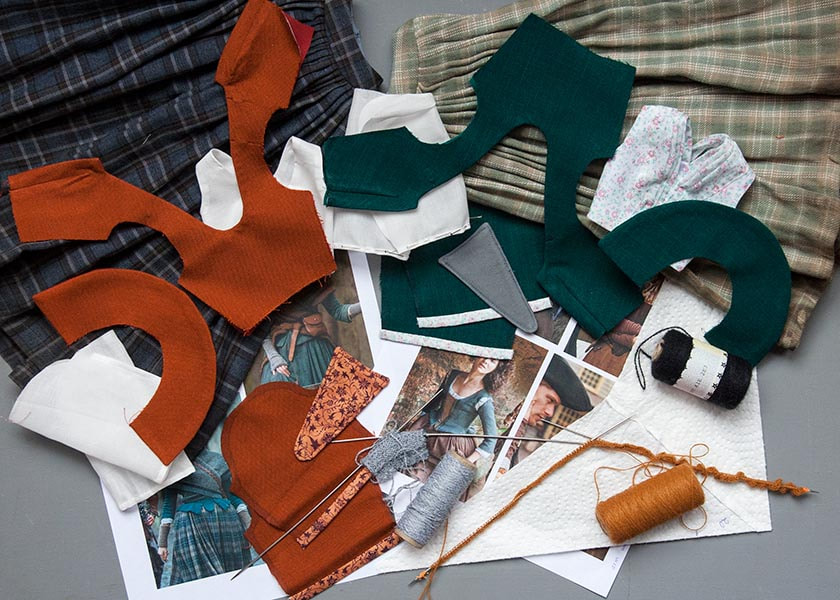
I was trying to reproduce the look of the costumes Claire wears on Outlander, and decided not to make every single layer of the costume separate, but combine some to help reduce bulk. I made the under bodices, which were technically intended to stand in for the chemise showing inside the bodice neckline. One even had the gathered 'kerchief' sewn in...
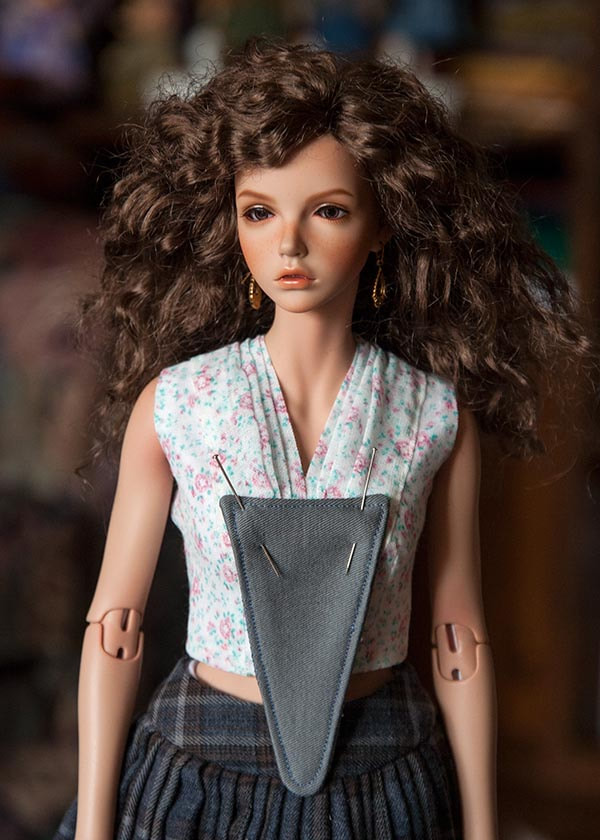
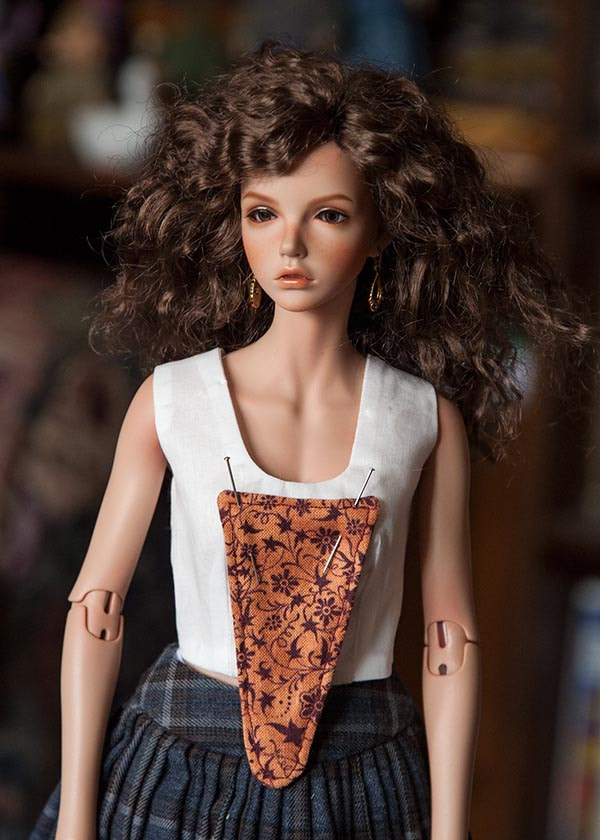
The 'stomacher' would get sewn onto it once I knew exactly where the jacket came to. The jacket would get laced over it in front. The second bodice was just plain cream cotton, with a print stomacher..
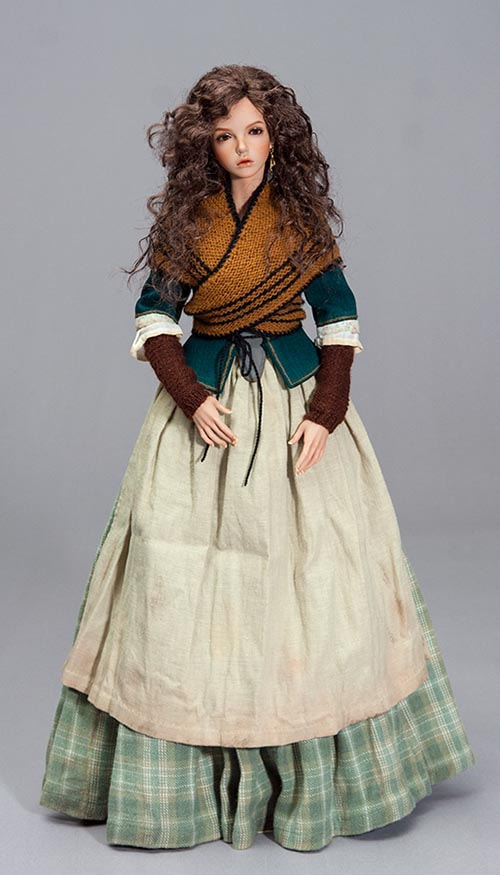
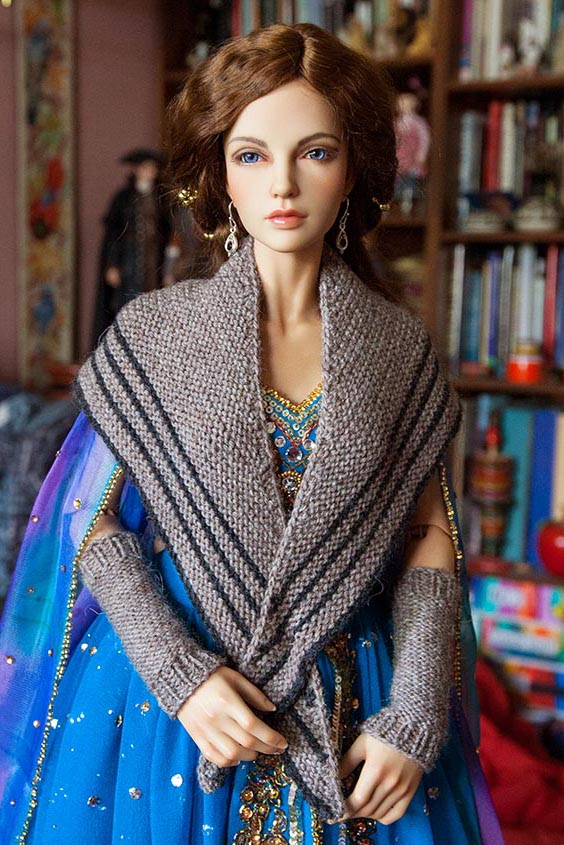
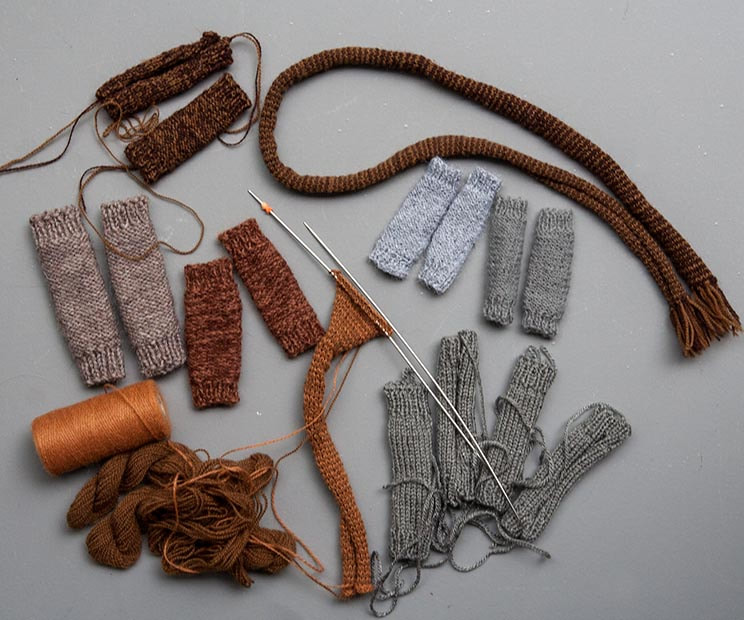
There were a lot of parts to keep track of, and many need hand-sewing, or basting, before machine sewing. I also started knitting gray arm-warmers and a brown shawl out of needle-punch yarn.
Shawl & Arm Warmers
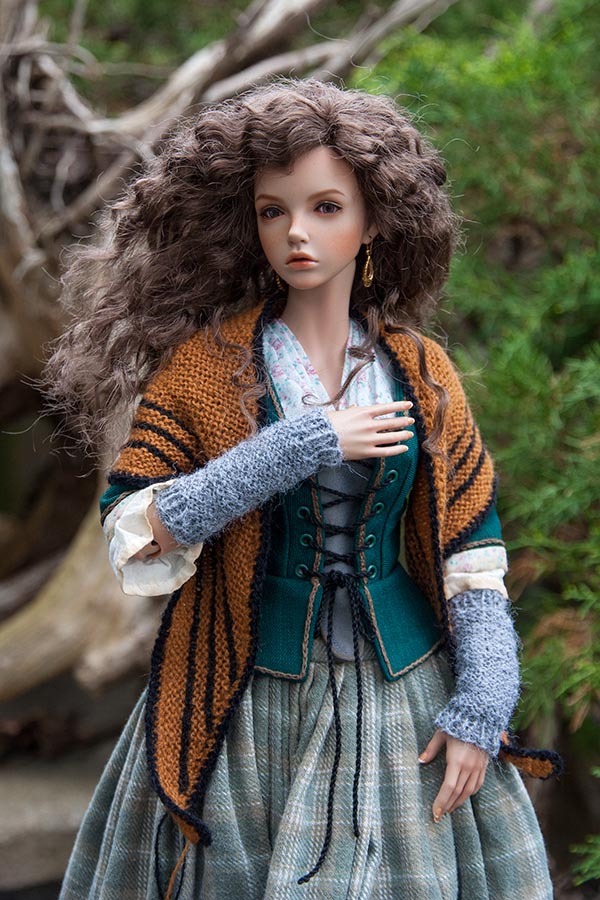
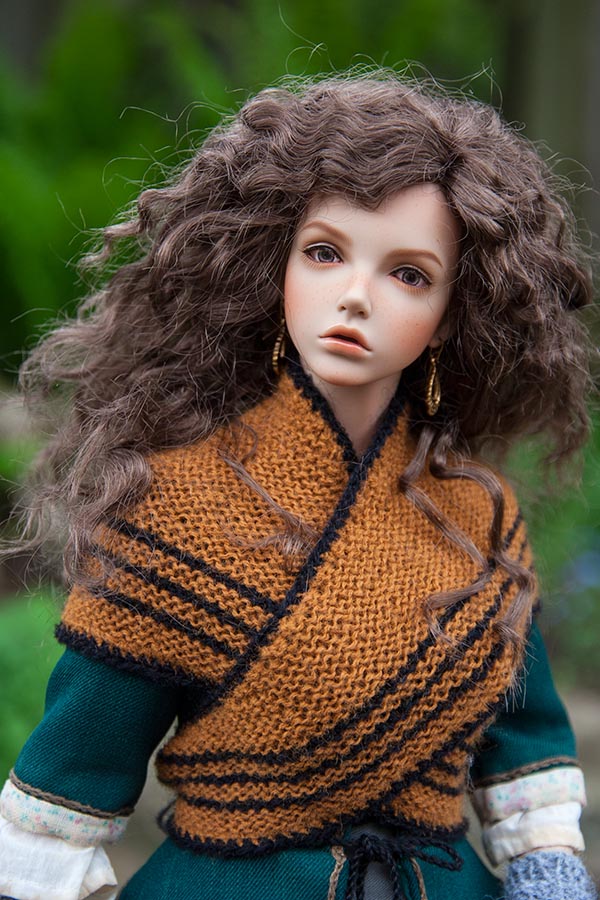
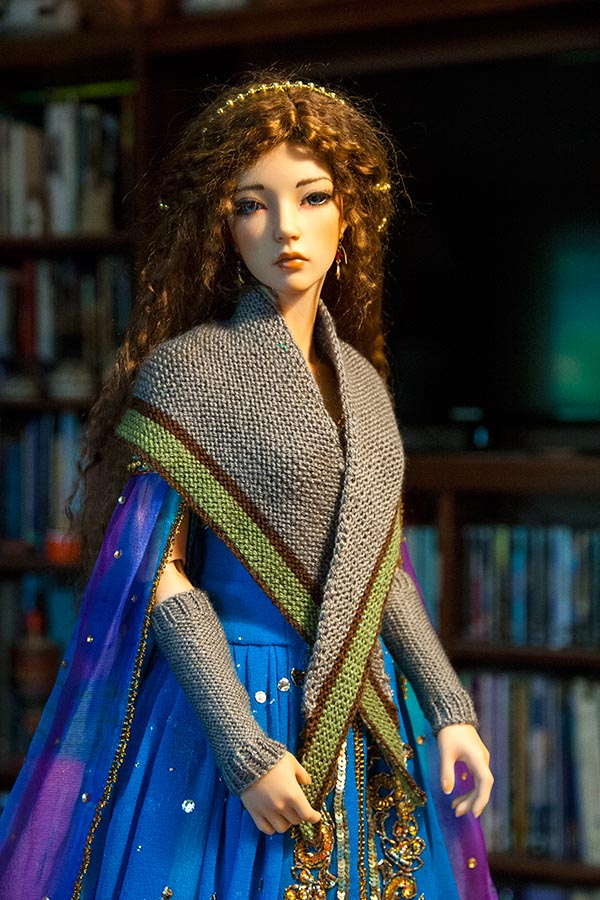
The first of the new 'Outlander' inspired costumes for Bianca were coming together. I was working on two similar outfits, with all the parts in different colours, so she can 'mix & match'. I knit some fingerless gloves and a shawl out of needle-punch yarn. It took two attempts to get the shape of the shawl right. The first one had way too sharp an angle, so I had to unravel it all and start over. The second attempt was a success. I still had to weave in the ends, but was excited to take a photo...
Her shawl looked great in real life, but showed rather 'orange' in photos, but I wasn't going to make another. At least not of this version. I stained her sleeve edges, and applied a diluted beige paint to the bodice to 'kill' the bright green...
I decided that I needed to open up the stomacher and insert something to stiffen it, since it 'pulled' together when the lacing on the jacket was done up. The second inner bodice definitely needed it. I used a plastic lid, from which I cut a stomacher shape, and inserted it between the cloth stomacher and the bodice, then sewed it shut again. Much better!
I also thought this combination needed brown arm warmers. But the brown yarn was so thin that I knit one using double thread, but it ended up way too bulky, so then I ended up using the super thin yarn after all. Then I need to figure out how to knit a 'cowl' shawl, and make a fine, white 'fichu'.
I also thought this combination needed brown arm warmers. But the brown yarn was so thin that I knit one using double thread, but it ended up way too bulky, so then I ended up using the super thin yarn after all. Then I need to figure out how to knit a 'cowl' shawl, and make a fine, white 'fichu'.
Another Outfit for Bianca
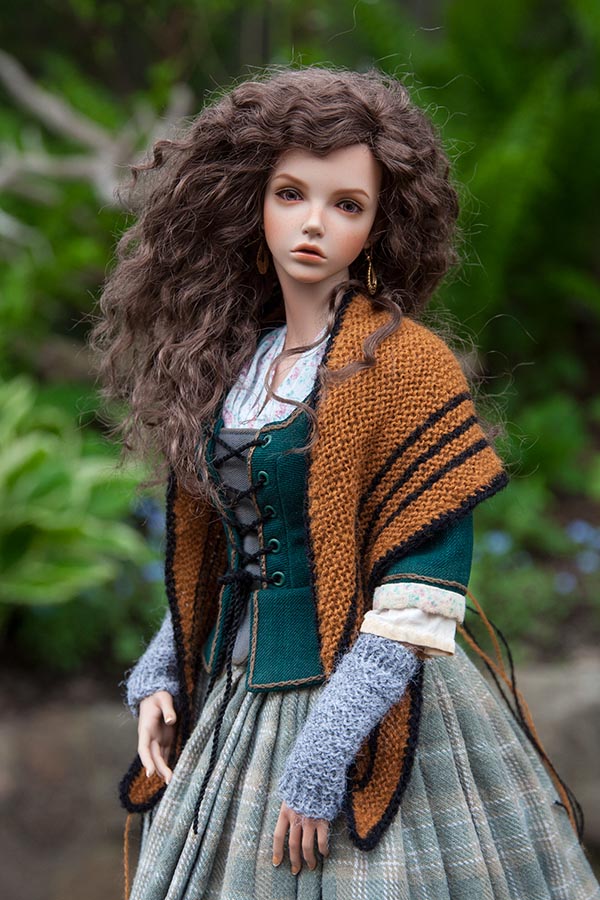
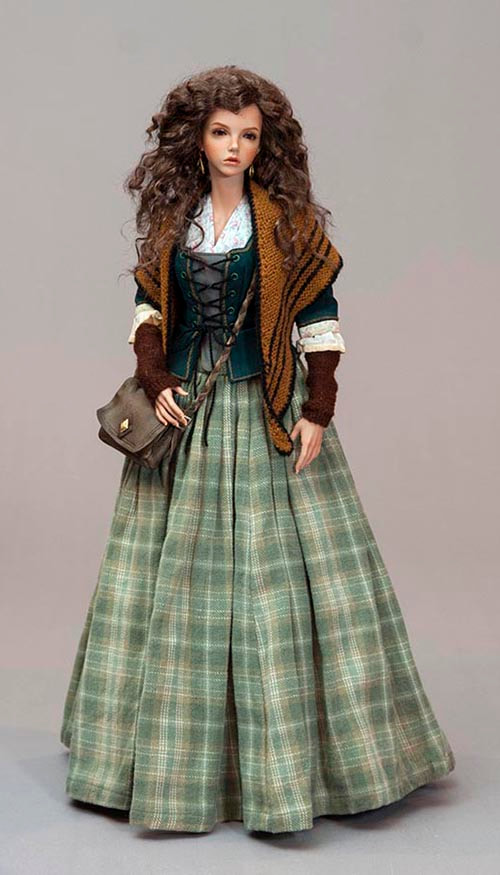
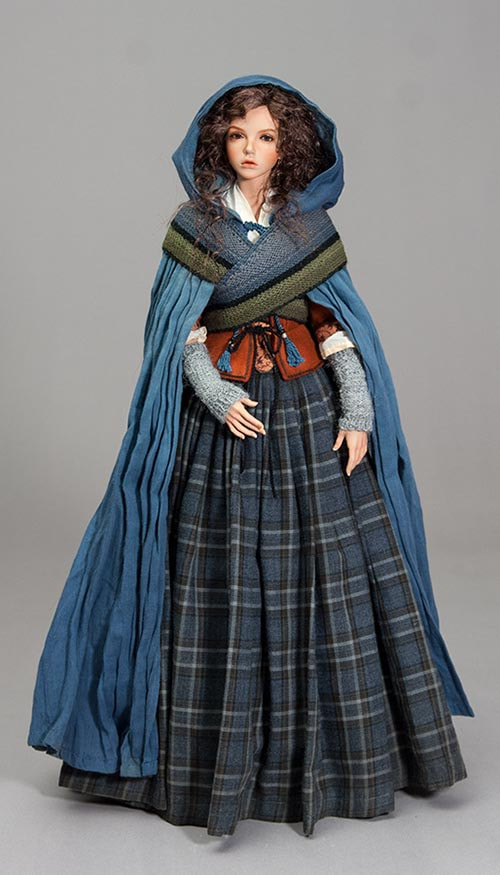
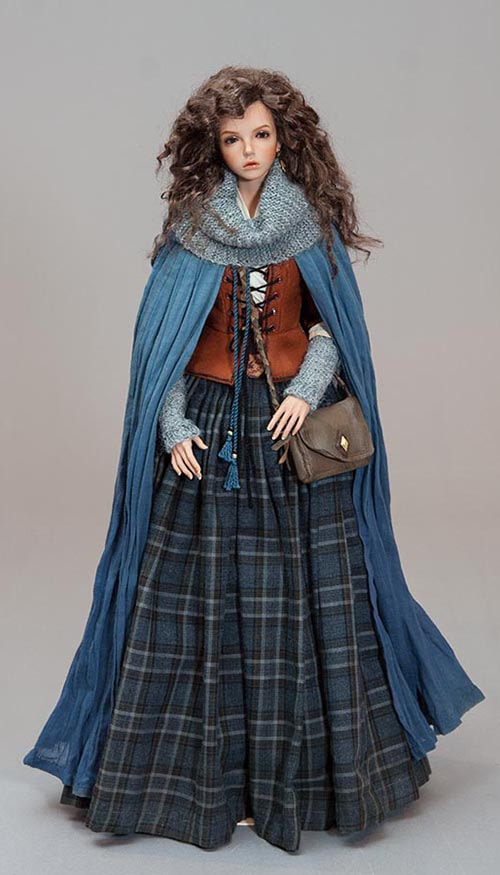
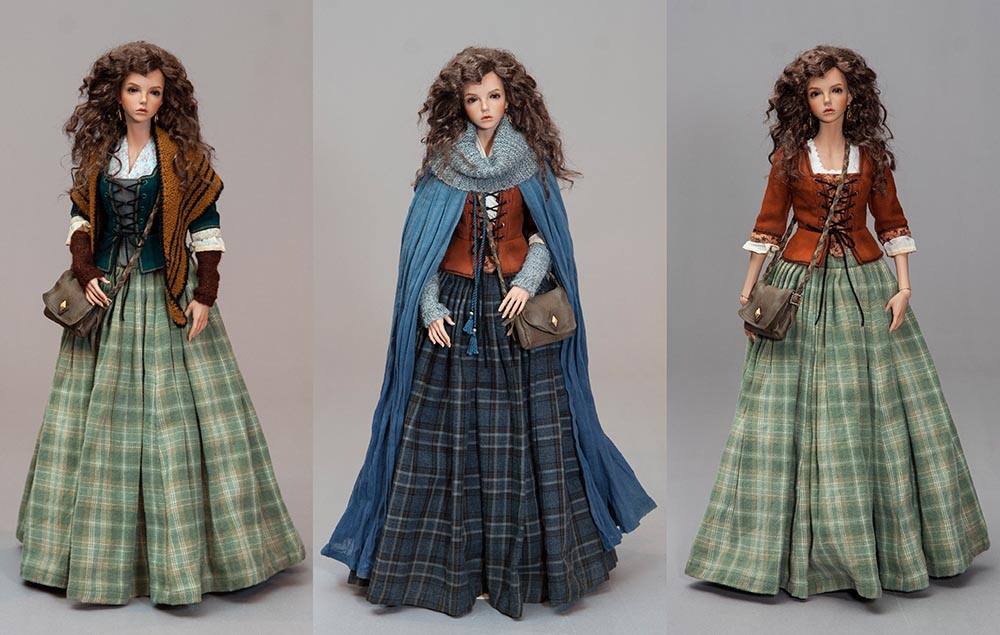
Finished Bianca's second 'Outlander' inspired outfit. The gray arm warmers were meant to go with this combination, and I was working on some brown ones for the green combo, as well as a cowl scarf for this one, but couldn't wait to take a few pictures....
Bianca's Finished Costumes
I made a leather shoulder bag and an apron to go with the green bodice outfit....
I made a hooded cloak and a cowl scarf to go with the Rust bodice version....
Instructions for Triangular Knit Shawl
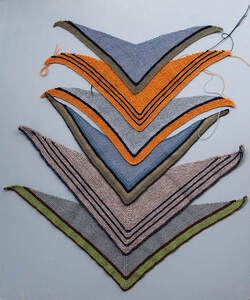
- using fine needle-punch yarn, cast on 100 stitches, slip on marker, and cast on another 100 stitches
- decrease 2 stitches at the beginning of EVERY row
- knit 2 stitches together on both sides of the centre marker every other row
- continue with decreasing until there are no stitches left
- finish with a crocheted edge
The top shawl was knit from an even finer thread, so turned out a bit too small. I ended up crocheting several rows of edging around it to make it bigger.
The bottom two shawls were knit from sock yarn and turned out the perfect size for SID & EID size
Shawls knit from Sock Yarn
The bottom two shawls in the photo above were knit from a yarn with a gauge of 32 stitches and 42 rows to a 4" square. I decided that I didn't much care for crocheting an edging on to the cast-on outer edge, so used two colours of yarn while casting on both of these shawls. That made for an automatic darker edge. Yes, it meant two more threads to work away afterwards, but it was also a lot easier than crocheting the darker edge on afterwards....
|
On an Iplehouse EID
|
On an Iplehouse SID
|
Dirty Laundry
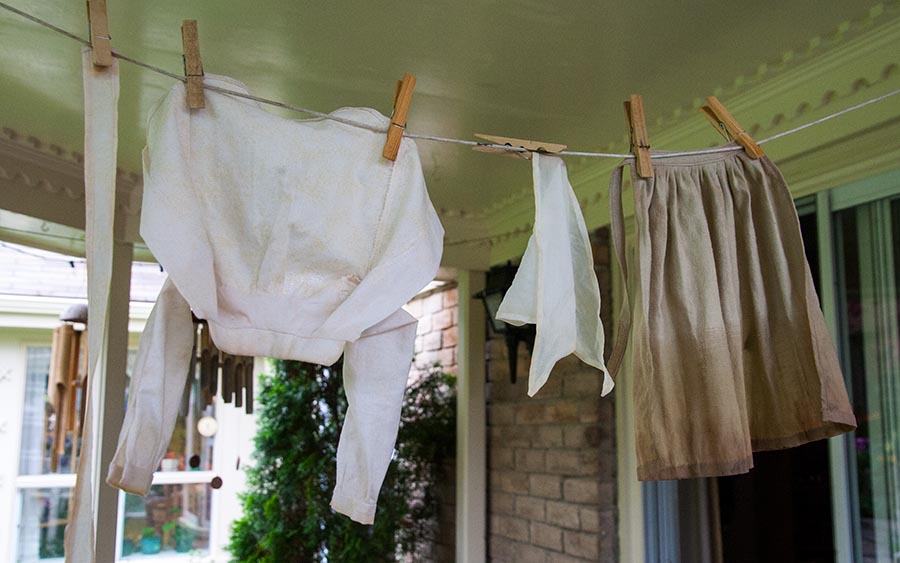
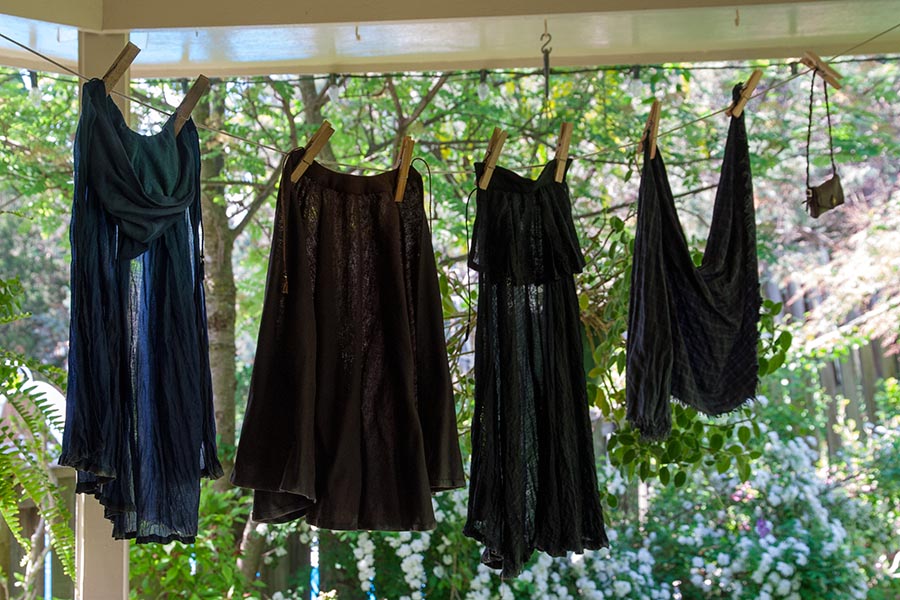
I was busy working on the travel clothes for Rex and Bianca, and had made Rex's shirt and cravat, as well as an apron for Bianca. But they all looked too new. Definitely too 'new' for people out on an adventure in the wilderness. So I dirtied them up, lightly staining everything with diluted acrylic paint. Kind of the opposite of what people normally do - instead of washing to make everything clean (which I did to the fabrics before I started, to remove any stray chemicals, and make sure all the old clothes were actually clean) I'm making the clothes look dirty and 'lived in'. Then everything was hung on the line to dry.
Rex
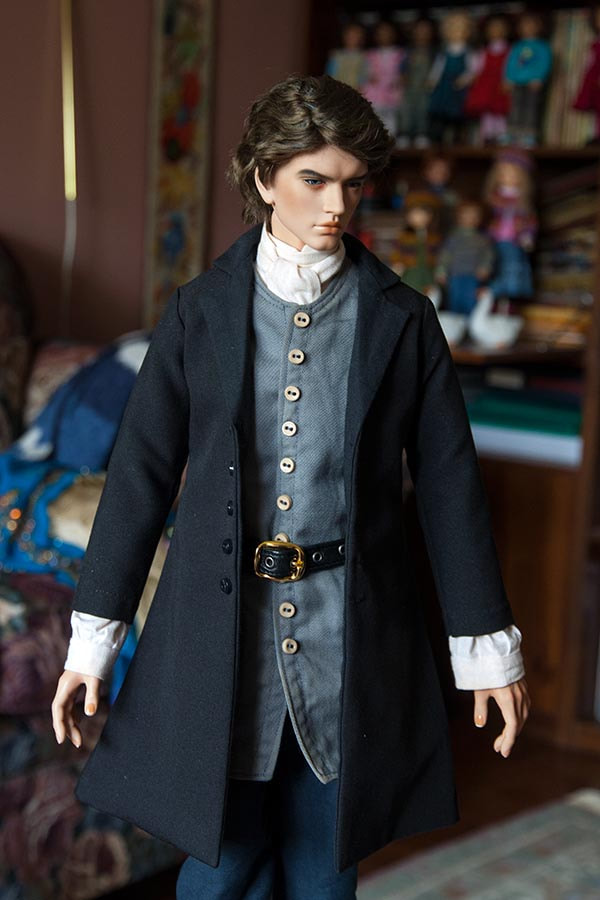
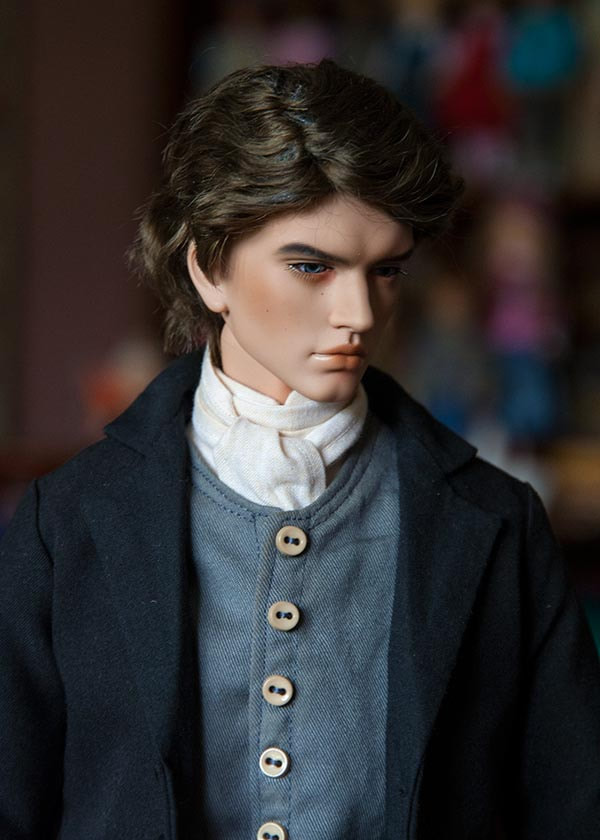
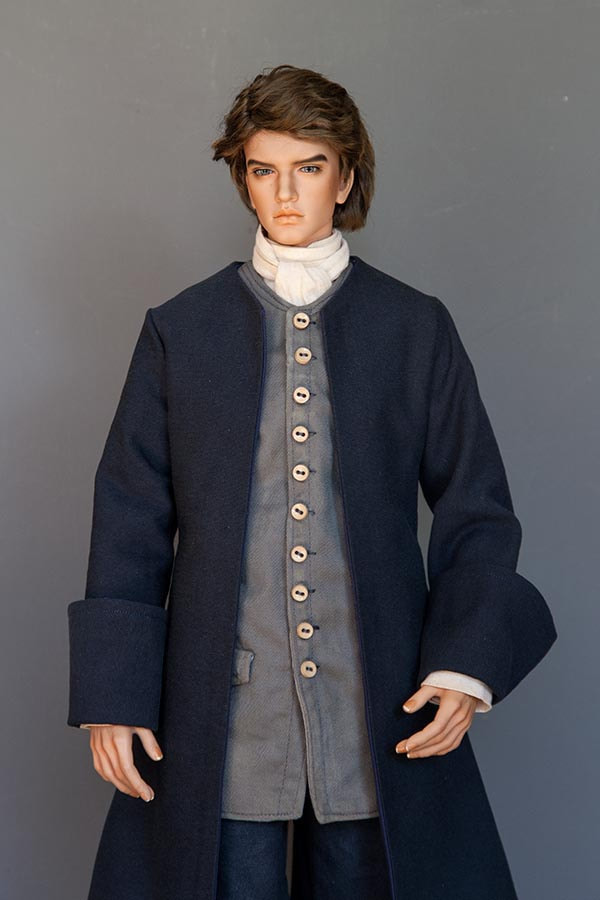
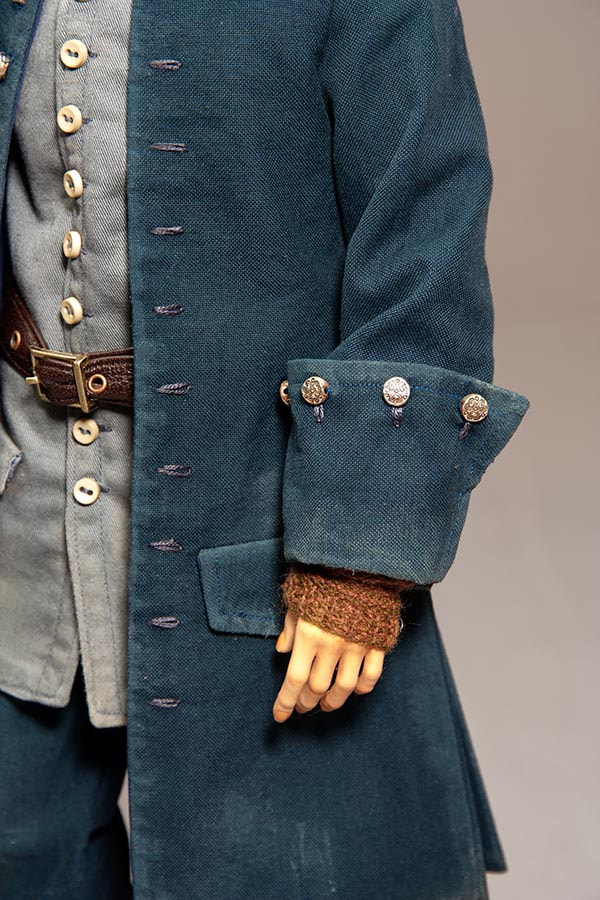
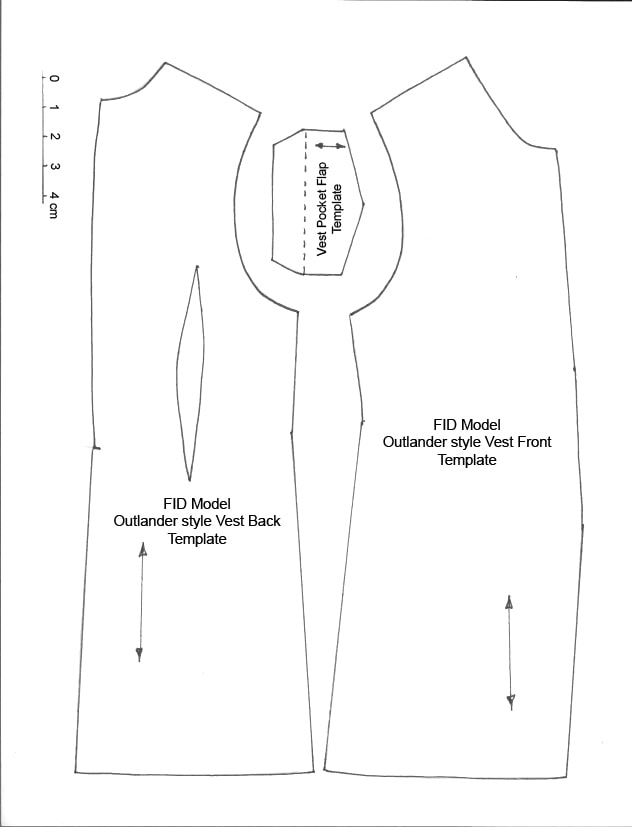
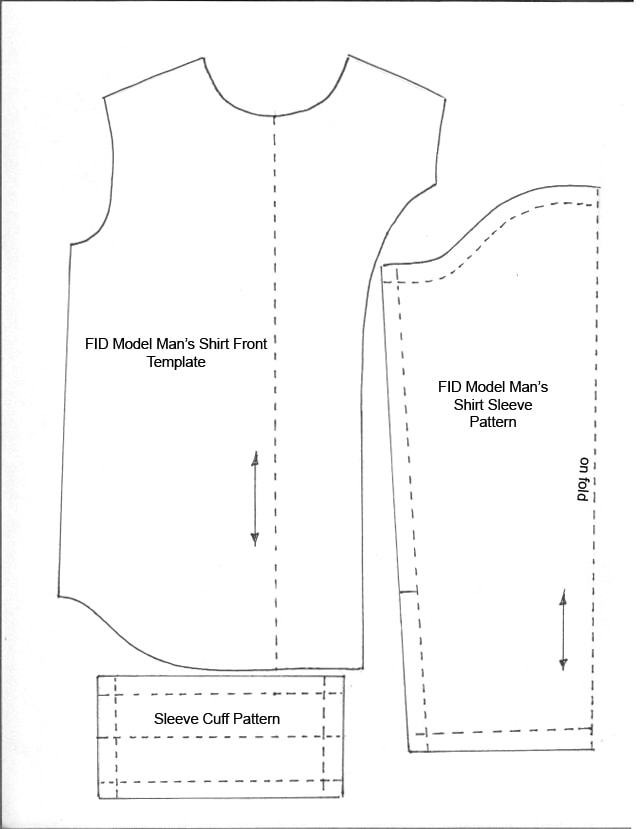
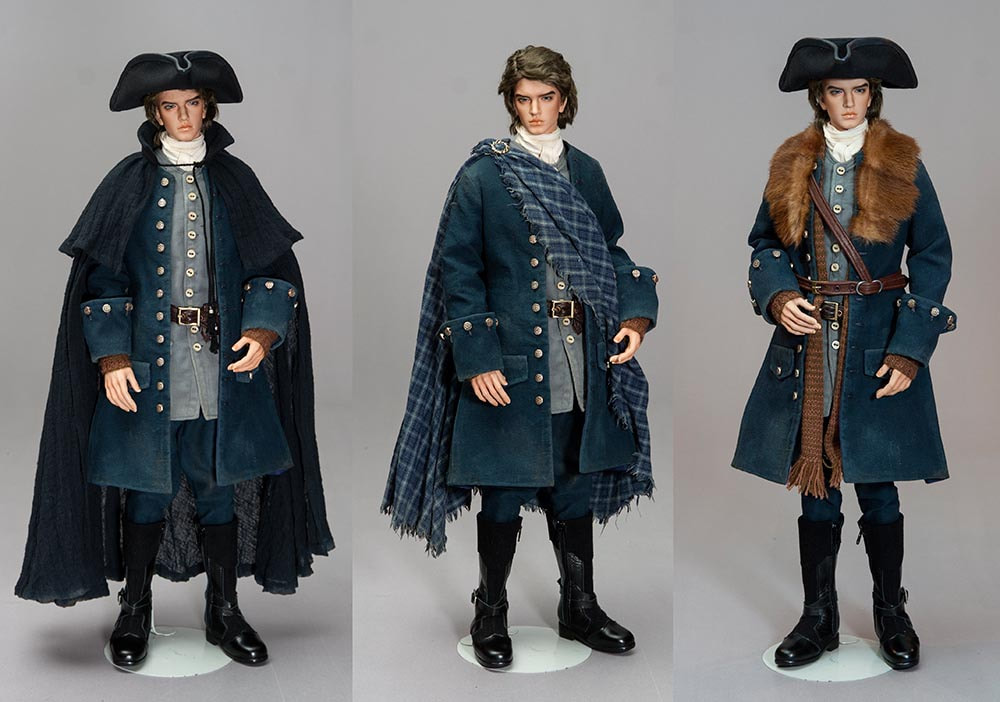
I was very busy working on the 'Outlander' inspired outfit for Rex, so taking interesting doll photos had taken a back seat. He has his socks, underwear, shirt, cravat, and a pair of pants. I had found an 'Old Navy' brand shirt at Value Village that was just the right colour, and thickness for his pants and coat. I made his shirt using the pattern I'd made for the Phantom's shirt, only I chose an ecru colour fabric. I chose a gray twill for his vest, and painted that down to make it look 'aged' as well.
After we got home from my semi-annual visit to the cancer clinic, it was time to design a coat to go over everything. It always helps to have an actual garment to use as a jumping off point, so I tried on Steve's black Victorian morning coat....
After we got home from my semi-annual visit to the cancer clinic, it was time to design a coat to go over everything. It always helps to have an actual garment to use as a jumping off point, so I tried on Steve's black Victorian morning coat....
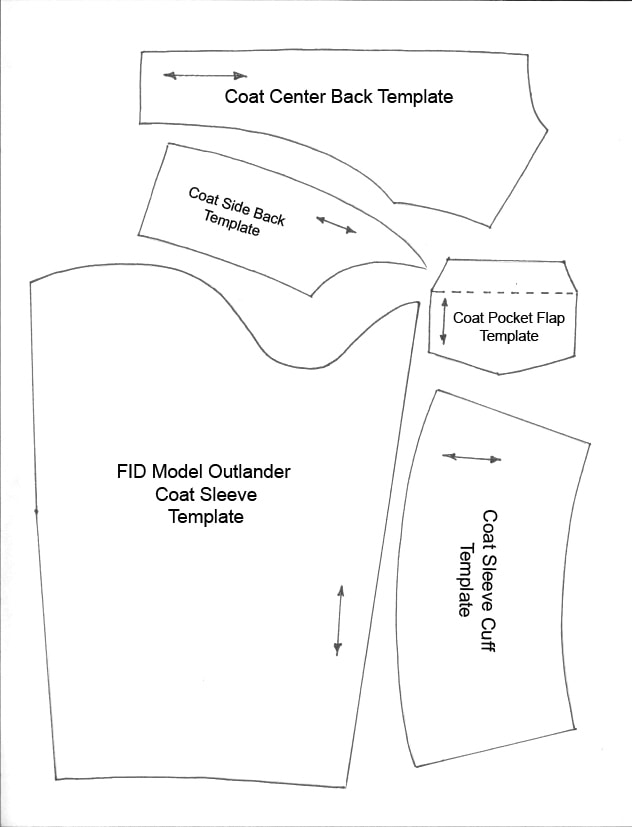
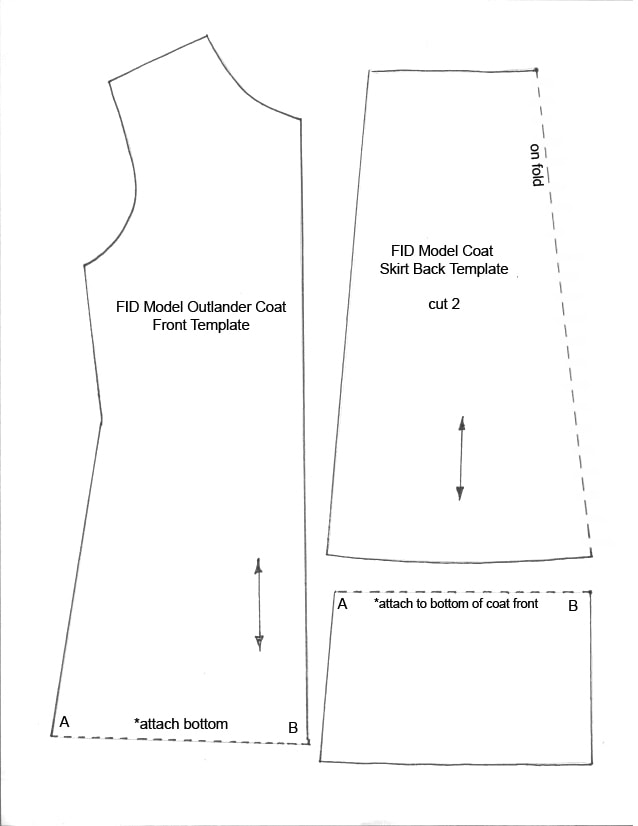
It was the wrong style, but the most important parts fit him, so that helped. The new period coat needed a different neckline, much longer sleeves, and the pleats at the back on this coat, need to be moved to the sides. So I drew up the new patterns and was ready to start cutting it out. But first a close-up...
..and he has a Coat..
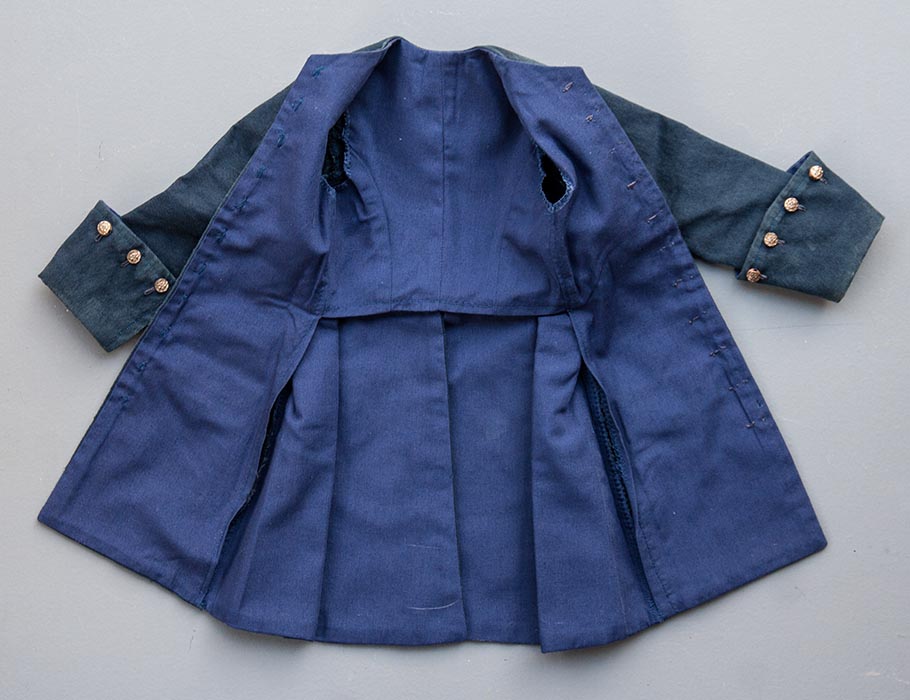
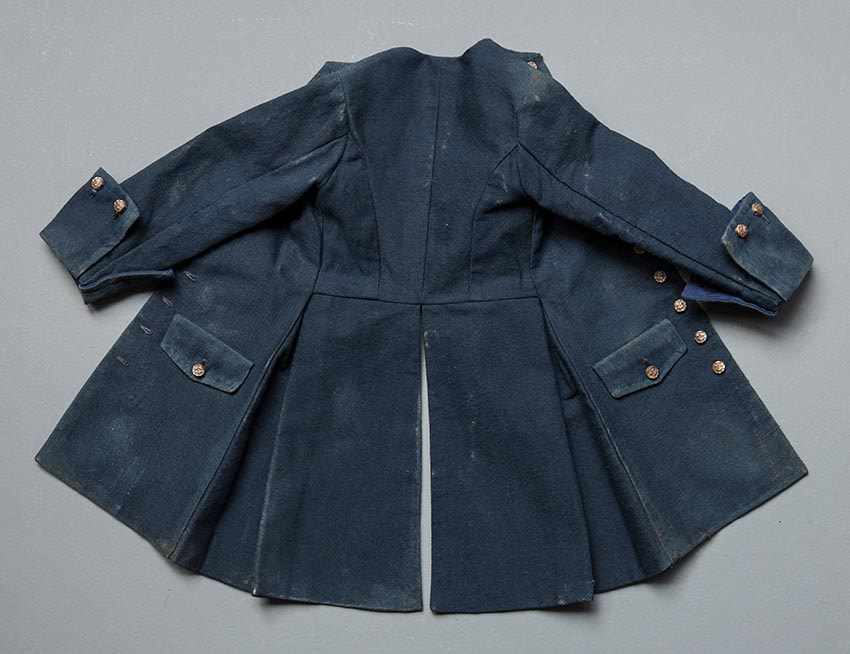
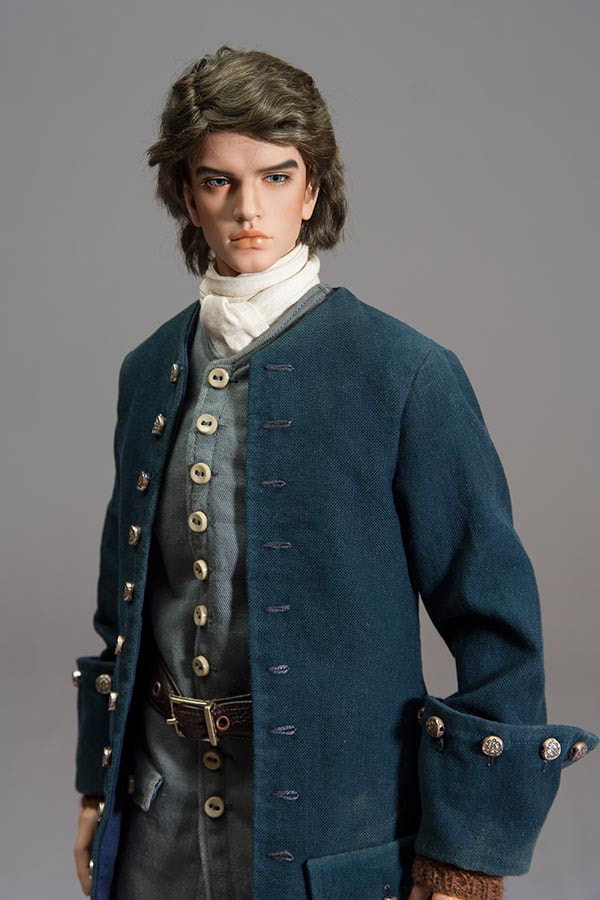
I finished making Rex's coat - well, at least the main sewing part. I was really happy with how it turned out, even though several things needed to be redone, and there's still one minor issue with the lining to be figured out for next time.
I did discover that the coat fit, and looked better, if the lining was left unattached at the armholes, and lower back. The issue I had was with the pleats on the back skirt. Hopefully I can figure out how to fix that next time. Maybe move them a bit more to thwarts the centre back?
I did discover that the coat fit, and looked better, if the lining was left unattached at the armholes, and lower back. The issue I had was with the pleats on the back skirt. Hopefully I can figure out how to fix that next time. Maybe move them a bit more to thwarts the centre back?
I can already imagine the coat being made in richer fabrics for fancier outfits from the period.
Now the fun begins. I got to sand the fabric and stain it to make the coat look old and lived in, like it's been his only coat for the past two years - worn in town and country, on ships and in the wilderness. Which is why I thought I should take a 'before' picture.
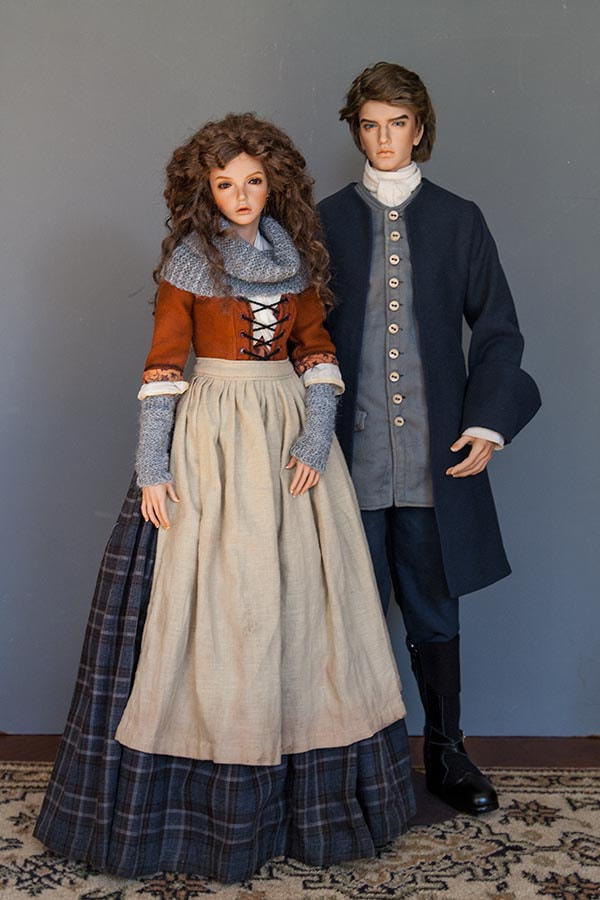
And while I was at it, I decided to take a photo of him with Bianca, whose latest outfit now includes a knit cowl scarf and an apron.
And while I was at it, I decided to take a photo of him with Bianca, whose latest outfit now includes a knit cowl scarf and an apron.
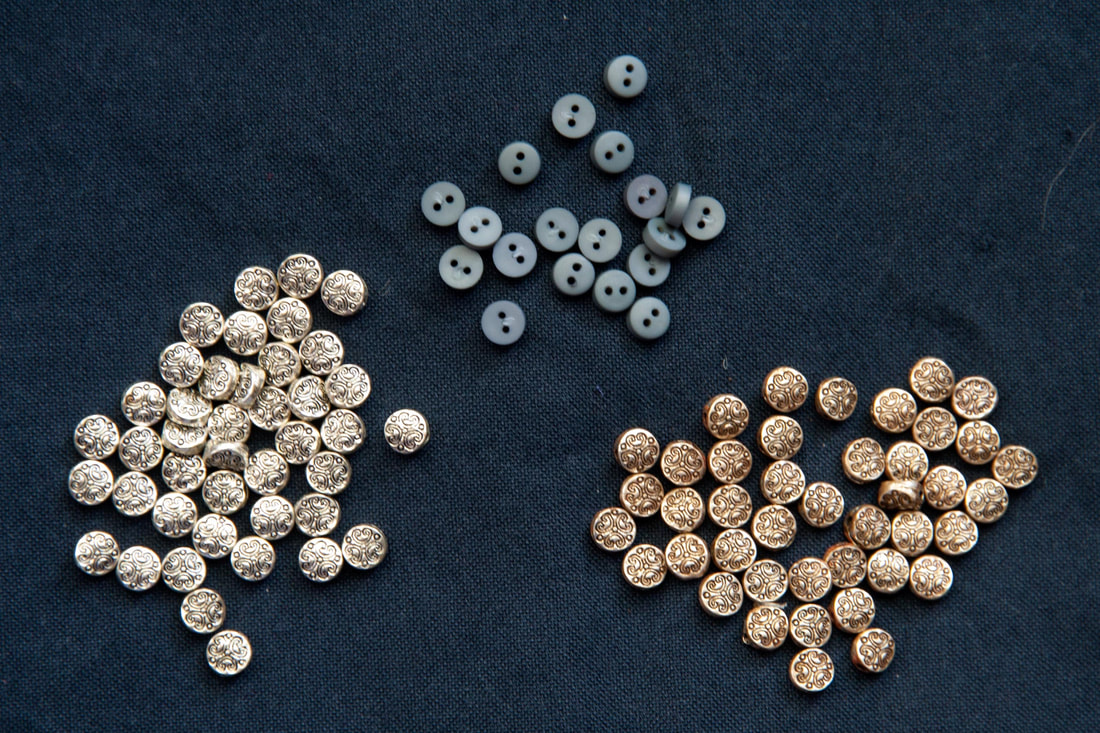
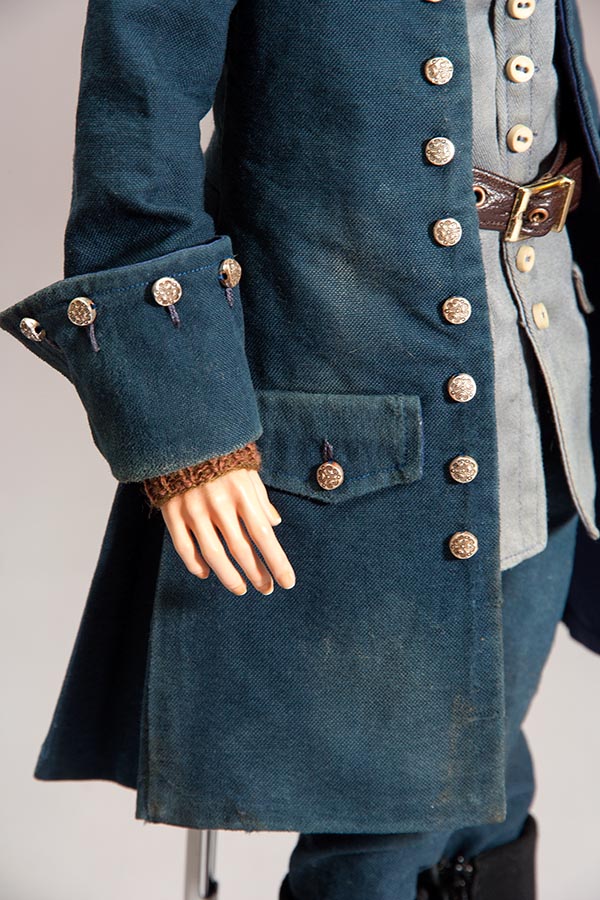
Rex's coat still needed the buttons, as well as some fake buttonholes. I had chosen some dark gray buttons, because I didn't want anything flashy, but there weren't enough. I really didn't make to make buttons out of polymer clay, so I printed off some discount coupons and headed over to Michaels to see if they had any tiny buttons in the right colour. No. Only packages with really bright colours. So I checked out their bead section, and they had some strings of an embossed silver metal bead, about the right size. Kind of a bright silver, which wasn't really what I wanted, but I bought two strings of them anyways. So I brushed one string with dark brown paint, killing some of the flashy silver. Then they look more like 'brass'.....
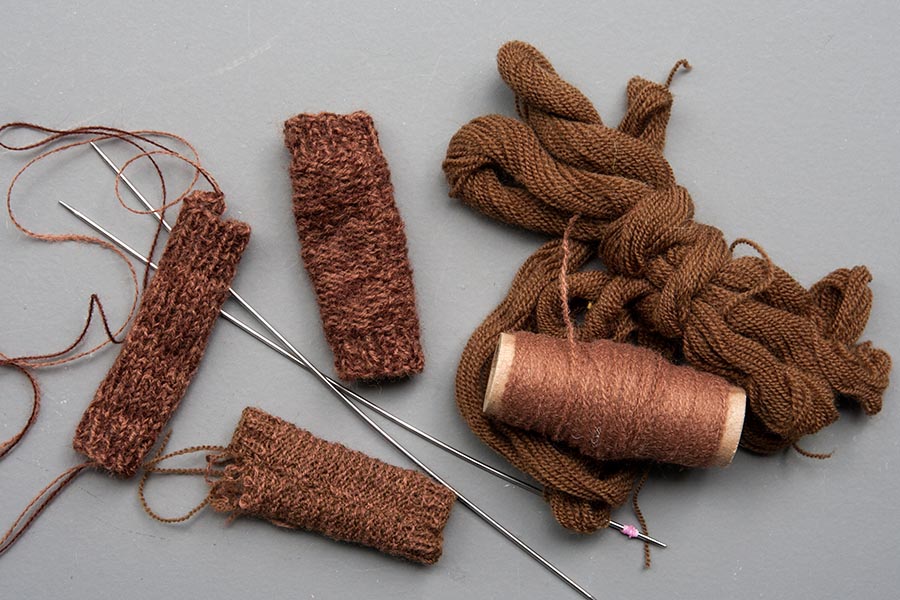
Rex also needed some knit fingerless gloves, and the first set I made were too 'rough' and thick. I had combined two very thin yarns and knit them together to give it a more 'home-spun' look, but they turned out too thick for my taste. So I knit a second colour combo, alternating two medium browns. Unfortunately I cast off too tight and messed it up when I tried to undo it, so now I have to start all over. Again. I just hope there's enough of the one yarn.
Instructions for Arm Warmers
1. Using needle punch yarn, cast on 26 stitches.
2. Knit 6 rows ribbing
3. Knit 26 rows stockinette stitch
4. Knit 6 more rows ribbing
5. Cast off LOOSELY
6. Sew sides together, and use with wrong side out
(looks more 'home-spun' on back side).
* For bigger dolls, use sock yarn
2. Knit 6 rows ribbing
3. Knit 26 rows stockinette stitch
4. Knit 6 more rows ribbing
5. Cast off LOOSELY
6. Sew sides together, and use with wrong side out
(looks more 'home-spun' on back side).
* For bigger dolls, use sock yarn
Then it was time to go 'age' that coat....and start some more arm warmers....
An 'Old' Coat
I did some staining and painting down of Rex's coat. I wet the coat along the edges and wherever I thought it should have a more 'worn' look, then let some very diluted beige paint seep in. I used a stiff brush and my fingers to smooth out the paint, then let the coat dry....
I had discovered that a single 'lazy daisy' embroidery stitch would pass for a convincing 'buttonhole'.
You can see the 'dusty, worn' edges everywhere, making it look more believable as an old coat.
I finished knitting his new (third attempt) arm warmers....
...and made him a belt. He's looking great!
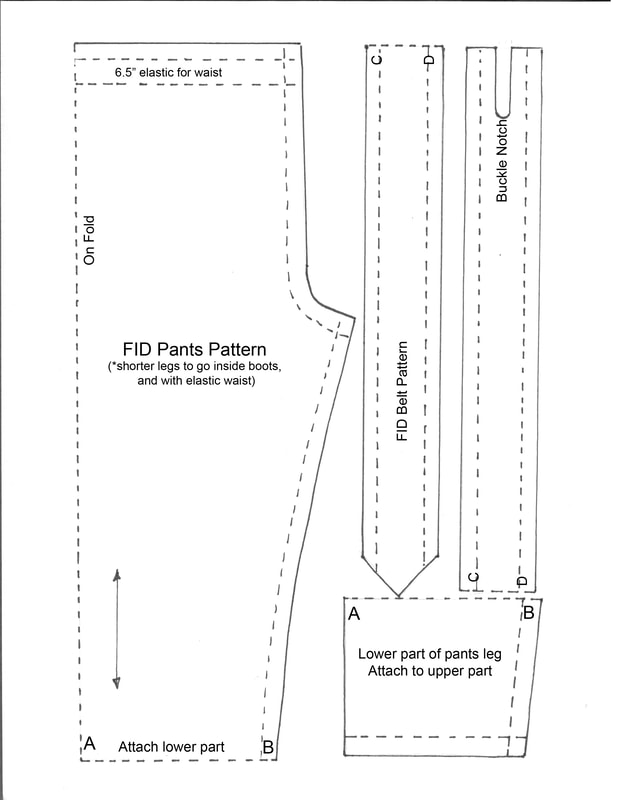
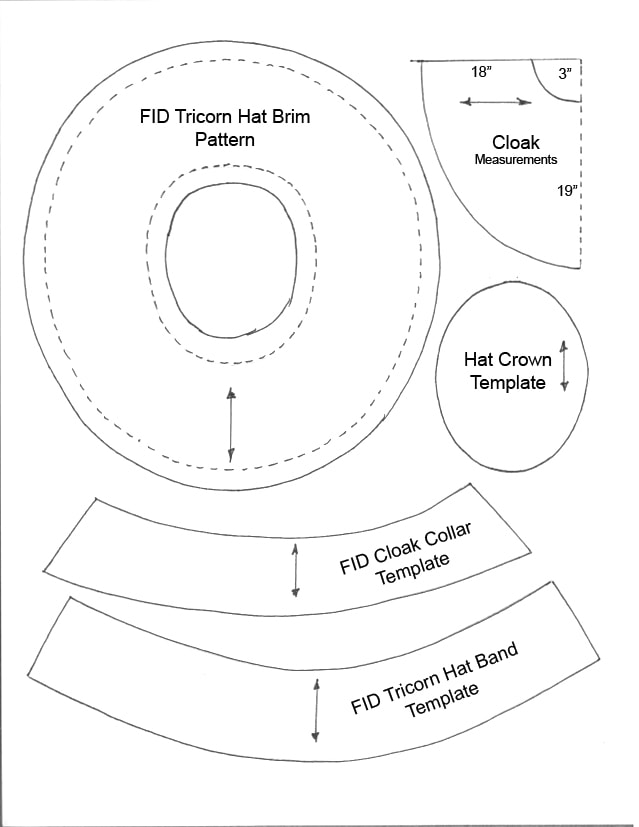
Patterns for Rex's Outlander Costume
I am including a pdf with the patterns and templates for Rex's costume. It has seven pages and does not come with any instructions. To download the pdf, just click on any of the top four pattern pages below...
the Hat
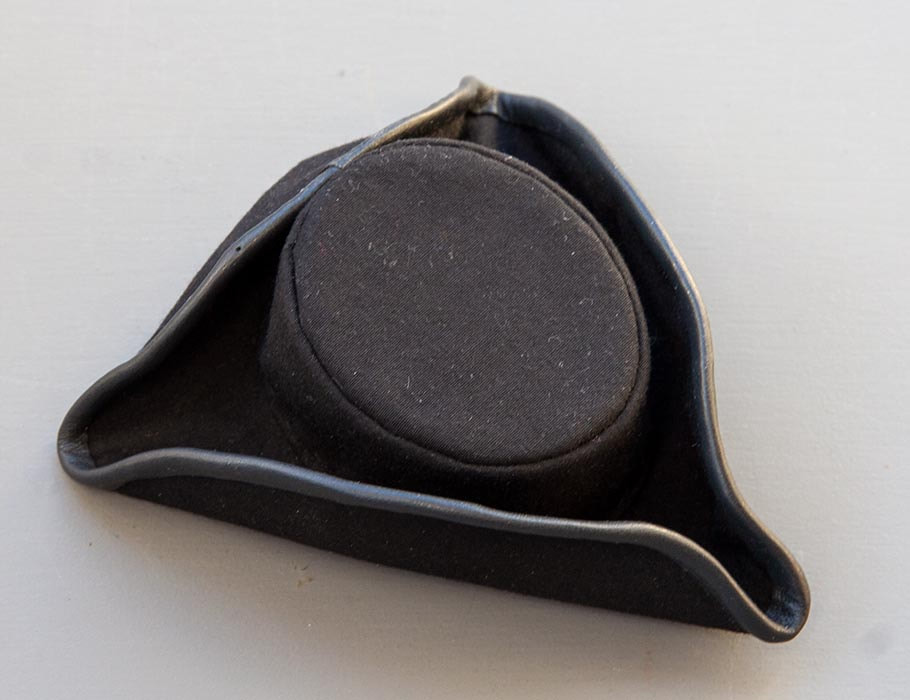
The hat was made by cutting two of each hat pattern and template piece out of thin black fabric, adding seam allowances to the crown and brim. The outer hat and hat lining were sewn separately. Then a cardboard crown was cut and lightly glued into the underside of the hat crown, making it smooth and stiff. When dry, the lining was positioned inside the hat with wrong sides together, and the two layers basted together. Zig-zag the outer edge, then hand sew a wire all the way around, overlapping a bit at the back. Then the wire was covered with a strip of black leather. After it was completely dry, the hat was bent into the proper shape.
Cloaks
Considering the weather we'd likely experience in Newfoundland, I decided both dolls needed a cloak. Or two. Bianca would get a hooded blue cloak, and a plain brown one, while Rex would get a tartan "Outlander' one, as well as a black layered cloak of the period. I chose very thin fabrics so they'd hang well. After sewing them, I wet and stained them, then let them dry naturally outside.
A Horse for Rex
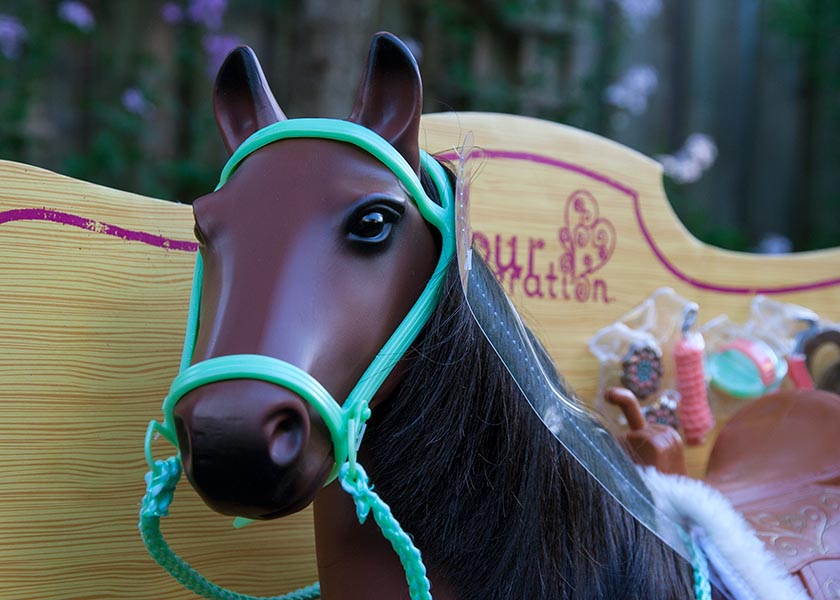
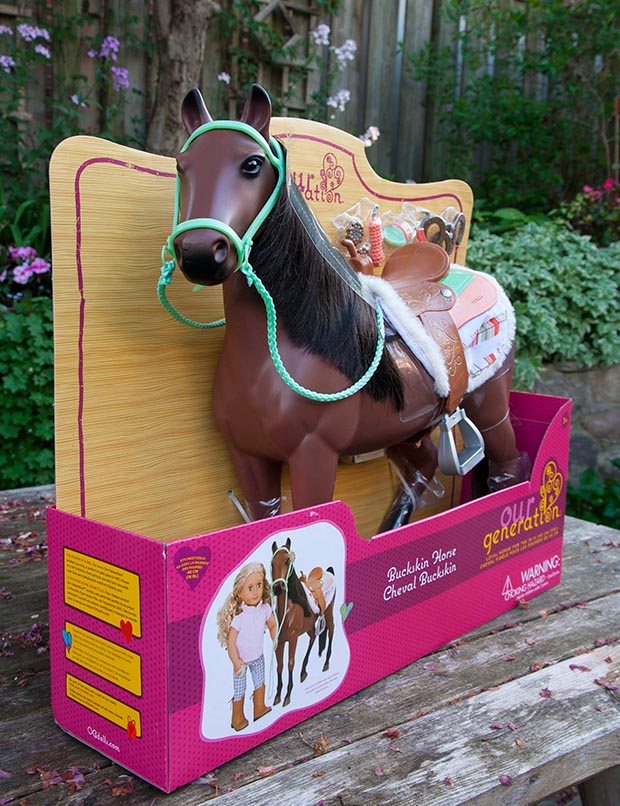
I have plenty of Our Generation horses, but felt Rex could really use a brown one. We found one at the Mastermind Toy store in Guelph. He's the Our Generation 'Buckskin' Horse....
I wanted to touch him up and give him a bit of shading with some paint, so he didn't look quite so 'plastic', and he was also going to need a new bridle (turquoise plastic just won't do) and he needed some work on his saddle. The shape was fine, but part of the 'saddle blanket' is molded on and has been painted peach and pale turquoise. Which totally won't do.
Horses
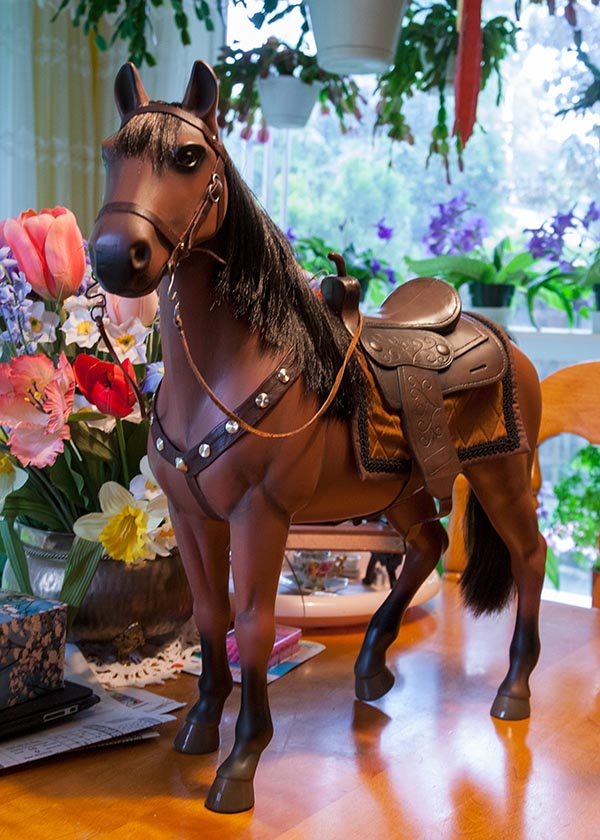
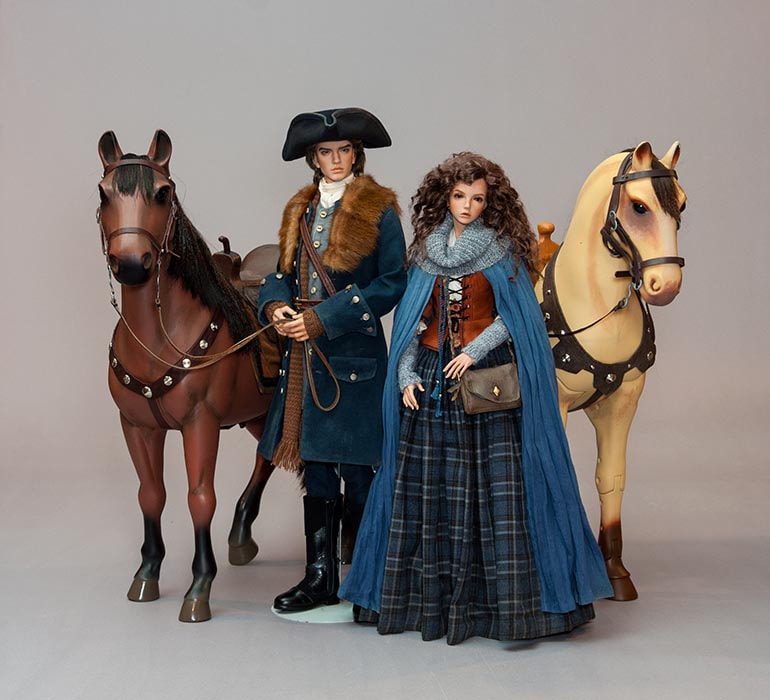
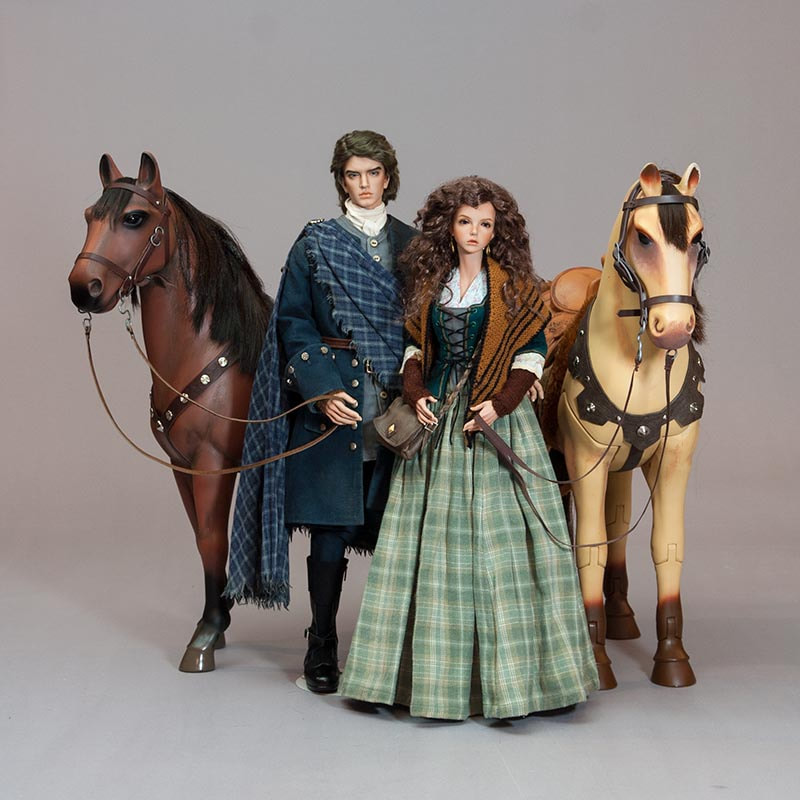
Both horses I'd chosen - 'Buck' and 'Morgan'- needed some work. Buck needed some hair and tail trimming, and both horses needed some shading with paint. I shuffled everyone's saddles around, and shaded them as well. Then Buck needed a new bridle (bright green was just not going to do!), and I spent quite some time on that. Then I tackled the saddle blankets...
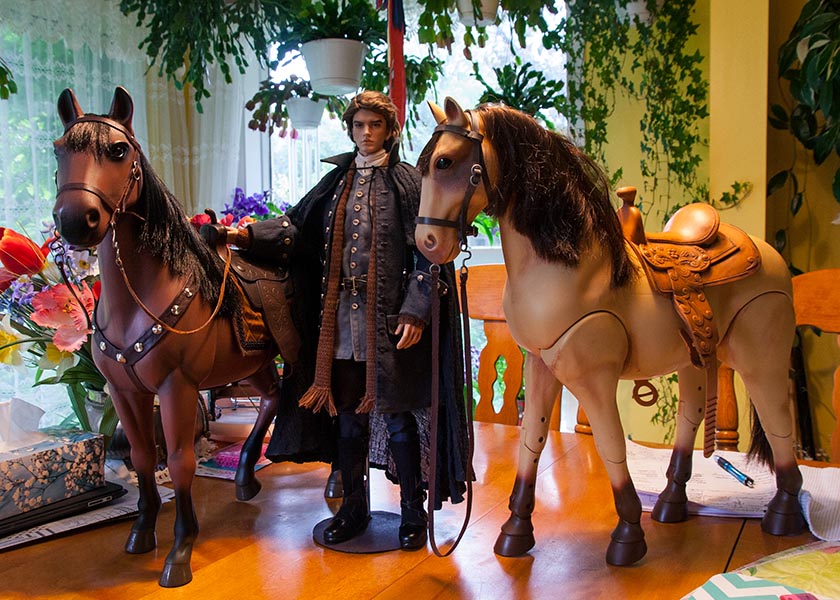
I was very happy with how Buck turned out, and I think Rex was too, as he'd been standing around in the kitchen, supervising. Morgan still needed some work....
Studio Photos
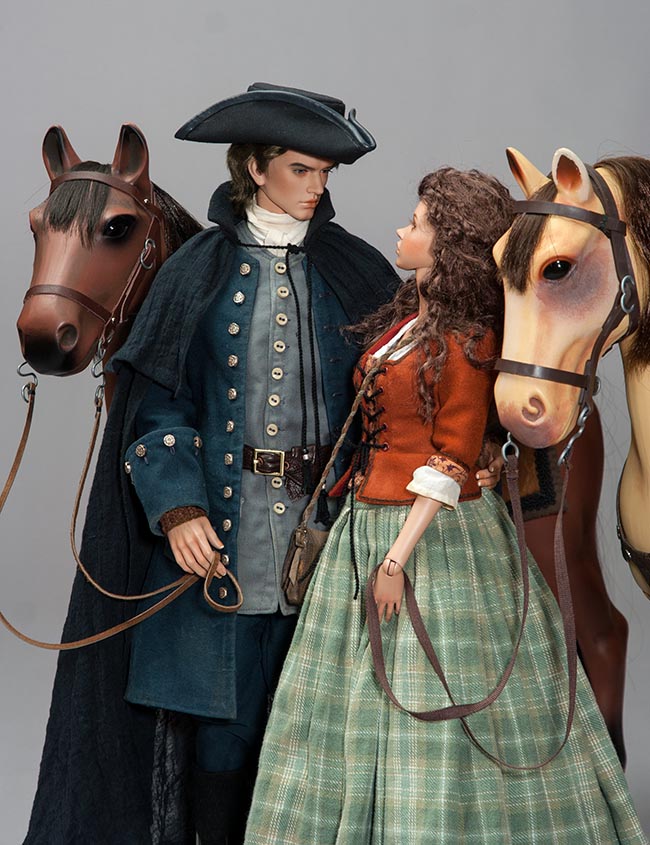
After everything was done, it was time for some photos in the studio. Each doll had three looks. First Bianca....
...and Rex....
...and together with their horses...
* Rex & Bianca's Newfoundland Adventure
Copyright © 2019 Martha Boers
All Rights Reserved
