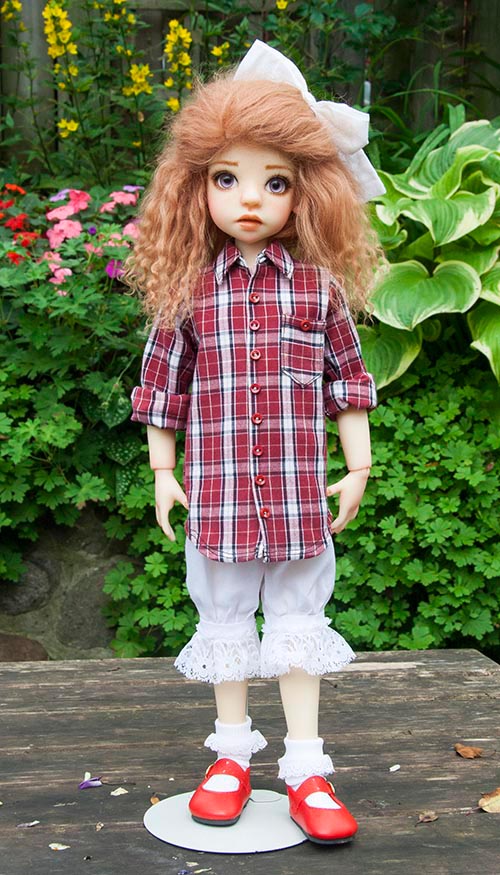
Shirt for Iplehouse JID Guy
Copyright © 2017 Martha Boers. All Rights Reserved. For personal use only
This pattern was designed to fit an Iplehouse JID guy. Their measurements are: height 46 cm, chest 23.8 cm, waist 17.5 cm,
hips 23 cm, neck circumference 8.5 cm, shoulder width 12 cm, arm length 16 cm, arm circumference 5 cm
*Please read through the entire tutorial before starting to make a shirt of your own
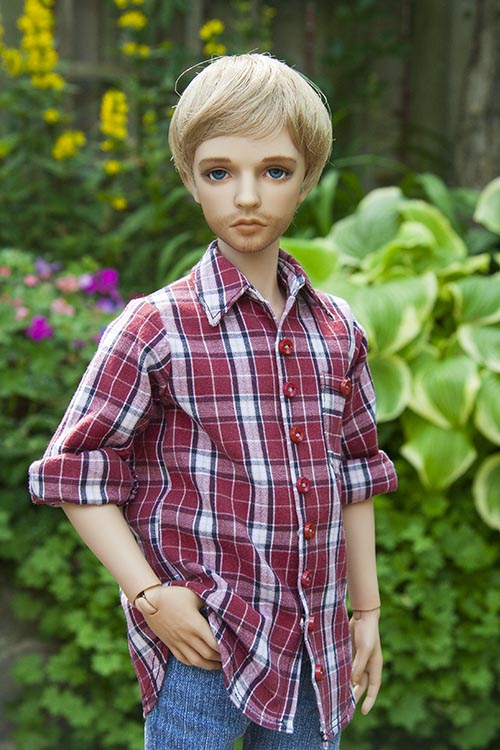
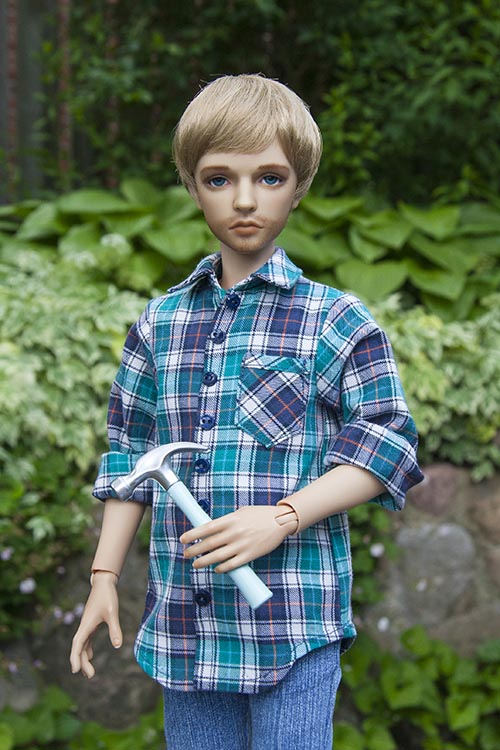
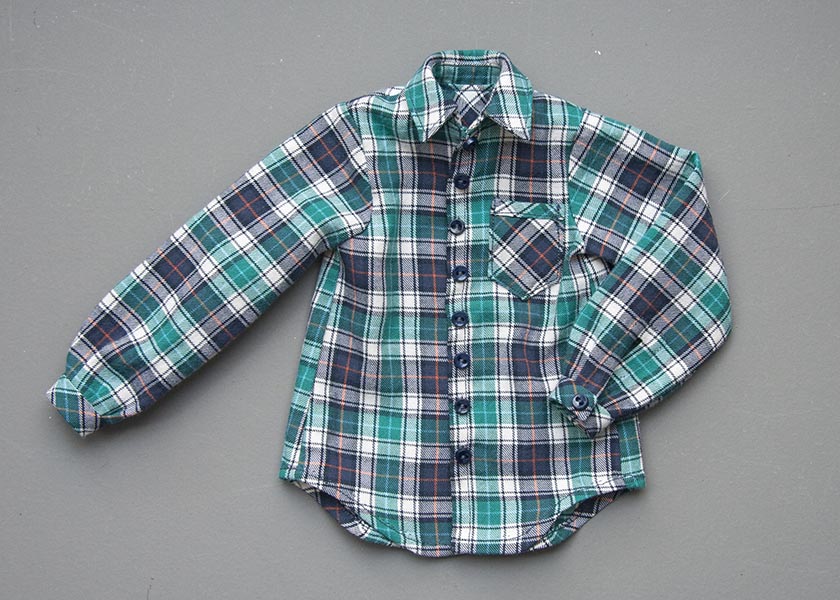
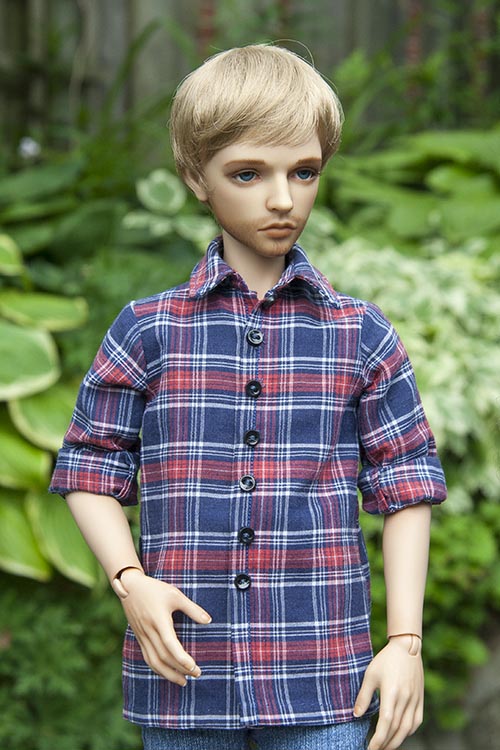
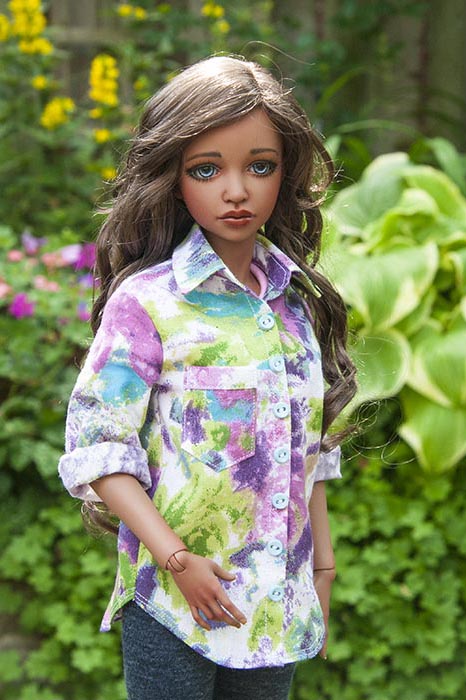
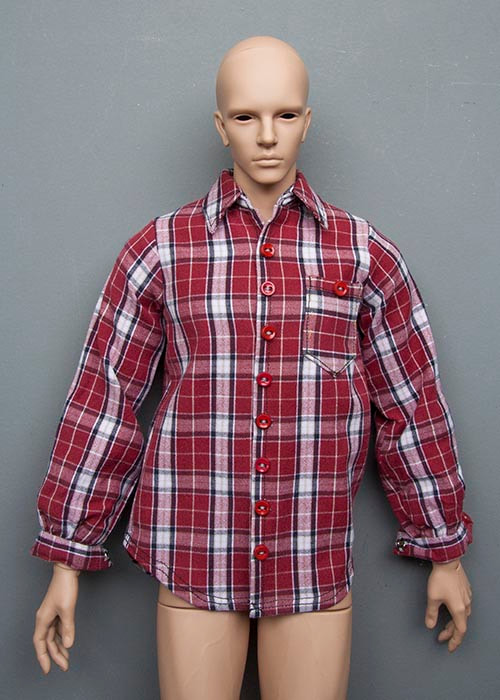
I started by making the green shirt, and that's the one that I took under construction photos for while I made it. However the shirt pattern needed a bit of tweaking, so then I made the red plaid shirt with the revised pattern. Instructions are exactly the same.
You'll notice something that I messed up with the green shirt, was in not paying attention to lining up the plaid
on the two front pieces. I did a much better job with the red shirt.
Both shirts were made from boy's shirts that I found in the secondhand discount store. Used clothing tends to be softer,
having been washed many times, plus it comes in all kinds of patterns that you'd never find in a fabric store.
Patterns
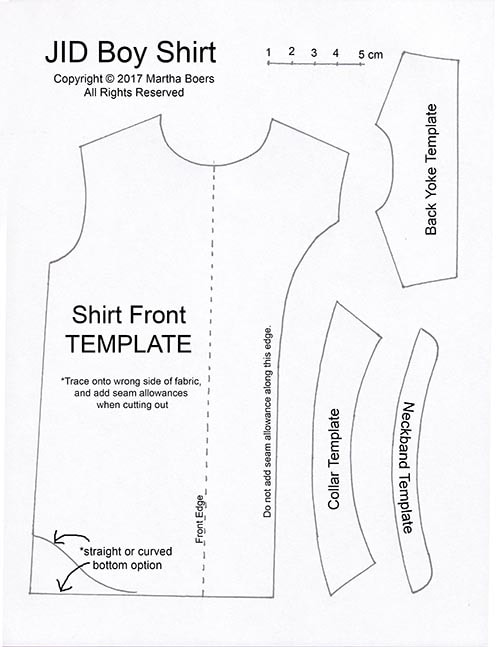
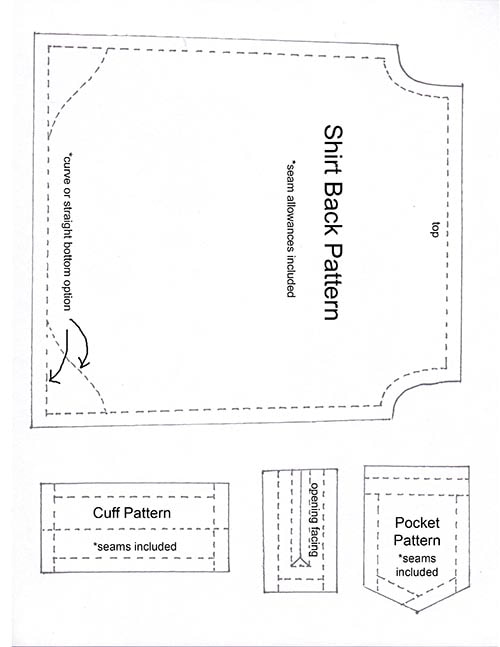
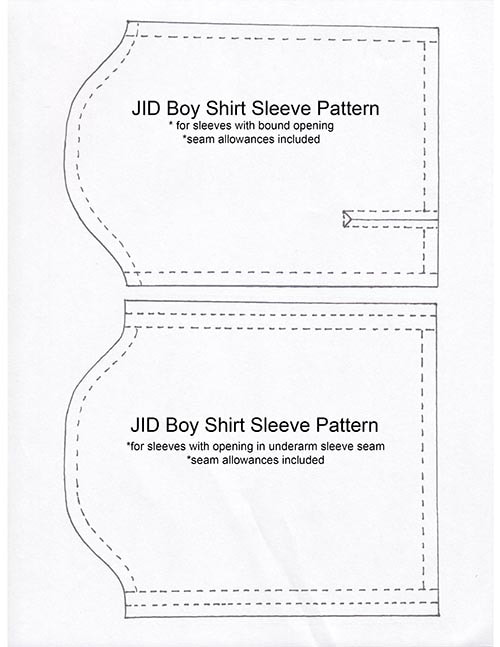
*Click on any of the pattern images below to download the pattern pdf
Materials
- shirt fabric - I used old shirts (boy size) - Fray Check
- sewing needles, pins, and matching thread - pen with disappearing ink
- sharp scissors - 12 small buttons
- small snap fasteners
- sewing needles, pins, and matching thread - pen with disappearing ink
- sharp scissors - 12 small buttons
- small snap fasteners
Instructions
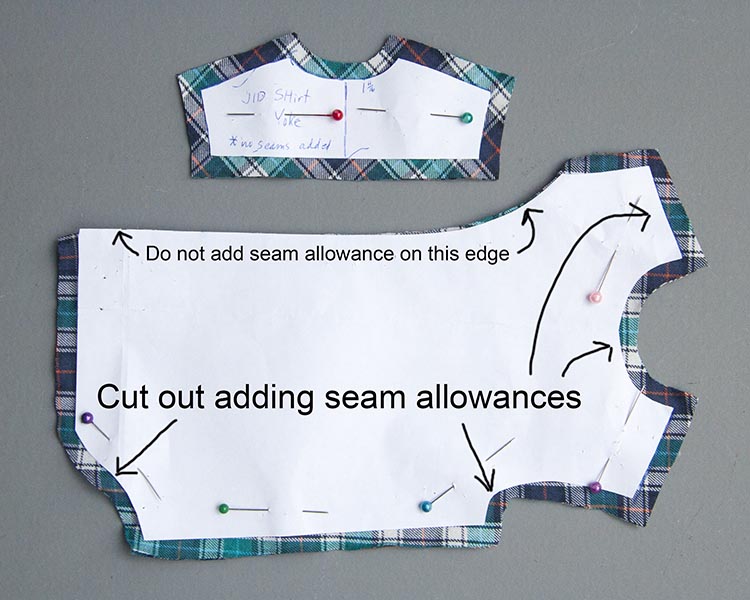
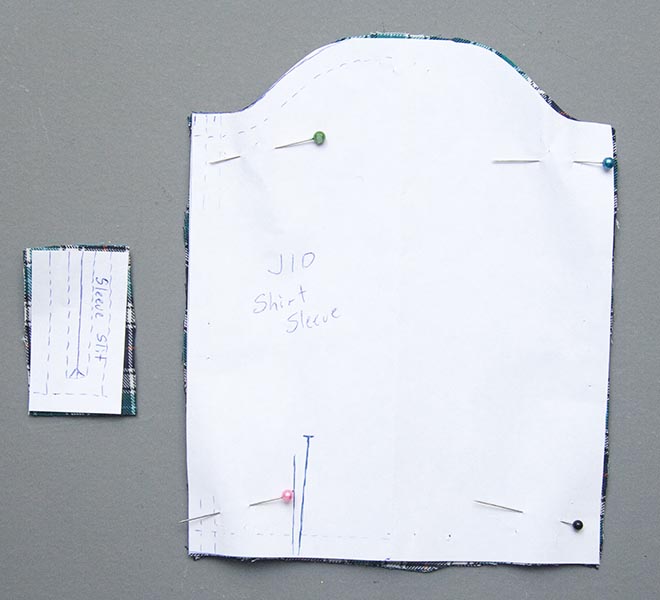
1. Download pattern and Print it out. Cut out the pieces. Please note that there are two kinds of 'patterns' pieces. Some are traditional pattern pieces and have the seam allowances already drawn on. However, most of the main pieces are actually TEMPLATES, which need to be traced onto the wrong side of the fabric, and cut out ADDING a seam allowance as you cut. I find that by using templates, the traced line becomes the sewing line, and it's so much easier to see where to sew.
First the Collar
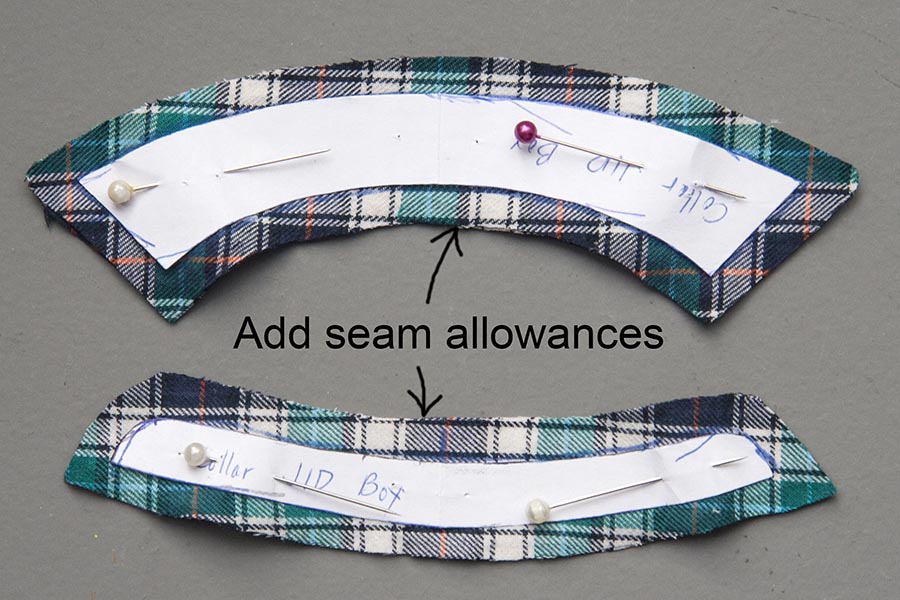
2. Fold fabric with right sides together, and position collar and neckband template pieces carefully, making sure the plaid pattern is symmetrical. Trace template with pen with disappearing ink. The pen I use has ink which disappears when heat is applied (ironed). Cut out the collar and neckband, being sure to add the seam allowances. I like seam allowances of just over 1/4".
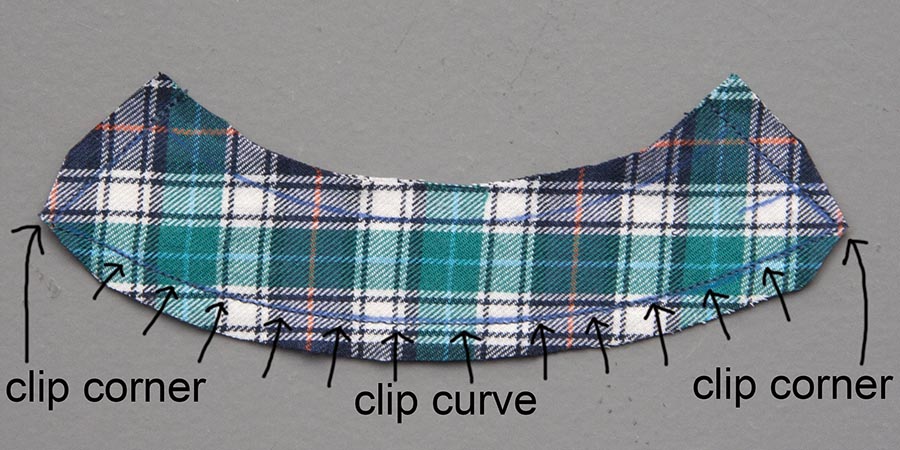
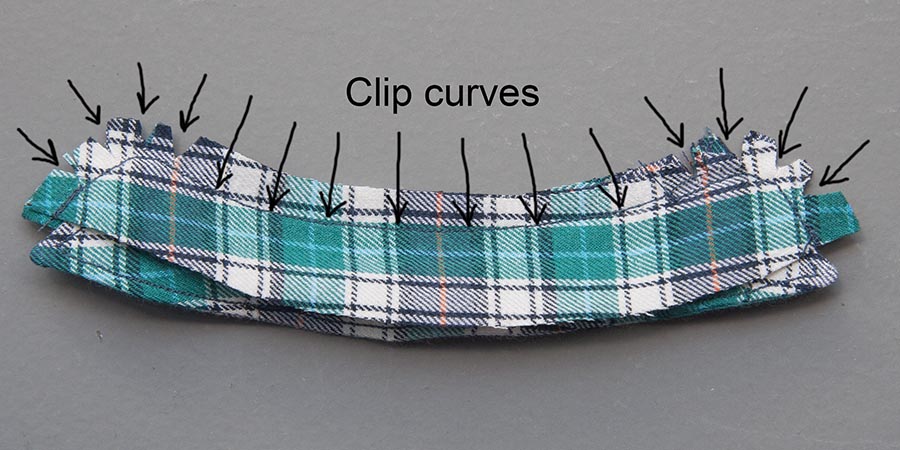
3. Stitch outer seams on collar piece, carefully following traced line. Clip corners off, and clip outer curve.
*Note - it's important to clip all your curves in order to get a smooth curve to the collar when turned right side out.
*Note - it's important to clip all your curves in order to get a smooth curve to the collar when turned right side out.
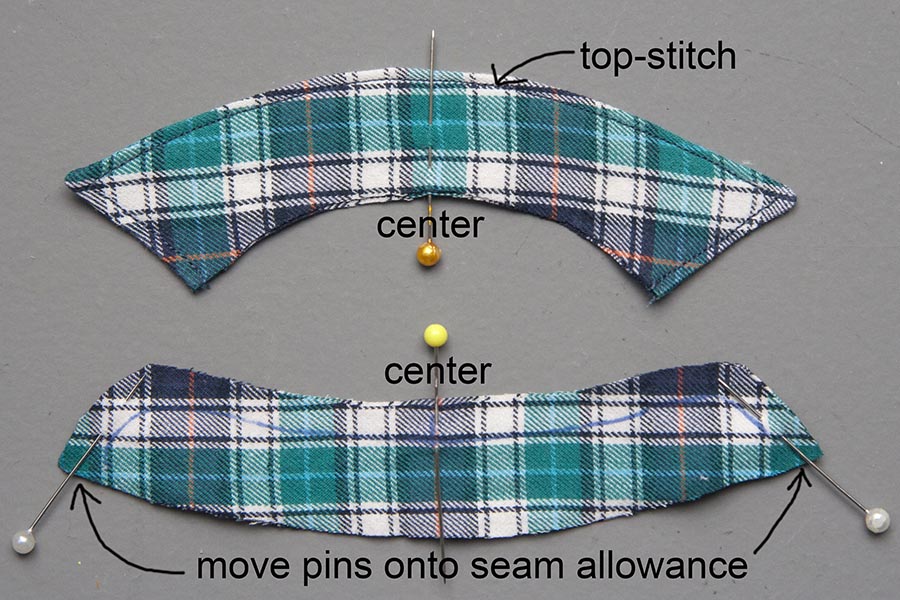
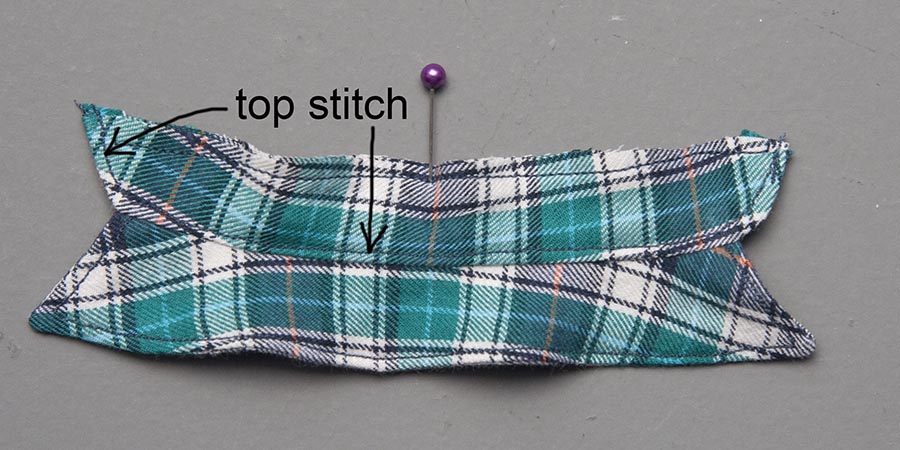
4. Turn collar right side out. Press and top=stitch around outer edge. Fold collar in half widthwise to find middle, and mark with a pin.
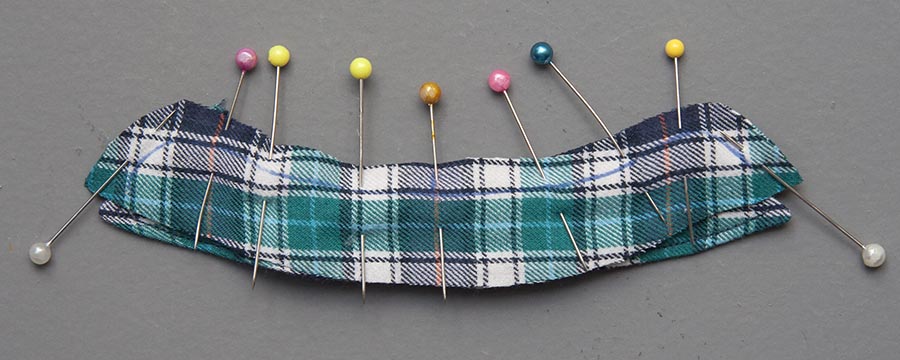
5. Move pins on collar band onto the outer seam allowance, and mark centre of band with a pin. Insert collar between collar band layers, matching up the two central pins. Pin in place. Line up the bottom collar edge with the top of the band edge, pinning in place. Make sure that the collar is exactly in the centre - see that both ends extend the same amount at the collar band seam lines.
6. Now carefully sew along the traced line on the collar band. Clip the curves - almost up to, but not touching the stitching.
7. Turn right side out, press, and top stitch collar band. Fold in half widthwise and mark centre of neckband with a pin.
8. Cut out shirt back pattern - it has seam allowances added. Then with right sides together, trace the back yoke and shirt front templates, begin careful to line up the horizontal striped of a plaid. For added realism, you can cut the yoke on the bias (diagonal) as I did for this shirt. Cut out, adding seam allowances where shown.
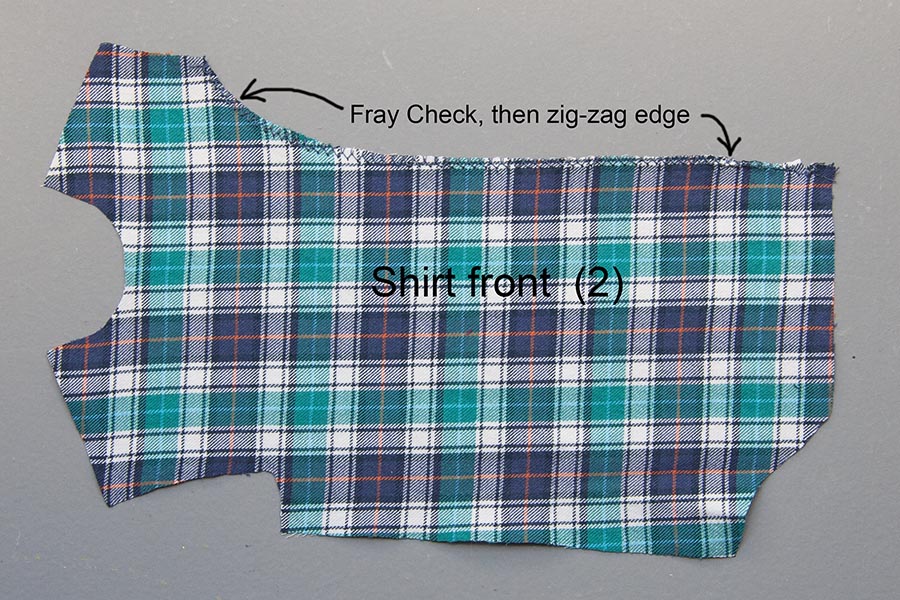
9. Apply Fray Check to curved inside edges of both shirt front pieces. When dry, zig zag edges.
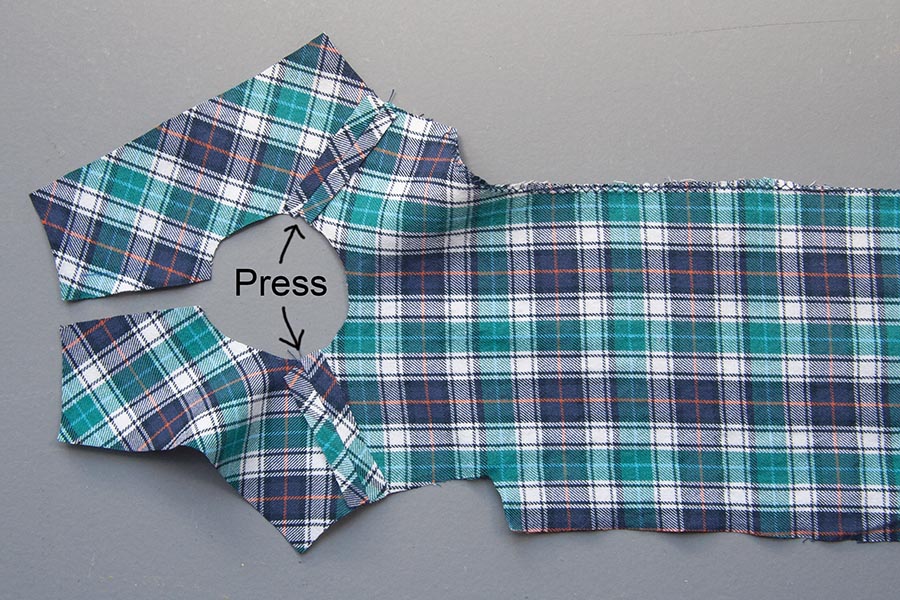
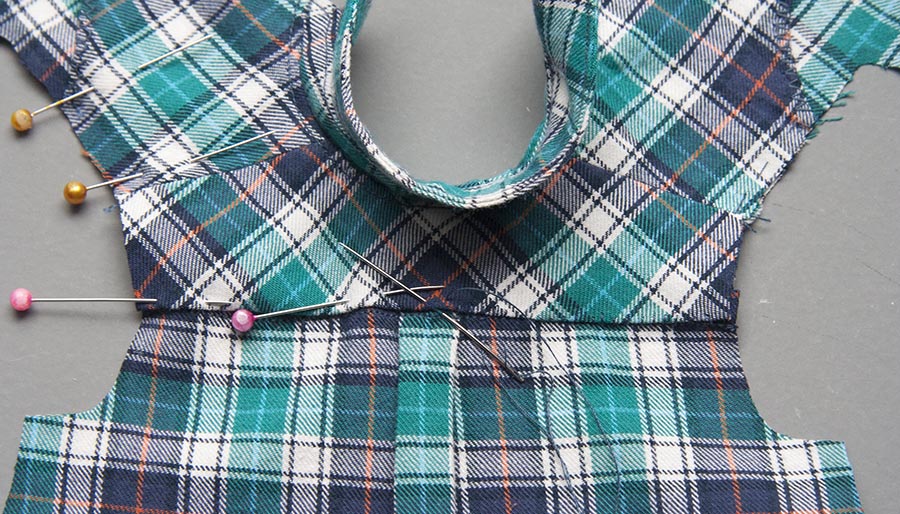
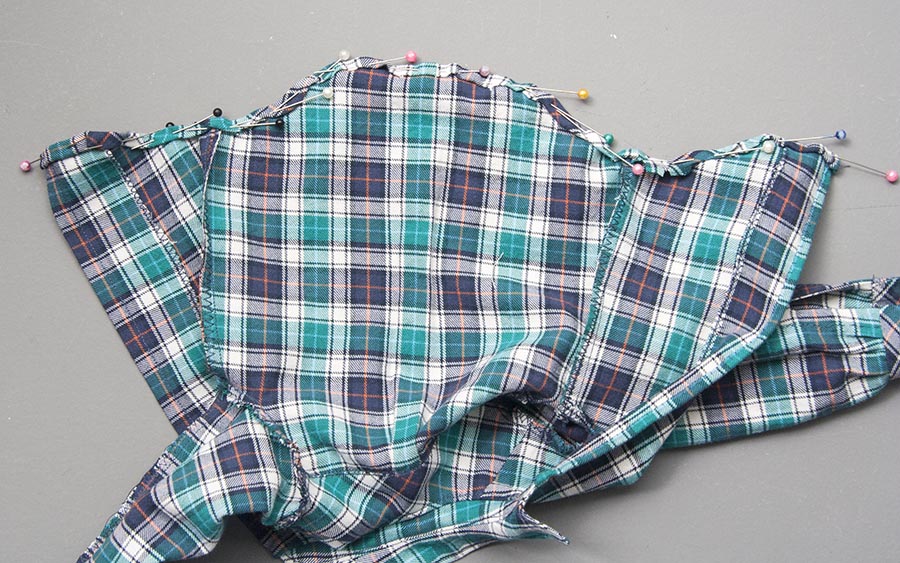
10. Pin a shirt yoke piece onto both shoulder sections of one shirt front piece, with right sides together. Stitch and press seams open
11. Then pin the second front side piece onto the yoke pieces as shown - like a mirror image. Stitch, and press seams open.
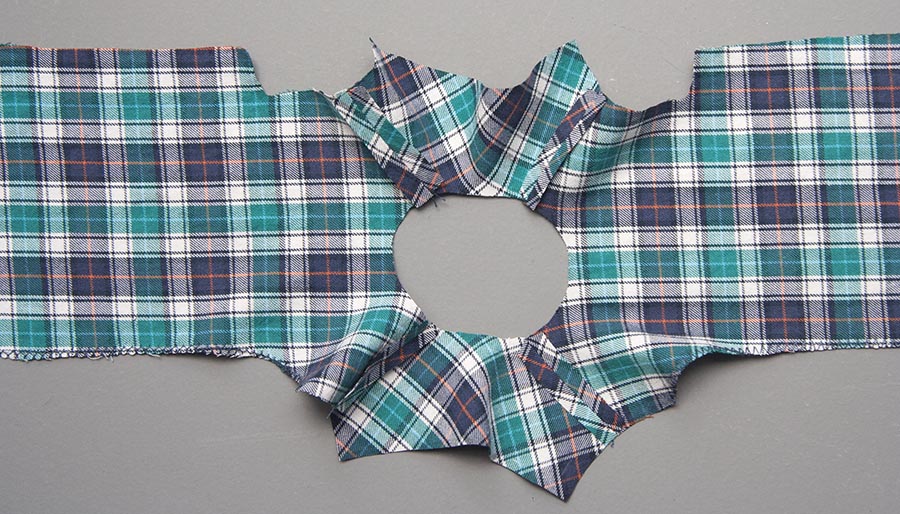
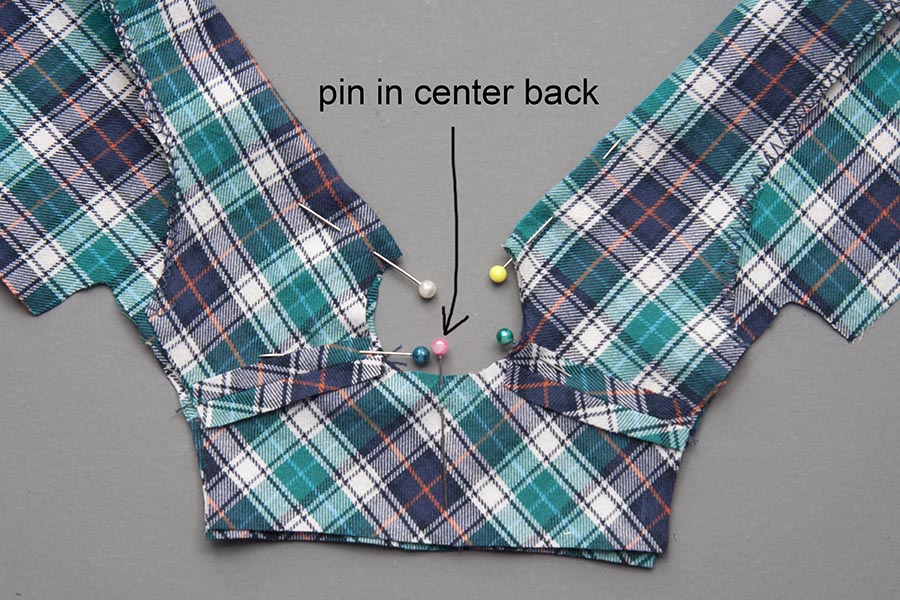
12. Folding right sides together, position the two yoke pieces on top of each other, carefully matching the shoulder seams.
Mark center back with a pin
Mark center back with a pin
13. *This will be the trickiest step in the whole shirt, so take your time.
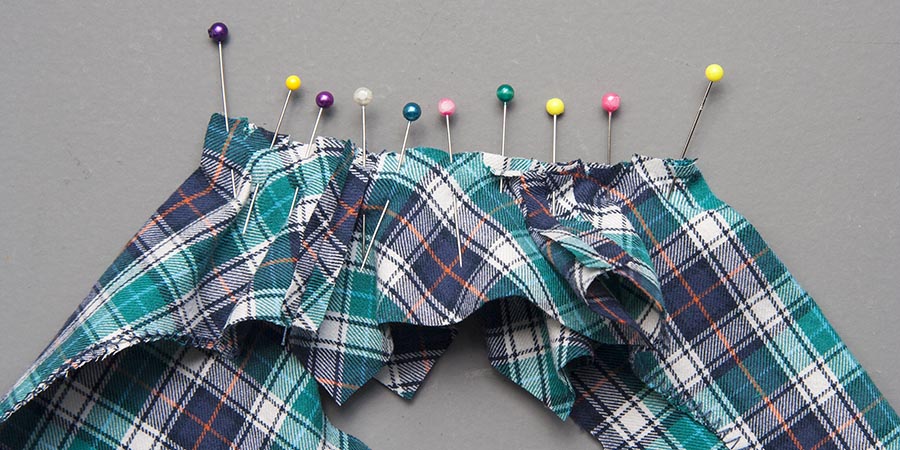
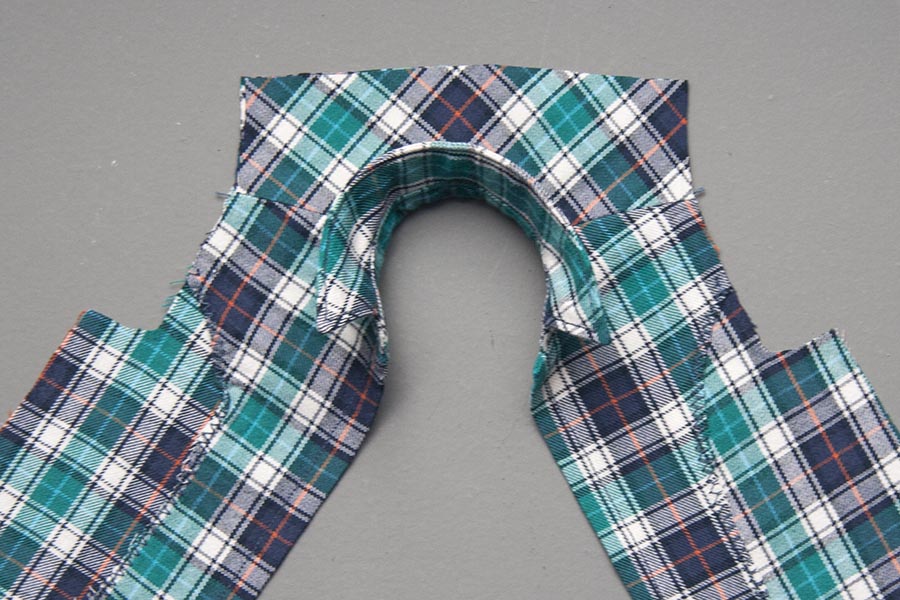
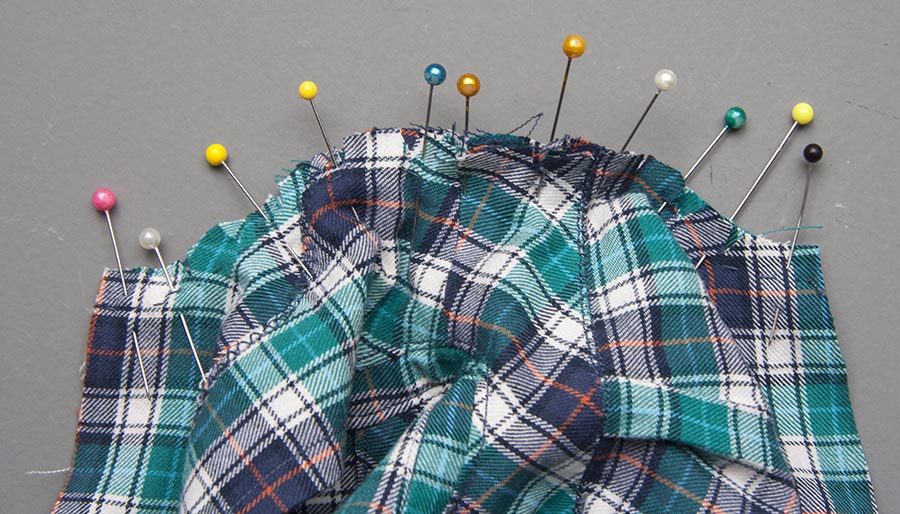
First make a series of tiny 1/8" clips around the entire inner circle at the neckline. Only 1/8" in order to make it easier to fit the curve of the collar, but now longer otherwise the clipping may go beyond the stitching line. Carefully insert the collar between the layers of the shirt, matching up the two centre back pins. Pin to hold. Now carefully match work the collar band around the neck opening, matching the fabric edges. and pinning in place every half inch or so. Check to see that both ends of the collar come to the same distance from the ends. If not, you will need to re-pin until they do. (I had to do it three times before it was good enough). When both outer edges are the same, baste (hand sew) along the seam line, making sure there are no puckers or gathers, and none of the fabric is caught where it shouldn't be. *It's important to baste first to make sure everything is right, because you certainly don't want to be picking out the stitches and making a mess of the clipped edges.
If basting was successful, then you can machine stitch the seam.
14. Clip the curve at the neckline, and turn the shirt right side out. Match the two yokes and shoulders. Press.
On right side, starting at bottom front, top stitch up along front edge about 1/4" from edge - to simulate front band - stitching up to neck, then closely around neck at base of collar, then down the other front 1/4" from edge.
Congratulations! You have just completed the most difficult part of this shirt !!
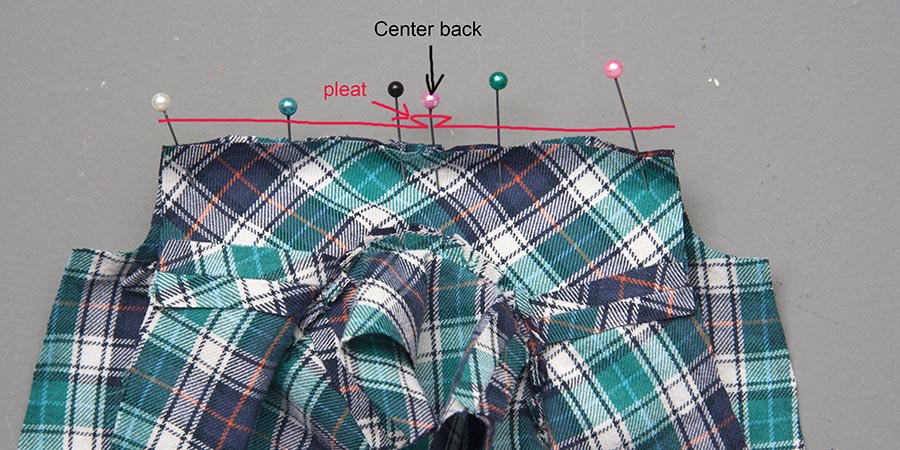
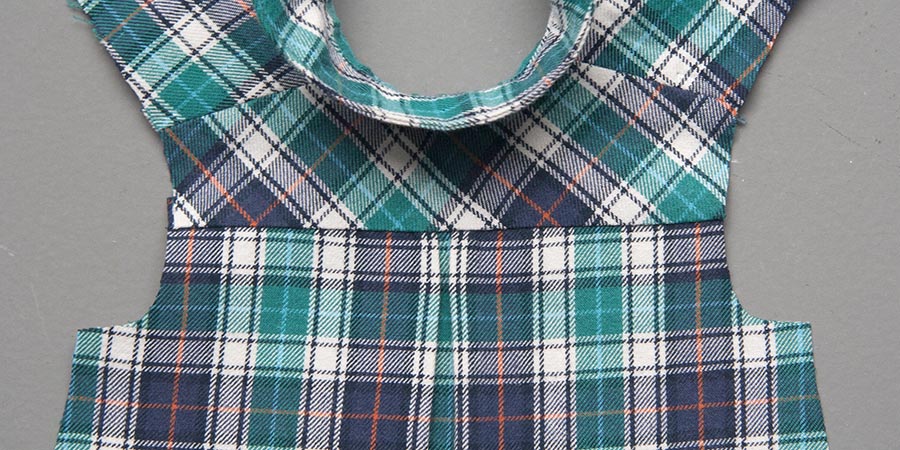
15. Cut out shirt back, and mark the centre top with a pin. Also mark the centre of the right side back yoke with a pin. With right rides together, match centre pins, and outer edges of yoke and lower back piece. Only pin to the right side yoke piece - not both yoke layers. The lower back piece is a bit wider, to allow for making a small pleat in the centre back. Smooth the two layers from the armhole inward, and make small pleat with the excess fabric before the pin. It doesn't matter if the pleat is on the inside or out, as shirts come with either one, but make sure both sides are a 'pair' to complete a proper pleat.
Sew, and press seam upward...
16. On inside of shirt, fold seam allowance on inner yoke piece up, and pin over seam. Hand sew in place with tiny stitches.
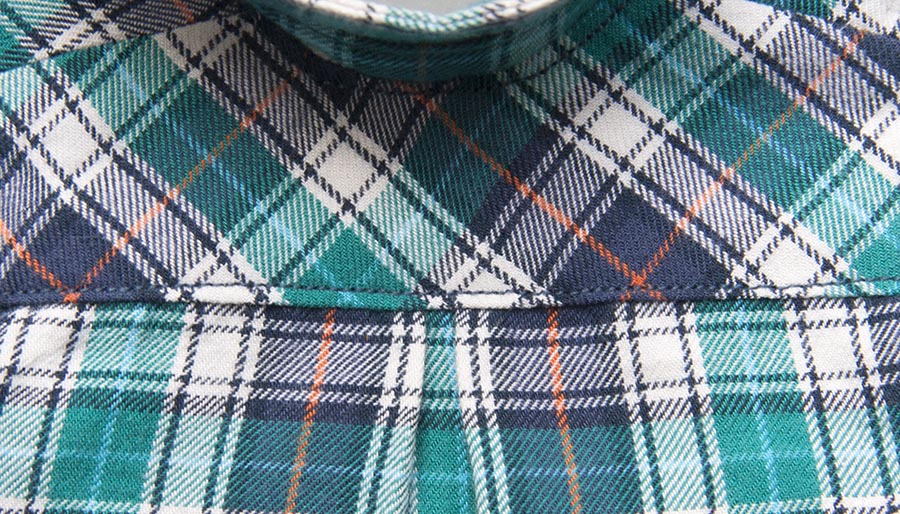
17. Top stitch across bottom of yoke on the right side. Press.
the Sleeves
18. *Please read all the sleeve instructions before cutting out the sleeve pieces, as there are two different options.
If going to make the sleeves with a bound opening on the outer edge of the sleeve, where they are on real shirts, cut out the narrower sleeve pattern and the facings for the bound openings....
If going to make the sleeves with a bound opening on the outer edge of the sleeve, where they are on real shirts, cut out the narrower sleeve pattern and the facings for the bound openings....
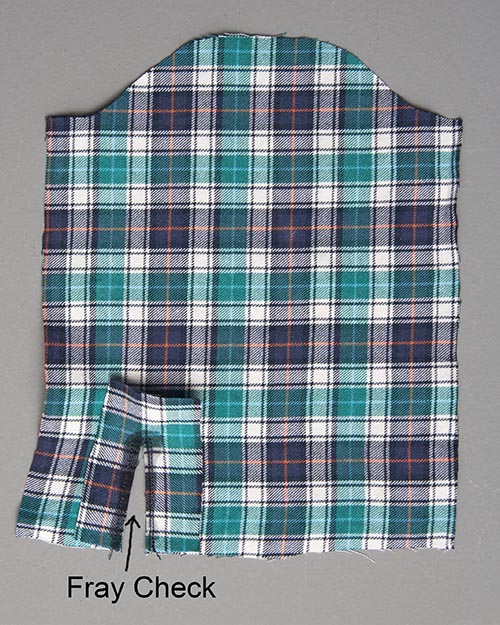
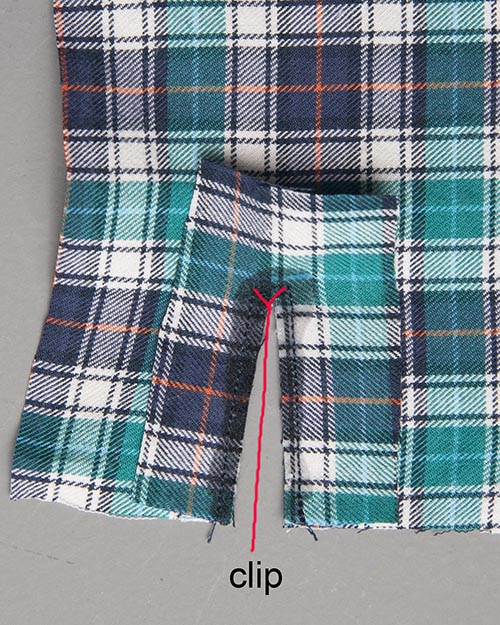
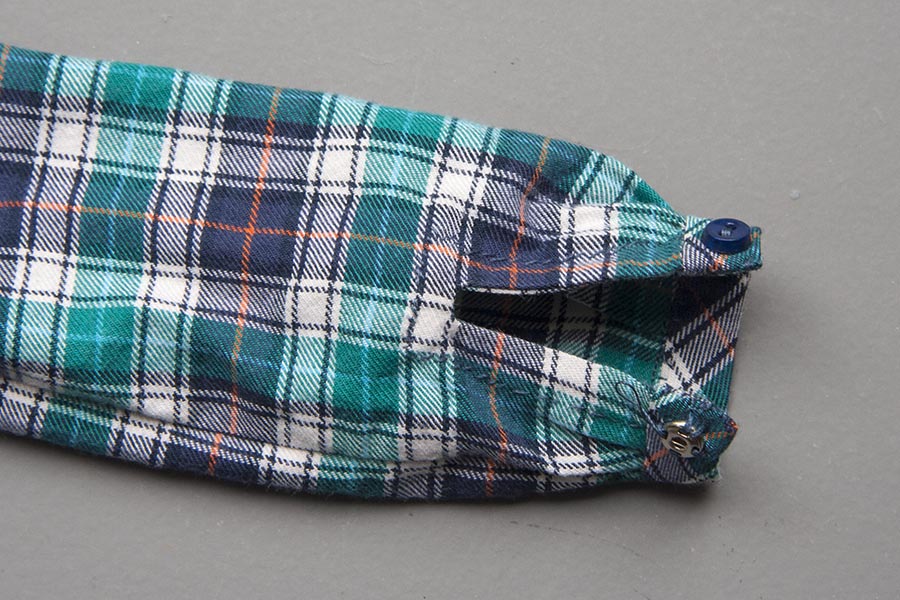
19. With right sides together, pin facing pieces onto sleeve, making sure you have a 'pair'. Stitch around inside seam line, apply Fray Check, and clip as shown. *It's important to clip into the opening and stop about 1/4 to 1/8" from the end, and then make two tiny clips into the corners. This is so the fabric will lay nice and flat when you turn it inside out.
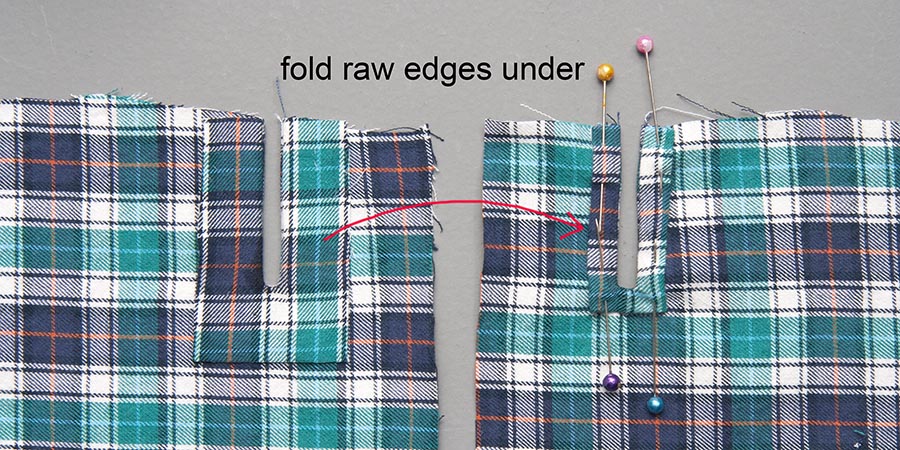
20. Turn the facing through slit to back of sleeve. Press flat. Then fold under the edges under, and pin in place. Hand sew the edges with tiny stitches. Press.
*We will sew the cuffs on after the sleeves have been sewn into the shirt and the underarm seams have been sewn.
*We will sew the cuffs on after the sleeves have been sewn into the shirt and the underarm seams have been sewn.
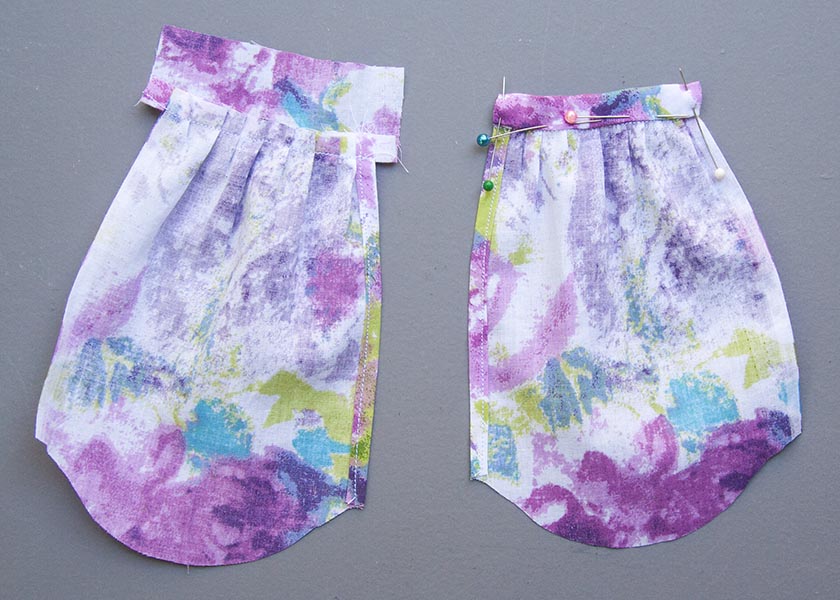
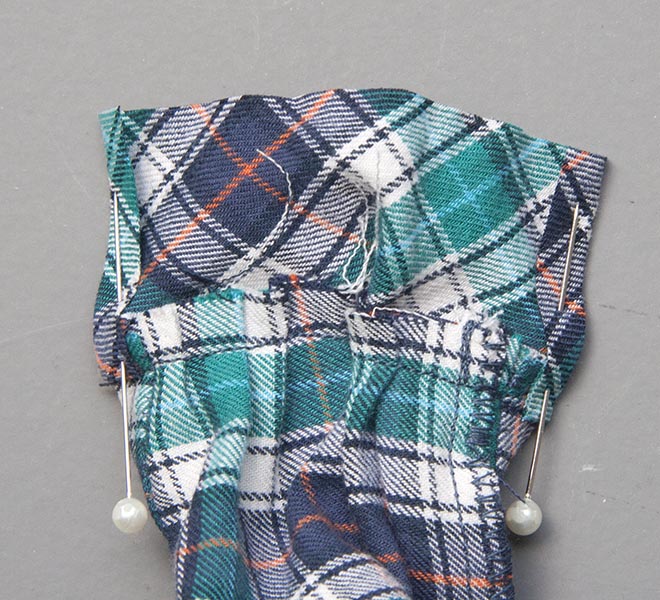
21. If the last few instructions with the bound opening seem a bit too challenging, you can always go the easy route, but only if you haven't already cut out the main sleeve pattern pieces out of fabric. For this easier option, I cut the sleeve fabric a little wider - adding half an inch on both sides - so I can make rolled hems on both side edges. The samples in the photo below are from the JID Girls shirt, done this way, but only one side has a rolled hem, as the other was cut on the finished edge so didn't need a seam.
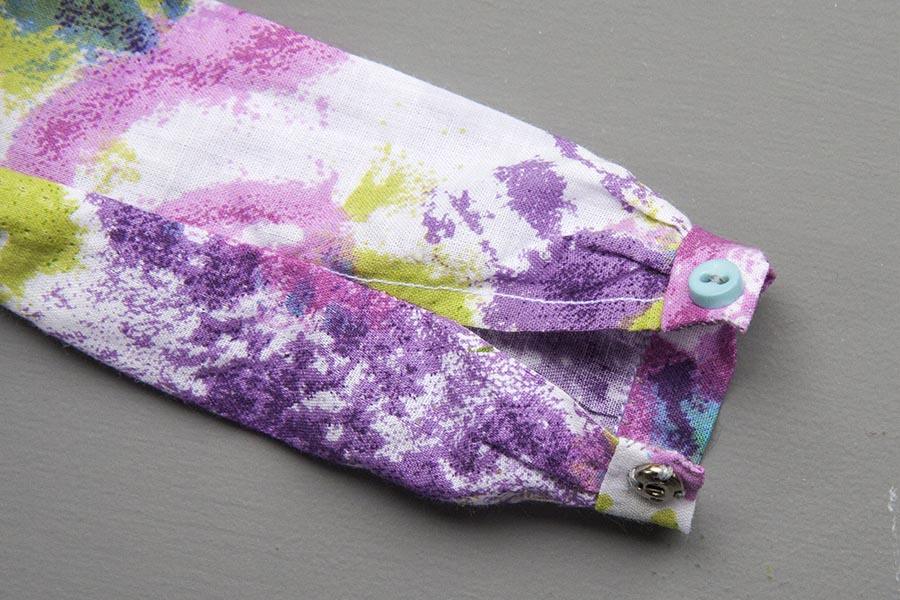
After hemming both sides, the sleeves get gathered onto the cuffs, and the cuffs folded over and back, and hand sewn. Later, when the sleeves have been sewn onto the shirt, and you are sewing the underarm seams, stop sewing about 1 1/2" before the cuff. The sleeve openings will be in the seam. Not where they really are in human shirts, but sometimes ease wins over accuracy.
Attaching the Sleeves
22. Carefully cut 1/8" clips along the curves of the shirt armholes. Fold top of sleeve to find middle, and mark with pin. With right sides together, and being careful to position the bound sleeve openings towards the back of the shirt, pin centre of shirt top onto shoulder seam of shirt. Ease the top of sleeve to fit the armhole, pinning into place. Baste sleeve onto shirt. I always baste sleeves first, so I can check to see I've done it properly and there are no puckers and nothing is caught.
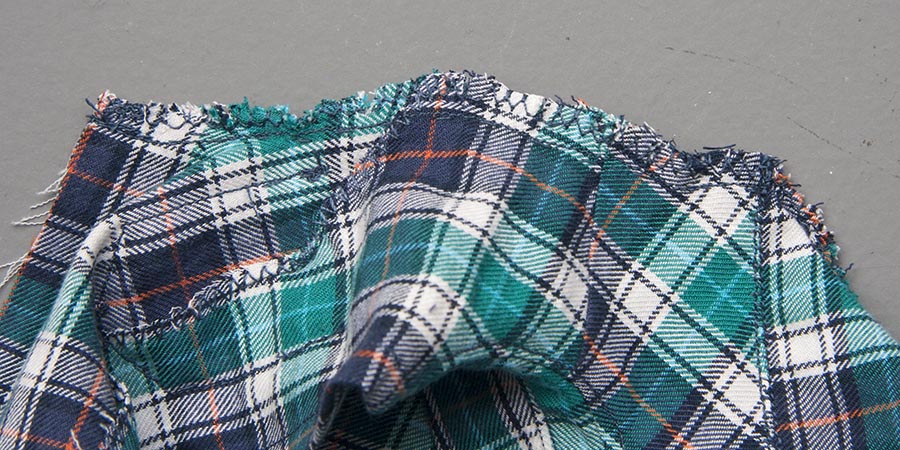
23. Machine stitch the seam again, and clip the raw edges a bit further. Then zig-zag the raw edges. *It's important to clip BEFORE zig-zagging, otherwise if done afterwards you'd cut the thread, and that defeats the purpose of zig-zagging the edge in the first place. Zig-zagging after clipping doesn't interfere with the clipping, and still allows for a nicely turned curve.
the Pocket
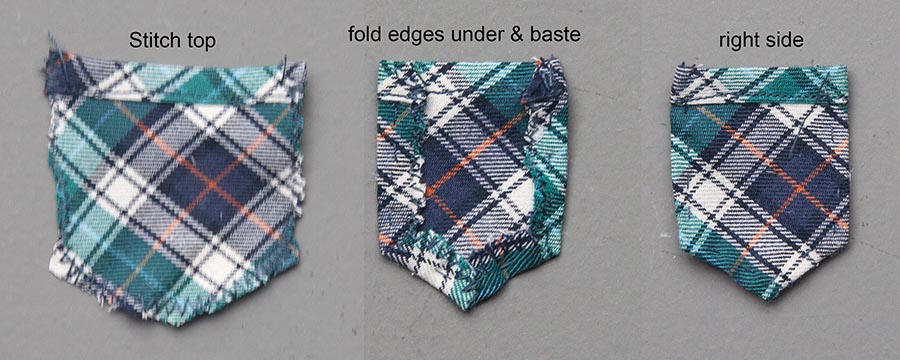
24. Cut out the pocket - on bias (diagonal) if desired. Secure all edges with Fray Check and let dry. Fold top edge forward twice to make a rolled hem, and stitch close to edge. Then zig-zag the other edges. Fold the edges to the wrong side, and baste to hold. Press
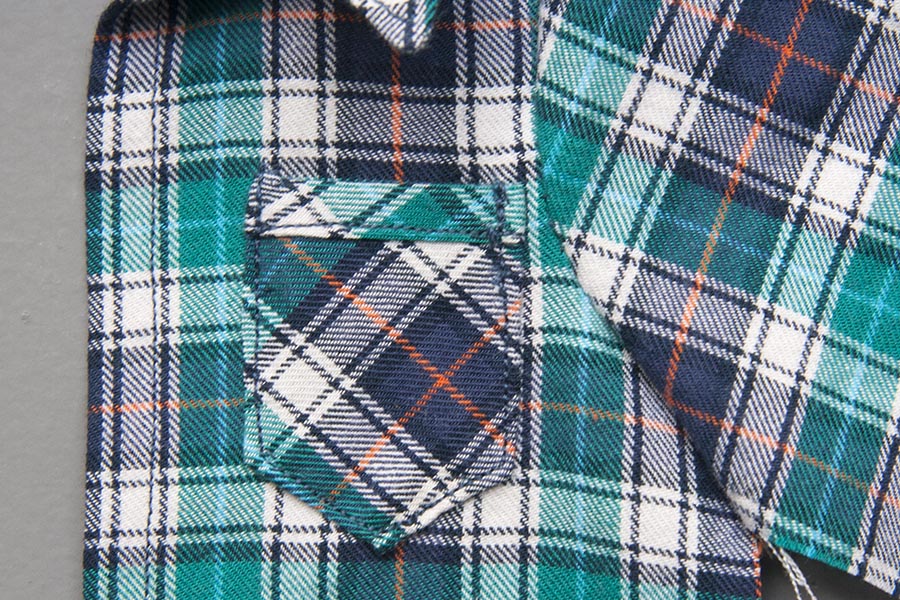
25. Position pocket on shirt, pin, then baste into position. Then machine stitch. Remove basting threads.
Side Seams
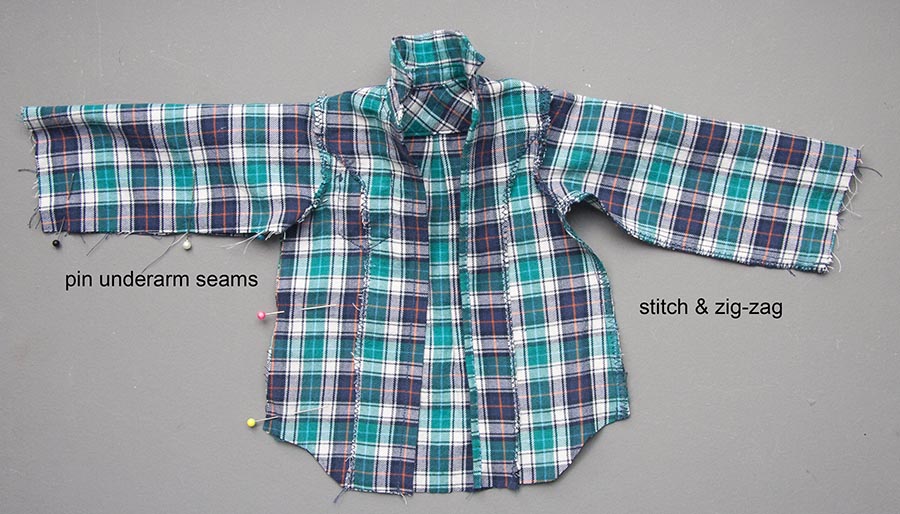
26. With right sides together, start by matching the underarm sleeve seams, and pin. Then pin the remaining seams, working out toward the sleeve cuff, and bottom of shirt. Machine stitch, clip underarm, and zig-zag seams. *Importent - if you are making the easier alternate sleeve version without the bound opening, remember to only sew the sleeve seam to about 1 1/2" from cuff.
Finishing the Sleeve Cuff
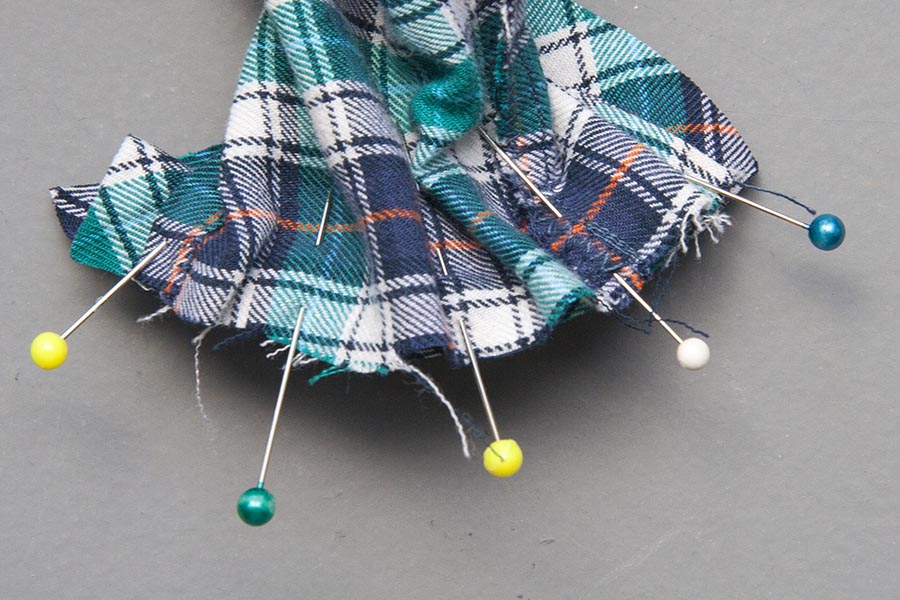
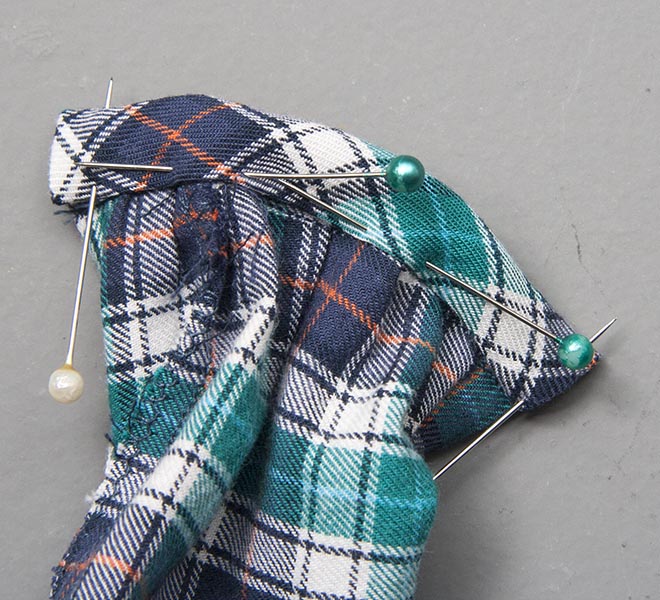
27. With right sides together, pin the sleeve end onto the cuff, gathering to fit, and sew along seam line.
28. Fold side seam allowances back. Pin.
29. Fold edge of cuff under, and to inside to cover raw edges. Pin, and hand sew.
the Bottom Hem
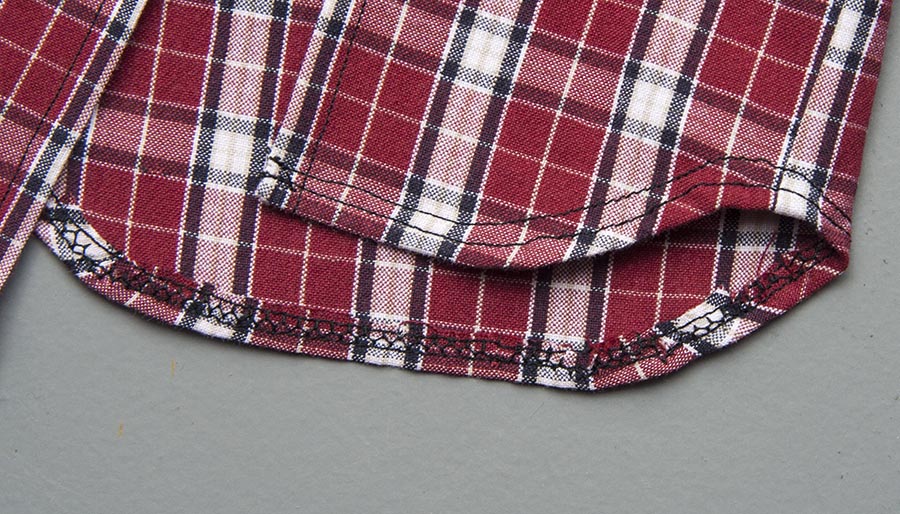
30. I tried hemming the bottom edge two ways. With the green shirt, I first used Fray Check along the bottom edge. After it was dry, I clipped the curves, then zig-zagged the edge. I tried to make a rolled hem - folding the edge under twice to make a neat edge. But it was a bit challenging to make a smooth seam along the side curves. I first hand sewed the hem on the inside before machine stitching it on the right side. I wasn't totally happy with the results.
30a. With the red shirt I also Fray Checked and zig-zagged the edge, and then just folded the seam once to the inside and basted it into place. Then top-stitched two lines on the right side. Then removed the basting thread and pressed it. This made for a smoother bottom edge, but it looks messier on the inside.
Of course one way to make hemming the bottom easier, would be to cut the shirt straight across (at the longest point) instead of cutting it with the shaped bottom edge. But I wanted to give this shirt the proper silhouette.
Buttons
31. I'm not big on making buttonholes, even in human size shirts, so don't bother. But if you want to try, that's totally up to you.
I measure placement of buttons with a ruler, starting a button's width from below the neckband, and inserting a pin every 3/4" to mark where I'm going to sew the buttons. I sewed snap fasteners behind every button on the green shirt. However I just sewed snaps behind every second button on the red shirt. Sew a button and snap fastener on each sleeve cuff.
I measure placement of buttons with a ruler, starting a button's width from below the neckband, and inserting a pin every 3/4" to mark where I'm going to sew the buttons. I sewed snap fasteners behind every button on the green shirt. However I just sewed snaps behind every second button on the red shirt. Sew a button and snap fastener on each sleeve cuff.
...and you're done!!
Gallery of Variations
the Shirt on Other Dolls
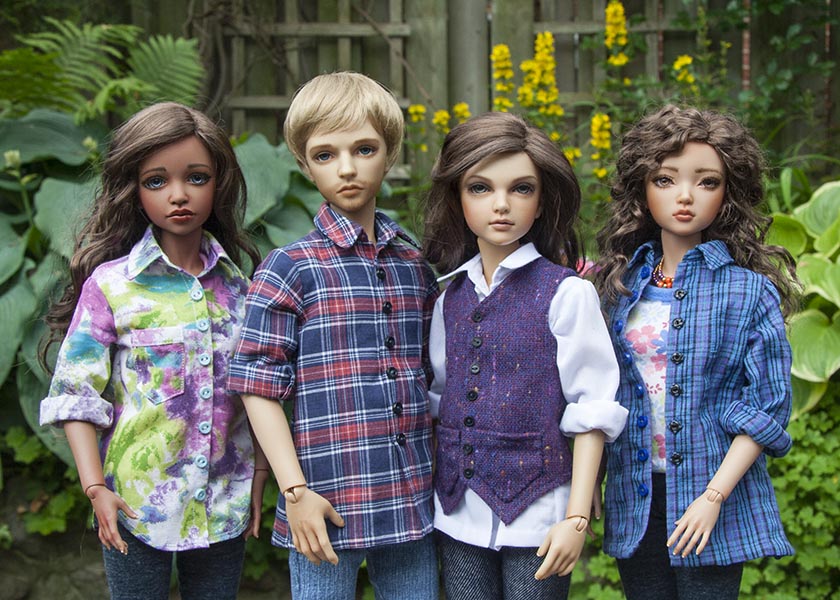
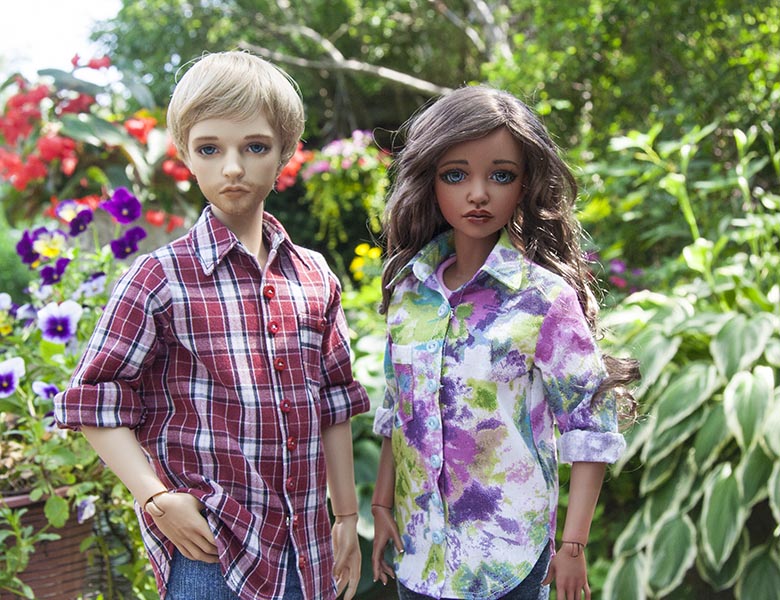
I thought I'd try the shirt on some other dolls to see how they would fit. First an FID guy, since there's almost nothing available for them out there. My guy isn't painted because I don't know if I'll keep him, but since he was still here, I put the shirt on him....
The shirt fit rather snug across the shoulders and around his arms. To make it fit him better, the shoulders should be a bit wider, and the armholes should be a bit bigger. Which means the top of the sleeves would need to be a bit wider to compensate, and the sleeves need to be at least 3/4" longer. The whole shirt may be at least a 1/2" longer too. But I'm not getting into FID patterns. Just giving tips to make this pattern fit one.
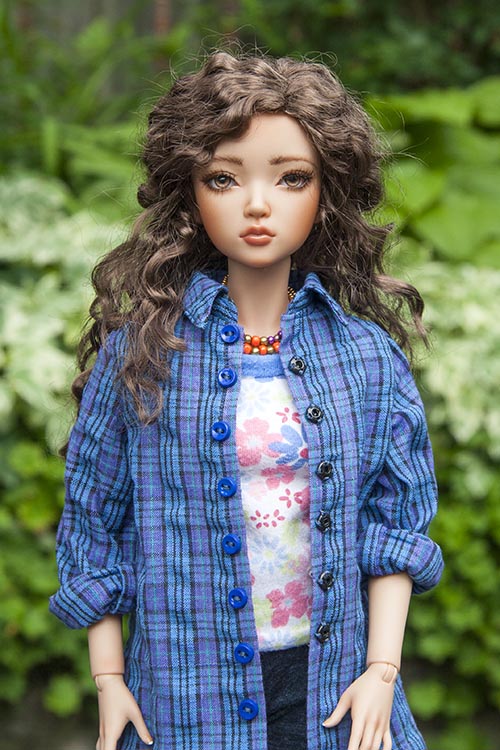
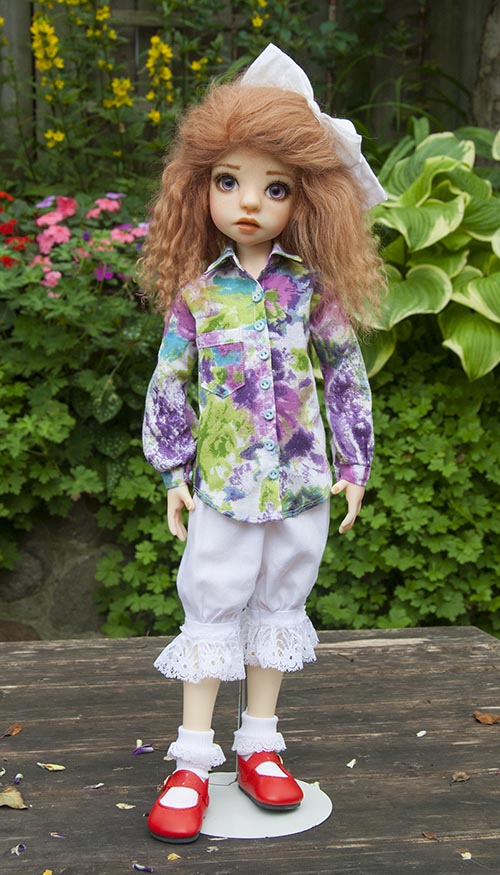
Then I tried the shirts on a Kaye Wiggs MSD, since they can wear much of the same clothes as a JID girl.....
Then I tried the shirts on a Kaye Wiggs MSD, since they can wear much of the same clothes as a JID girl.....
The JID Girl Shirt fit perfectly. The Guy's Shirt is nice too, but it's roomier, so could be worn open over something. The sleeves on the Guy's shirt are way too long for the standard KW MSD. Maybe they'd be good for a Maurice body - but I don't have one to check.
Copyright © 2017 Martha Boers
All Rights Reserved
All Rights Reserved
