Hard Cap Wig Tutorial
I wanted to make more realistic-looking wigs for my guys, so needed to know how to make a hard cap as a base for the wig. I found a tutorial online, by Ira Scargeer of Whispering Grass, and liking her results thought I'd try it. It looked simple enough, but proved anything but. However, I have since figured out ways to make her basic technique easier for myself, and will share that here.
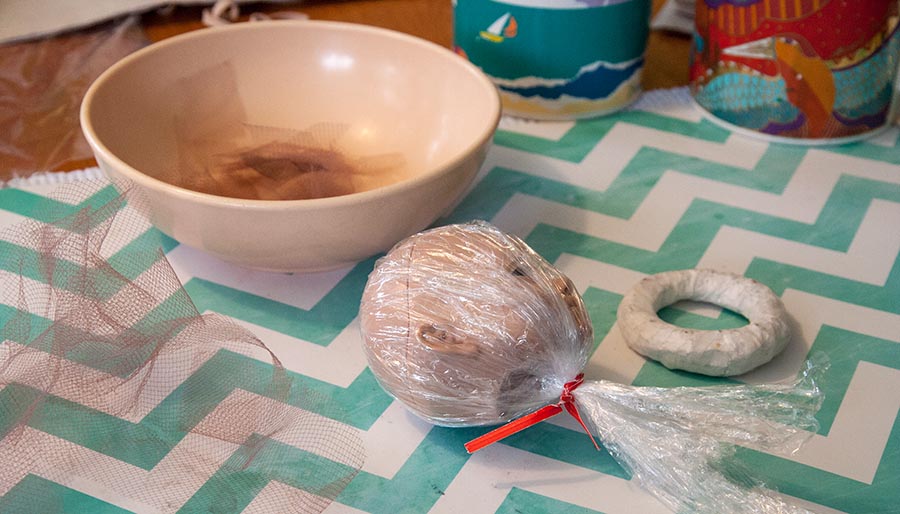
Materials that I use
- fine tulle in a colour matching the hair fibres or the doll's resin colour
- plastic wrap
- Gemtack Glue - special white glue for attaching gems, that dries washable
- popsicle stick for spreading glue
- twist ties
- some kind of ring to rest the head on
- bowl with wet rag for wiping fingers
- plastic wrap
- Gemtack Glue - special white glue for attaching gems, that dries washable
- popsicle stick for spreading glue
- twist ties
- some kind of ring to rest the head on
- bowl with wet rag for wiping fingers
Instructions
*Please read instructions thoroughly, before starting
*New, easier method added at end
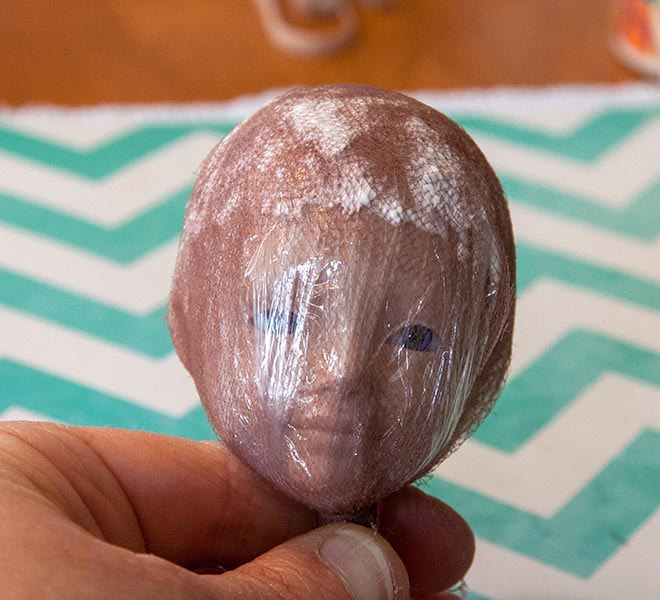
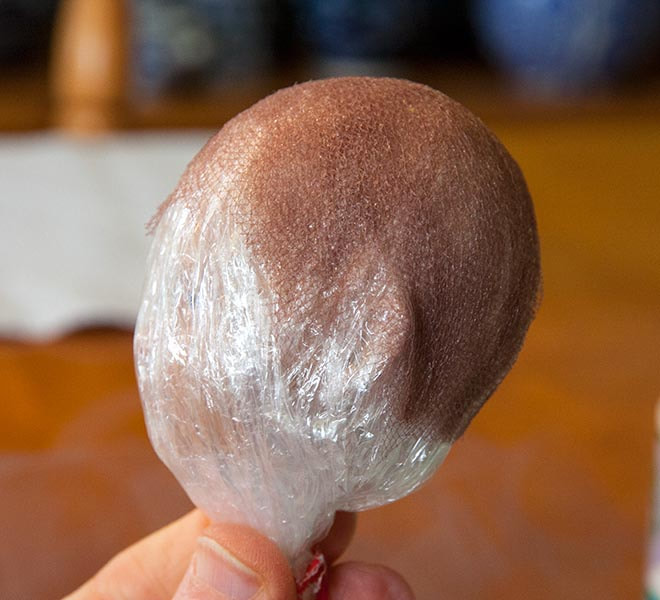
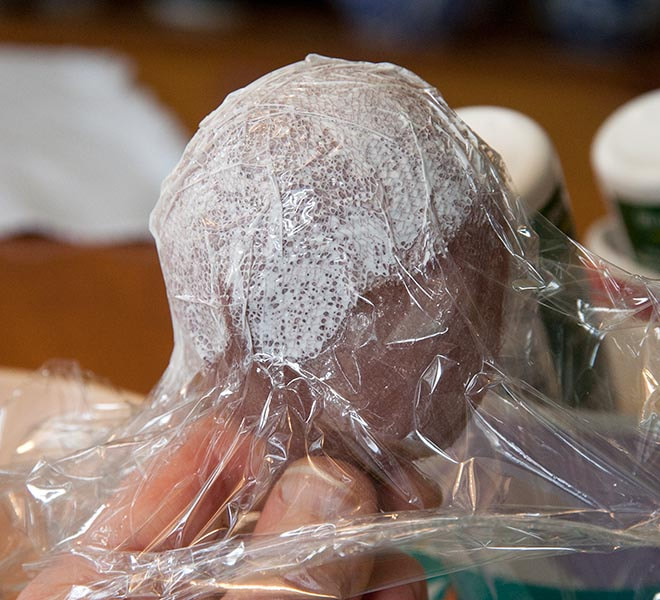
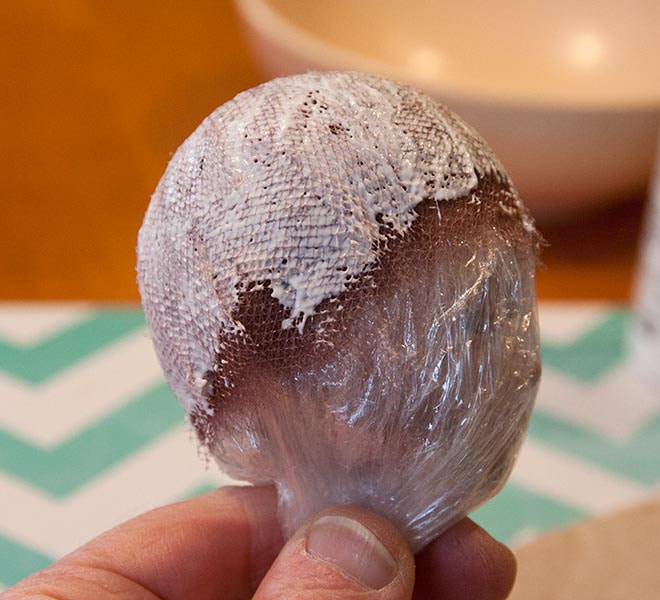
1. Gather materials. Cut tulle into several very long strips about 1" wide, then cut some of the strips into smaller squares. Store the pieces of tulle in a bowl so you can see them. Take a long sheet of plastic wrap, fold it double, and place over middle of doll's head (preferably blank head) and secure plastic wrap underneath with a twist tie.
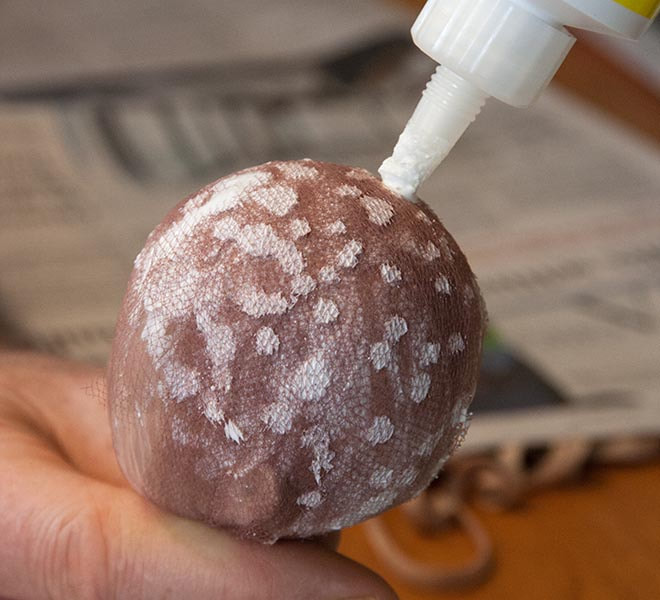
2. Pour some glue onto head, and spread evenly with a popsicle stick. *I use Gemtack glue, which is specially designed for gluing 'jewels' onto costumes. It dries waterproof, so will not dissolve when a wig is wet for styling - unlike most other white glues.
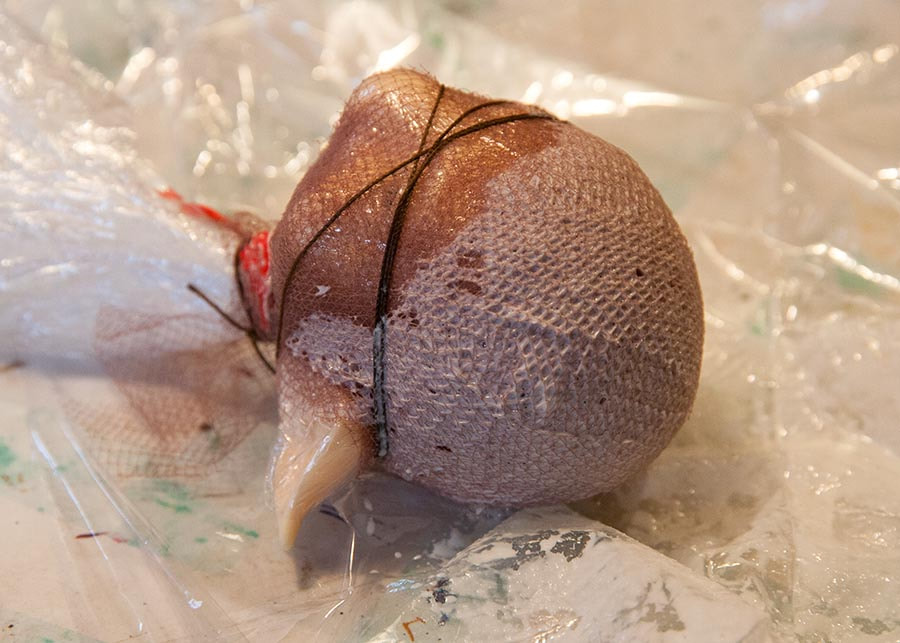
3. Apply some of the little pieces of tulle all over the head. This is the part that used to drive me crazy, because the tulle would not lay flat on the head, but would stick out just like in the picture. With tulle there's almost no surface area for the glue to stick to, so it doesn't. But I figured out how to deal with it, so don't get upset trying to make the pieces lay flat. We'll deal with that shortly. For now you just stick on as many of the small pieces of tulle as you can. It helps to press them on with the popsicle stick, since the Gemtack is extremely sticky, and the tiny pieces of Tulle will just stick to your fingers and come right back off. When you've had enough trouble getting the pieces to stick, just move on to the next step.....
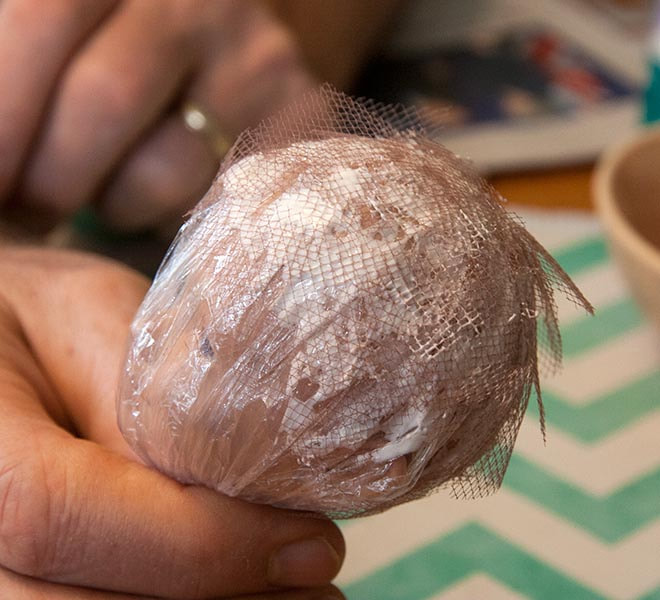
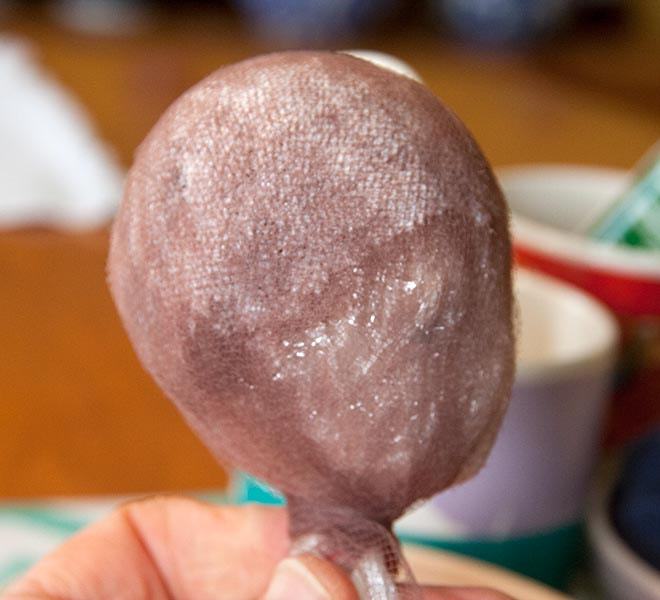
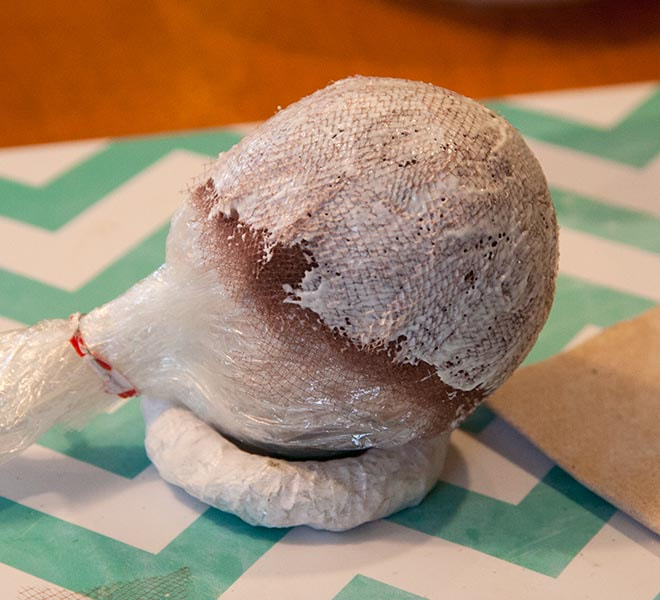
4. Take one of the long strips of tulle, and secure the end into the twist tie. Then carefully wrap the head, going over the top, flattening all the little pieces of tulle that are sticking out everywhere. Go over the head to the other side, go around the neck, then back up and over in another spot. You may need to use more than one strip of tulle to totally cover and smooth the surface. Secure the end with a twist tie. This is what it should look like now....
|
|
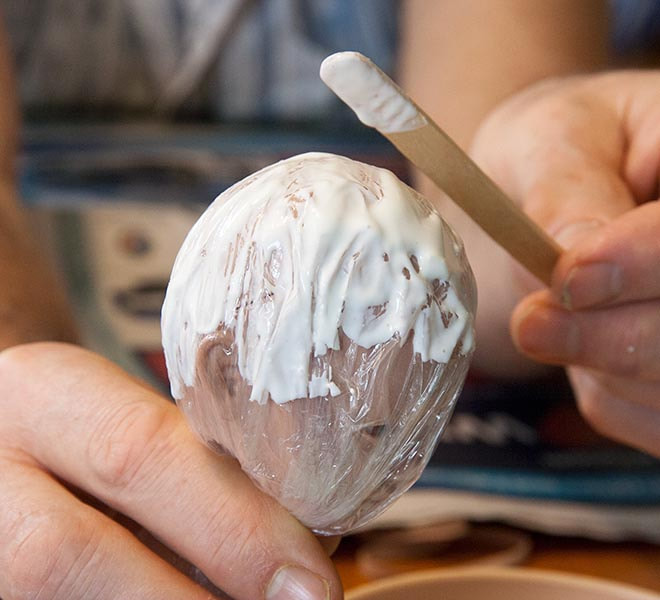
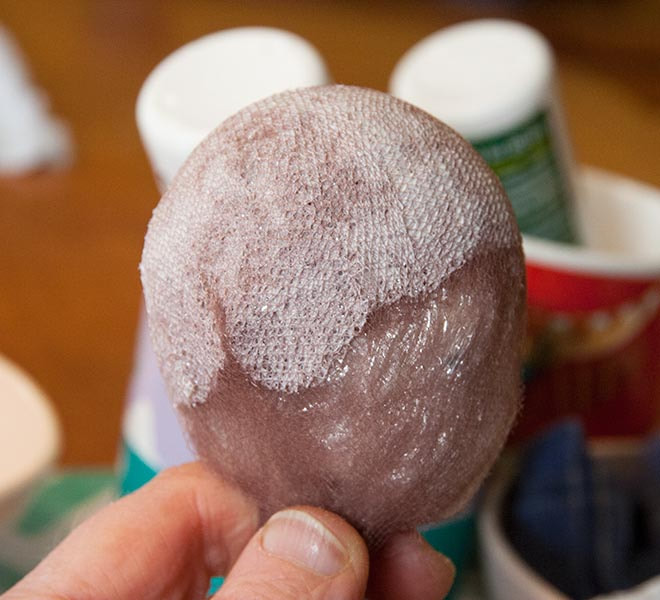
5. Squirt dabs of glue all over the head cap area....
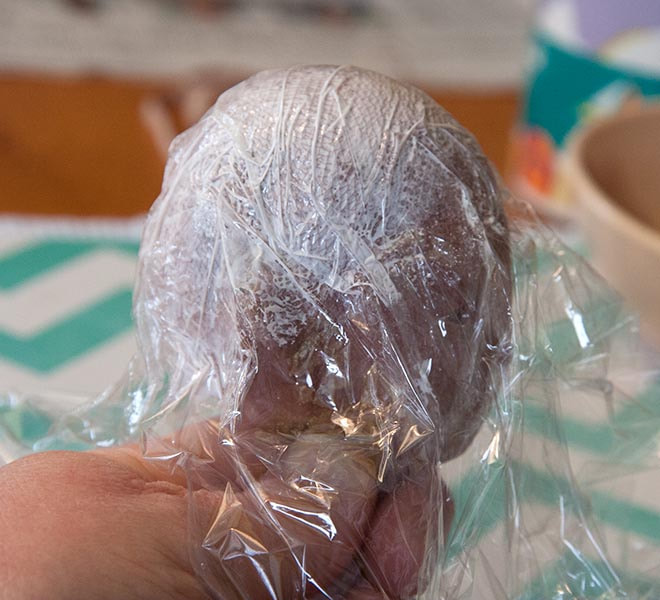
6. Take another pice of plastic wrap, lay it over the head, and press it down onto the glue, working the glue with your fingers so everything looks evenly white...
|
|
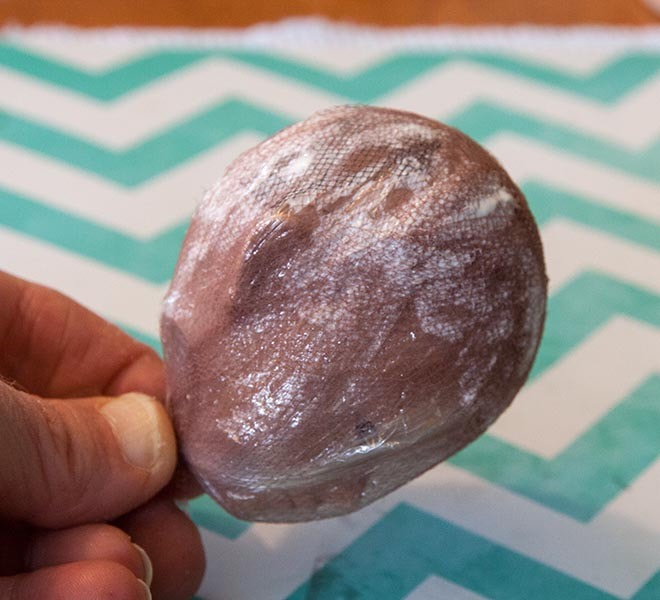
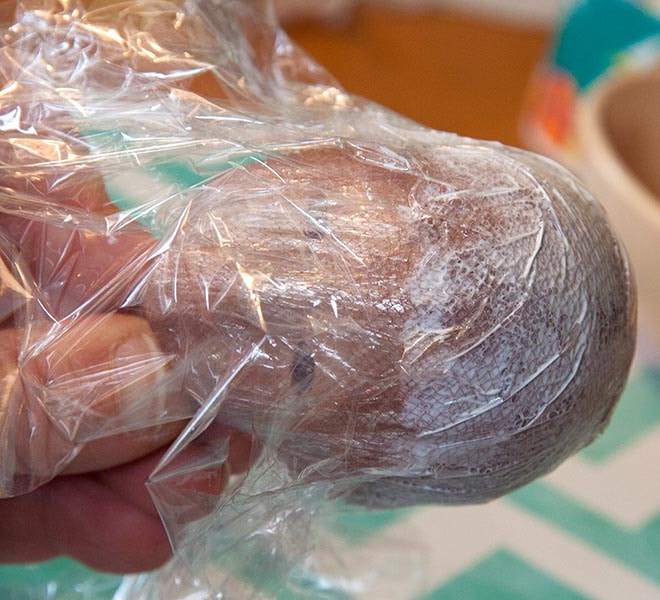
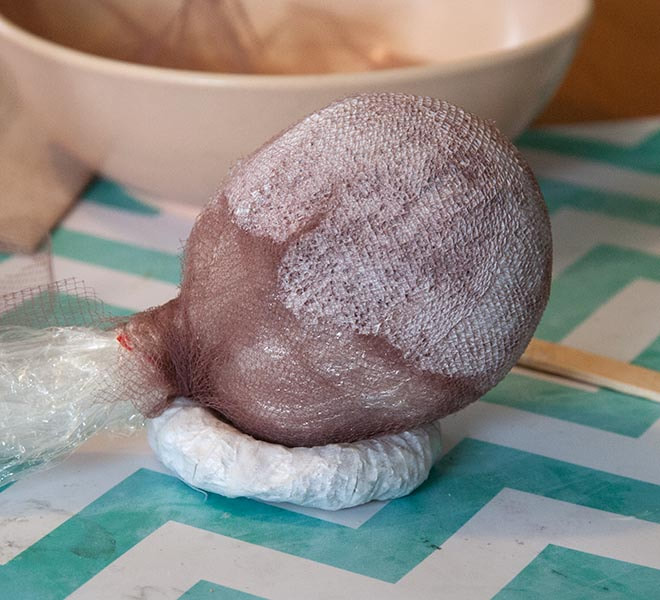
7. Now peel off the plastic wrap, and let the glue dry. I rest my doll's chin in a round 'donut' made of foil, so the air can circulate around the entire wig cap.
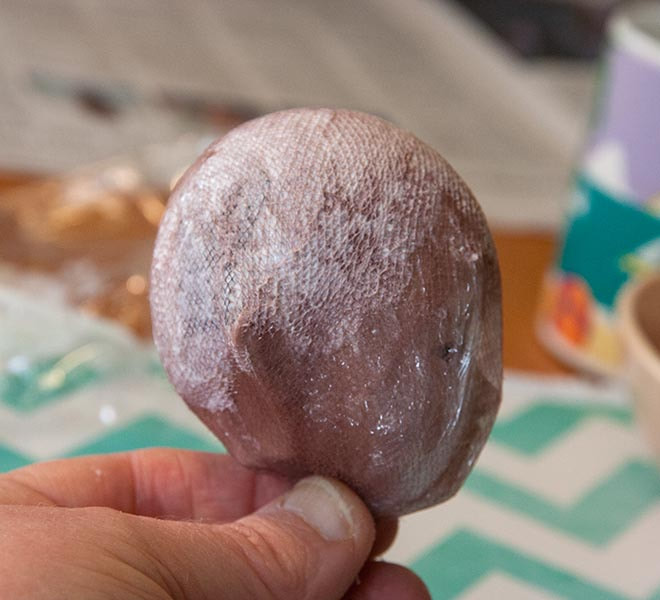
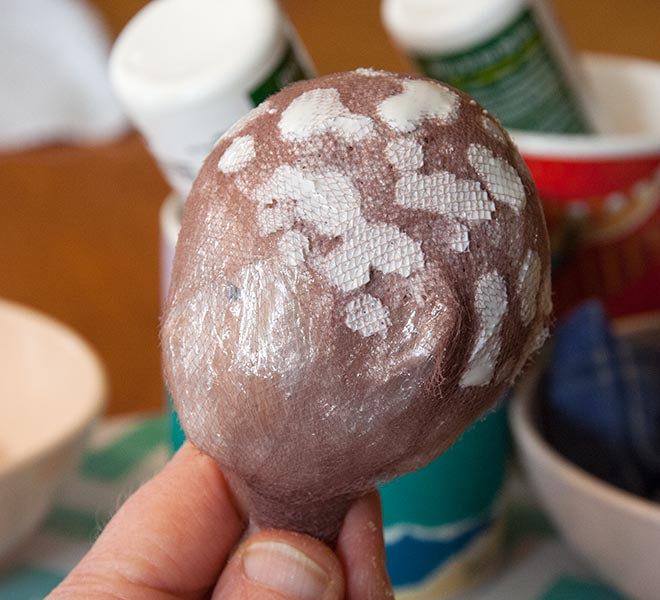
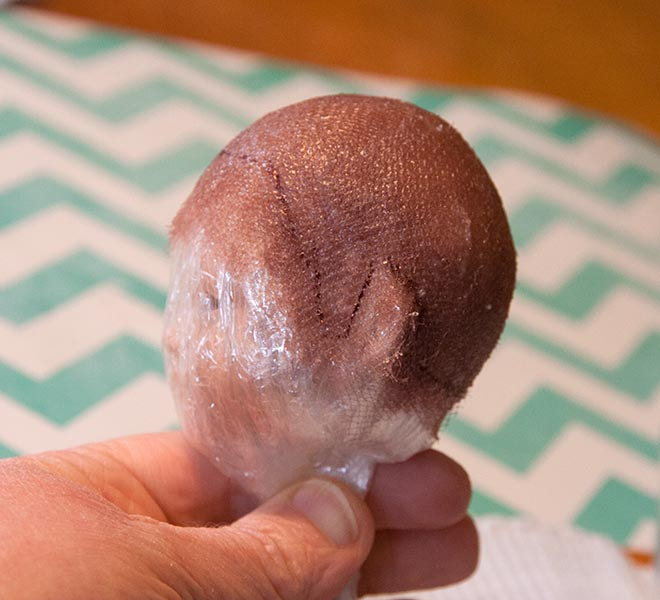
8. When the glue is completely dry (takes several hours) carefully cut away the unglued tulle which is around the bottom of the face. Be careful not to cut the plastic wrap protecting the face, and do not remove the twist tie. that's holding it onto the head.
9. Now we are going to repeat steps 2 to 4 and make a second layer. Second layer wrapped in tulle strips....
|
10. More dabs of glue
|
11. Pressed flat with plastic wrap....
|
|
|
|
12. Plastic wrap peeled off....
|
13. Drying
|
|
|
14. When the glue is dry, trim away all the excess tulle around the bottom of the head, and give the cap one more layer of glue. Spread with popsicle stick, and press using plastic wrap. Peel off the wrap, and let dry...
|
|
|
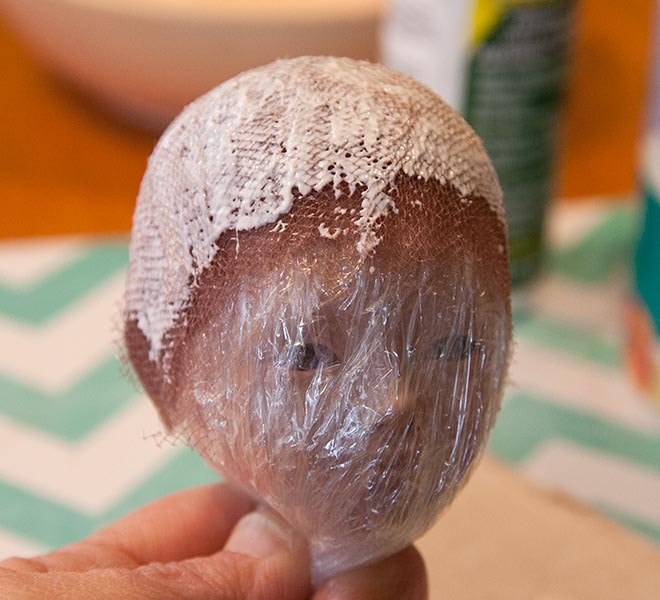
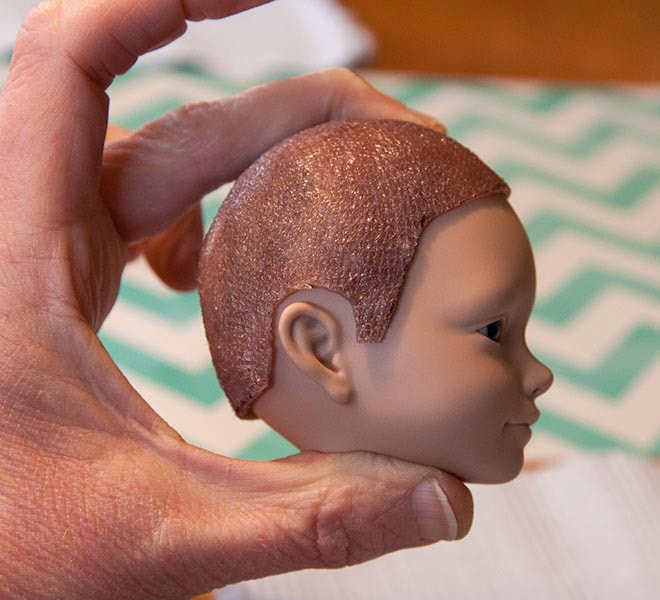
15. When the head cap is thoroughly dry, draw the hairline on the tulle cap.
16. Remove the cap from the head, and peel out the innermost layer of plastic wrap. I will often leave the innermost layer, which is against the glue, since it's often too difficult to remove. If it's not too difficult to remove, you can remove it. Just know that the glue will stay a bit tacky for a while, so the wig cap can stick to the doll's head. It doesn't leave a mark, and will lose the tackiness eventually.
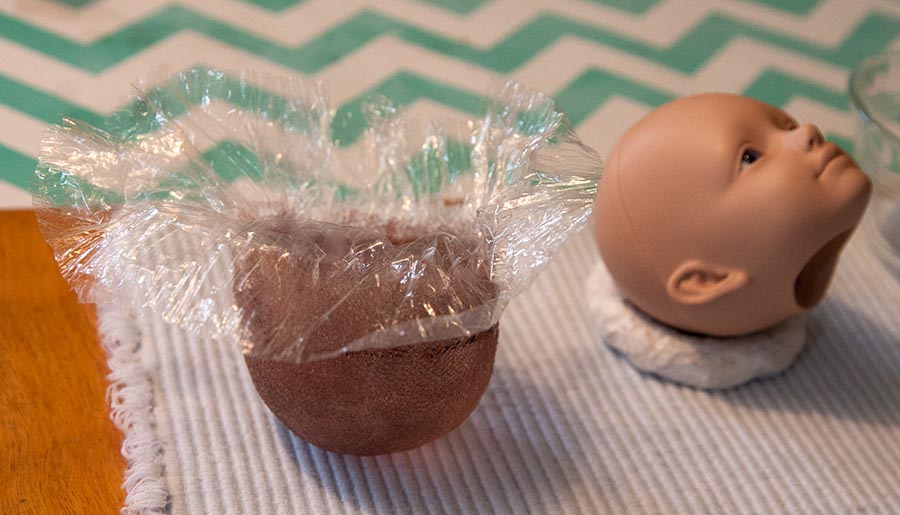
17. Carefully trim the wig cap with scissors. * I'd suggest cutting closer around the ears than I have in the photo below. For some reason the lines I've drawn on the head cap are always a little misleading, and I end up cutting off too much. It would be better to cut closer around the ears, and cut more off later if needed. After all, you can always cut more off, but you can't add it back on.
18. So now you are ready to glue on the hair. Tutorial to add mohair
*New Easier Method to Make Wig Cap
Making the wig cap from small bits of tulle was always rather frustrating, so I came up with a much easier solution. I'd cut narrow strips of tulle off the end of the bolt. The width would be determined by the size of the head. Most MSD size heads can use a strip one inch to three quarter's inch wide. Smaller heads willed narrower strips.
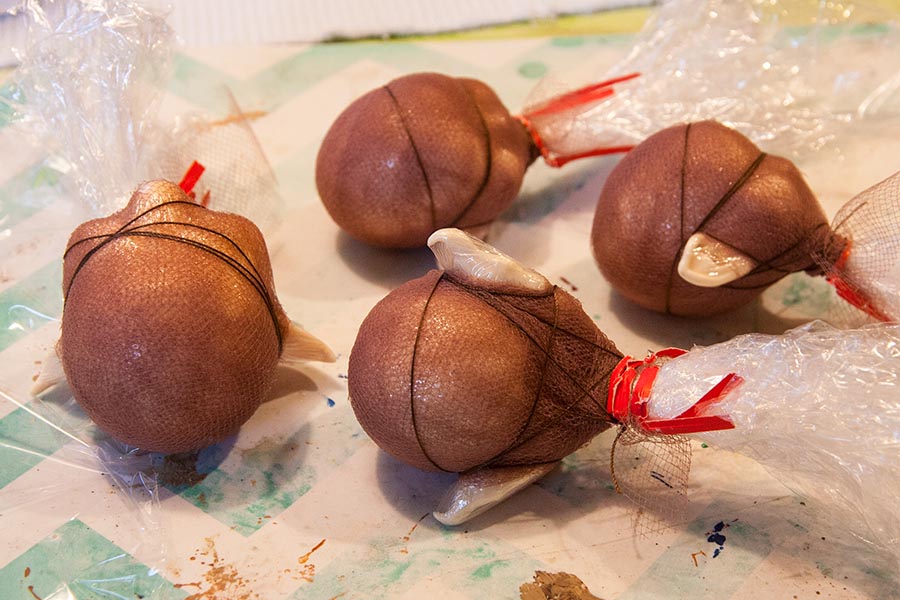
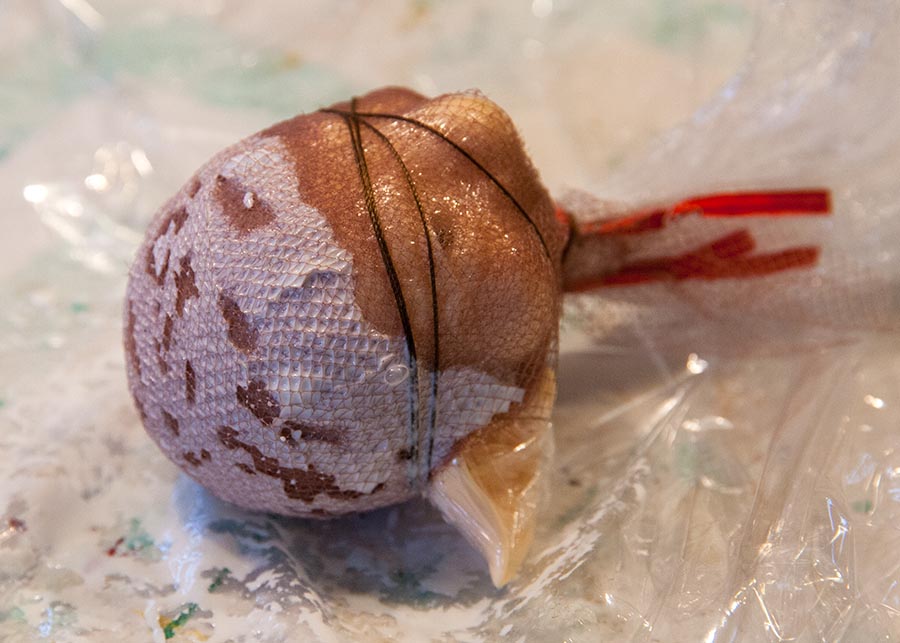
After covering the doll head with plastic wrap, and securing it with a twist tie, I would wrap two long lengths of tulle around the head, making sure to cover evenly. Then I'd tie string around the head to better delineate the ears. The string will end up buried in the glue and become a permanent part of the wig cap, so choose a colour that will blend in with the hair colour.
This works really well if the head is blank, since you an wrap the tulle and string right over the face. But if the head has a faceup, including eye lashes, care must be taken when covering the head with plastic wrap that the face area is more loose so as not to press on the lashes. The tulle can't be wrapped over the face either, so it's a bit trickier. These are all blank heads...
Next step it to take the Gemtack glue and apply it all over where you want the head cap to be. It's okay if there's some small spaces
Take some plastic wrap and cover the glued head and press the glue into the tulle.
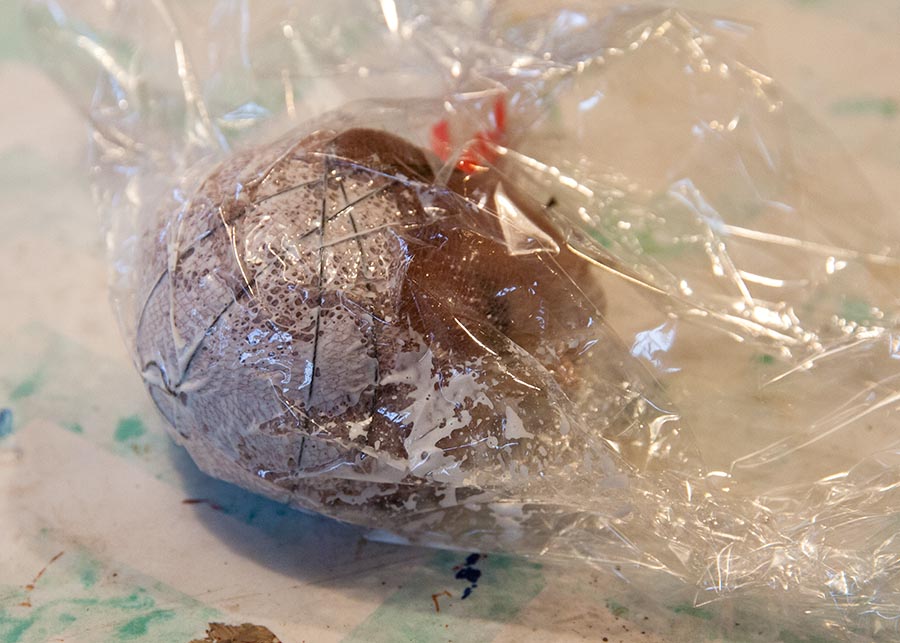
It should fill all those small holes. If not, add some more glue. remove that plastic wrap and let the glue dry.
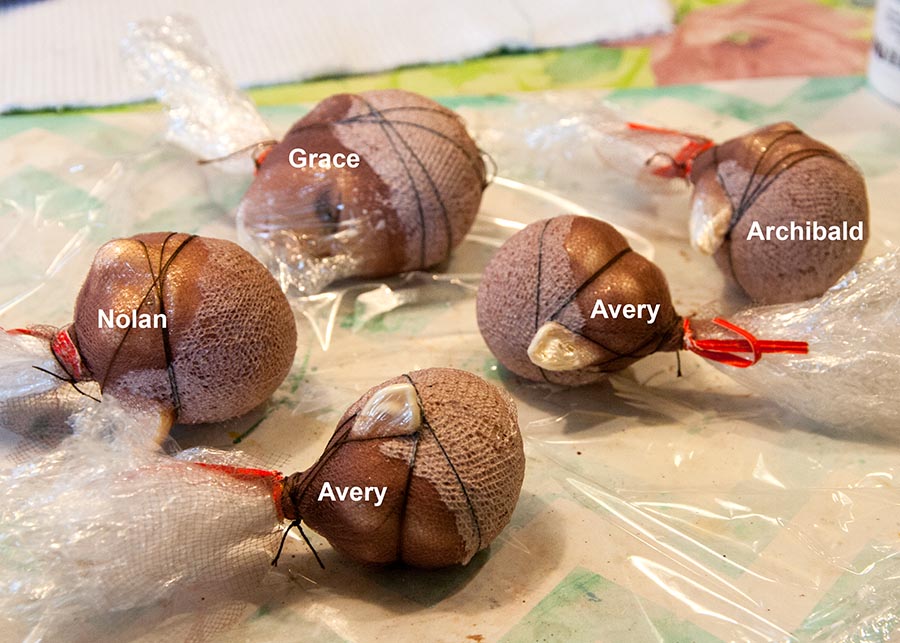
Five heads drying. Note that Grace, who has a faceup, does not have tulle or string over her face, and that her plastic wrap is roomy in the face area...
After the glue dries, add another layer of glue, press with plastic wrap, and let dry again. Then draw on the hairline, remove everything off of the head, and trim the wig cap to size.
Copyright © 2019 Martha Boers
All Rights Reserved
