Green Floral FID Gown
a Creative Journey
*the Pattern pdf is included at the end
Designing a Pattern
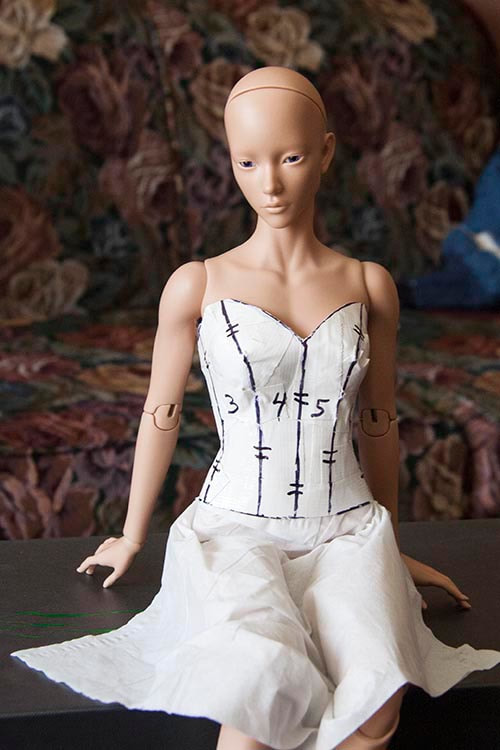
February 20, 2017 - I'm trying to make a bodice pattern for Miho. I started way back in early January, then promptly dropped the ball when I got sick. When I tried to work with the patterns I'd designed back then, nothing would come together properly. I needed to start completely from scratch, so last night Jan helped me do a second duct tape form. I drew on the seam lines, and numbered all the sections....
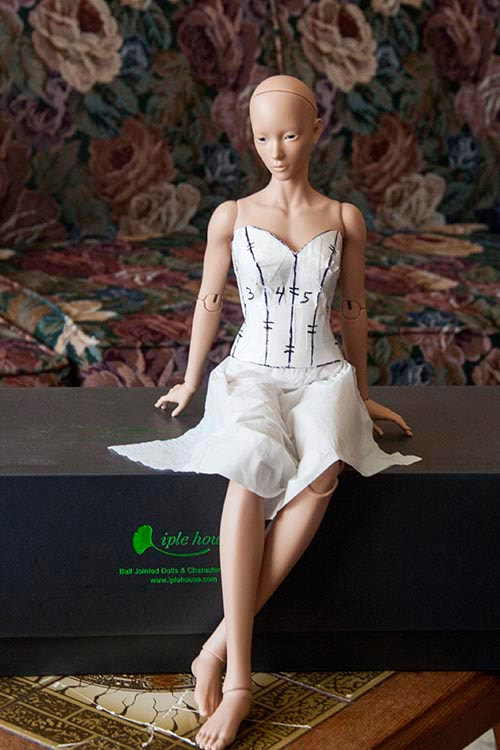
I tucked in a Kleenex skirt, so she could maintain her modesty. I think I seriously need to make her some panties.
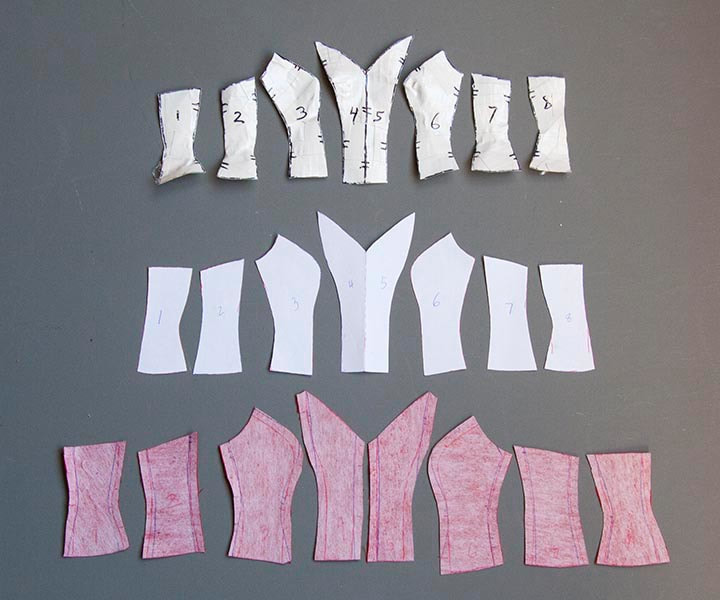
After cutting apart the duct tape sections, I created the paper patterns, by tracing and modifying some sections as I went along. Then I traced the patterns onto iron-on interfacing, and ironed them onto red cotton to make the first test bodice. When I cut out all the pieces, I only added the side seam allowances, to get a better idea of how the bodice would look....
Design & Fabric Choices
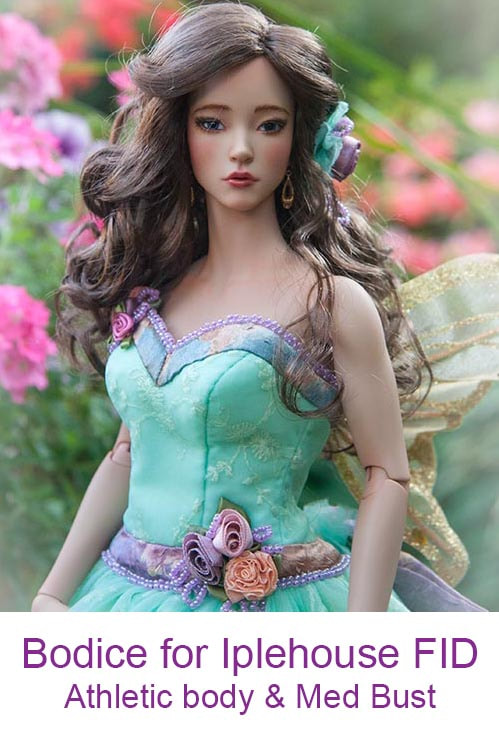
February 23 - I finally decided what to make for my FID Miho. I found this picture of a gorgeous gown by Stella De Libero on Facebook. I want to try make something similar for my Miho...
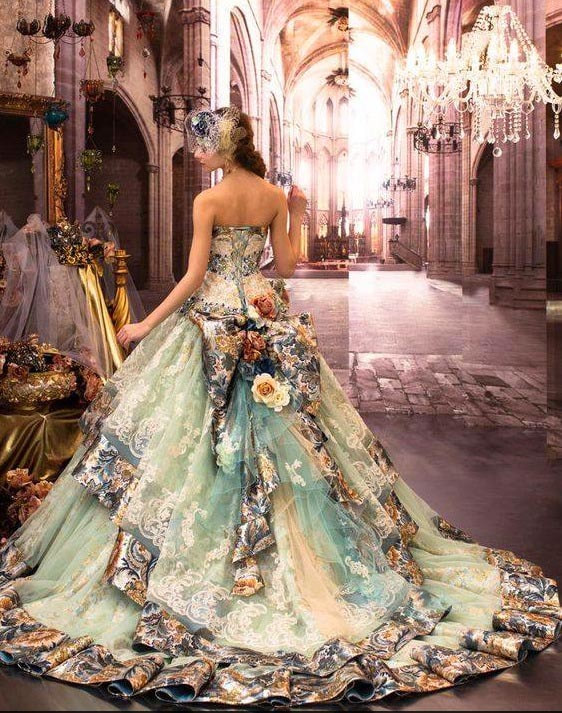
What's especially interesting about this dress is the layers of fabric, and how there's a wide floral fabric border on the edge of the sheer overskirt. At first I thought the lace layer was on top of the sheer layer, but on closer scrutiny, it appears to be underneath. I think I've found the perfect fabrics....
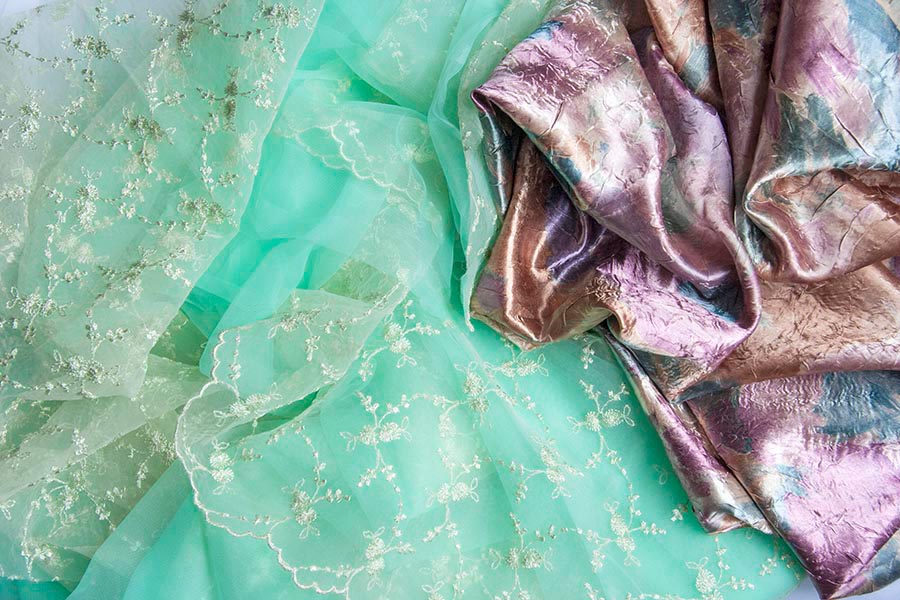
The nylon tricot isn't nearly as bright a turquoise colour when it's just a single layer. The multi-coloured satin isn't 'floral' but I think it will still work. I just hope there's enough of the lace fabric. I don't think there will be enough for the full length of the underskirt, as there's no way to get more. That's what I get for always being so frugal and just buying a single metre of things I like, but haven't got a definite plan for. So I'll probably have to work out some kind of layering. Maybe with some matching tulle at the top, hidden under the overskirt.
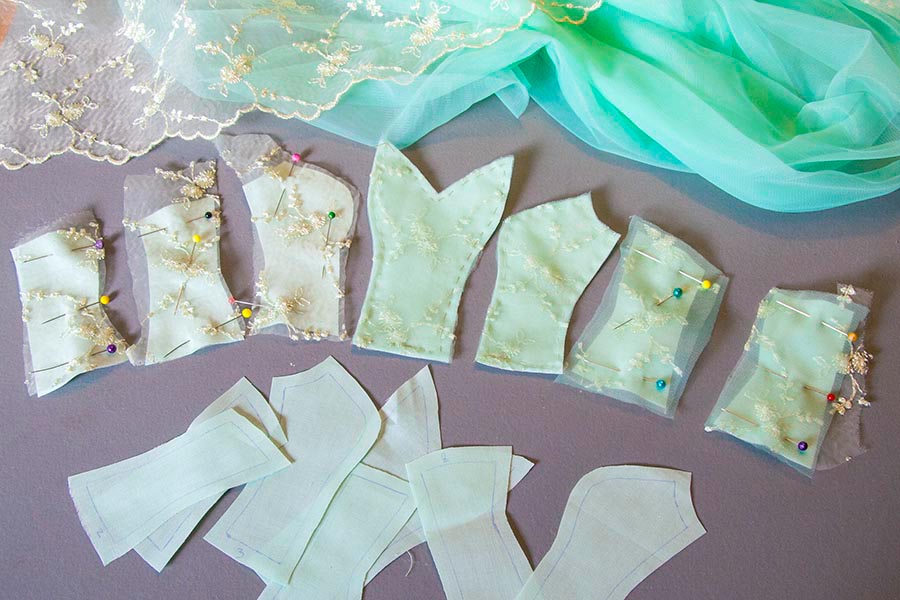
Anyway, I have to make the bodice first. I traced the pattern pieces onto iron-on interfacing, and ironed them onto some pale green cotton. Next, I'm layering on the lace and then the tricot on top, and basting them into place, before finally trimming all the edges. Then I can baste the pieces together. I've also traced and cut out the bodice lining pieces, which are also ready to sew together
Anyway, I have to make the bodice first. I traced the pattern pieces onto iron-on interfacing, and ironed them onto some pale green cotton. Next, I'm layering on the lace and then the tricot on top, and basting them into place, before finally trimming all the edges. Then I can baste the pieces together. I've also traced and cut out the bodice lining pieces, which are also ready to sew together
Questioning Choices
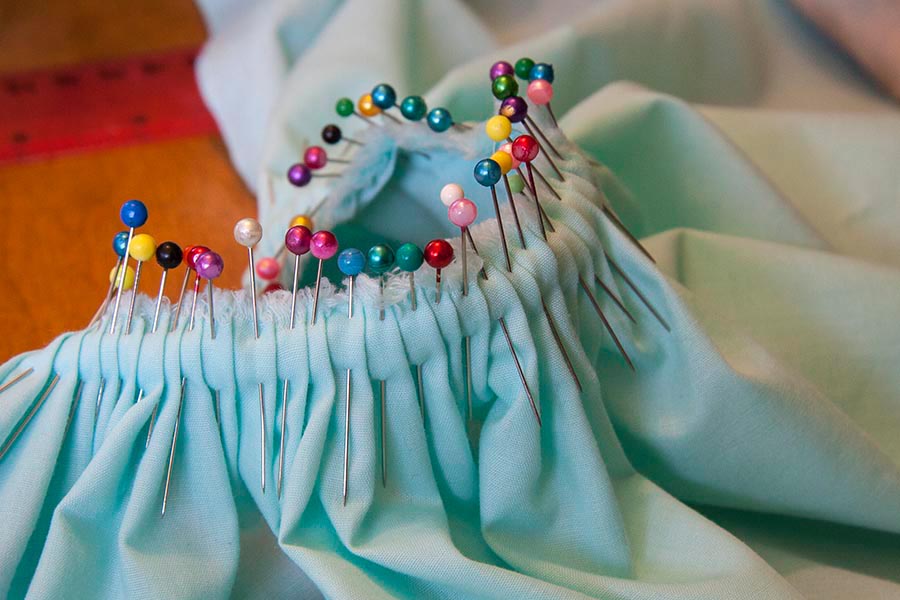
February 25 - I started work on the bodice for Miho's gown. I basted a layer of lace and nylon tricot onto each individual section of the bodice, then basted the sections together before machine sewing. This gown does take that kind of meticulous attention to detail, since the doll is not very tall, so all her clothes have to look perfect in order to look convincingly in scale.
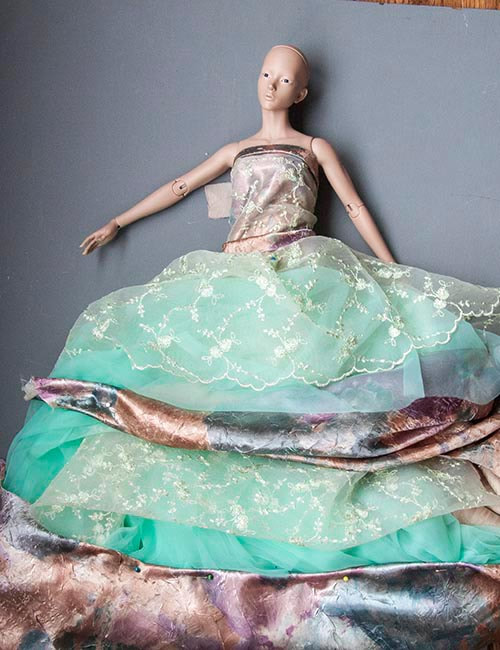
Then I started to question my fabric choices. Should I keep going with the light green bodice, or start over with lace over the mottled satin, and lace over the tricot skirts? So I did a rough pinning of the fabrics onto the doll to get an idea of both options....
Then I started to question my fabric choices. Should I keep going with the light green bodice, or start over with lace over the mottled satin, and lace over the tricot skirts? So I did a rough pinning of the fabrics onto the doll to get an idea of both options....
|

|
Well, I didn't care for the bodice on the left at all - it blends right into her skin colour - and it showed me that I was going in the right direction after all. So I'm continuing with my original idea.
Starting to Come Together
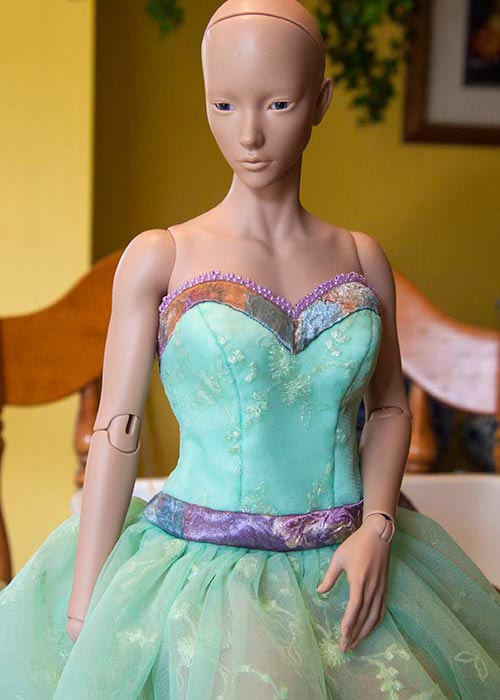
February 27 - The bodice and upper skirt layers of Miho's gown are sewn together...
|
|
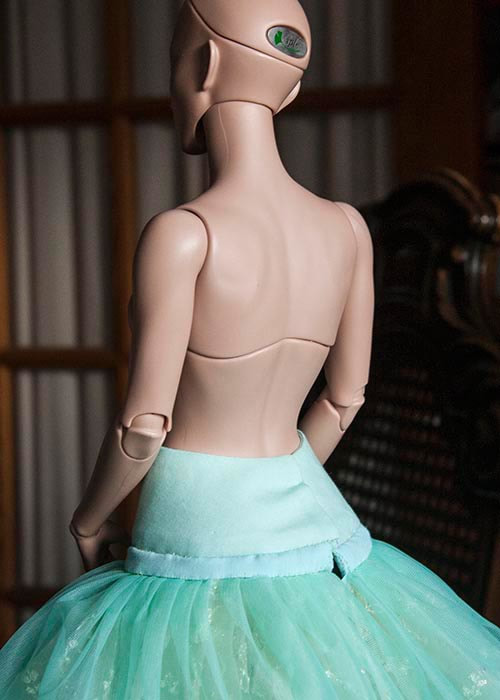
I'm mostly happy with how it's coming along. The bodice pattern will still need some additional tweaking to make it fit even better.
The band at the waist ended up a bit too bulky-looking for my taste, but there's 18 layers of fabric in there, so I guess it couldn't be avoided. I'll need to figure out a way to embellish it to hide it....
The band at the waist ended up a bit too bulky-looking for my taste, but there's 18 layers of fabric in there, so I guess it couldn't be avoided. I'll need to figure out a way to embellish it to hide it....
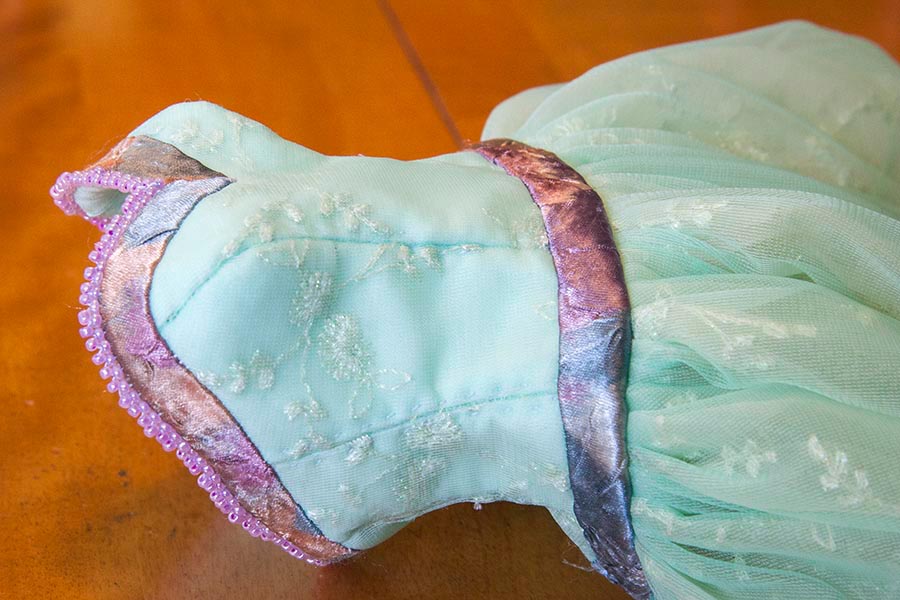
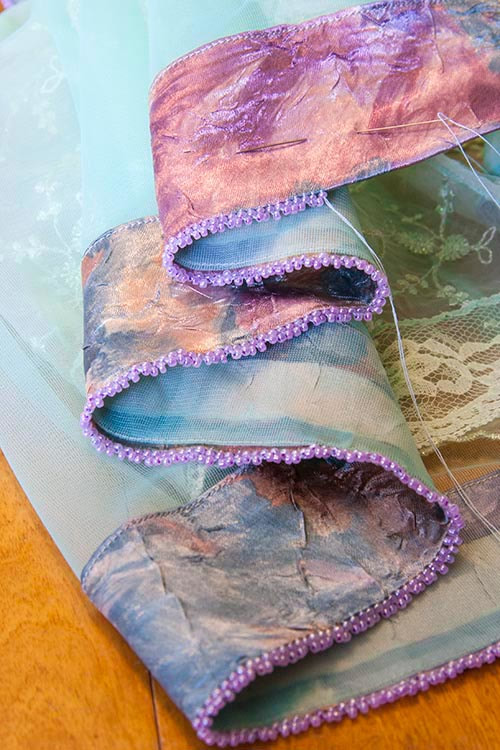
I'm in the process of beading the edge of the overskirt..
The lace fabric for the underskirt layer won't have the nice scalloped, finished edge, as the upper lace layer, so I found some matching light green lace for that edge.
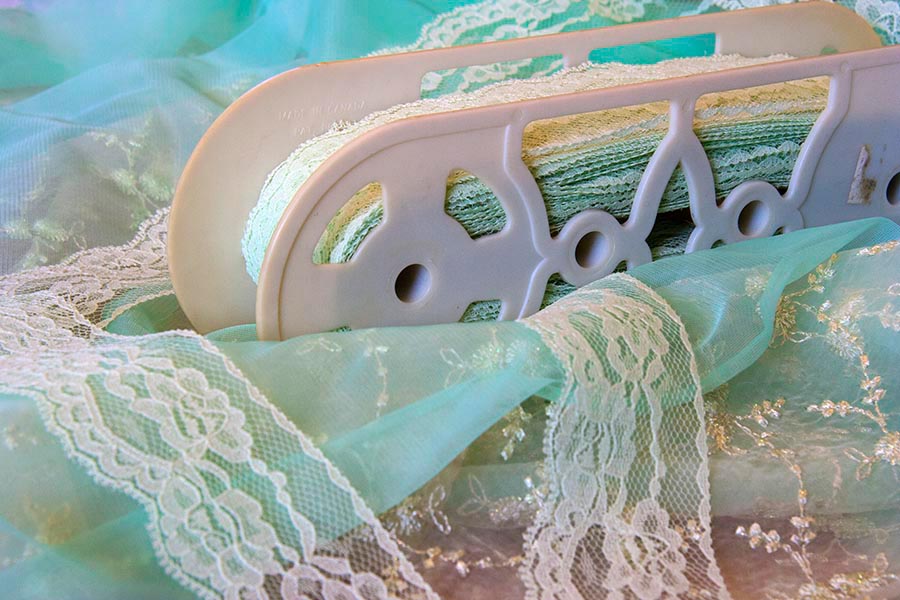
There isn't enough lace for the full length underskirt, which means fitting the lace to matching coloured tulle at the top. And that means I need a solid turquoise underskirt so the difference between the lace and tulle layer isn't too obvious. The waistband is already way too bulky, so I can't make an underskirt with the last skirt layers that goes up to her waist. It would look even bulkier. So I'm going to make the final three or four skirt layers fit onto their own band, which I will then hand stitch onto the bottom of the existing waistband, thus adding nothing to the fit of the bodice. I've pleated the innermost skirt onto the second waistband....
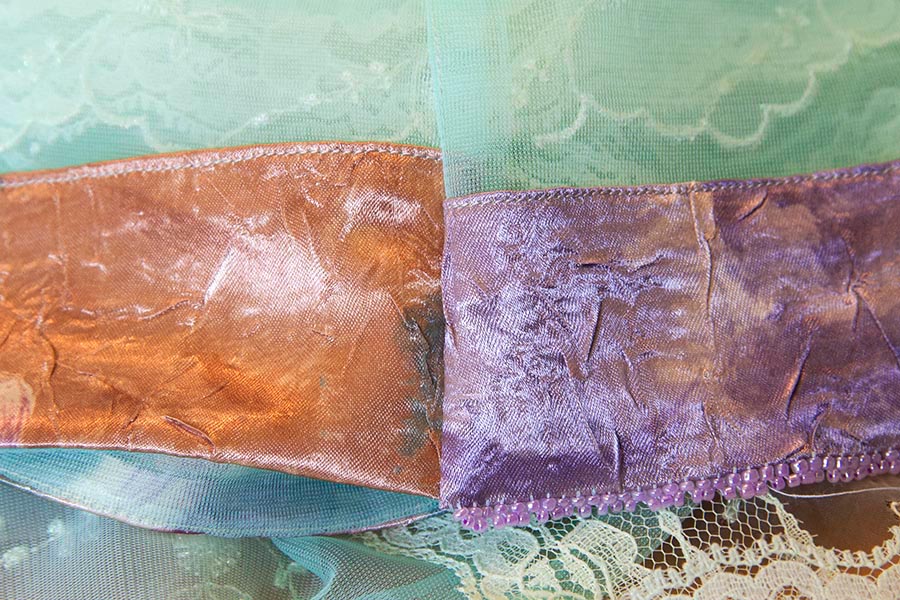
And finally, for those who consider me a 'sewing goddess', whose work is alway perfect, here's a little reality check. I make mistakes too. I totally forgot to make sure the two satin border ends on the bottom edge of the top tricot overskirt, were the same width before I did the top stitching on the front. Forgot to check they were the same. So they ended up different widths after I could no longer do anything about it. I just hope the embellishments on the back of the gown will hide it.
Ball Gown Adventures
March 6 - Every now and then I'll be working on a doll costume, and everything constantly needs to be redone - because the outfit has a mind of it's own. Miho's ball gown is turning out to be one of those. Every day brings something new to redo, or add. Of course it's also the very first thing I'm making for my Fashion girl, so there's a lot of kinks to work out as well. This gown is actually a 'test'.
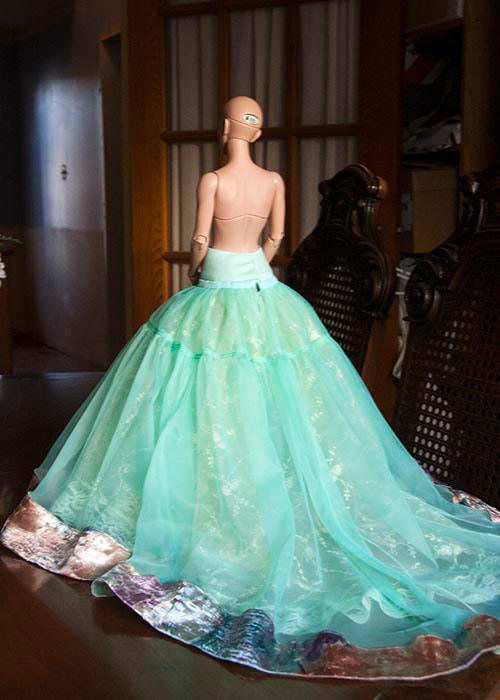
I didn't have enough of the mint tricot for the full length of the underskirt layer, so had to make it gathered in tiers. I also didn't want all the skirt thicknesses at the bottom of the bodice, so made a yoke for the top of the underskirts....
I didn't have enough of the mint tricot for the full length of the underskirt layer, so had to make it gathered in tiers. I also didn't want all the skirt thicknesses at the bottom of the bodice, so made a yoke for the top of the underskirts....
|
|
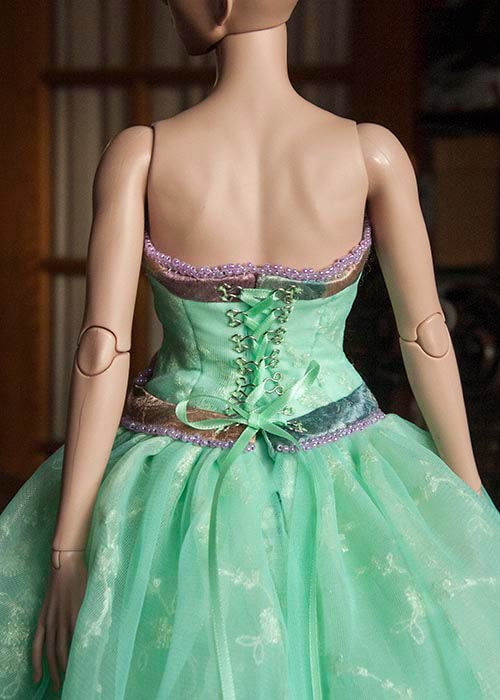
The pattern for the bodice still needs some adjusting for next time, but I have to work with this one the way it is. I wanted the bodice to lace up the back, but there were far too many layers of fabric to insert eyelets. So I sewed on a row of 'eye's down each side.
|
|
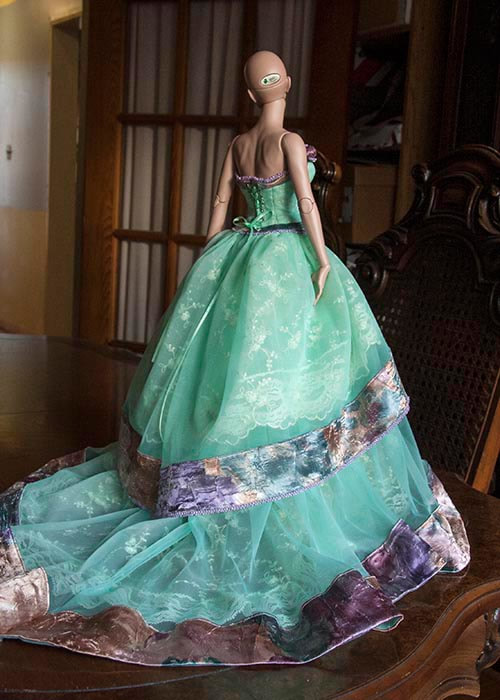
The back of the underskirt just seemed too long. My Miho was still in her flat bare feet, so I was adding extra to the skirt lengths to compensate. I figured I better put her high heel feet on and find some heeled shoes. The only pair I had was a pair of pink boots that came with my Leona....
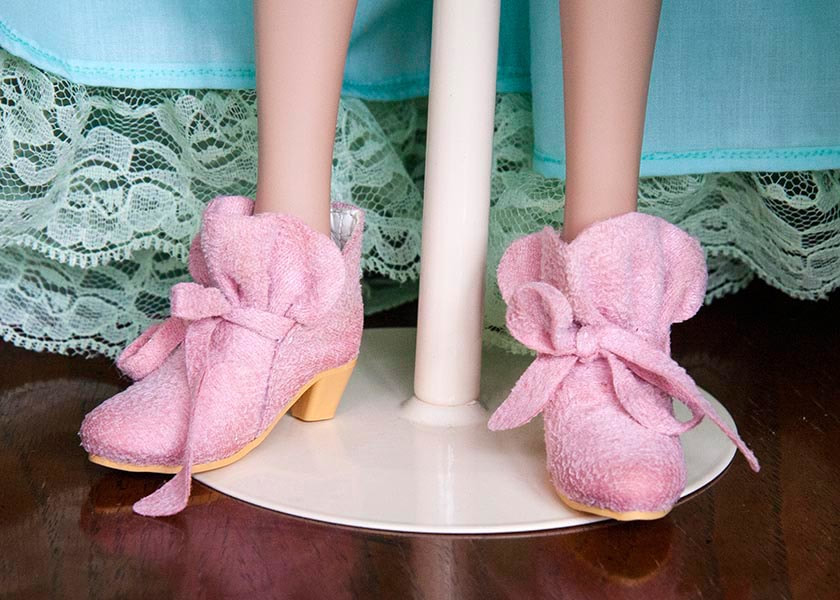
Not exactly appropriate footwear for such a fancy gown! I'm going to have to buy - or make - some nice high heeled shoes to go with it. But for now these will just have to do. At least I could now check the length of the skirts. They were way too long. So I picked out all the seams on both the sheer overskirt, and the lace underskirt, removed the edges and gathered lace, cut off a couple of inches, and reapplied the edgings. Then the dress was a much better length....
Before
|
After
|
I had sewn decorative ribbon flowers onto the bodice....
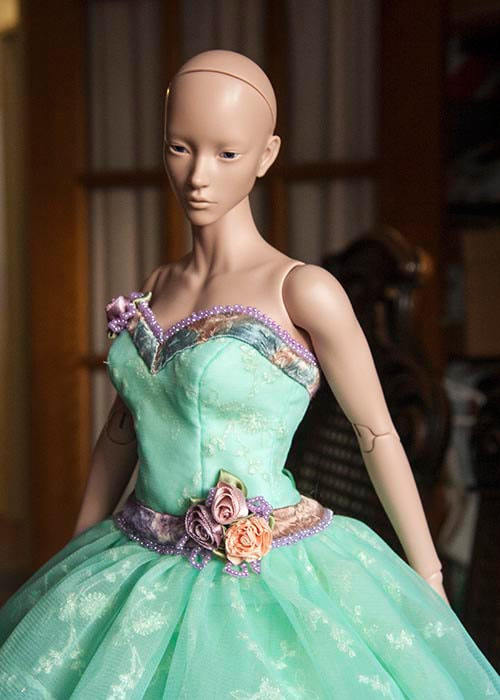
Of course, then the skirt edges demanded similar flower embellishments.
Good thing I had stocked up on ribbon roses and flowers at the sale last week....
Good thing I had stocked up on ribbon roses and flowers at the sale last week....
I had thought a single row of flowers, alternating between small and larger ones, would be good. But the skirt is now telling me it looks too 'sparse' and wants another row higher up. I had debated between sewing the flowers or, or gluing them, and decided I would sew them on - at least for the over skirt. Although, now that there's going to be a second row, AND the longer skirt wants the same thing - plus a beaded edging - I may just have to resort to glue after all.
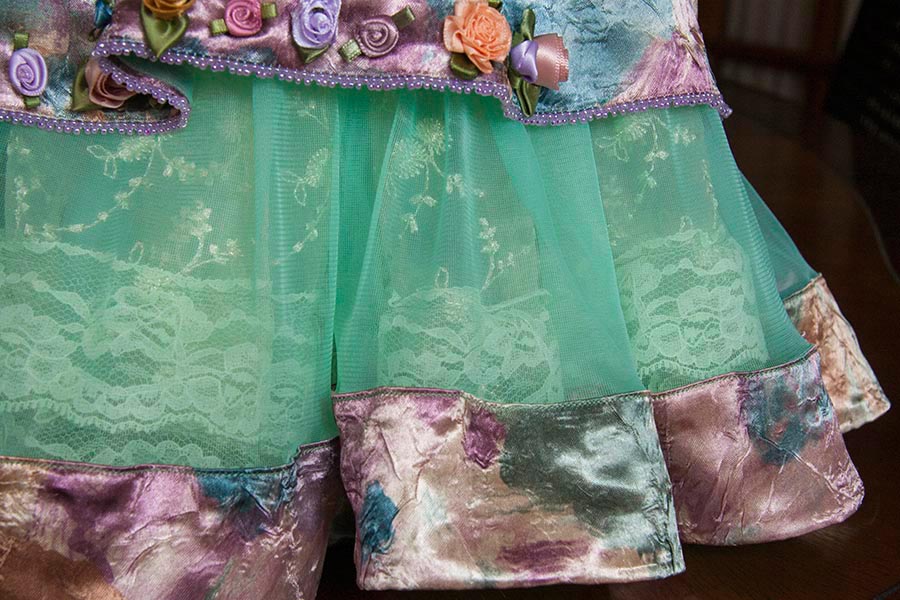
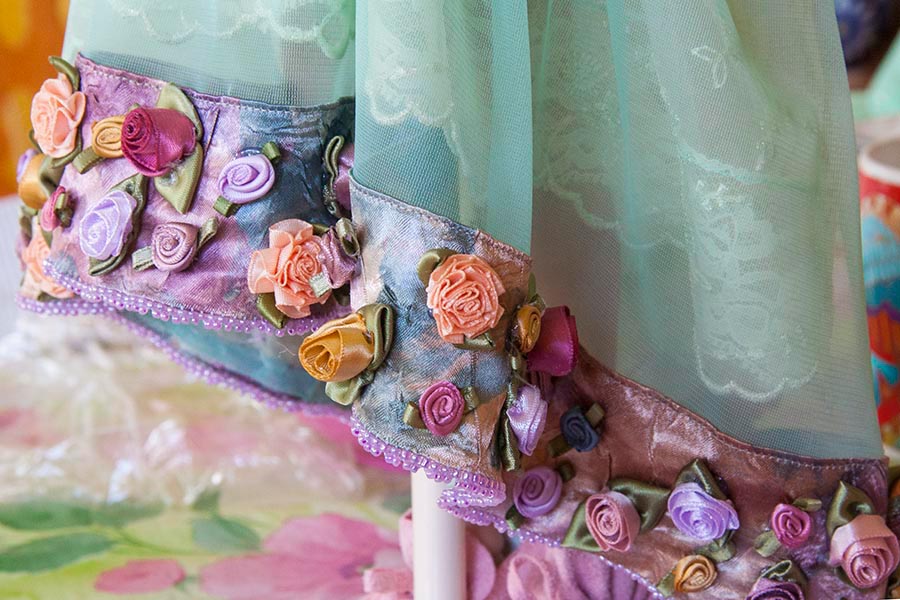
And because I shortened the sheer overskirt, the lace edging on the bottom of the lace skirt underneath didn't show anymore, so I had to sew a second lace ruffle above the first one, so the lace will show through.
And because I shortened the sheer overskirt, the lace edging on the bottom of the lace skirt underneath didn't show anymore, so I had to sew a second lace ruffle above the first one, so the lace will show through.
I need to get some more beads, start on the big fabric bow for the back of the gown, and continue with sewing on the flowers. This is going to take a while!
More Flowers
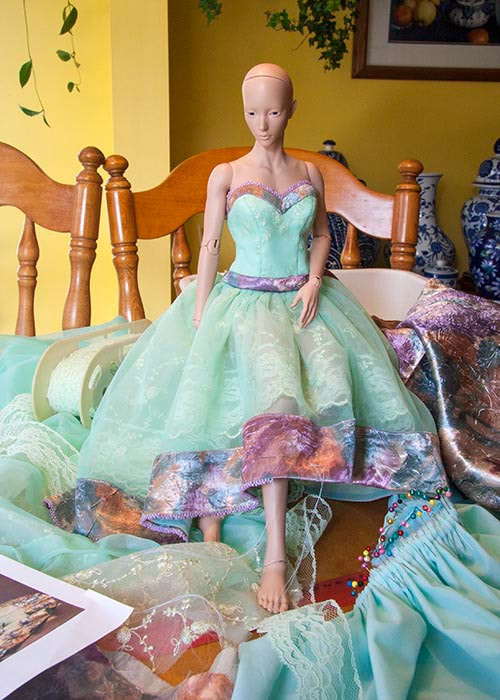
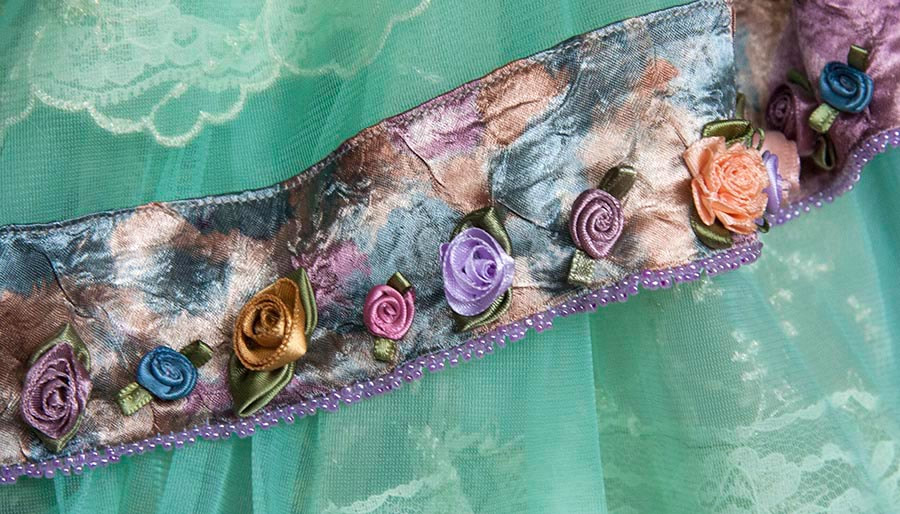
March 8 - Miho's dress decided it needed more flowers along the fabric band, so I complied. But I gave up with all the hand-sewing, and decided to use my glue gun instead. Much faster!! It took just 15 minutes to glue on the second row of flowers, whereas it took two days to sew on the first row.
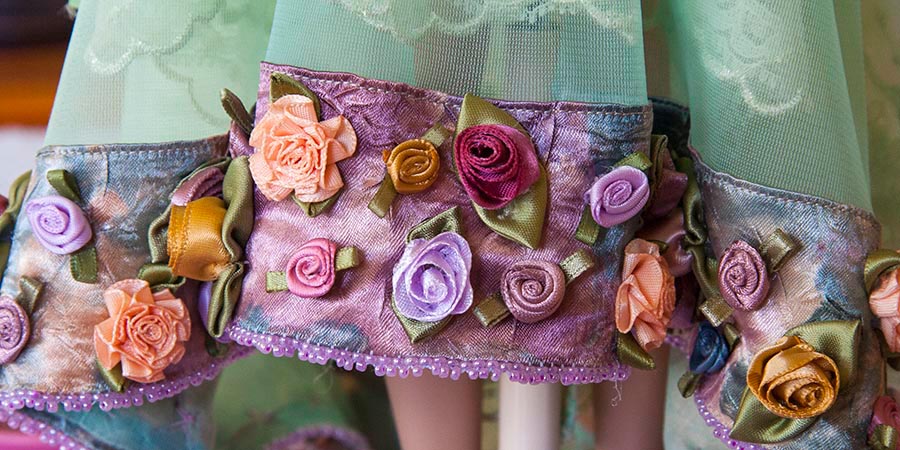
It may look totally random, but there is definitely a pattern - five small, and five larger flowers,
in a repeat pattern all the way around. Then a new repeat pattern for the upper row....
in a repeat pattern all the way around. Then a new repeat pattern for the upper row....
All the flowers add a nice weight to the upper dress, and make it drape beautifully.
I think it could even be worn alone, as a shorter fancy evening gown.
I think it could even be worn alone, as a shorter fancy evening gown.
I think it will need a slip underneath though, as it's a little too see-through as it is.
Even More Flowers
March 9 - I managed to finish all the beading on Miho's underskirt last night, so this morning I glued on all the flowers. There were almost 100 flowers per row, and each row took just one hour. I dread to think how long it would have taken to sew them all on.
For the most part the gluing went just fine, but there are a few spots where I can see the shine of the hot glue peaking out. I need to go around with a small brush and some white glue to brush on any shiny glue spots. The white glue will dry matte and hide the shine.
Now I have to address the big bow and embellishments for the back of the dress.
Now I have to address the big bow and embellishments for the back of the dress.
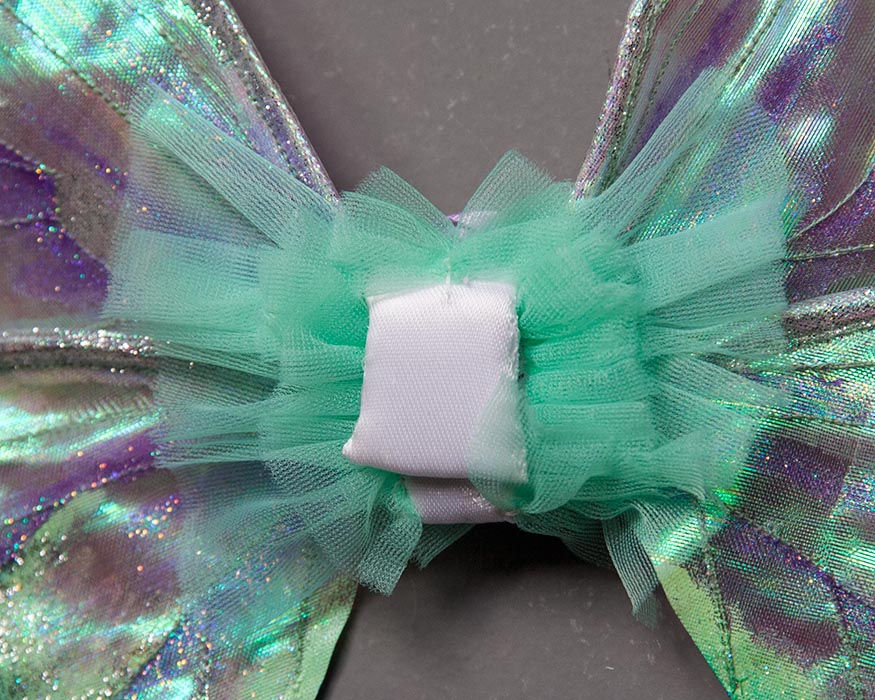
Making the Bow
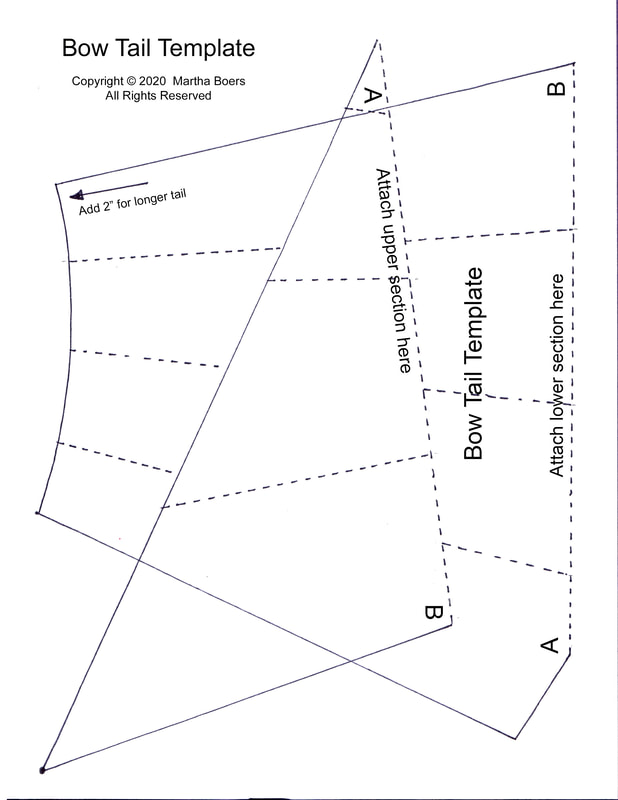
March 11 - I'm working on the bow for the back of Miho's dress. It took a bit of fussing to figure out how to cut the fabric for the tails of the bow so it would drape the way I wanted it to. The 'bow' itself is also a strange shape so it will hang the way I want.
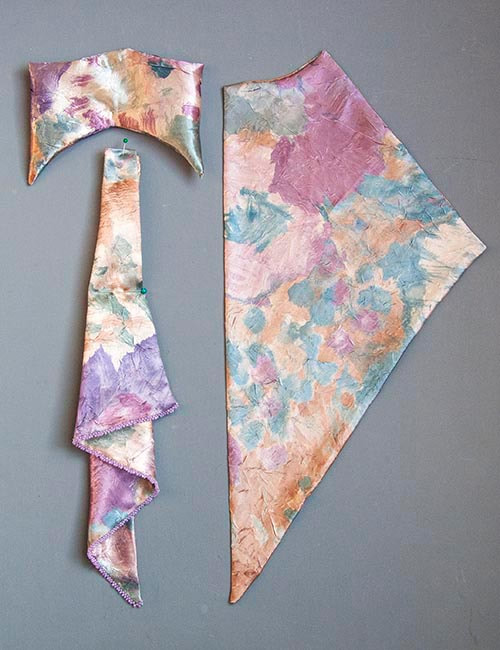
These are the kinds of things one needs to keep in mind when making a dress for such a small doll. The fabric I'm using is a heavy satin meant for human scale clothes. A 1/4 scale doll should ideally have clothes made from fabric that's 1/4 as thick. But where does one find that?? Not anywhere around here. So the next best thing is to figure out how to 'fake' things so it 'looks' like it's right.
Two Bows
March 14 - I finished the bows for the back of Miho's dress today. I would have been done sooner if not for the snow storm we never got. For days they were saying that we would be getting 15 to 20 centimetres of snow, so I thought I'd make a shawl and scarf for my Wizard so he could go out on some winter adventures with my Fantasy crew. But we didn't get more than a light dusting.
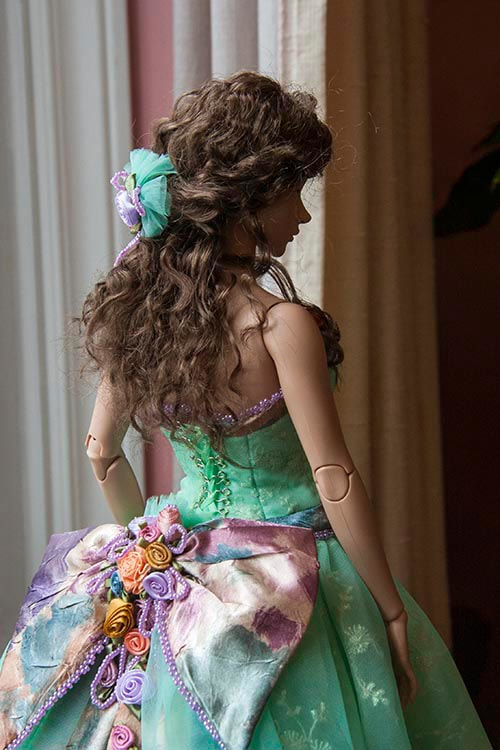
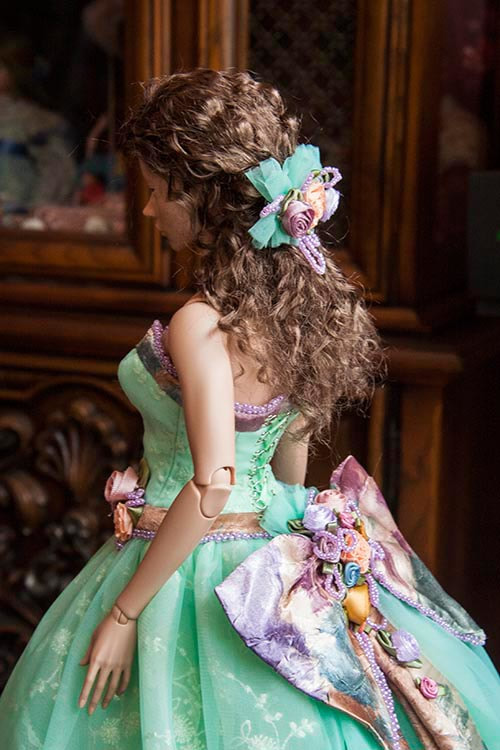
So back to finishing Miho's dress. I also made a matching clip for her hair.
So back to finishing Miho's dress. I also made a matching clip for her hair.
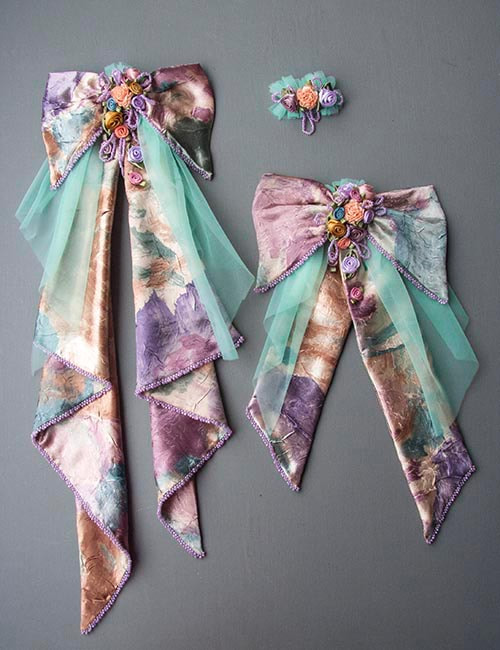
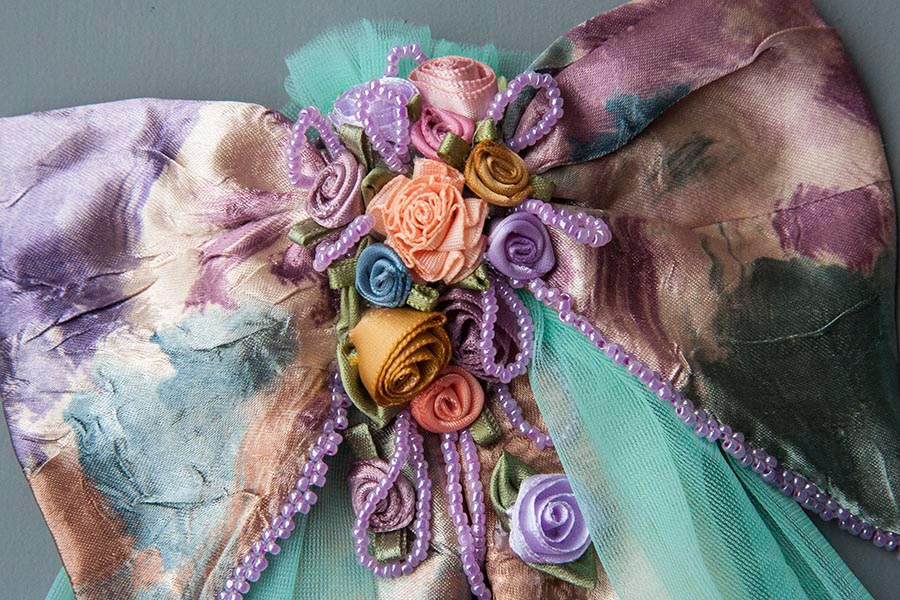
Both bows were beaded and have the same flower arrangement. They attach with snaps to the back of her dress.
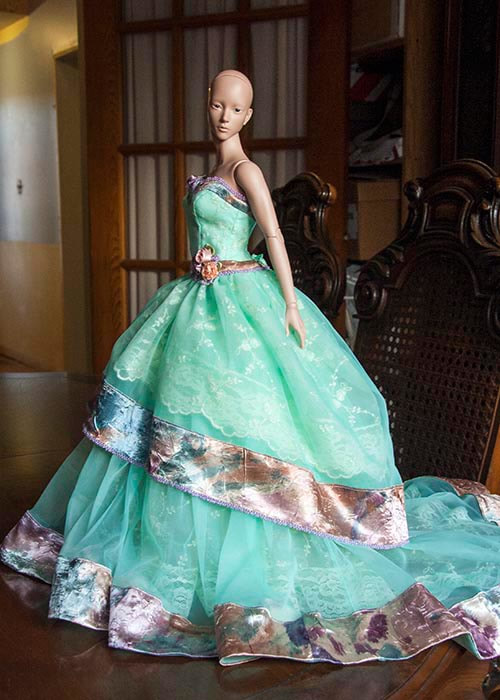
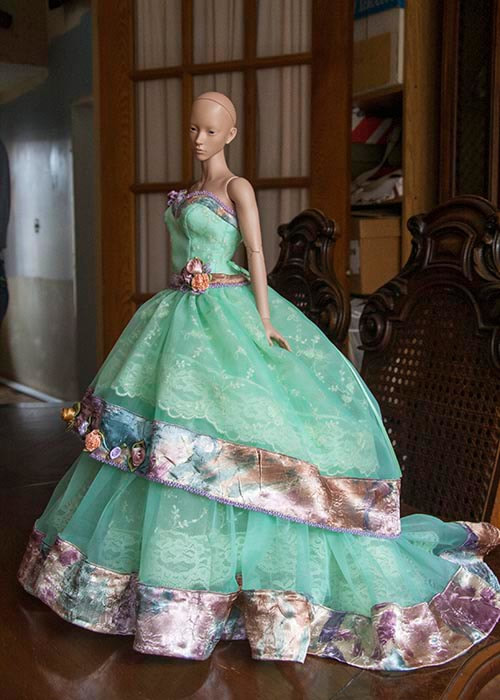
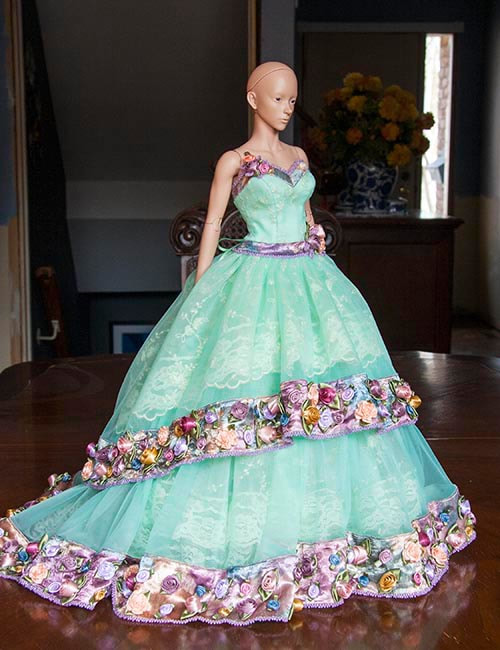
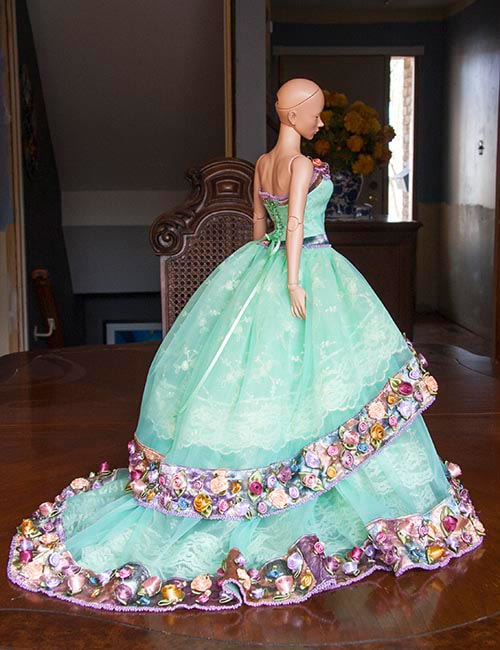
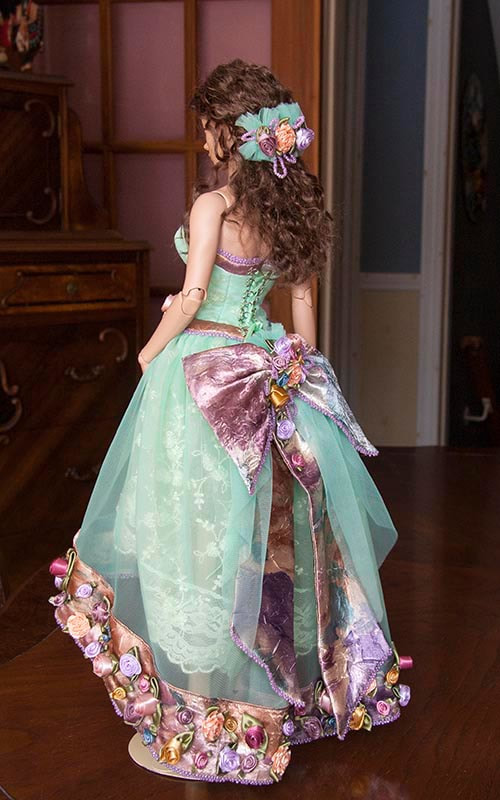
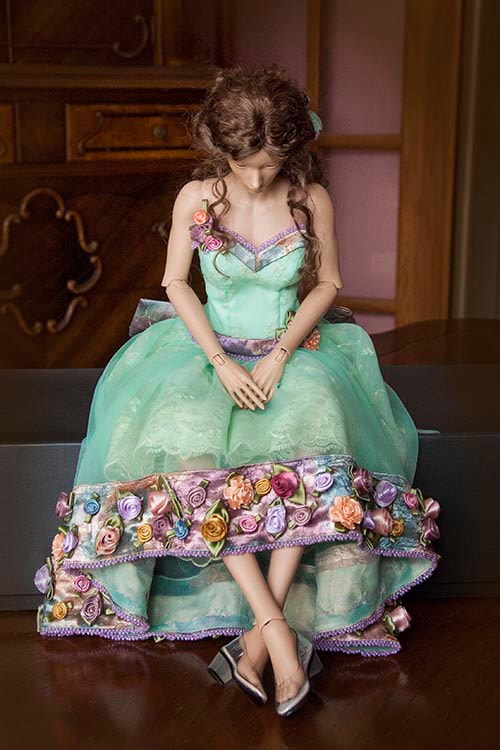
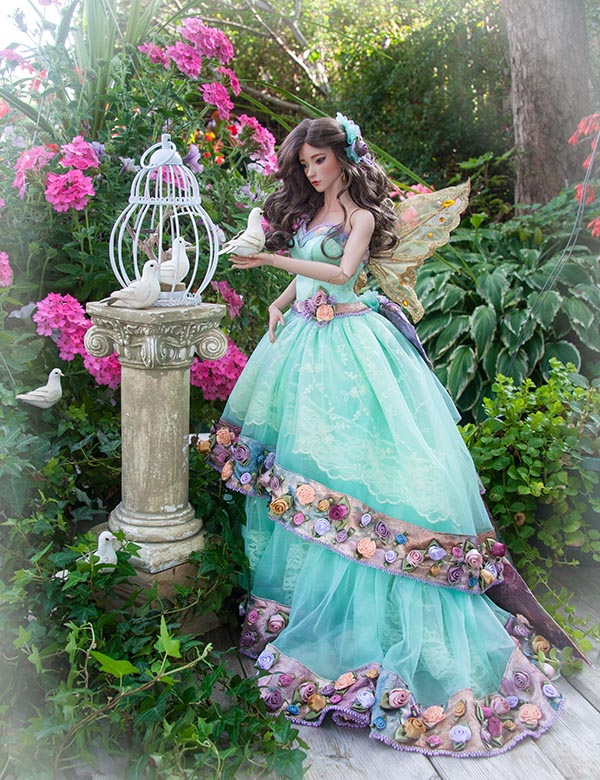
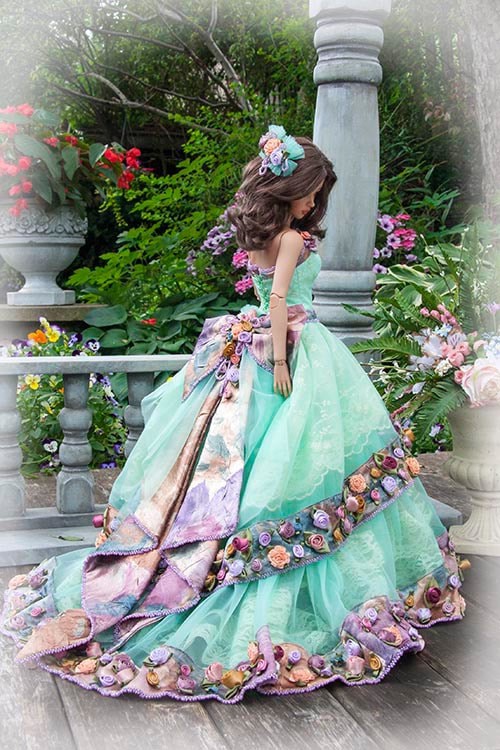
I debated whether or not I should take photos of Miho in her finished dress, or wait until after she's painted. But painting could still take weeks, and I'm sure everyone would like to see the finished gown. So I took some photos....
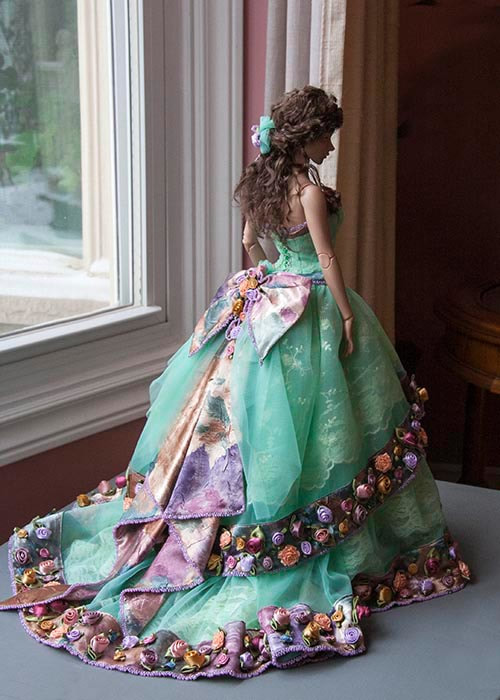
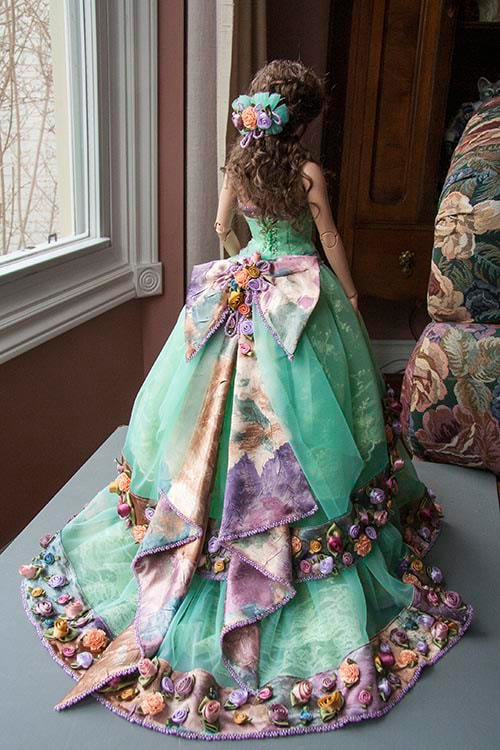
|
|
|
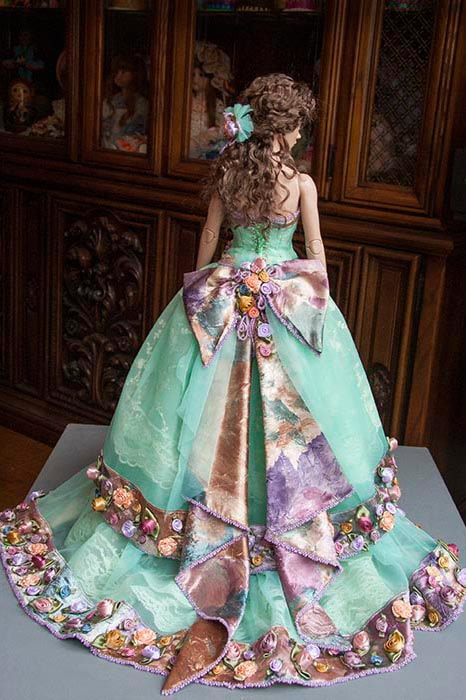
|
Now I still have to make a slip, so she can wear just the shorter part of the dress by itself.
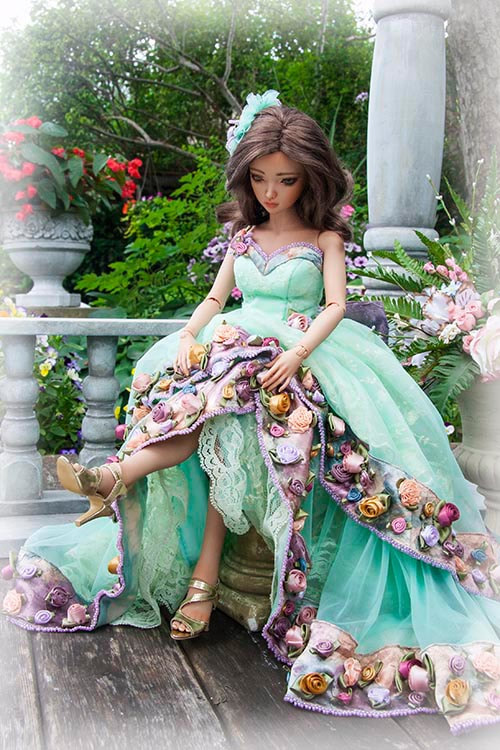
the Shorter Dress
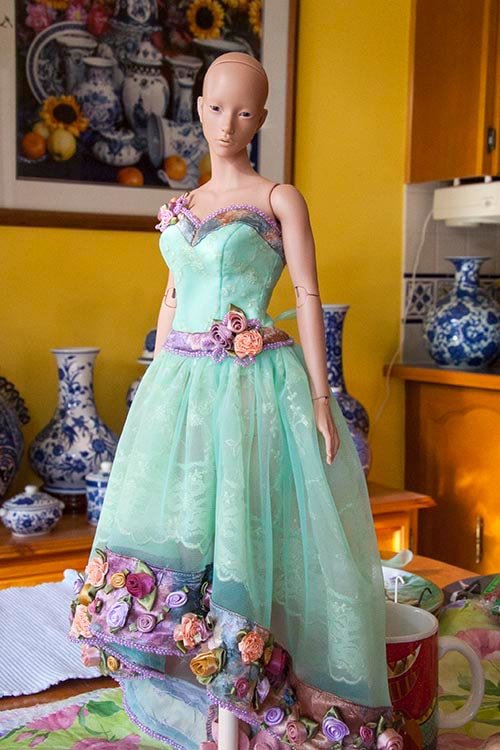
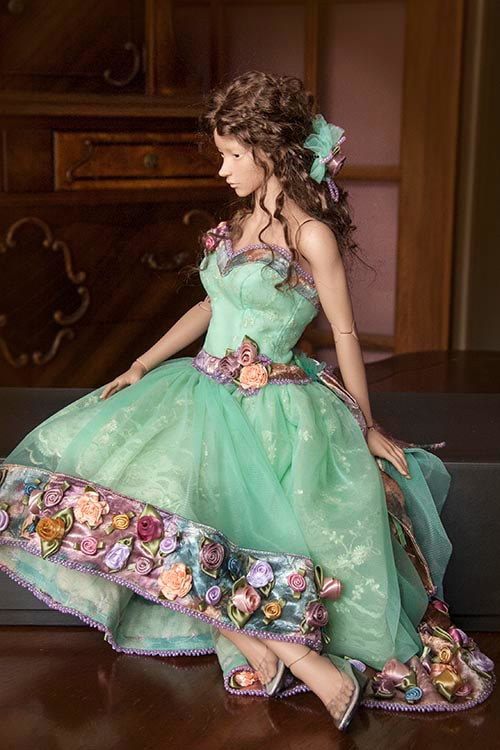
March 15 - I made a slip to fit under just the shorter skirts of the dress, and decided to take some more photos. But those clunky pink boots were just not going to do. I found a pair of low heeled 'glass slippers' that would do for now, until I order her some proper shoes. Or make some.
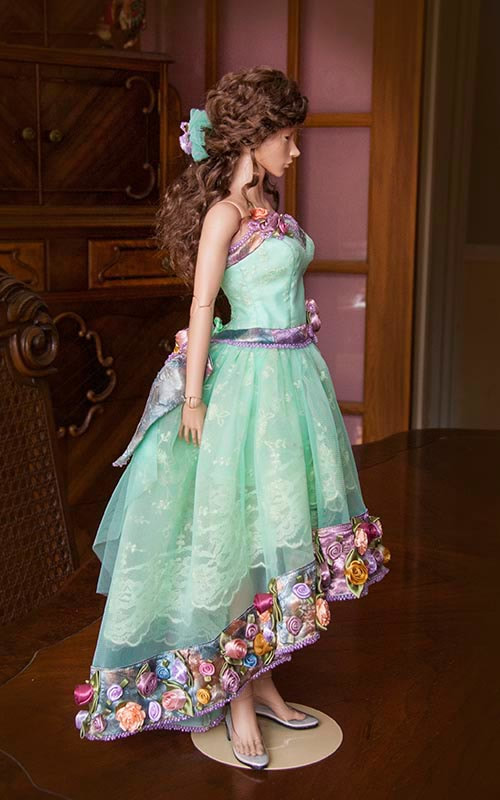
|
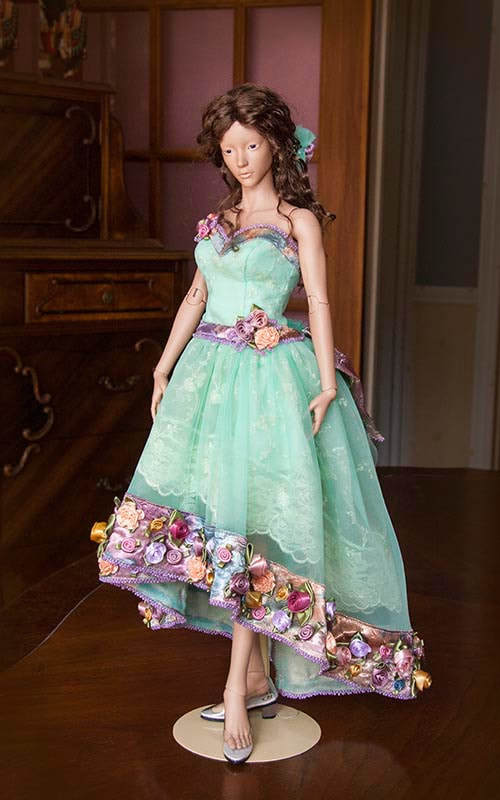
|
Having the longer skirts separate makes this dress so much more versatile.
|
|
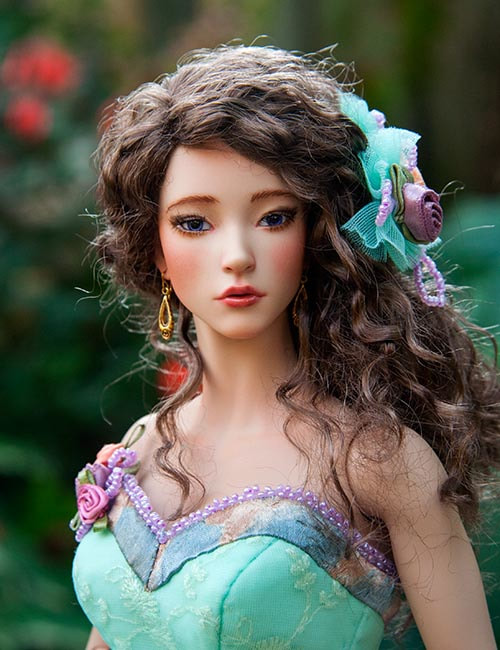
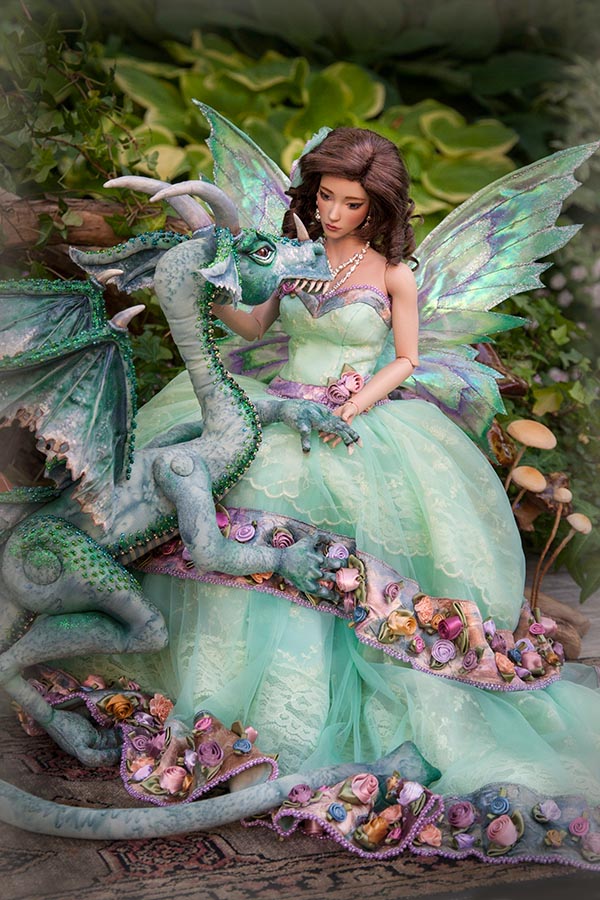
And after she was painted....
The gown also fit Isis, my JID 'I', although the skirt is a touch long...
|
|

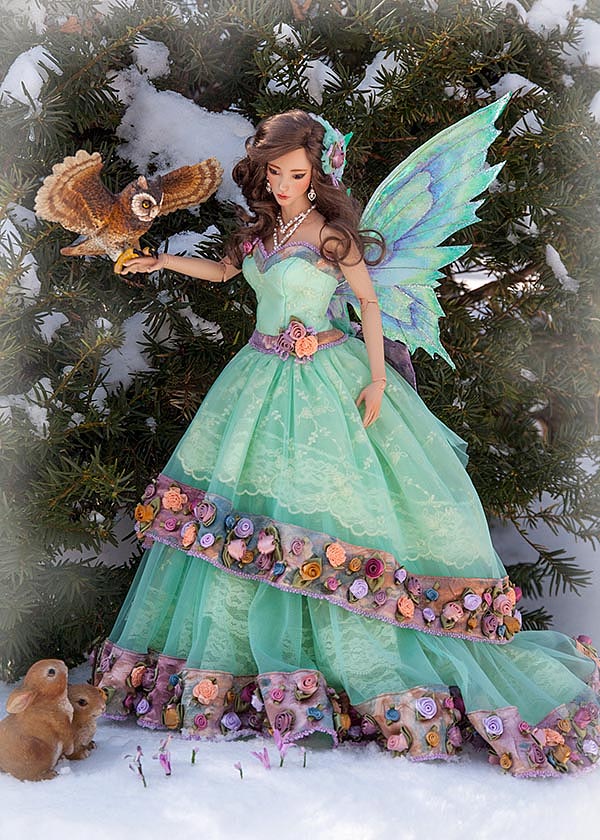
With Wings
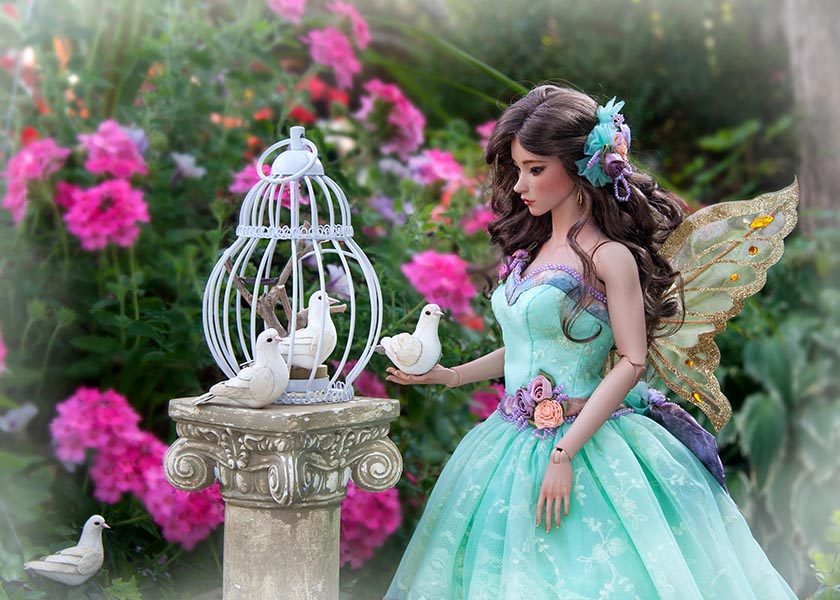
I made some wired wings to go with the gown....
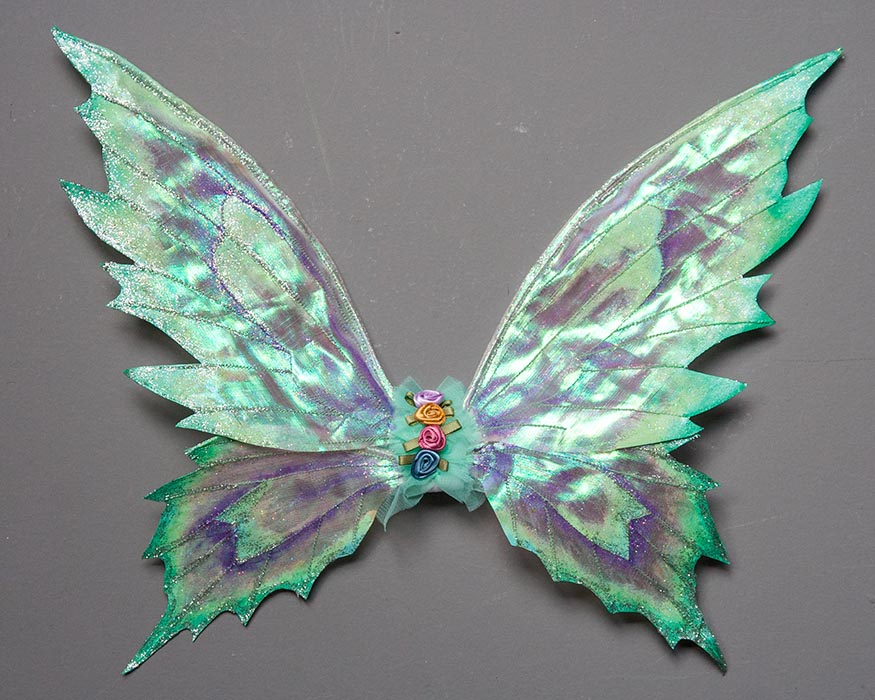
Because the gown is sleeveless, I needed a new way to attach the wings, and without the unsightly velcro I use for my tiny fairies. So I formed a hook shape out of wire, padded it with felt and covered it with fabric, then sewed on the wired wings. The padded 'hook' slips over the back of her bodice...
Wearing the wings...
Just Patterns
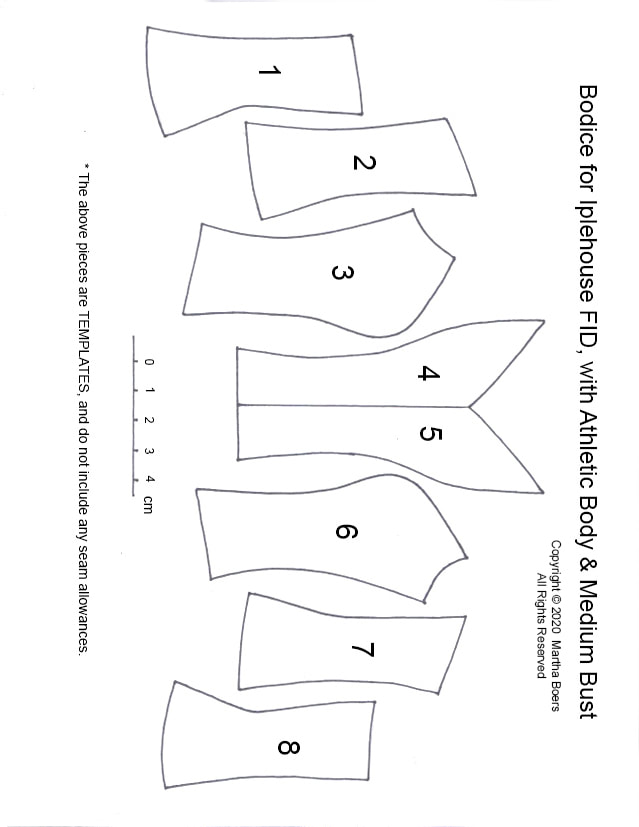
These patterns and templates are intended for more experienced sewers. There are no instructions, so you are on your own, although the under construction photos in this 'Creative Journey' may help.
To download Pattern pdf, click on image below..
To download Pattern pdf, click on image below..
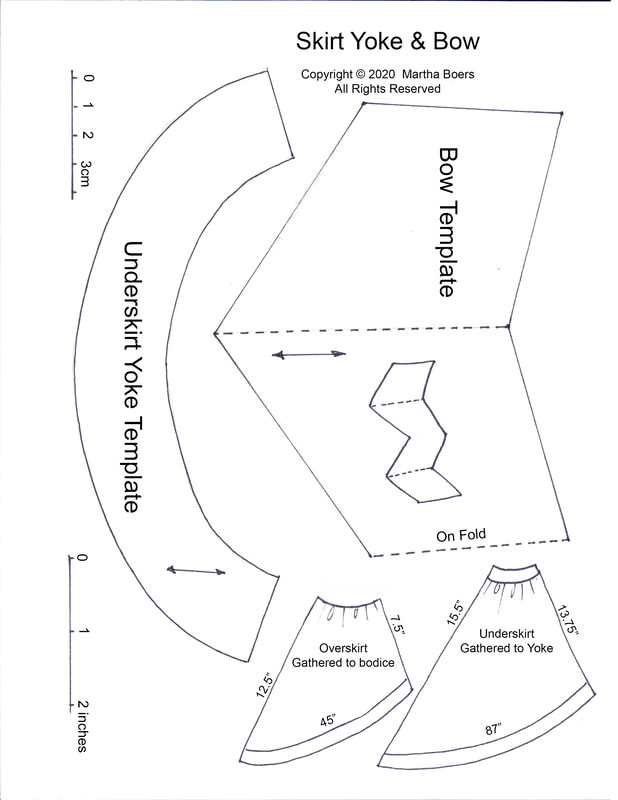
There are four pages in the pdf. Note, pieces marked 'Pattern' include seam allowances. Pieces marked 'Template' are meant to be traced onto the wrong side of your fabric. The traced lines become the sewing lines. Remember to add the seam allowances
|
|
|

|
Copyright © 2018 Martha Boers
All Rights Reserved
