Arthur Pendragon - A Creative Journey
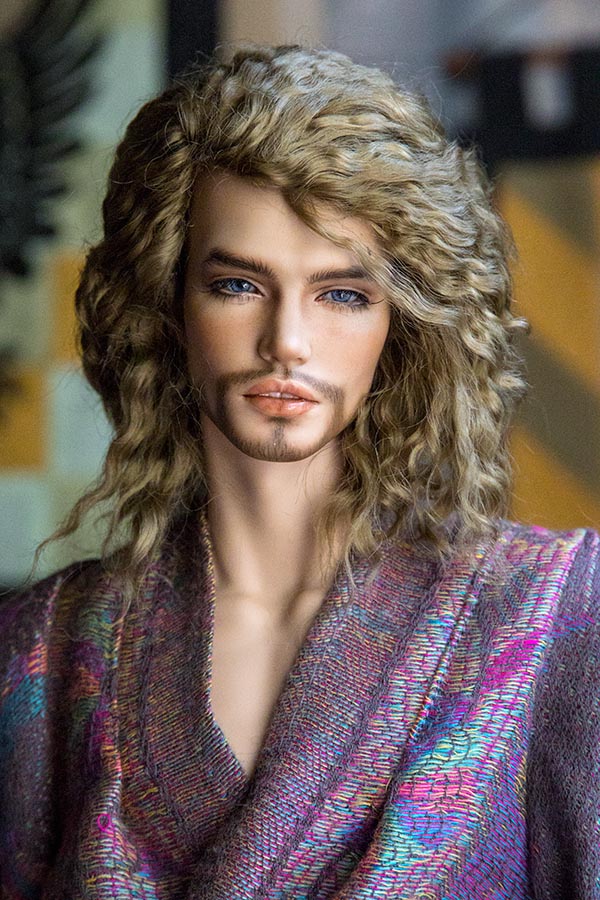
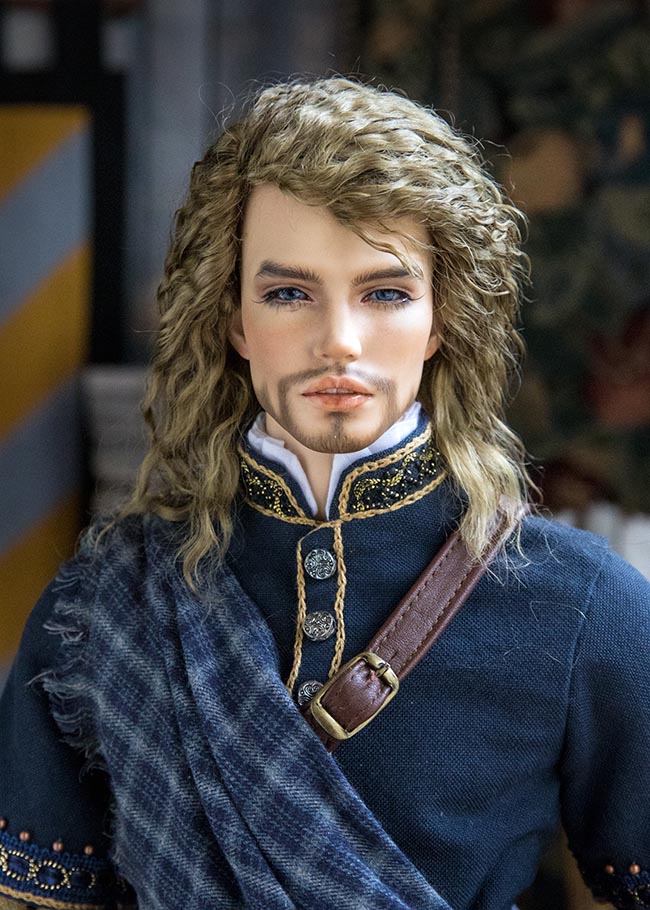
I wanted to make a knight costume for my SartoriaJ Matias, and had decided that I didn't want to make him the same kind of knight outfit as my three Iplehouse FID guys. I wanted to do something different, but couldn't decide on exactly what. In the meantime Matias was standing around waiting for me to decide what I wanted to make for him, so I made him a robe to keep him warm...
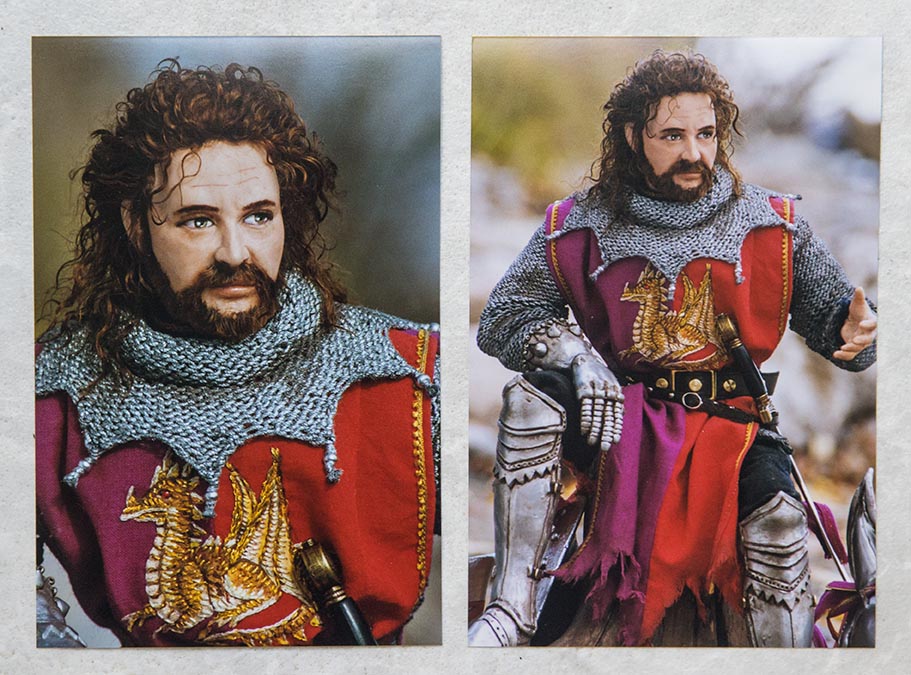
Years ago when my sister and I were making dolls together, we made one of King Arthur. I loved that doll and regretted selling him...
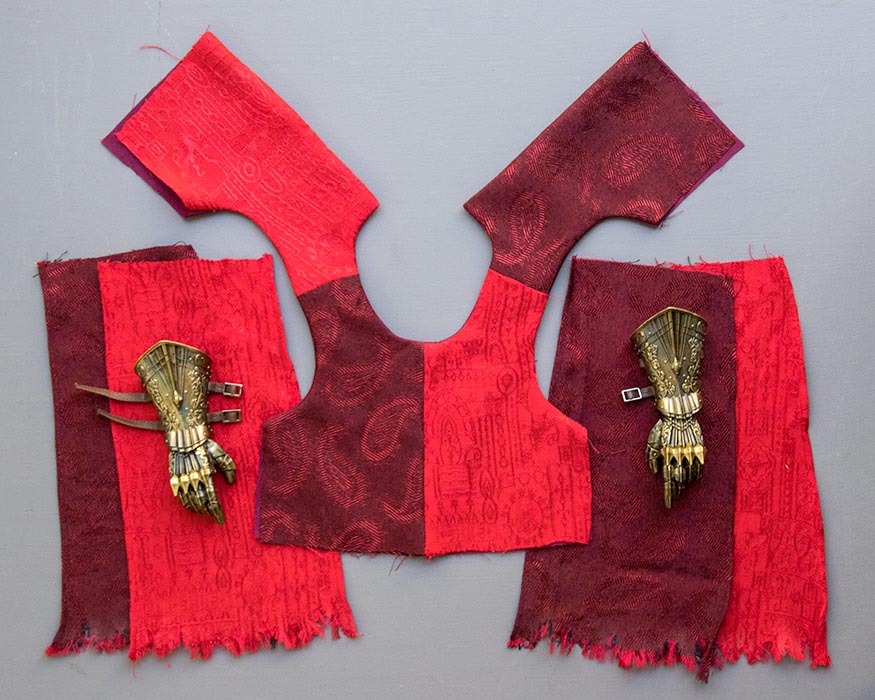
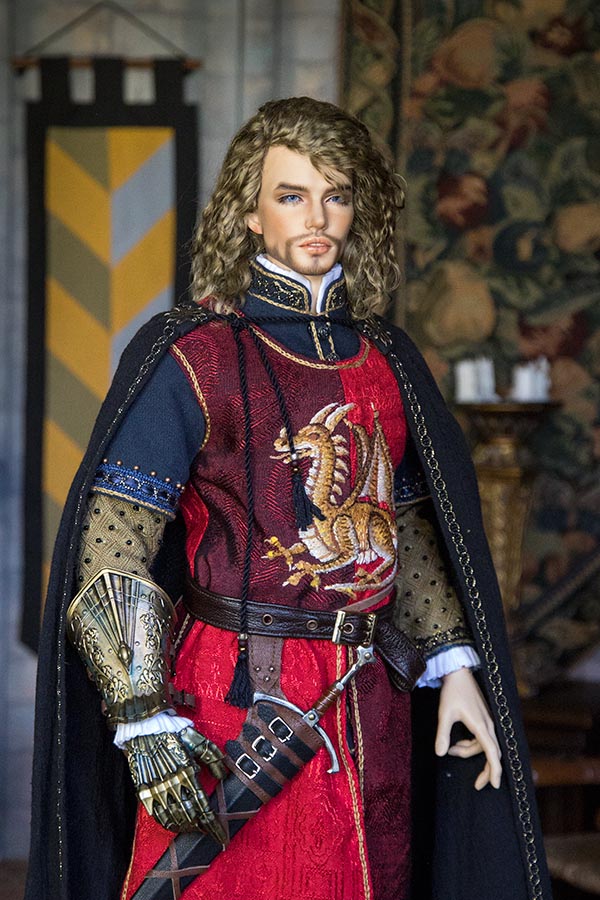
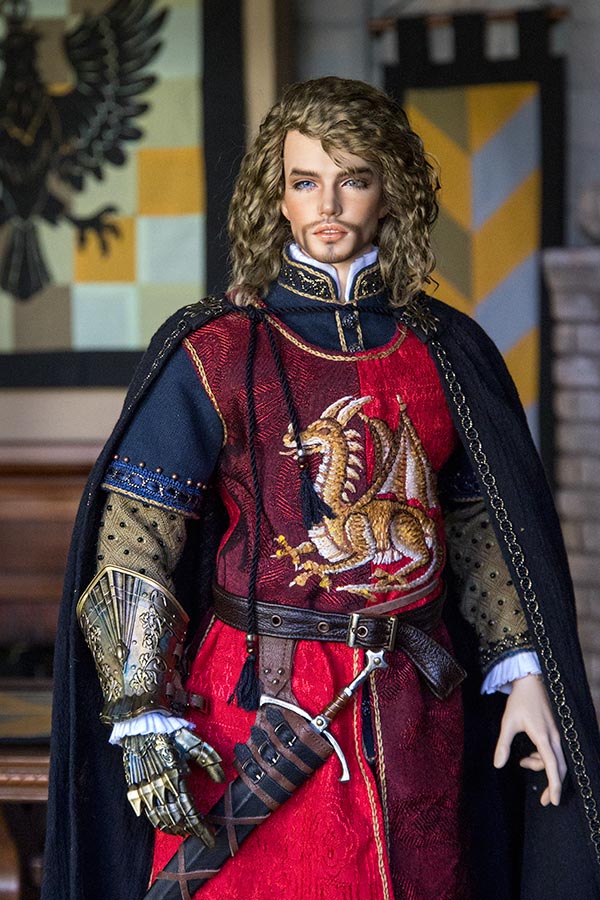
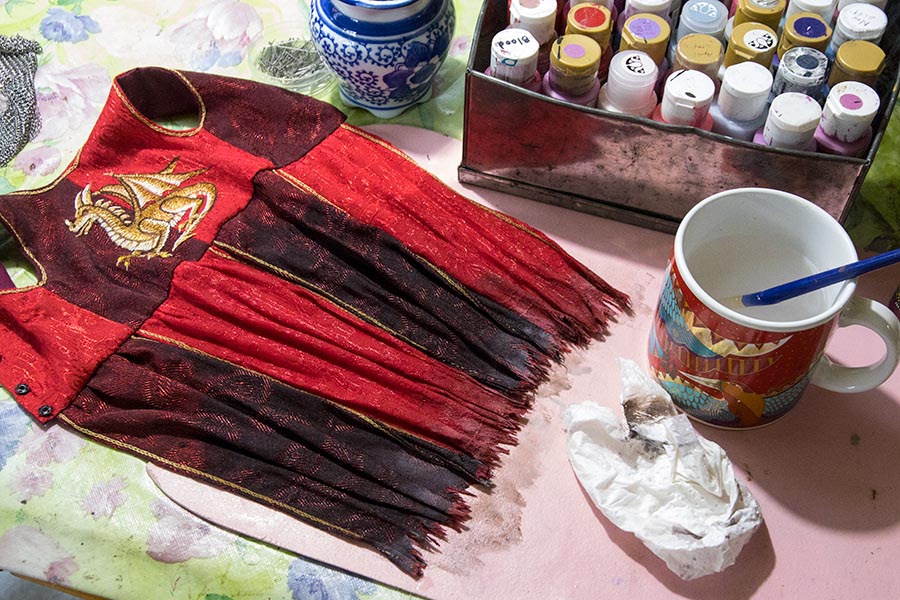
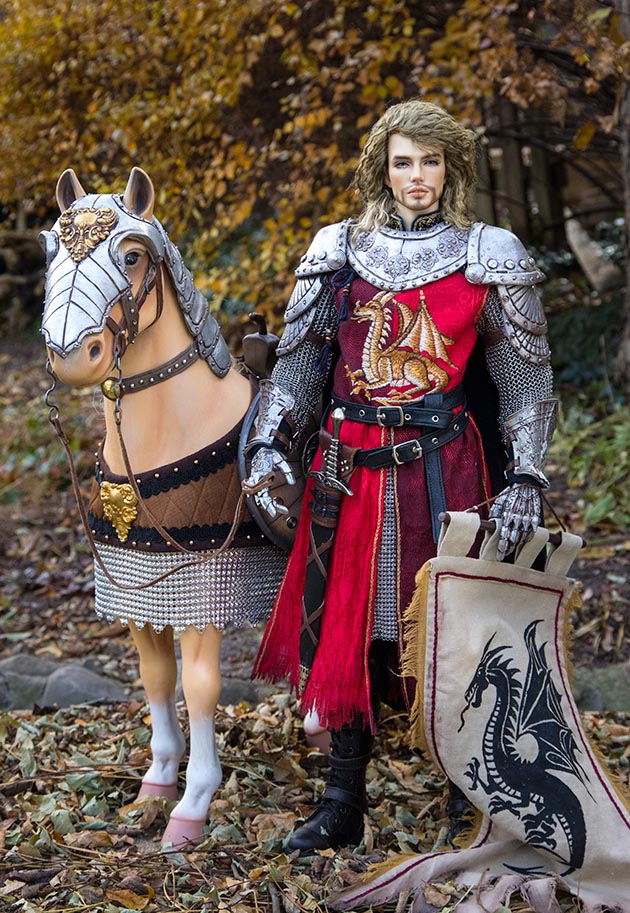
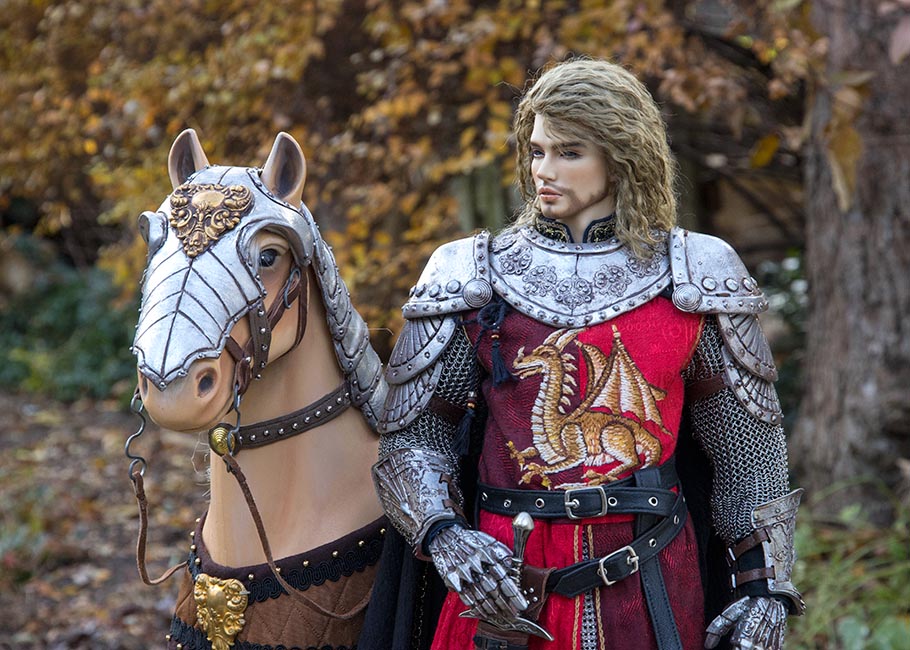
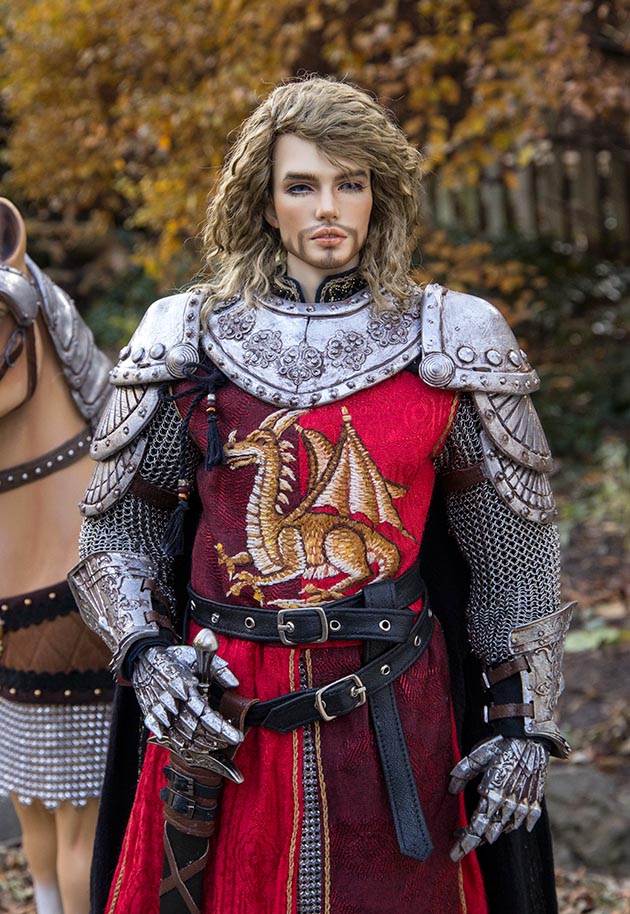
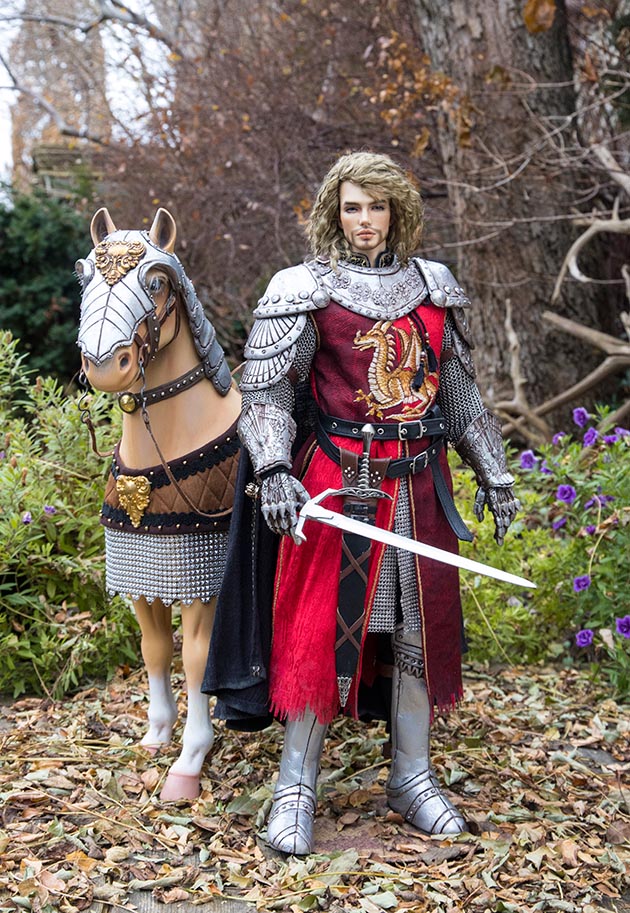
So I thought I'd make Matias a knight outfit inspired by Arthur's costume. I had been gifted a set of SartoriaJ's knight gloves that were part of Matias' full set, and they would be perfect for it. I'd use real metal chainmail instead of the knit chainmail from years ago. And he'd get plate armour sculpted out of Aves Apoxie. And since he was in service to the Elf King, and the Elven army had a dragon as their mascot, Arthur's dragon would be perfect too. So I chose two red brocades for the surcoat and started work on it....
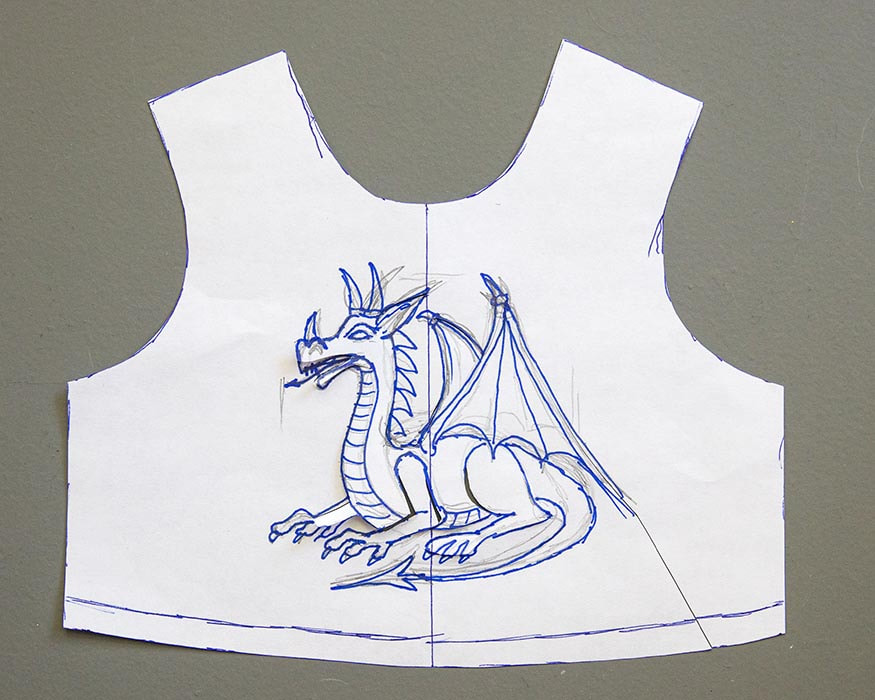
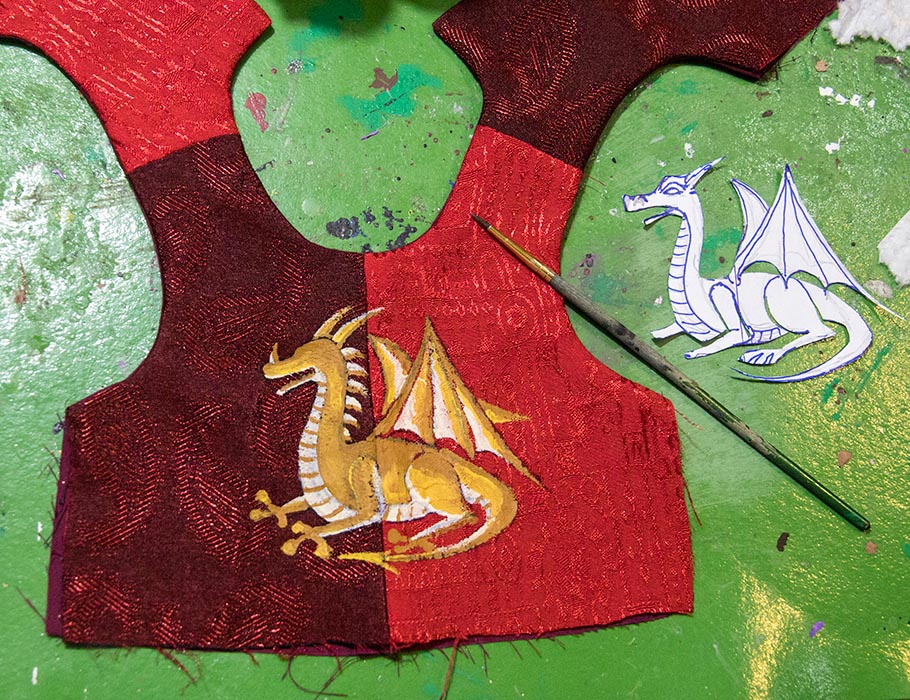
It would be a lot easier to add the dragon motif before finishing the surcoat, while it was still flat, so I drew a dragon design onto the paper pattern piece....
Then I cut out the dragon and traced it onto the surcoat, and painted it with acrylic folk art paint.
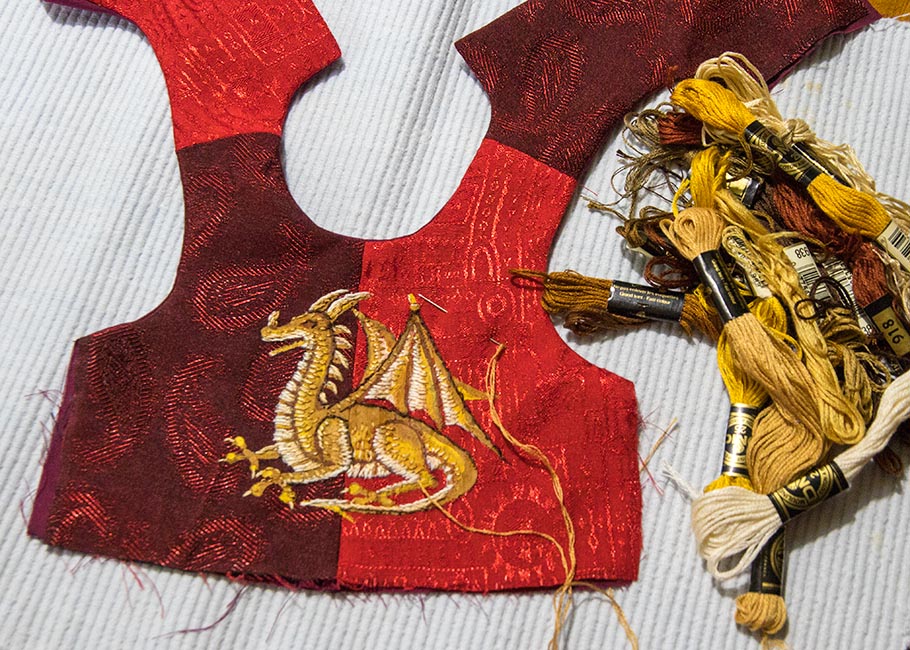
It didn't have to be perfect, since I was going to embroider over the paint and add all the details with embroidery floss. But painting the background saves a lot of work since the entire figure wouldn't need to be filled in...
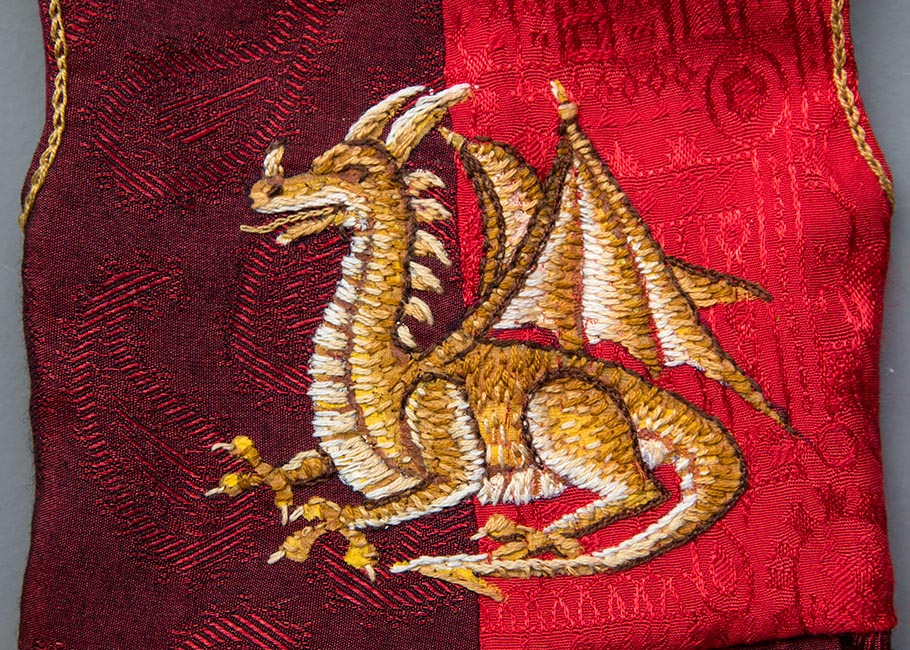
The finished dragon looks like it's completely embroidered, but it isn't. The original paint layer shows through more than half of it. I find this technique is a great way to create something that looks like it's heavily embroidered, but in a fraction of the time.
All it still needed was a shiny red bead for the eye.
All it still needed was a shiny red bead for the eye.
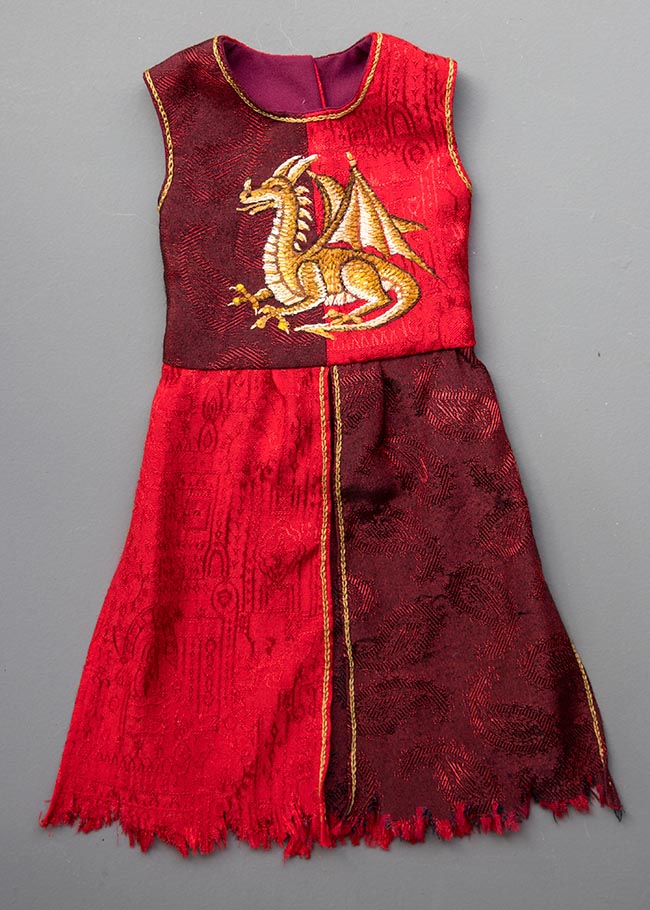
Then the surcoat was sewn together. It still needed some stains and wrinkles, but I'd do that later.
Meanwhile, Matias needed to attend a party, and he needed something to wear, so he borrowed Jude's formal tunic, and I tamed his hair some..
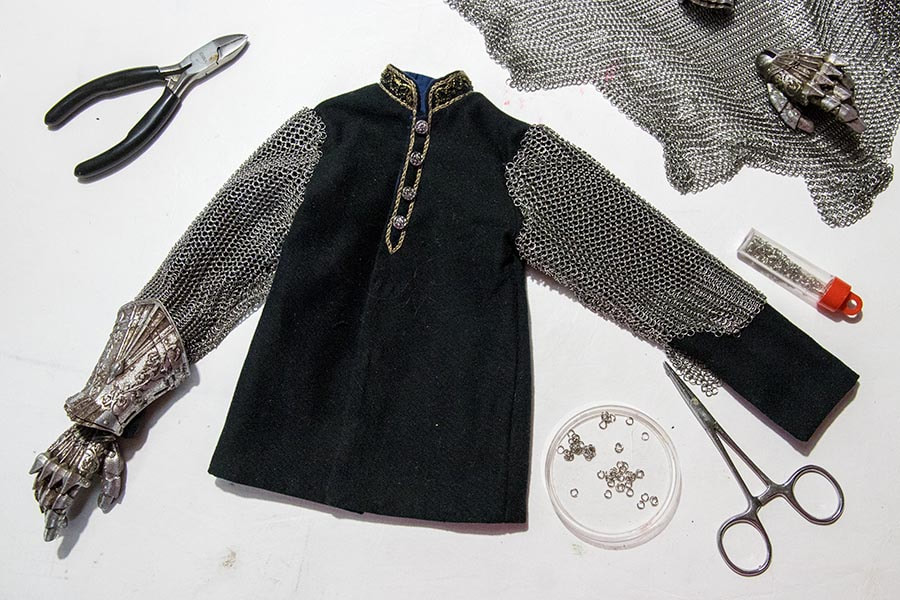
The next part of his knight costume that needed to be made was the tunic underneath the surcoat. Since Matias was wearing Jude's tunic, I thought I'd just try the surcoat over it to see how it fit and looked, and to see if the pattern needed any adjusting. I also switched his one hand to the resin armour glove....
I thought he looked great, although he definitely won't be getting white ruffles at the wrist or neck. He will get a black tunic, onto which I will sew the chainmail sleeves and 'skirt'. Then once that's done, I'll wrap him in plastic and attempt to sculpt some armour pieces for around his neck and over his shoulders. But first he needs everything under the armour made so I can make it the right size to fit over top. I just hope I can do something fine and fancy enough to go with those amazing gloves. And finally he'll need belts, and a sword of his own. But one thing at a time.
Making Chainmail
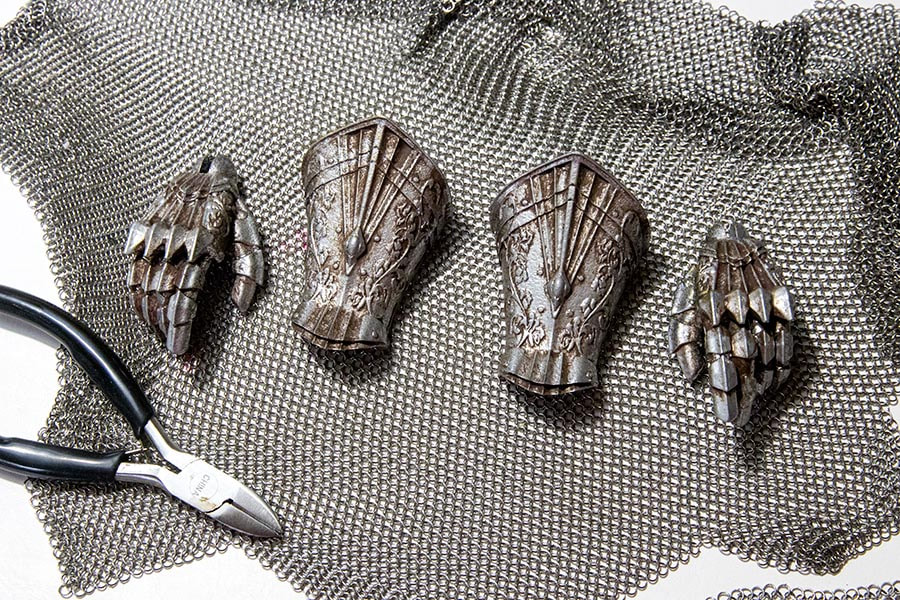
I was super busy with books and calendars, so progress on Matias' costume was going rather slow. I wanted his resin gloves and vambraces to be 'steel' instead of bronze, so sprayed them 'silver', with the last of my chrome spray paint. Then I 'aged' them with some dark brown paint. Then they matched the stainless steel chainmail I was going to use....
The next step was to cut chainmail 'sleeves' for his tunic. In the past my knights only needed chainmail from just above the elbow, and down to the wrist, so it was cut as a rectangle. But Matias needed entire sleeves right up to the shoulders, so his chainmail needed to be cut in a proper sleeve shape. With chainmail being so 'slinky' it proved very challenging, but I eventually got them cut, one tiny ring at a time. Then the tops of the chainmail sleeves were sewn onto his tunic, and the laborious task began of linking the two sides together with tiny jump rings.
There was no way I could finagle the tiny jump rings into the same pattern as the rings in the chainmail, so I just linked the two sides of the sleeve together. Even so, it still took a few days.
To reduce bulk, I was only planning on suggesting that he was wearing an entire suit of chainmail under his surcoat, and only having it sewn on where it would show - on the sleeves, and along the bottom showing under his surcoat. But I didn't have enough of the stainless steel chainmail to make an entire 'skirt' without piecing lots of parts together, plus it would be ridiculously heavy, so I opted to use aluminum chainmail for the bottom instead. It's a lot lighter, and easier to work with, plus if I used it with the wrong side out, it would look reasonably similar.
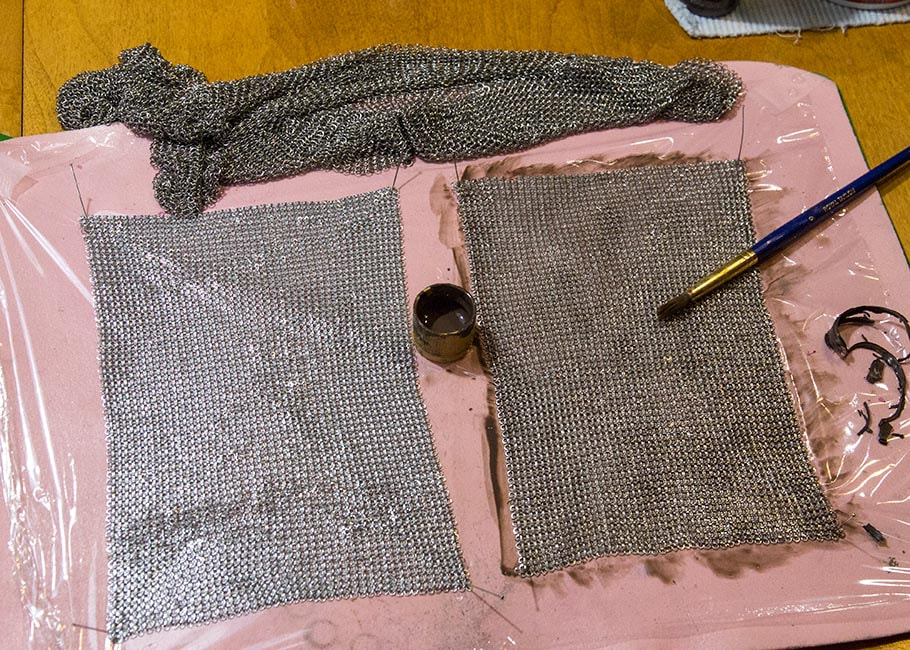
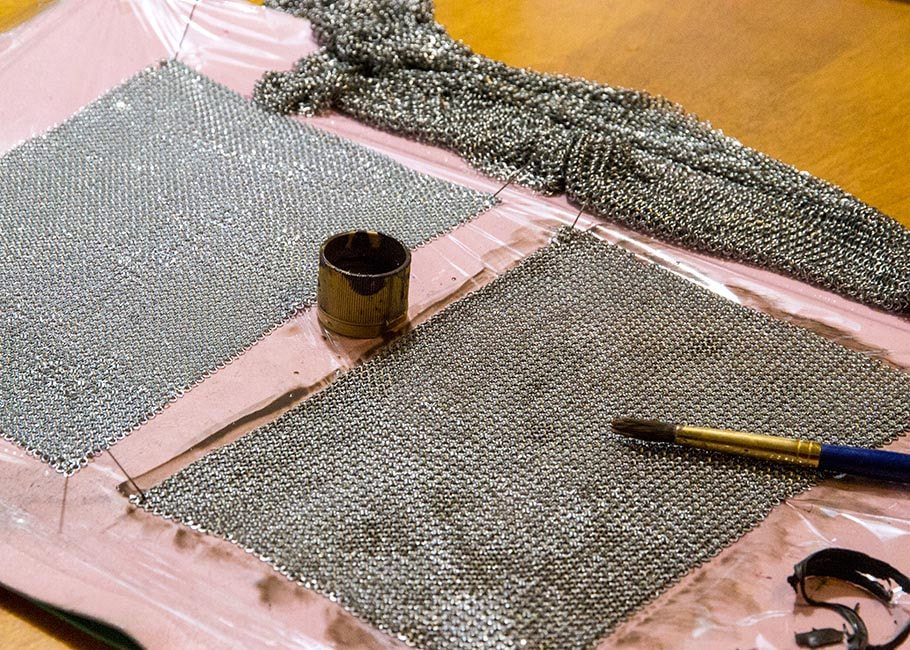
The aluminum chainmail was from fancy clutch purses I'd collected from Value Village over the years. I've found it in several different colours and sizes. But the 'silver' aluminum was too 'silver' compared to the stainless steel chainmail, so I decided to stain it some with diluted brown paint.
Then the colour matched much better...
I wet his surcoat and crunched up the lower part so it would dry crinkled, looking more like it was draping in proper scale. While I was at it, I also roughed up and stained the bottom edges with 'dirt-coloured' paint. After all I needed him to look like he'd been wearing his surcoat for a while out in the field, and not like he'd just gotten it brand new from the castle tailor.
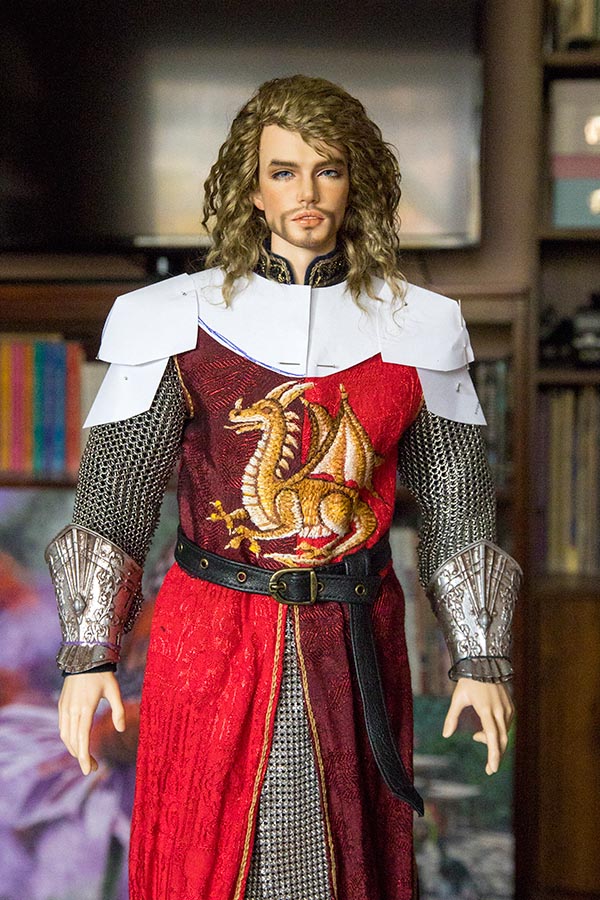
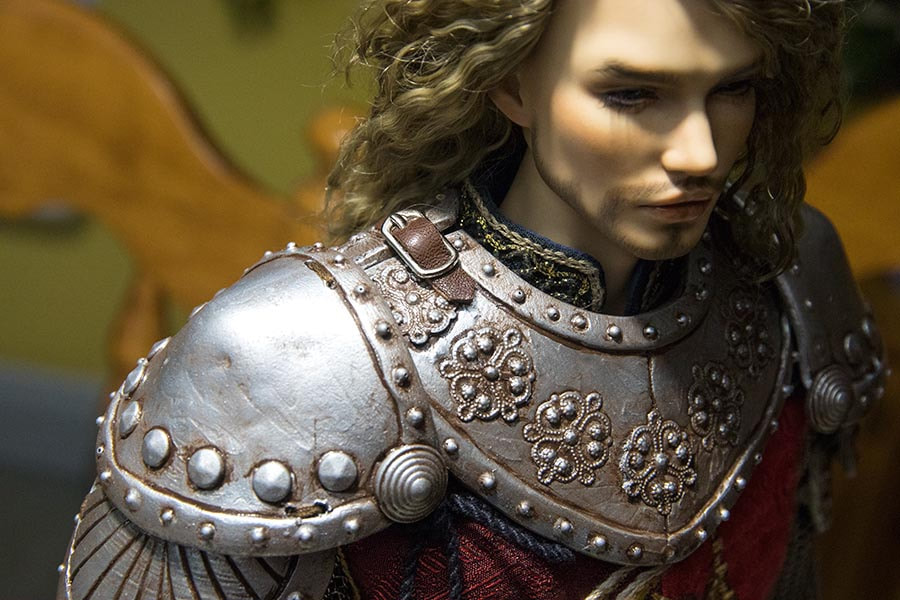
With his chainmail and surcoat finished, the next thing he needed was his armour. I drew up some paper patterns....
Making Armour
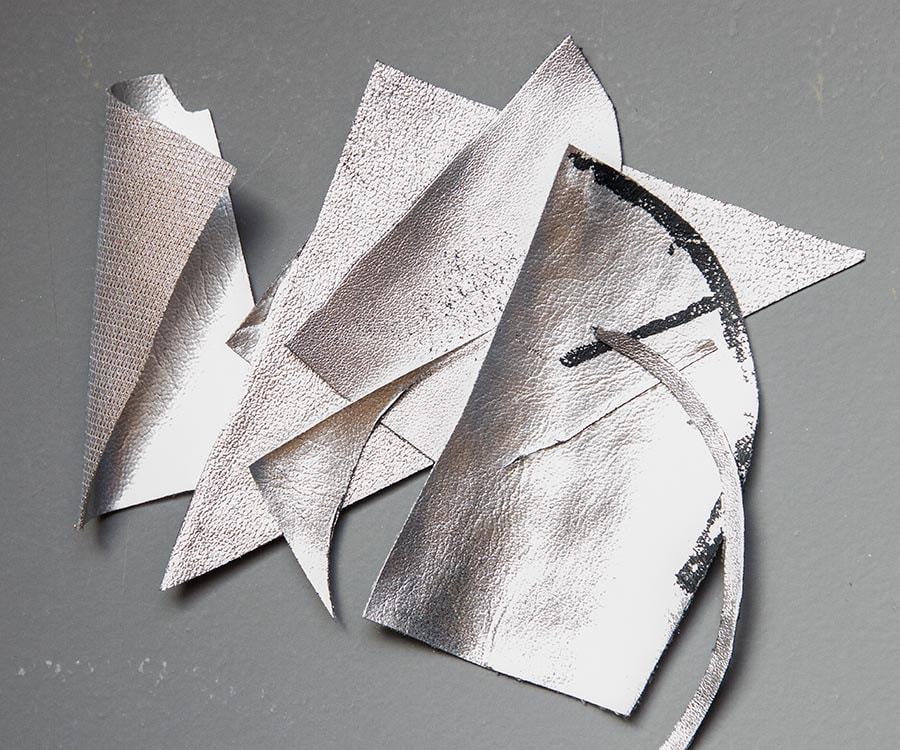
After drawing up some armour patterns in paper, I needed to figure out how to actually make them. I don't work with metal, and am not the biggest fan of working with Apoxie, so thought I'd experiment with leather. I remembered from my old doll-making days that silver, lacquer based, spray paint didn't work very well on either vinyl or real leather, but couldn't remember which one. So I sprayed a couple of samples. It definitely worked better on the vinyl. So I tried cutting and gluing some bits, but it didn't have the right look I was after, plus the pieces just peeled right off,
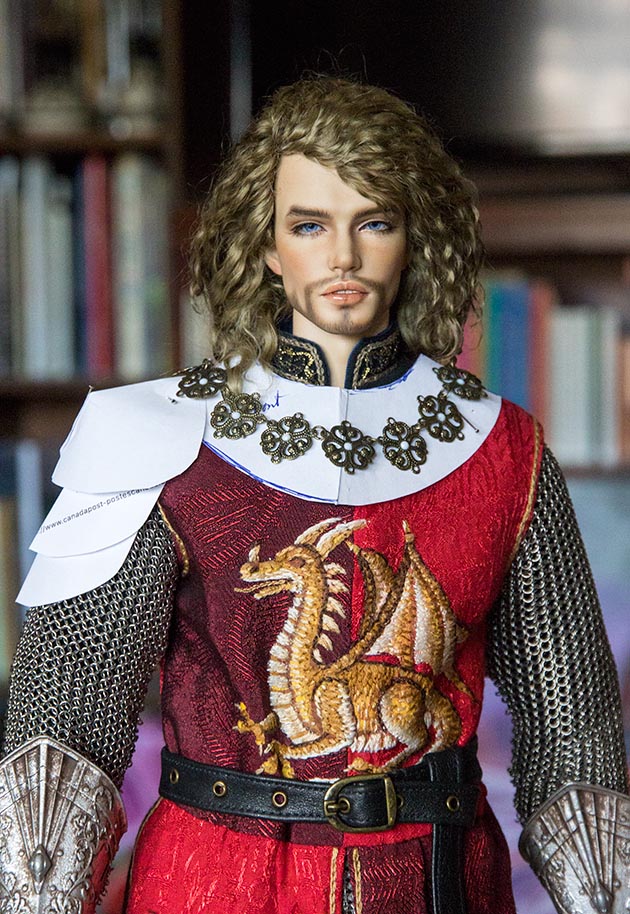
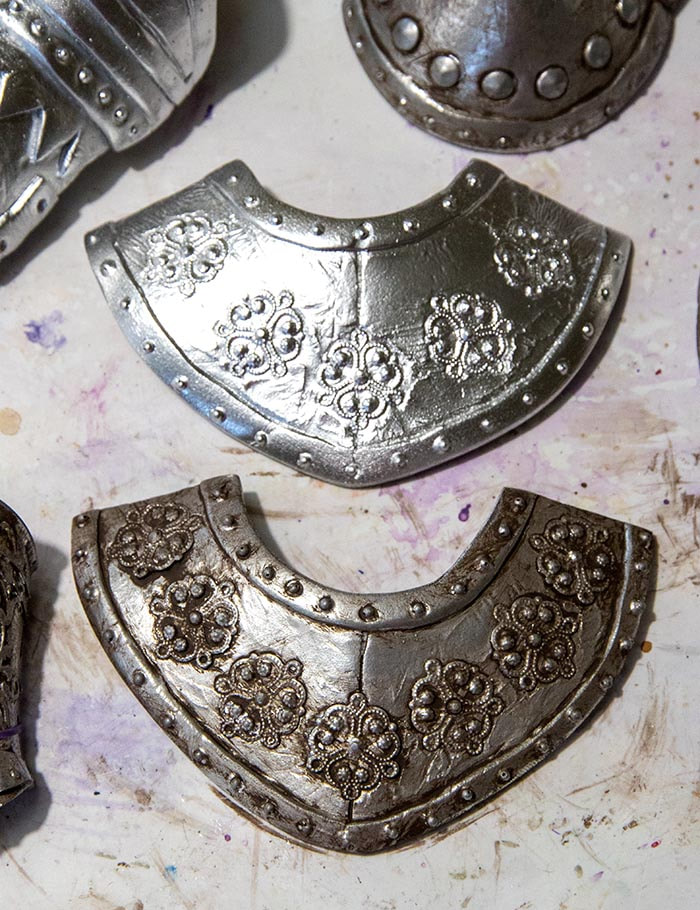
Which meant going back to sculpting with Apoxie. I needed the armour to look somewhat decorative so it would go with the highly detailed gloves and bracers from SartoriaJ. So I went looking through my stash of metal studs and filagree. I came across the leftovers from Dominic's chain, and there would be enough, so tried his chain on Matias to see how it might look...
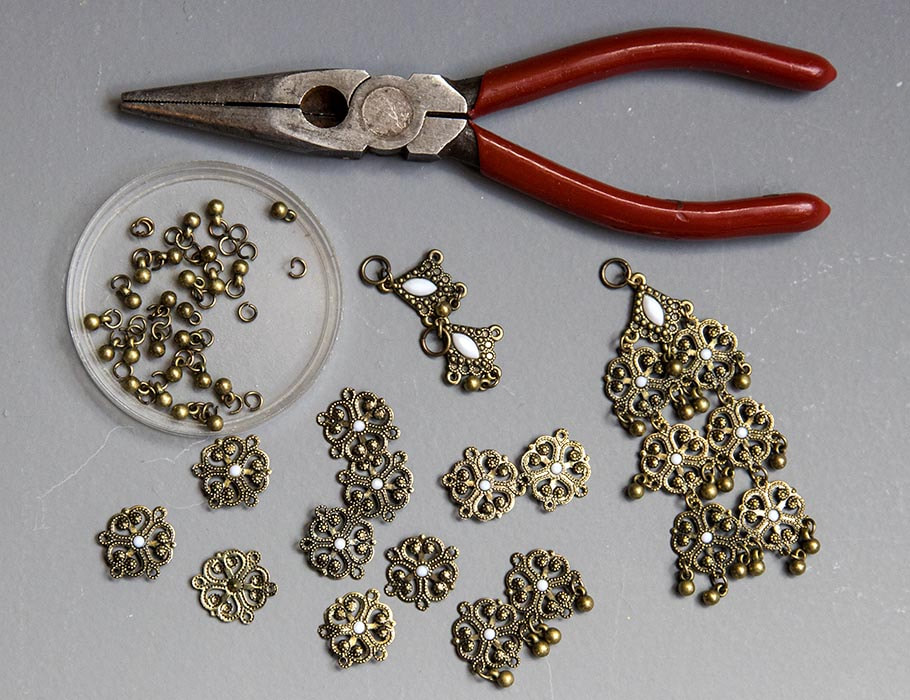
Dominic's chain was fashioned from pieces of some Indian jewelry which I found at Value Village years ago. So I proceeded to separate the remaining medallions...
Before starting to sculpt all the armour, I cut all the pattern pieces out of card stock. The card stock would serve as a base for the Apoxie, keeping it smooth and sturdy while it cured, and then it would remain permanently on the underside of the armour.
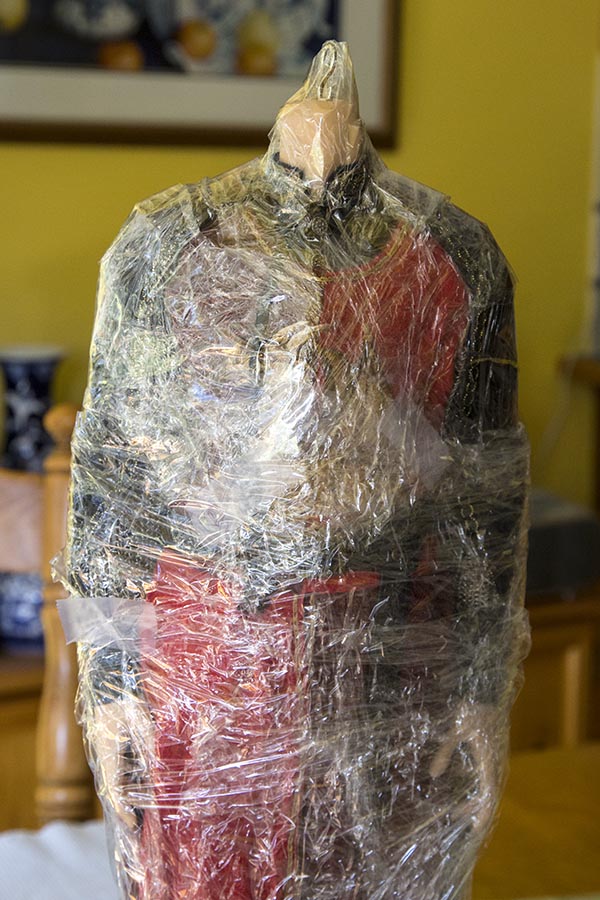
Then I removed Matias' head and put it somewhere safe out of the way. I definitely didn't want to risk getting any Apoxie on his face. Then I put on his cloak, and wrapped his entire dressed body in plastic wrap..
Then I removed Matias' head and put it somewhere safe out of the way. I definitely didn't want to risk getting any Apoxie on his face. Then I put on his cloak, and wrapped his entire dressed body in plastic wrap..
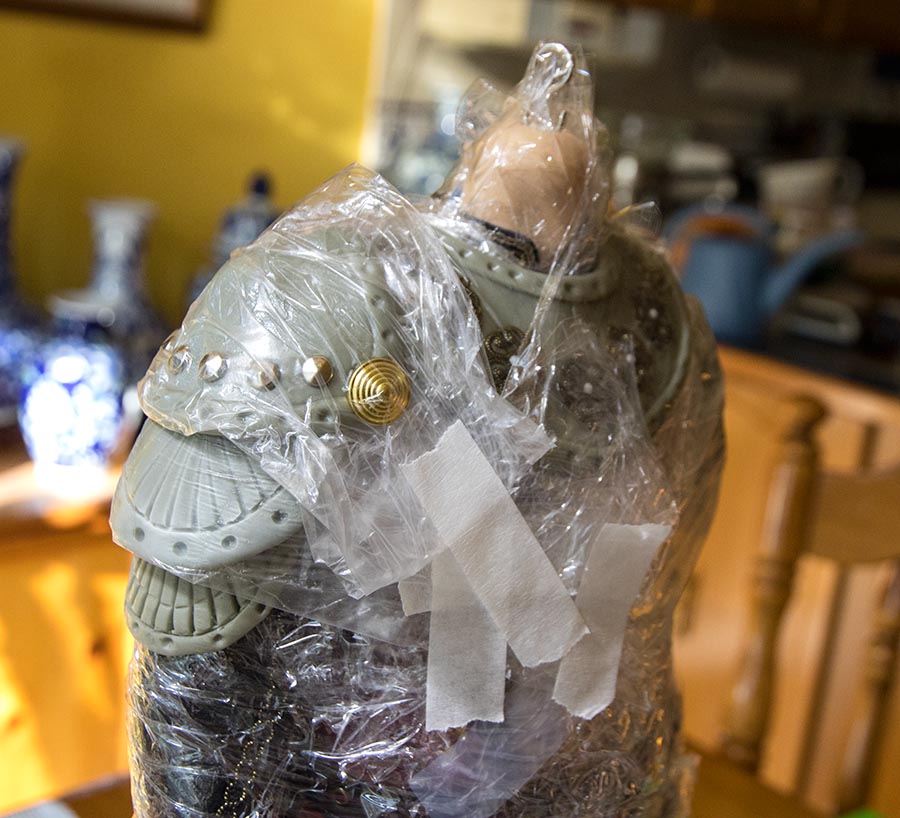
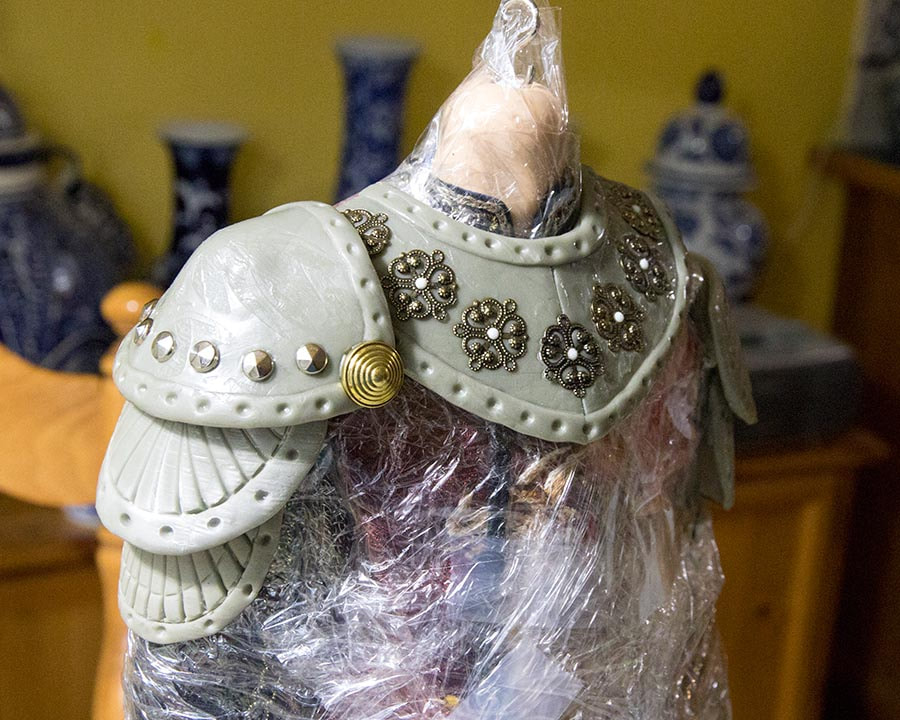
On the first day I mixed up some Apoxie and made the two lower sections of the armour on his upper arms. I wanted the Apoxie to be as thin as possible, and tried running it through my pasta machine, but it was too sticky, so that didn't work. I ended up having to layer the Apoxie between plastic wrap and flatten it with a wooden roller. After cutting out and shaping the armour pieces, I used plastic wrap and tape to secure the sections onto the body to mold them to shape, and left them that way for 24 hours until they cured. Then on the second day I made the next section of his upper arm armour, and the front section around his neck. I hadn't mixed enough Apoxie to make the back section, so made one of the shoulder sections instead. All the new pieces were covered with plastic wrap and held in place with tape...
The following morning, after removing all the plastic wrap....
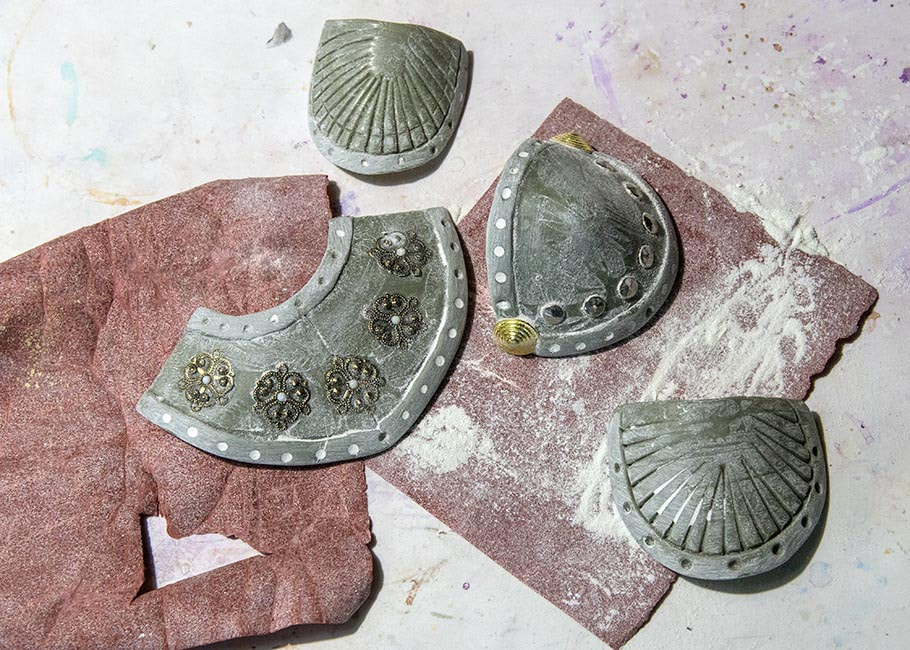
Once the last few pieces were sculpted, and cured, they all needed to be sanded so everything would be smooth and flat. Then I will glue tiny bead 'rivets' into all the dents along the edges, and it will finally get sprayed silver, and 'aged' with brown paint.
Apoxie Armour
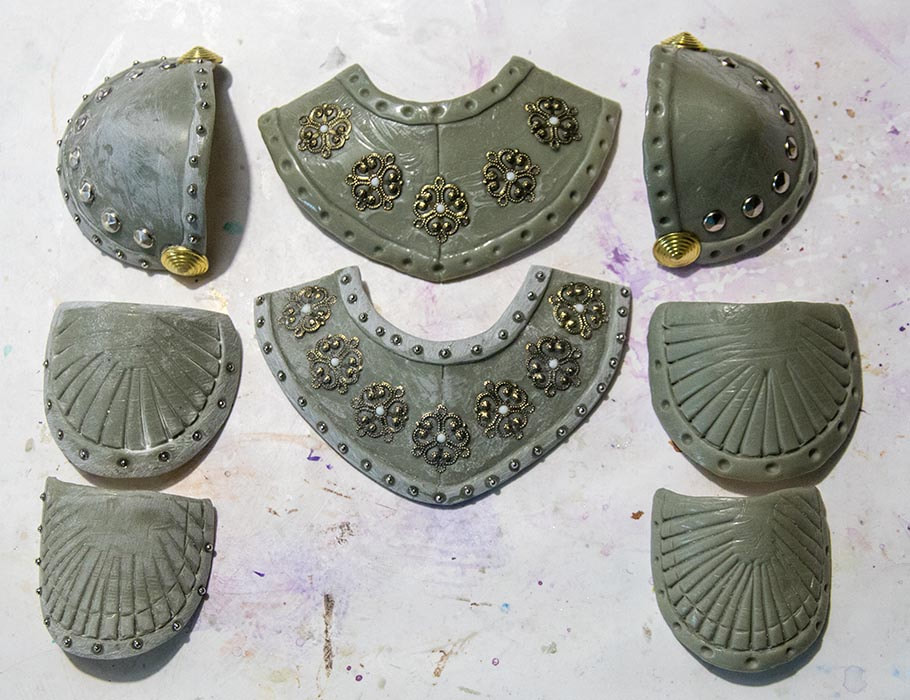
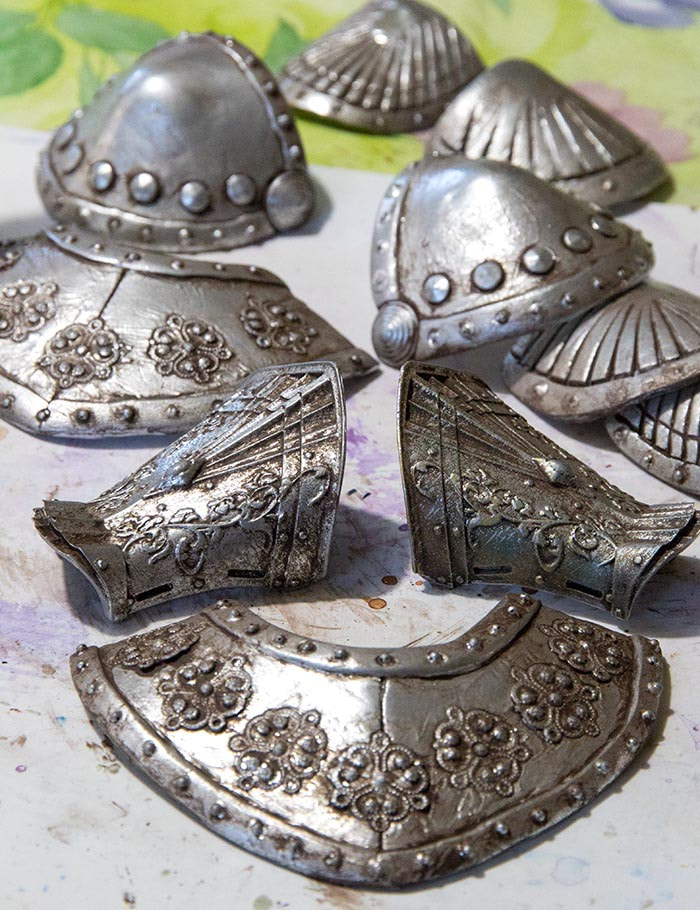
All the pieces of armour after they were cured and the plastic wrap removed. Unfortunately the plastic wrap that was used to hold the pieces down and mold them to shape, left a texture on everything.
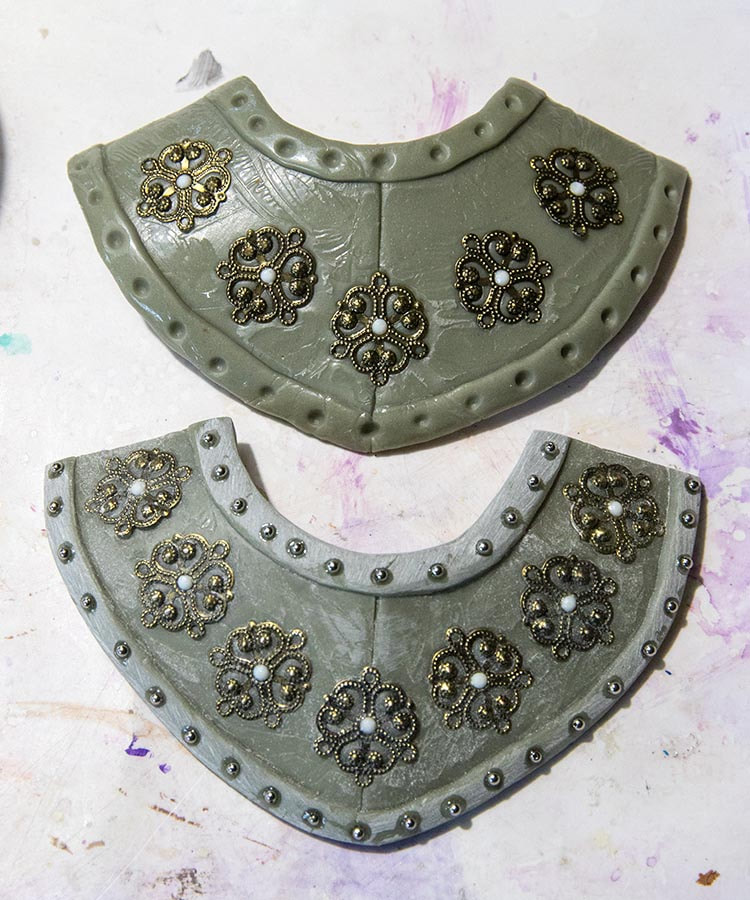
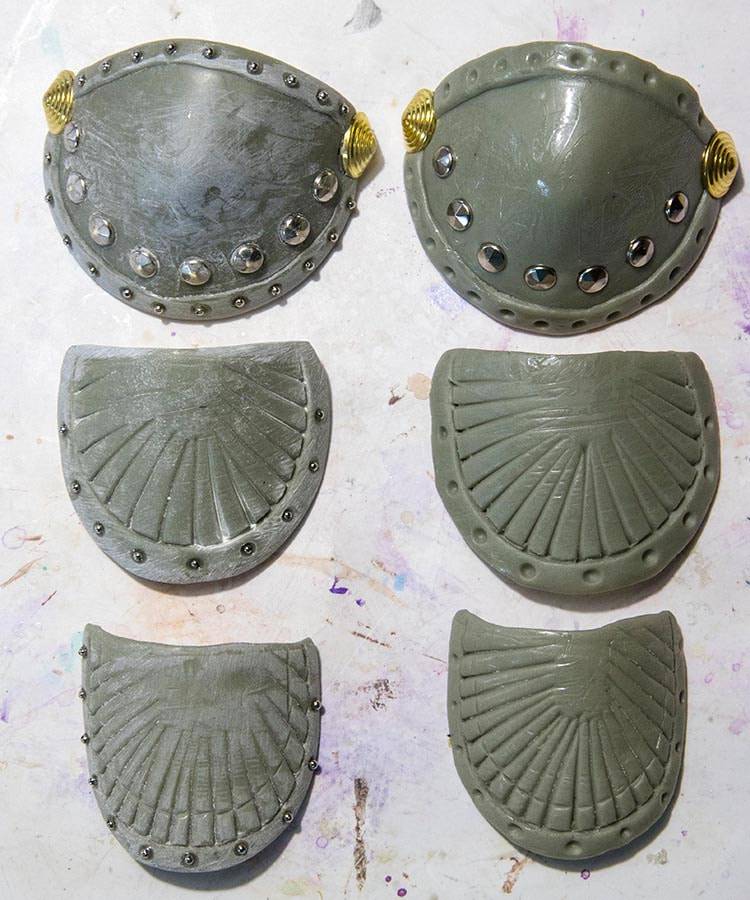
I did my best to sand it down, but most of the texture still remained. The sanding did smooth out the edges and make them more even. Then after sanding everything I used 5 minute Epoxy to glue tiny silver beads into all the dents around the edges...
The front and back pieces, showing the difference after sanding and gluing in the beads...
The arm pieces...
Leg Armour
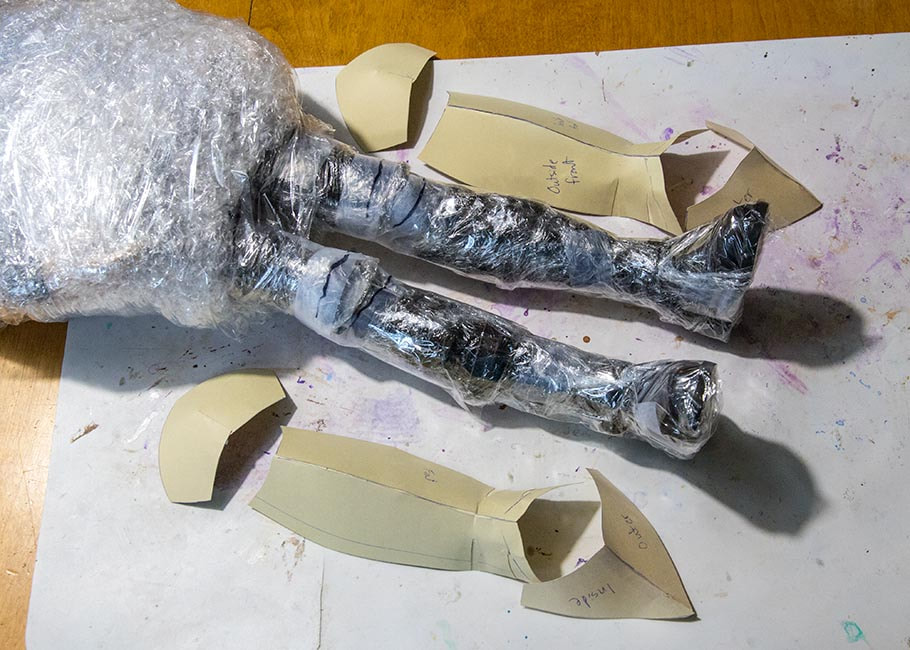
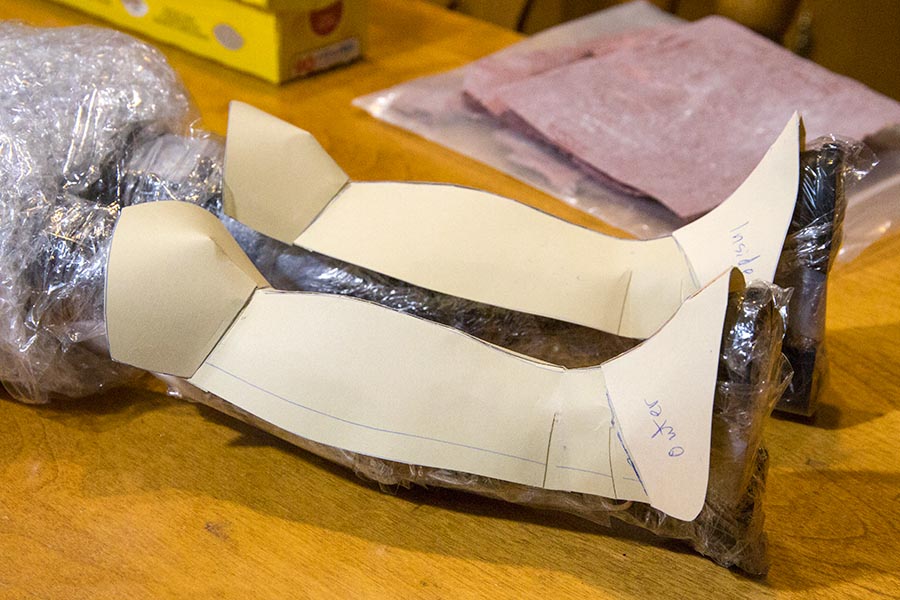
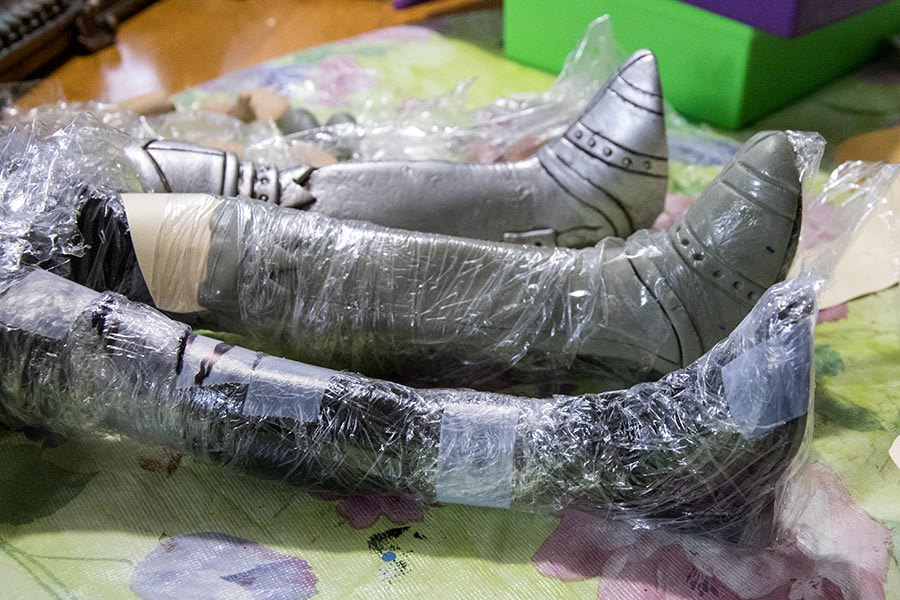
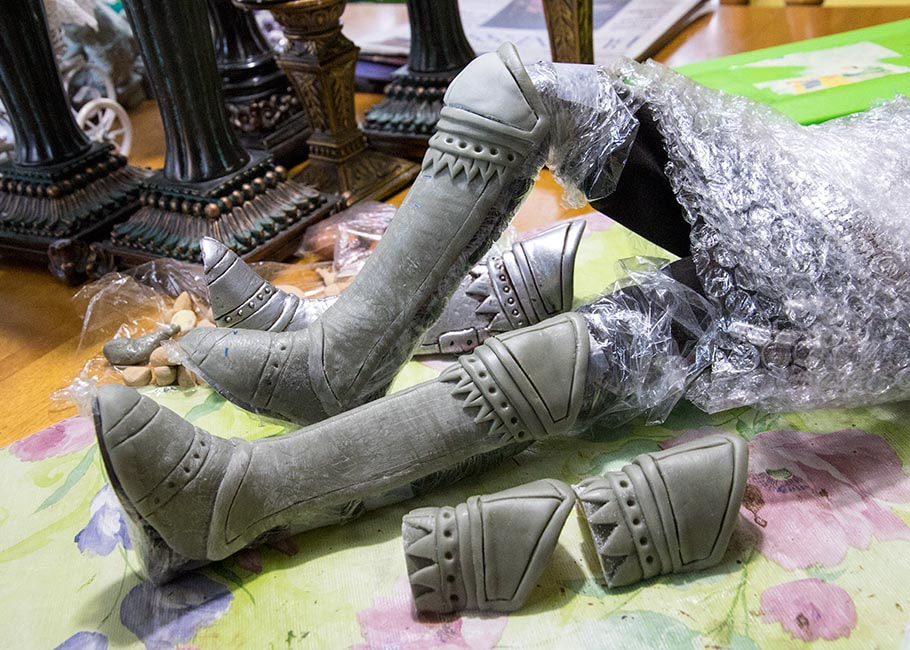
I wasn't sure if armour over his boots and lower legs would look good, or end up being too bulky, but since I was sculpting armour already, I figured that I might as well give it a try. After all, I definitely wouldn't want to make them later. So I started by wrapping Matias' body and legs with plastic wrap to protect everything. Then I designed patterns out of paper towels, which I then used to make the pieces out of card-stock....
I made sure to label every piece....
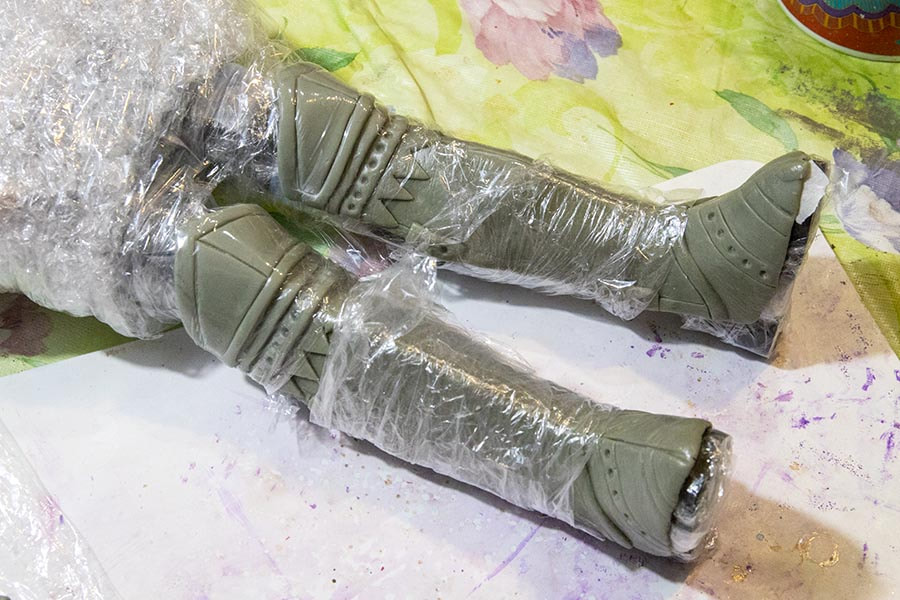
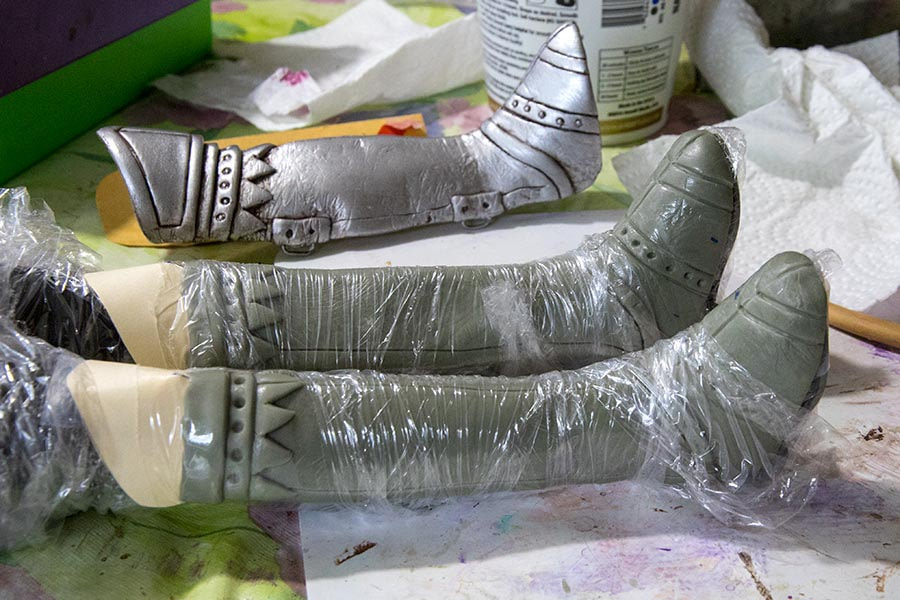
I sculpted the leg armour in sections, over two days. First the foot, then the upper legs, and finally the knees. At each step I wrapped everything tightly with plastic wrap to mold the pieces to shape around his legs...
Painting the Armour
I had used the last of my Chrome spray paint on the SartoriaJ gloves and bracers, so went looking for a new can. But no one carried it anymore. So I ended up buying a can of silver spray paint. But the silver didn't match the colour of the chrome gloves. So we went looking again, and found some Chrome Bumper Spray Paint for cars, at Canadian Tire.
The spray paint is toxic, so thankfully it was a relatively 'warm' week, so the parts could be sprayed outside. Then I brought them inside and put them in the powder room with the fan on and door closed, since it's the only room in the house with a fan exhaust to outside.
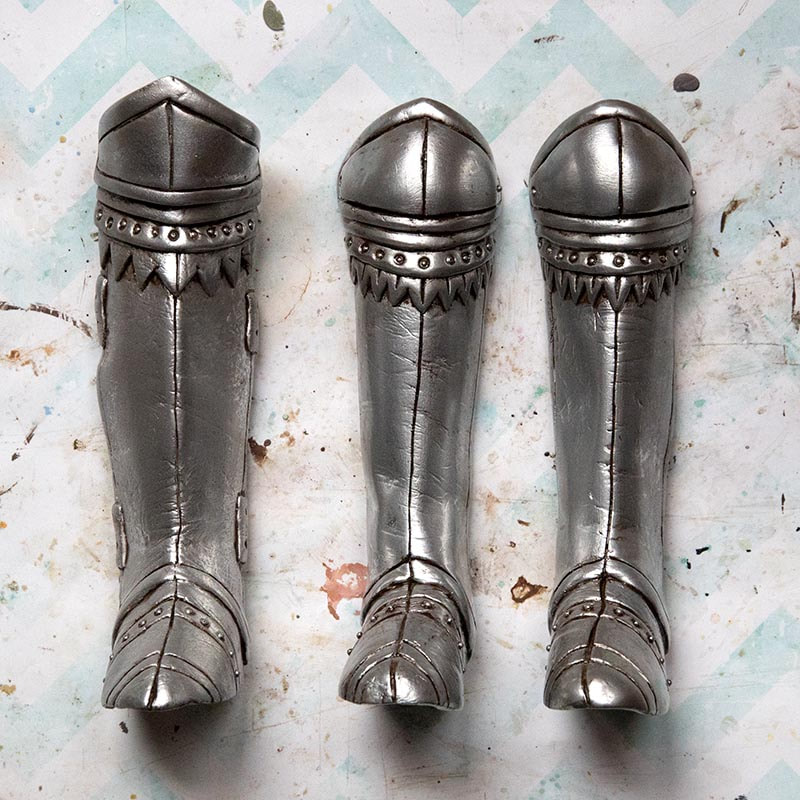
Once the paint was completely dry, I 'aged' the parts with dark brown paint. I brushed dark brown folk art paint over the entire surface, then wiped it off immediately with a paper towel. The paint gives the armour an 'aged' tarnished look, and remains in all the cracks and crevices, highlighting all the details.
Before and after....
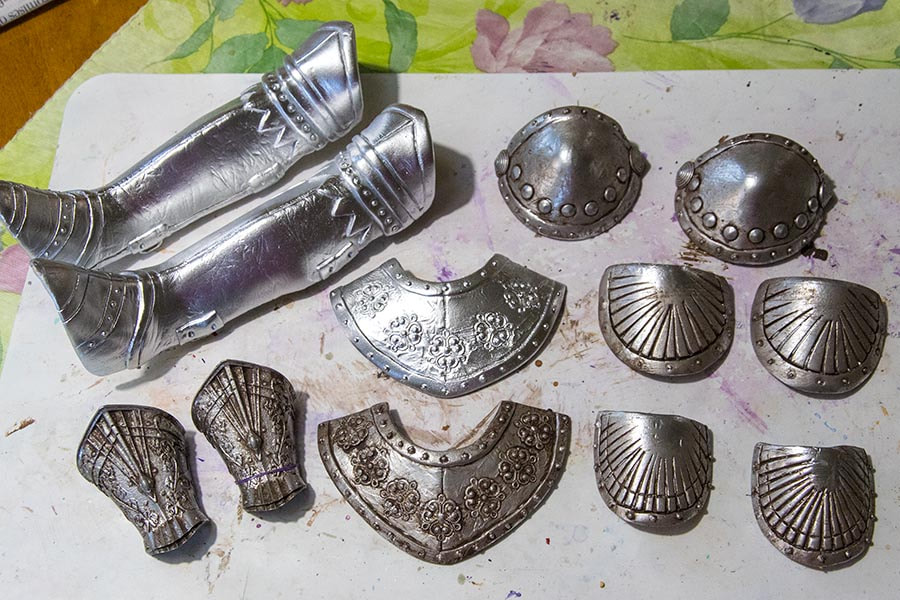
All the armour sprayed, and some stained. The colour of the stained, new, chrome, spray paint matched the gloves perfectly.
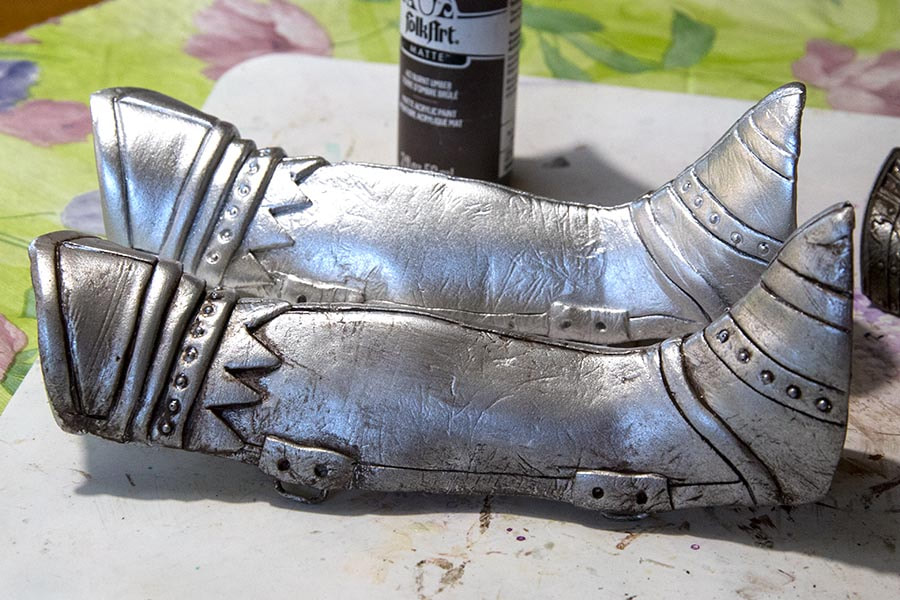
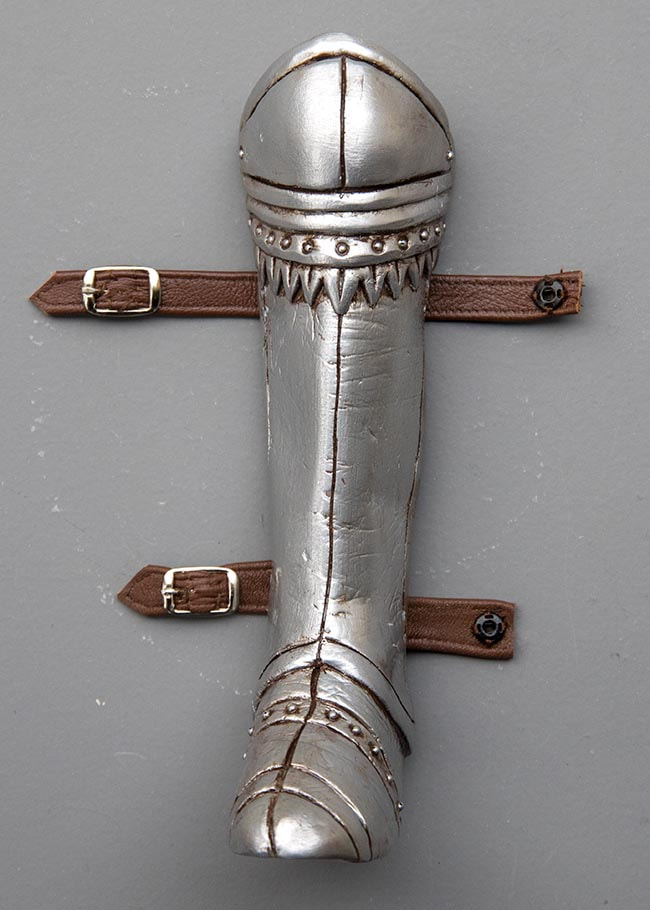
Leg armour before and after...
Finishing the Armour
All the armour pieces were finished, and ready to put together...
I had struggled with trying to figure out the best way to put the armour together, and took inspiration from my DreamHigh Studio Otto, whose armour made up of lots of separate pieces all attached to each other with thin elastic....
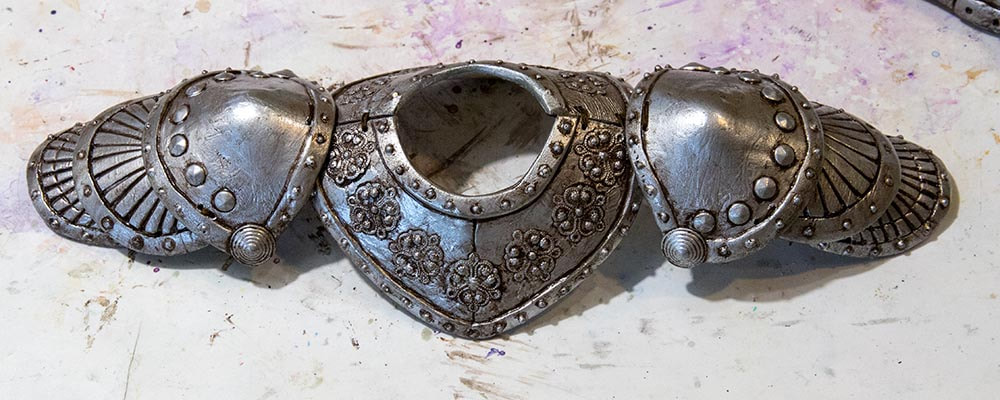
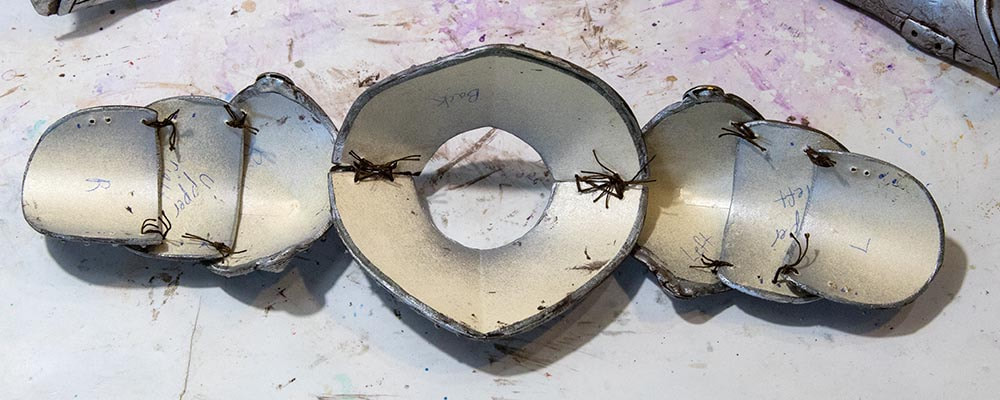
I wasn't going to use elastic, but it was a good idea to attach the armour pieces to each other. I decided to attach the front and back plates to each other permanently, which meant I'd have to take Matias' head off in order to put the armour on, or take it off. But that was easy enough. I measured where one armour plate would go over another, and holes were drilled in the brown 'channel's along the edges of each piece. Then I used strong brown thread to stitch everything together....
When I turned it over to take a photo of the underside, I realized that I'd sewn the shoulder armour on the wrong sides of the neck pieces. So I had to cut the threads and switch the two sides. I also left long threads when I made the knots, as the threads from the first few knots were cut too short and undid themselves. So, I left longer threads, and then glued them down.
*Notice the sets of two drill holes on both end plates of armour. Those are for sewing leather straps, that will go under Matias' arms and hold the armour securely in place.
*Notice the sets of two drill holes on both end plates of armour. Those are for sewing leather straps, that will go under Matias' arms and hold the armour securely in place.
Finishing
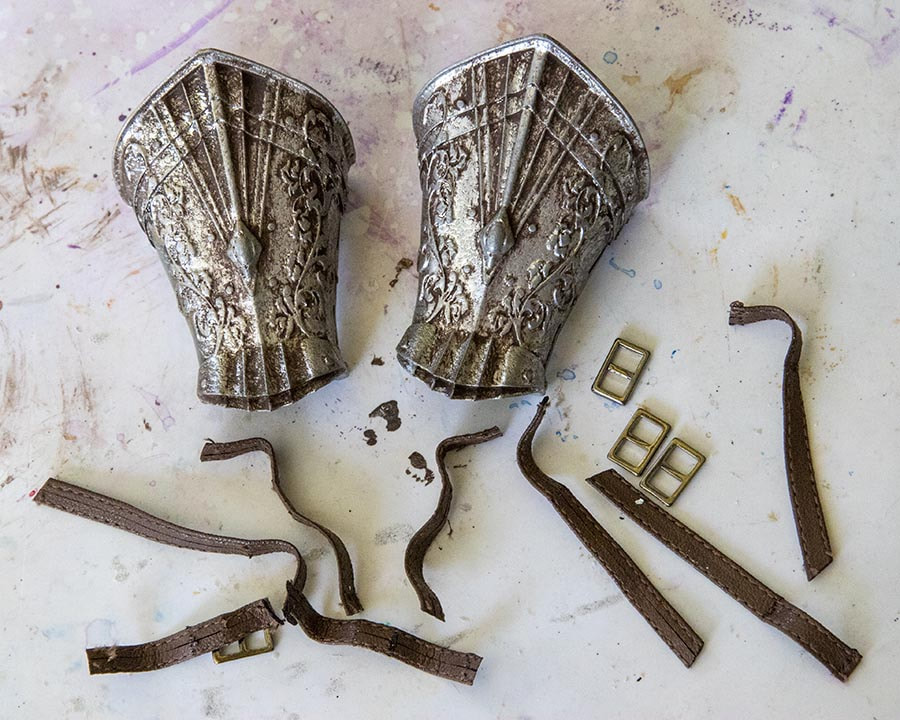
After all the armour was done, and Matias was wearing it, the final job still left to do was to reattach the leather straps to the bracers. I had removed them before spraying the bracers, so they wouldn't get any spray paint on them. But they did have to go back on.
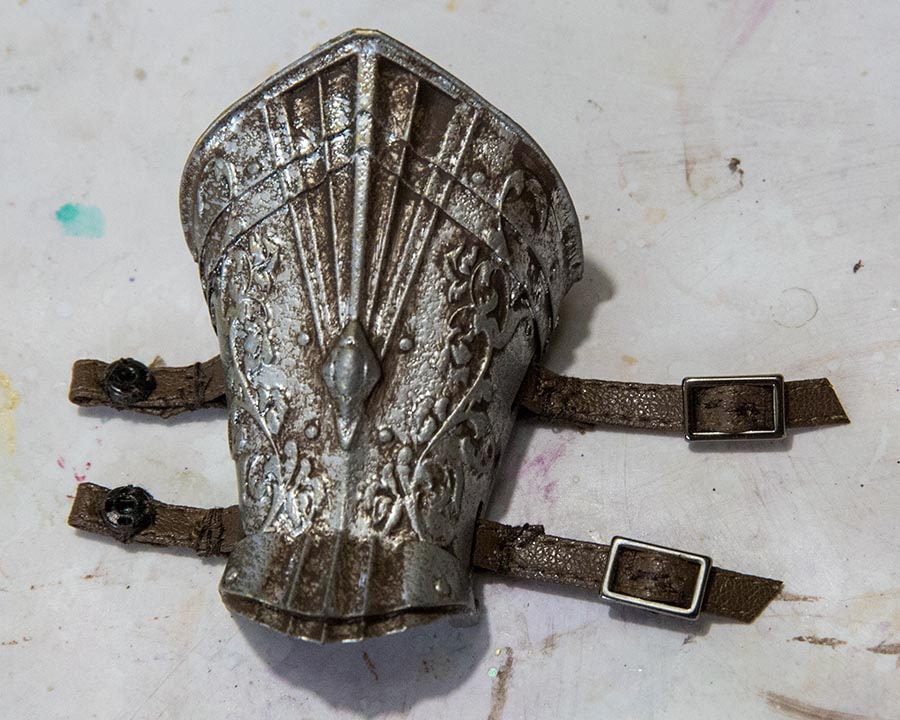
The shorter of the leather straps originally held a buckle, and the longer strap would be threaded through it. But I found that it was a bit of a challenge to thread the leather through the buckles, and they weren't very secure, because there was nothing holding them in place and the two parts would just slide apart. So I decided to rework the straps so they'd have tiny black snaps instead.
I moved the buckles to the longer straps, and stitched the snap directly underneath. Then I stitched the other part of the snap onto the shorter strap where the buckle originally was.
I moved the buckles to the longer straps, and stitched the snap directly underneath. Then I stitched the other part of the snap onto the shorter strap where the buckle originally was.
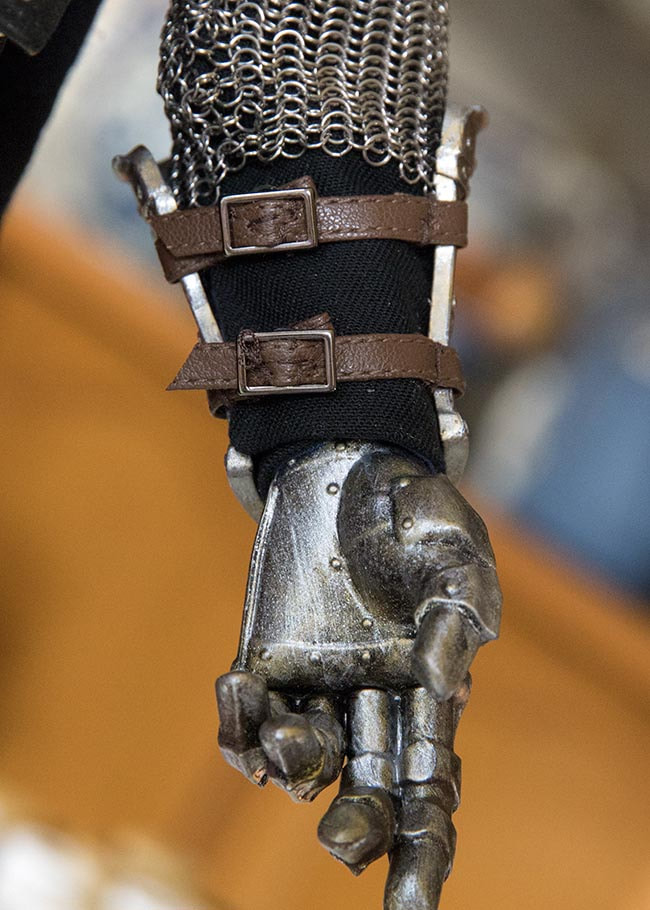
When I put the bracers on Matias' arm, they looked pretty much like they originally had (except for the stitches showing) but they were infinitely easier to do up.
The last thing the armour still needed was the buckles at the neck. The front and back chest pieces were permanently attached to each other, but I still wanted to give the suggestion that they were separate and buckled together.
First Photos
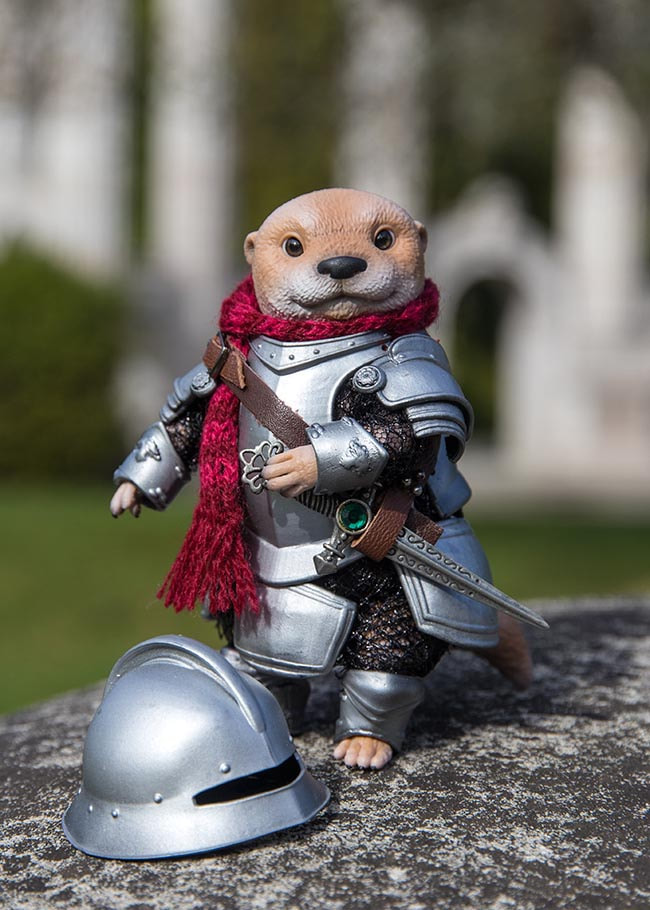
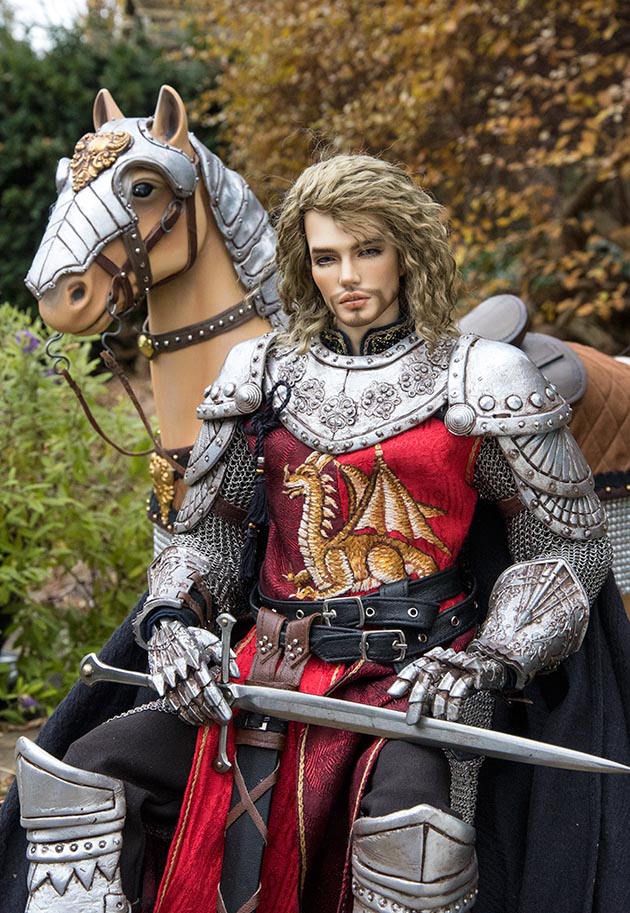
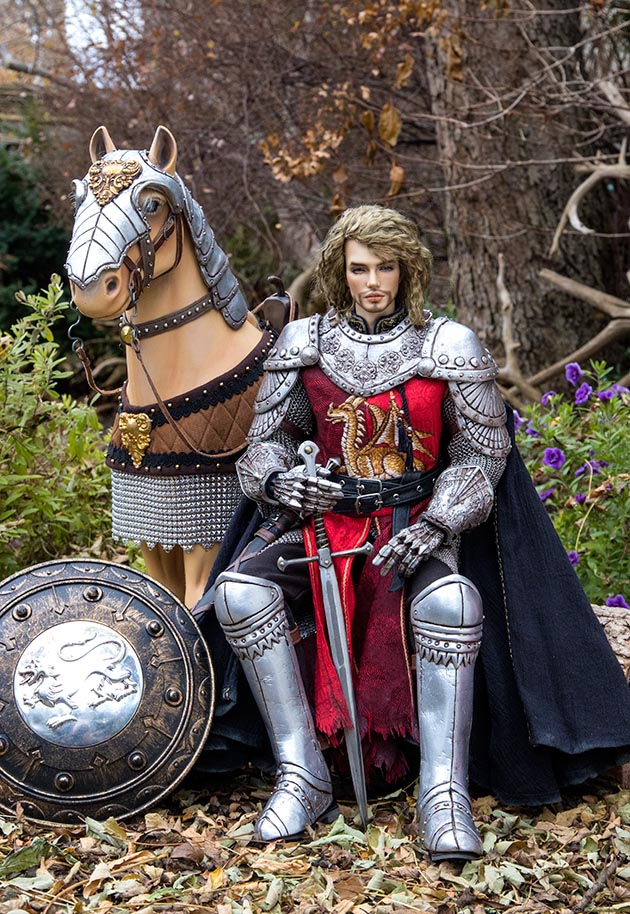
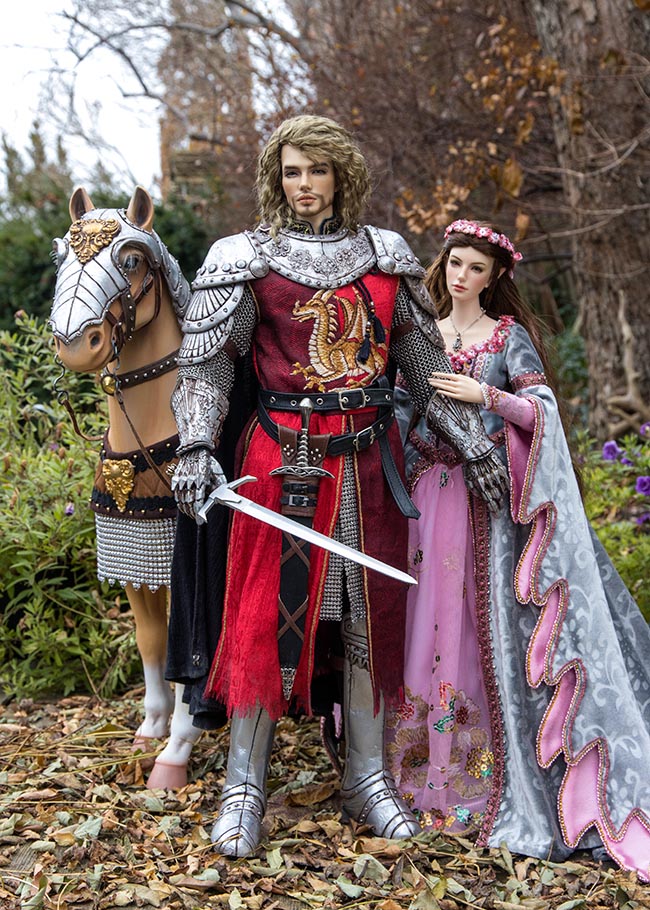
It was freezing cold the day I finally finished the straps on the armour, but I wanted to take some photos, so out we went....
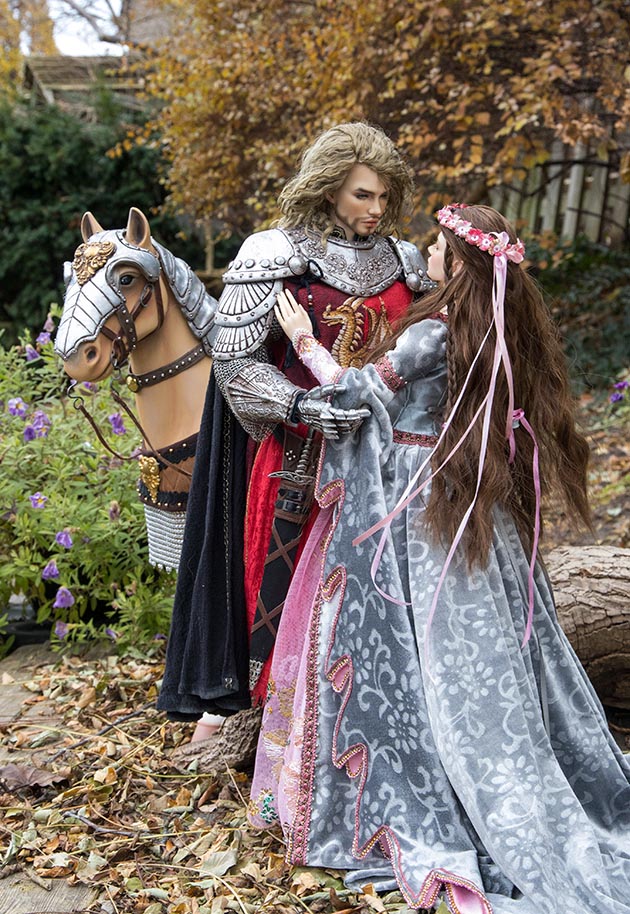
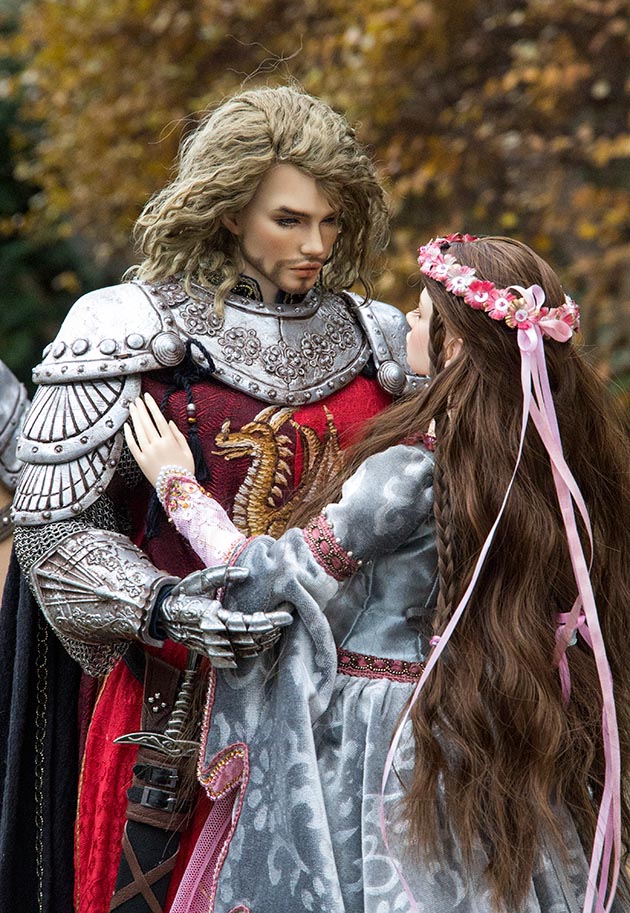
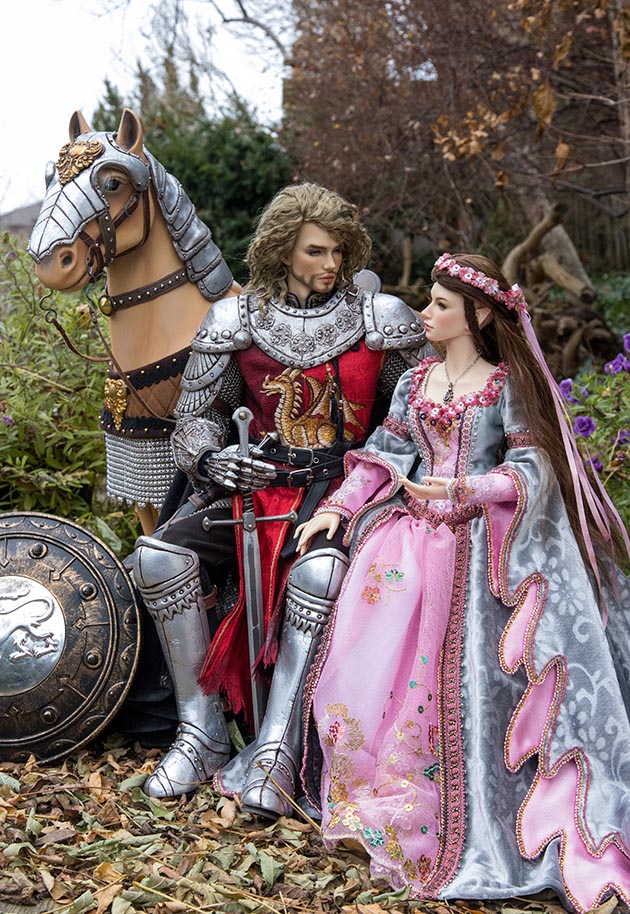
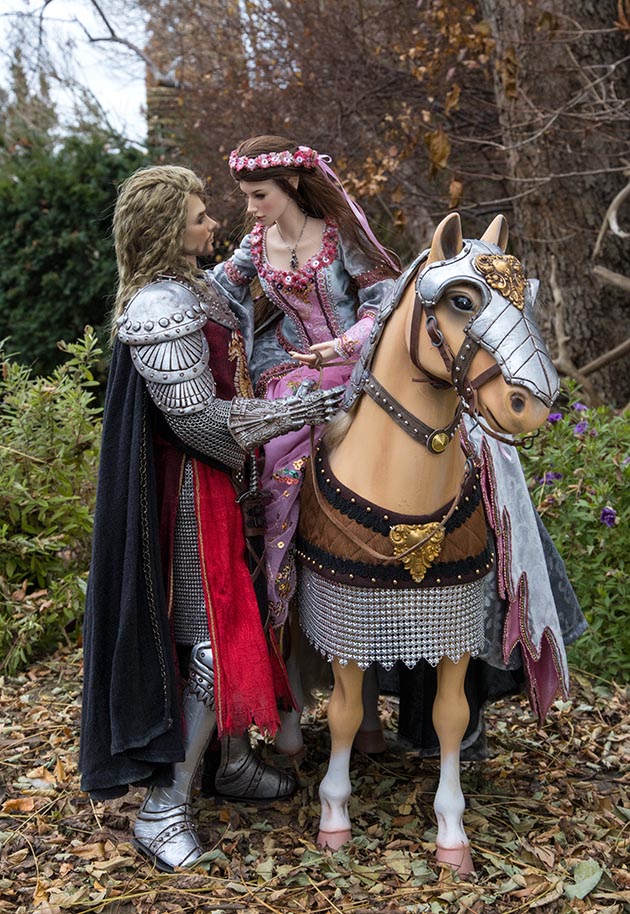
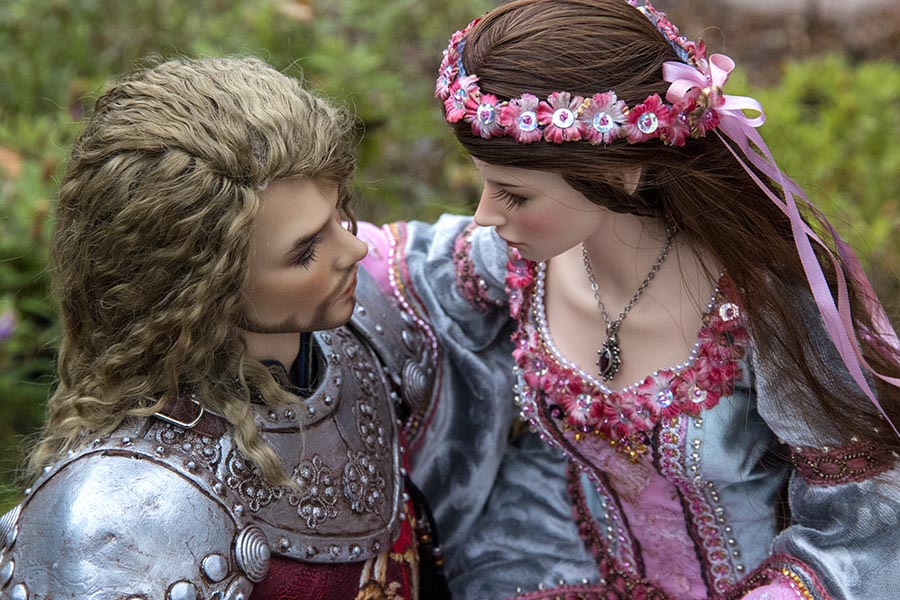
Then Agnes, his lady love, joined him....
Leg Armour
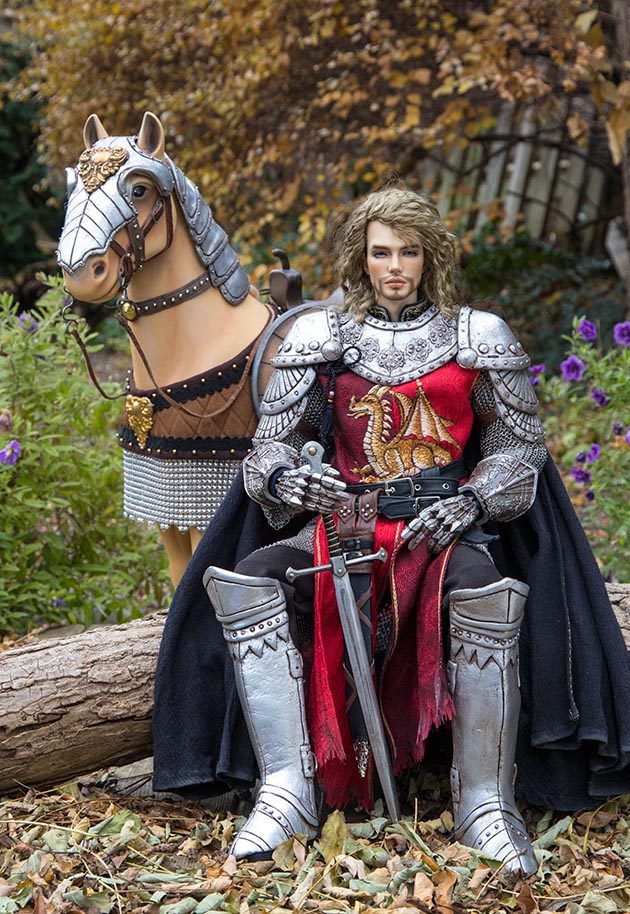
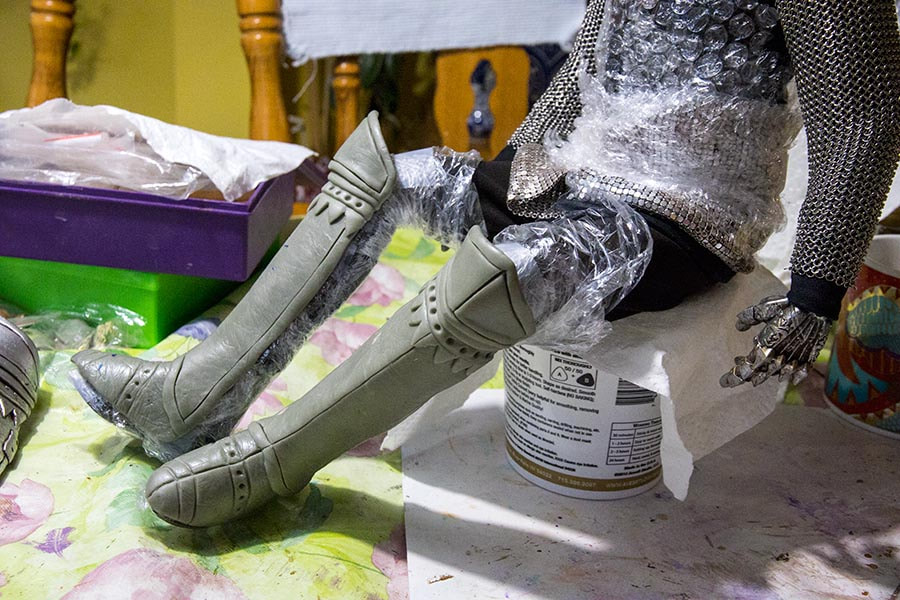
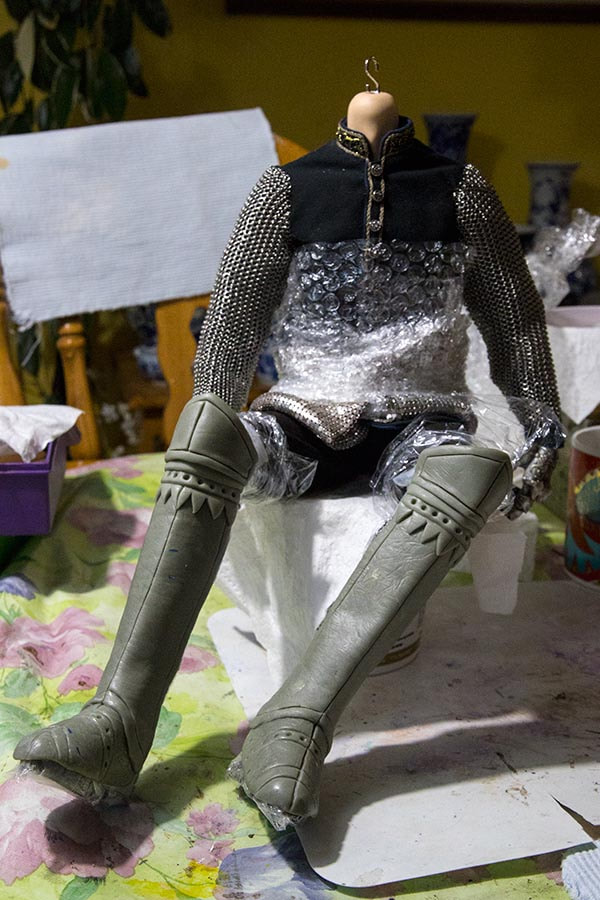
I also took some photos of him with the leg armour. It would show best if he was seated...
I found the leg armour looked way too 'chunky', although it was more acceptable in close ups with just the tops showing...
So, I got an idea on how to make narrower, more in scale leg armour, which means I need to start all over with it.
Sigh.... And I thought I was finished. But it bugs me, so I have to do something about it.
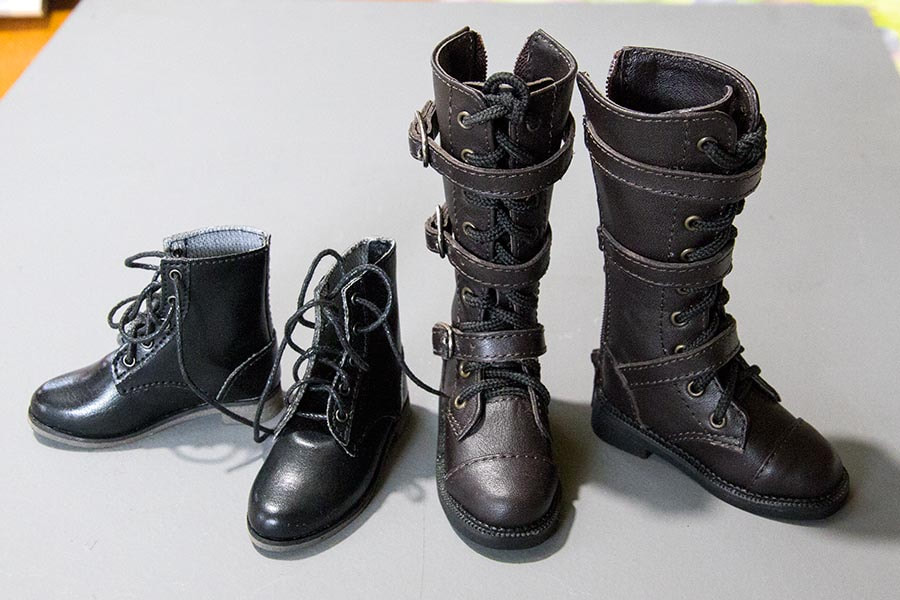
So, even though I really didn't feel like sculpting another pair, I knew I would never be happy leaving it as it was. The big problem was that I'd sculpted the armour over his boots, and they were already hefty boots to start with. I wondered if there could be a way to make narrower, better scale looking leg armour. Then I remembered I had two pairs of Peter Pevesie boots. They were a lot smaller and finer than his SartoriaJ boots.
Building armour over the much smaller black boots would result in armour roughly the same size proportionate to the bigger, brown boots. So I sewed Matias some long black socks to hold his pants tight to his legs, put the black boots on him, wrapped him back up in plastic wrap, and set about redesigning the armour boot pattern and making a pair out of card stock.
But that's as far as I got. We went for our Covid booster shots on November 24th, and the very next day I came down with Covid. Coincidence or what? They say you can't get Covid from the vaccine, and I had no idea where I might have picked it up. The next few days were rough, and I did nothing at all. Then just when I started to feel a little better, Jan came down with it as well.
Anyways, a few days later, once I started to feel like doing something again, I turned my attention back to Matias' armour. I started work sculpting the lower sections of the armour boot. I was hopeful that with the smaller boots and his pant legs wrapped tight, the new set would turn out much better.
Work was slow, and I didn't feel all that great, so it took two days just to get the bottom sections done....
The next day I finished them....
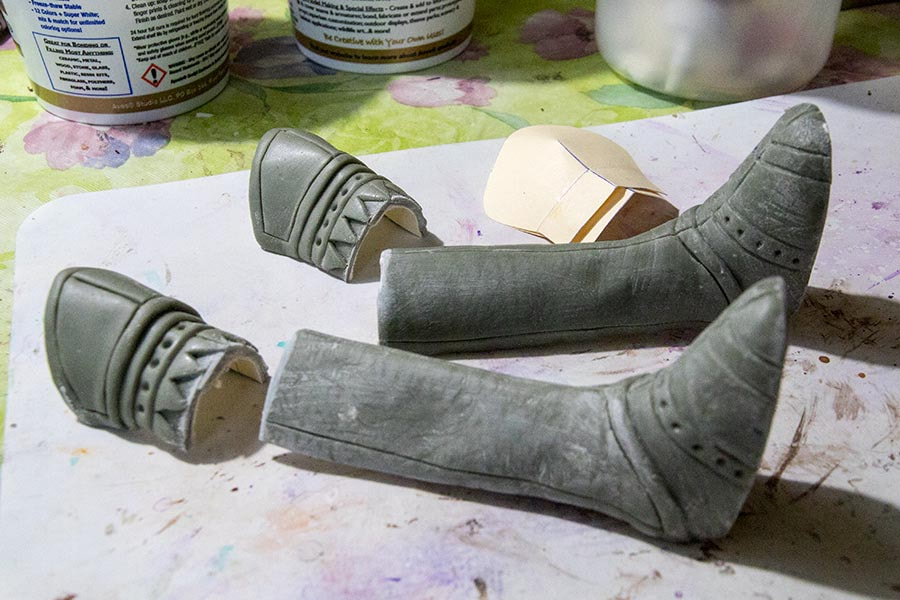
I was starting to think maybe I'd made them too long, and when I posed Matias into a sitting position after they'd cured, sure enough, I'd made them much too high. I don't know how that happened. I'd used the same patterns. I blame Covid brain!
But the lower parts were nice and slender, and the perfect size...
So I asked Jan to saw the tops off, and I'd remake them AGAIN.
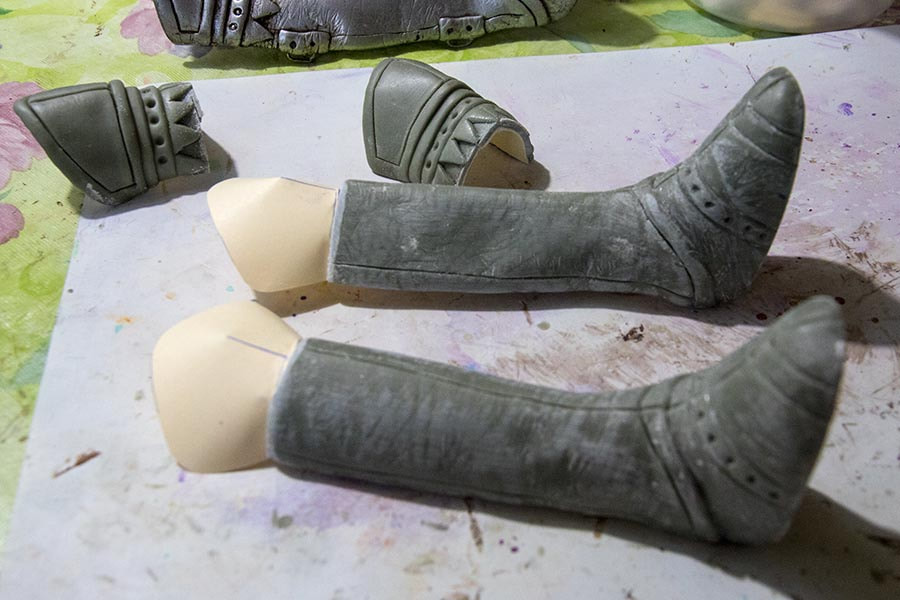
So I made new card stock sections and glued them in. The new tops would end up at least a centimetre shorter, and I hoped that the third time they'd be better.
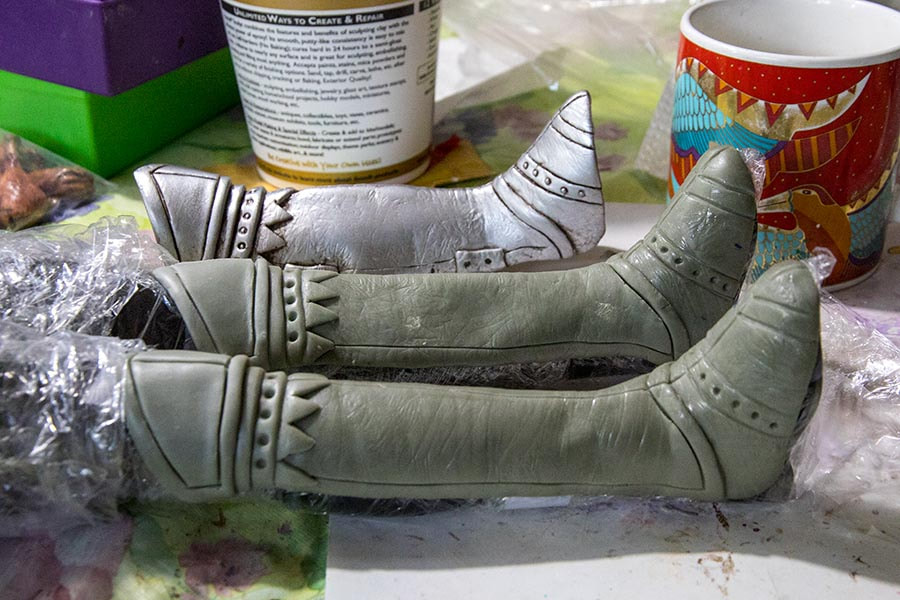
Yes! Finally leg armour was the right size! Although I didn't like the way the tops dented inwards, so added a bit more Apoxie to round them out. The right one was already done, and the left one still needed some rounding out.
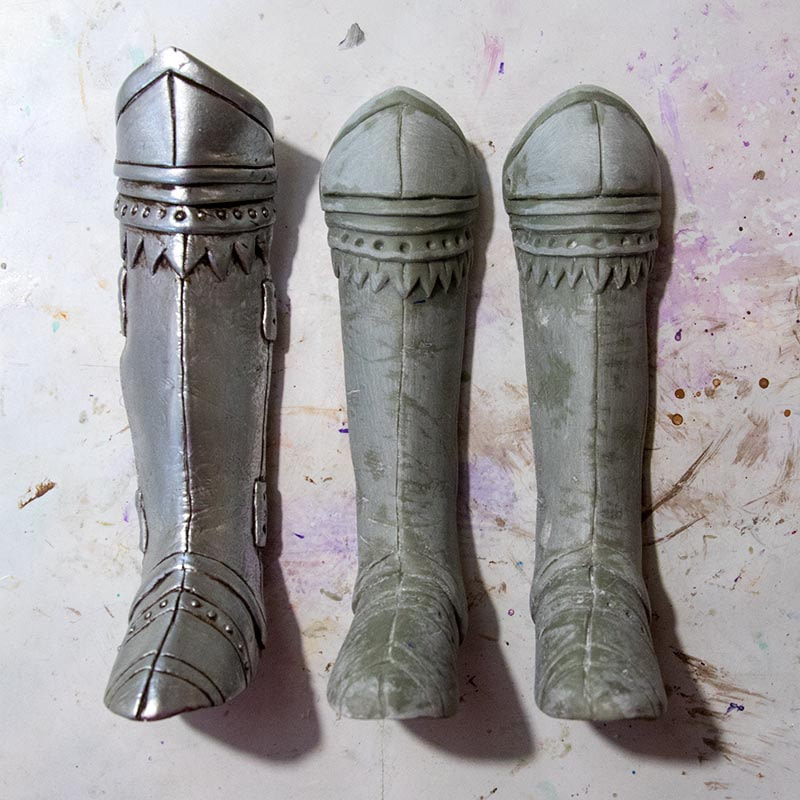
The new, sanded leg armour with one from the original pair. The new ones are a lot better shape. They are narrower, and with a much better shaped 'boot'. I wasn't sure about the more rounded tops on the new pair, thinking I preferred the flatter more pointed version on the very first pair, but I really wasn't going to redo them a fourth time.
After sanding, I glued in all the tiny bead 'rivets'. You may wonder why I glue the beads in afterwards, instead of inserting them into the uncured Apoxie. After all it would seem a lot easier. But I need to be able to sand the Apoxie. It's not the easiest to get nice flat edges, so I rely on doing the final shaping by sanding after the Apoxie has cured, and the beads would stick out of the surface, and prevent smooth sanding. So they have to get glued in afterwards.
Now I need to make leather straps to secure the armour around Matias' legs. And then wait for a decent weather day to take some photos. Hopely, we'd be recovered from Covid by then.
Painting the 'Leftovers'
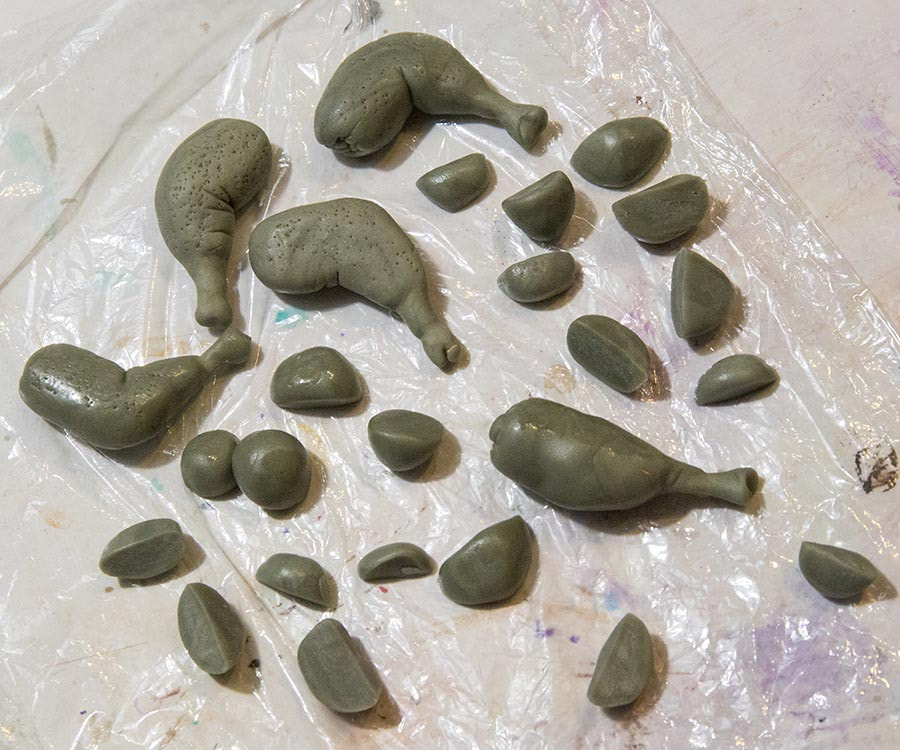
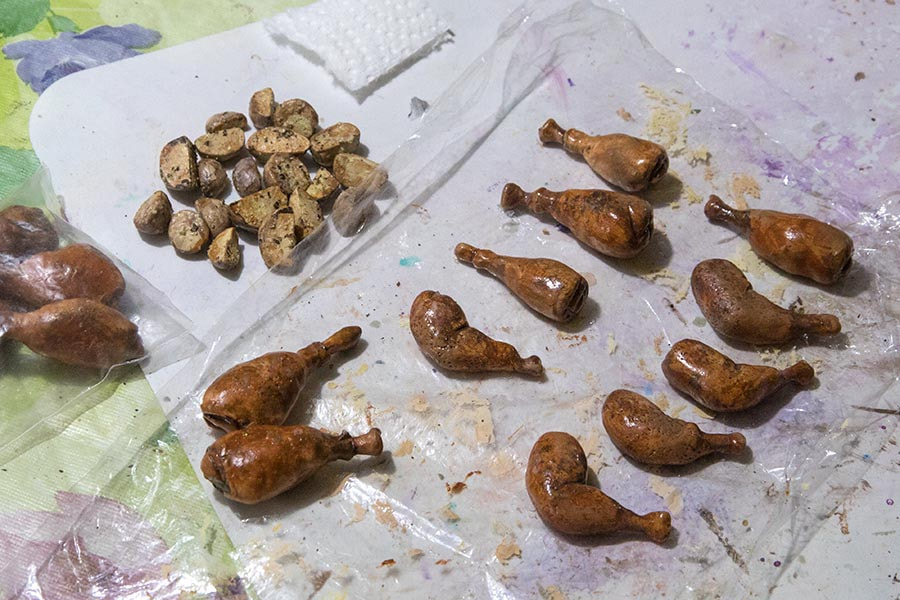
Since it's impossible to mix up just the exact amount of Apoxie one needs, I decided not to waste it, but to make the leftovers into 'food' items. So every time I mixed up some Apoxie, there were always some leftovers, which I then shaped into chicken or mutton legs, and roast potatoes. They all still needed to be painted.
I find it's always better to have an actual item to match colours to, instead of guessing. Real food often is quite a different colour than what you assume it is.
So, when I first started on the armour, and started making 'roast potatoes' out of the leftover Apoxie, I had saved two pieces of actual roast potato from dinner one night, to colour match. The real potatoes had dried and shrivelled up since then, but they had still stayed their original colour.
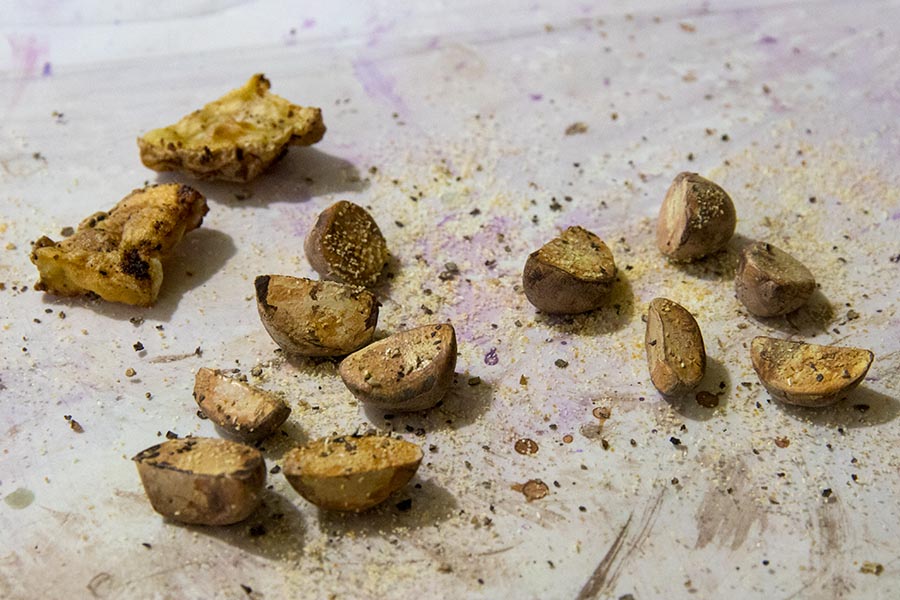
So I painted the Apoxie potatoes to match. It's always a challenge to paint a 3-D object, since you can only paint one side at a time. Then, eventually, after I was done, I'd apply some satin varnish, and sprinkle some real pepper and garlic powder on them. I figured real spices would look infinitely more real than if I tried splatter painting 'spices' on. Plus the real spices would provide texture. Then after the varnish dried, I'd go over the spices again to help seal them in.
Then I painted all the meat....
Then, with his armour almost done, Matias would soon be able to go gallivanting about, doing his knightly thing, while also staying reasonably well fed.
Attaching Straps
The final step in finishing the leg armour was attaching the leather straps. I did the same thing as when I reattached the straps to his bracers. I attached the buckles to the outer layer, and stitched snaps underneath. That way they'd be a lot easier to do up.
Final Photos
Horse Armour
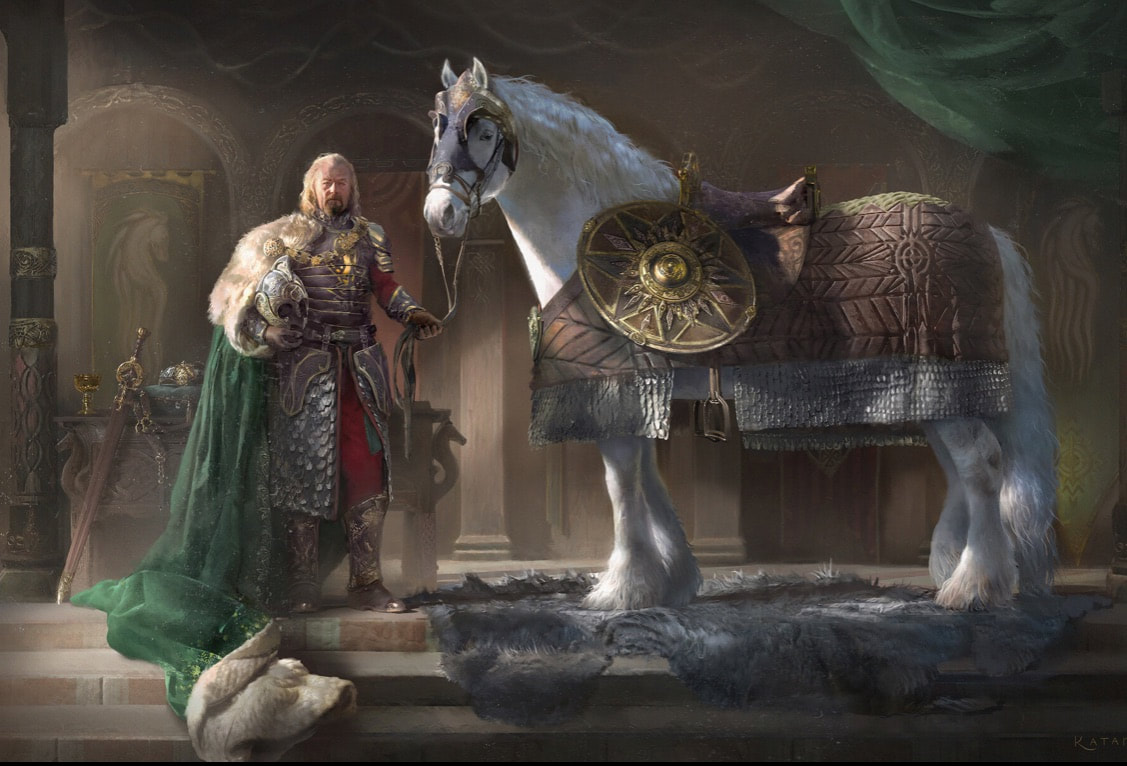
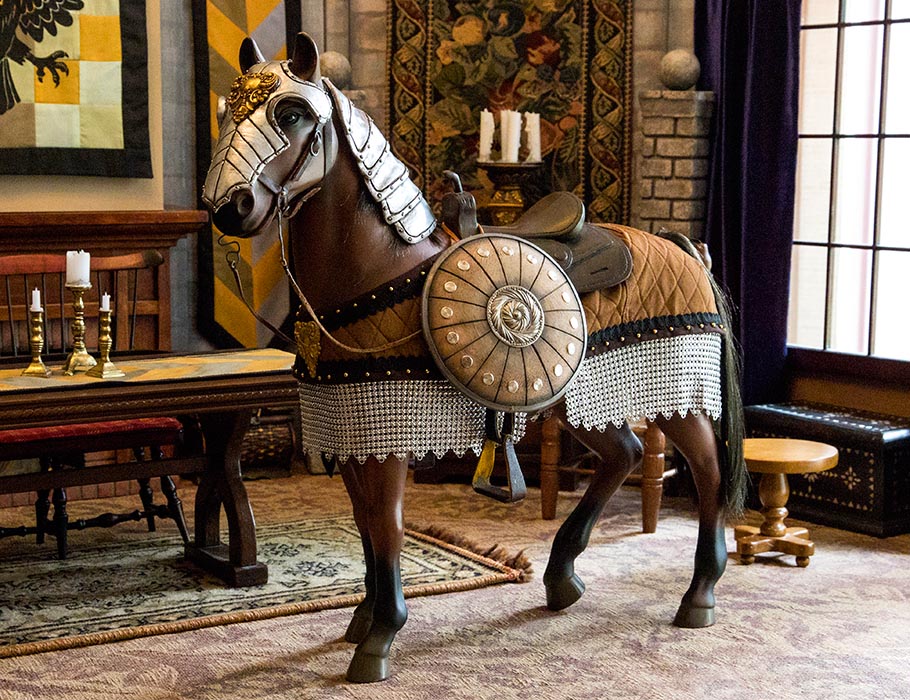
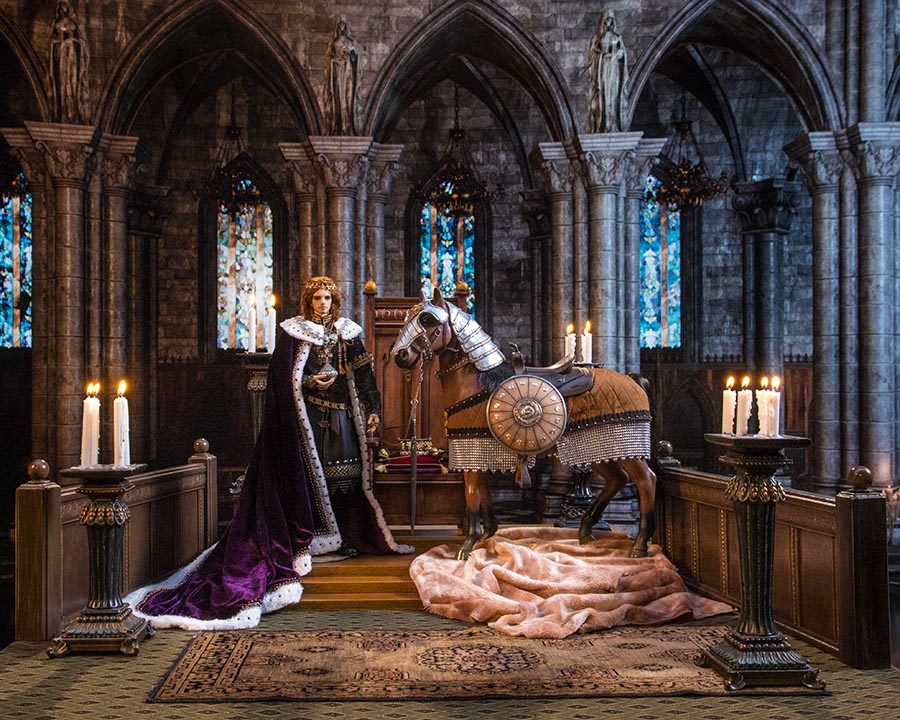
I had come across a photo on the Internet of a painting of King Theodan in LOTR posing with his horse like he was posing for a painting. I wanted to try recreate something like that with my Lawrence and his dark brown horse and have it photographed at our son's movie studio. Then afterwards, the armour would go on Matias' blonde horse.
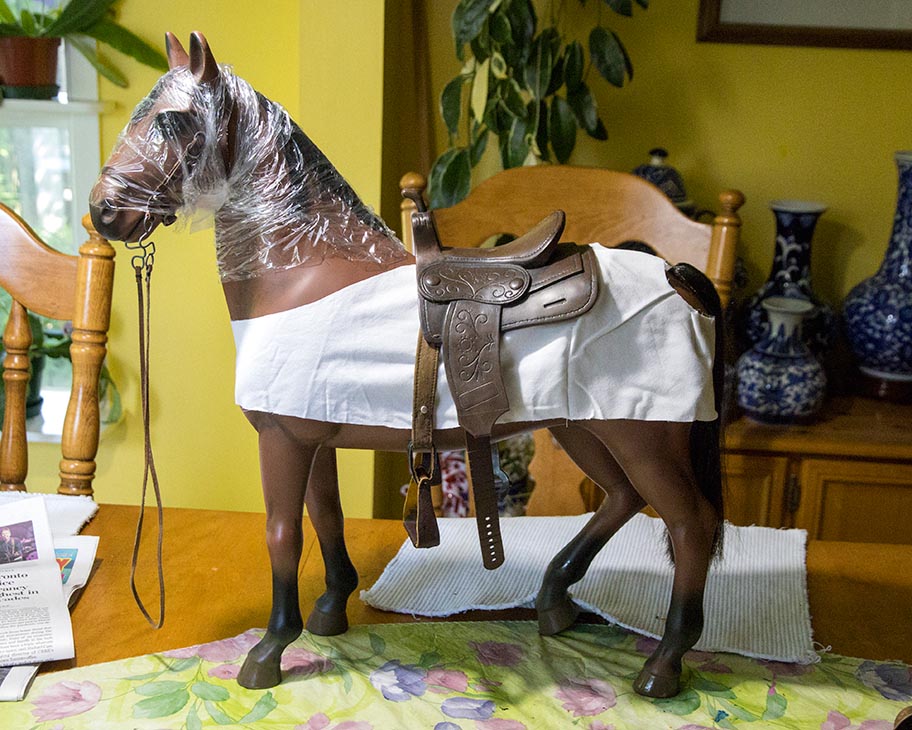
The horse needed a 'blanket' with chainmail, and some protective armour for his head. I made a test blanket out of some white cotton (an old bedsheet) to check for fit before cutting into the good fabric. And I wrapped his head and neck with plastic wrap...
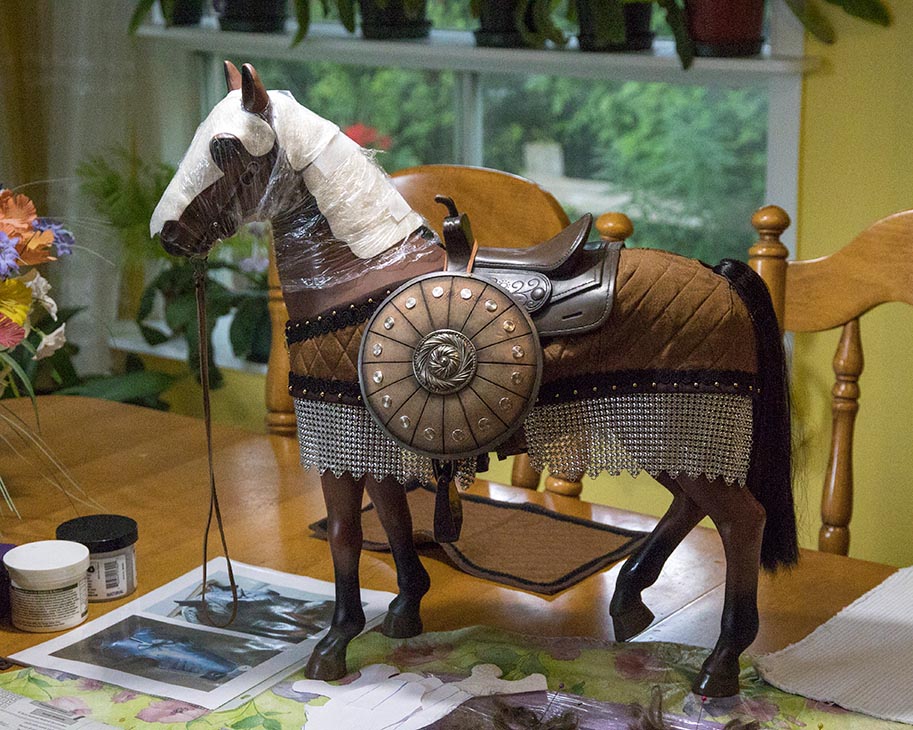
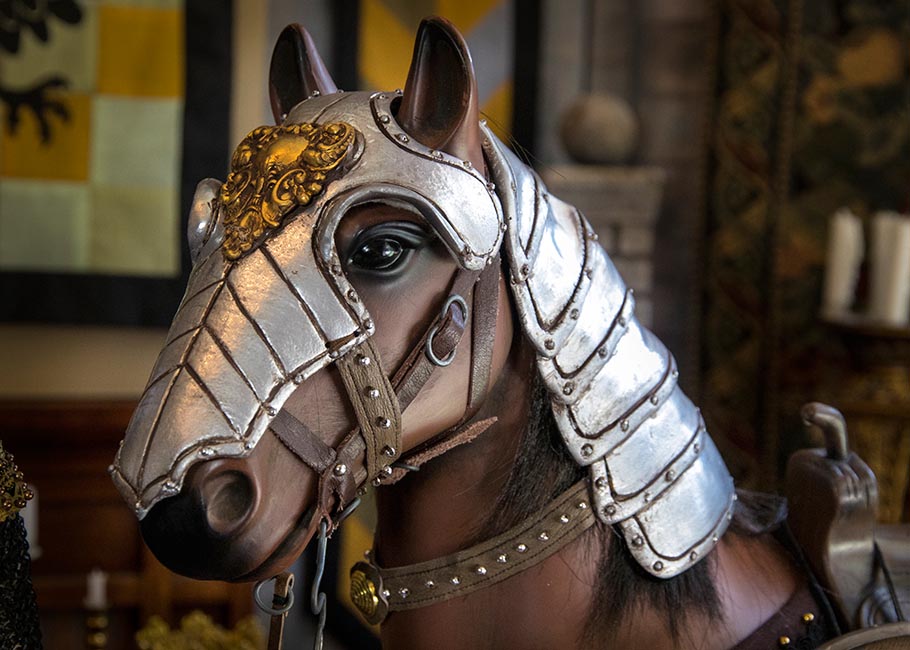
With the blanket sewn, and chainmail sewn on, it was time to address the head armour. I would be making it out of Aves Apoxie, and in order to protect the horse's head from scratches, I first drew up a pattern for the armour, then cut it out of felt, which I positioned on the horse, and covered with another layer of plastic wrap. That way there would be space under the armour to glue the felt.
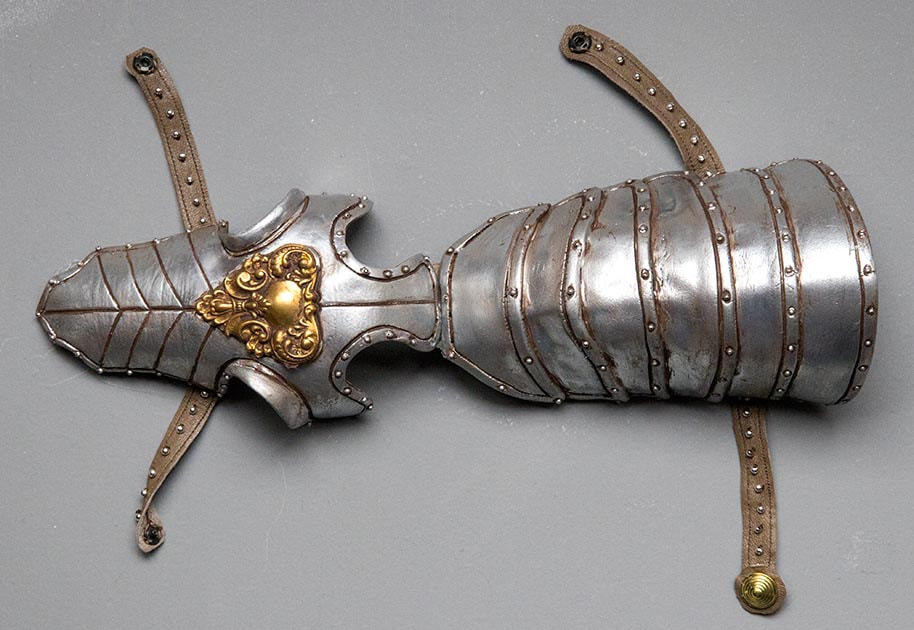
I sculpted the face armour as one unit, and all the neck armour in one piece Then I sanded them, glued tiny beads into the 'rivet' holes, and sprayed it silver. With the armour sculpted, and painted, I glued the felt underneath and tried it on the horse...
Taking a closer look.
The armour with leather straps with snaps attached.
For more horse stuff, like saddles and tack, see my Tutorial - Horse Stuff
For more horse stuff, like saddles and tack, see my Tutorial - Horse Stuff
And finally, the photo the horse armour was initially made for....
Copyright © 2023 Martha Boers
All Rights Reserved
