Making a Mask with Apoxie Sculpt
Apoxie Sculpt is a two-part sculpting medium which air-sets. Even though I'm not especially fond of working with it, as it's very soft and sticky, the final strength when cured, and the ease with which it can be carved, sanded and painted is so worth it.
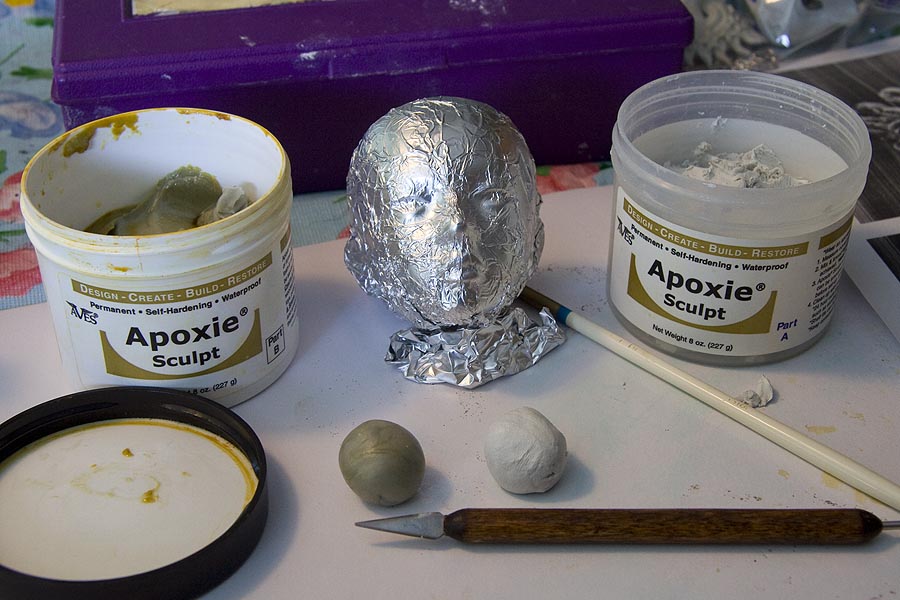
Materials
|
- a doll head, preferably blank, OR a plastic face guard
- plastic wrap - aluminum foil - Aves Apoxie Sculpt - sculpting tools - dish with water - any metal filagree embellishments |
- thin dowel
- fine wire - X-acto knife - sand paper - paint - spray, acrylic, glitter - decorative embellishments (ribbon, flowers, jewels |
Instructions
|
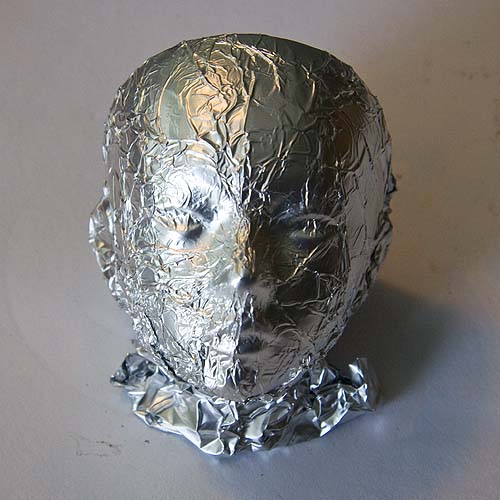
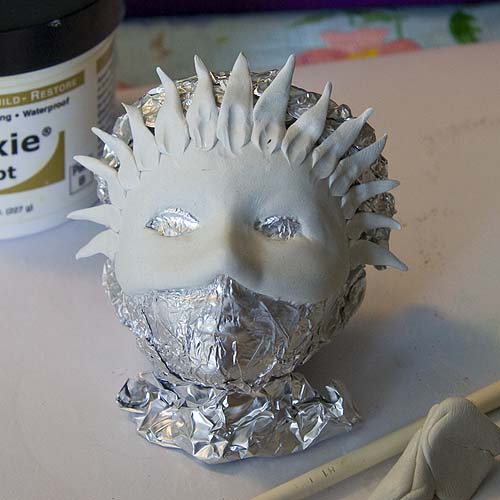
1. To make a mask for your doll, you can choose to either work with a clear face-guard, or with the actual doll head itself. However, any eyelashes on a doll with a faceup will likely be damaged, so it's best to make a mask using a doll head before it gets painted, and while it's still blank. I needed a mask for my Queen of the Night, and although my Asa did have a faceup and lashes, she was going to get stripped and be given a new faceup, so I wasn't concerned about any damage. To protect my doll, I first covered her head with a layer of plastic wrap (to protect against the foil) and then crumpled a sheet of aluminum foil and pressed it over the face to capture as much detail as possible. I bunched the excess foil at the bottom back to form a base to hold the head upright so it wouldn't roll away as I worked on it. |
|
2. Take equal parts of the Apoxie - same size ball from each container - and mix thoroughly until well blended.
|
3. Flatten the Apoxie and position on head where you want your mask (half mask, full mask) Press in place. 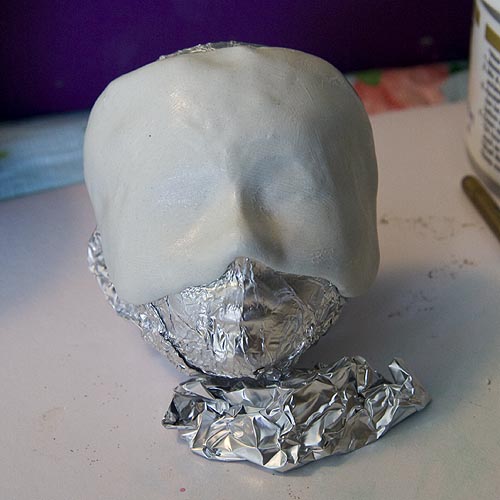
|
4. Lightly cut away excess Apoxie, being careful not to cut too deep and damage the doll's head underneath. Cut eye holes. Smooth edges with wet finger 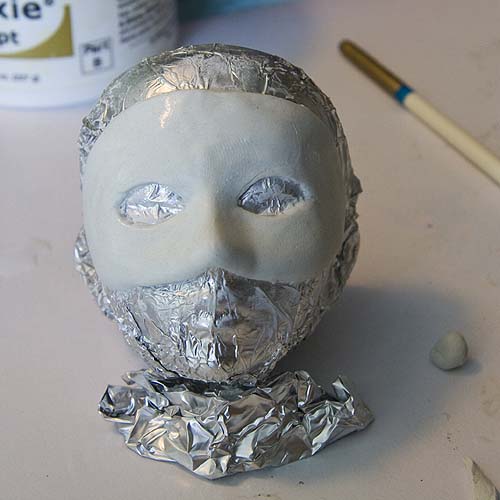
|
5. I wanted the mask to have a crown of flames, so shaped bits of Apoxie and pressed them along forehead. This was as much
as I was going to do at this point. The mask needed to cure before I could continue to work on it. Let cure for 24 hours.
as I was going to do at this point. The mask needed to cure before I could continue to work on it. Let cure for 24 hours.
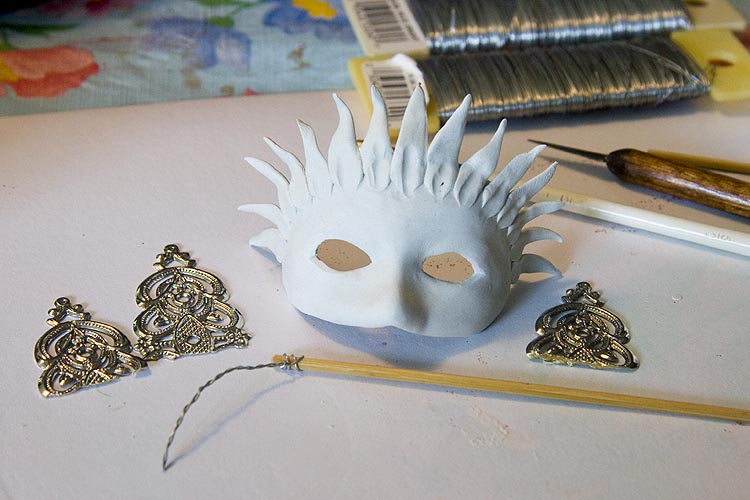
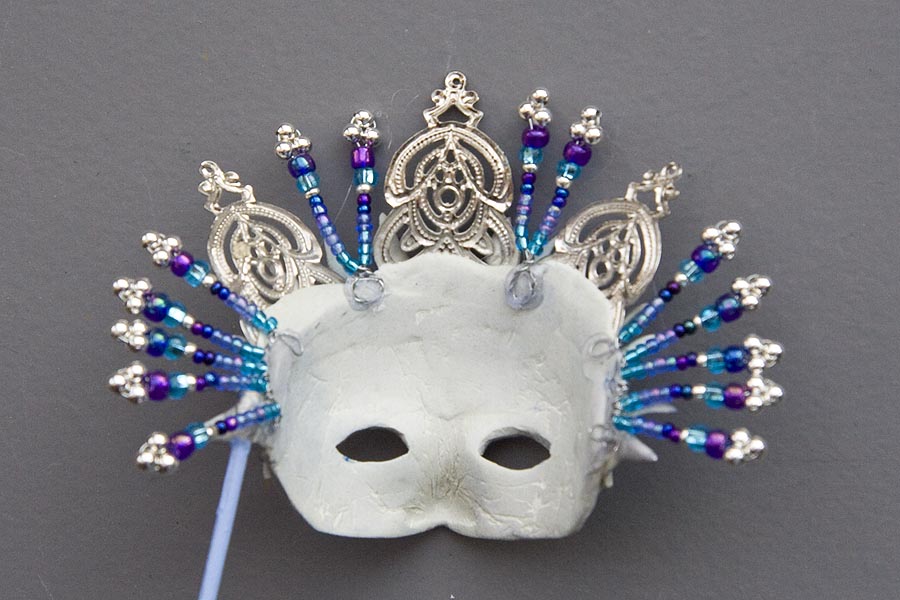
6. The next day after the Apoxie has cured, remove it from doll head. Notice that the Apoxie has turned white. Remove foil and plastic wrap. Using an X-acto knife carefully carve eyeholes so they are the same size and shape. Sand the edges of the mask, paying special attention to the edges and smoothing out any irregularities. I wanted to add a crown, so cut three pieces of metal filagree. My mask was going to be on a stick, so I prepared a thin dowel with a length of twisted fine wire at the top.
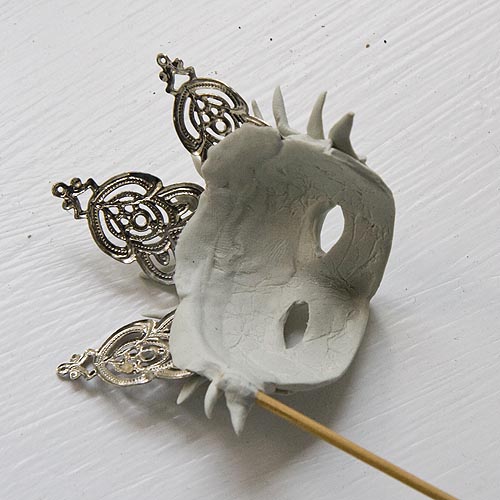
7. Mix up some more Apoxie. Place the dowel with wire in position on the inside of the mask, and cover wire and end of dowel with Apoxie, smoothing it into the cured mask. Using more Apoxie, attach the decorative elements inside the top of the mask.
*Note that the inside of the mask is textures from the crumpled foil. If you wish to smooth the inside, thin some
Apoxie and work it into all the crinkles with a wet finger. To add eyelids to the eyes, roll two small cylinders of
Apoxie, flatten and smooth into place. Let cure. The right side of the mask....
Apoxie and work it into all the crinkles with a wet finger. To add eyelids to the eyes, roll two small cylinders of
Apoxie, flatten and smooth into place. Let cure. The right side of the mask....
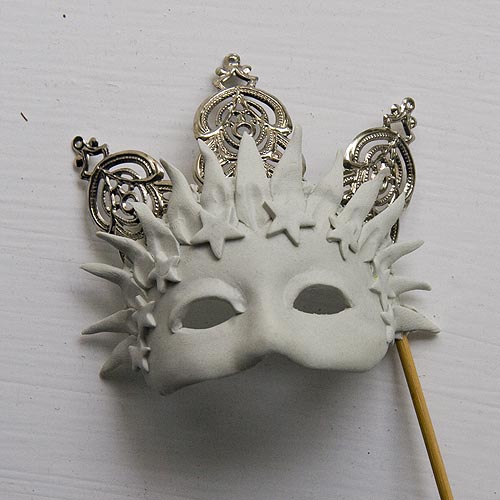
8. After curing, sand any rough bits. At this point your mask is ready to paint and embellish any way you wish.
Apoxie may be painted with any medium.
The following photos illustrate how I finished the mask for my Queen of the Night. I wanted a shiny silver mask, so covered the silver metal filagree with some paper towels and sprayed the mask with chrome bumper paint, on some newspapers outside
Apoxie may be painted with any medium.
The following photos illustrate how I finished the mask for my Queen of the Night. I wanted a shiny silver mask, so covered the silver metal filagree with some paper towels and sprayed the mask with chrome bumper paint, on some newspapers outside
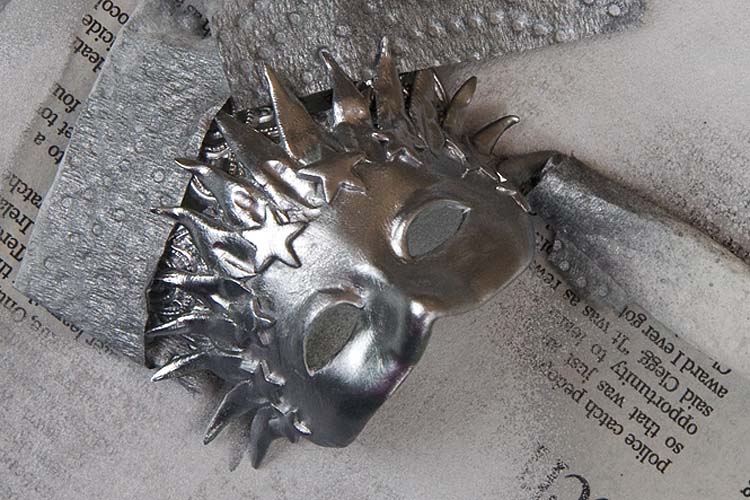
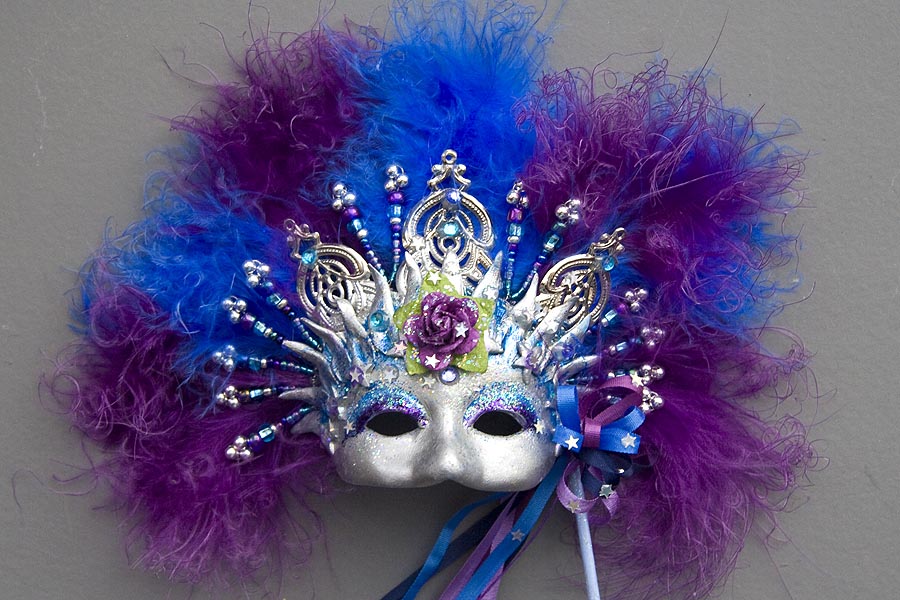
9. After the silver lacquer paint dried, I added details with metallic folk art pant, and sparkle paint.
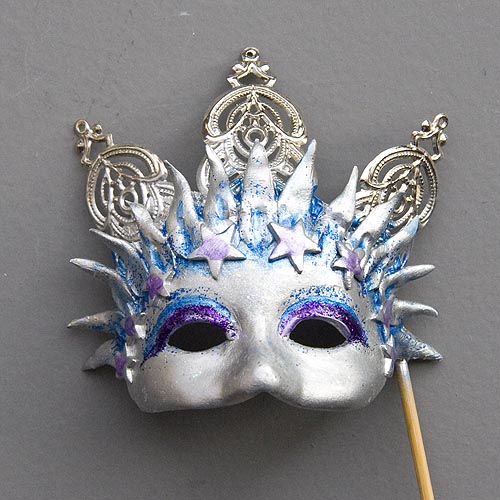
10. For extra embellishment, I wired some beaded crown pieces....
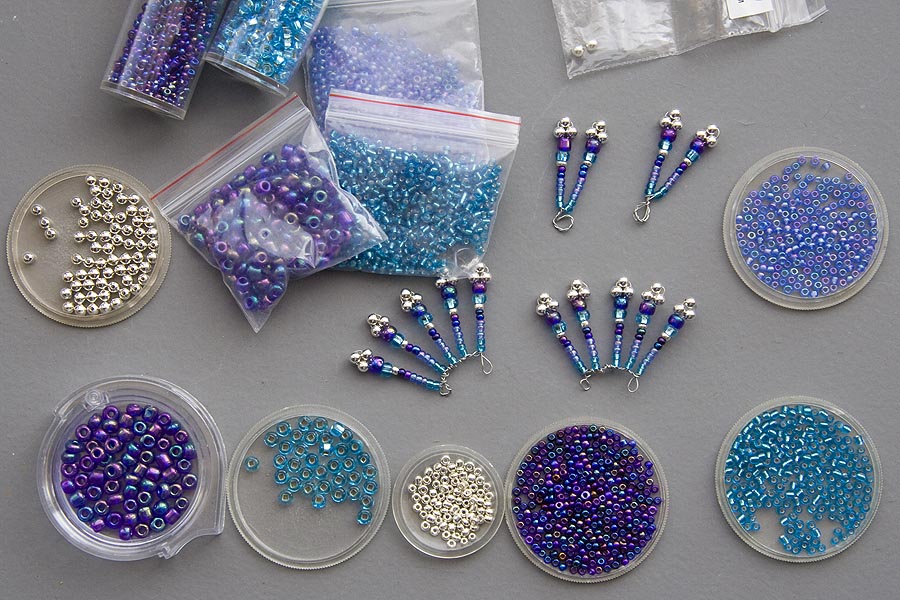
11. I attached the beaded crown bits between the silver filagree on the inside of the mask with hot glue.
*Tip: to make the hot glue set flat, wet the tip of your finger (lick it) and press your finger down
on the hot glue. The moisture keeps the hot glue from burning your finger, or sticking to it.
*Tip: to make the hot glue set flat, wet the tip of your finger (lick it) and press your finger down
on the hot glue. The moisture keeps the hot glue from burning your finger, or sticking to it.
12. Next, I glued feathers along the upper inside. I had curled the feathers with my scissors blade (just like curling ribbon)
Then I added more glitter paint, and glued on rhinestones and tiny stars, and a paper flower.
Then some silk ribbon streamers.... and the mask is ready for the Queen of the Night.
Then I added more glitter paint, and glued on rhinestones and tiny stars, and a paper flower.
Then some silk ribbon streamers.... and the mask is ready for the Queen of the Night.
Copyright © 2014 Martha Boers
All Rights Reserved
All Rights Reserved
