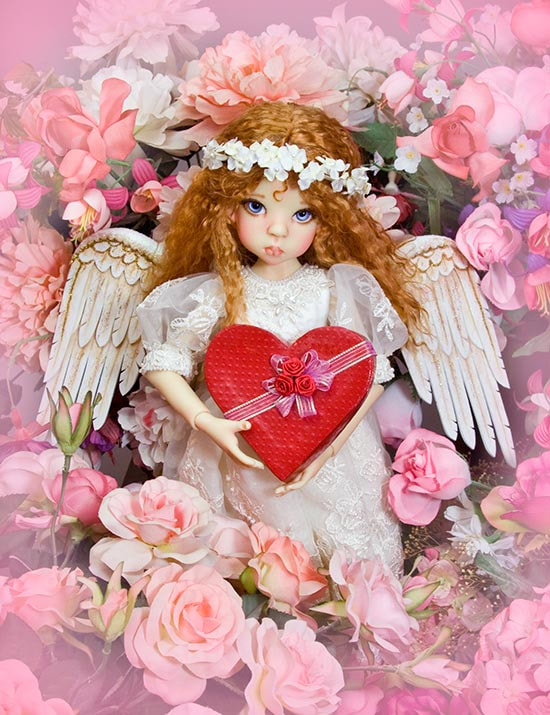
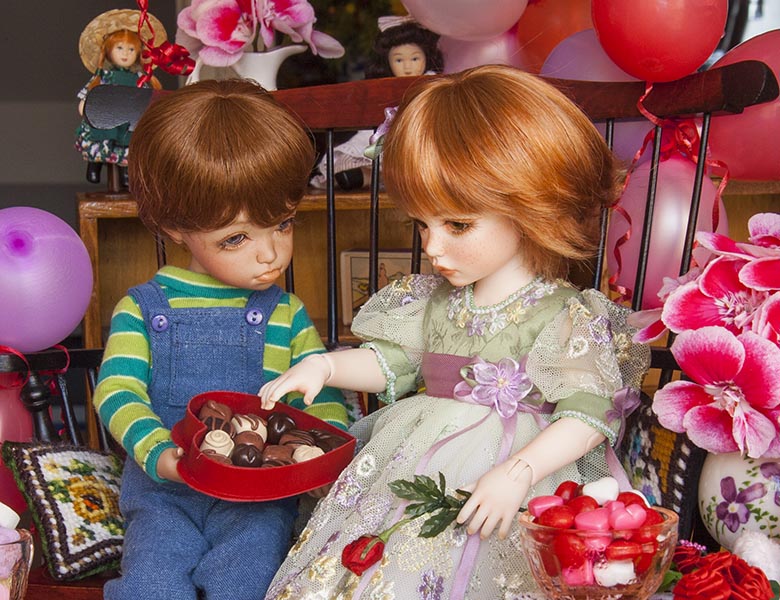
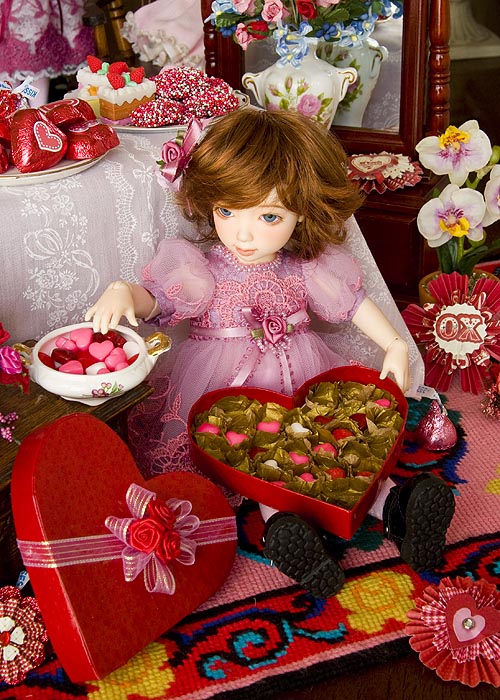
Wishing everyone a Happy Valentine's Day, with some of my favourite Valentine photos...


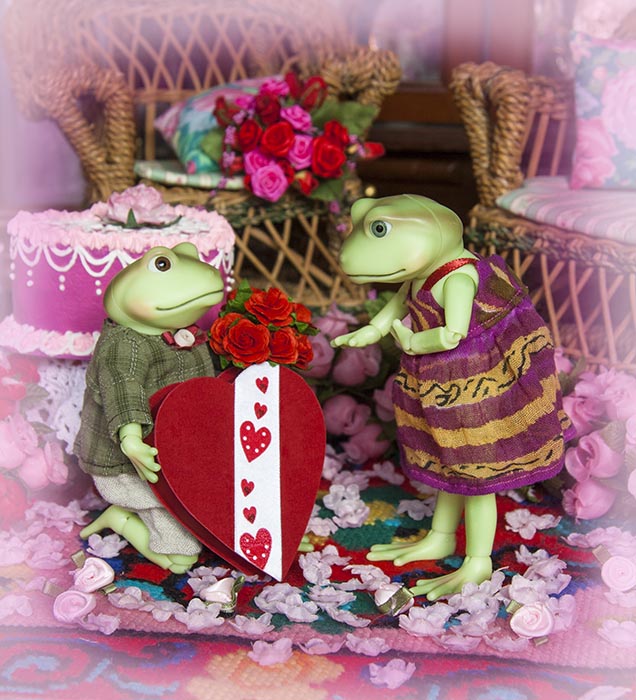
And of course, Mr. Ropuha's Valentine's Day proposal....
|
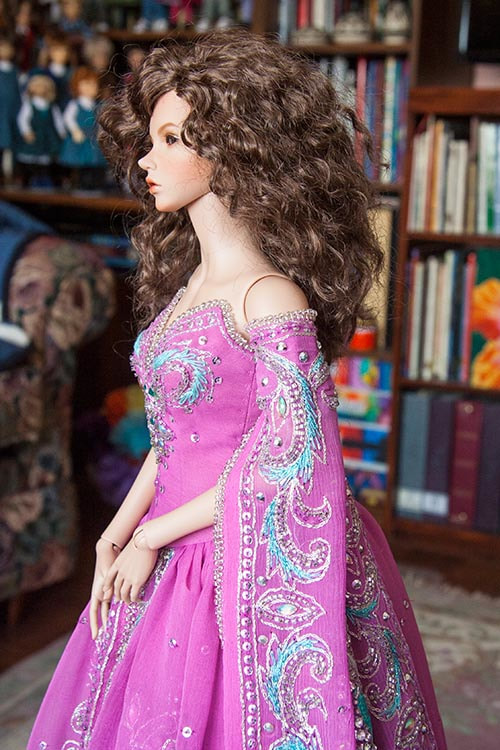
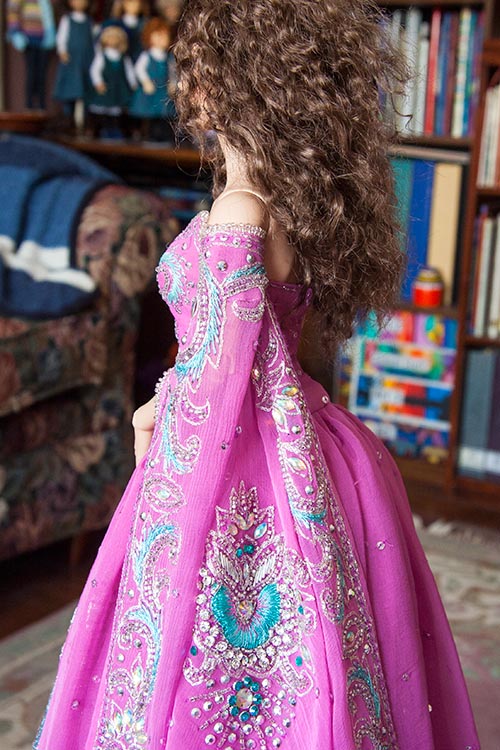
Wishing everyone a Happy Valentine's Day, with some of my favourite Valentine photos... And of course, Mr. Ropuha's Valentine's Day proposal.... I decided to make 'hanging sleeves' out of the last two corners of the sari. The 'corners' are where I want the tops of the sleeves to be. This is what they ended up looking like. The shorter finished edge will be at the front, and the longer edge will drape down the back. The fabric is so fine and flimsy, that I found it almost impossible to make a nice rolled hem along the bottom curved edge. So I applied Fray Check to that edge, and let it dry. That stiffened the edge, giving it much more 'body', and I was able to pin and hand-sew the hem. 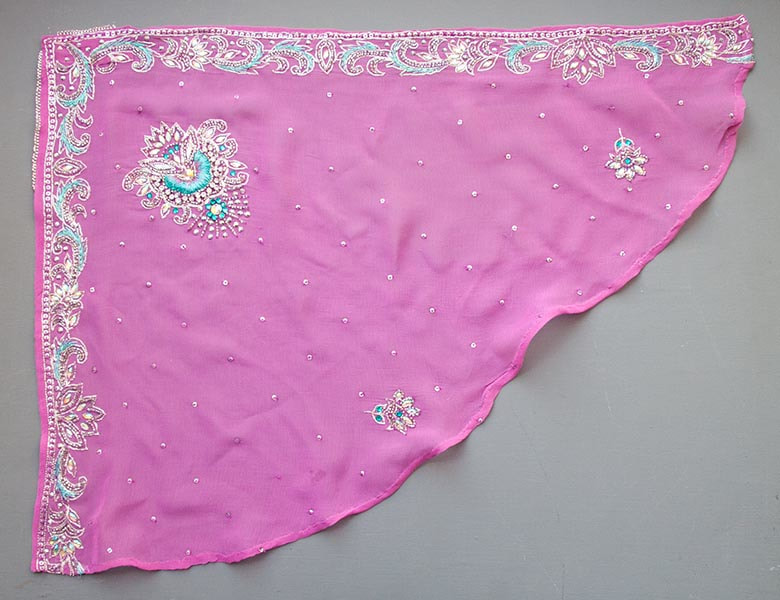 But then I had to figure out a way to make the sleeves stay up. They wouldn't be able to stay up on their own, and I couldn't attach them to the bodice, because the weight would pull it down. Then I thought maybe an 'armband' of wide elastic might work. I tried making one with a snap closure but it made for a big, unsightly bulge. So I ended up with a simple loop of 1/2" elastic.... 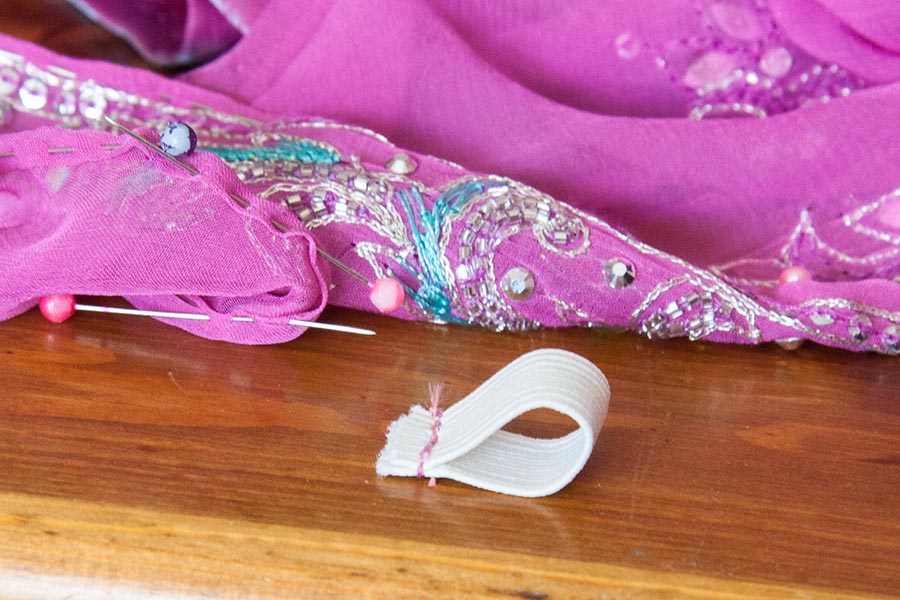 The next step was to prepare the tops of the sleeves. I added a small rectangle of cotton fabric to the upper corners to provide something a bit stronger to sew the snap fasteners to. I measured where on the elastic armband they needed to go, and sewed them on - a bit below the edge in order to hide the elastic - choosing snaps that fit rather tightly together, as they need to have a good grip that wouldn't just undo later. 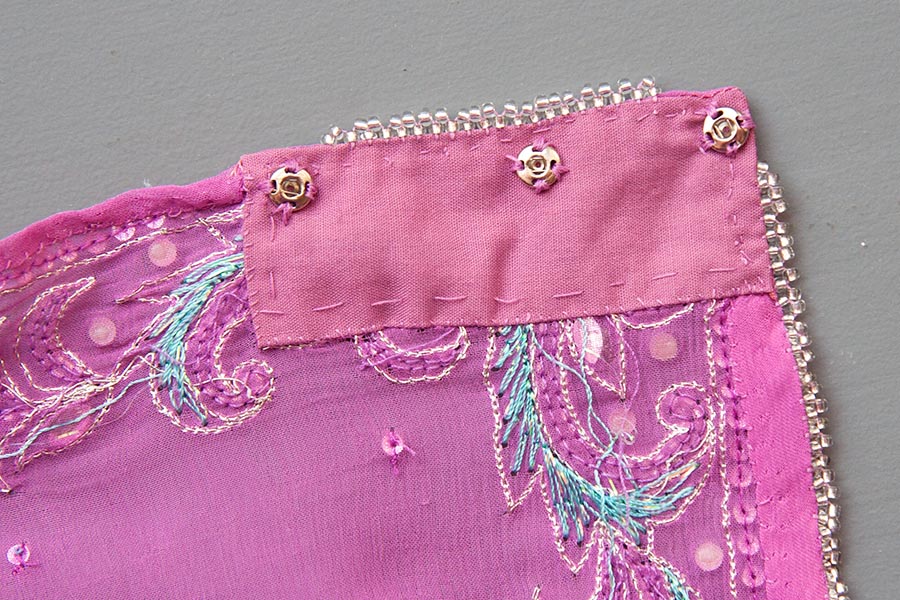 After sewing down the raw edges of the elastic seam and sewing on the snaps, I put the elastic armband on Bianca. It's not the easiest thing to get on, since it needs to fit rather tight.... 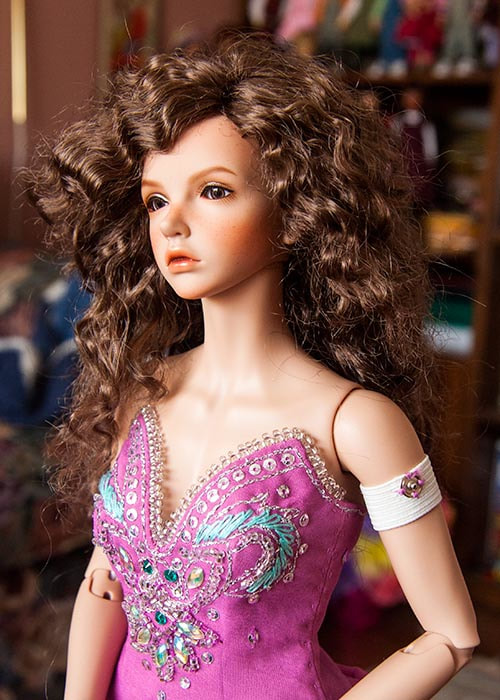 ...and with the upper sleeve edge snapped into place,,,, 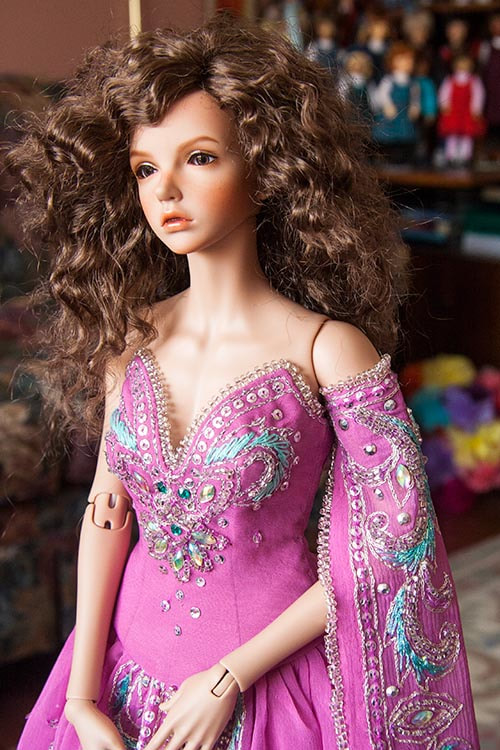 I'm in the process of beading the front edge, and have already beaded the top. I did not sew any beads on the edges where they would be under her arm, because they are glass beads, and I was afraid they might end up scratching her resin. The sleeves hang down to the ground.
Once I'm done both sleeves I'll take some full-length photos.
Narea decided that an art studio was too messy a place for pristine white walls.... 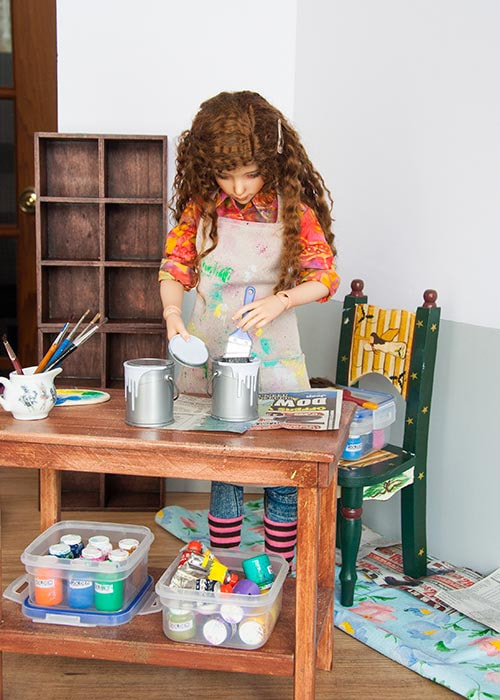 ....so she decided to paint the lower walls.... 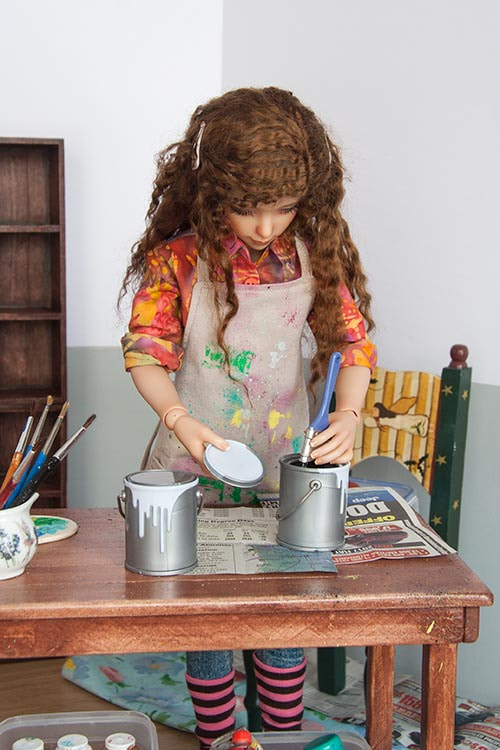 ....a nice pale gray.... 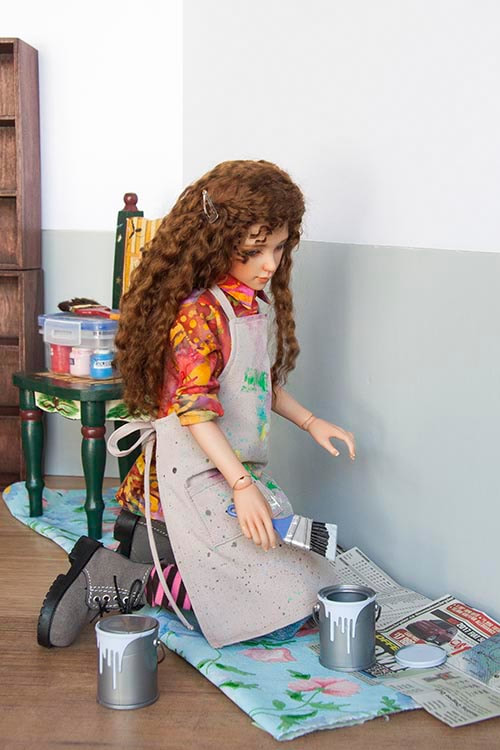 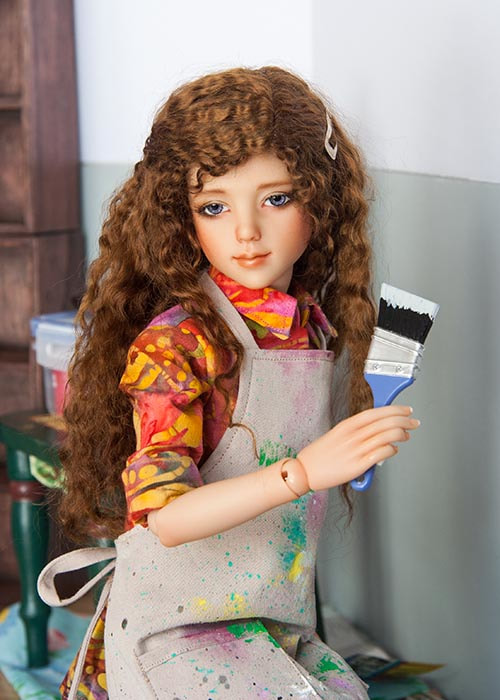 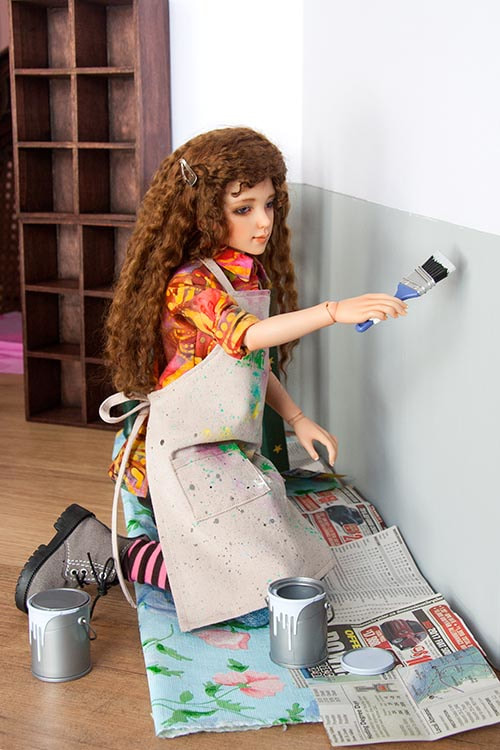 Yesterday was a gorgeous, sunny day, and after an entire weekend of snow, we decided to go for a drive up north to enjoy the 'wilderness in winter'. Steve and Isis came along.... 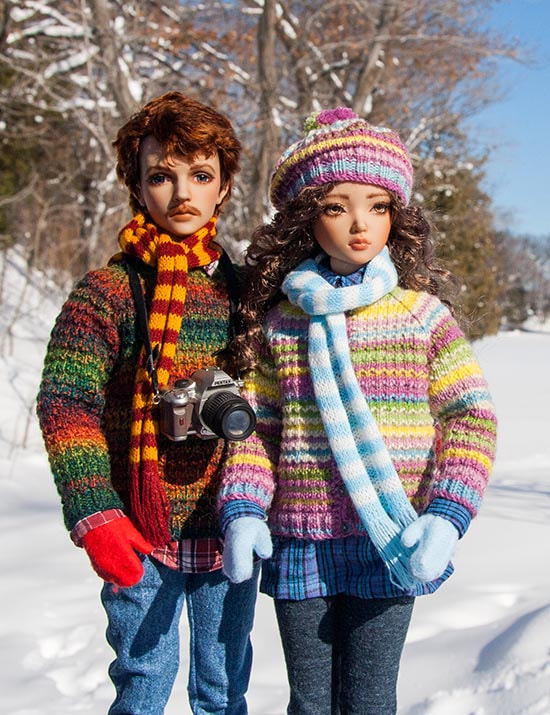 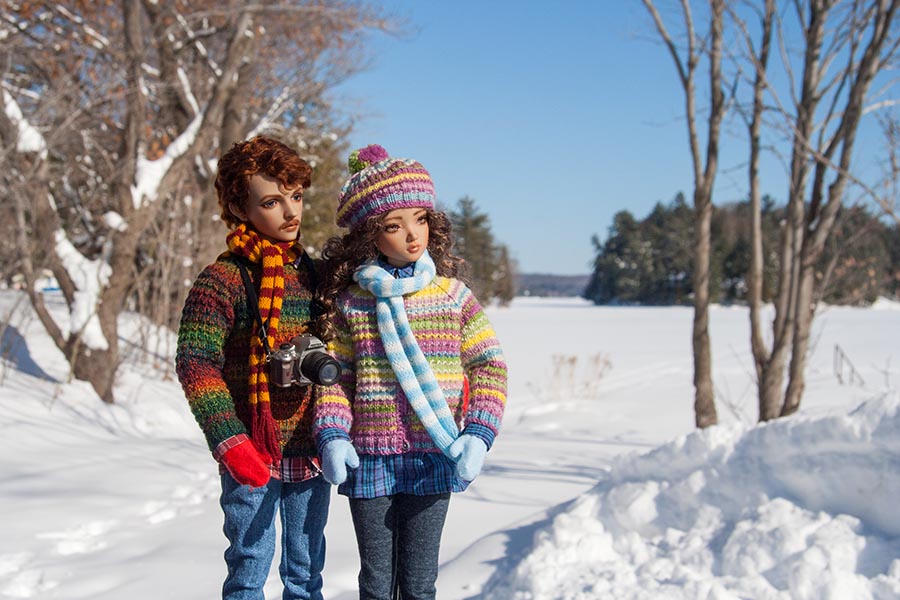 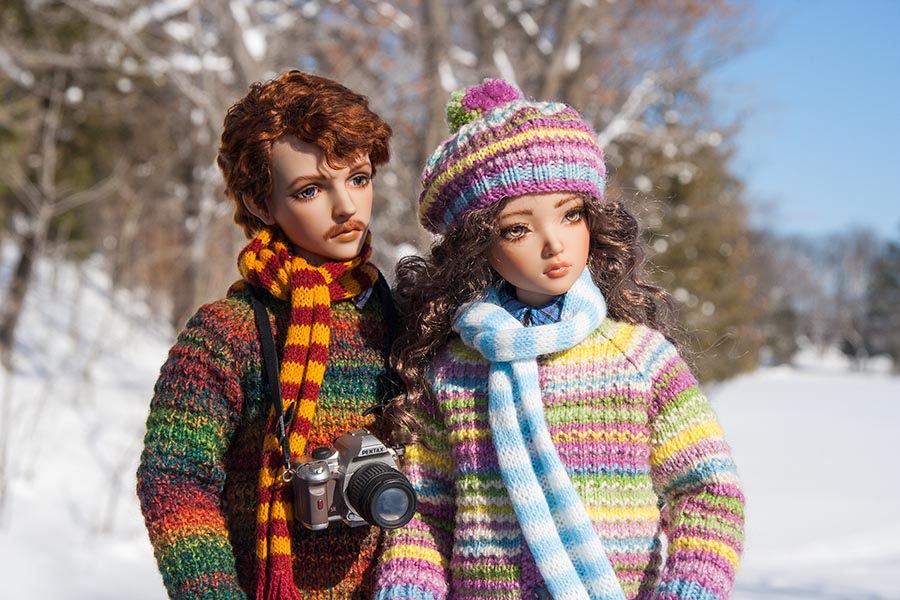 Rachel didn't bring her doll yesterday, so she asked if she could play with mine, and I could take some pictures with her. And since i just happened to have an art studio under construction on my dining room table, I thought the doll could be 'painting' something.... 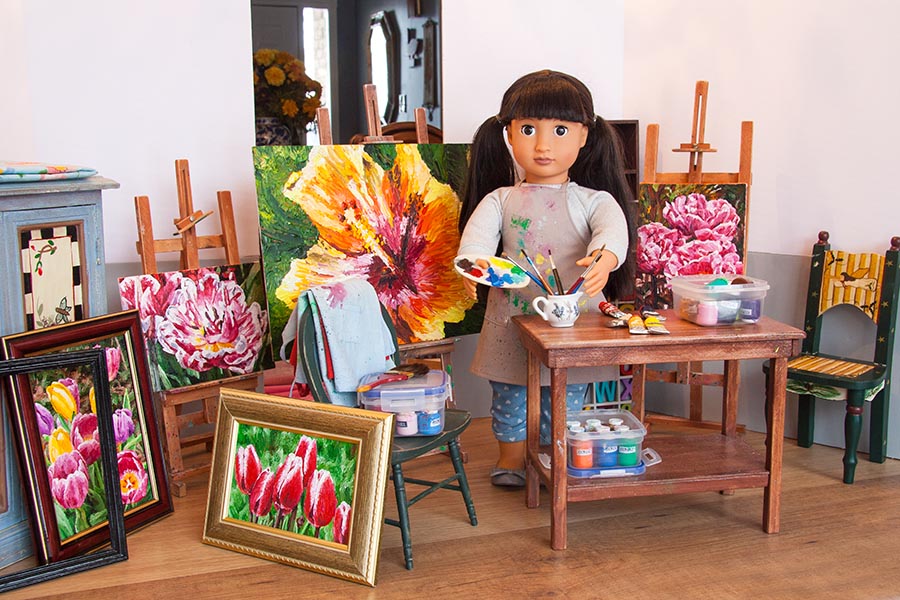 The background walls in the first photos seemed rather stark, so the girls made some tiny artwork.. 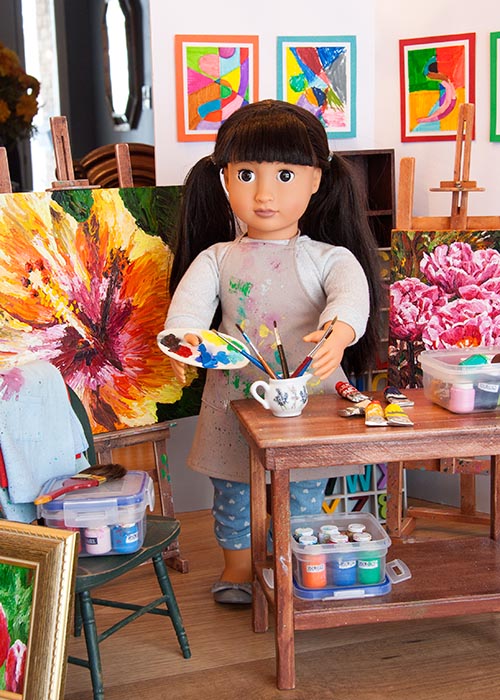 Then the dark cupboard behind the doll seemed too dark and empty....so .... 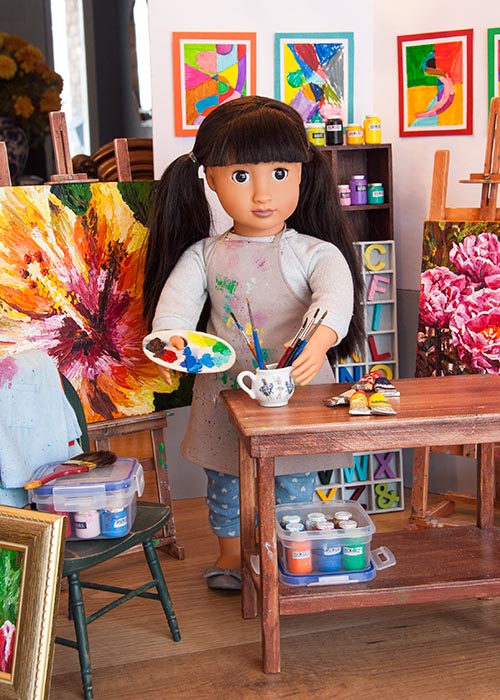 Then Teagan's doll came to join in the fun... 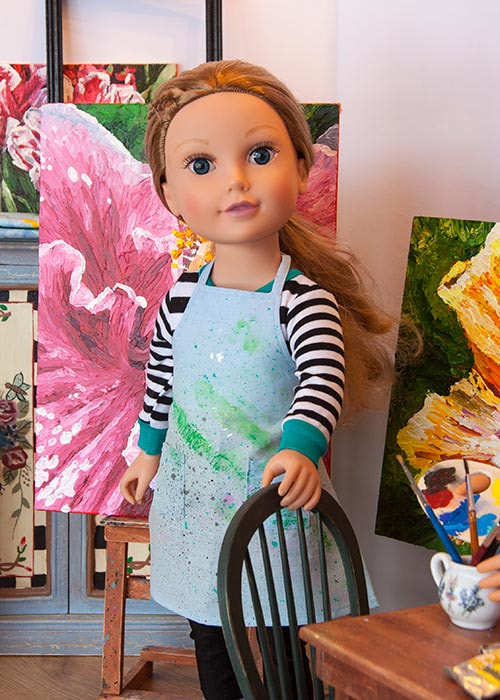 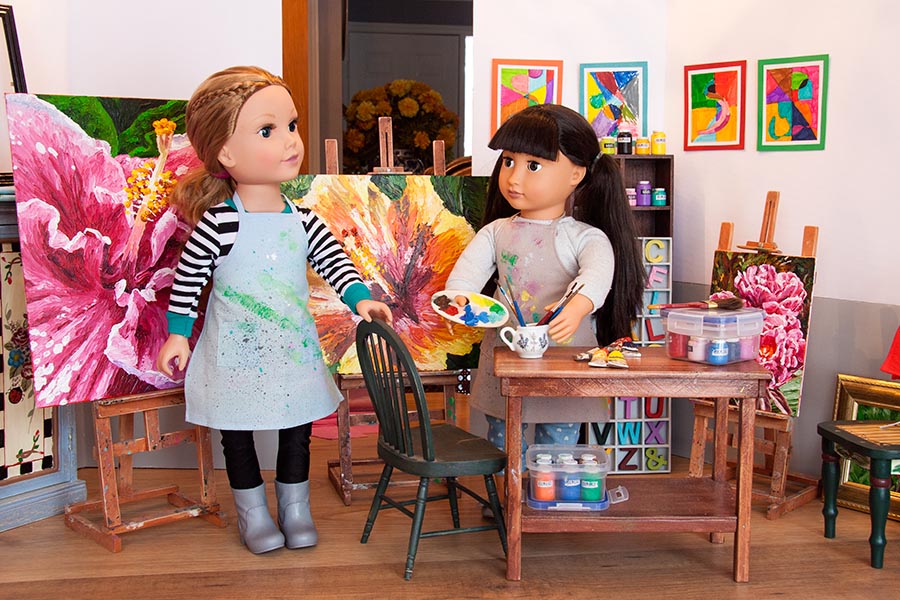 We had our granddaughters over all day yesterday, and since it was snowing heavily out there, Teagan came prepared with a snowsuit and board for her doll. So we trekked out into the backyard, through the snow, for some pictures....   Then she invited her friends to join her...   *Photo TipWhen taking photos outside, while it's actually snowing, be sure to take more than one photo of every scene, because you can never tell when a snowflake will be passing by right in the middle of your photo. Like here..... 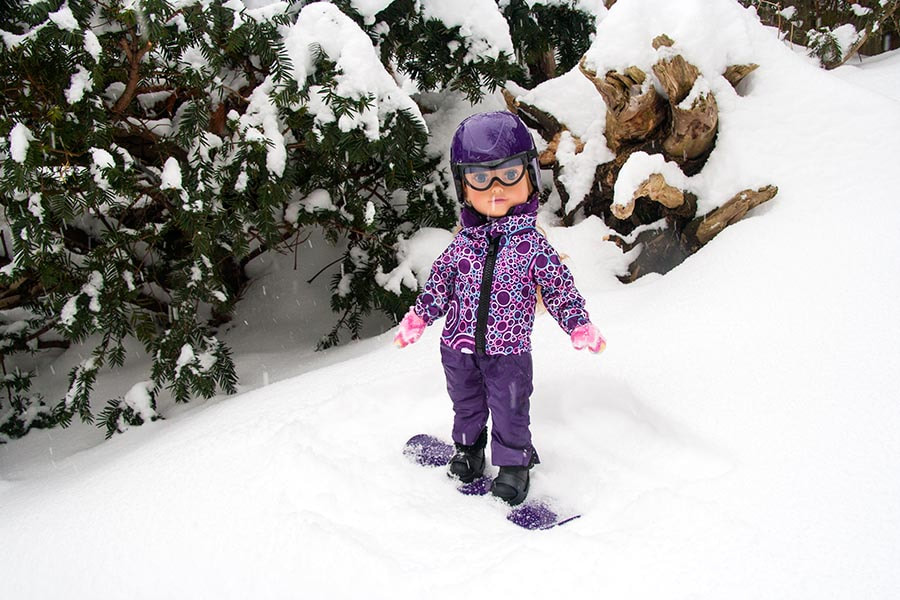 ...with a big white streak coming out of the doll's nose....  All the snow we are expecting the next couple of days, made me think of this little story from three winters ago....www.antiquelilac.com/snow-removal-service---fav-photos-2015.html 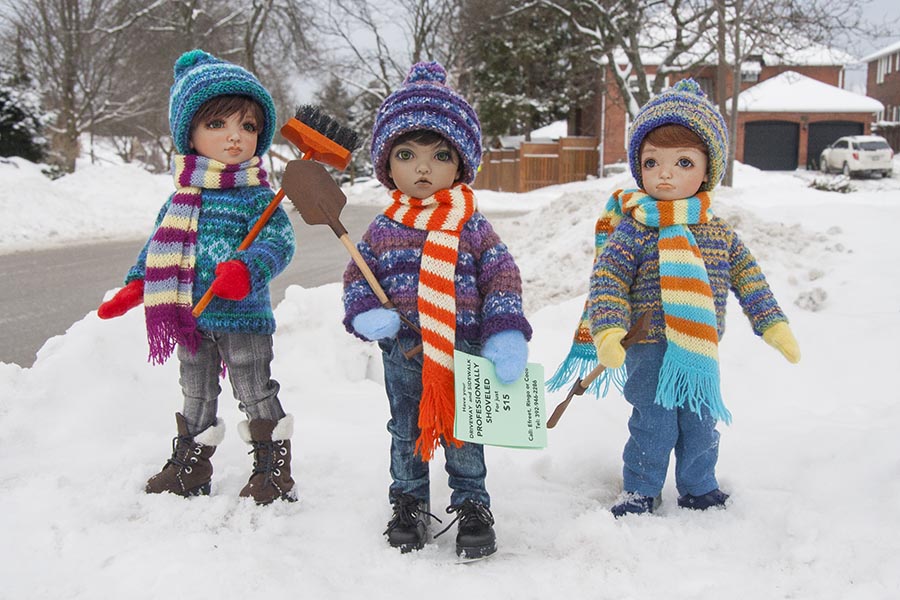 I'm very happy with how Bianca's gown is coming along. I decided to bead the upper edge of her bodice, after embellishing it with matching embroidery, and finished that the other day....  Then I sewed on the shorter, main skirt. I decided to bead the entire edge, starting at the middle front, going down, and working my way all the way around. It's taking me awhile, but I like the way the beading gives the skirt some weight so it hangs better.... and it's something mindless to do in the evenings while listening to the TV..... 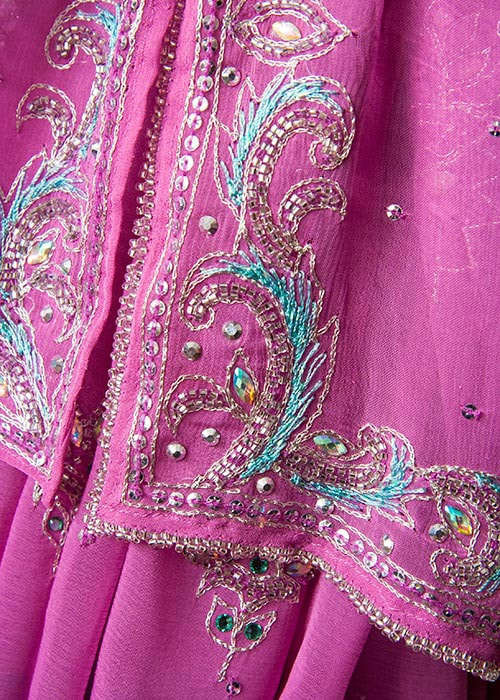 The intention is for this outfit to serve multiple purposes by mixing and matching the various layers. The main dress can be worn alone (with a slip I have yet to make). And I see that I really need to get her some silver shoes - I only have black and gold ones, and neither will do.... 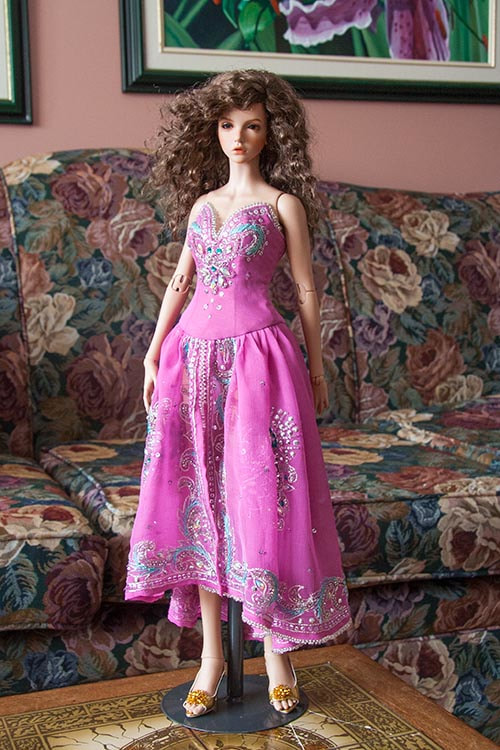 Yesterday I made the long underskirt. The top of the skirt is designed with a 'yoke', so that the skirt fabric can be pleated at her hip level instead of adding way too much bulk at her waist. That's a useful design element, since I had three yards of the beautifully edged sari fabric for the skirt... 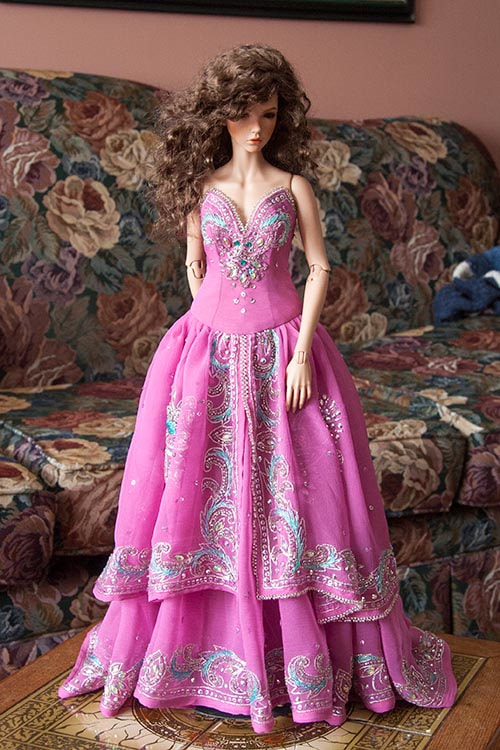 The next step will be designing some long hanging sleeves - or an off-the-shoulder cloak - from the two remaining sari corners. The biggest challenge will be figuring out a way to keep them/it up, because I'm afraid that if I connect them to the top of the bodice, the weight might pull it down. And we can't have that. 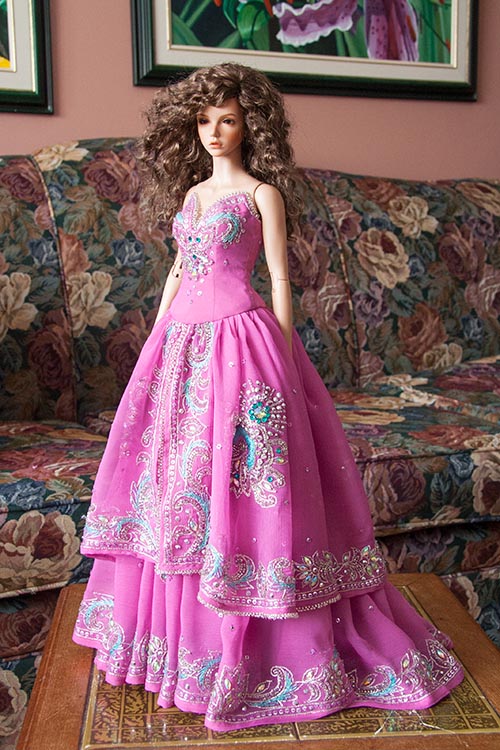 I'm really loving this doll, and am seriously considering getting her a guy during the current FID order period, now that there's a new slimmer body choice available. I've always loved Rex, especially the EID version with the 'Special Forces' face up.
Narae got the keys to her studio this morning, and started bringing some things over.... 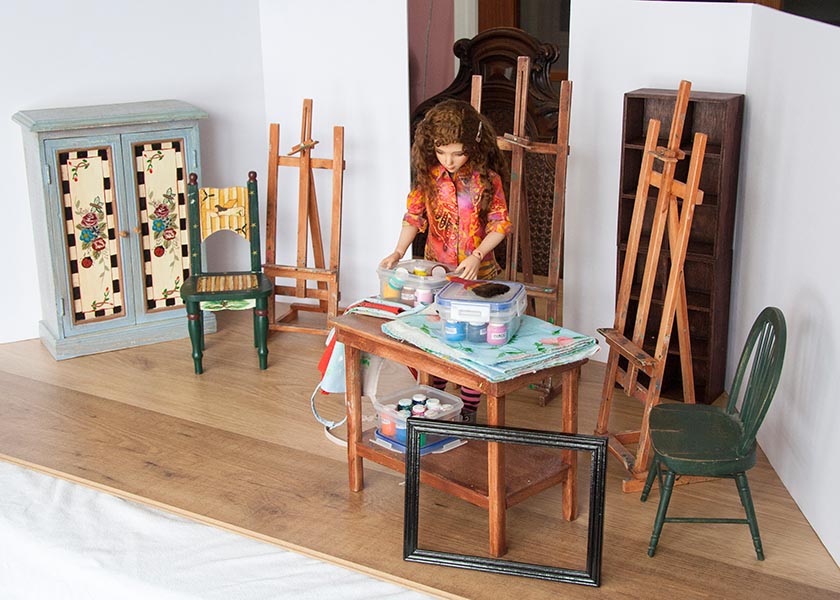 I'm expecting this to be quite a lengthy series of photo stories, and that I'd need more than the usual dining room table space, so we turned the table so the width is across the room, allowing for a considerably wider studio. Then I laid down a tablecloth to protect the table from the strips of wood flooring. I had purchased two sheets of foam core for the walls, but turns out they aren't high enough, so I will need to get some more, so the walls can be higher. 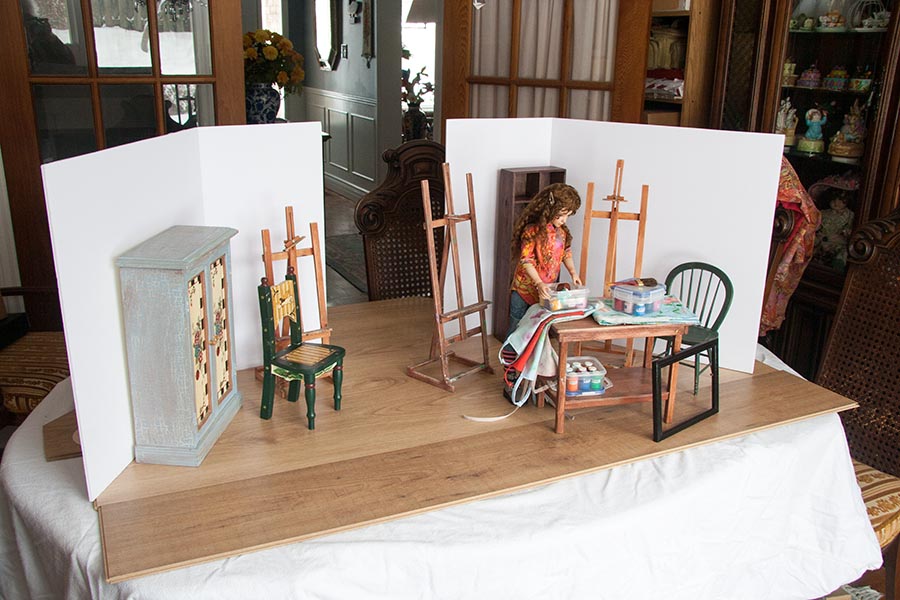 Narae hasn't decided if she wants to paint the walls or not. But if she does, then that has to be done first, before she moves anything else in. 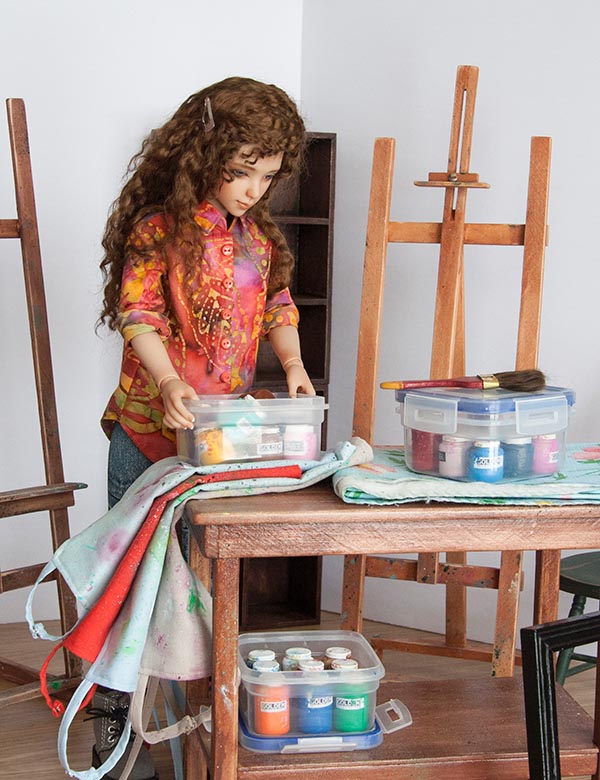 The coloured pencils are all done. It took an entire day just to paint them (not of continuous work) since the tiny 'pencils' could only have one end painted at a time, then they had to dry before the other half could be painted. Then they all needed a second coat...  And the block only had 30 holes big enough to hold them, so after the first batch was painted, I had to go through the whole process again with the second batch. And then they all needed two coats of varnish, again in two batches, which took all day yesterday. But now they are all done, and my dolls have lots of pencil crayons to colour with...... 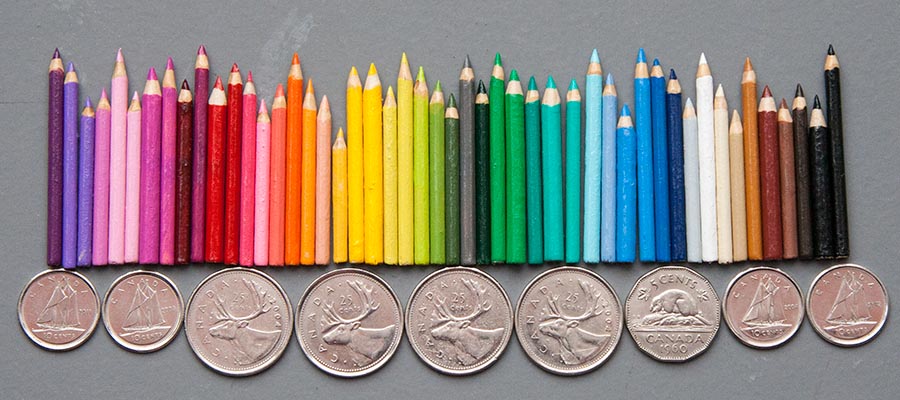 Scale-wise, compared to full-size pencil crayons, I think they may actually be more like 1/3 scale, and be a bit big for 1/4 scale, but I can't imagine making them even smaller.  |
AuthorMartha Boers is an award-winning Canadian doll maker and costumer specializing in fantasy and historical-style costumes. Archives
May 2024
|
 RSS Feed
