Making a Wizard/Santa - a Creative Journey
the Beginning
Just before Christmas 2014, I thought it would be fantastic to have a Santa BJD so I could shoot stories with my smaller dolls. But time ran out - mostly because I'm not a big fan of sculpting - and so I thought I'd have plenty of time to sculpt an old man's head in 2015, so it would be ready by the following Christmas. The idea was to sculpt a head that would fit on my Doll Leaves Maya's body. I'm not a big fan of dolls sharing bodies, so if the head turned out I'd need to get it a body of it's own. But first I needed to address the head.
In November 2015 I finally decided that if I was going to have a Santa BJD in time for Christmas photos, I'd need to get my act together and get started.
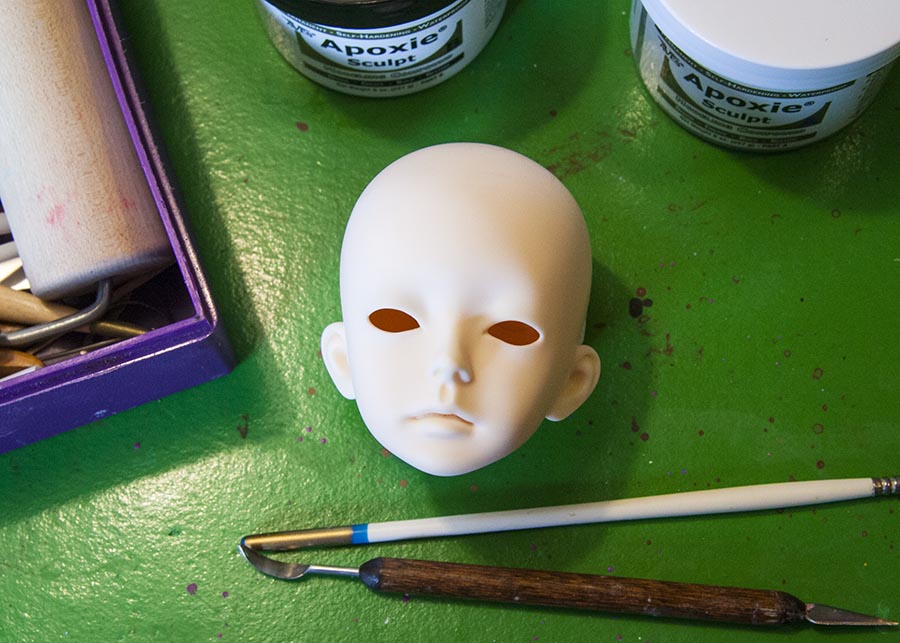
So I finally decided to take the plunge and try sculpt an old man's head so I can have a Santa or Wizard bjd. I wasn't the least bit interested in sculpting an entire head out of Sculpey, since it would be too complicated to make it hollow to fit an existing doll body, and how in the word would I make a removable head cap? So my friend Charie Wilson gave me a Doll Family practice head to use as a base. It was the most 'mature' looking of the practice heads she had on hand. It has beautifully smooth resin, which proved a bit challenging to get the Aves Apoxie to stick to. I HATE sculpting people, and even more I HATE working with Aves Apoxie Sculpt. It's like playing with chewed gum. So I'm hoping two negatives will cancel each other out, and I might be somewhat successful.
At least with a wizard or Santa, most of the face will get covered with facial hair, so it doesn't have to be too perfect. Of course if the head is going to be successful, it also means having to learn a whole slew of new techniques, like spraying with matte sealer, gluing hair onto a head with a removable pate. And then of course comes clothes. I know I should have started sooner! Oh well, maybe he'll just have to start off as a Wizard, who moonlights as Santa next year.
The head fits on my Maya (Doll Leaves), although he does look a bit bobble-headed. If this works out, I'll have to get him his own body. So I printed out some "old men's faces" for inspiration.....
The head fits on my Maya (Doll Leaves), although he does look a bit bobble-headed. If this works out, I'll have to get him his own body. So I printed out some "old men's faces" for inspiration.....
November/25/15
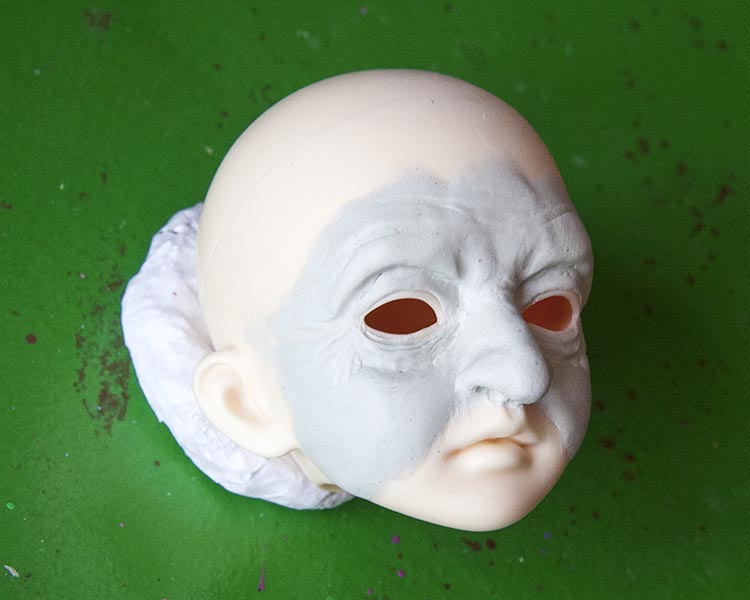
Slowly making progress on my head. I only mixed up a very small amount of Apoxie at a time, and I printed out some reference photos to work from. The first time, I built up the upper and lower eyelids, the baggy cheeks, and added to the nose. After that was partially set, I added the forehead, built up the nose and added to the cheeks. Now it needs a bit of refinement, and some sanding.
Slowly making progress on my head. I only mixed up a very small amount of Apoxie at a time, and I printed out some reference photos to work from. The first time, I built up the upper and lower eyelids, the baggy cheeks, and added to the nose. After that was partially set, I added the forehead, built up the nose and added to the cheeks. Now it needs a bit of refinement, and some sanding.
November/27/15
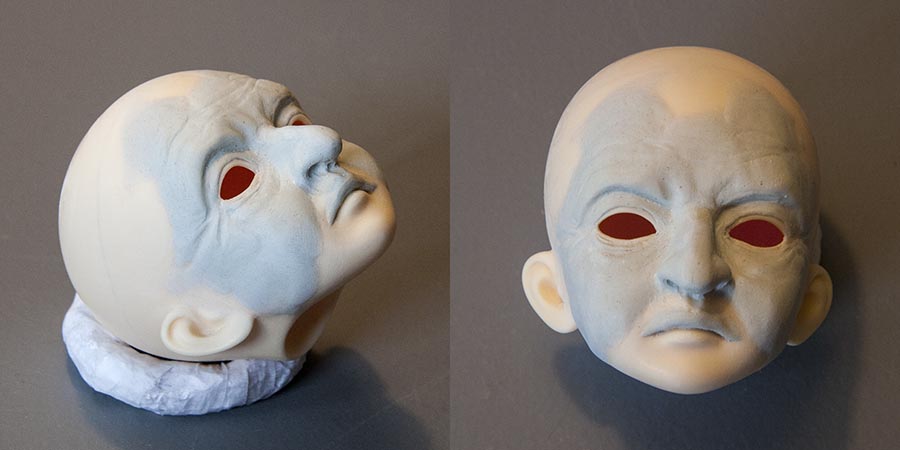
The sculpting on my old man's head goes very slowly. I've decided to take some stress off and not try to push him to be done for Christmas photos this year. Which means he'll probably start life out as a Wizard early in the new year. That will give me all of next year to make some old-fashioned Father Christmas costumes. After all, next year there will be another Christmas.
So in the meantime, when I do add a bit to his face, I just mix up pea-size balls of Apoxie. That way I can't get carried away sculpting too many things at once, and then accidentally mess things up when I invariably over-work stuff. The last few bits of Apoxie were used to add to the forehead, soften some of the wrinkles, raise the top of the cheeks, and extend the lower lip downward.
I need to add a tiny bit to his lower lip, and add some to the top of his ears, since they seem way too low. Then I need to learn about painting resin and Apoxie. I've already picked up a can of Testor's Dullcote - not that I have any experience using it.
February/4/16
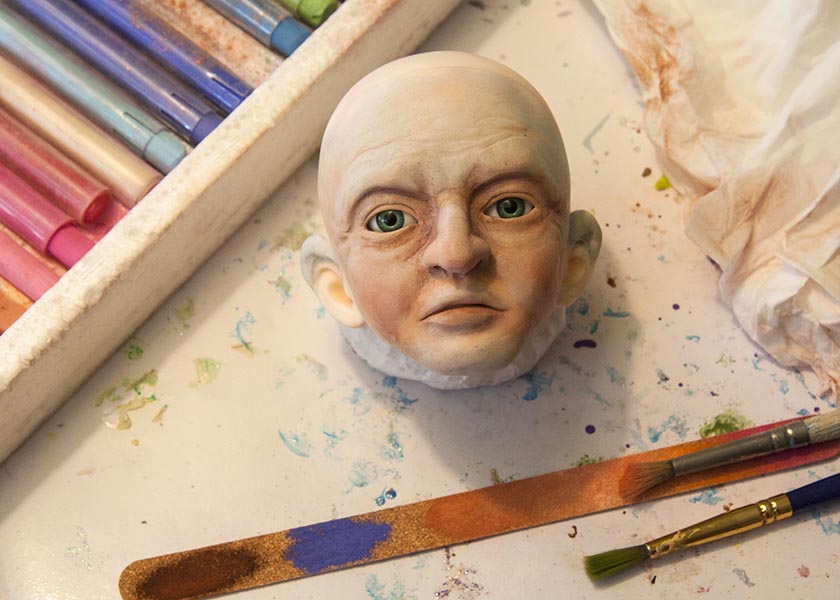
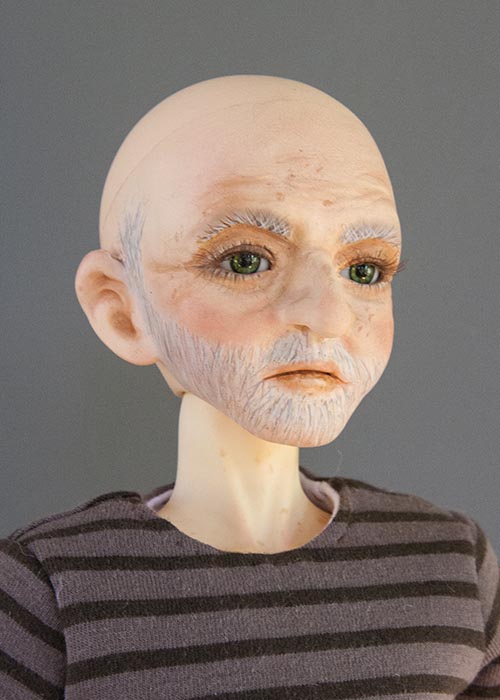
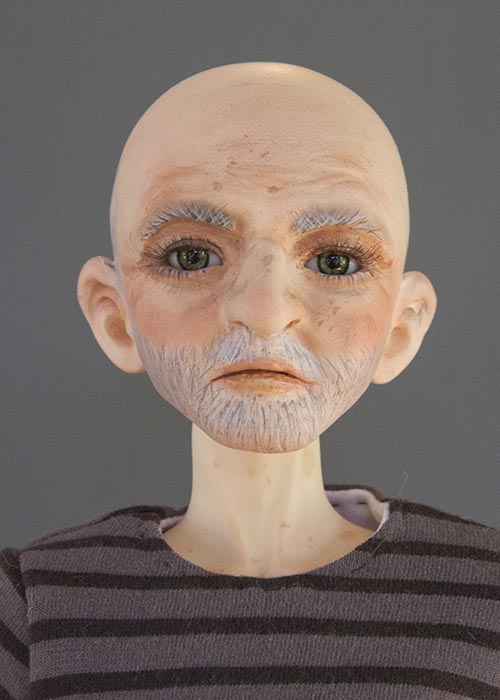
Last week I got the head as close to 'finished' as I figure I'll come, having added a bit more to the lower eye lids, the chin, cheeks, lower lip, and tops of the ears. Then yesterday was such a warm day (at over 15 degrees Celsius, we broke the record for the warmest day in February EVER) so I took the opportunity to spray the head with Testors Dull Coat outside. I've never used the stuff before, and made sure to stand upwind so the fumes wouldn't blow into my face. Then I put the head parts in my main floor powder room which has a fan to outside, to let the head dry completely.
This morning I thought I'd try give the head some colour. After all how hard could it be? I'm an "artist" and can paint all kinds of things, so why not a doll's head? But it was nowhere near as easy as I thought. Of course it didn't help that I can barely see what I'm doing. I have uncorrectable astigmatism, macular degeneration, and the start of cataracts in both eyes. Thankfully my camera has auto-focus, so I can still take photos with confidence, but doing handwork is becoming increasingly difficult. Anyway, I got a bit of uneven colour on him.....He looks pretty good, although it's become very clear that I won't be able to paint him myself - at least not to my perfecting standards.
I think once he's properly painted by a professional, and gets his hair and beard, he'll make a great Wizard and Santa.
But he also needs a body, and even though the head fits nicely on my Maya's body, I don't like the idea of them sharing a body. Plus this Wizard-Santa guy is going to need his hands modded into 'old man hands'. He can't have Maya's smooth 'young' hands. Which means getting him a body of his own. Fortunately Doll Leaves (where Maya comes from) is one of the few doll companies that will sell just a body. I'd order one, but our dollar is so low right now. But I really, really, really want to see this guy come together, and who knows if, or when, our dollar will ever recover, so maybe I just have to go for it. And order him some 'holdy' hands while I'm at it.
February 24/16
I've been looking around for a body for my head, and even sent Doll leaves an email to order a boy body. But they never got back to me. Which turned out to be a good thing. I saw one of the doll companies that sells just bodies was having a big sale, so I asked my friend Charie what she knew about their quality. She said she had two old Fantasy Doll boys that I could check out to see if their bodies would fit my head.
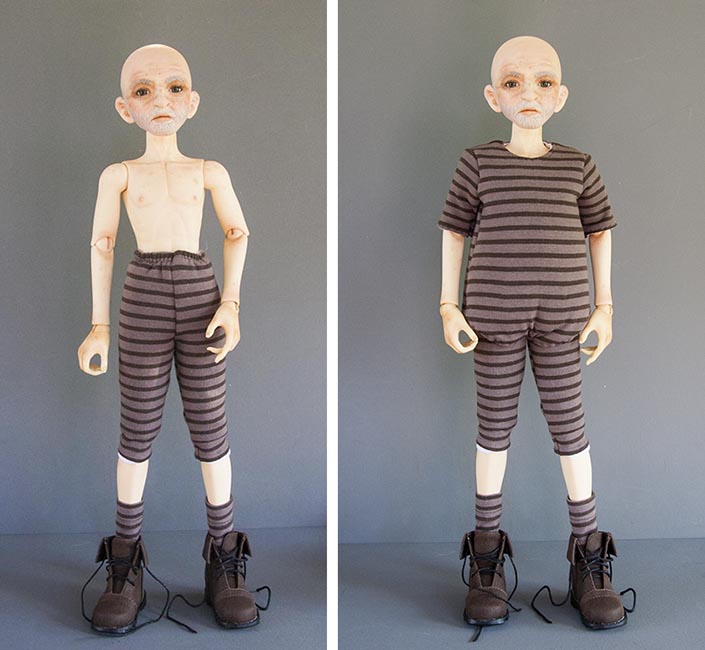
The Fantasy Doll boys were older discontinued models, and were taller than my Maya - which is what I was hoping. I didn't really want a 'squat' wizard figure. The Doll Family practice head fit perfectly. Only problem was the hands. They were rather small, and way too smooth for an old man. So Charie pulled out her 'parts' drawer, and we found a pair of larger hands that were originally from some old SD doll. They were bent into a 'holding' position, and already had great knuckles, so wouldn't need any extra modding.
I paid for the doll, and left everything with Charie. When she has time she will paint him for me. I wish I could do it myself, but I know my limitations, and it's just not going to happen. Plus, Charie has painted all of my other dolls, so if she paints my old man, he'll fit in better.
So now I'm just waiting.
October 16, 2016
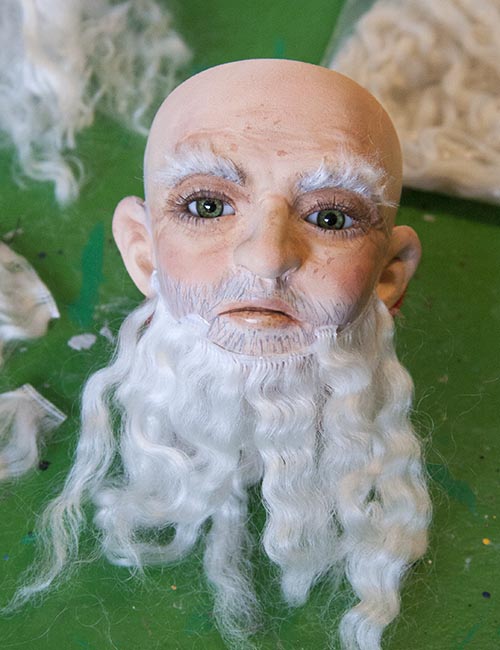
It's been a very challenging year for both of us, but my Santa was finally panted, and ready to pick up. Charie said it took around 15 thin coats of paint to blend the grey Apoxie into the 'peach' of the resin. She gave him a light face up suitable for a Santa figure. When he becomes a Wizard, I can add darker shading around his eyes - and if I don't seal it, it can be washed off when he becomes Santa again. I can't wait to see him with hair and beard!
November 2016
His Fantasy Doll body is extremely thin, so I'm working on some 'fluffy' clothes to give him a more 'robust' look. I made some pants and a top, out of two layers of stretch jersey with quilt batting in between, with extra padding in the sides and front....
I added an elastic strap between his legs that connects the front to the back, and prevents the top from riding up under his clothes.
Now to decide what kind of clothes to make for him!
Now to decide what kind of clothes to make for him!
End of November 2016
I thought all along that I'd be gluing his hair directly to his head, but my sister pointed out that if he's going to be wearing a hat a lot of the time, then a wig would probably be better. So I've decided it would be best to make him a wig after all. Which means he'll need a hard cap, as a base for his wig, so I looked online for a tutorial.
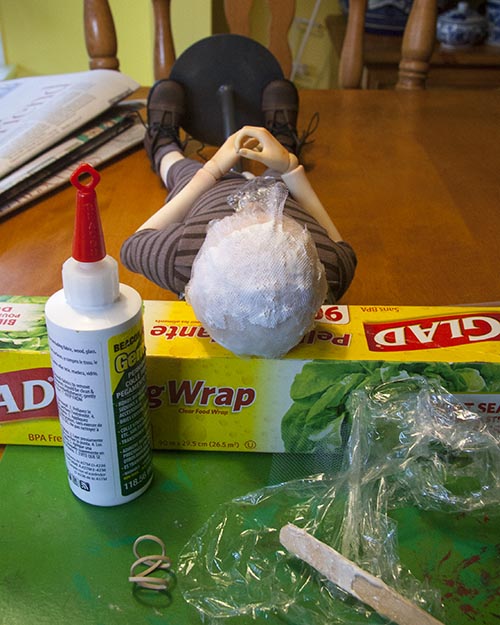
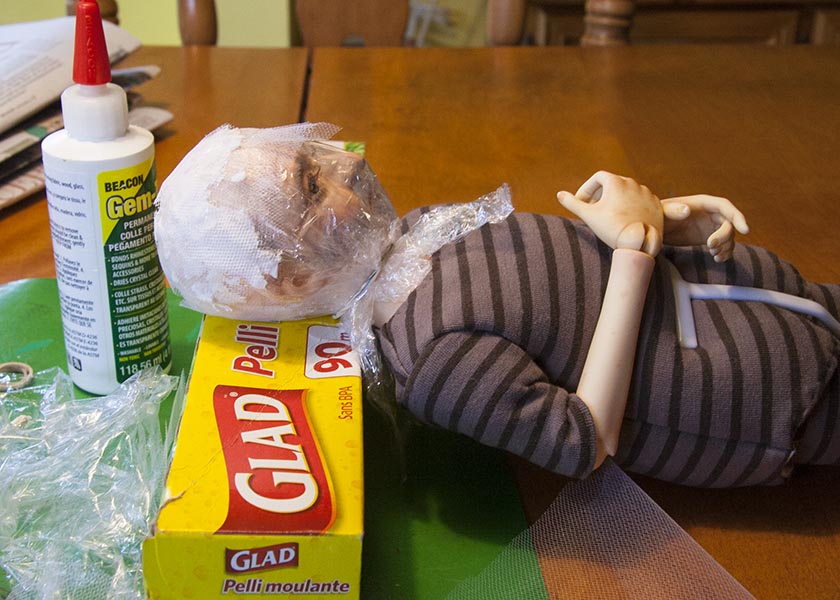
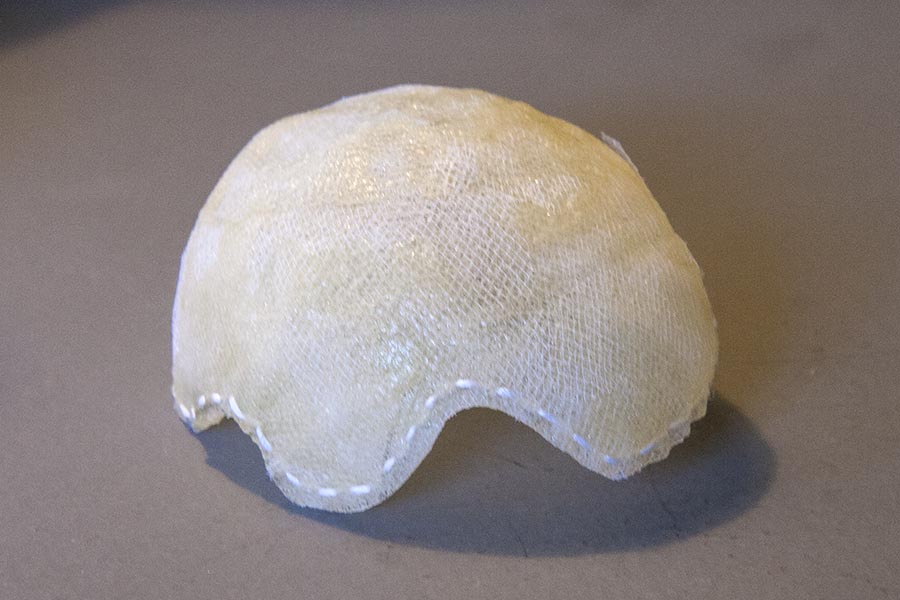
I've started a hard-cap wig for my Santa. I'm still calling him 'Santa' as long as we aren't past Christmas. If I don't get him done by then, his name will change to 'Wizard'. Anyway, I'm trying the method described in the Whispering Grass tutorial. She uses layers of tulle with polyurethane glue. But I don't have that kind of glue, so am using Gem Tac. It's washable when dry, so should hold together when styling a wig. Only problem is getting the glue to hold on the tulle, as there really isn't a lot of 'surface' for the glue to stick to.
Relaxing at the spa.... Each layer takes a long time to dry.
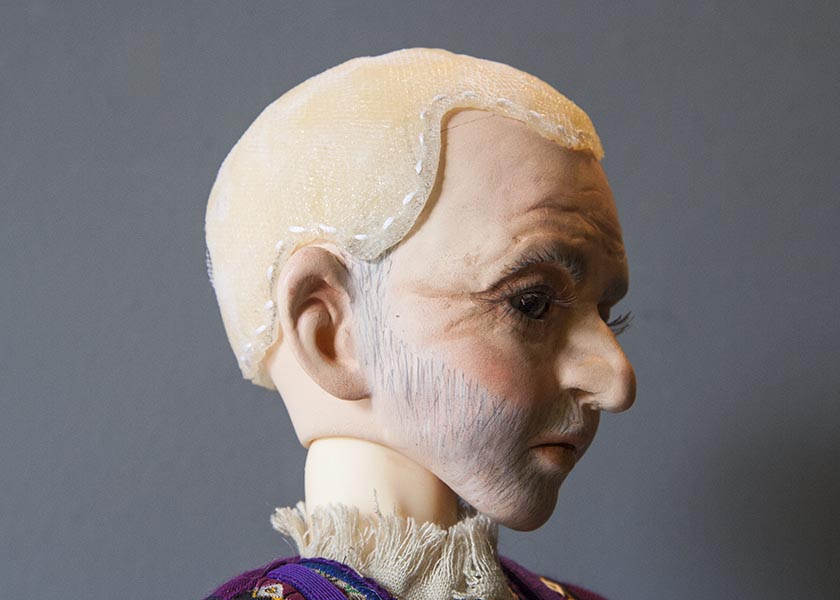
After building up many layers of tulle and glue, I removed the cap and trimmed it so it had a proper hairline. I decided that there wasn't going to be enough time to actually finish him as a Santa anymore this year, so put him aside to continue on him again in the new year - as a Wizard first.
February 6, 2017
I was ill all of January, and unable to work on him, so decided my Wizard has waited long enough, and made him one of my projects for February.
Well, I decided it's high time to get back to my hybrid 'old man', whose going to be both a Santa and a Wizard. I made him a hard wig cap in the end of November, but then things ground to a halt. I decided at the time I didn't want to rush a Santa, so put him on hold and then he could start out 2017 as a Wizard. Well, I finished my January projects, and it's time to address my old guy.
I figured the clothes would be a good place to start. I'm still somewhat intimidated by doing his beard, and making his wig, so if I get all inspired making his clothes, then I'll WANT to tackle his beard and hair, so he'll finally be finished. At least that's my plan.
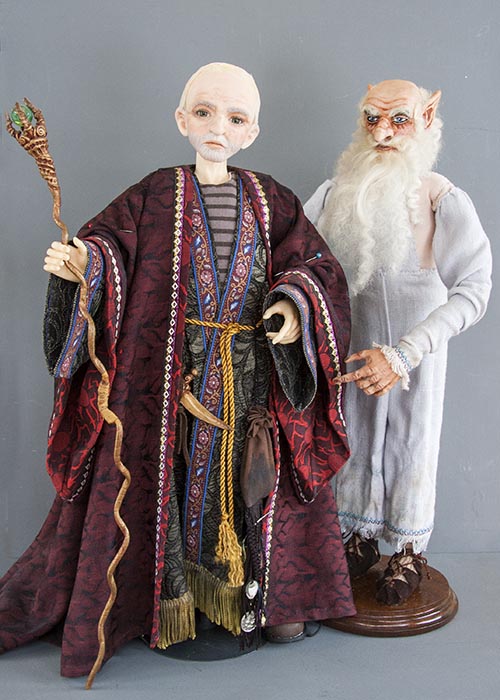
So I undressed my old Wizard figure, that I made way back in 1989, to see how his clothes fit my new guy. The shoulders were way too wide, and the sleeves way too long, but the style looked really great....... I was totally tempted to steal them.
Wizard Underwear
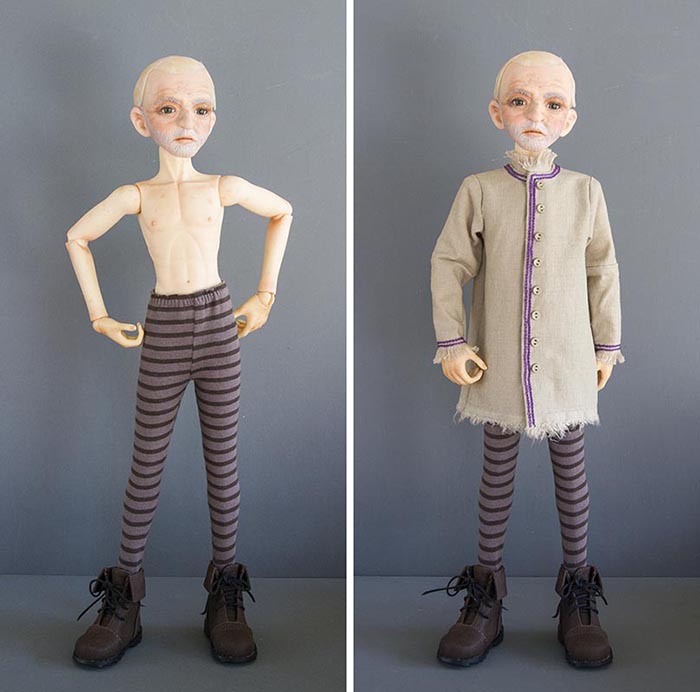
I decided that my Wizard wasn't going to be wearing the 'fat suit', that I made for when he's 'Santa'. It would be too bulky under all those layers, so he needed to be his own skinny self. Which meant he needed something to wear under his robes. I decided on some tights and a long-sleeve shirt. The ragged ends of his sleeves will hide his rather unattractive, huge wrist joints.
I decided that my Wizard wasn't going to be wearing the 'fat suit', that I made for when he's 'Santa'. It would be too bulky under all those layers, so he needed to be his own skinny self. Which meant he needed something to wear under his robes. I decided on some tights and a long-sleeve shirt. The ragged ends of his sleeves will hide his rather unattractive, huge wrist joints.
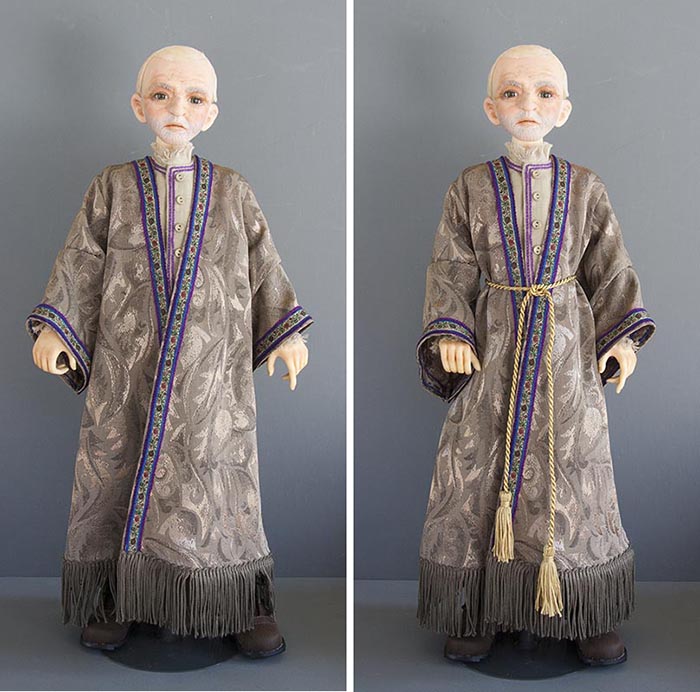
Then I made the inner robe. Even though I thought I had measured carefully, his sleeves were still too long,
so I basted them inside at the elbow, so they'd be the right length.
so I basted them inside at the elbow, so they'd be the right length.
As much as I had been seriously tempted to steal my old OOAK Wizard's robes, I decided to make my new guy ones of his own. After all, That old Wizard was one of the very dolls I ever made, and I still really liked him.
Over Coat
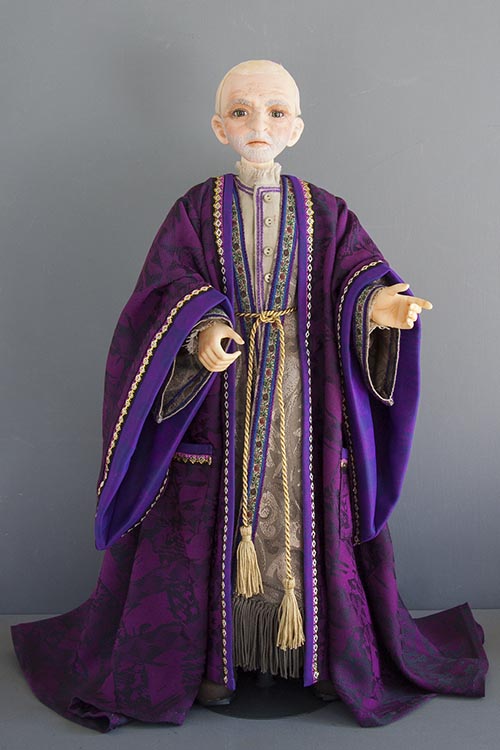
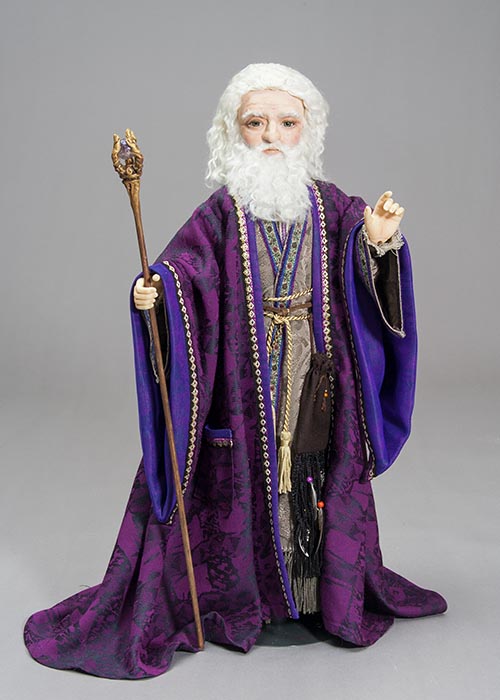
I didn't have much in the way of interesting old brocades left - the ones I still have are 25 years old, and stores no longer carry anything like them. Nowadays, if I can find a nice brocade at all, it's a stiff synthetic, and won't drape nicely like the old brocades, and I need a fabric that drapes nicely. The only brocade fabric I had that was big enough, was a deep purple with dark green designs woven through it. It was left over from one of my large lady's gowns. Both sides of the brocade looked rather similar, and I had wanted something more contrasting for the insides of the sleeves and for the front facings. So I lined them with a purple tricot. It's very thin, and fine enough not to add any extra weight or thickness, and it's transparent enough to let some of the brocade design show through..... The new fabric combination looks considerably more elegant that my old Wizard's robes.
I didn't have much in the way of interesting old brocades left - the ones I still have are 25 years old, and stores no longer carry anything like them. Nowadays, if I can find a nice brocade at all, it's a stiff synthetic, and won't drape nicely like the old brocades, and I need a fabric that drapes nicely. The only brocade fabric I had that was big enough, was a deep purple with dark green designs woven through it. It was left over from one of my large lady's gowns. Both sides of the brocade looked rather similar, and I had wanted something more contrasting for the insides of the sleeves and for the front facings. So I lined them with a purple tricot. It's very thin, and fine enough not to add any extra weight or thickness, and it's transparent enough to let some of the brocade design show through..... The new fabric combination looks considerably more elegant that my old Wizard's robes.
So now I'm working on his bag, and sword scabbard and belt. He'll need a staff too. I'm not sure yet if I'll give him an 'over-cloak
with hood', or a wizard hat - or both. And then when all his clothes and accessories are done, he'll need his hair and beard.
the Props
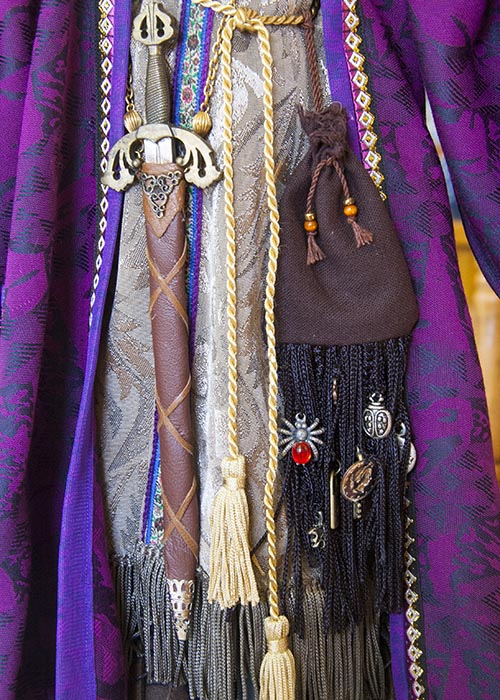
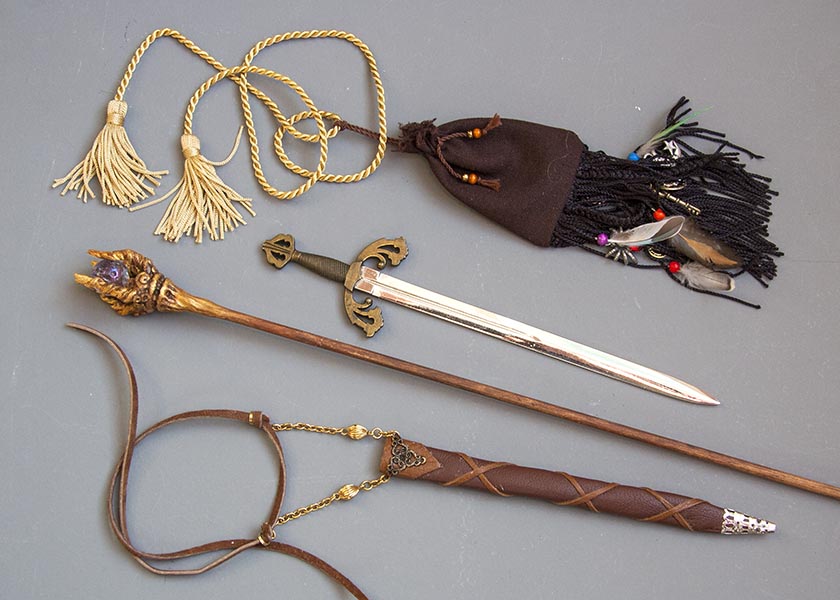
I finished all my Wizard's props. I had already decided that he'd have a cord 'belt' as opposed to a leather one, and I made him a cloth bag for all his 'magic talisman', to hang from it. The bag has long fringes on the bottom, into which I tied even more 'magic' objects. I chose a nice letter opener sword, and it needed a scabbard, which I suspended from a leather strap tied around his waist.
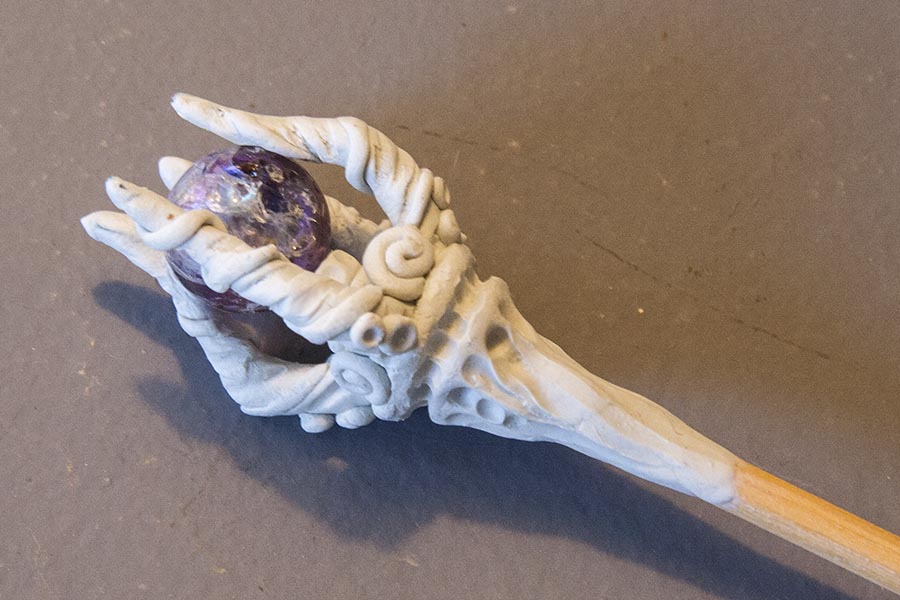
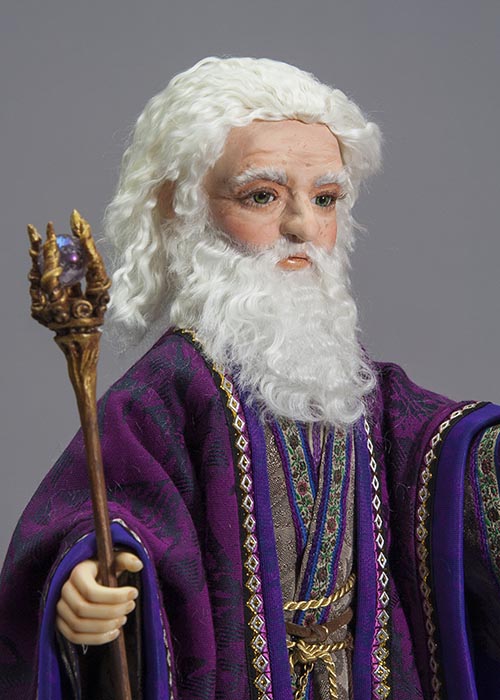
Next, he needed a staff. Jan drilled a couple of small holes into the end of a thin wooden dowel so i could make a wire armature for the sculpted end. The decorative end that holds a small fancy marble, was sculpted of Apoxie. In the past I've always made the tops of the staff out of polymer clay, and that does make for better details, as it's easier to form into fine details, but I wanted the strength of Apoxie, so went with that this time. The glass 'globe' is an old pitted and cracked glass marble.
All his props completed....
Wizard Hair
Well, I'm finally at the point where I have to start on my Wizard's hair and beard. To help inspire, and give me confidence, I got out another old Wizard figure I made. This one isn't as old as the first one, so that gives me a little more confidence. Plus he has a much neater beard...Okay....I think I can do this.....
Well, I'm finally at the point where I have to start on my Wizard's hair and beard. To help inspire, and give me confidence, I got out another old Wizard figure I made. This one isn't as old as the first one, so that gives me a little more confidence. Plus he has a much neater beard...Okay....I think I can do this.....
Time to choose the mohair. And just a quick word about "mohair". Many people mistakenly call Tibetan Lambskin 'mohair', but it's not. Tibetan lambskin is the pelt of the Tibetan sheep, and it's a by-product of when they are killed for their meat. Mohair, on the other hand, is sheared off a live goat - just like sheep - and then he (or she) goes on to grow another coat to be sheared again the following year. The length of the mohair is determined by how long a goat is left between shearing.
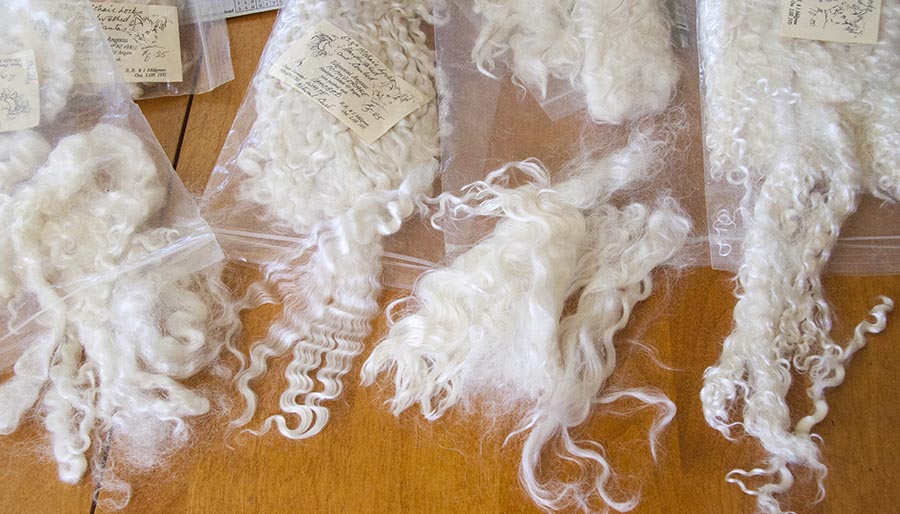
I have quite a large collection of mohair. It was all purchased from Edgewood Angoras a long time ago. They used to sell at doll shows, but went out of business many years ago. They had a farm with several mohair goats, and each one had a name. Each goat had it's own distinctive curl in their mohair. Younger goats had curlier hair, while the oldest goats hair was almost straight. After they sheared, cleaned and dyed their mohair, it was all packaged in baggies with the name of the goat it came from.
So, I've taken out all my white mohair to see which one I want to use. There is quite a difference between the different locks, as would be expected, since they come from different goats....
From the left - 'Mandrake' (uncombed), 'Mandrake' (combed), 'Gideon', and 'Cleopatra'.
If my guy was just going to be a Wizard, I'd go for the locks from 'Gideon' as they are the straightest, and suggest a very old man - like my little Wizard above. But he's also going to play the various Santa characters, so I'm not going to use the really straight mohair. The 'Cleopatra' locks are too curly. That leaves 'Mandrake'. I think I'll forgo the combed locks, and leave them for whenever I need to make a nice elegant Rococo wig. So that means using the uncombed ones from 'Mandrake'. The individual locks average 8 to 10" long, so I can cut them in half (or thirds) to make the wefting.
Well, enough time spent at my computer, putting off the inevitable....I better start sewing wefting.
Wizard Wig
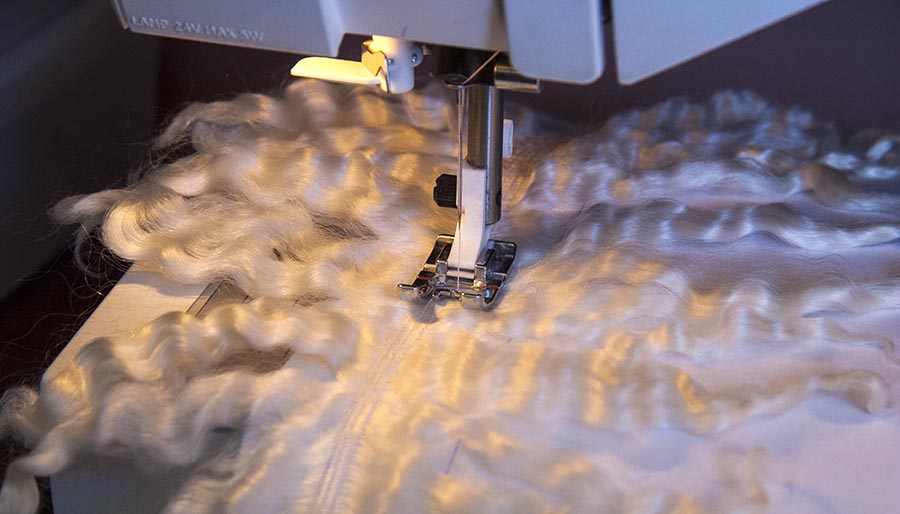
I've never liked making wigs, or styling my doll's hair. But I've done everything I could on my Wizard, so now I'm at the point where I have no choice anymore. I sewed some wefting....
I've never liked making wigs, or styling my doll's hair. But I've done everything I could on my Wizard, so now I'm at the point where I have no choice anymore. I sewed some wefting....
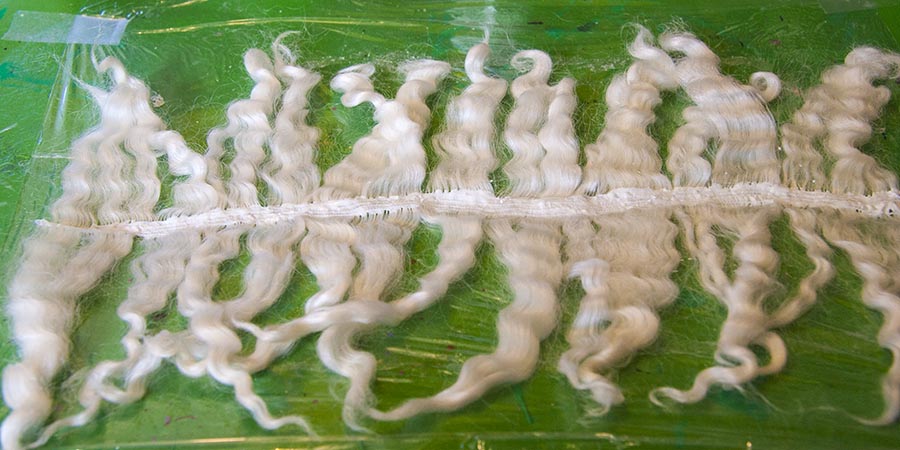
After removing the paper backing, I applied some Gem Tack glue. It's supposed to be permanent, and washable, so should hold the mohair fibres permanently in place. When the glue dries, I will cut up the middle to make two rows of wefting...
The Whispering Grass wig tutorial suggested hand-stitching around the outside edge of the wig cap,
to keep it from stretching out of shape.
to keep it from stretching out of shape.
Gluing on the Mohair
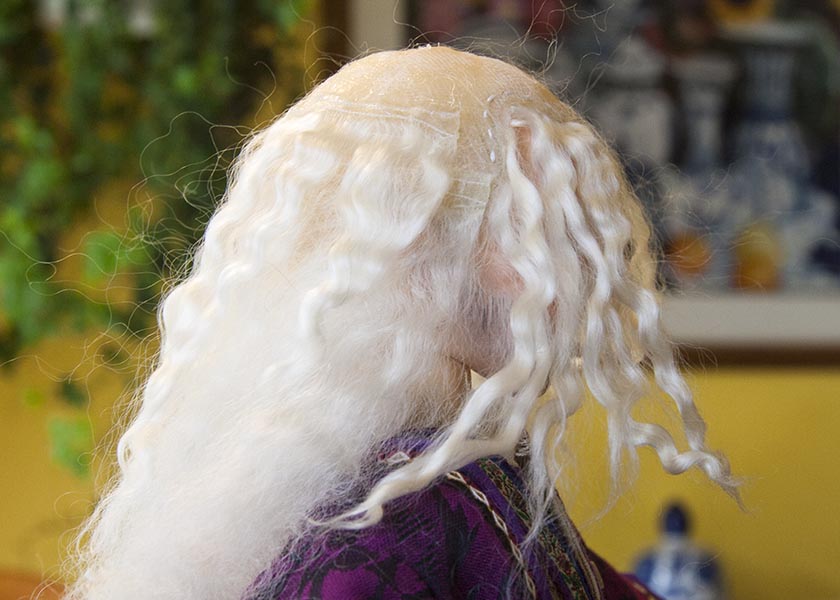
Ready or not, it was time to glue on the wefting on my Wizard's wig cap. I used my trusty hot glue gun, knowing there's just the one chance to get it right. I started with the fringe around the inside front edge. Then started adding layers on the back....
Ready or not, it was time to glue on the wefting on my Wizard's wig cap. I used my trusty hot glue gun, knowing there's just the one chance to get it right. I started with the fringe around the inside front edge. Then started adding layers on the back....
* Note - I did not use the glue gun with the wig cap on the doll's head. I handheld the wig cap, or had it on a wig stand.
I only put the wig on the Wizard after the glue had cooled, to see how it looked , and take the pictures.
I only put the wig on the Wizard after the glue had cooled, to see how it looked , and take the pictures.
I had made some wefting out of the combed 'Mandrake' mohair, and afterwards I wish I hadn't used that
for the inside front edge, as the mohair wanted to stay in clumps and not spread evenly across
for the inside front edge, as the mohair wanted to stay in clumps and not spread evenly across
Oh well. Once it's glued on, it's too late. Just proceed and hope for the best....
Finally, with all the mohair strips glued on, and after a bit of initial combing.His crazy, wild hairdo reminds me of the witch in
Robin Hood, Prince of Thieves. It definitely needs some serious styling. The trick is getting him to look like what I want him to.
Finally, with all the mohair strips glued on, and after a bit of initial combing.His crazy, wild hairdo reminds me of the witch in
Robin Hood, Prince of Thieves. It definitely needs some serious styling. The trick is getting him to look like what I want him to.
The Beard
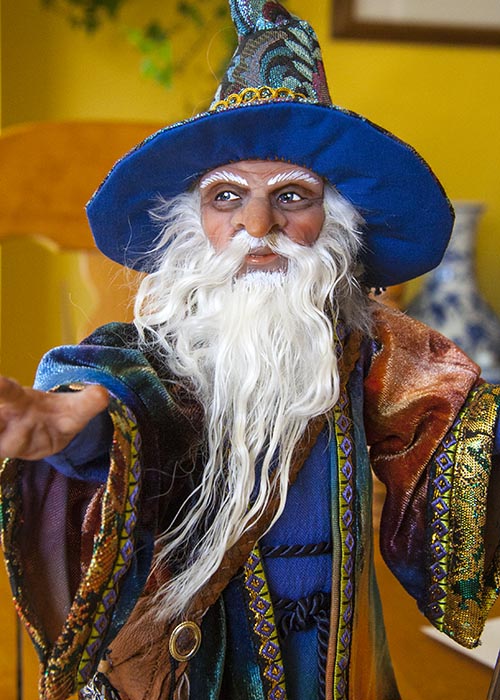
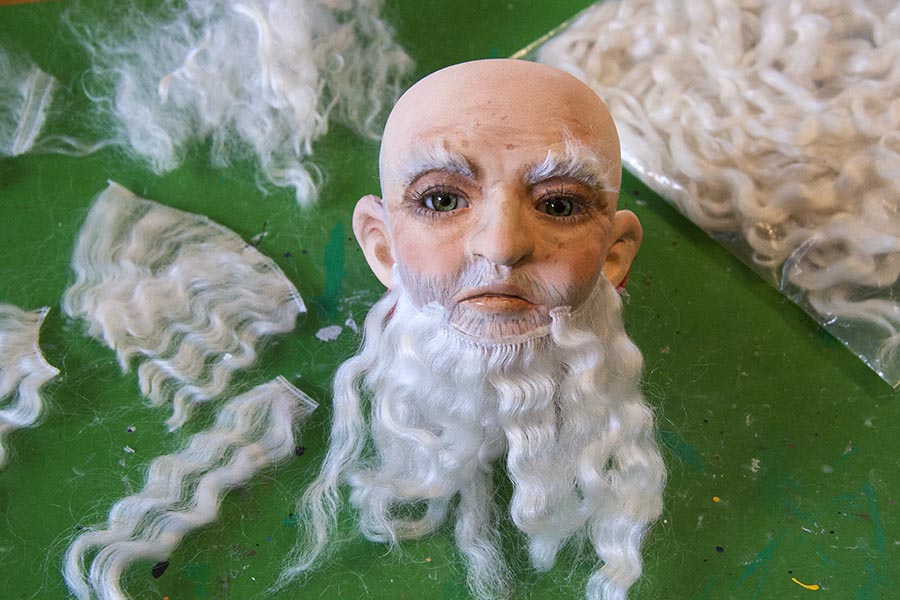
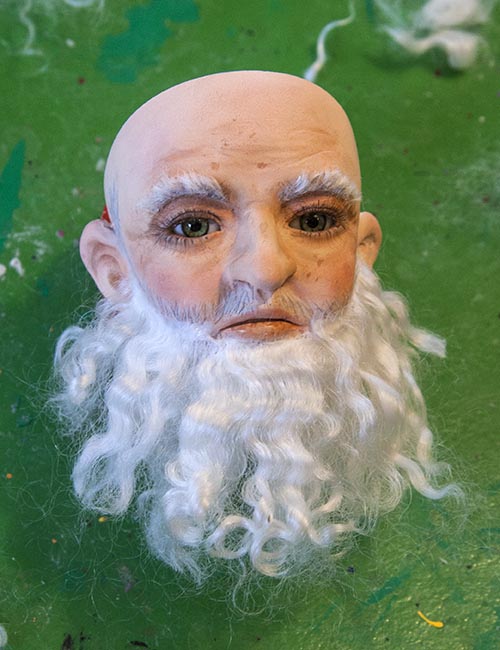
Yesterday I finally tackled my Wizard's beard. I made a few lengths of wefting, so the lower part of the beard would glue on faster. But it can only be towards the bottom of the beard, otherwise the stitching will show. Here he is with the rows of wefting glued into place, and mohair glued onto his eyebrows. Everything will get trimmed once it's dry.
Yesterday I finally tackled my Wizard's beard. I made a few lengths of wefting, so the lower part of the beard would glue on faster. But it can only be towards the bottom of the beard, otherwise the stitching will show. Here he is with the rows of wefting glued into place, and mohair glued onto his eyebrows. Everything will get trimmed once it's dry.
The rest if his beard had to be glued on with individual clumps of loose mohair. It's a slow, tedious process, since each layer has to dry before the next one can be added. But he's looking good....
Almost Done
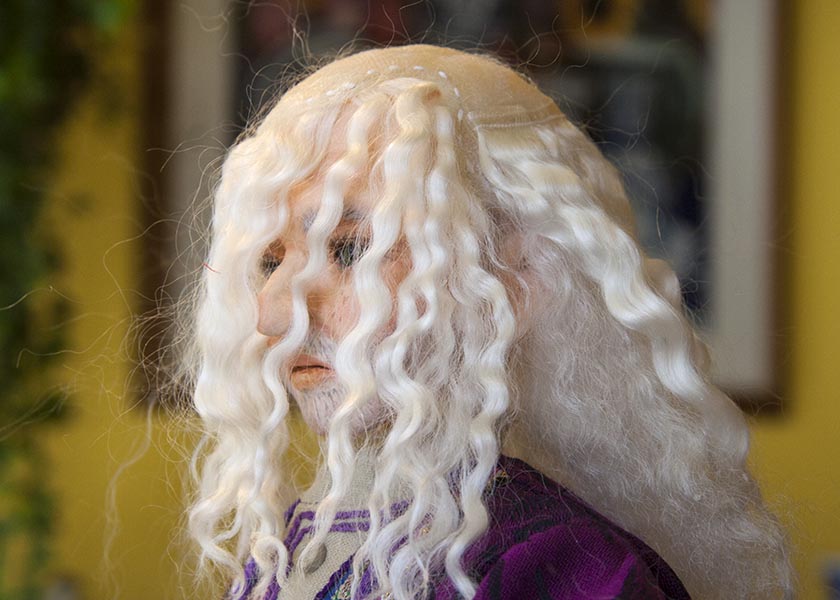
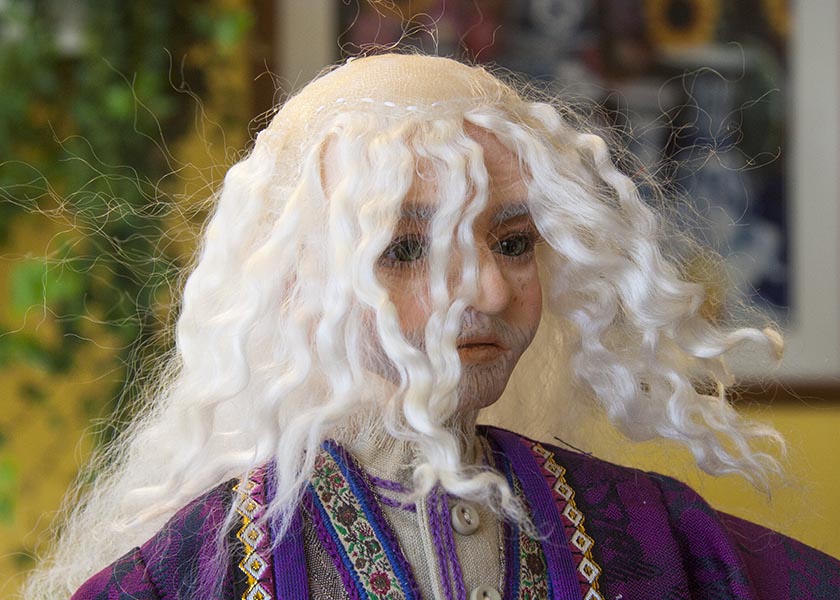
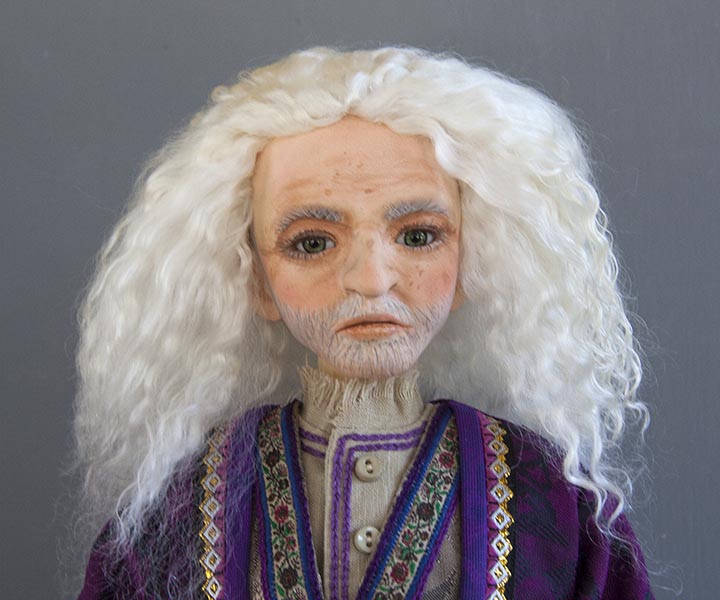
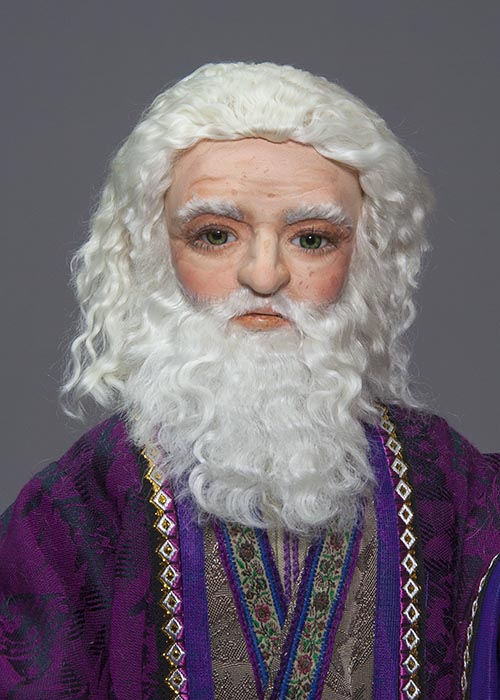
Yesterday I spent all day working on my Wizard's beard, then trying to trim his hair to match.
It still needs some fine-tuning, but I'm leaving it for now.
Yesterday I spent all day working on my Wizard's beard, then trying to trim his hair to match.
It still needs some fine-tuning, but I'm leaving it for now.
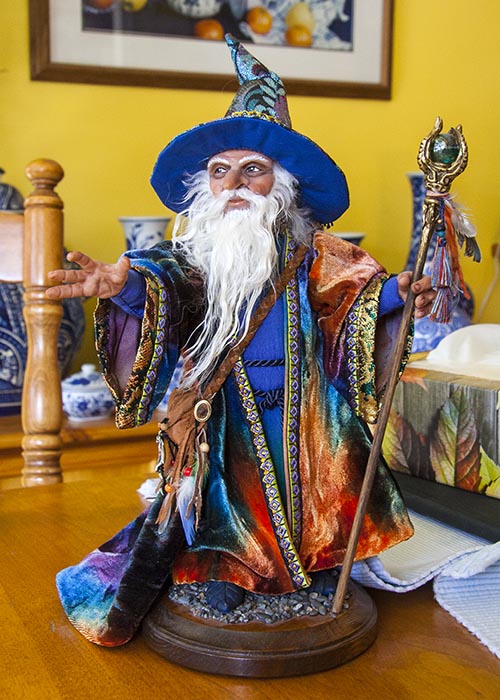
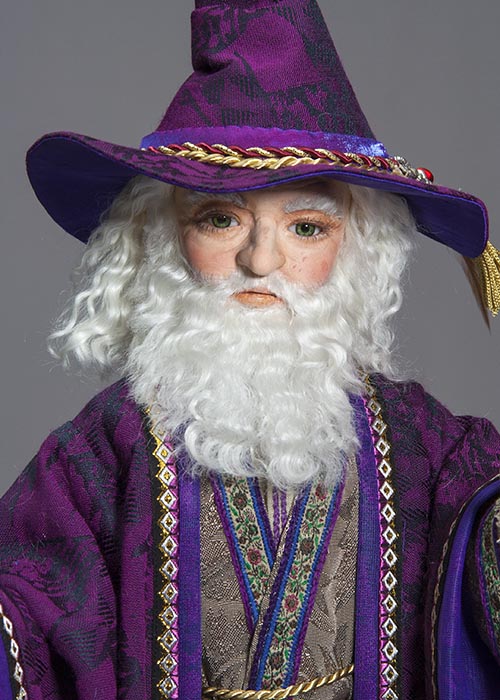
He looks pretty good, but I'm thinking he looks a bit too 'biblical', like he's Moses parting the Red Sea.
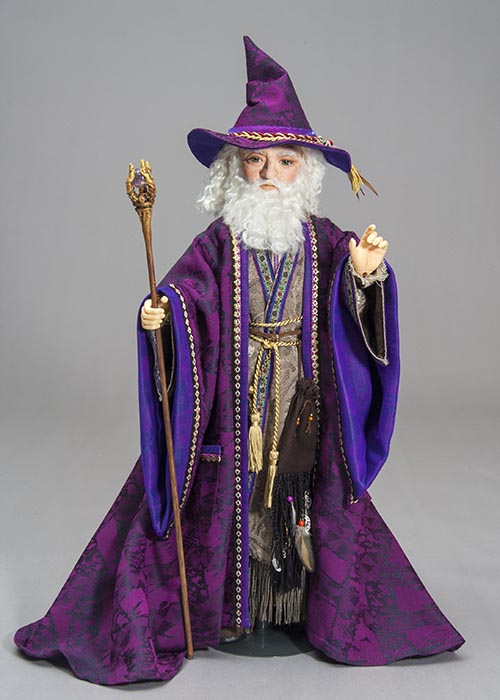
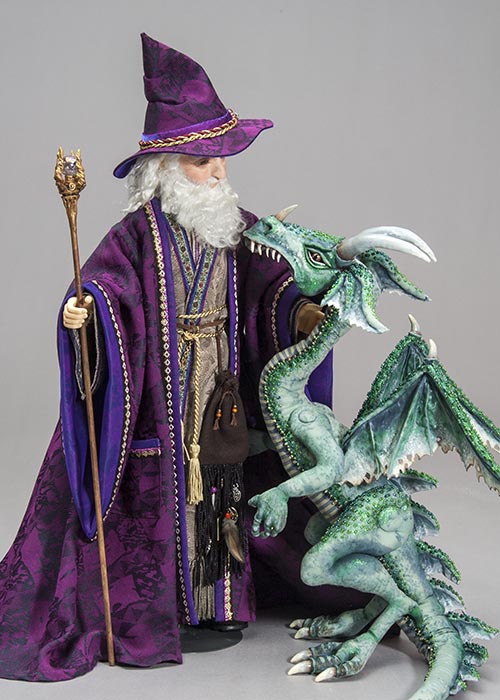
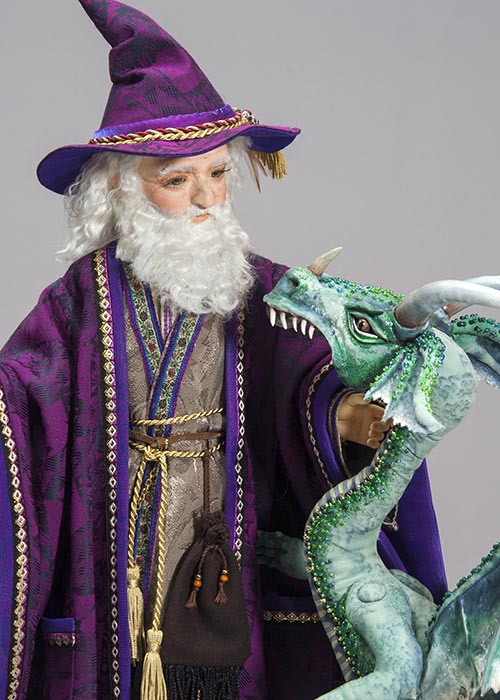
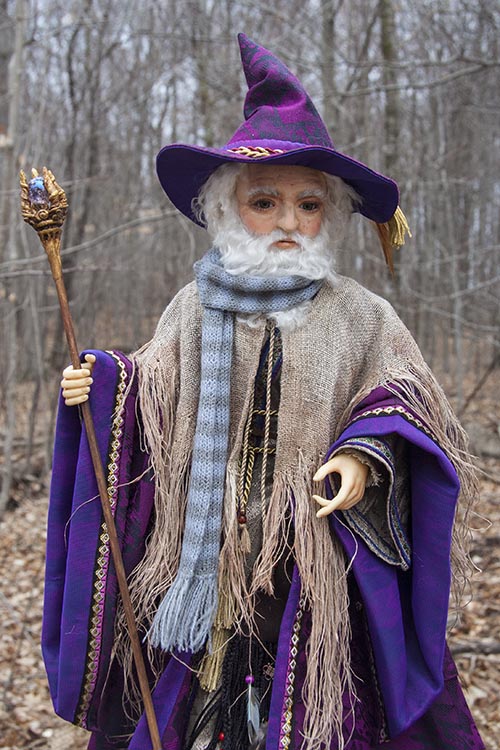
I figured he needed a hat to make him look more like a Wizard, so I made one out of matching fabrics...
That definitely looks better. Now he looks like a Wizard instead of a 'prophet'.
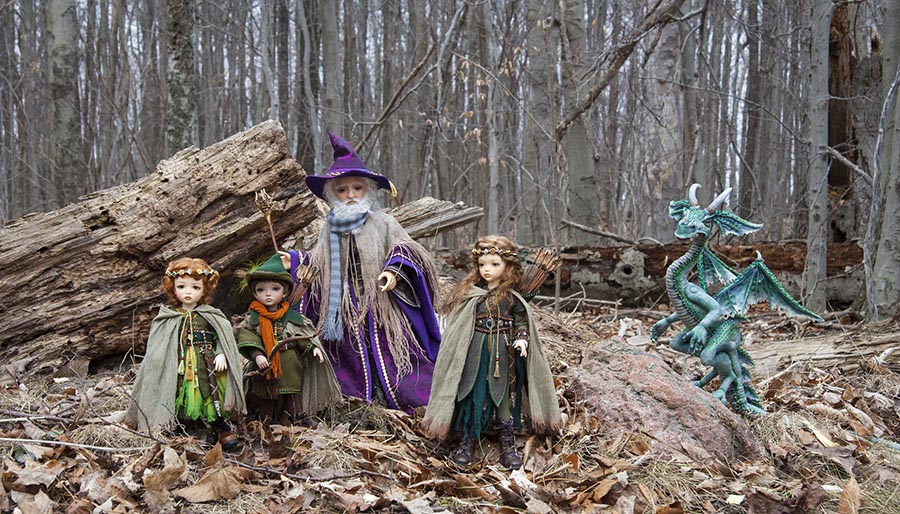
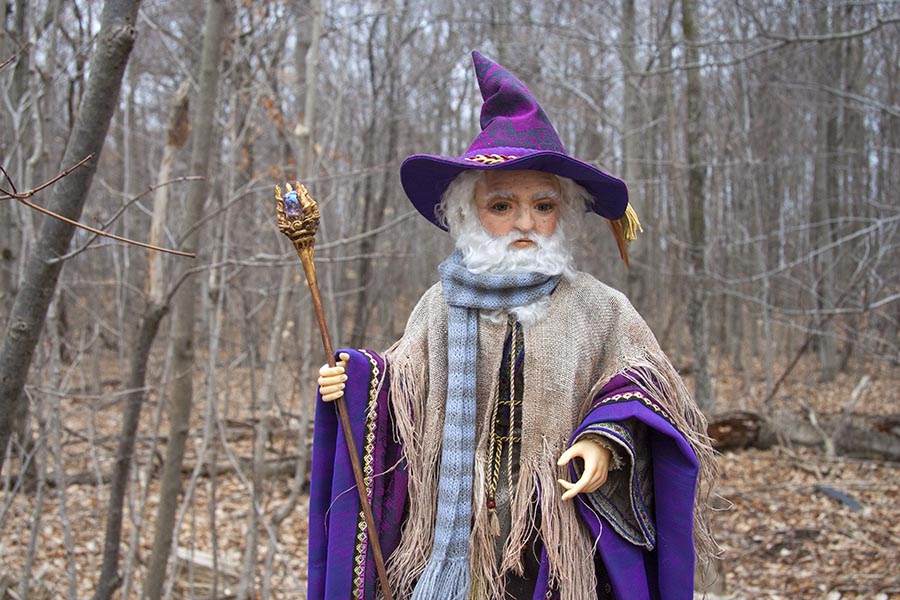
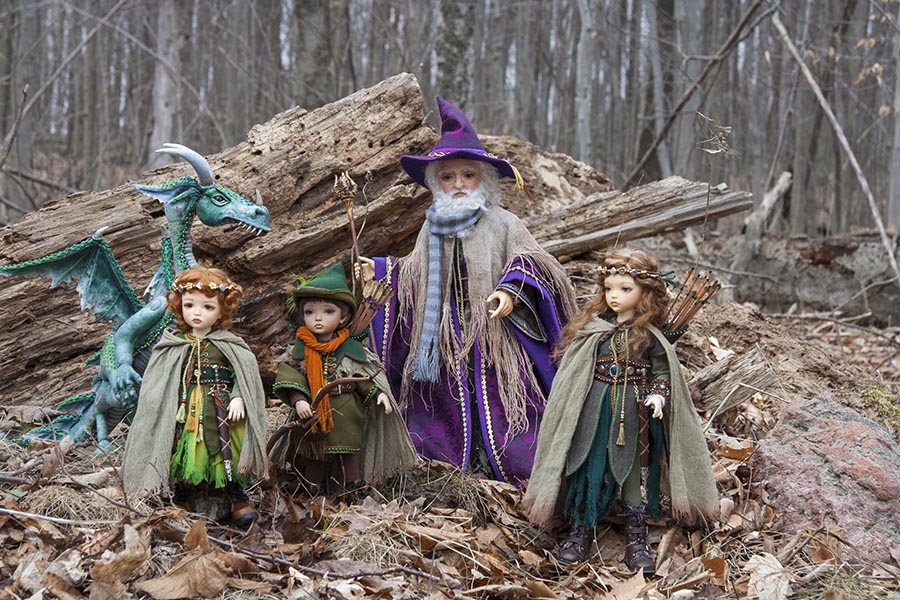
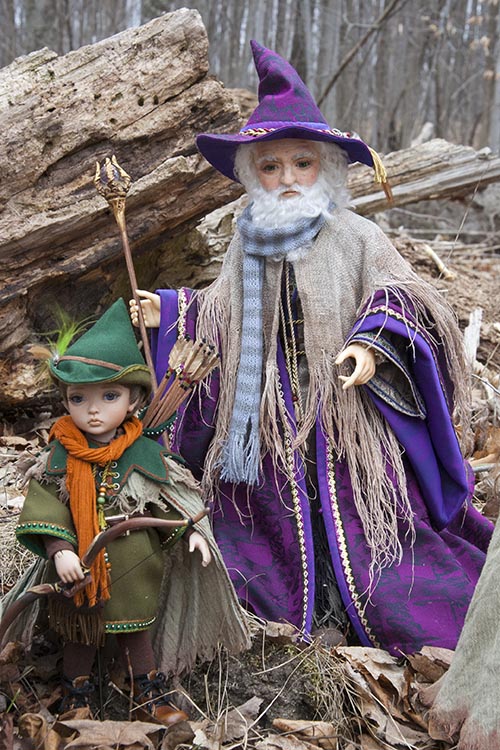
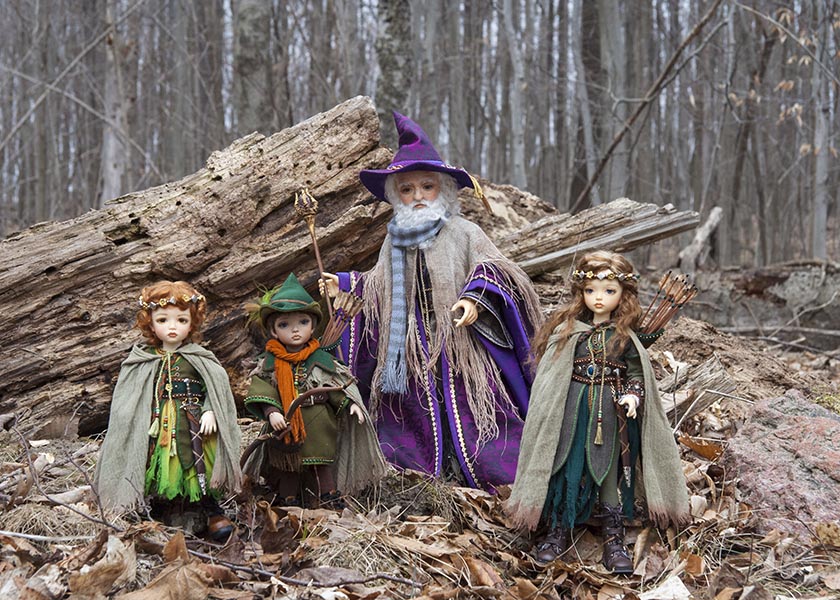
PHOTOS His first adventure out in the world, into the woods on the first day of spring....
To give him a more 'rugged, outdoorsy' look, I made him a fringed shawl, and knit him a scarf.
Someone suggested I name him 'Nicholas the Good', since he's really St. Nicholas, Santa, and Father Christmas,
moonlighting as a Wizard the rest of the year. Totally makes sense, so I might just do that.
moonlighting as a Wizard the rest of the year. Totally makes sense, so I might just do that.
Copyright © 2017 Martha Boers
All Rights Reserved
