Under Construction
A collection of Blog posts about whatever I'm working on. No patterns or in depth instructions in this album, although I will include links to patterns if they exist elsewhere. Hopefully you will find some helpful tips.
Medieval Family
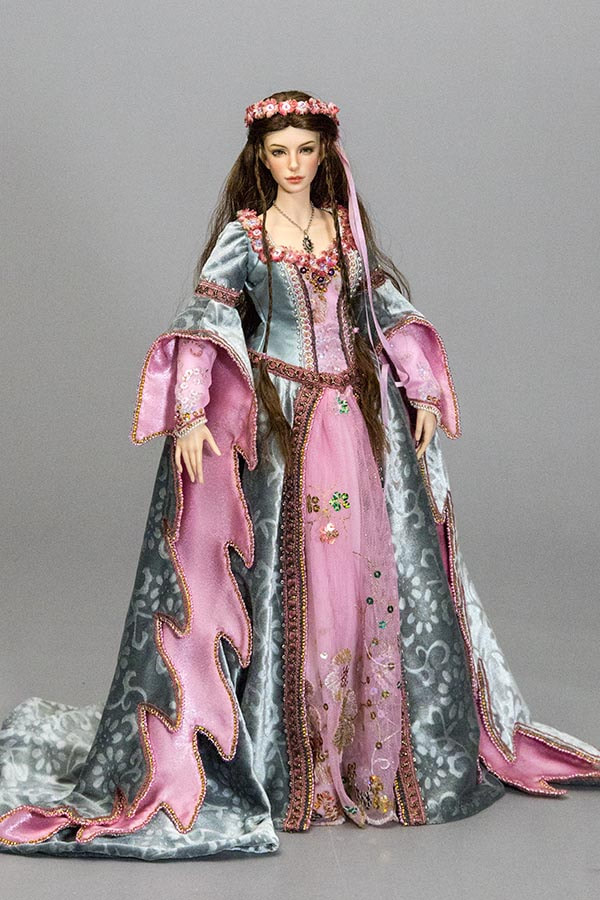
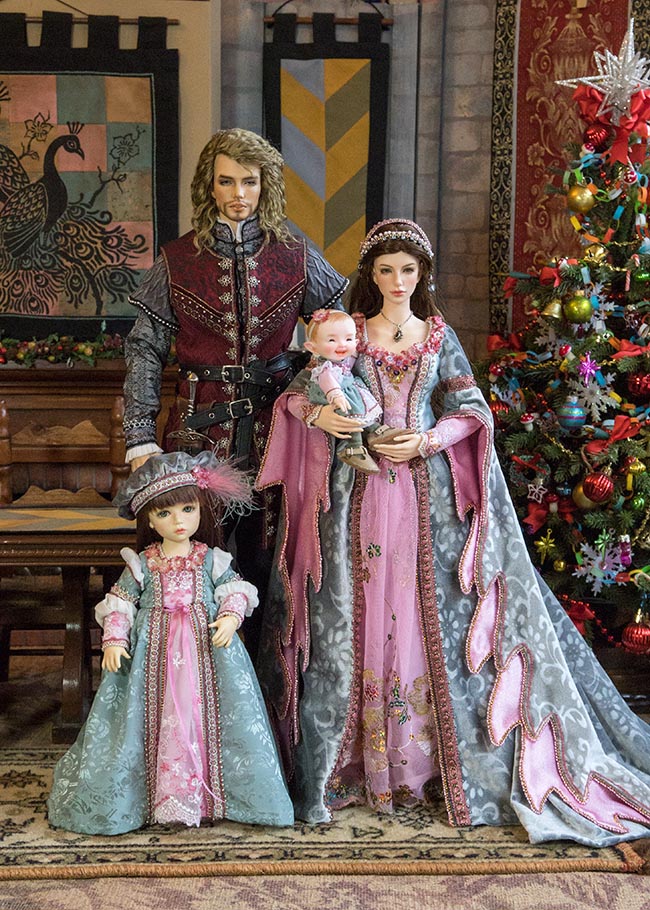
I'd been working on the final set of costumes for my Fashions book. It needed a cut-off point or it would never get printed, so the final photos to be included would be those of Matias and Agnes' family. I'd already completed Agnes' gown last summer, and Matias' formal outfit last month...
|

|
|
Then at Christmas when I decided they'd have a daughter, Olivia, she needed something to wear as well, and I thought it would be nice if her dress would be in similar colours to her mother, I chose a gray/green brocade, and a wide pink lace, and started work on it.The patterns for a similar dress can be found in Medieval BIDs.
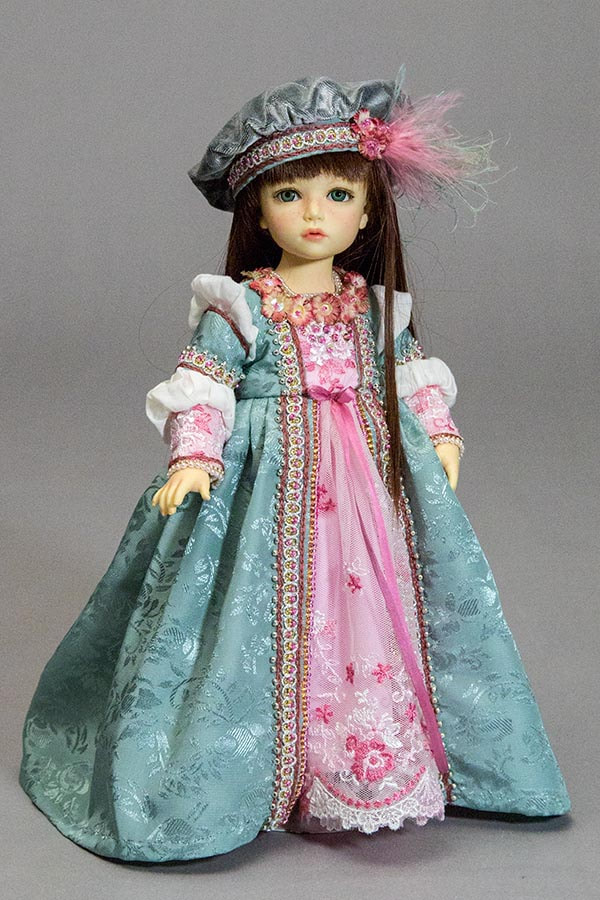
I had originally made her a flower wreath for her hair, but decided to make her a hat as well. Velour is a much softer fabric than the fabric of her dress, and therefore makes a better crown, so I used some leftovers from Agnes' gown for the crown of Olivia's hat.The patterns for a similar hat can be found in KID Renaissance Girls 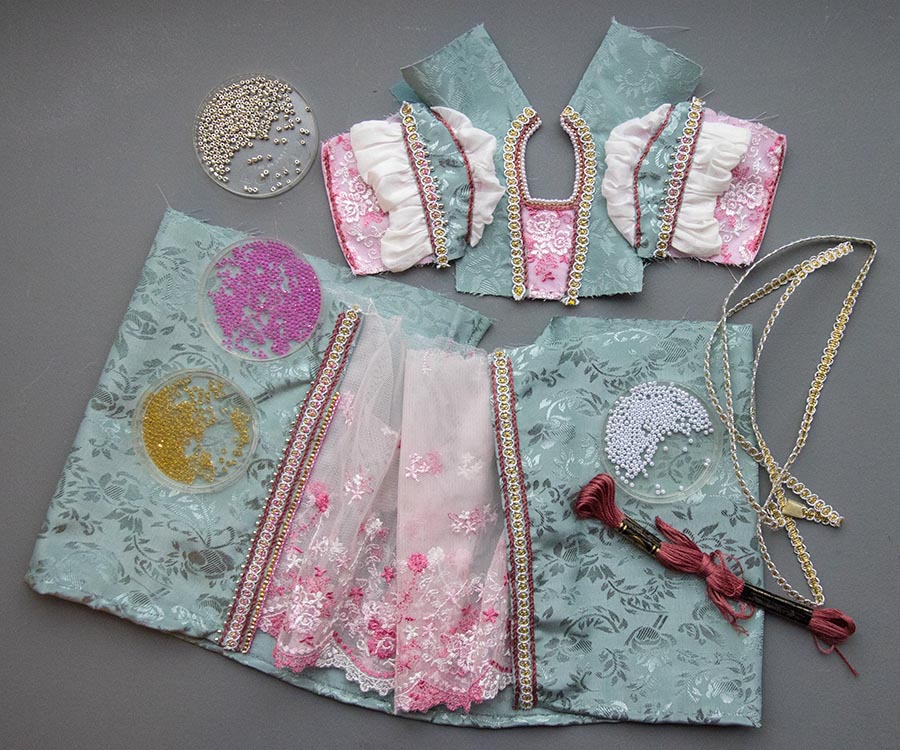
|
|
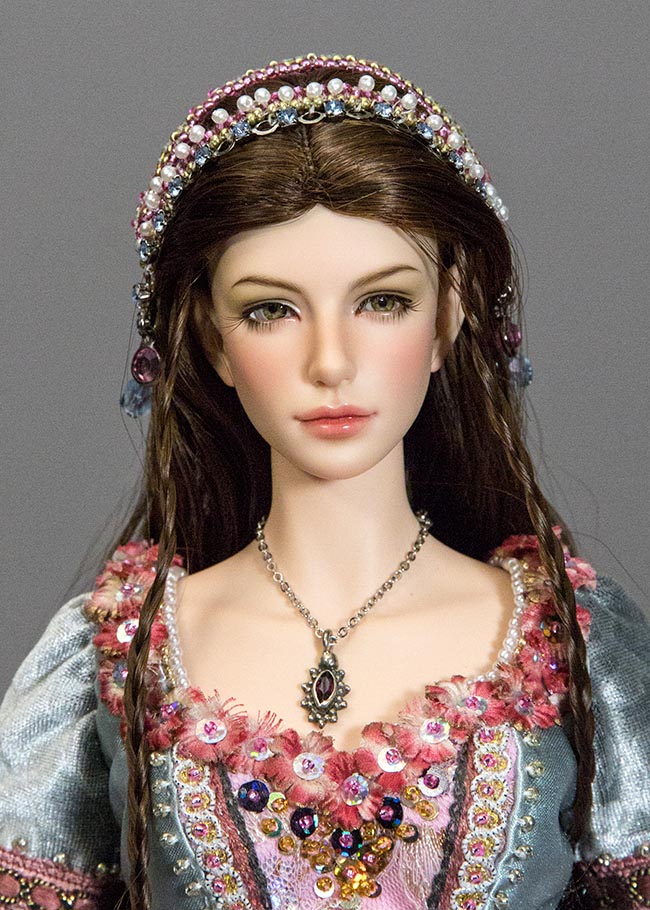
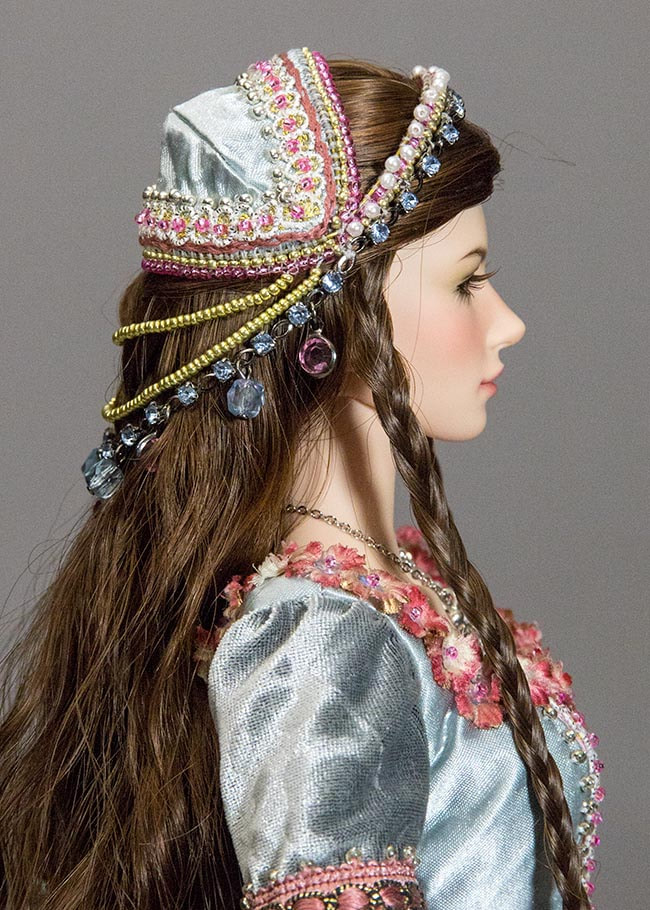
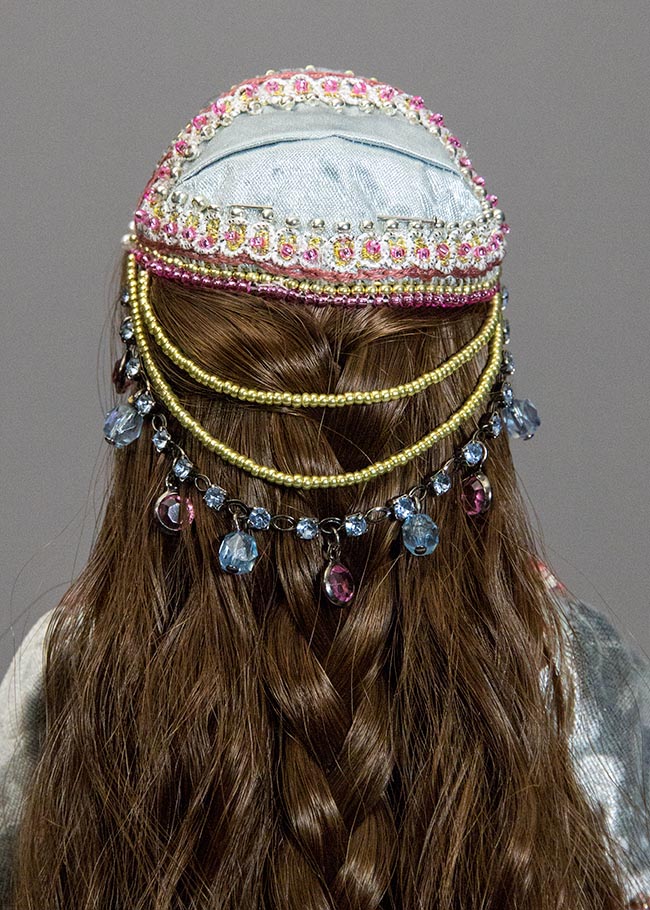
LWith Olivia having a hat now, I thought Agnes needed something to replace her flower wreath as well, so I made her a little Medieval cap. It was the same design I'd used before, (pattern in FID Renaissance ladies) but this time I added parts of a necklace I'd found at Value Village. I stitched the chain of pale blue rhinestones across the front, and secured the front of the necklace with the dangling pink and pale blue pendents across the back....
|
|
|
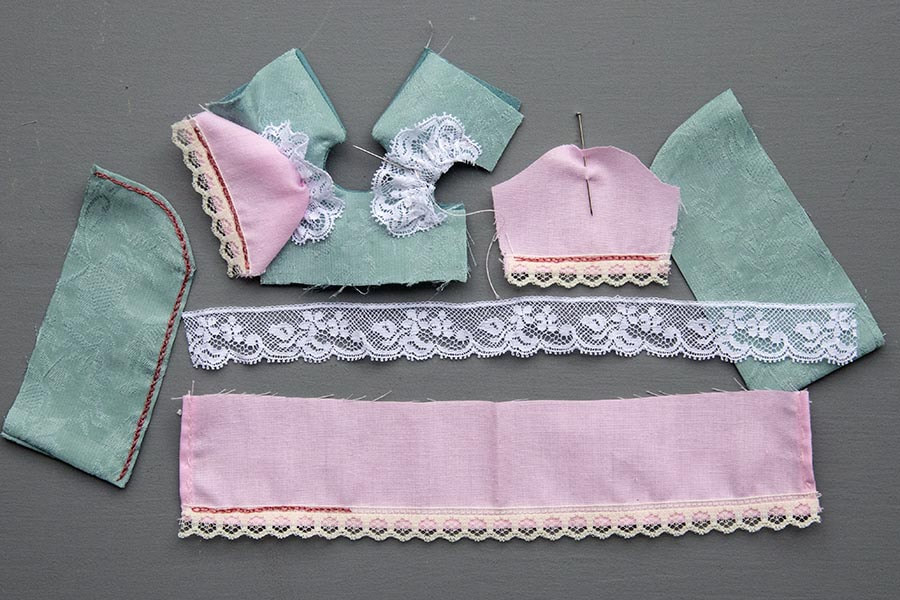
Then it was the baby's turn. I used the same brocade as Olivia's dress, but felt that the shiny flower designs were too big for such a small dress, so I used the wrong side of the fabric. All my pink laces were not really suitable, so I just used some pink cotton and stitched on some fine, narrow, white and cream lace. Then, to eliminate messy hemmed edges on the very fine brocade, I made the gray/green overskirt panels double thickness, stitched the edges, and turned them right side out.
|
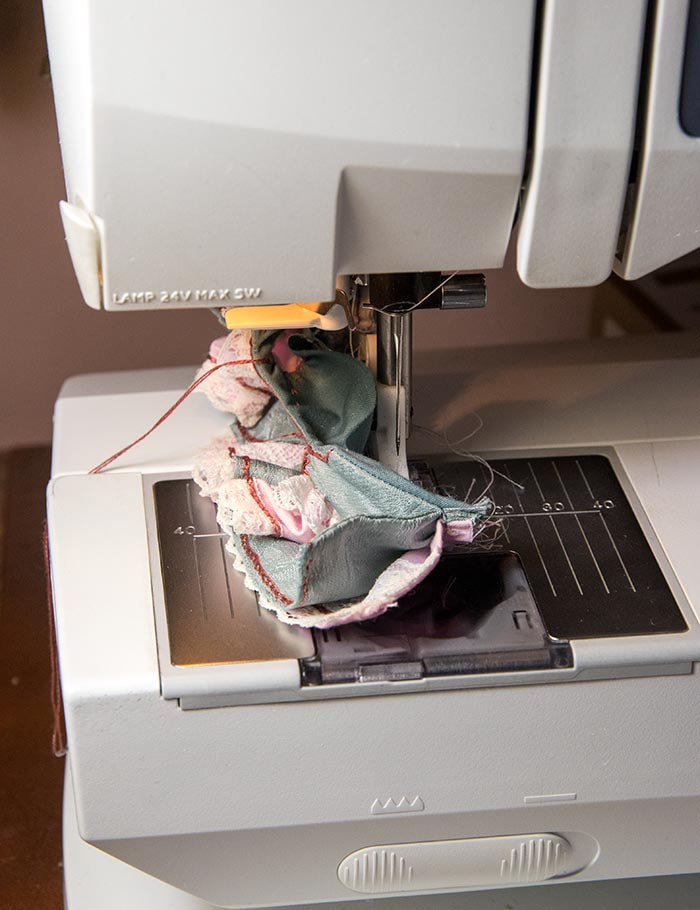
When working on such a tiny garment I find it's necessary to hand baste every seam before running it under the sewing machine. And even then, especially with curved seams like armholes, I often have to pick out the machine stitching and do it again. Sometimes more than once. But eventually after redoing a few seams on the machine, then finishing by hand, and doing all the embroidery and embellishing, the tiny dress was done, and the baby had a cute matching outfit. 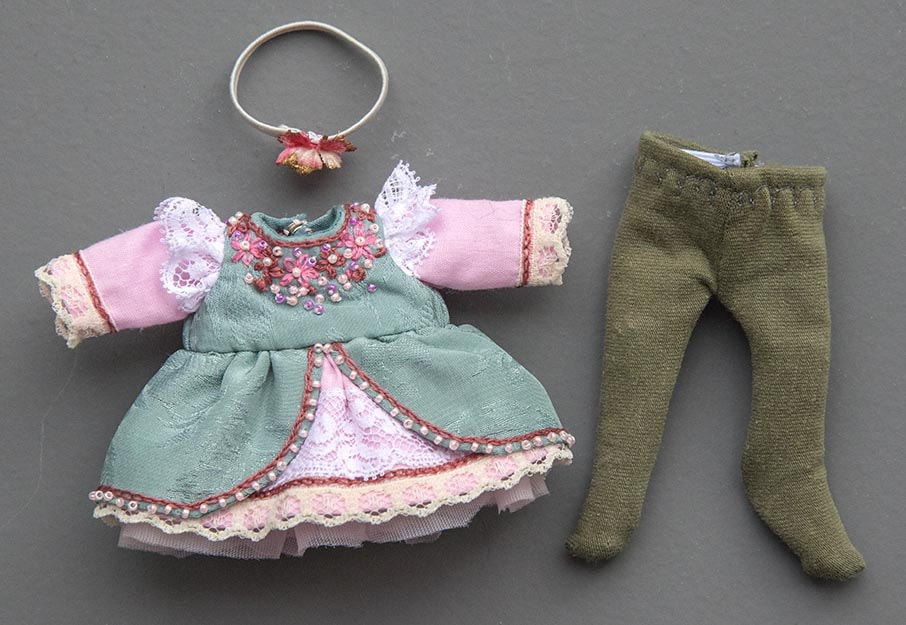
|
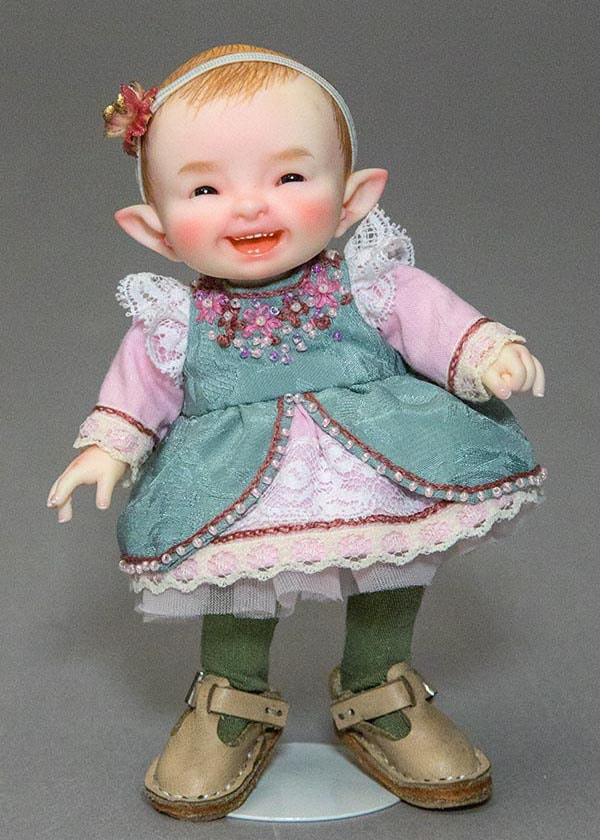
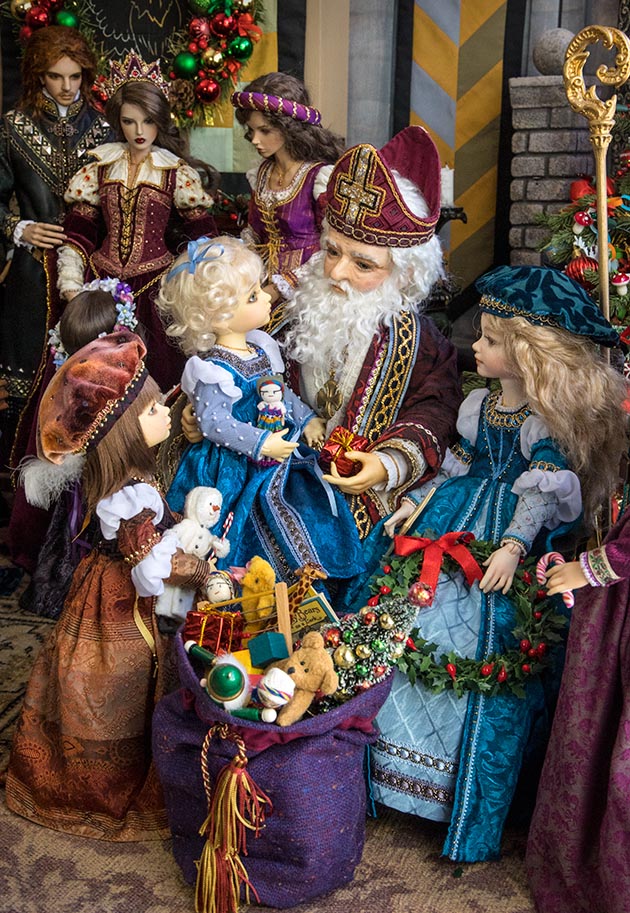
And with baby Mika's dress complete, the entire family was ready for their formal portrait...
|
|
Knitting with Variegated Yarn
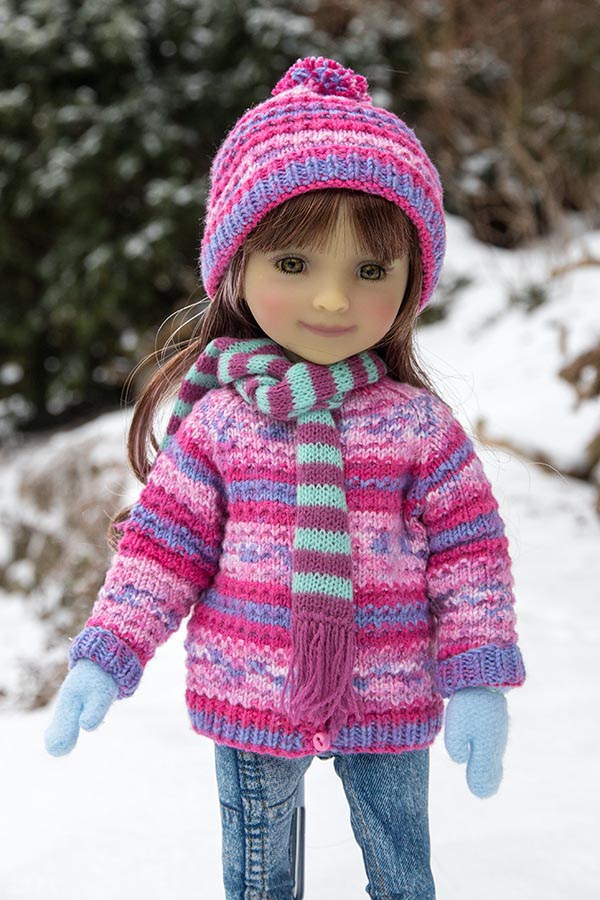
I'm in the process of knitting sweaters for my three Ruby Red dolls. I love using the variegated sock yarns and have a box full of them. I chose a nice pink one with long lengths of each colour...
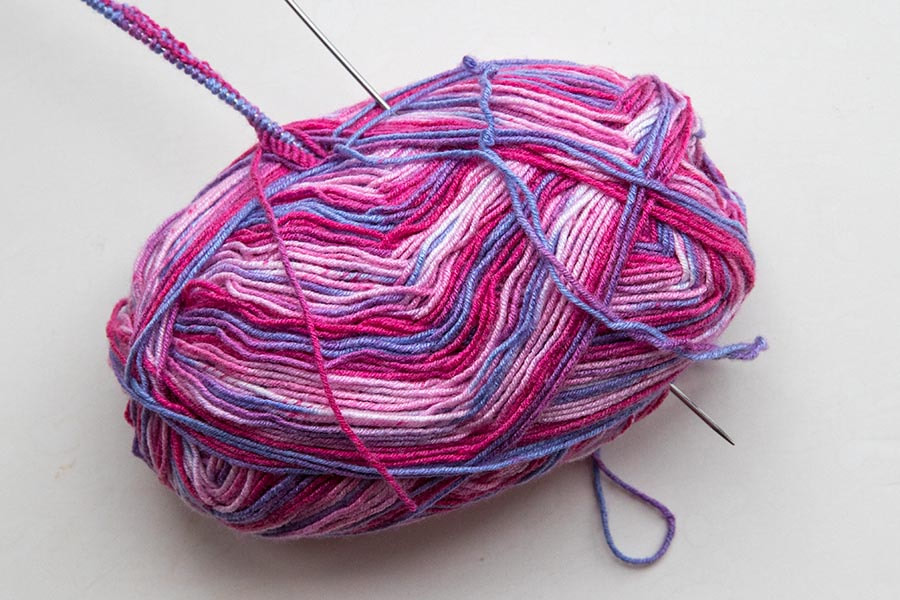
I've seen lots of doll sweaters knit from beautiful variegated yarn where each sleeve was knit in its entirety one at a time, and the colour stripes ended up very wide and the two sleeves don't match at all. So I developed a way to make both sleeves almost identical.
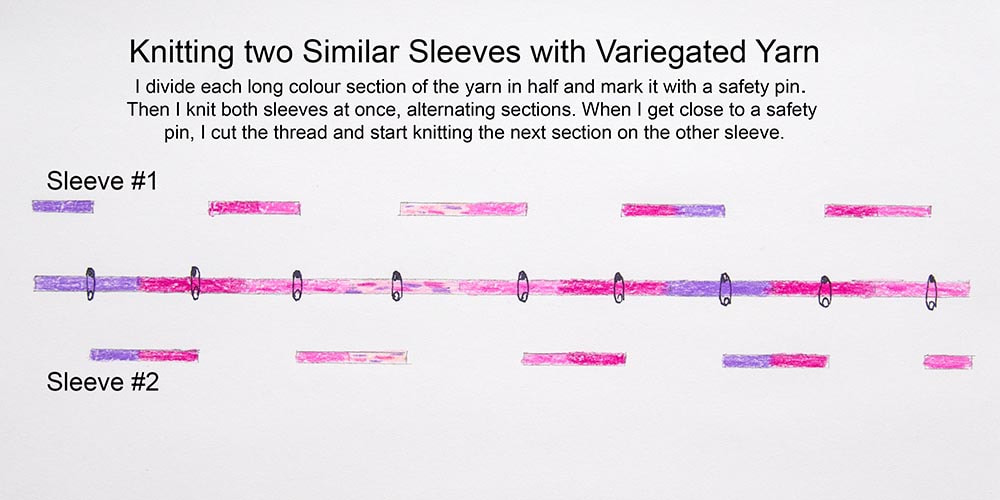
This technique only works for the yarn that has long colour sections, not the yarn where the colour changes every few inches. The pink/purple one I used for this sweater has colour sections averaging around two yards/meters long. I divide each colour section of the yarn in half as I get to it, and mark it with a safety pin. I start sleeve #1 with the first half of the first colour (purple in this case) and when I'm at the end of a row close to the safety pin, I cut the thread, then start the second sleeve, knitting until I get to the safety pin at the middle of the second colour. Then I cut the thread and go back to the first sleeve and knit to the middle of the next colour....
This technique only works for the yarn that has long colour sections, not the yarn where the colour changes every few inches. The pink/purple one I used for this sweater has colour sections averaging around two yards/meters long. I divide each colour section of the yarn in half as I get to it, and mark it with a safety pin. I start sleeve #1 with the first half of the first colour (purple in this case) and when I'm at the end of a row close to the safety pin, I cut the thread, then start the second sleeve, knitting until I get to the safety pin at the middle of the second colour. Then I cut the thread and go back to the first sleeve and knit to the middle of the next colour....
Yes, this system means I have to weave away more threads, but it's worth it when both sleeves end up looking more or less identical....

Bella wearing her sweater...
Tiny Wooden Toys
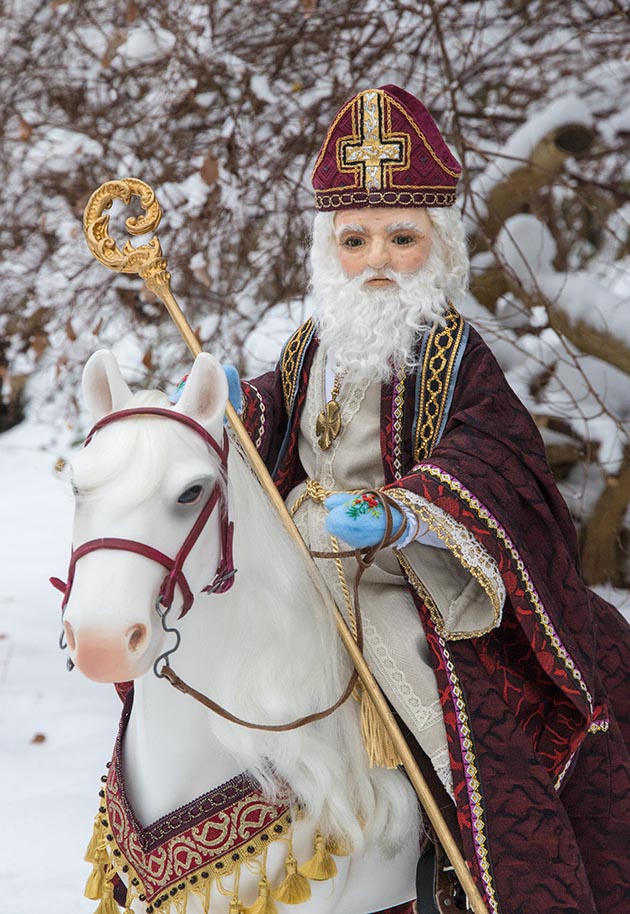
I had just finished photographing St.Nicholas visiting the children at Court, and he was on his way to the next castle..
|
|
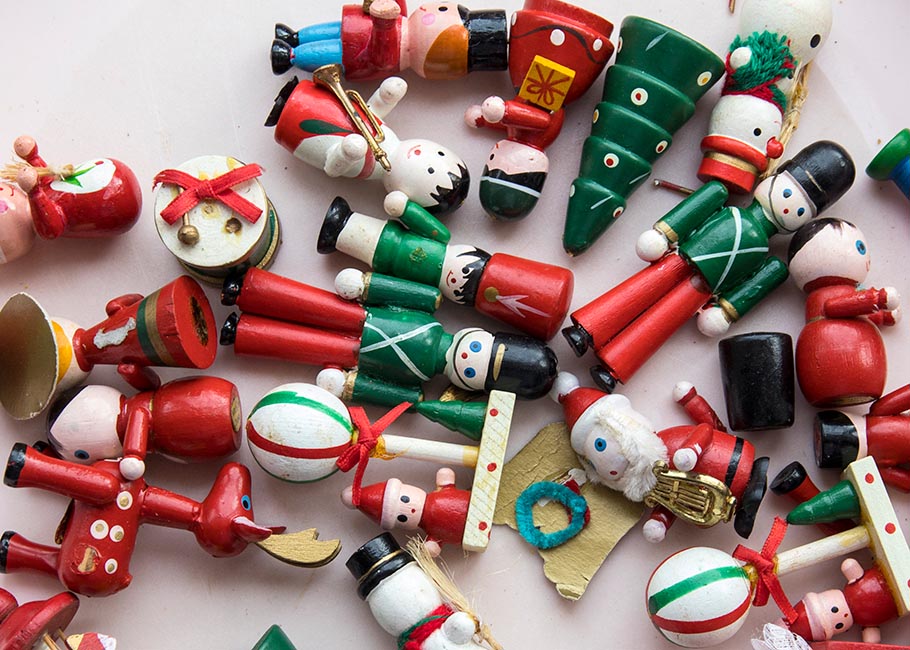
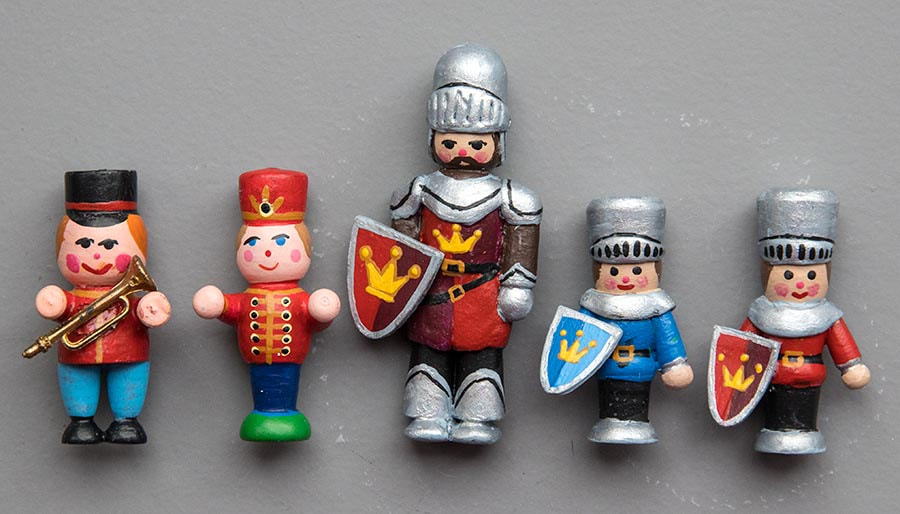
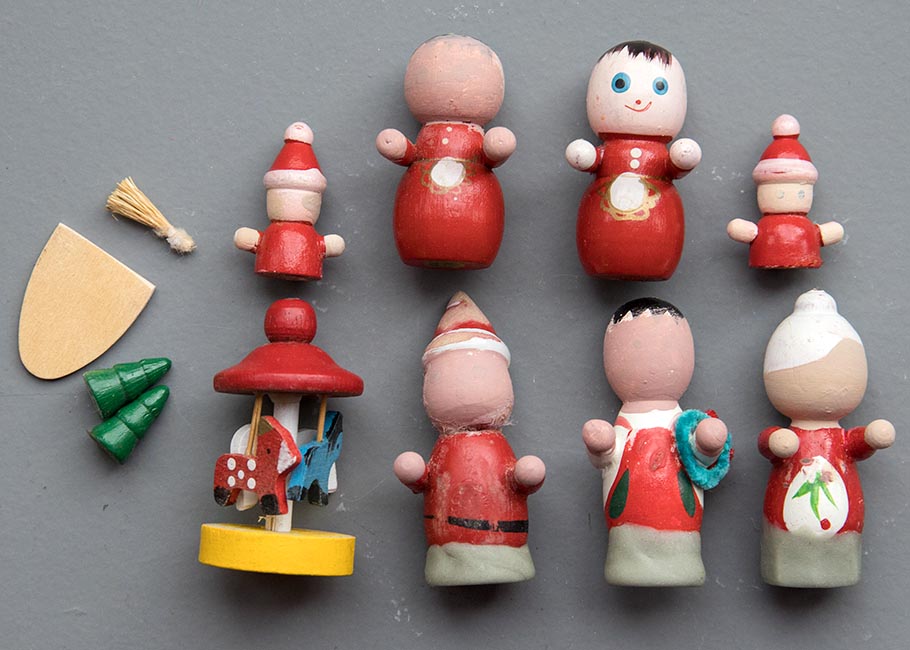
When I realized that he couldn't very well have the exact same toys in his sack at his next stop. What to do? I couldn't very well fill his sack with contemporary toys. They had to look at least a bit 'vintage'. Then I remembered the bag of small wooden ornaments that I'd picked up at Value Village a few years ago. I dug them out, but they seemed rather too crudely painted, especially if they were going to end up being photographed in close-ups.
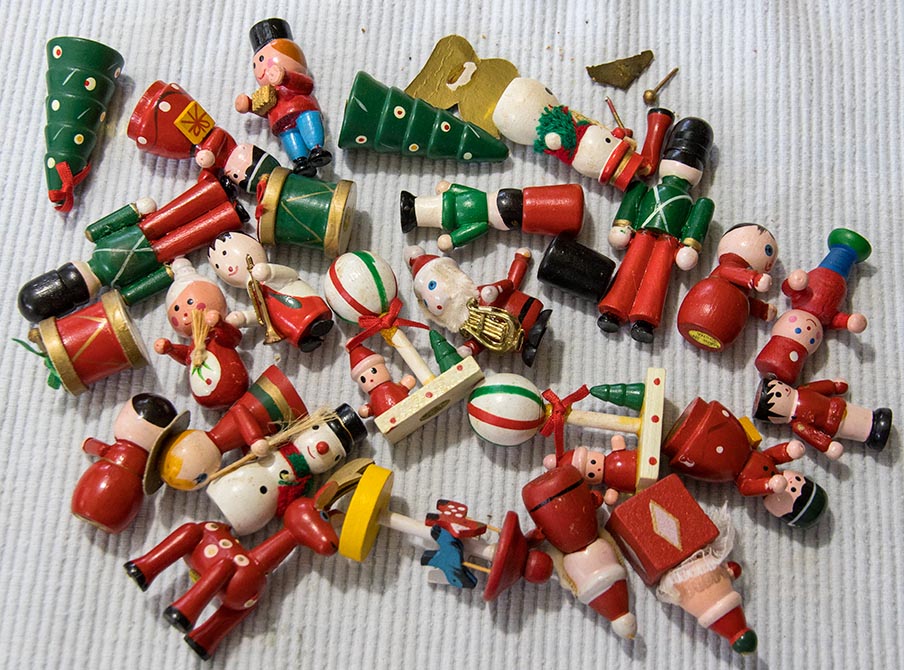
But I could see the possibilities, so cut their cords off with an exact knife.
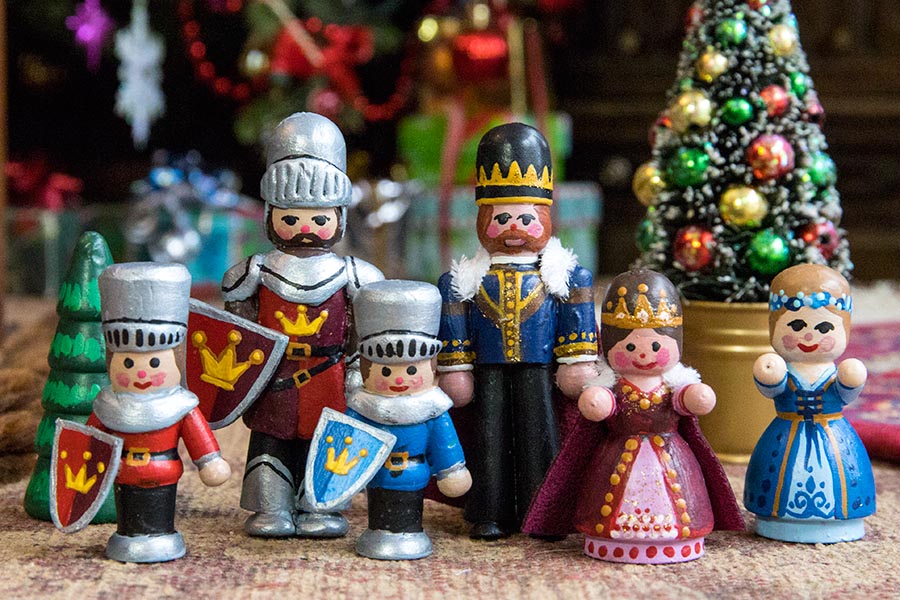
Then I removed all their glued-on props, and spent the next three days repainting many of them. I wanted to turn therm into Medieval style characters, so the first one I tackled was one of the tall soldiers, turning it into a King. The painting may seem a bit crude, when looking at them so close up, but it was a challenge considering they were just two and a half inches tall, and my eyesight isn't exactly the best...
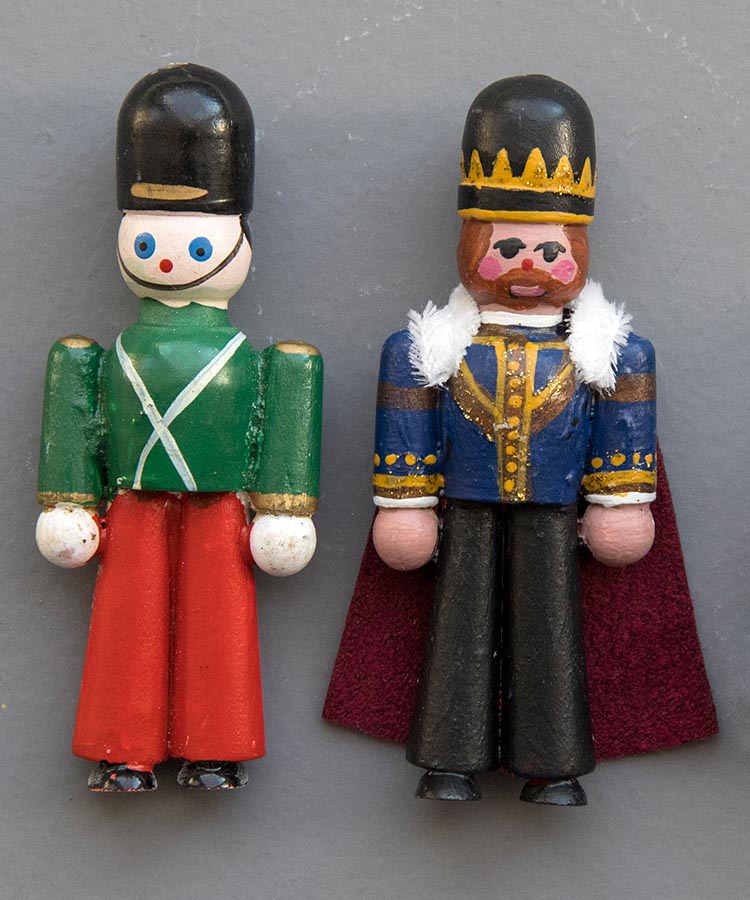
Then I wanted to turn the second tall soldier into a knight. So I mixed up a bit of Apoxie and added a bit of tiny armour. After painting him, I glued on a tiny shield made from an oval 'Woodle' cut in half, and painted.
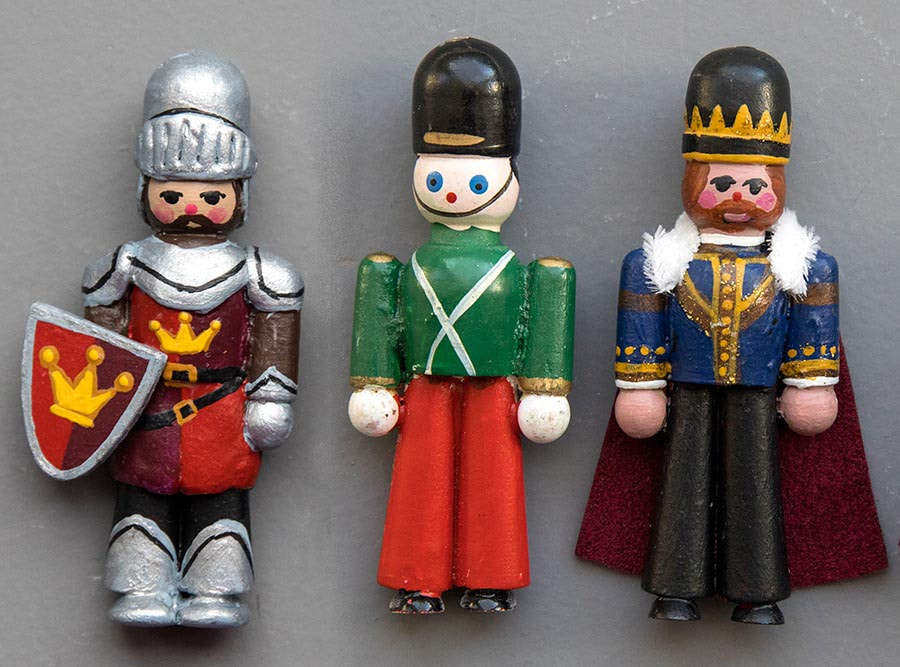
Then I painted the smaller men, turning two of them into knights as well...
I turned the two tiny (one and a quarter inch tall) ladies into a queen and princess...
...and had fun with several of the other ornaments...
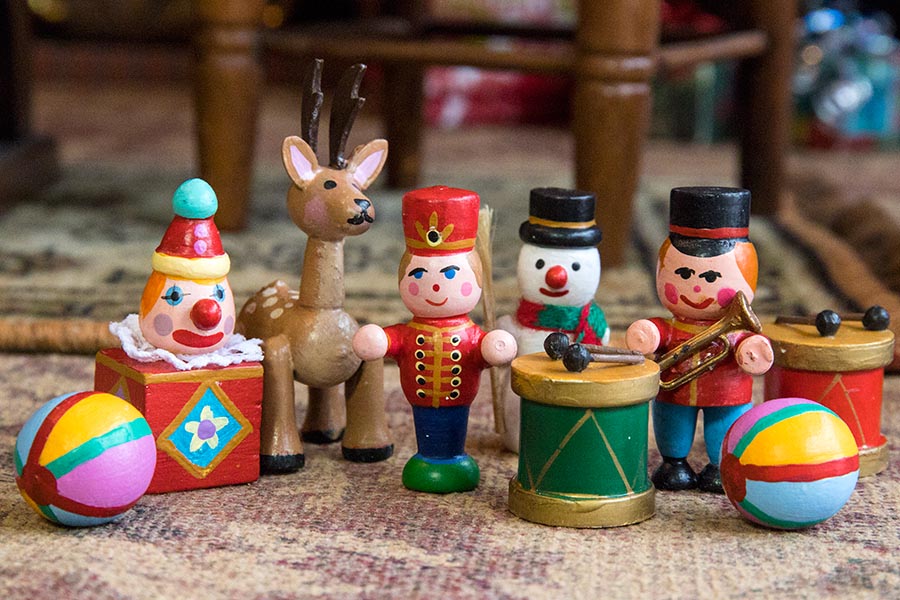
At that point I'd had enough. I figured I had painted enough new toys for St. Nicholas' next stop, and decided to leave the rest to be painted at some other time...
Creating a Stamp Collection
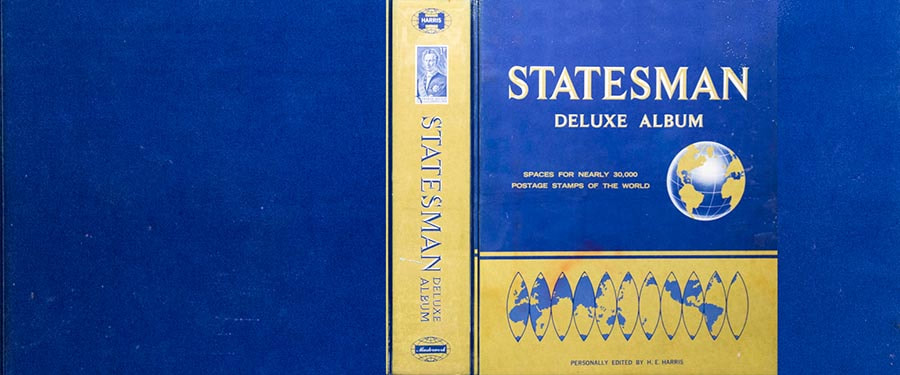
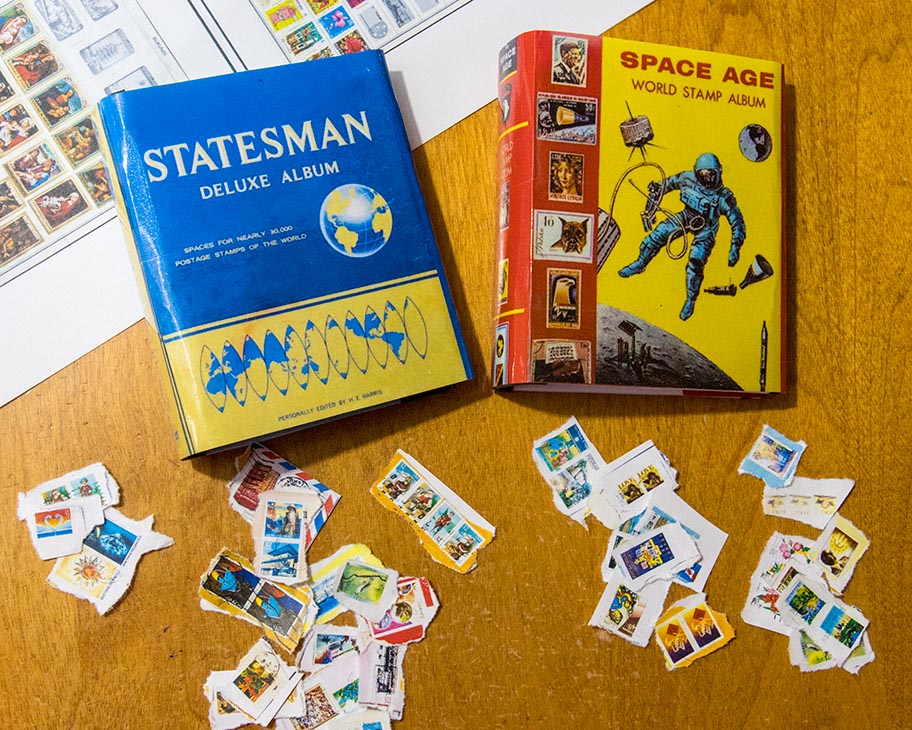
I loved collecting stamps when I was a kid, and with National Stamp Collecting day coming up on February 13th I decided it was finally time to feature this special day. Which meant having to make a miniature stamp collection.
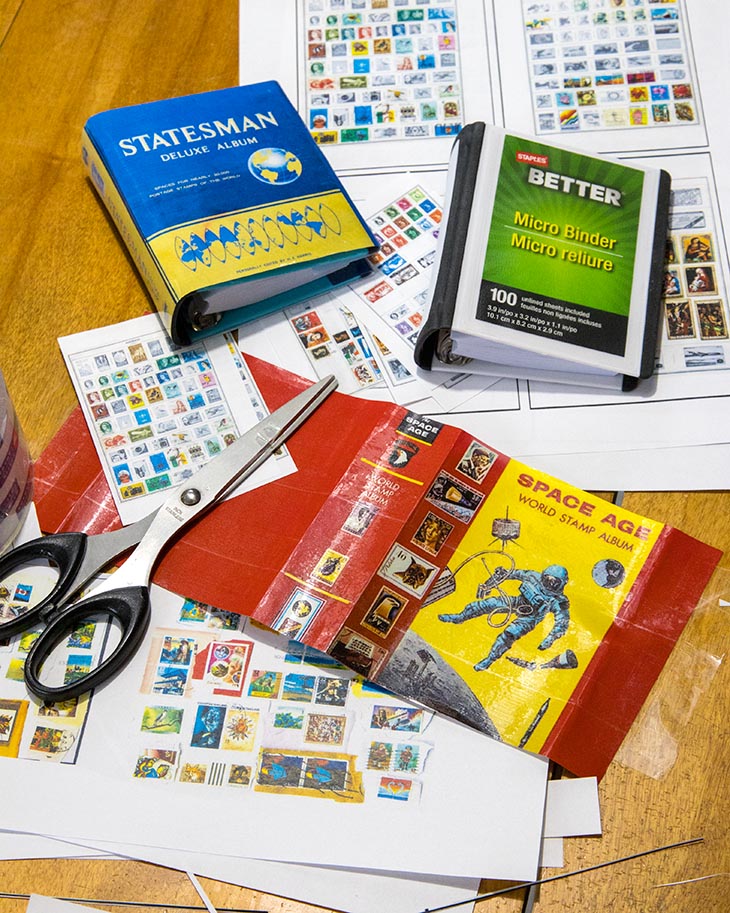
I started by photographing the cover of one of my old stamp albums...
I started by photographing the cover of one of my old stamp albums...

I had two tiny Micro Binders from Staples, which were different proportions than the stamp album cover, so I had to widen the album cover in Photoshop, and enough extra for the album cover to fold inside the micro binder cover.
My second, much older stamp album was in rough shape, so I just photographed the cardboard inserts from the cover...
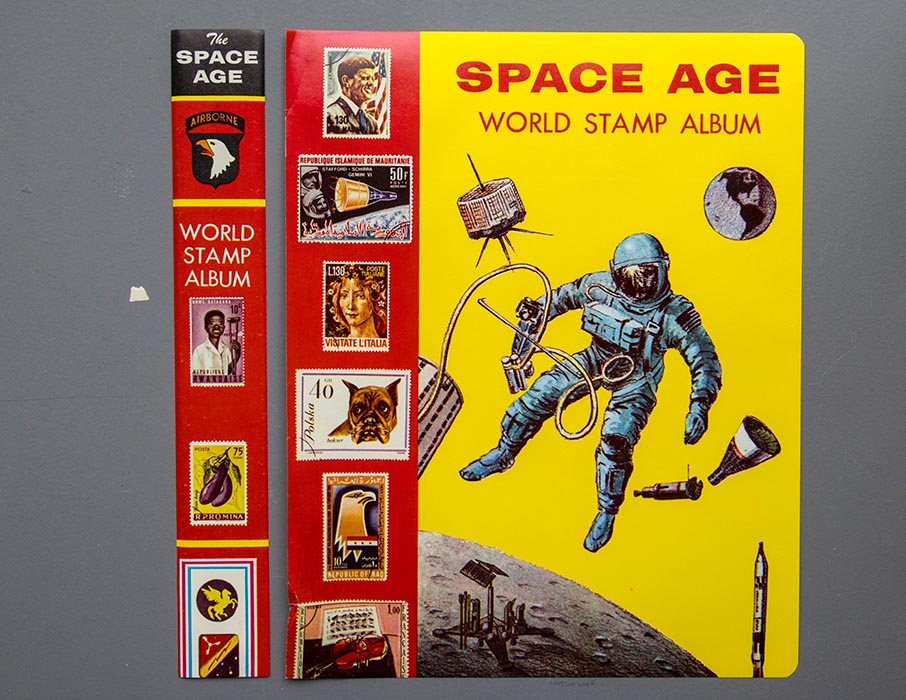
Then created a properly proportioned cover in Photoshop, with extra on both ends to fold around the ends of the micro binder cover...

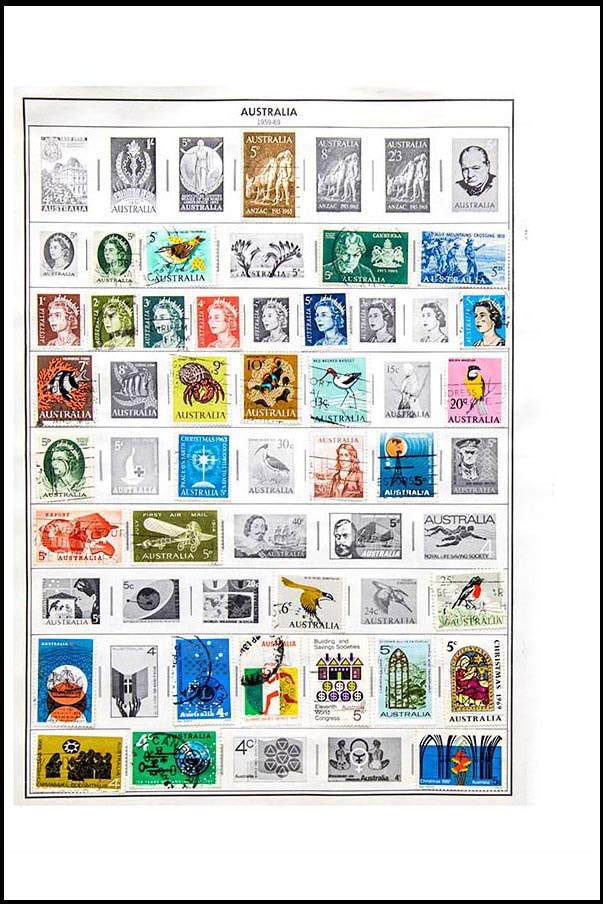
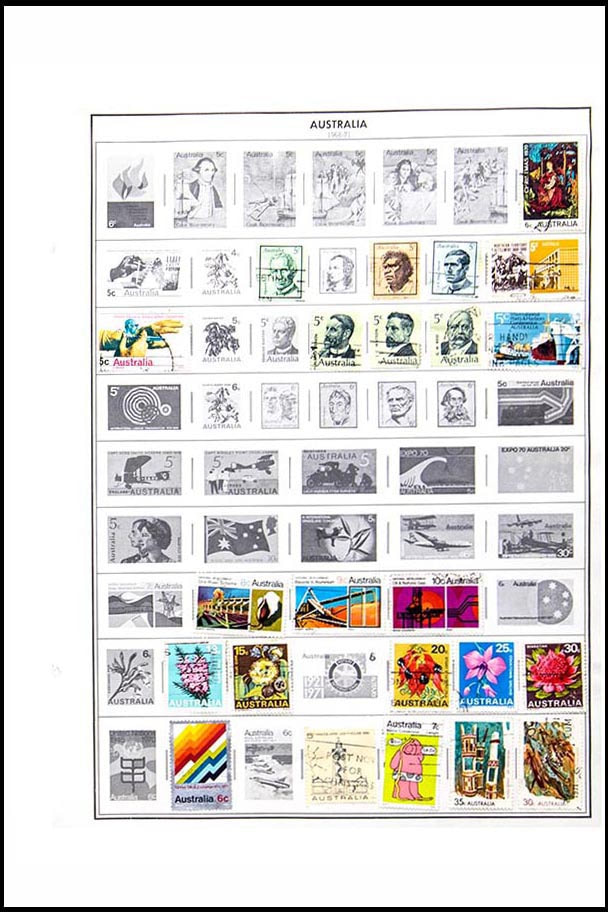
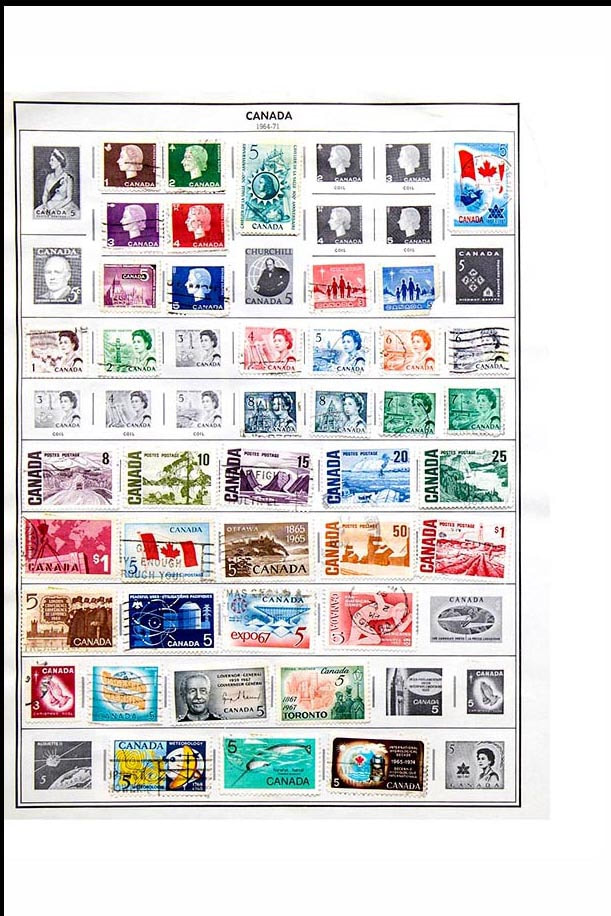
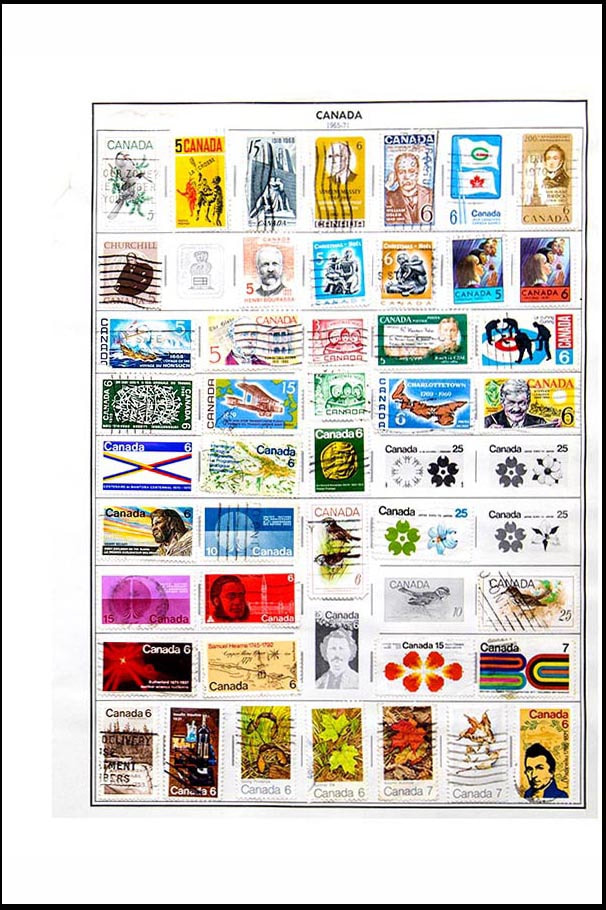
I also photographed several of my favourite pages from the stamp albums, and added borders so they'd be the same proportions as the pages in the Micro Binders, and allow room for punching the binder holes...
|
|
|
|
Then I printed out the covers and pages to scale. I used clear packing tape over the cover printouts to seal and protect them, and give them the proper shiny look. Then it was time to cut out all the album pages and punch holes so they'd fit in the binders. A regular standard hole punch would make holes way too big for the tiny binders, so I used one of my leather hole punches instead.
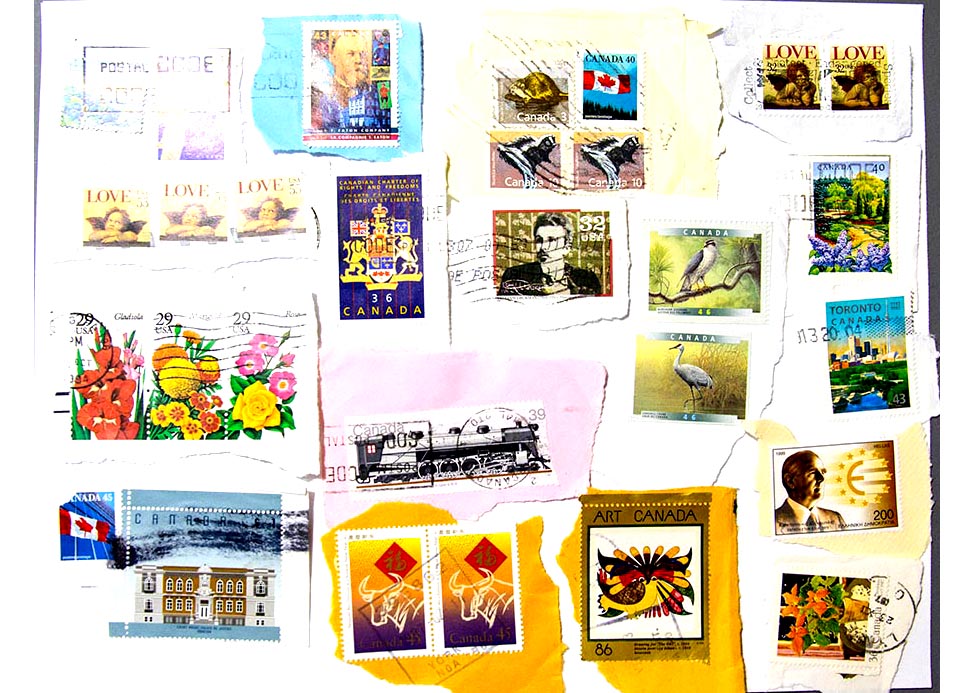
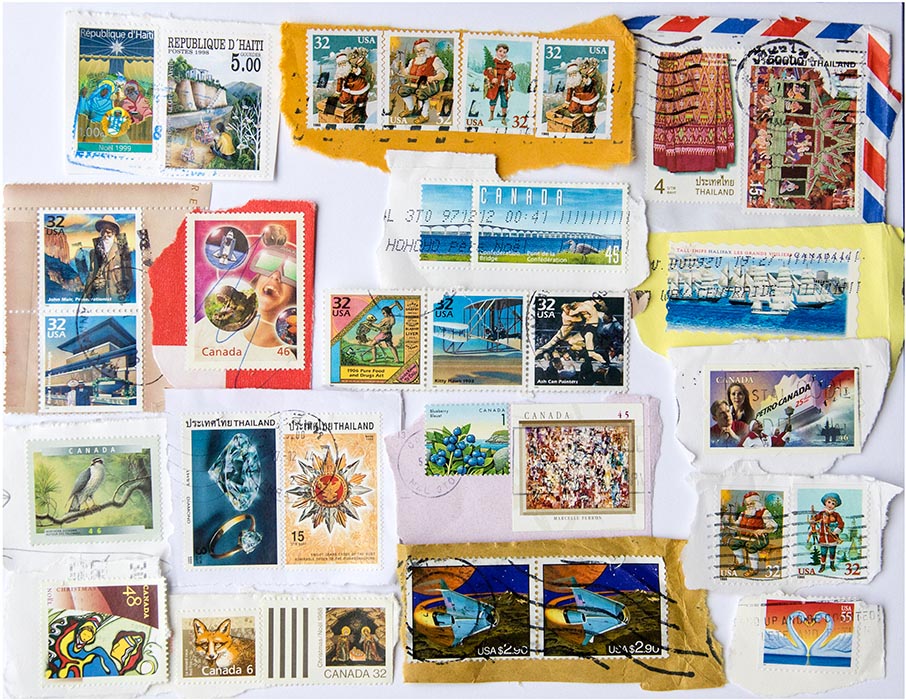
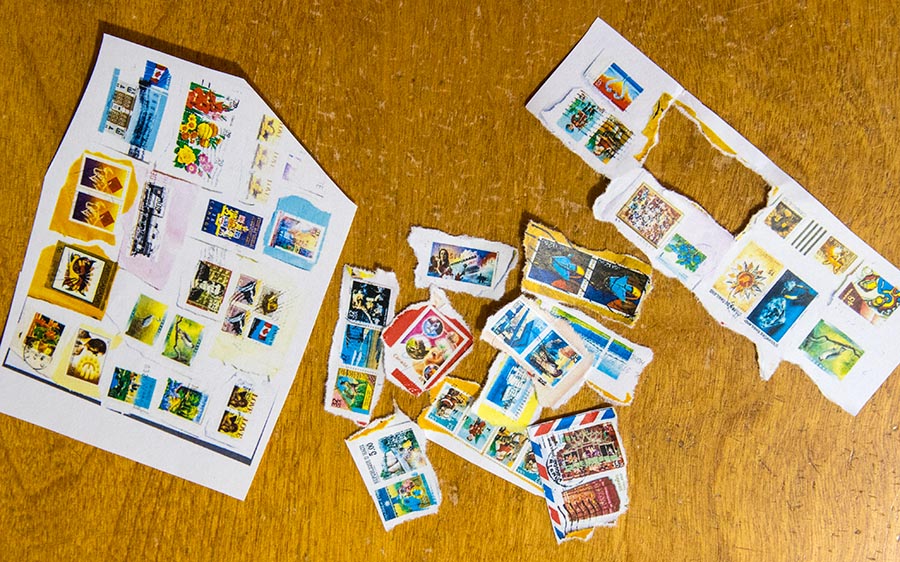
Half the fun of stamp collecting was saving stamps from envelopes that came in the mail, and then later soaking them off. So I took some photos of stamps still on their envelope corners....
|
|
I printed them out at quarter scale and carefully ripped them apart. Did I mention that I LOVE my colour printer?
So I had albums and stamps....
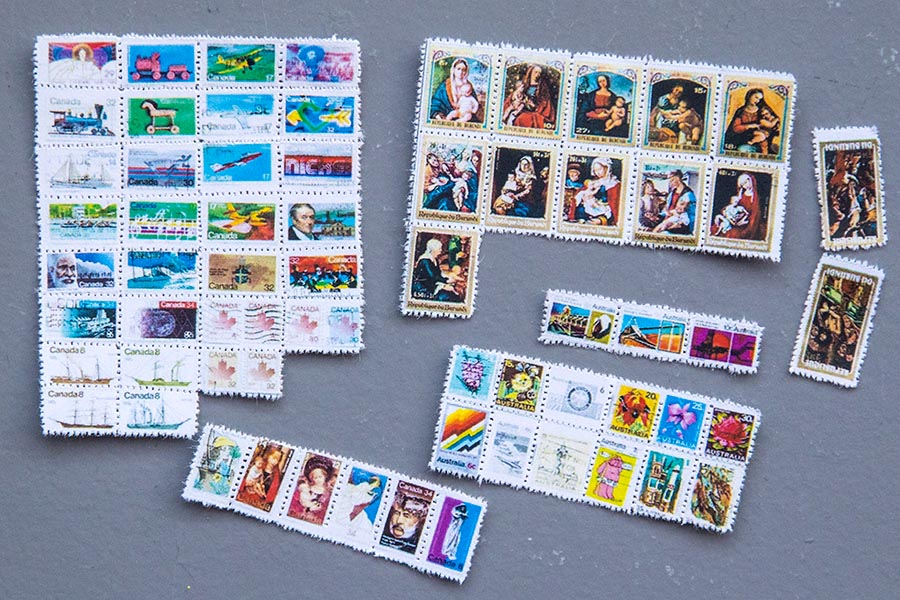
Then I still needed some stamps that had already been soaked off their envelopes, and ready to put in the albums. I printed out a couple of the most colourful pages from my stamp album, ones where there were lots of stamps in neat rows. Then I ran the printouts under my sewing machine needle (without any thread) to create the perforations...
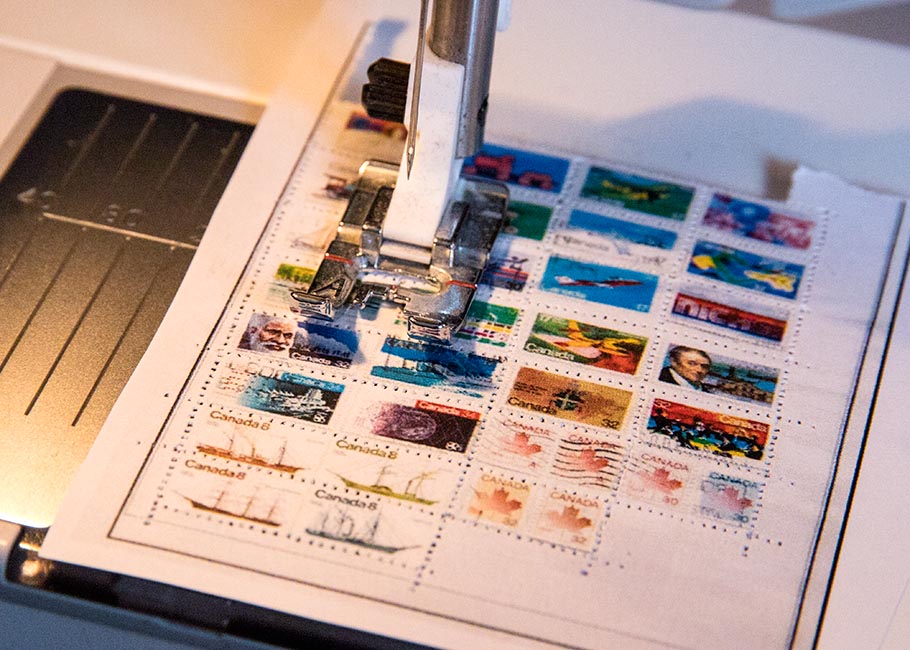
...and carefully separated them. they look a bit rough when blown up in a photo like this, but the stamps average just around 1/4" or less so the perforations work quite well.
When I was ready to take photos for Stamp Collecting Day, I set up the interior of Byuri and Aaron's living room in one corner of my castle set which was still on the table...
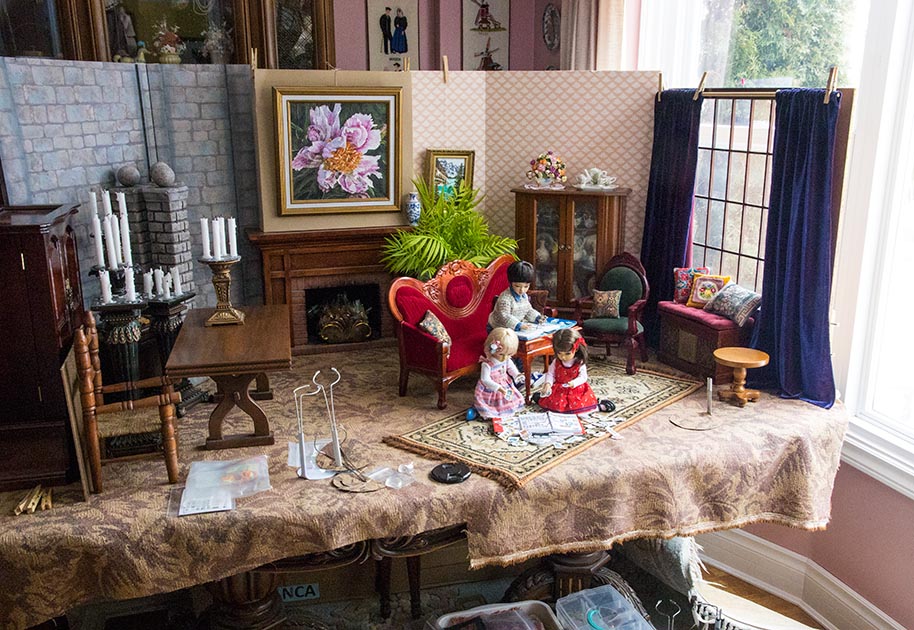
..and the kids could spend a nice afternoon sorting and adding new stamps to their albums...

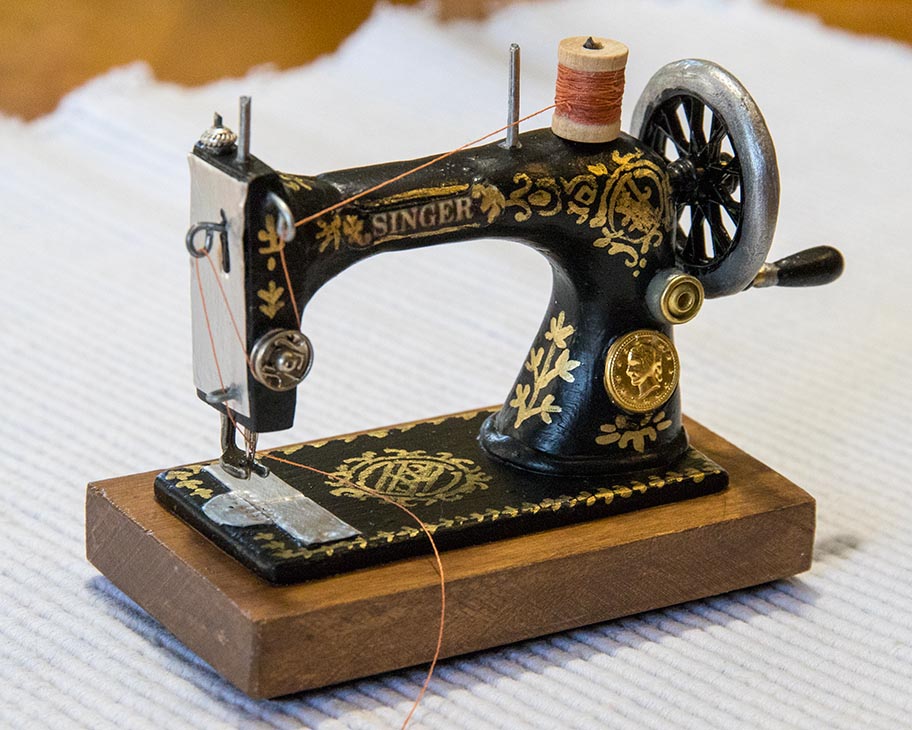
Making a Sewing Machine
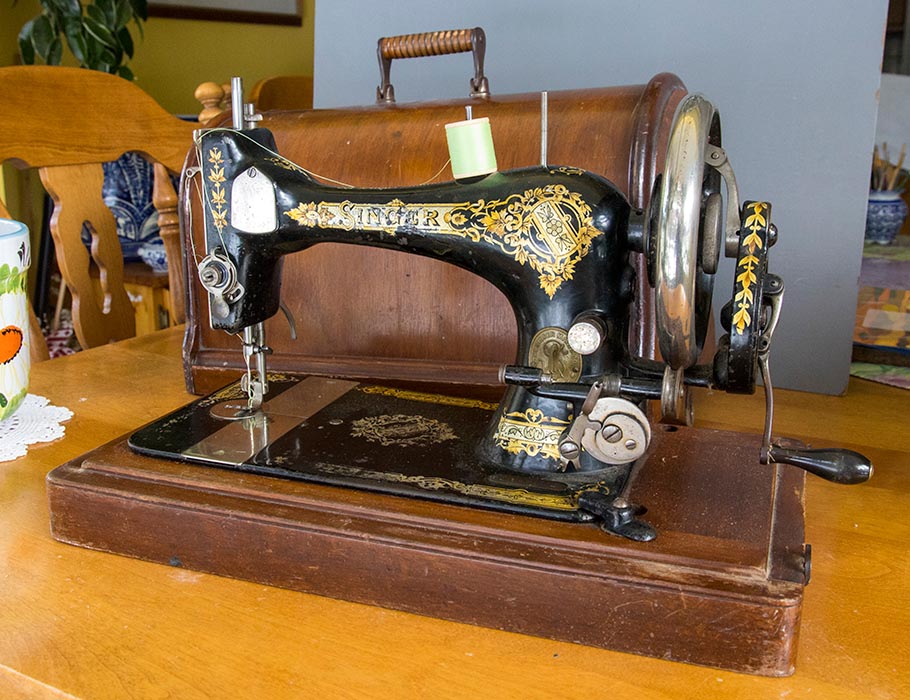
I've wanted to have a Victorian sewing machine for my dolls for a very long time. There's plenty for sale online, but they are all 1/12th scale, and that's way too small. I'd been using a brass pencil sharpener shaped like a vintage sewing machine in my photos in the past, but I wanted something better. Something like my Mom's vintage 1870's sewing machine....
Jan had shaped a couple of pieces of wood last summer - the main body, and the wooden base - but the thought of making a sewing machine just seemed way too intimidating, so the pieces had lingered in a bowl on the end of the kitchen table ever since. Then in February I finally decided it was time to attempt to finish it.
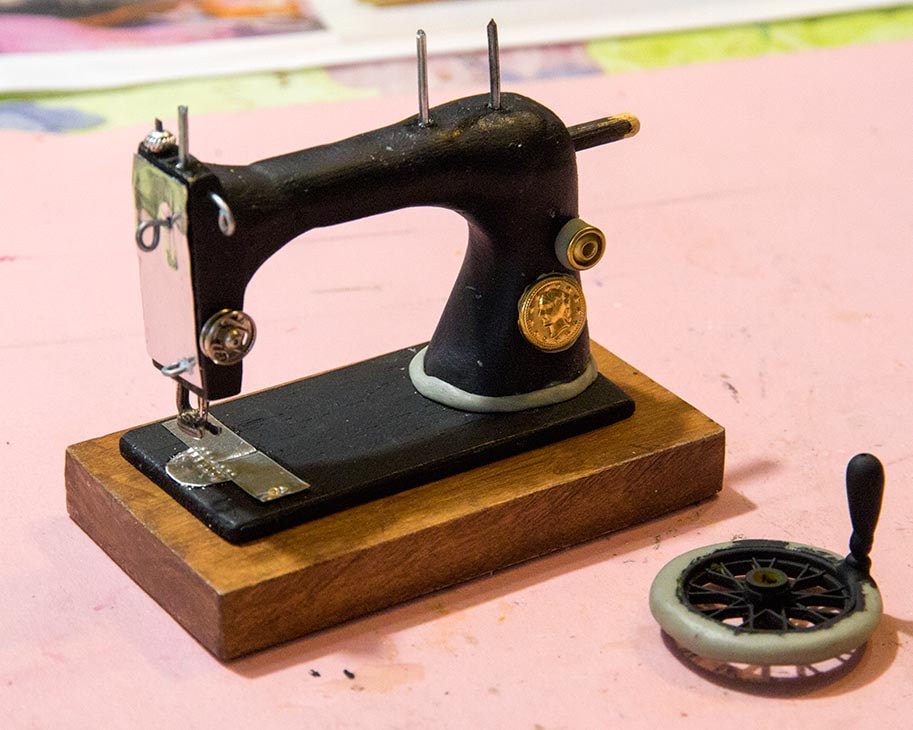
The wooden body was a bit irregular, so I added a layer of Apoxie to smooth it out. The biggest challenge was finding something for the fly wheel. Then I came across a bag of LEGO wheels at Value Village, and thought there was one in the bag that would be perfect, so bought it. I removed the tire, and built a rim of Apoxie around the outside. It had a thin wire inside so I could make a handle protrude out of it. The handle was made of three beads
The wooden body was a bit irregular, so I added a layer of Apoxie to smooth it out. The biggest challenge was finding something for the fly wheel. Then I came across a bag of LEGO wheels at Value Village, and thought there was one in the bag that would be perfect, so bought it. I removed the tire, and built a rim of Apoxie around the outside. It had a thin wire inside so I could make a handle protrude out of it. The handle was made of three beads
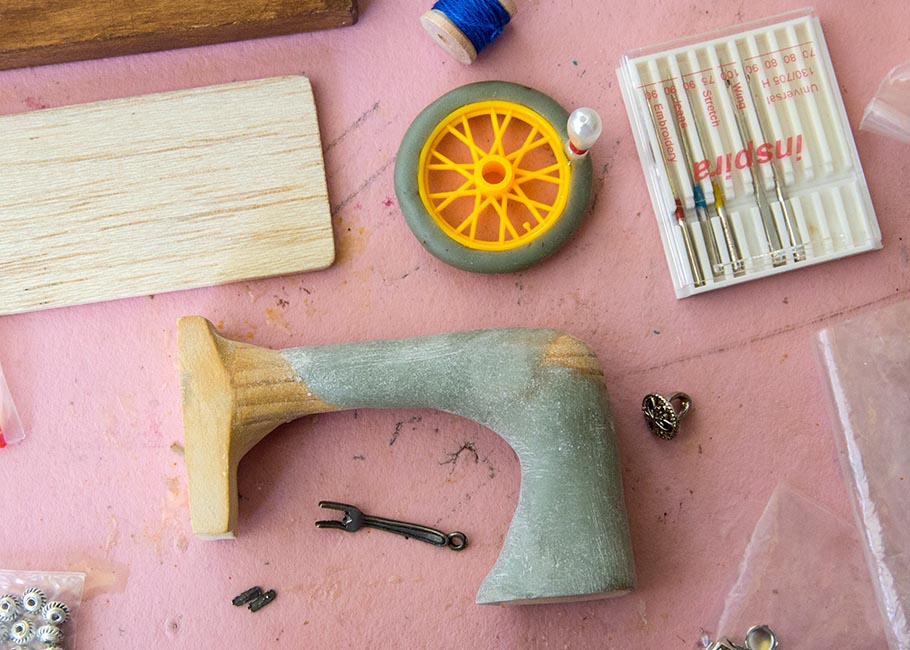
I wanted the sewing machine to look as realistic as possible, and I wanted to be able to thread it, so I wanted to use a real sewing machine needle cut in half. For the presser foot I took one of my tiny metal forks and broke out the middle two tines. I gathered all kinds of bits and pieces - wire, studs, snaps, and some tiny beads - that might be useful for some of the machine parts.
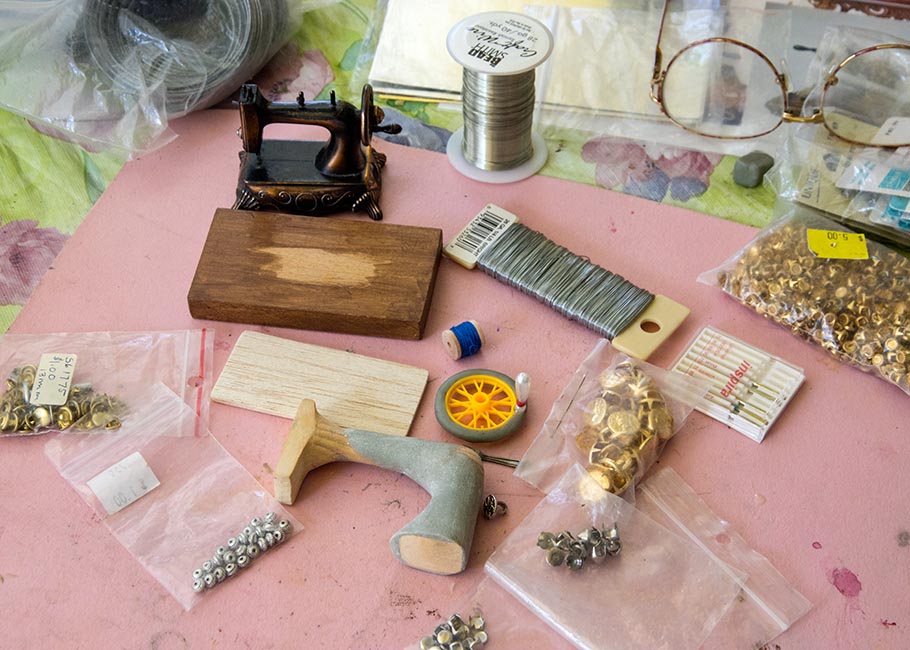
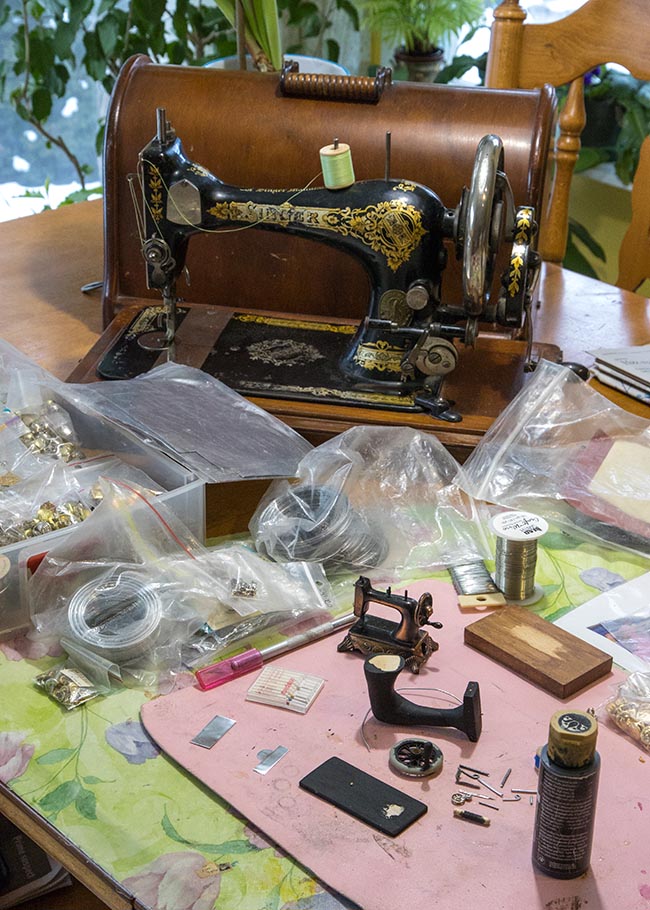
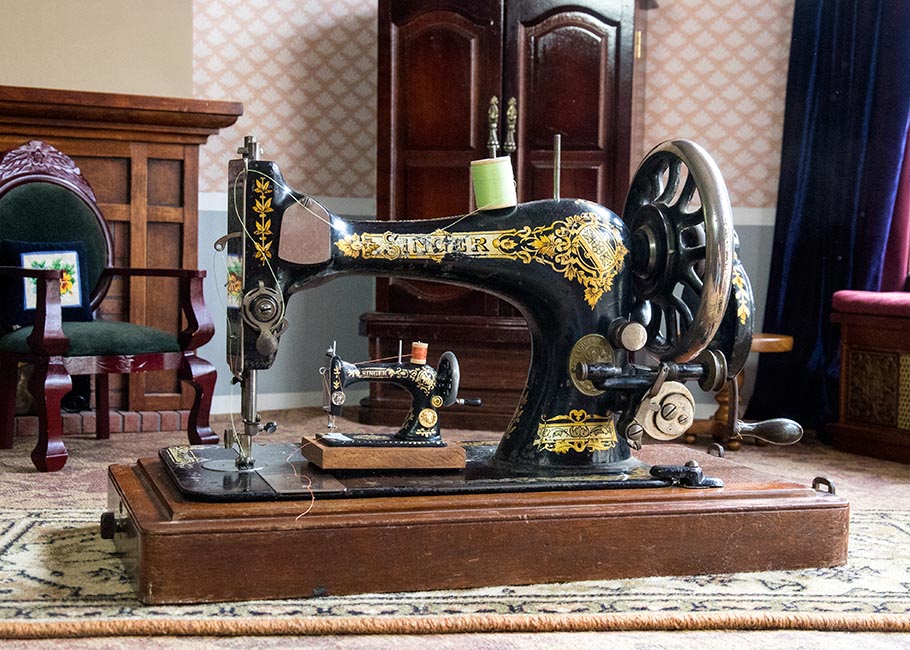
I had my Mom's machine and the tiny brass pencil sharpener for inspiration...
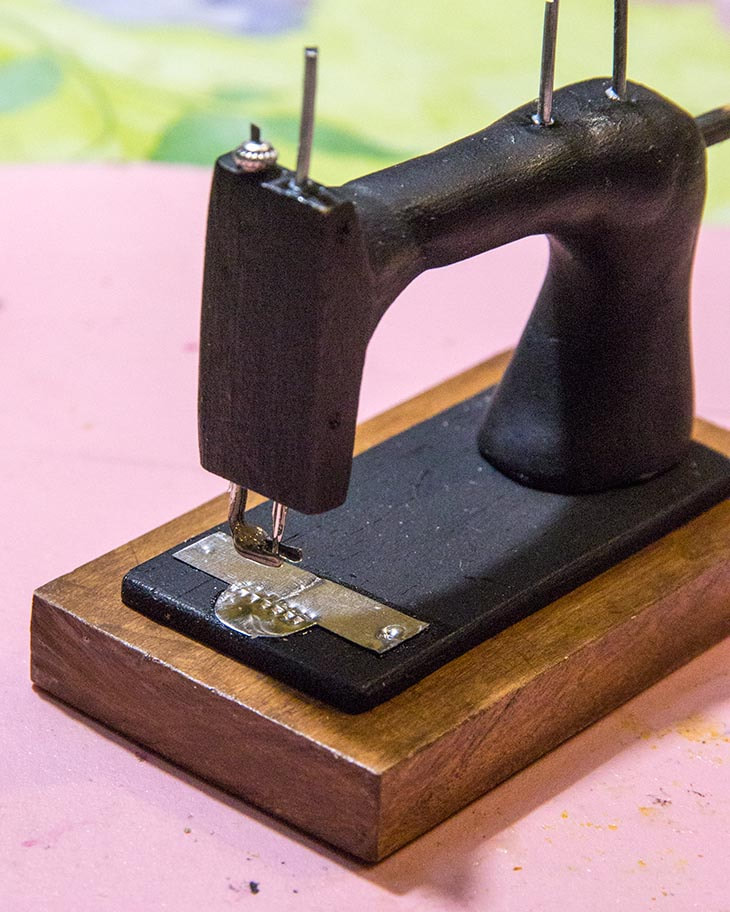
I painted the body and base plate black, and Jan drilled some holes for the needle and 'presser foot' and I glued them in...
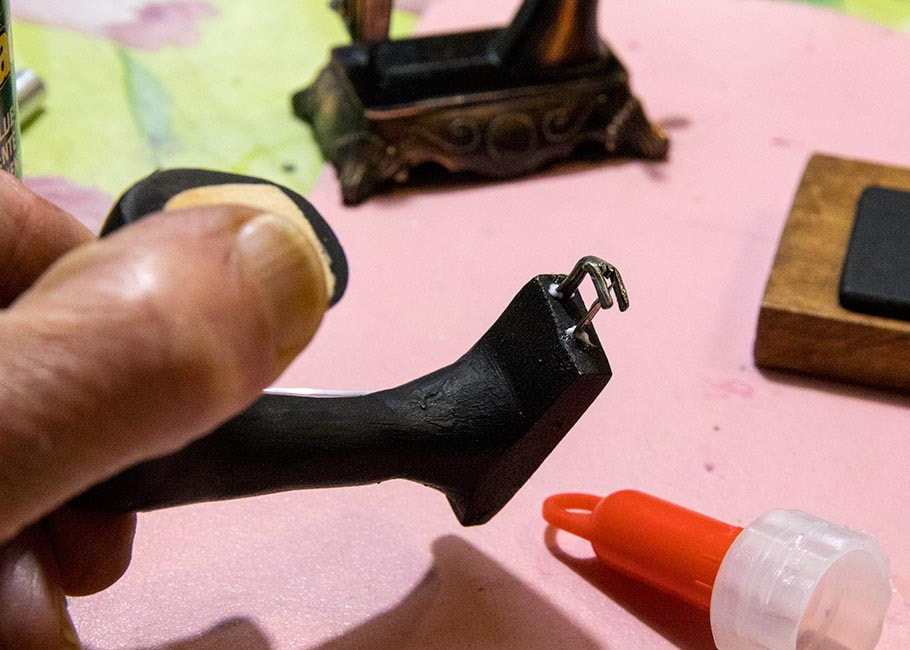
Jan drilled holes for the wires I'd cut and shaped.
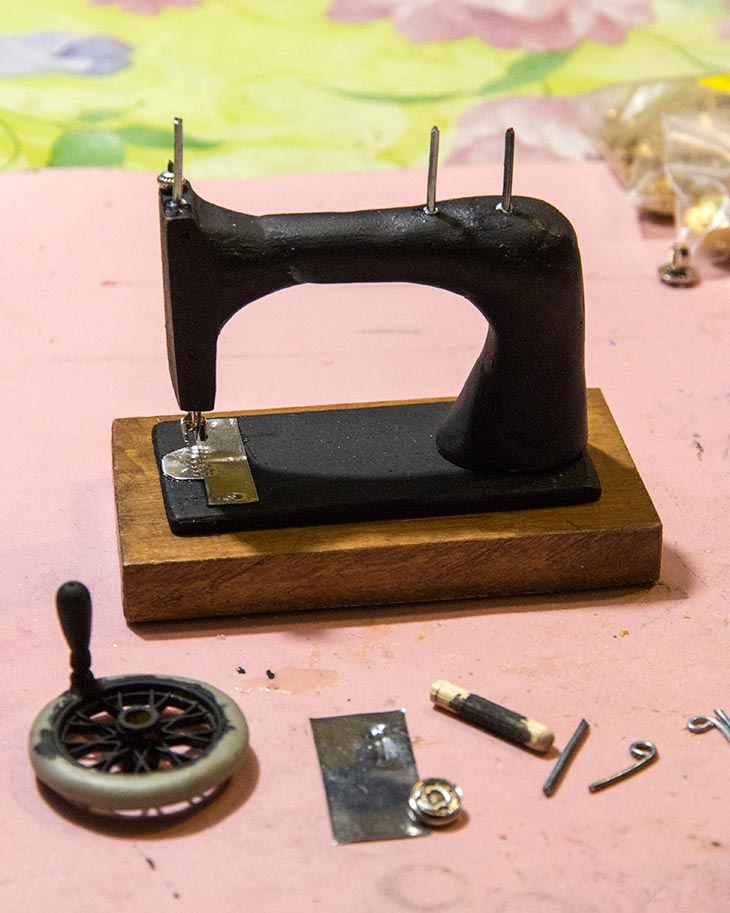
I had some thin silver metal, which I cut the bobbin plate and feed-dog out of. I glued them in place and used carving tools to press the indents suggesting the feed-dog into the metal.
It also needed a metal plate on the end. Then Jan drilled holes into it for the wire loop 'take up levers' that I'd formed. I used a large snap fastener for the tension disk. I wasn't going to bother with the thread wind-up mechanism, so glued another snap and decorative stud to suggest the parts on the full size machine. A hole was drilled for the dowel which would hold the fly wheel. Finally, the bottom of the main body as a bit uneven and there was a slight gap between it and the base plate, so I added a ring of Apoxie to cover and support it.
Then it was time to paint all the decorative gold embellishments, using one of my very finest brushes. I knew I'd never be able to paint the name 'Singer' so I cut it from a paper printout and glued it on.
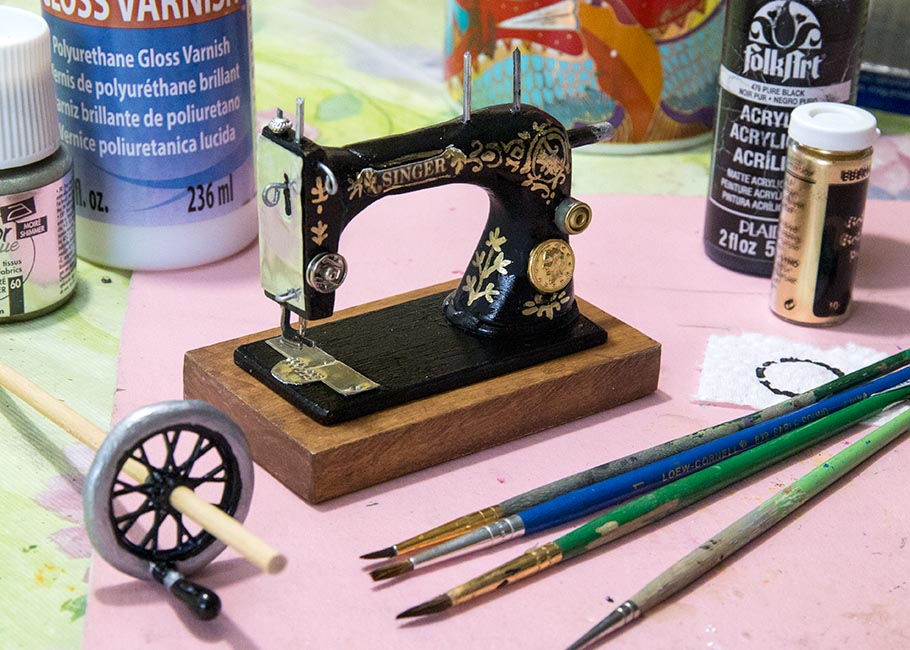
Then with all the decorative painting done, and the fly wheel attached...
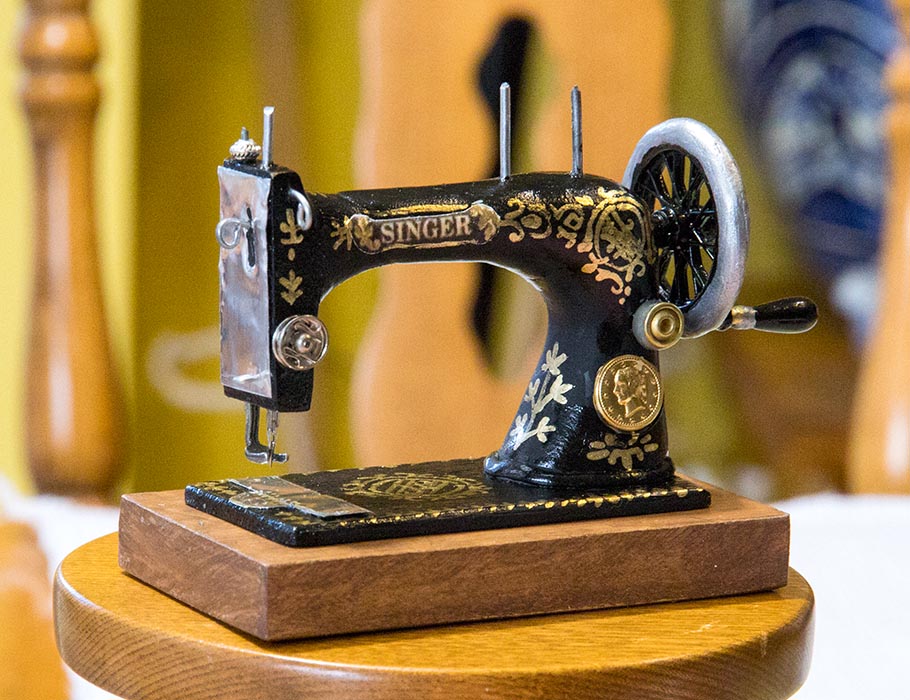
...and the machine threaded...
Big and small...
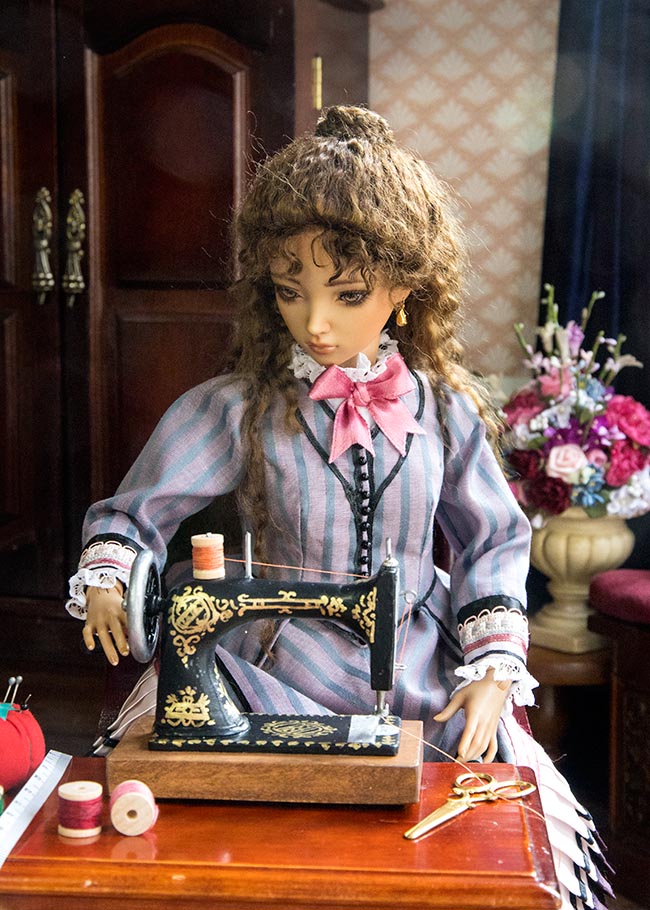
So Iris finally had a proper sewing machine...
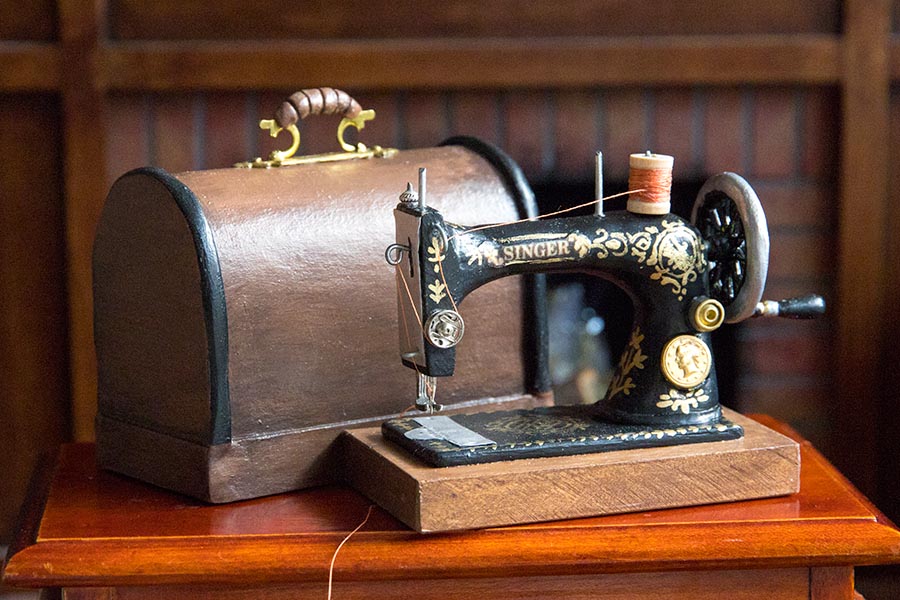
Then I wanted to make a carrying case like my Mom's machine. Her's was wood, and the handle of the sewing machine would fold upwards so the case would fit over it.
But my little sewing machine crank wasn't moveable, so I made my case with a solid wood bottom so no one would ever be tempted to try and force it over the sewing machine. I made the case out of cardboard, with Apoxie edges. The handle was a miniature, 1/12 scale, swivel door handle, which I build up with a bit of Apoxie. Then I painted it.
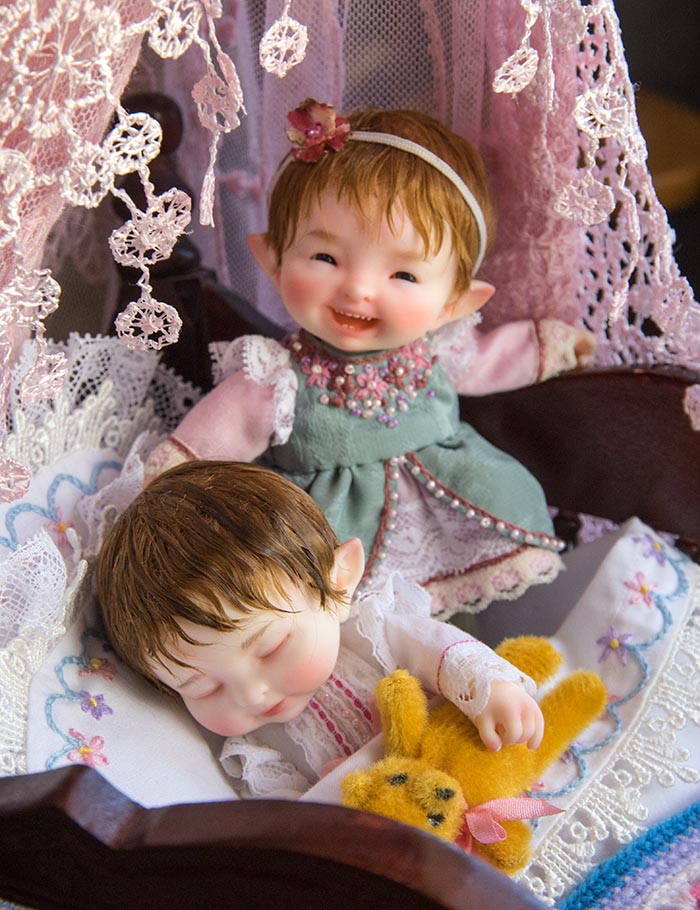
Baby Elf Wigs
When my first Baby Elf by DreamHigh Studio arrived last summer, I found her head way too bare looking. I didn't want to make a wig that would make her head look even bigger, so I painted some hair on her.
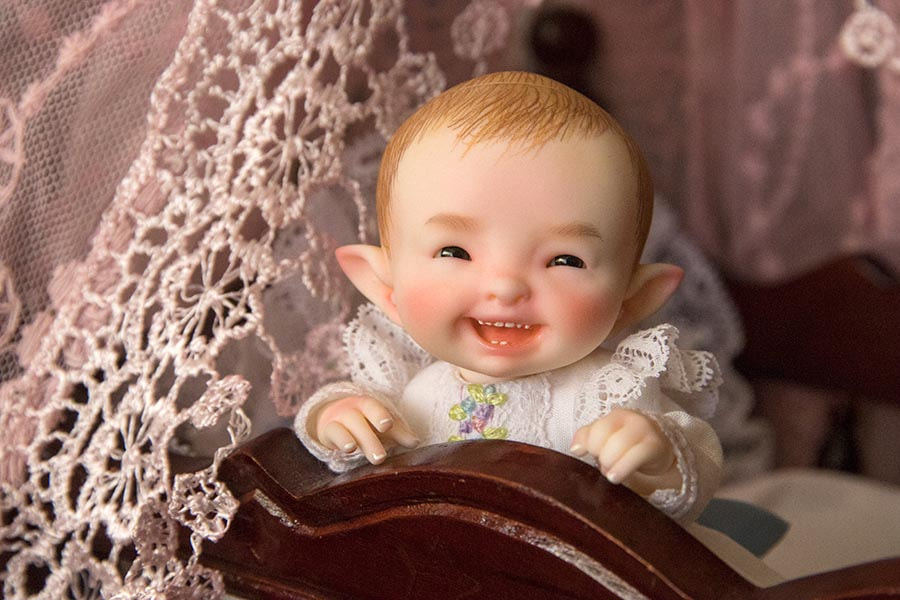
My intentions were to paint hair on my second baby elf and all the faceplates. But that meant both dolls would look exactly the same, which didn't seem all that appealing.
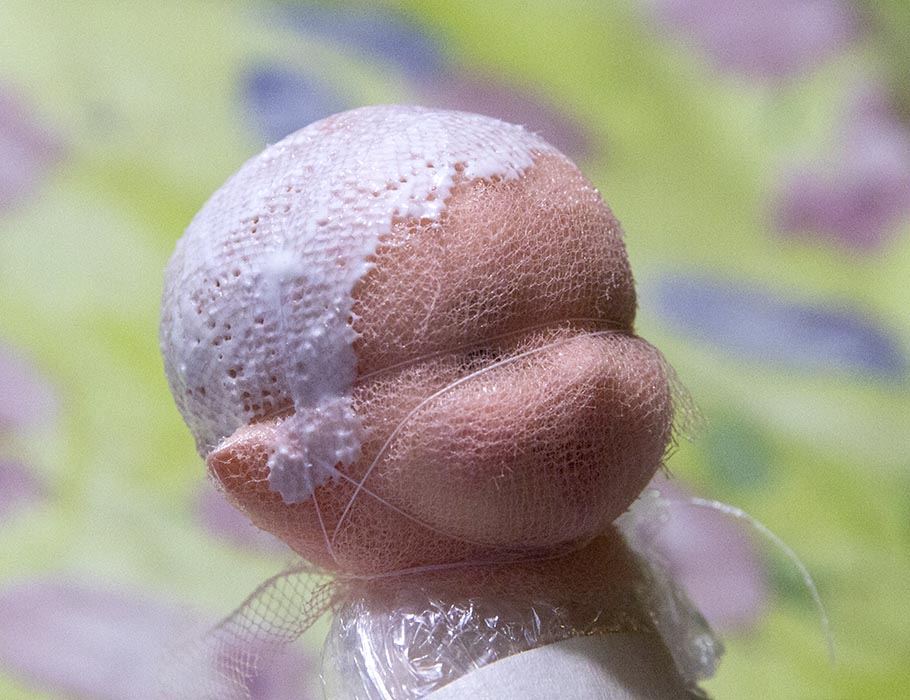
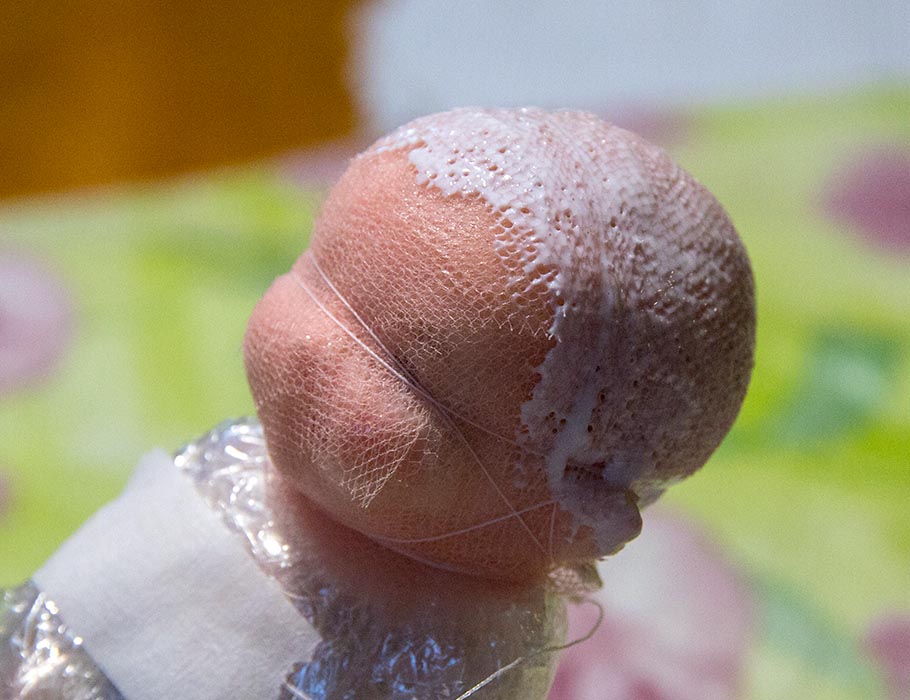
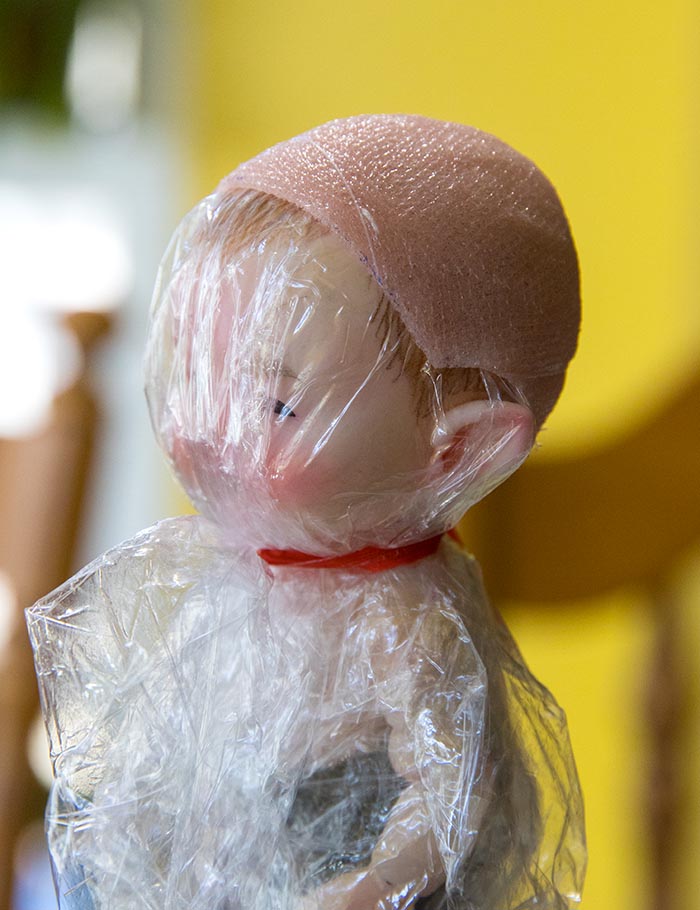
But then, when everyone started getting their own baby elves, someone posted a wig making tutorial on Facebook that showed how to make a really wispy baby wig. It looked adorable, so I thought I'd give it a try. The wig cap was made the same way I always do, by first covering the entire doll with two layers of plastic wrap, then wrapping the head with a long strip of 1/2" wide peach coloured tulle. The wig cap tends to shrink a bit, if the tulle is pulled tight, so it's important not to stretch the tulle when wrapping the head. It was convenient that the doll didn't have eye lashes, so I could tie string around her head so the tulle was nice and smooth. Then I painted on the first layer of Gemtack glue. It has to be Gemtack glue since it dries waterproof, which means the wig can be wet later, without falling apart. After the first layer of glue dried, I painted on a second layer.
But then, when everyone started getting their own baby elves, someone posted a wig making tutorial on Facebook that showed how to make a really wispy baby wig. It looked adorable, so I thought I'd give it a try. The wig cap was made the same way I always do, by first covering the entire doll with two layers of plastic wrap, then wrapping the head with a long strip of 1/2" wide peach coloured tulle. The wig cap tends to shrink a bit, if the tulle is pulled tight, so it's important not to stretch the tulle when wrapping the head. It was convenient that the doll didn't have eye lashes, so I could tie string around her head so the tulle was nice and smooth. Then I painted on the first layer of Gemtack glue. It has to be Gemtack glue since it dries waterproof, which means the wig can be wet later, without falling apart. After the first layer of glue dried, I painted on a second layer.
|
|
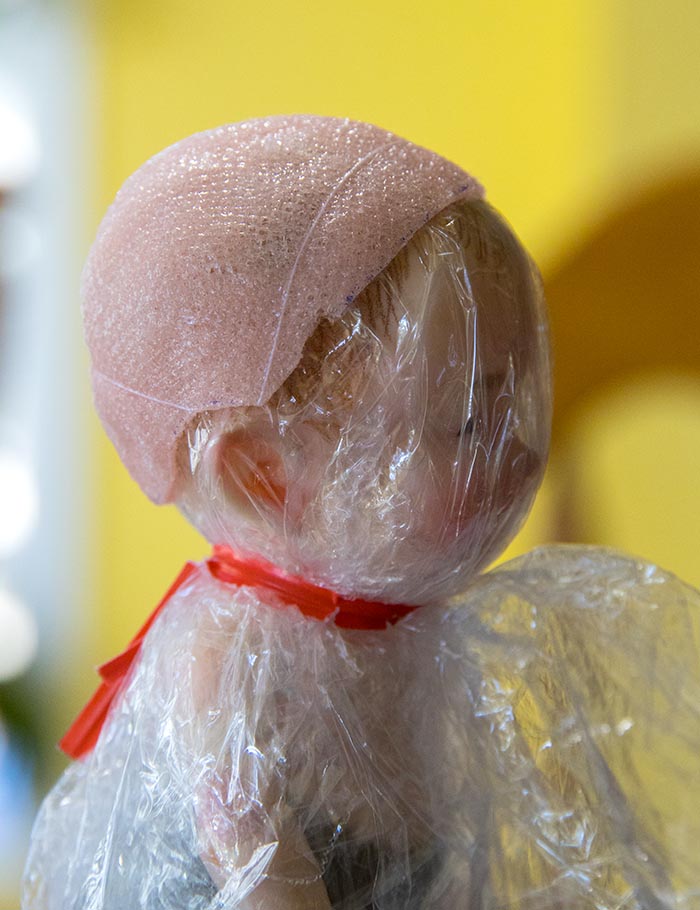
When the second layer had dried, I carefully drew on the edges of the hairline so I'd know where to cut the cap. Then I removed the tulle cap, and the plastic wrap from the doll. I cut the wig cap along the lines I'd drawn. Then I covered the baby's head with a new double layer of plastic wrap, and secured it around her neck. (which always feels so wrong, like I'm suffocating the doll)
|
|
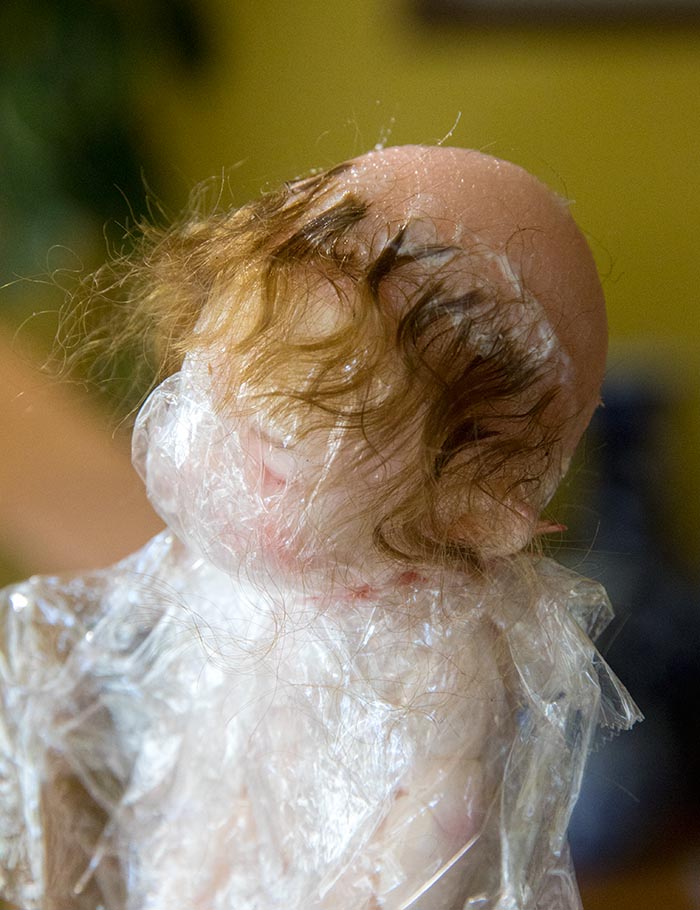
hen I started the tedious task of gluing on individual tufts of mohair, by first brushing a line of glue on the wig, positioning the end of a thin wisp of mohair on the glue, and then using the brush with more glue to securely hold the mohair in place. Each time more mohair was added, it needed to completely dry before more could be glued on. I was working on two wigs at once, each a different colour, so had to be careful not to mix up the two colours of mohair.
|
|
I kept gluing on thin bits of mohair until I reached the crown...

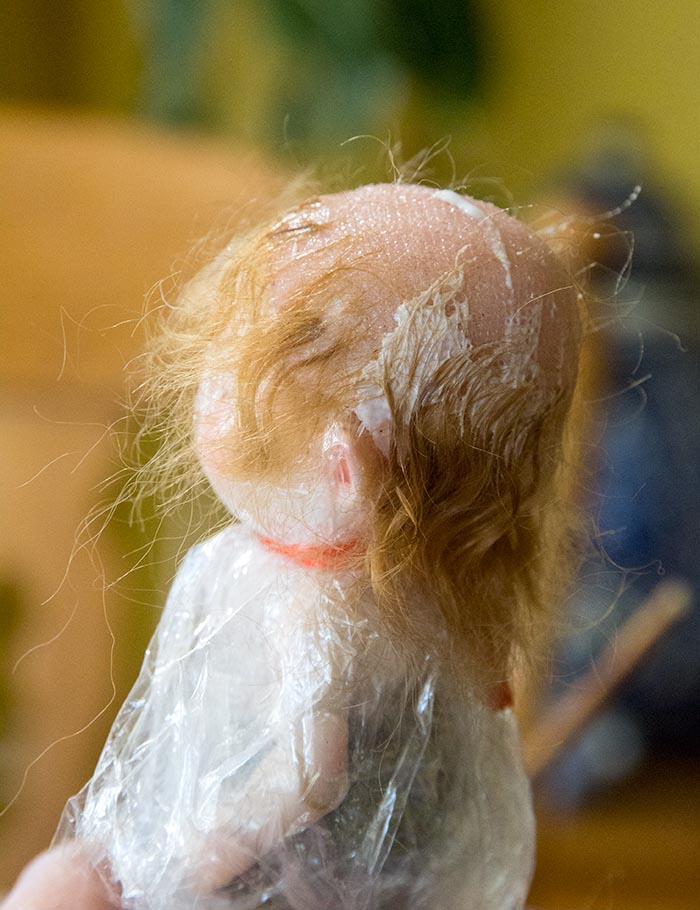
Then I brushed some glue into the middle of the crown, and laid two thin strips of longer mohair criss-cross across the crown. When the glue was getting tacky I pressed it down with the edge of a comb to suggest a 'part'. I'd occasionally press the 'centre part' until the glue had dried.
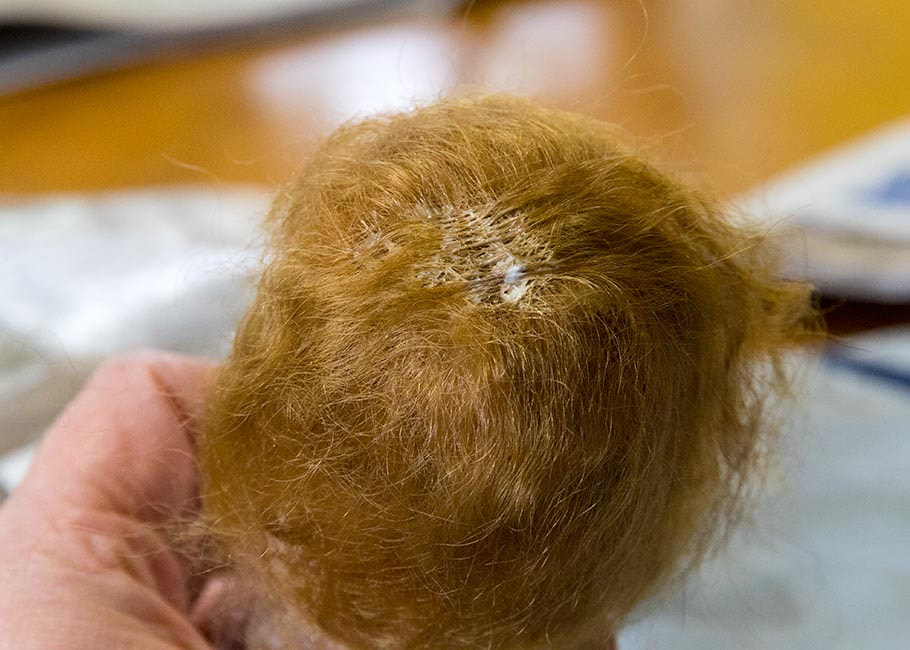
When the wigs were thoroughly dry - I waited 24 hours to make sure - I wet the wigs, carefully combed the mohair, and applied a bit of hair gel. Then I started trimming the hair, snipping upwards one tiny bit at a time.
I was very pleased with the final result - nice thin, wispy baby wigs that didn't make their heads look bigger...
I was very pleased with the final result - nice thin, wispy baby wigs that didn't make their heads look bigger...
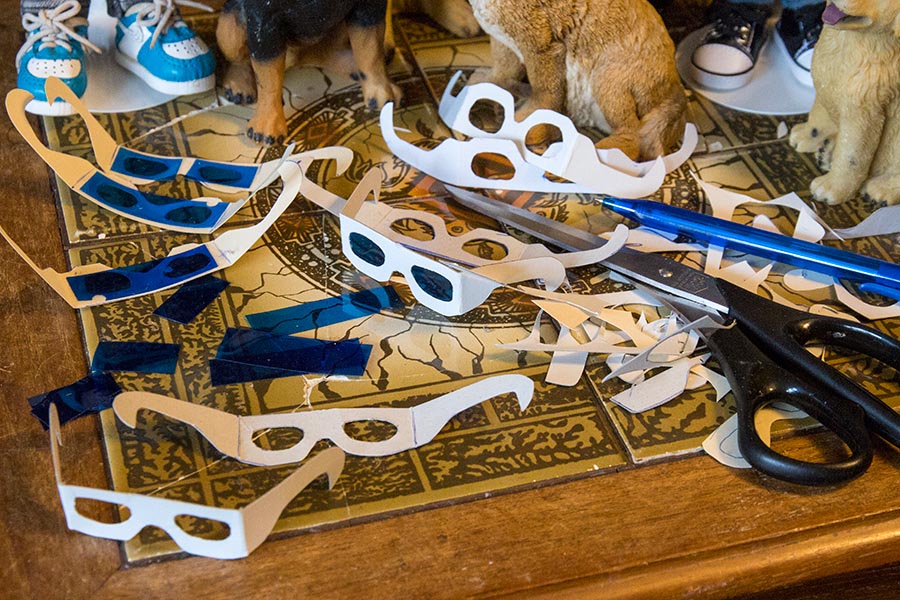
Eclipse Glasses
We were expecting a total solar eclipse on April 8th, and I thought it would make a good photo for the Special Days book I was working on, so I set about making lots of tiny eclipse glasses. The first three were made of cardstock, with blue cellophane lenses, but the cardstock didn't seem stiff enough, so O made the next six out of thin cardboard....
I was also been working on some smaller safety vests for my KIDs for another Special Days photo....
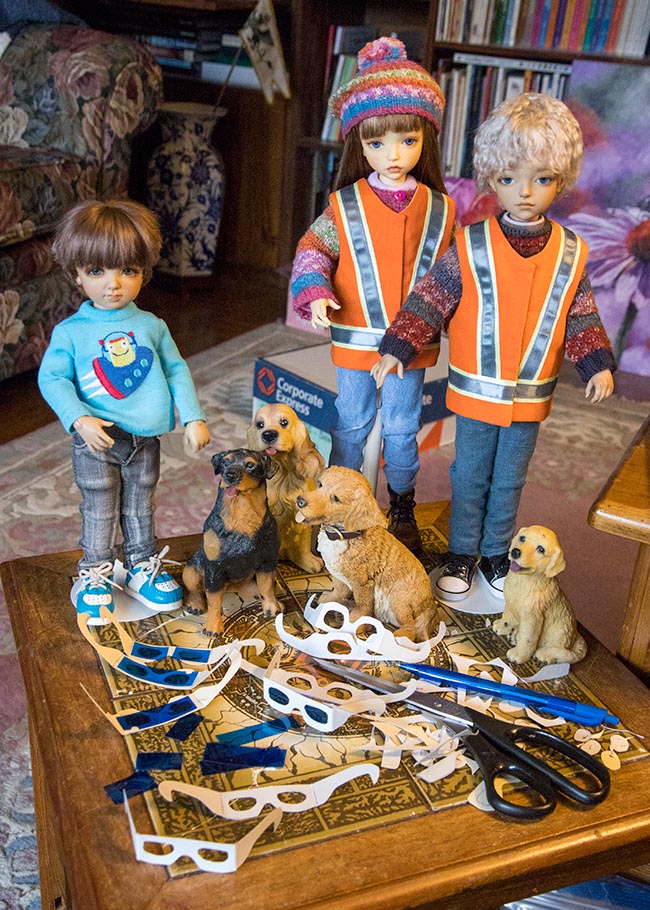
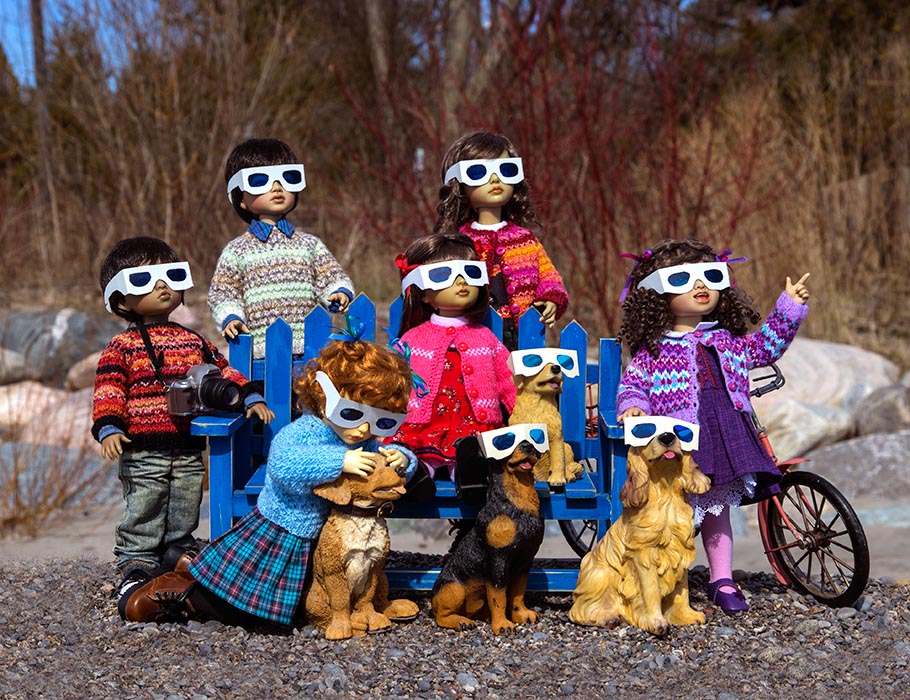
In the end, I used the three cardstock glasses for the dogs, and the six cardboard ones for the dolls....
Butterfly Fairies
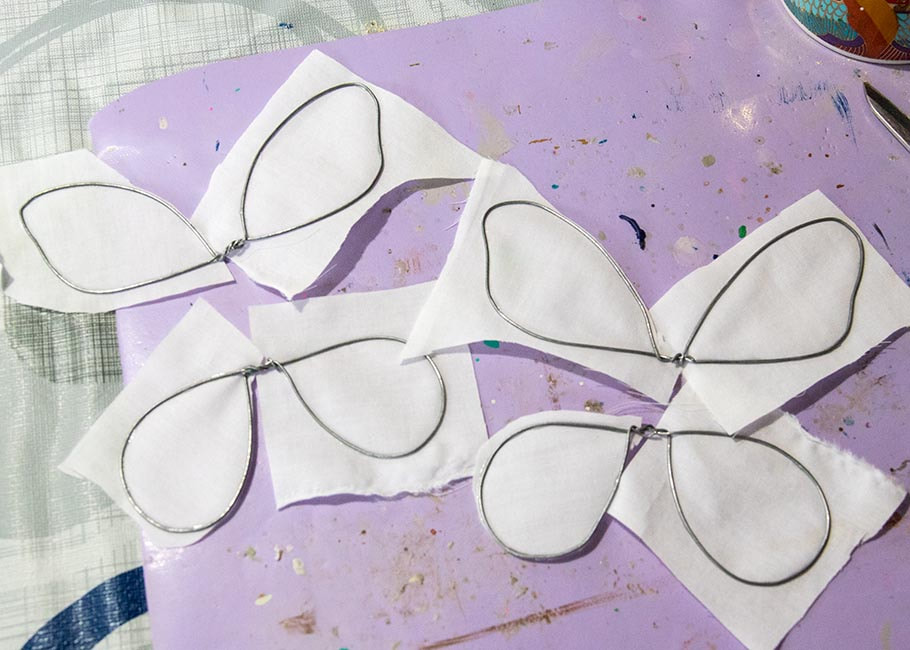
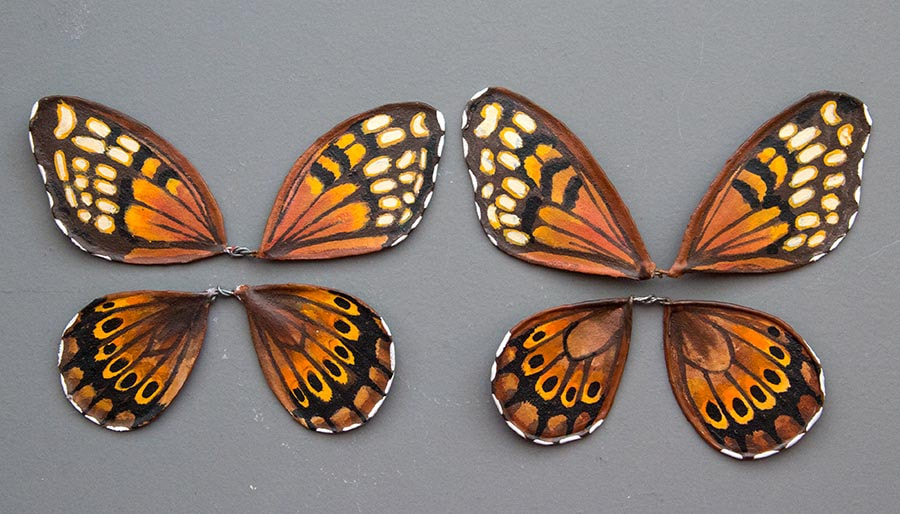
I had wanted to make little butterfly fairy costumes for the Avery twins so they could go out and about with the Grandma Phairby. So, last month I started on the wings, forming them out of wire, and then gluing on white cotton with Gemtack glue.
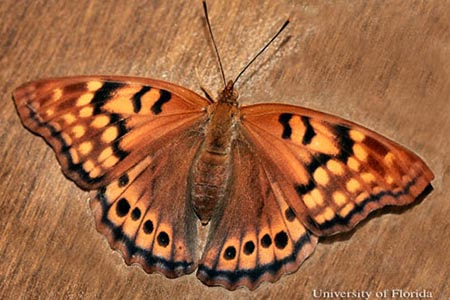
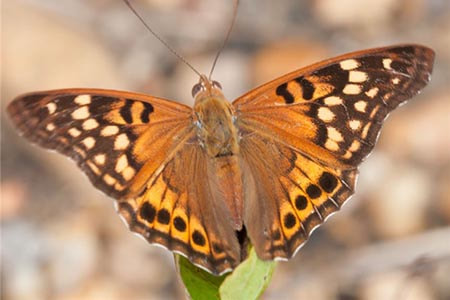
I didn't feel like painting all the fine details of monarch butterfly wings, so I researched other 'orange butterflies' so the kids would still be the same colour as their Grandma. I settled on the Tawny Emperor Butterfly.
|
|
Then I started painting the wings....
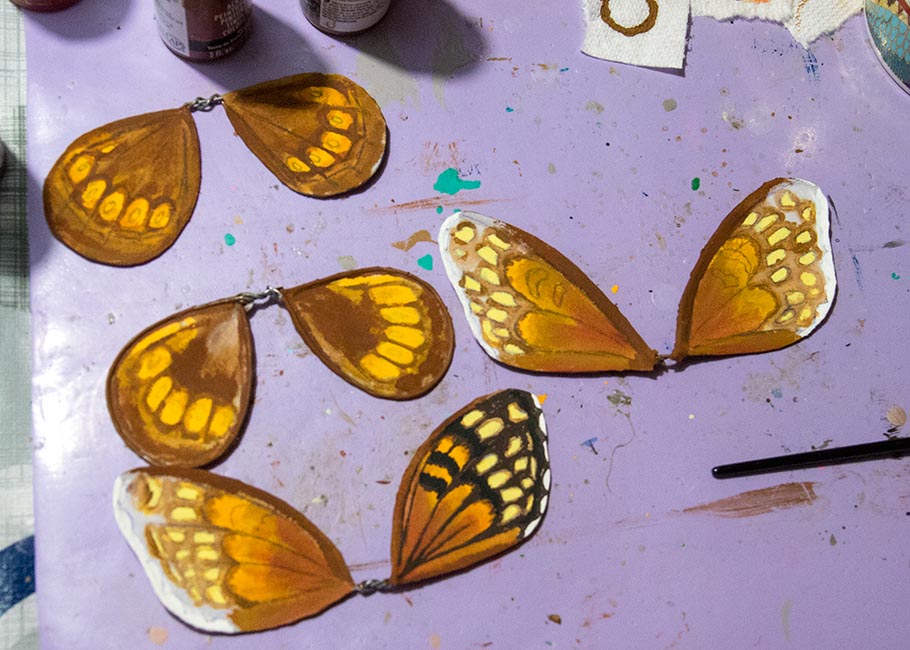
It took forever since both sides of the wings needed to be painted, which meant sixteen sides altogether. Then they were sealed with a few coats of matte varnish...
I started on tiny fairy outfits based on the ones I had made years ago for the OOAK polymer clay fairies, but they just weren't working out, so I gave up for a few weeks and went on to some other things. Then a month later I decided to try finish the two tiny fairy outfits I'd started, as I really hate having unfinished projects laying around. Especially after having put all that time into the wings. So I tried the outfits I'd made onto the dolls again and determined that what had tripped me up was trying to make fairy outfits with no sleeves, and that they would be worn with bare legs. I realized the two dolls didn't look very good with bare limbs. They had way too many tiny joints (the arms have five separate pieces alone) and their arms are always twisting all over the place. The dolls needed long sleeves and tights. So I made both dolls black stockings, and stitched tiny orange tubes for sleeves, which I hand-stitched into the existing armholes.
I thought the pigtails of Emily's wig would obscure too much of the wings, so tried on a commercial wig that I'd originally purchased for her years ago. I trimmed all the long curls at the sides and back...
I thought the pigtails of Emily's wig would obscure too much of the wings, so tried on a commercial wig that I'd originally purchased for her years ago. I trimmed all the long curls at the sides and back...
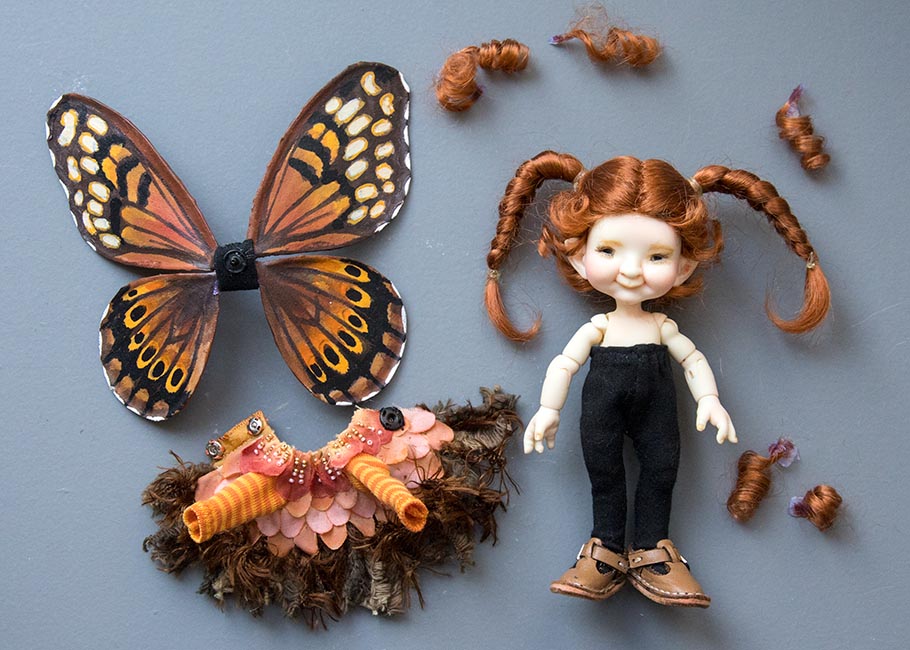
Then I stitched the two long braids into little buns instead...
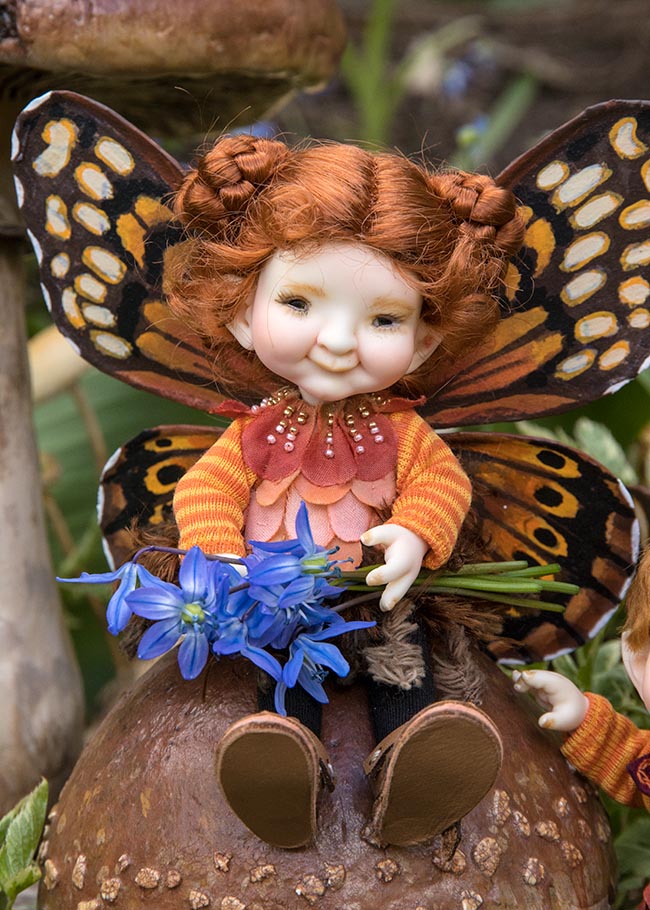
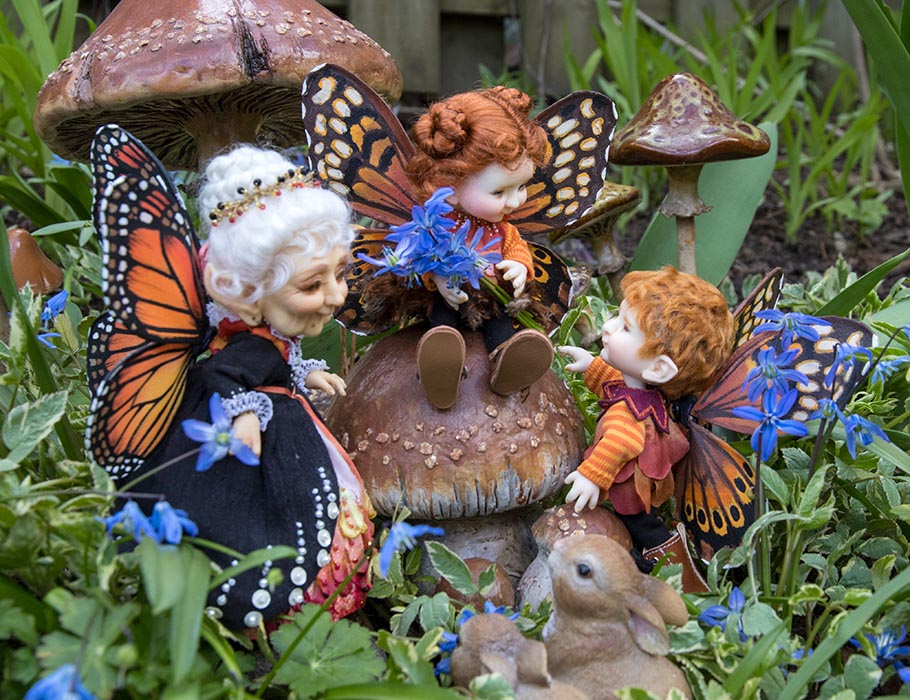
Then the twins were ready to go exploring with their Grandma...
Copyright © 2024 Martha Boers
All Rights Reserved
