Tiny Fairy Costumes & Wings
Copyright © Martha Boers 2015. All rights Reserved
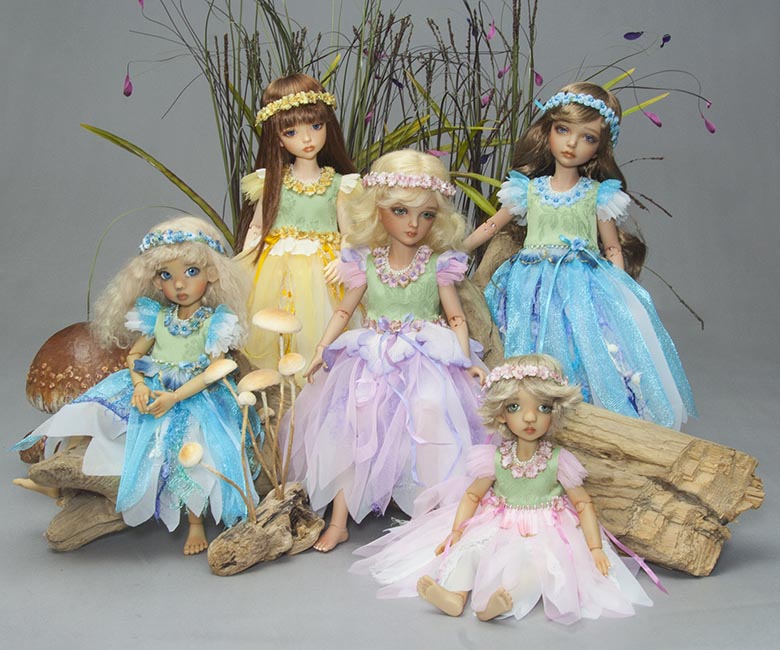
The patterns in this tutorial were designed to fit several different tinies; Iplehouse BIDs and KIDs,
and both sizes of Kaye Wiggs Tinies. The wings are separate from the dress, and are attached with velcro.
The patterns in this tutorial were designed to fit several different tinies; Iplehouse BIDs and KIDs,
and both sizes of Kaye Wiggs Tinies. The wings are separate from the dress, and are attached with velcro.
Patterns
To download pattern pdf, click on image below.
Materials for Fairy Dress
|
- satin for bodice
- light weight iron-on interfacing - white cotton for lining - white nylon tricot for underskirt - snap fasteners |
- nylon tricot in colour of choice for skirt and sleeve ruffles
- fabric flower petals for upper skirt - small fabric flowers for waist and headband - optional; cheesecloth, ribbons, fancy yarns - Velcro to match bodice colour (I used green) |
Instructions
1. Download pattern pdf, print and cut out. Trace bodice template onto lightweight iron-on interfacing. Cut out, remembering to add seam allowances all the way around. Press onto wrong side of bodice fabric, and cut out.
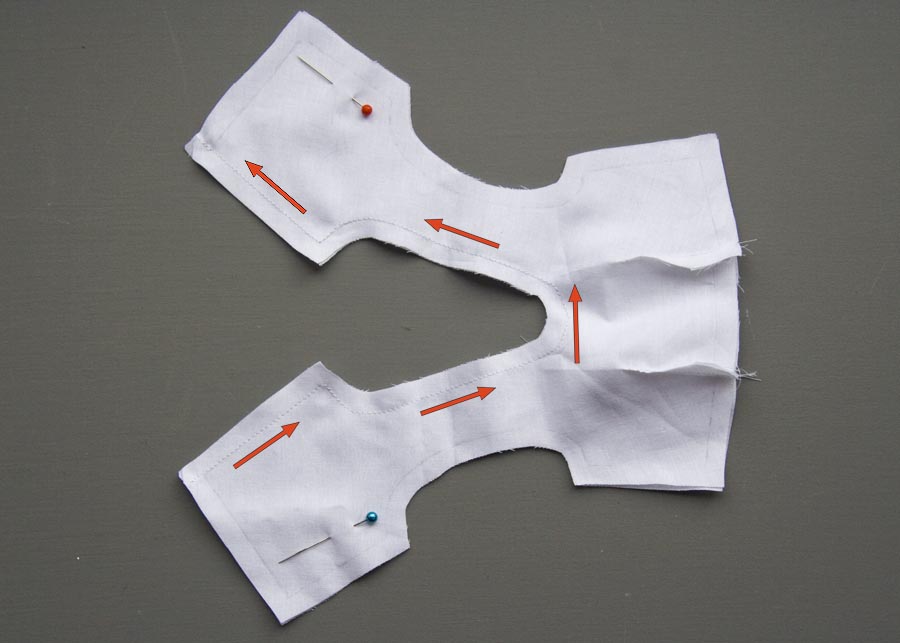
2. Pin bodice right side down on lining fabric, and cut out, leaving the two pinned together. Sew up one side of back opening, around neckline, and down other back side, stitching directly on the traced line. Trim corners, and clip curves. (Since I didn't take any construction pictures of the actual fairy dresses while I was making them, I'm going to use pictures from my KW Pinafore instructions to illustrate what I'm talking about. They were made the exact same way. Just ignore the darts in the pictures)
2. Pin bodice right side down on lining fabric, and cut out, leaving the two pinned together. Sew up one side of back opening, around neckline, and down other back side, stitching directly on the traced line. Trim corners, and clip curves. (Since I didn't take any construction pictures of the actual fairy dresses while I was making them, I'm going to use pictures from my KW Pinafore instructions to illustrate what I'm talking about. They were made the exact same way. Just ignore the darts in the pictures)
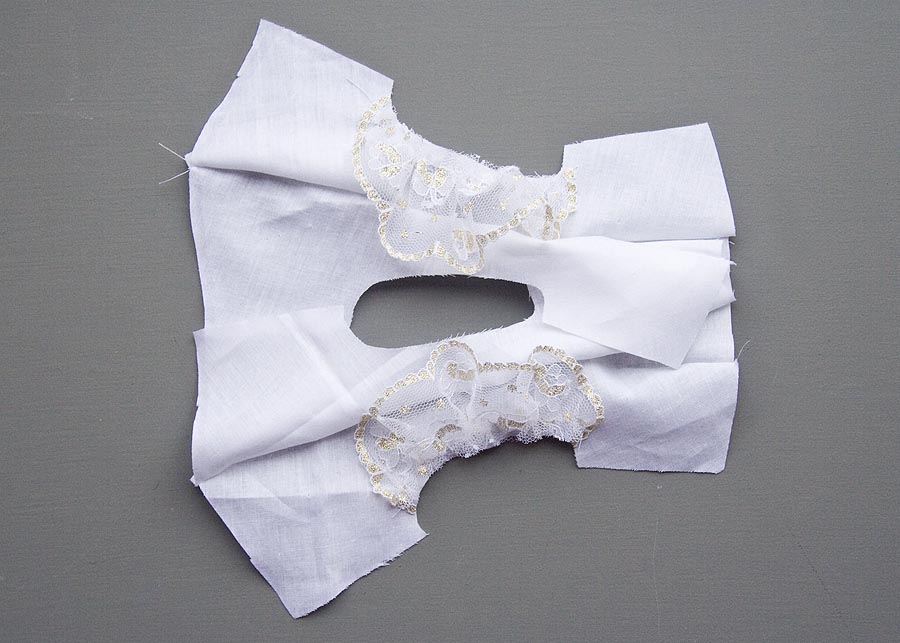
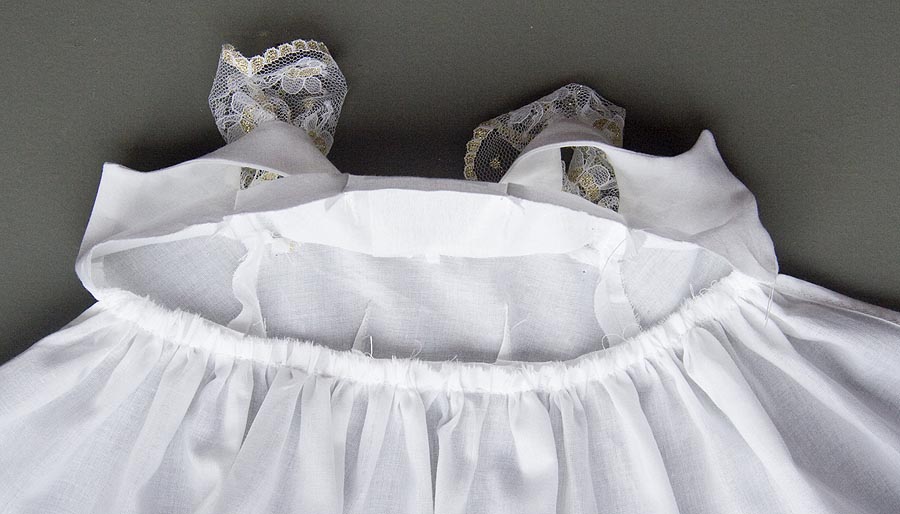
3. Turn right side out, and press. Cut out shoulder ruffles. First gather the smaller ruffle into the bodice armhole. I prefer to hand-baste before machine sewing. Then gather the wider, longer ruffle on top of the smaller one.
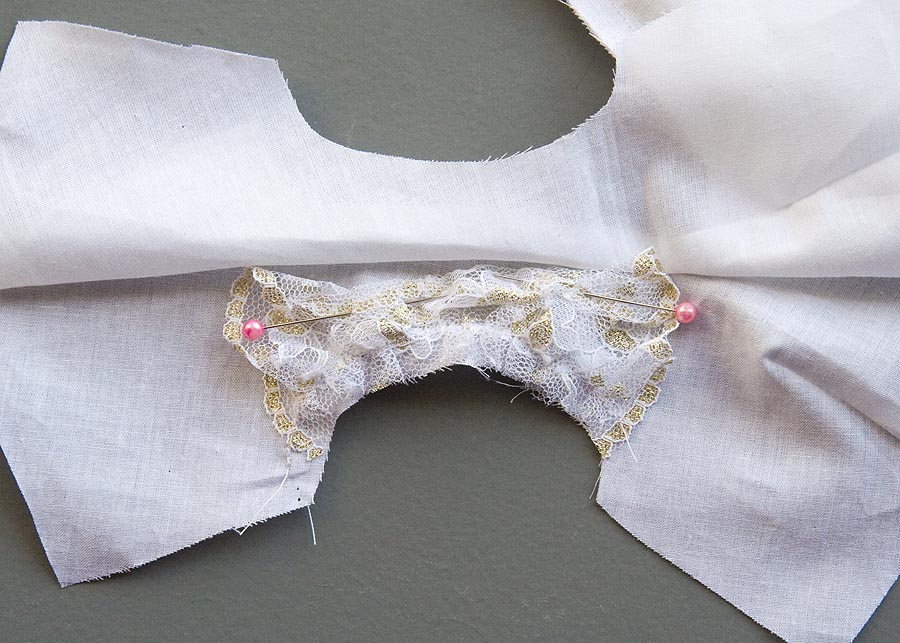
4. Roll up the shoulder ruffles as shown and pin. This is to keep them neatly out of the way when sewing the armhole seams.
5. Sew armhole seams. Clip curves. Turn right side out, by inserting a hemostat from the bodice front, up through the shoulder, and grabbing the lower back opening, then pulling gently through the shoulder. Press bodice flat.
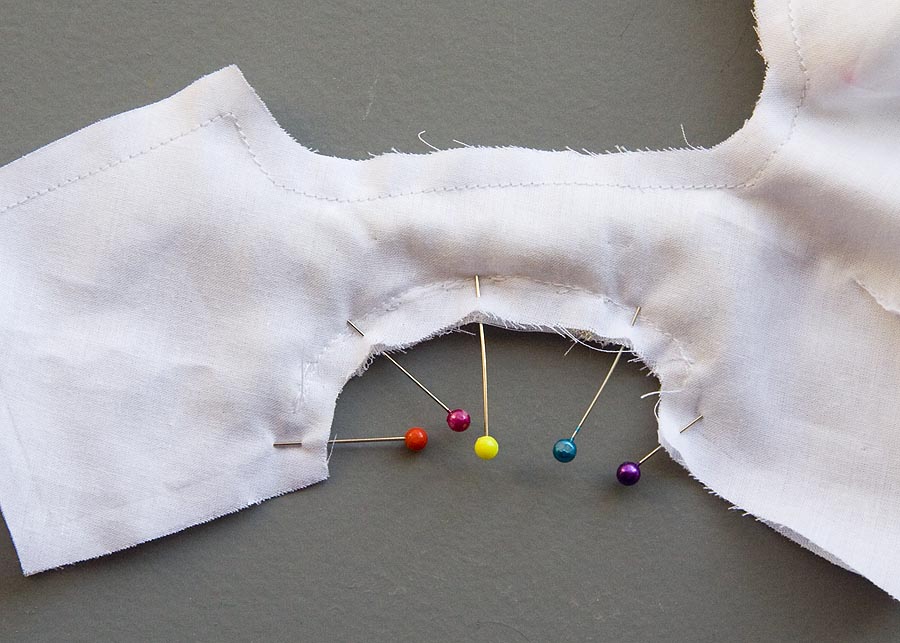
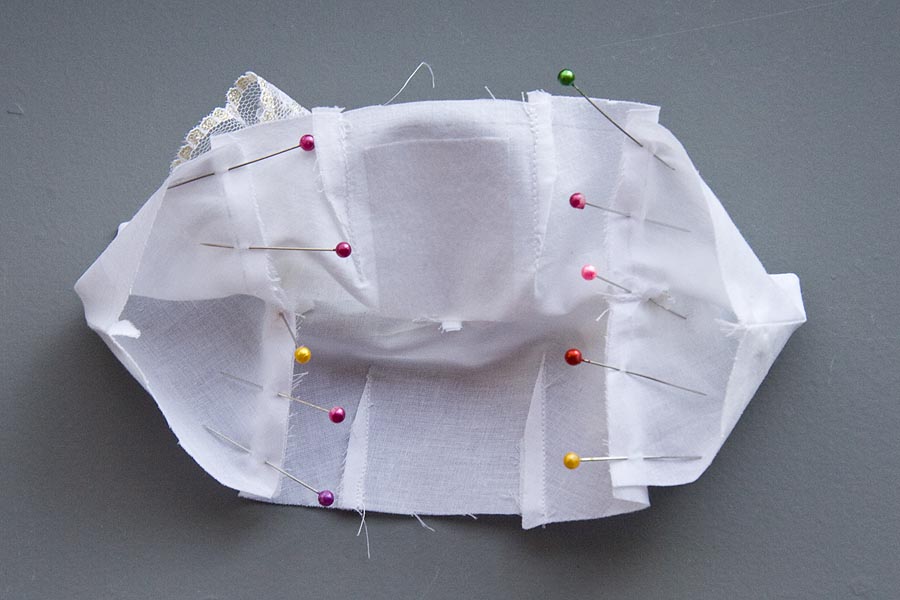
6. Pin underarm seams as shown, with bodice underarms together, and lining underarms together. Stitch. Press seam open, and then press bodice flat.
6. Pin underarm seams as shown, with bodice underarms together, and lining underarms together. Stitch. Press seam open, and then press bodice flat.
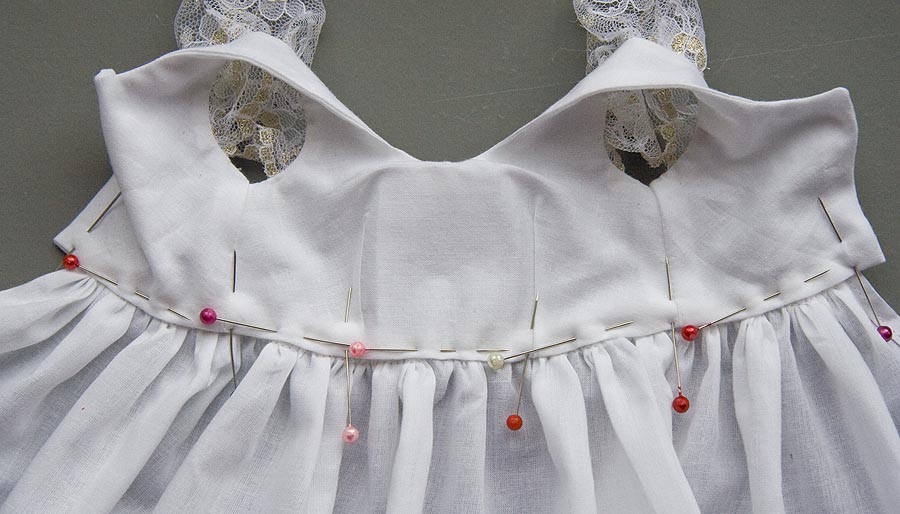
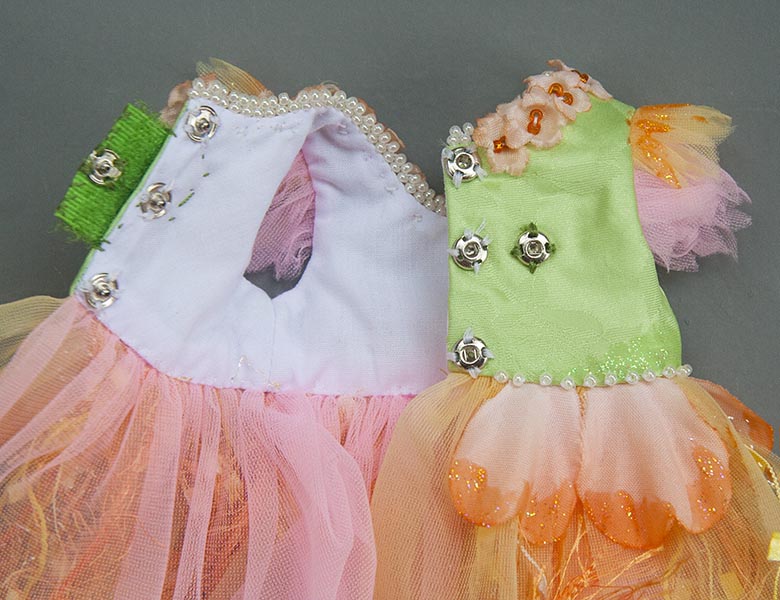
7. If you are going to use flower petals at the waist, pin them in place along the bottom of the bodice first and baste into place. Gather tricot flower petals onto bodice over flower petals. Then gather tricot underskirt on top. Add any ribbons, fancy yarns, or cheesecloth between the layers as desired. Machine stitch across all layers at the waist. Fold bottom seam allowance of bodice lining under and pin into place over raw edges of skirt top. Hand sew. Try on doll and measure for snaps. Sew snaps on back.
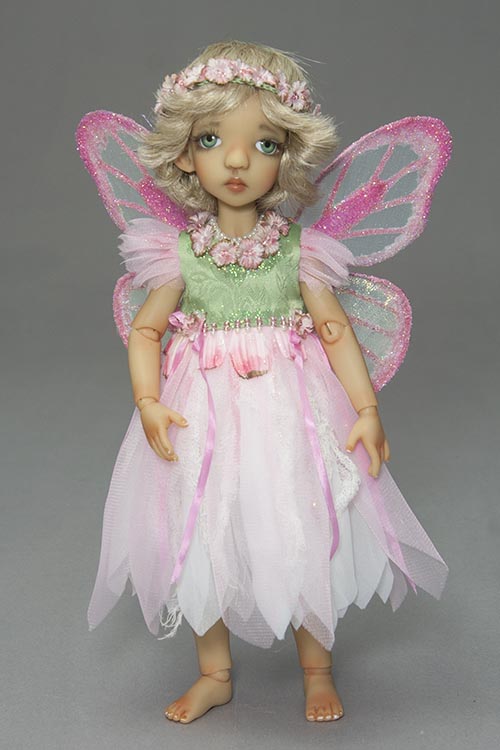
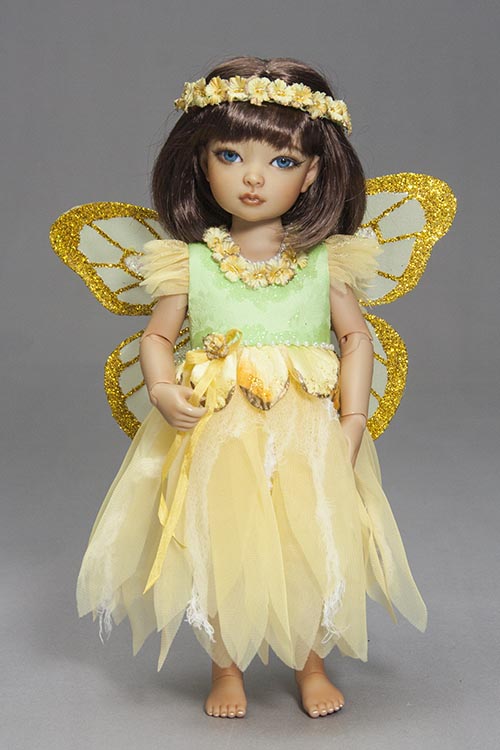
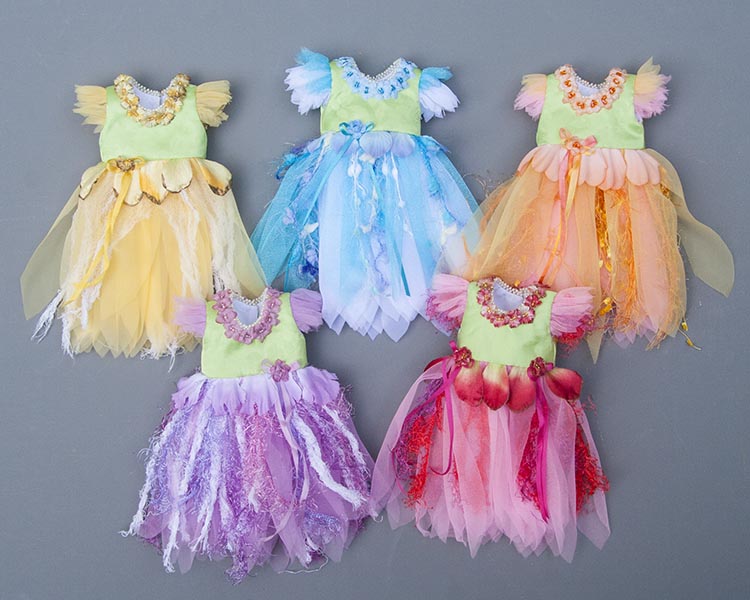
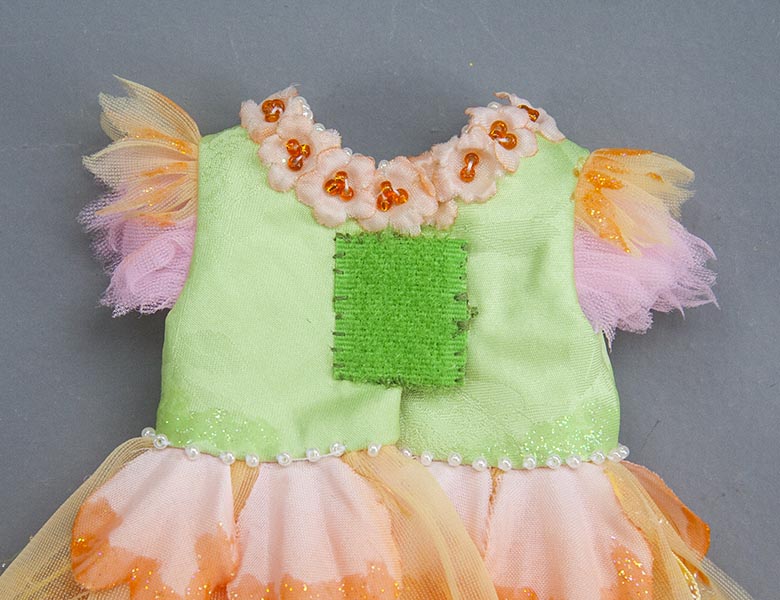
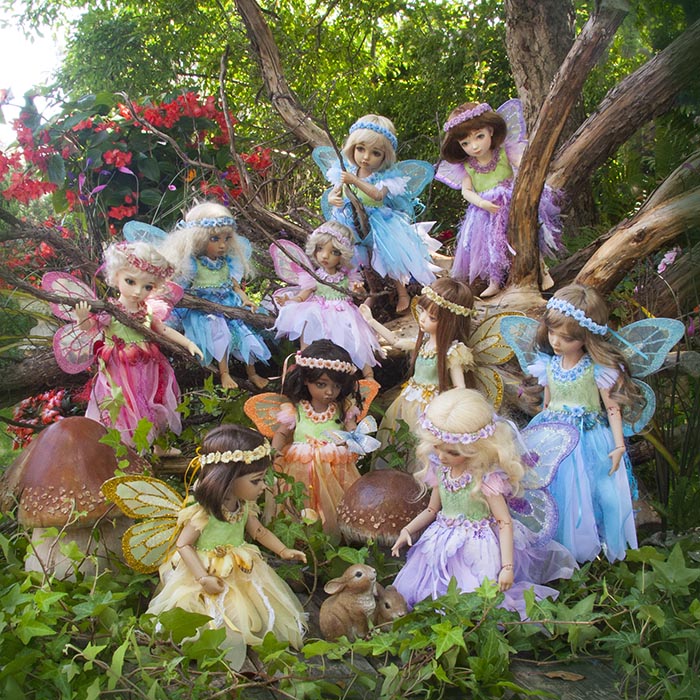
8. Embellish the bodice. I did picot beading around the neckline, and then stitched a row of tiny fabric flowers around neckline. You can add a ribbon bow with flower at the waist if desired. These are the five BID fairy dresses I made....
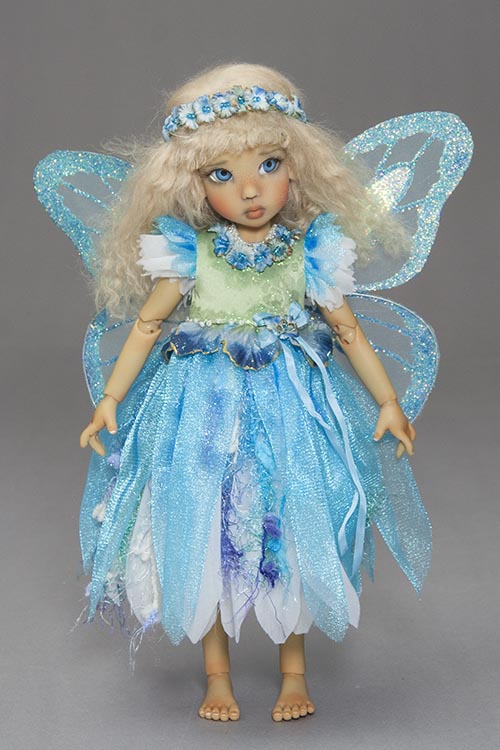
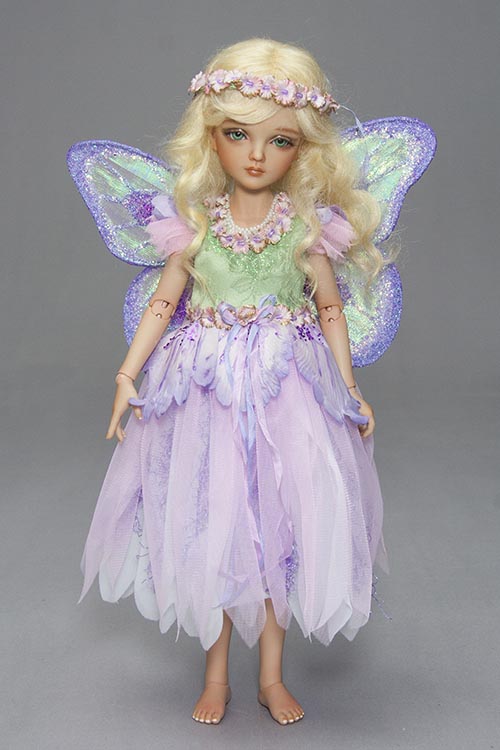
Then I made three KID size dresses, and one for each of the Kaye Wigg Tiny sizes...
Wing Materials
|
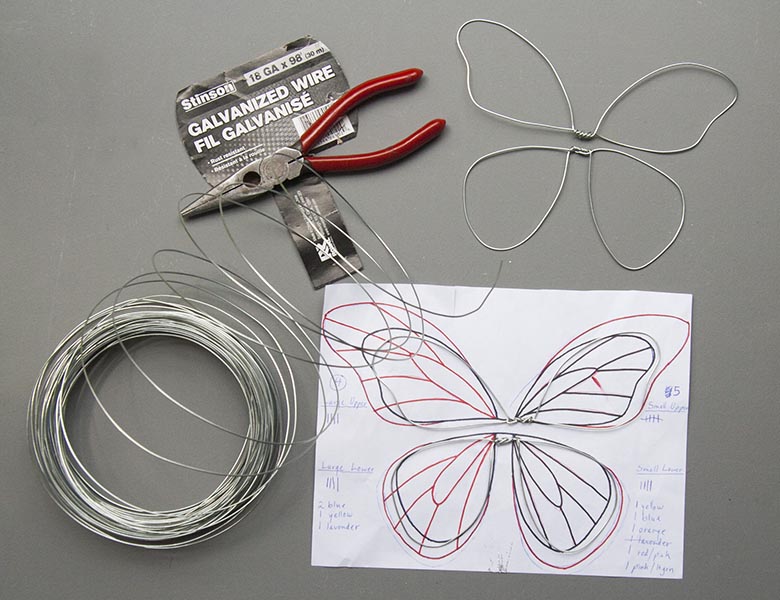
- 18 gauge wire
- pliers & wire cutters - glue (I used Gem-Tac) |
- stiff sheer fabric
- assorted fabric glitter paint - assorted fine glitter - hemostats for holding wings |
Wing Instructions
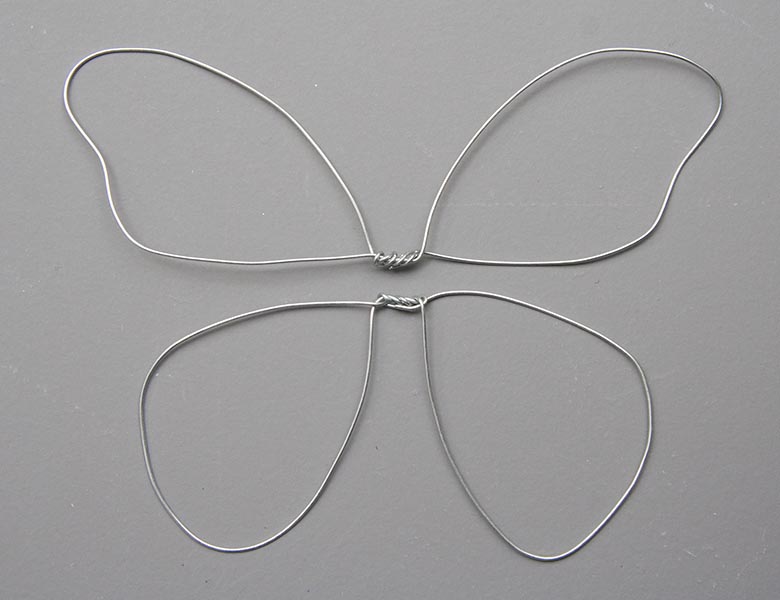
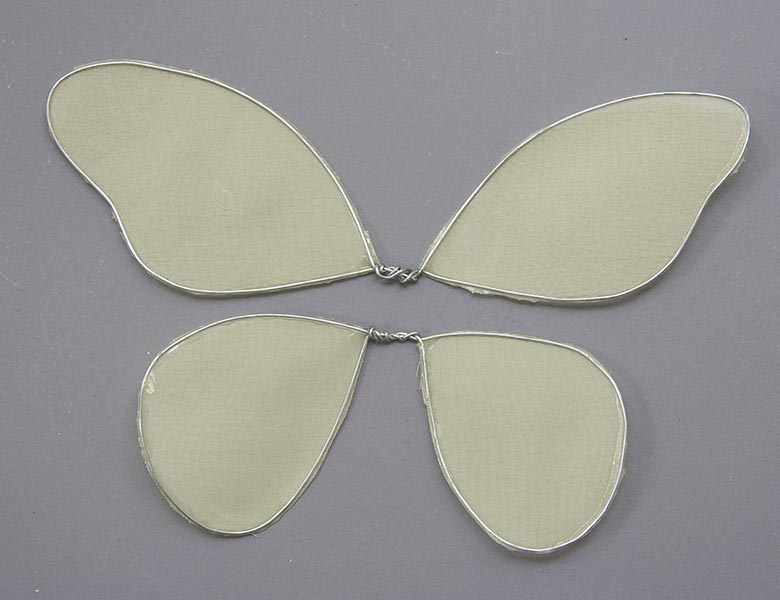
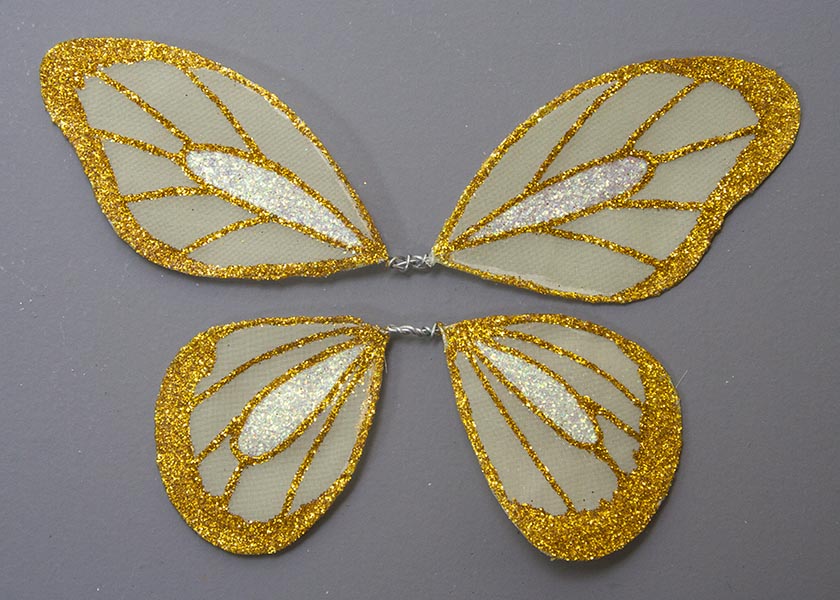
1. Form wire wing shapes. In the picture, I had both sizes of wing drawn on the same paper, but for your convenience I've separated the large and smaller patterns. The top and bottom wings are separate from each other. When forming the wings, start at the central cross-piece, form one of the wings, twisting across the bridge in the middle, form the second wing, and twist the end in the middle. Cut wire. Repeat for second set of wings.
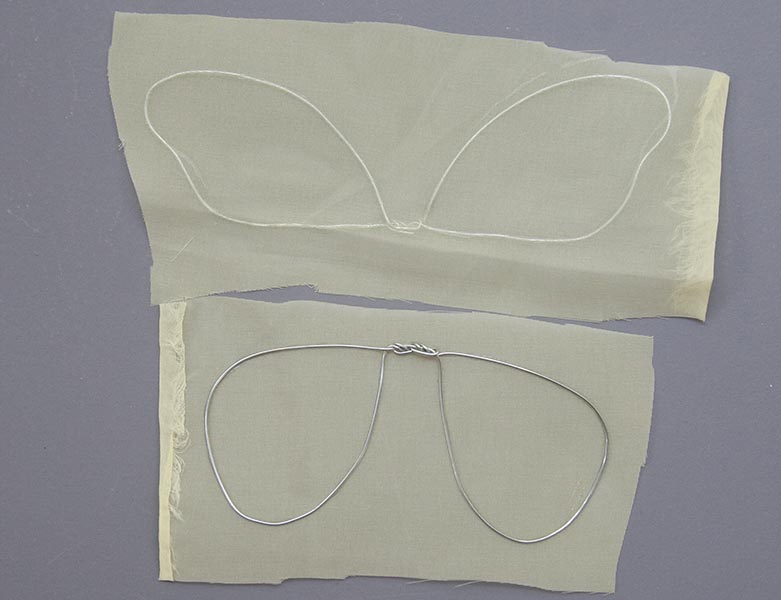
2. Cut a rough rectangle of fabric somewhat larger than the wings. Apply glue carefully along the wire. Place fabric on top, making sure it's touching the glue-covered wire. Let dry completely. When the glue is completely dry, trim away the excess fabric. Check to make sure the fabric is actually glued to the wire everywhere. If not, just squirt a little extra glue along the inside edges. In fact, I added extra glue all around the inside edges just to give it extra hold.
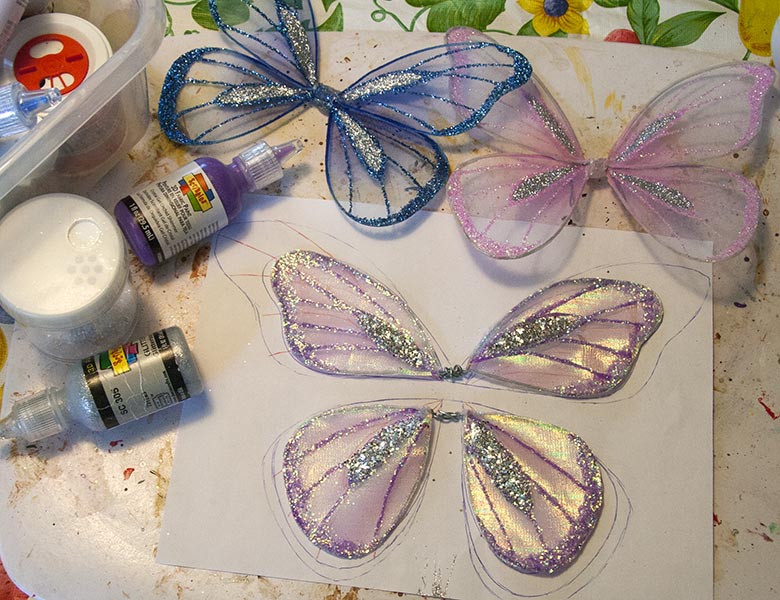
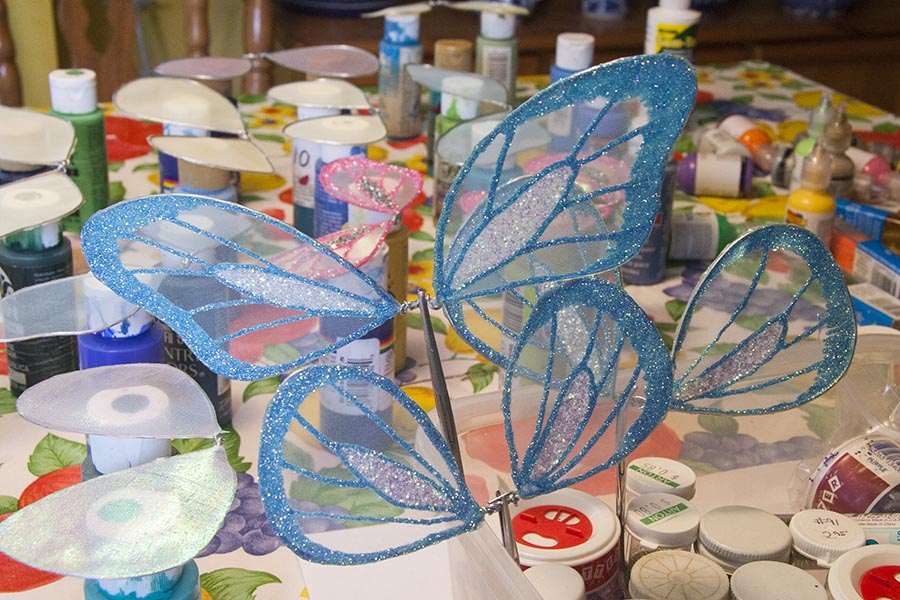
With these wings, I was aiming to recreate the look of some butterfly wings I purchased several years ago. I thought fabric glitter paint would be good enough, but found it didn't provide enough glitter on it's own, so ended up buying very fine loose glitter to sprinkle on top of the wet glitter paint.
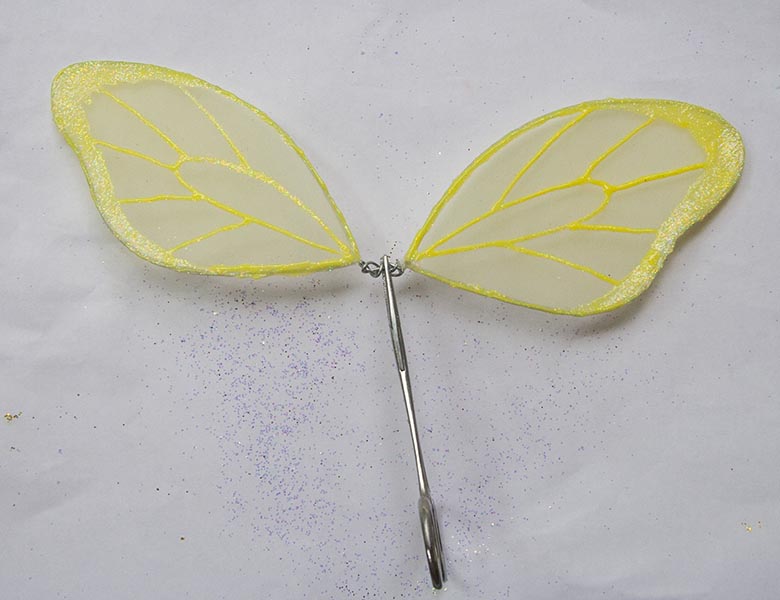
3. Time to apply the glitter. Because the sheer fabric will let the glitter paint seep through to the other side (which means they would stick to any surface they were laid on) I used hemostats to hold the wings while I worked on them, and when they dried. Hold the wing over the wing pattern so you can follow the vein pattern with the glitter paint. Work on just one side at a time. After applying all the glitter paint around the outside and drawing in the veins, sprinkle with matching colour fine glitter. Shake off excess.
4. Repeat for other side of wing. Prop the hemostat (still holding the wing) into something secure so the wing can dry.
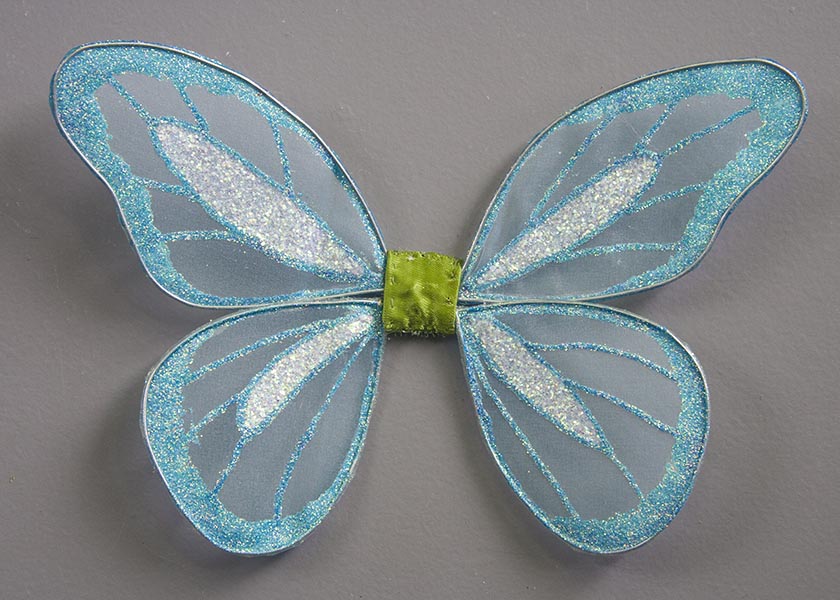
5. When the wing is thoroughly dry, brush a light layer of gloss water-base varnish just over the glitter, so the wing doesn't end up continually shedding glitter forever. The finished wing, ready to add the velcro.....
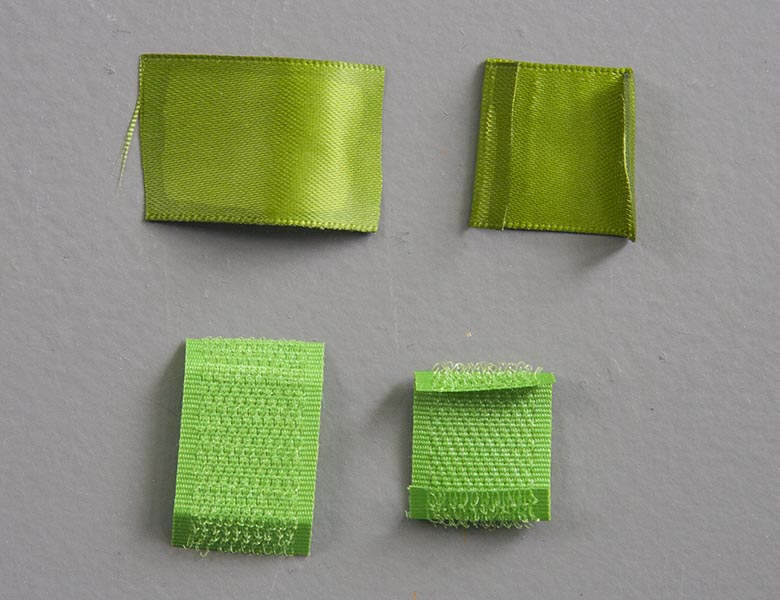
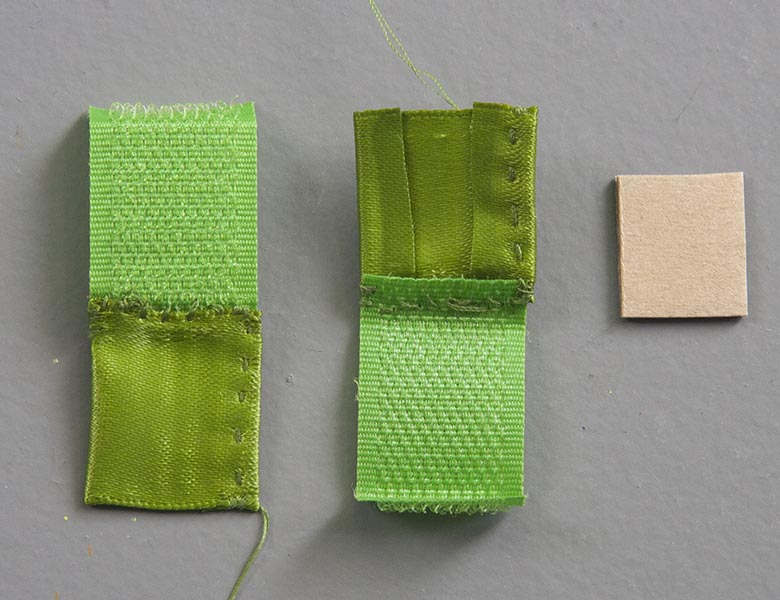
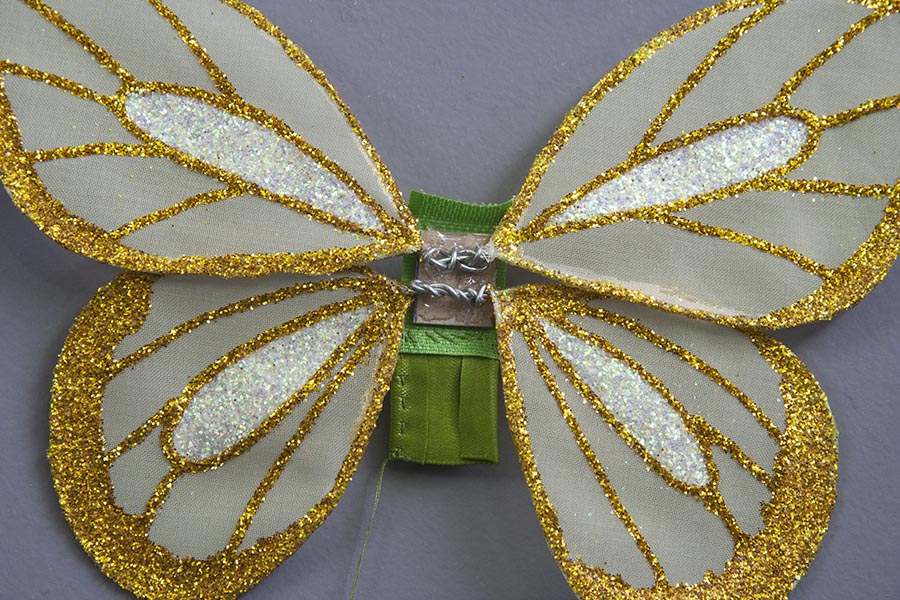
6. Cut a short length of velcro, and equal lengths of the same width satin ribbon. Apply Fraycheck on cut edges of ribbon. Fold cut edges of Velcro and ribbon under, and baste ribbon. Stitch ribbon piece to folded edge of Velcro. Cut square out of stiff cardboard, slightly smaller than ribbon or Velcro.
7. Apply hot glue to cardboard square and press onto centre wing wires. Glue cardboard square into middle of Velcro (back of hook piece). Apply more hot glue, fold Velcro tab down, and satin ribbon up to cover cardboard.
8. Stitch the top edge of the satin ribbon to the top of the Velcro edge.
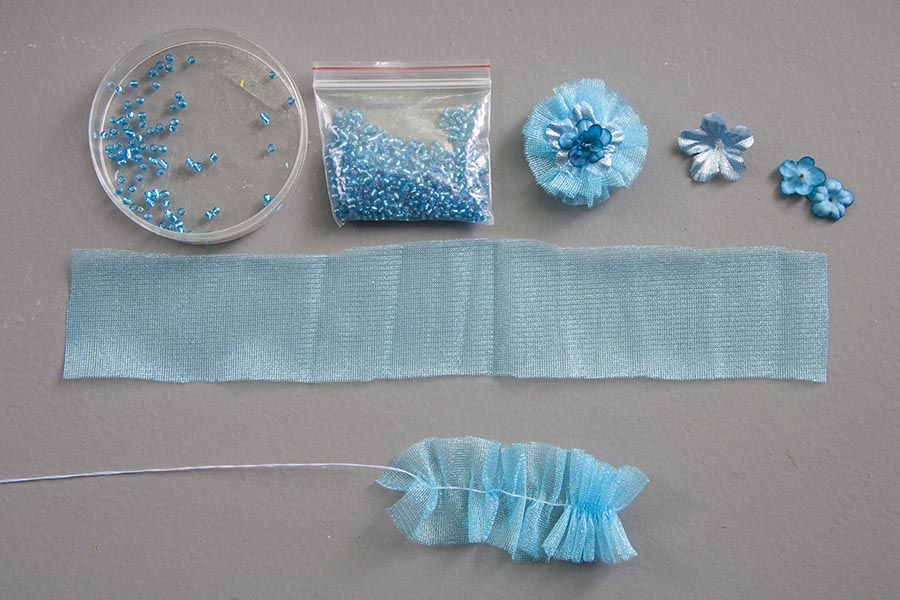
9. Cut strip of nylon tricot from same fabric as fairy dress. Gather up the middle to make a rosette.
Embellish with flowers and beads. Hot glue thee rosette onto the satin ribbon side of the wings.
Embellish with flowers and beads. Hot glue thee rosette onto the satin ribbon side of the wings.
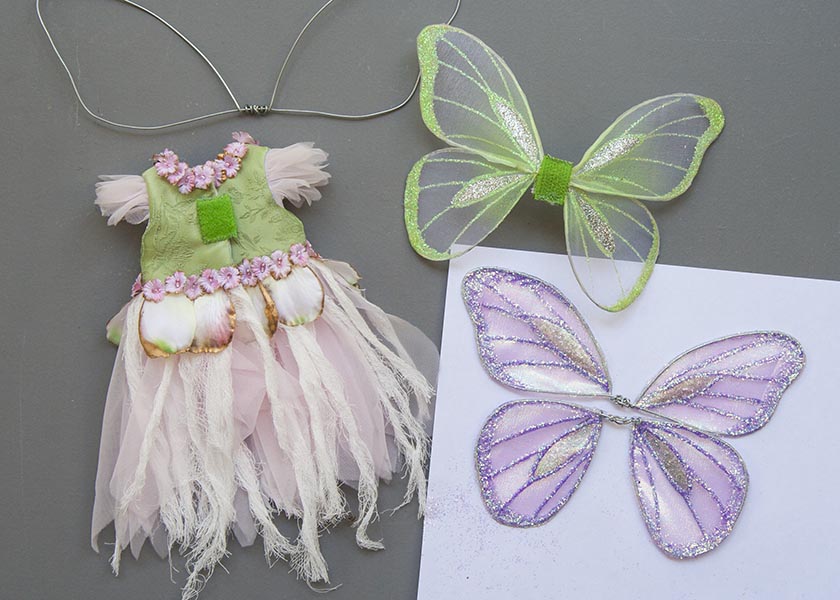
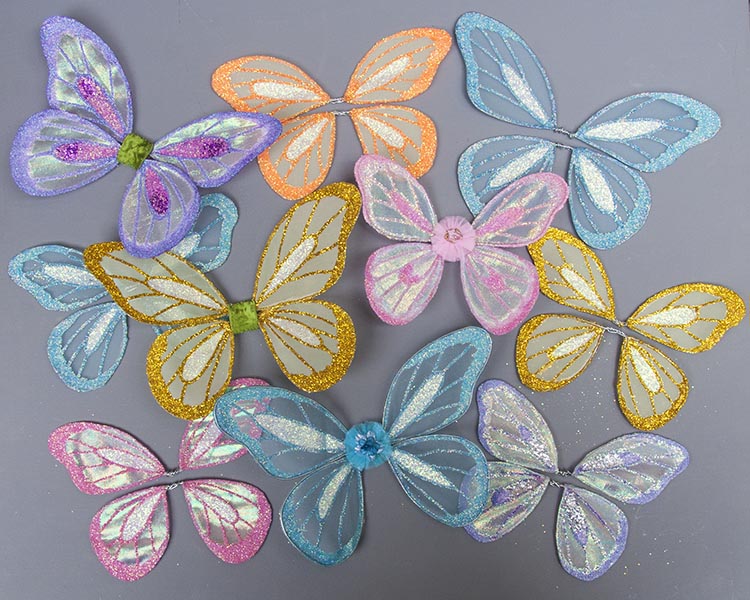
Fairy wings in various stages of construction....
10. To make Velcro part for back of dress, fold edges of loopy Velcro and satin ribbon under with wrong sides together,
and hand-stitch all the way around. Position Velcro in middle of back of bodice - it will extend over the back edge as shown.
Sew an extra snap fastener onto the Velcro extension to help wing sit flat on the back of the dress.
and hand-stitch all the way around. Position Velcro in middle of back of bodice - it will extend over the back edge as shown.
Sew an extra snap fastener onto the Velcro extension to help wing sit flat on the back of the dress.
And you are all done!
Copyright © 2015 Martha Boers
All Rights Reserved
