Making a Pair of Rococo Shoes
This tutorial shows all the steps involved in making the shoes for my Queen of the Night.
My Queen of the Night, an Iplehouse JID Asa, with high-heel feet, needed a pair of black Rococo shoes which I could embellish to match her gown, but since there's nothing available out there even close to what I needed, I had to make my own shoes.
My Queen of the Night, an Iplehouse JID Asa, with high-heel feet, needed a pair of black Rococo shoes which I could embellish to match her gown, but since there's nothing available out there even close to what I needed, I had to make my own shoes.
Preparing the Soles
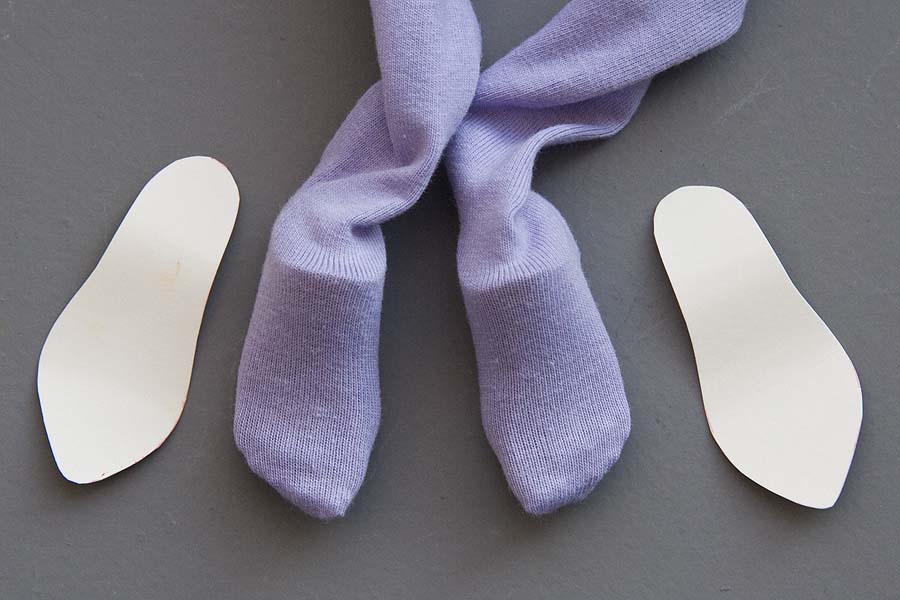
I spent an entire evening trying to come up with a pattern for the soles of the shoes, but I found it too frustrating
having to prop the doll up against something so I'd have one hand free to hold the paper, and the other free to trace
around the doll's foot. She had kept slipping on her stand because her stocking feet had no grip on the smooth metal
base, so I had to hold her. So I removed the doll's high-heel feet, tucked them into the stockings, and things went
much better. I had cardboard soles in no time....
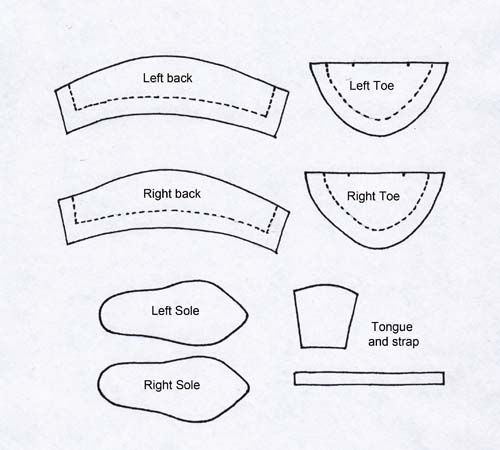
I've made a pattern pdf in case someone wants to try their hand at making a pair of shoes like this. Click on image to download.
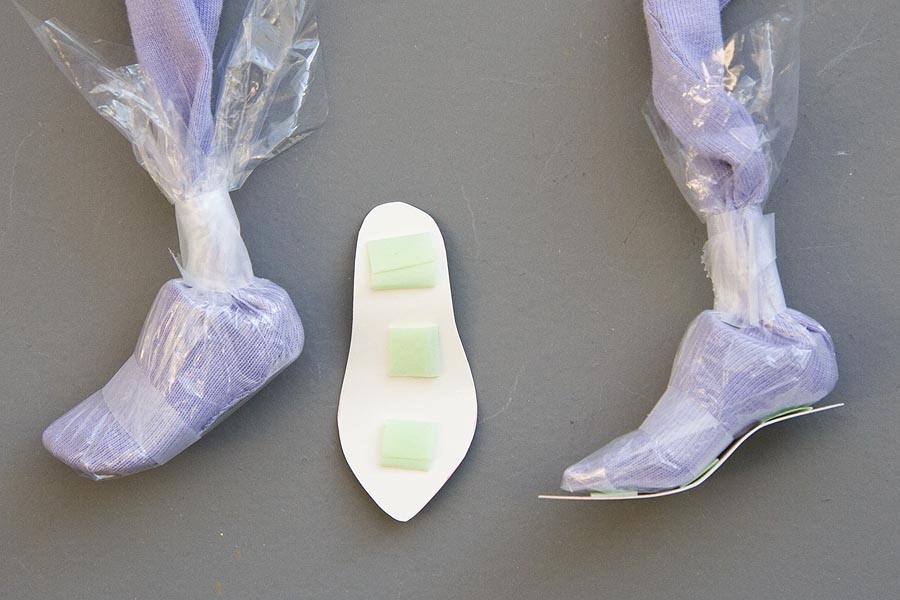
Next step was to wrap the stocking feet in plastic wrap, to protect the stockings. I made tiny rolls of painter's tape and stuck them on top of the soles. It's important to use painter's tape as it won't stick to the cardboard as permanently as regular tape, so the sole won't be damaged when I eventually remove the foot from the finished shoe. Stuck the soles onto the bottoms of the feet. Notice that the soles extend out in front at the toe.
Coming Up with a Pattern
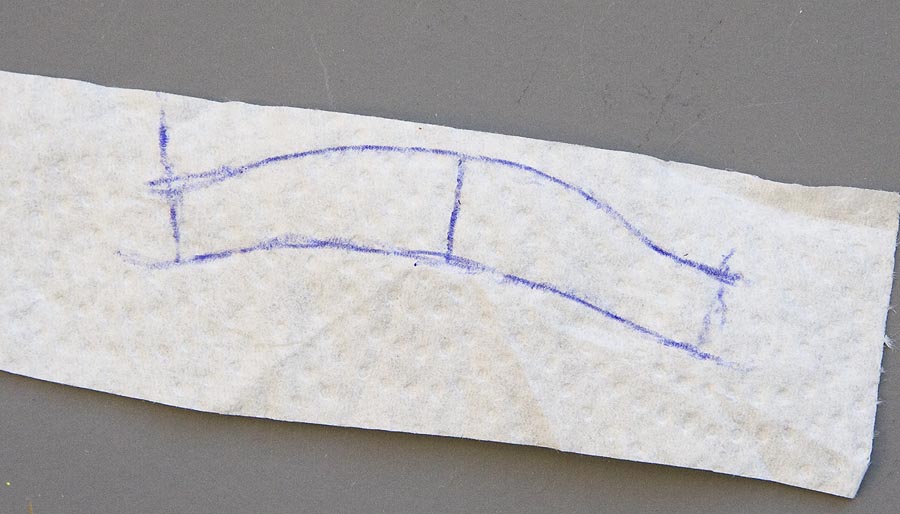
Took a strip of paper towel, folded it around the foot, marked center back of the heel, and drew the upper back of the shoe....
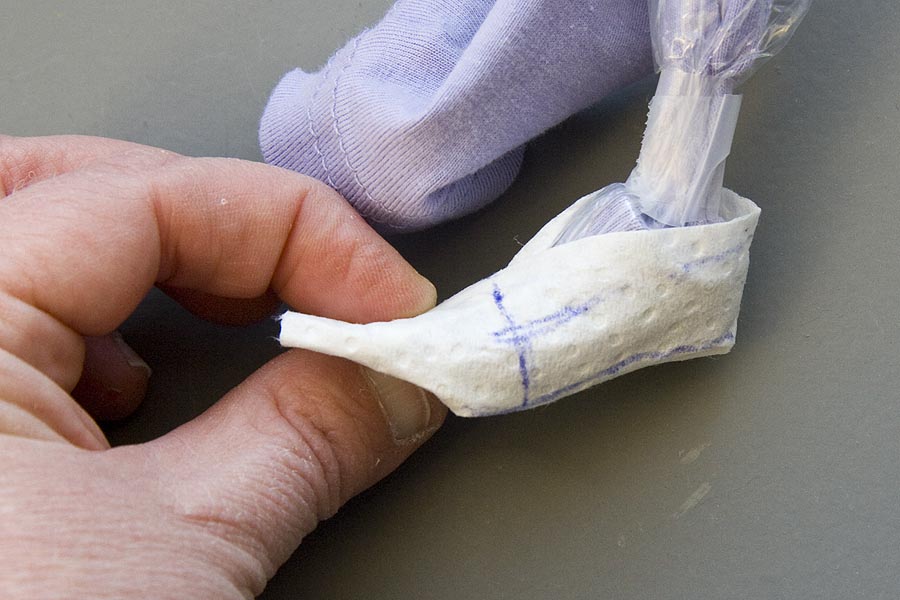
The pattern for the upper back. The pen lines do not include seam allowances.
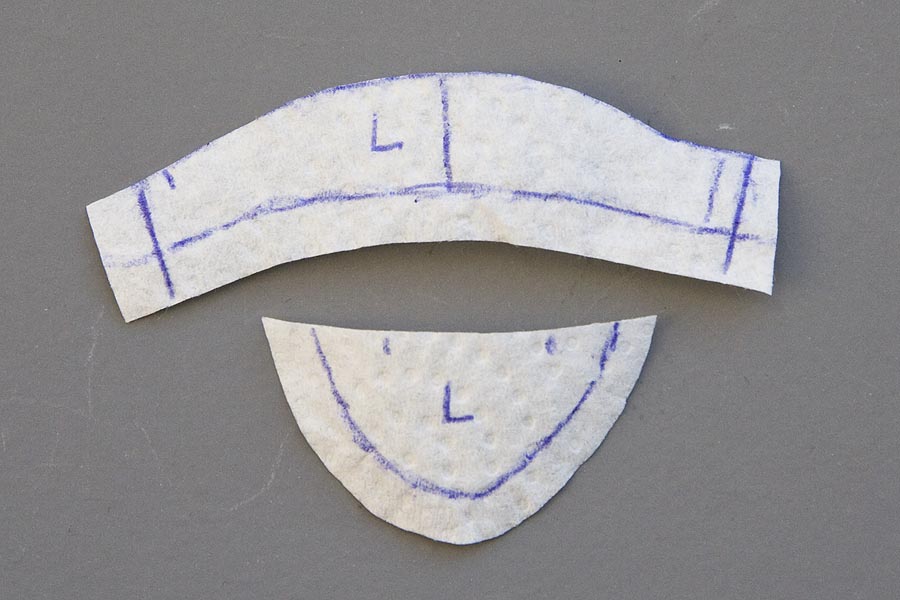
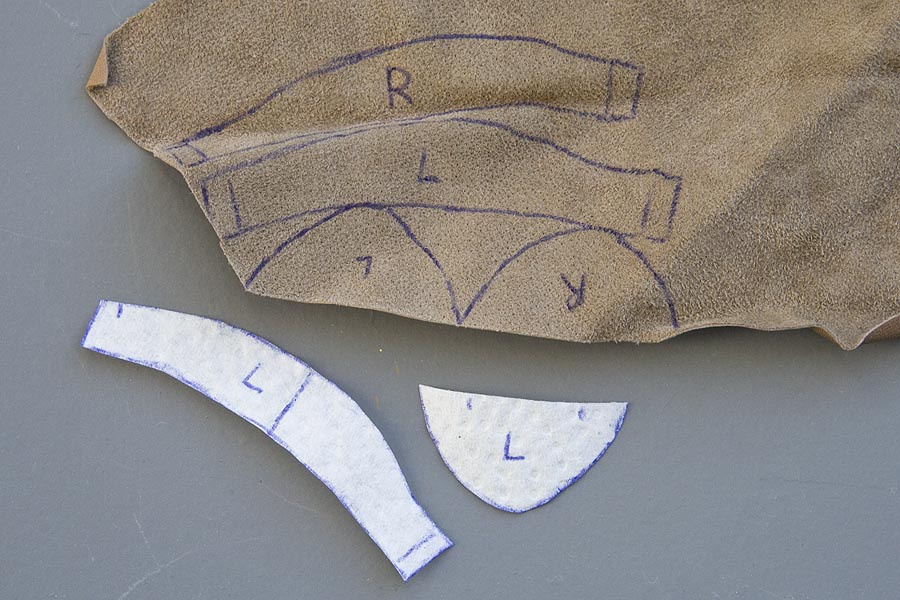
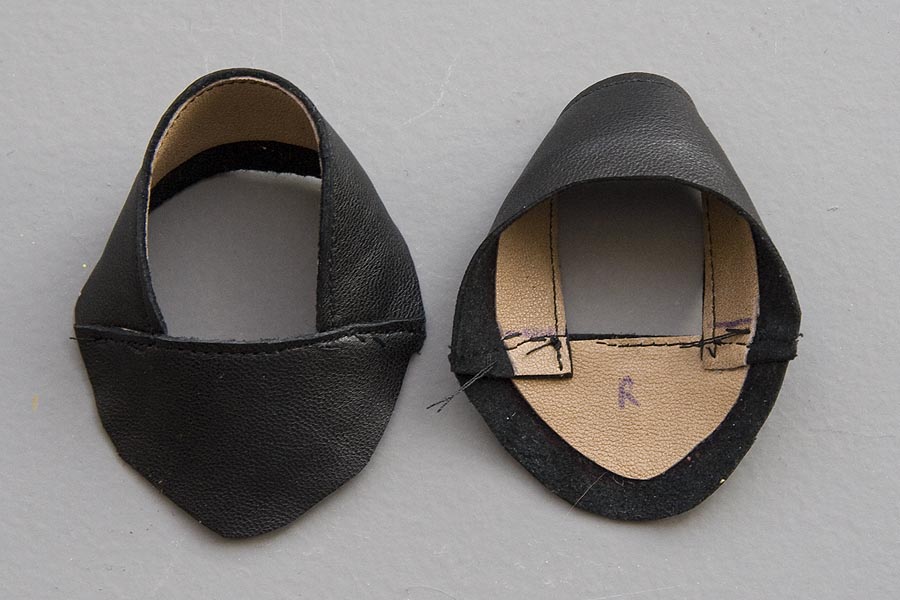
Cut out the pattern with seam allowances added. Drew pattern for toe, and cut it out with seam allowance. The pattern was for the left foot. The right foot would be the mirror image. Traced the patterns onto the wrong side of some black leather, and cut them out. Made sure to flip the patterns for the other foot.
Making the Upper Part of the Shoe
To make the shoes sturdier, and smoother on the inside, I decided to line them. Cut the seam allowances off the
patterns and traced then onto the wrong side of some thin beige leather. Marked which were for what foot.
patterns and traced then onto the wrong side of some thin beige leather. Marked which were for what foot.
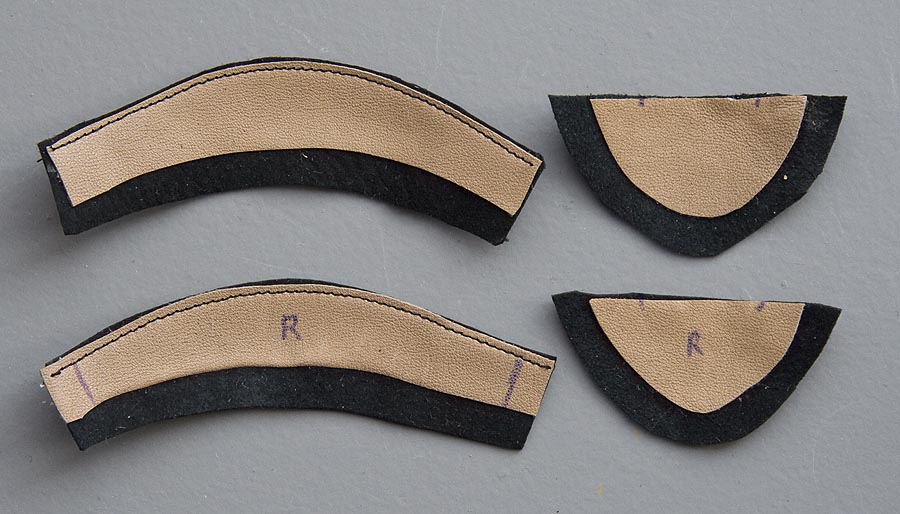
Glued the lining pieces wrong sides together onto the shoe outer leather.
After the glue dried, I machine-stitched along the back edges, using a needle for leather.
After the glue dried, I machine-stitched along the back edges, using a needle for leather.
Positioned the shoe front pieces over the back pieces, glued them in place and basted them with a glover's
needle and some black thread. After the glue dried, I machine stitched across the front edge of the shoe.
needle and some black thread. After the glue dried, I machine stitched across the front edge of the shoe.
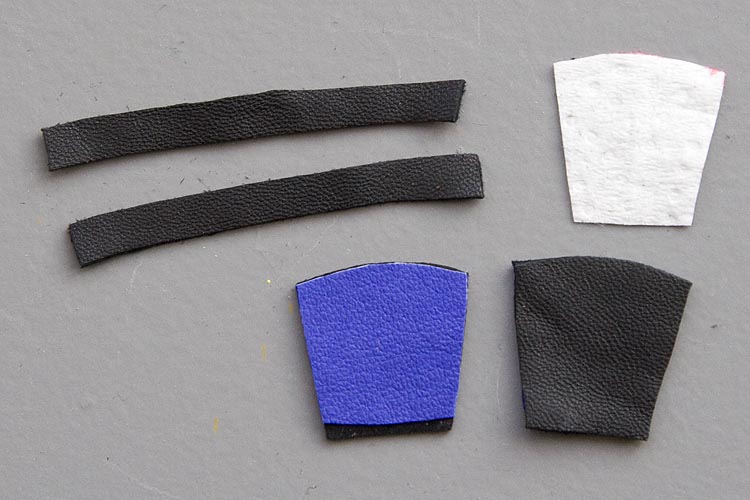
Drew a tongue pattern, cut it out of black leather and a blue leather for a lining. Glued the blue leather onto the
back of the black with wrong sides together. Also cut two decorative strips that fit across width of shoe.
back of the black with wrong sides together. Also cut two decorative strips that fit across width of shoe.
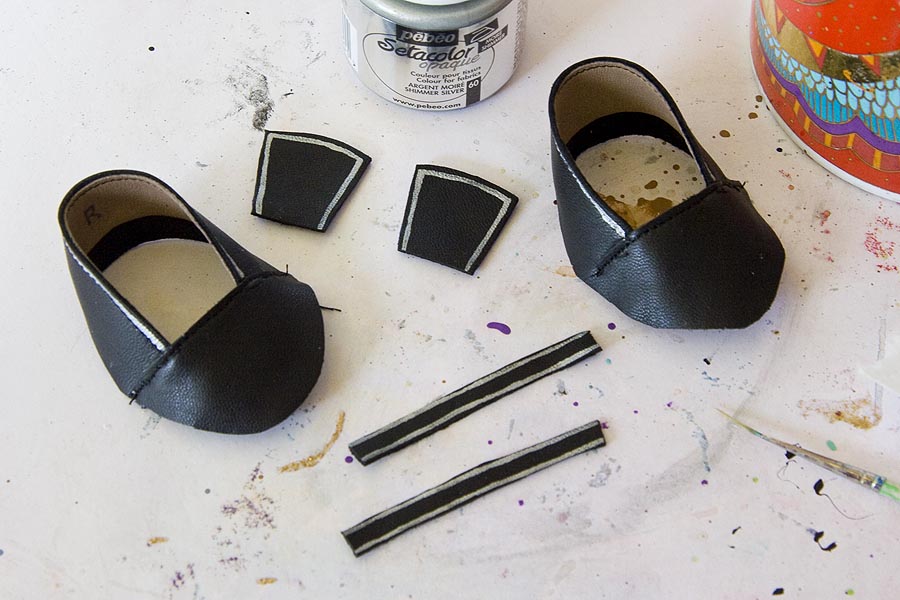
Painted silver lines along edge of shoe back, tongues, and decorative strips. Let dry thoroughly.
To avoid excessive bulk under the sole, I clipped and notched the seam allowance all the way around.
Applied some glue to every notch, then glued the shoe upper to the sole.
Applied some glue to every notch, then glued the shoe upper to the sole.
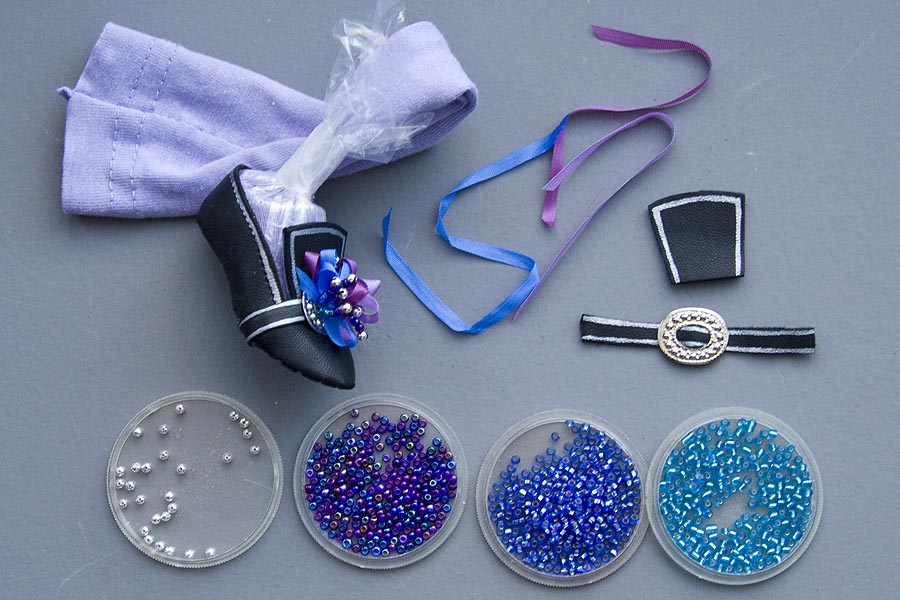
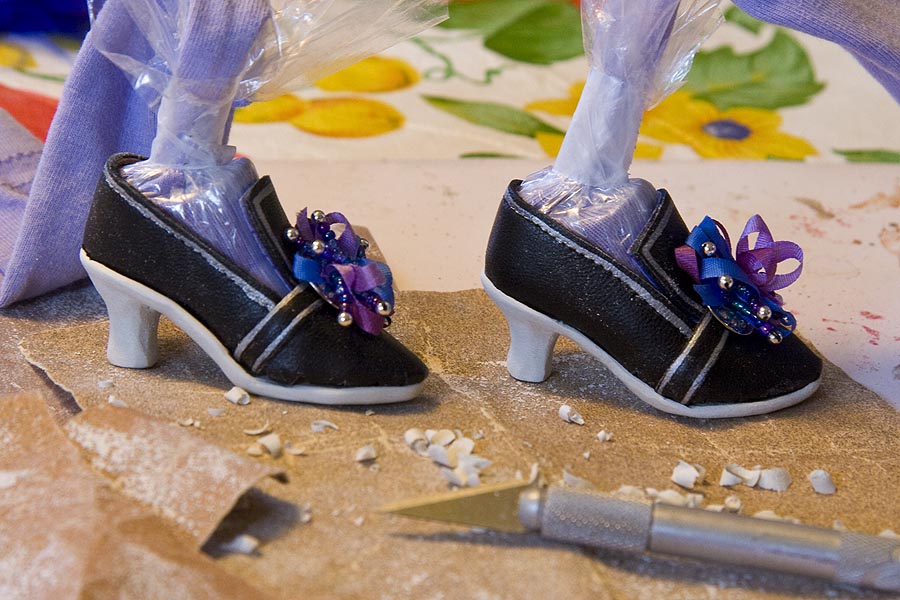
To embellish the front of the shoe, I threaded the thin leather strip through a decorative buckle. Ten glued the tongue
under the buckle. Using a glover's needle I sewed bows from three different lengths of silk ribbons. Added some beaded embellishments. Then glued the strip across the top of the shoe, making sure to center the tongue in the opening.
under the buckle. Using a glover's needle I sewed bows from three different lengths of silk ribbons. Added some beaded embellishments. Then glued the strip across the top of the shoe, making sure to center the tongue in the opening.
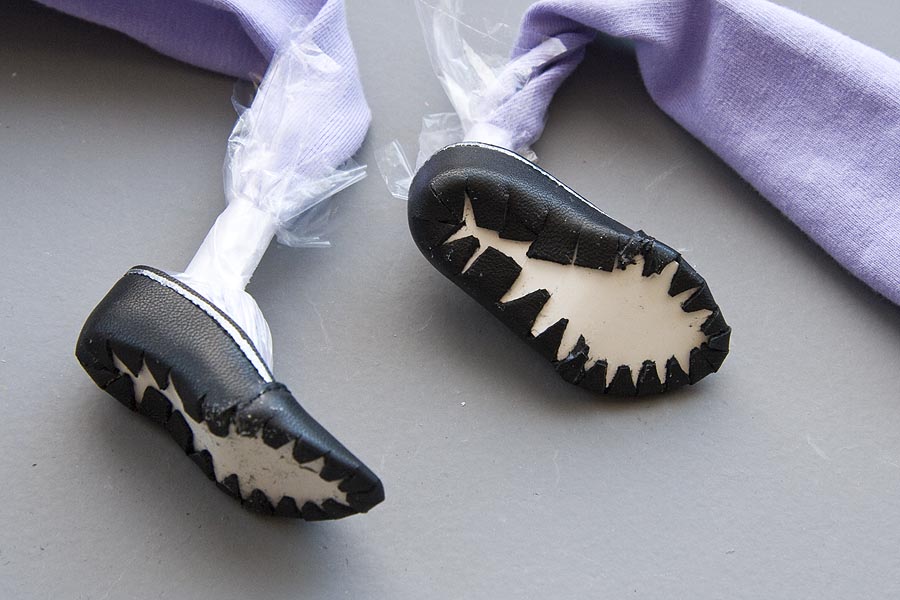
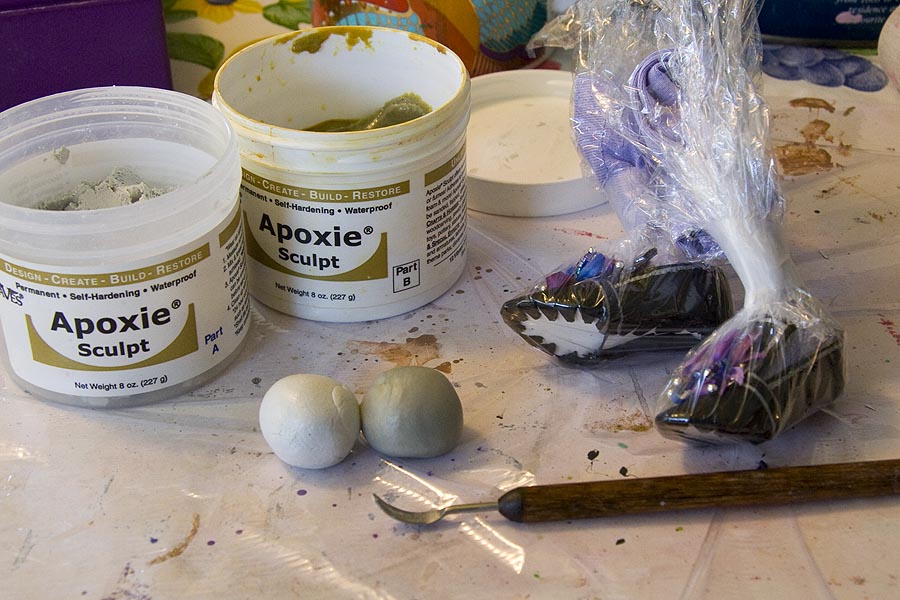
After both shoes had their buckle embellishments, it was time to make the soles and heels. To protect the shoe while working with Apoxie, I wrapped the shoes tightly with plastic wrap, and secured it with tape. Mixed up equal parts A & B of the Apoxy.
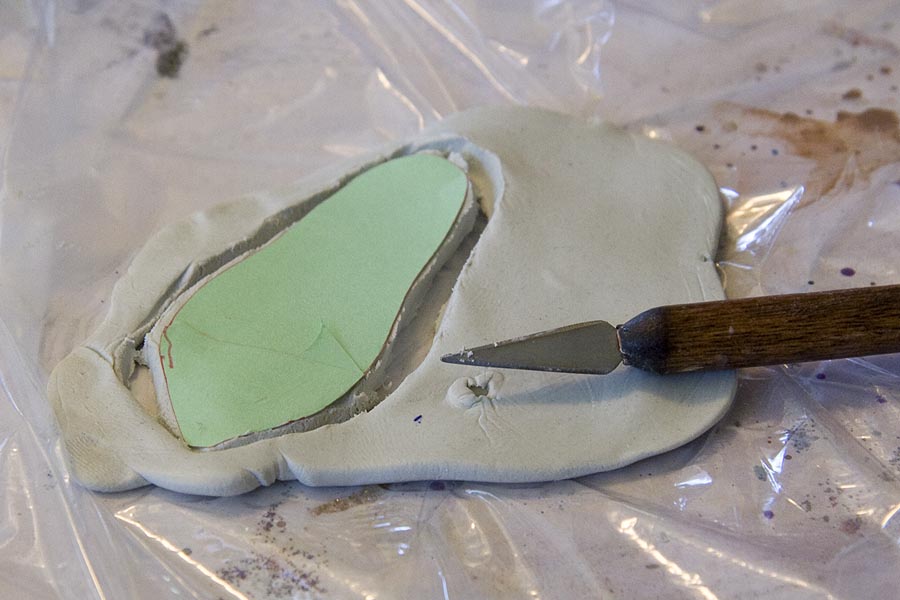
Flattened the Apoxie by hand somewhat first, then placed it between some plastic wrap and rolled it thinner. I used the sole pattern as a template to cut around. Cutting the sole wasn't very easy,as the Apoxie sticks to the blade, and the Apoxie also stuck to the paper, so the sole deformed a bit when I pulled the pattern off.
Making a sole and heel sounds easy enough, but I spent several frustrating hours trying to get them to my liking. The heels were especially challenging, so I don't take any "under construction" photos - just how the shoes looked at the end, when I decided they were "good enough" for now, and set them aside to cure. I'm hoping after the Apoxie cures, that some carving and sanding will improve the overall look.
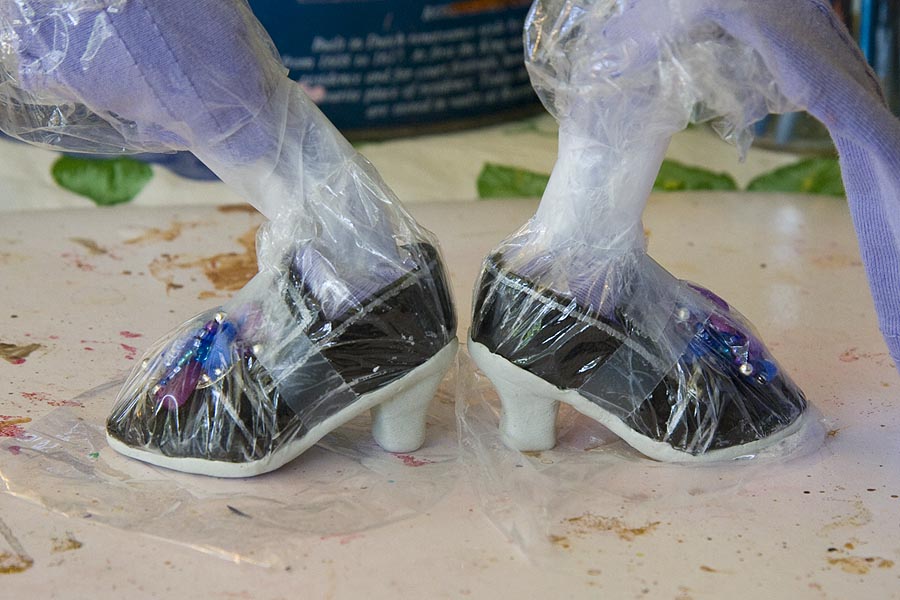
The next morning, the Apoxie had cured, so I removed the shoes from the soles. Notice how rough the edges of the soles are...
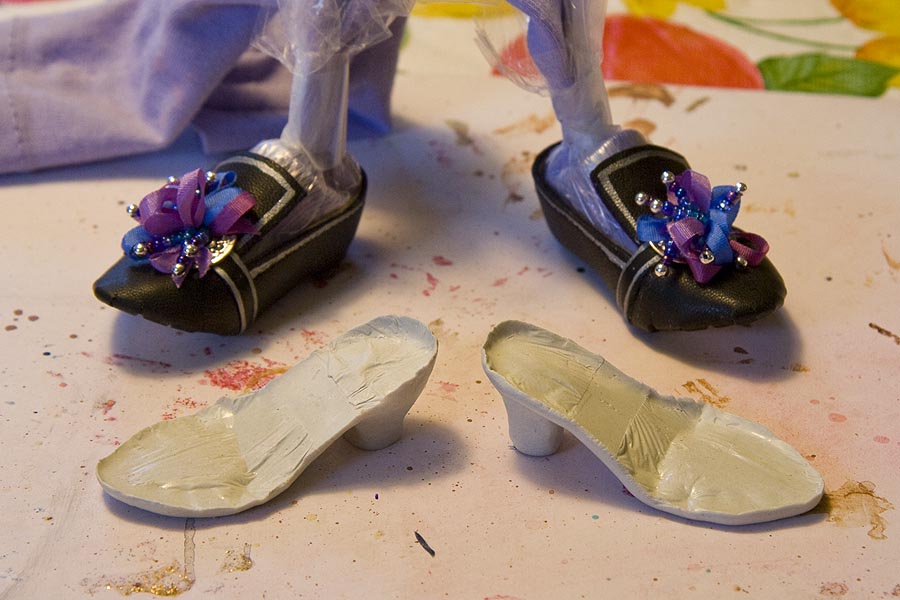
I spent about an hour and a half sanding the edges of the soles, and carving down the heel.
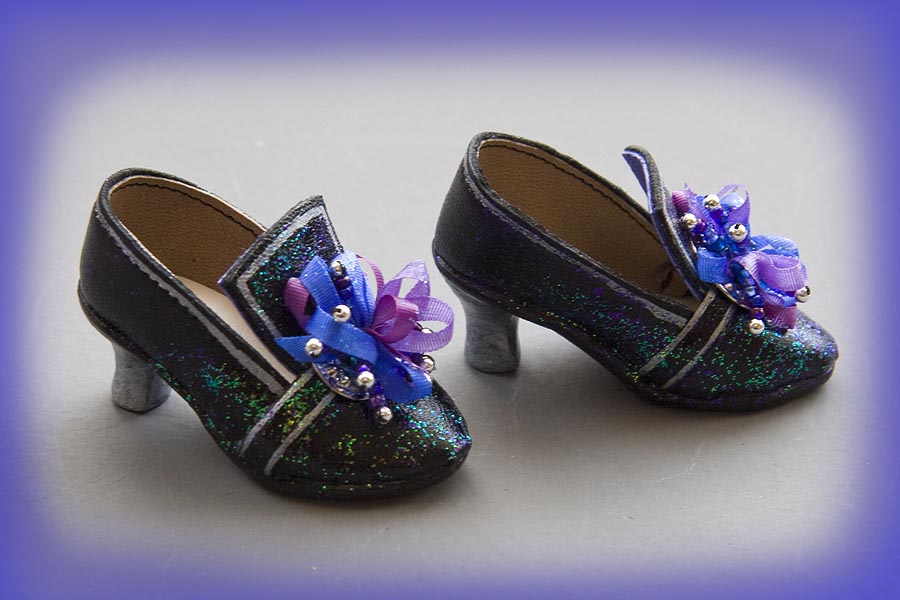
Then I painted the soles black, and the heels silver. After they were dry, I glued them onto the bottoms of the shoes with white glue. I brushed on a coat of satin water-base varnish to the soles and heels, and added iridescent & purple glitter to the shoes.
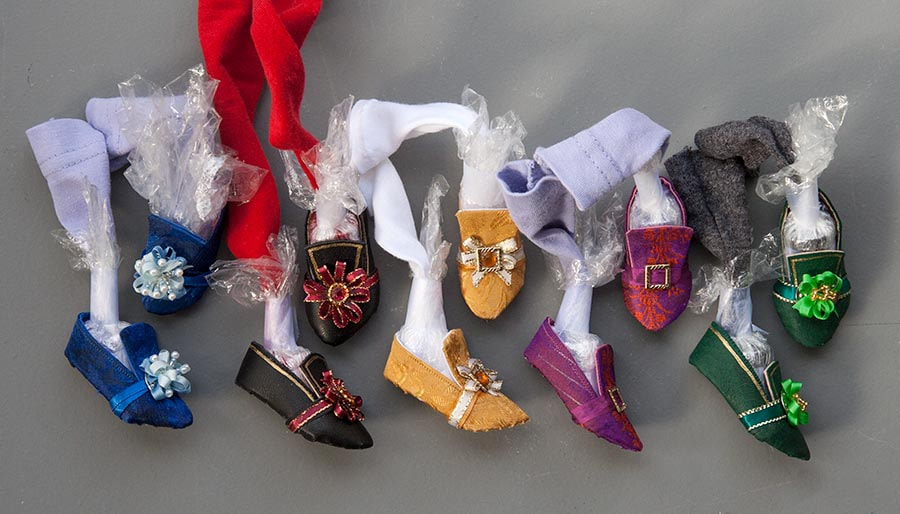
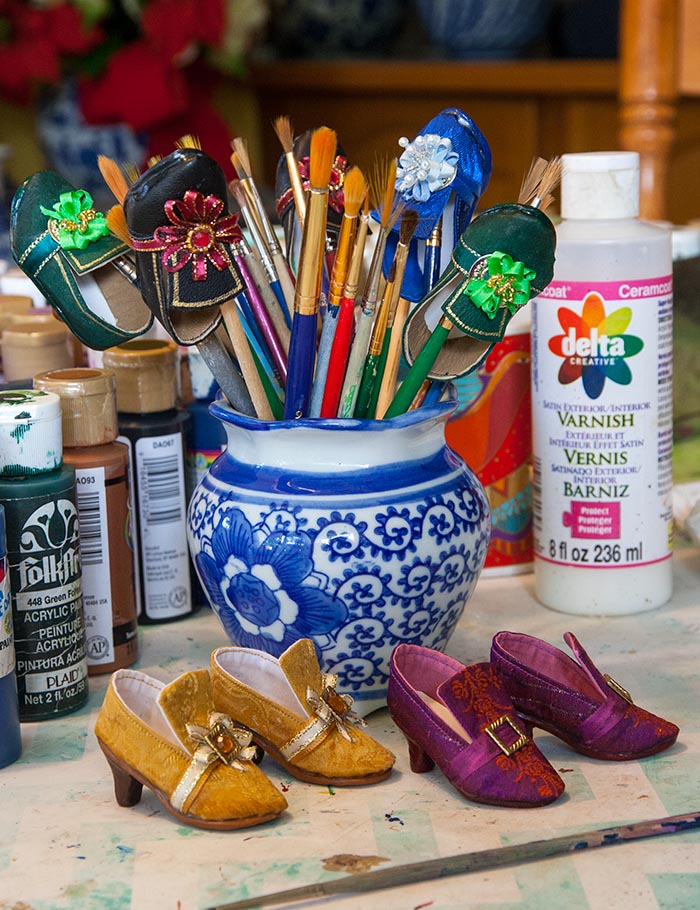
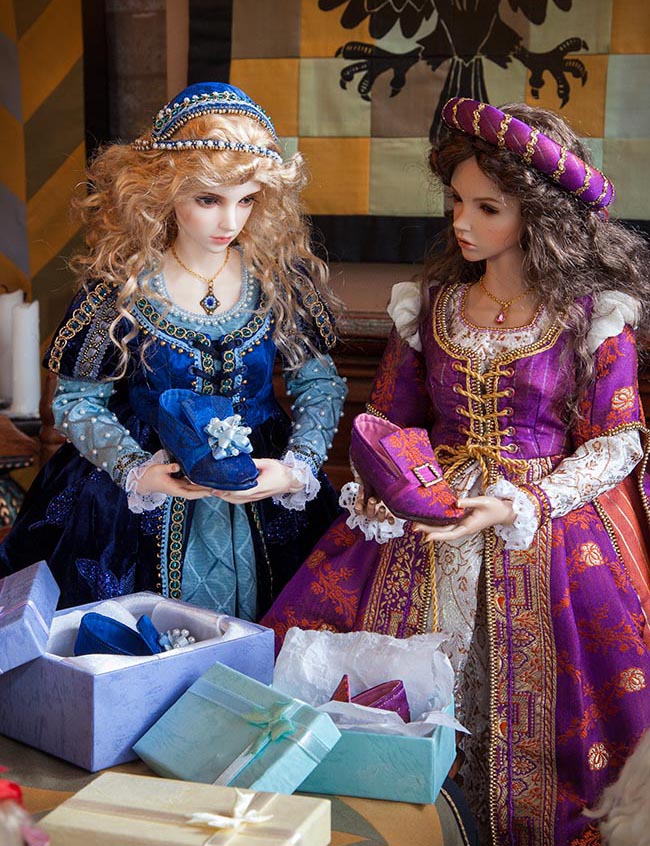
More Shoes
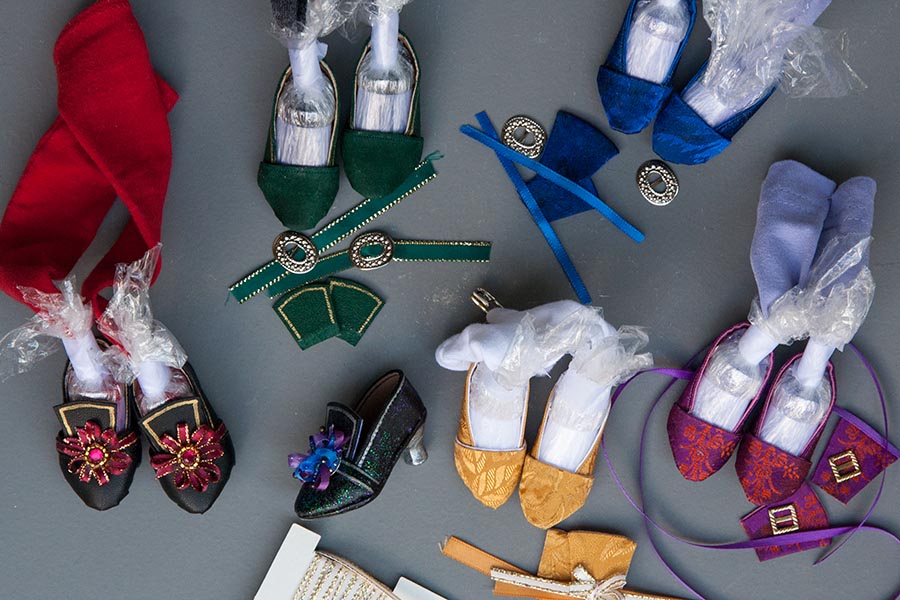
A few years later I made five more pairs of similar shoes for my Fashion size ladies....
|
|
Copyright © 2014 Martha Boers
All Rights Reserved
