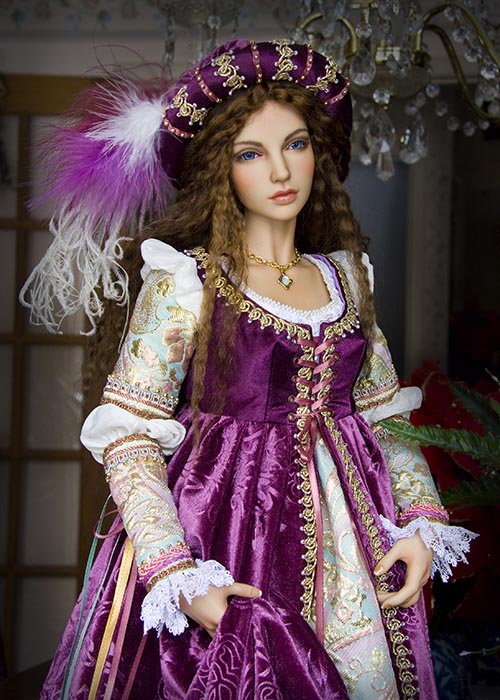
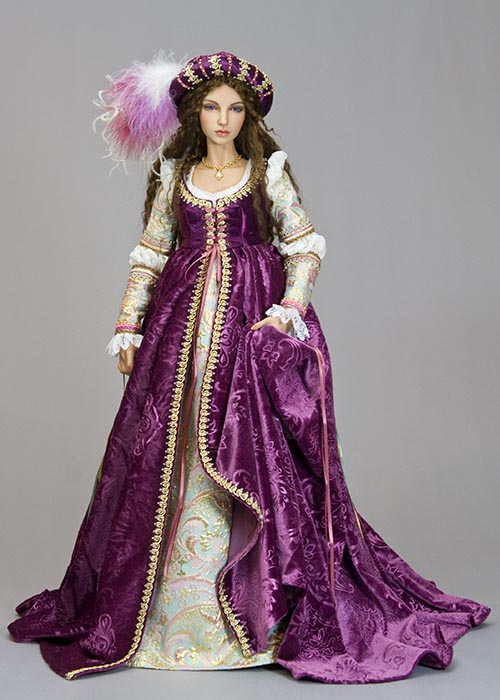
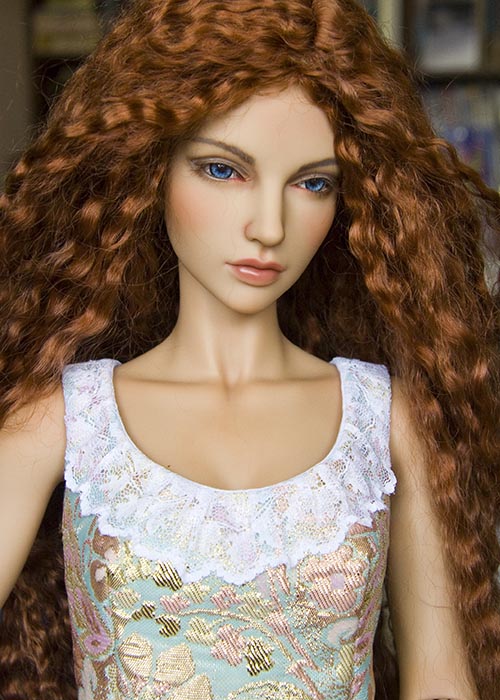
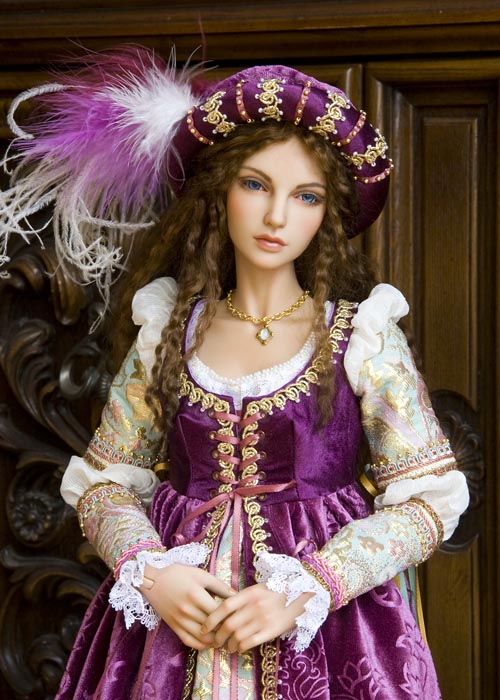
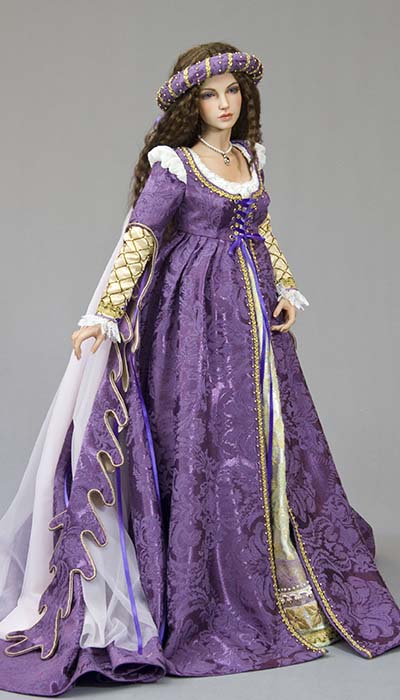
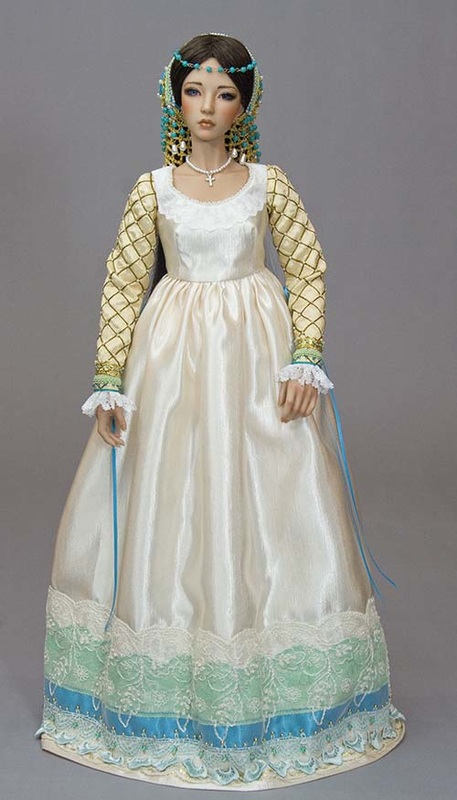
Italian Renaissance Gown for Iplehouse EID
This pattern was designed to fit my Iplehouse EID Carina with Medium size bust (Iplehouse's smallest EID breast size)
The finished gown also fits my SID Asa with Medium breast, and my hybrid Hazy on a Soom Super Gem body,
although the bodice is a little looser on both of them.
The dress was inspired by gowns worn during the Italian Renaissance, and is not intended to be historically accurate.
Patterns were drafted to recreate the 'look', on a modern BJD, in as simple, and easy-to-sew, design as possible.
|
|
* Please read through all the instructions before starting.
Patterns
The full-size patterns are available to download in pdf format, to be printed on standard 8.5 x 11" paper.
Click on any of the pattern pages below to download the pdf.
Click on any of the pattern pages below to download the pdf.
|
|
|
|
|
|
Print out the 6 pages of patterns, and cut them out.
*Note that some of the pattern pieces are actual patterns with seam allowances included. Some of the pattern
pieces are templates, and they do not include seam allowances. They are meant to be traced onto
the wrong side of the fabric, then the fabric cut out adding the seam allowances as you go.
*Note that some of the pattern pieces are actual patterns with seam allowances included. Some of the pattern
pieces are templates, and they do not include seam allowances. They are meant to be traced onto
the wrong side of the fabric, then the fabric cut out adding the seam allowances as you go.
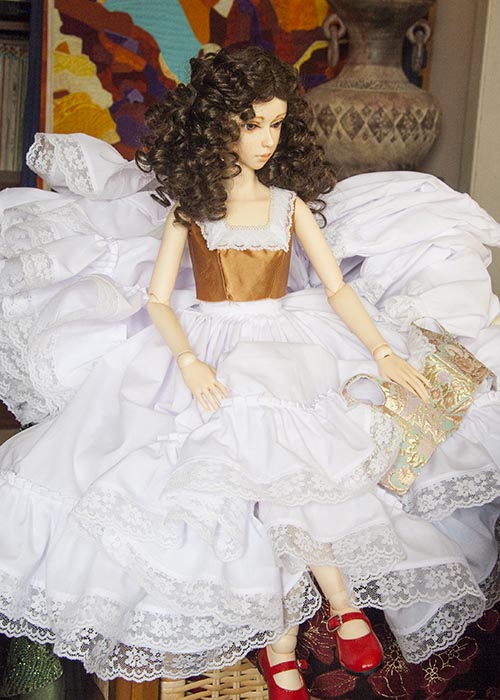
the Under Dress
*Unfortunately I do not have under-construction photos for the actual EID Renaissance gown, however I did take photos when I made the exact same gowns in SD size - although not until after the underdress bodices were already made. So I will do my best to explain the process verbally, using photo examples from the SD Tutorial and other projects, as well as close-ups of the finished EID gown. So I hope you won't be thrown off when photos of a particular step are not of the same colour dress as in a previous step.
Materials
- underdress skirt and bodice fabric
- white cotton lining (pre-washed and pressed)
- lightweight iron-on interfacing
- 1.5" wide lace
- pearl seed beads
- white cotton lining (pre-washed and pressed)
- lightweight iron-on interfacing
- 1.5" wide lace
- pearl seed beads
Instructions
*before proceeding with making the bodice from the good fabrics, it would be a good idea to just trace the bodice template onto
scrap fabric, adding only the underarm seam allowances, sew the underarm seams to make a "test bodice", and check the fit.
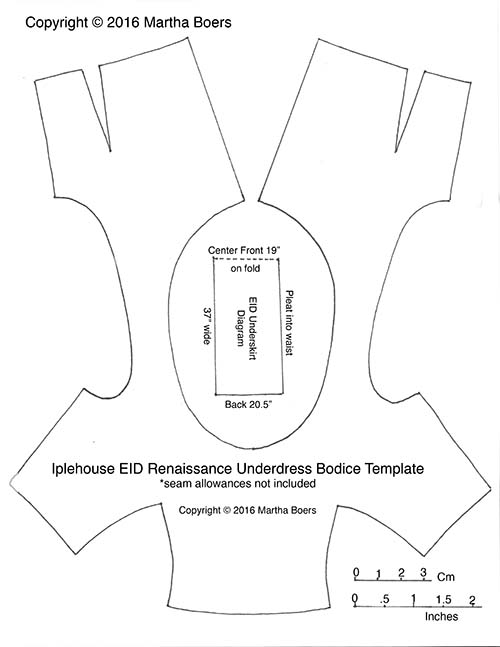
1. Cut out underdress bodice and trace onto the non-sticky side of lightweight iron-on interfacing. Add seam allowances and cut out.
Iron interfacing onto wrong side of main underdress fabric.
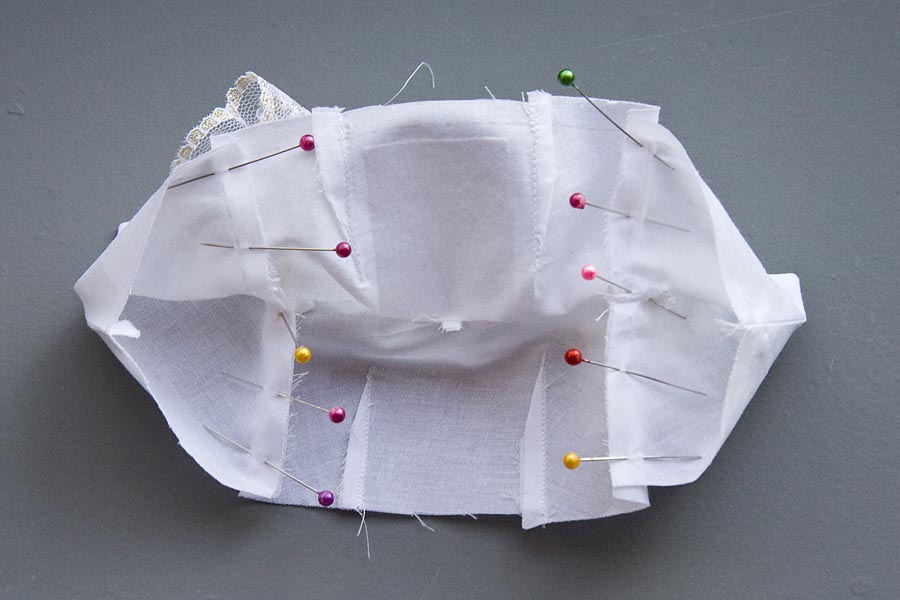
2. Gather and stitch lace around the neckline as in this example....
scrap fabric, adding only the underarm seam allowances, sew the underarm seams to make a "test bodice", and check the fit.
1. Cut out underdress bodice and trace onto the non-sticky side of lightweight iron-on interfacing. Add seam allowances and cut out.
Iron interfacing onto wrong side of main underdress fabric.
2. Gather and stitch lace around the neckline as in this example....
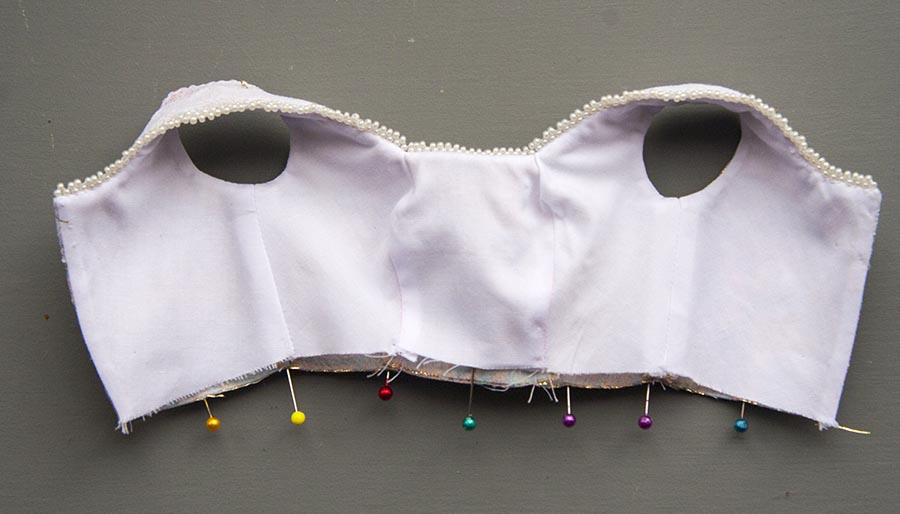
3. Cut out lining for bodice, and pin onto bodice with right sides together. Stitch up back opening seam, around neckline, and down
other back seam. (*photo is not from this project, but being used as an example)
other back seam. (*photo is not from this project, but being used as an example)

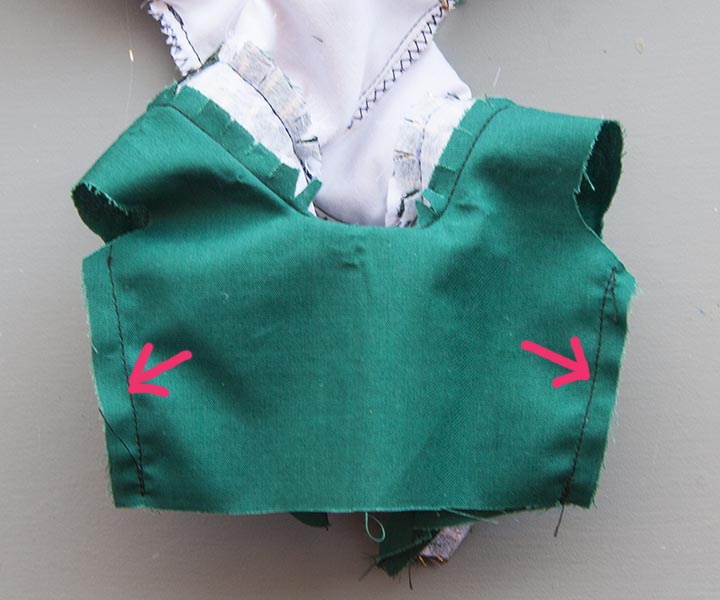
4. Stitch both armholes seams. Clip all corners and curves. Turn right side out by pulling bodice backs through shoulders to front.
Press neckline and armholes. Sew darts in bodice and lining (separately)
5. Pin underarm seams matching bodice to bodice side seams, and lining to lining, as shown (photo is not from this project)
Press neckline and armholes. Sew darts in bodice and lining (separately)
5. Pin underarm seams matching bodice to bodice side seams, and lining to lining, as shown (photo is not from this project)
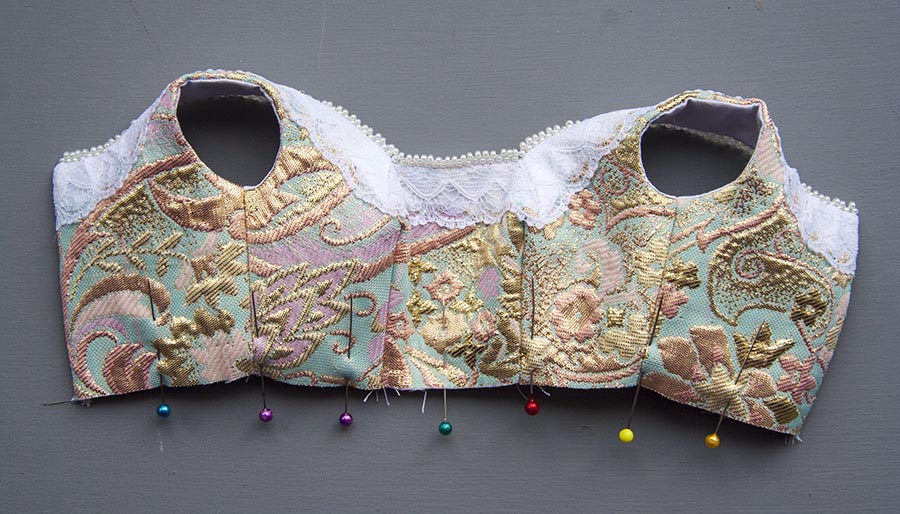
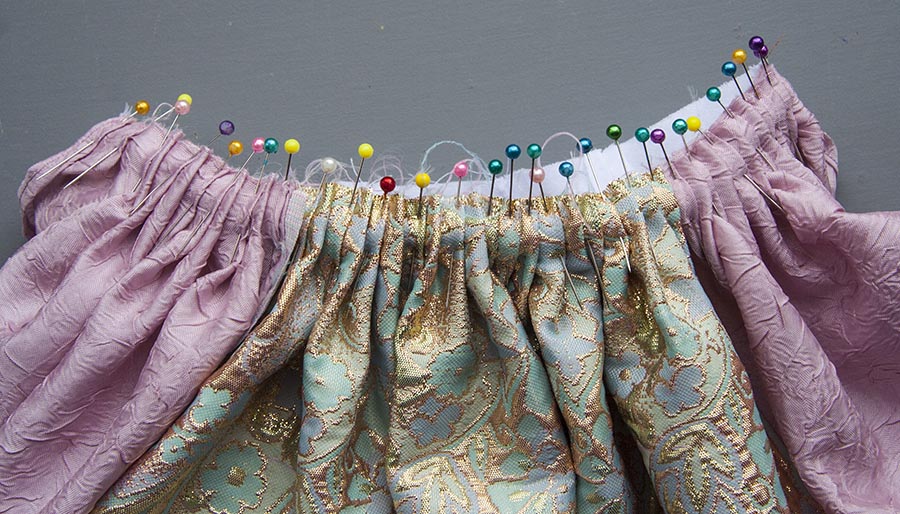
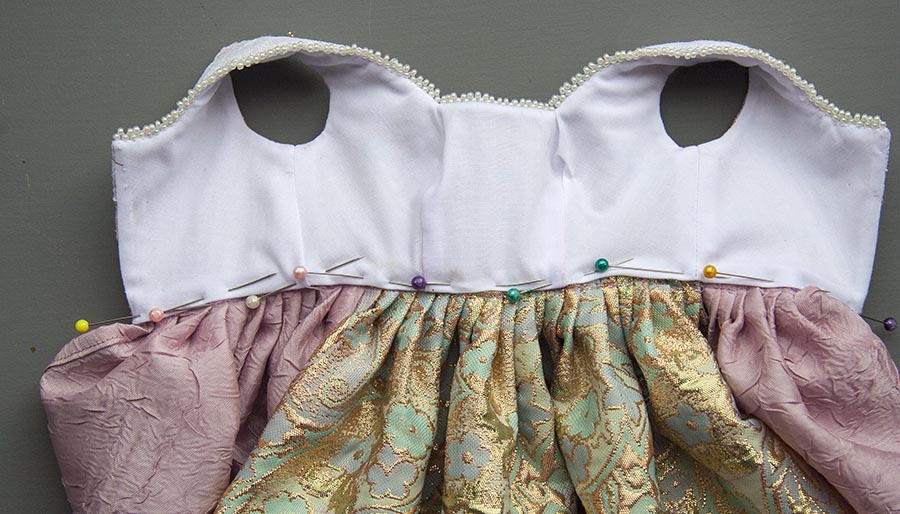
7. Here's my technique for adding a full skirt. Divide the bottom edge of the bodice into eighths and mark with pins....
8. Cut underdress skirt as shown in pattern diagram. Hem both side edges. Stitch skirt back together about 2/3 way up, leaving opening at top. Hem skirt bottom. Depending on the fabric, and how fussy you are about authenticity, hemming should be done by hand - since they didn't have sewing machines in the middle ages. Press skirt.
Divide top of skirt into eighths, and mark with pins. Match pins on skirt to pins on bodice. *Do not pin into lining.
Divide top of skirt into eighths, and mark with pins. Match pins on skirt to pins on bodice. *Do not pin into lining.

9. For the neatest fit, I prefer to pleat the fabric to fit the bodice, pinning each one into place.
*Note - the SD skirt in the photos is two-tone because I didn't have enough of the turquoise brocade left for the entire skirt (after making the EID gown) so it's just in the front, where it will show, with the pink fabric added on either side for fullness.
*Note - the SD skirt in the photos is two-tone because I didn't have enough of the turquoise brocade left for the entire skirt (after making the EID gown) so it's just in the front, where it will show, with the pink fabric added on either side for fullness.
10. Baste by hand, then machine stitch.
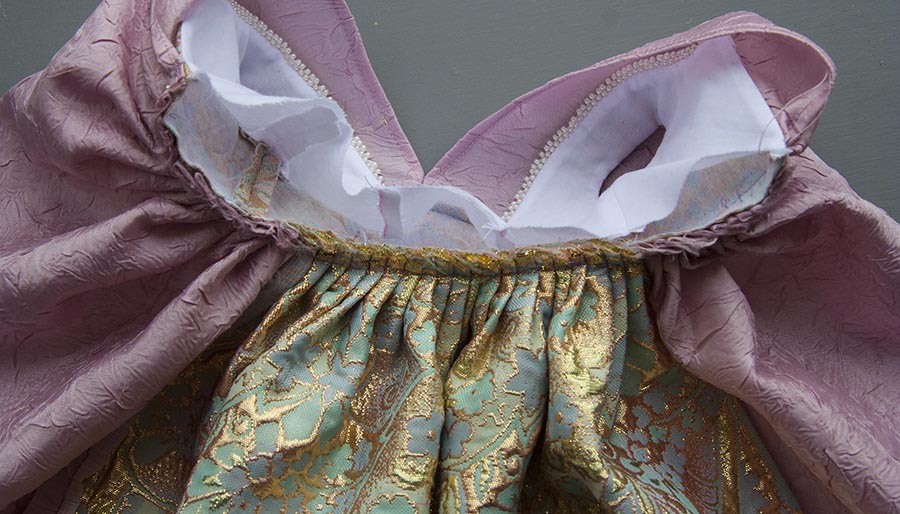
11. Fold under seam allowance of lining and pin into place covering raw edges of skirt top.....
12. Hand-stitch lining into place. Press lightly, turn right side out. Fit on doll, and sew on snap fasteners.
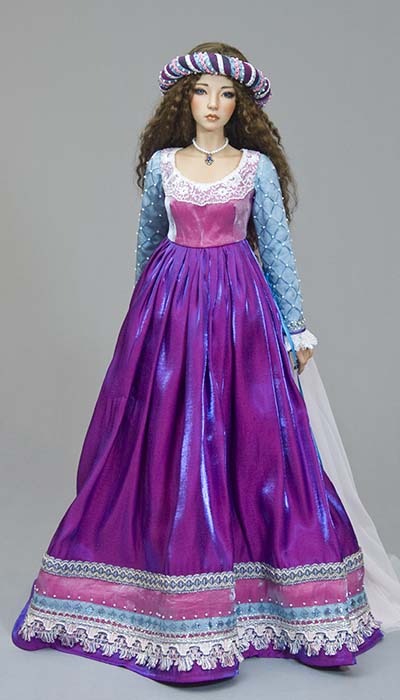
the Overdress
For the overdress skirt it's important to choose a fabric that drapes nicely. The bodice may be of the same fabric
(as with the SD version below) or it could be of a different matching fabric (as the EID version)
(as with the SD version below) or it could be of a different matching fabric (as the EID version)
|
|
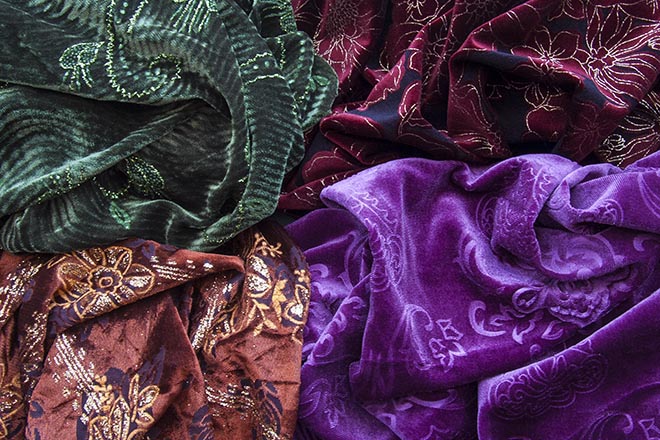
A thin, soft velour works very well. The following are all "Metallic Embossed Velour Ends" from our local fabric shop
Materials
- 2 yards of soft velour
- bodice fabric - can be same as skirt, or a complimentary brocade
- medium weight iron-on interfacing
- brocade for upper and lower sleeves
- soft semi-sheer white cotton for sleeve puffs
- 20" of 3/4" wide lace for wrist ruffles
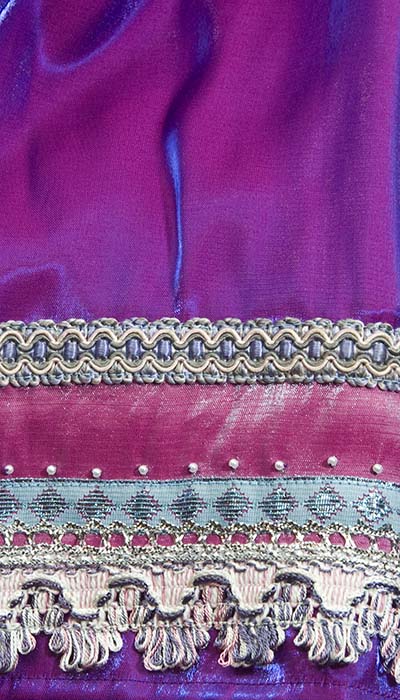
- assorted trims for sleeves, and 2 1/2 yards of trim for around bodice neckline and down skirt fronts
- eyelets and eyelet setter
- 4 yards of 1/8" ribbon (36" for each sleeve, and 50" for bodice front lacing)
- white cotton for sleeve lining, and coloured cotton for bodice lining
- bodice fabric - can be same as skirt, or a complimentary brocade
- medium weight iron-on interfacing
- brocade for upper and lower sleeves
- soft semi-sheer white cotton for sleeve puffs
- 20" of 3/4" wide lace for wrist ruffles
- assorted trims for sleeves, and 2 1/2 yards of trim for around bodice neckline and down skirt fronts
- eyelets and eyelet setter
- 4 yards of 1/8" ribbon (36" for each sleeve, and 50" for bodice front lacing)
- white cotton for sleeve lining, and coloured cotton for bodice lining
Preparing the Skirt
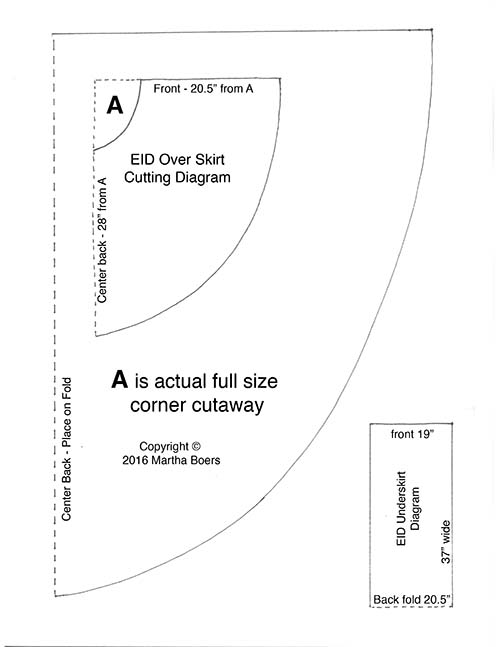
1. Fold skirt fabric in half along a selvedge. Cut out the large curved pie-shaped piece on the 'EID Over Skirt Cutting Diagram' page, and position it on the fabric as illustrated, with the long edge of the pattern along the fabric fold, and the shorter end along the finished edge of the fabric. Pin in place. For the front edge of the skirt, measure an additional 20.5 inches away from the curved central cutaway piece. Mark with pin. Then measure an additional 28" further along the folded edge of the fabric. Mark with pin.
Using pins, mark a nice curve between the two pins. Cut out skirt and middle cutaway section A
*To make a fuller overskirt, enlarge the central cutaway pattern, and measure the skirt from that as before.
2. Hem front edges of skirt. Leave bottom edge of skirt un-hemmed for now.
Using pins, mark a nice curve between the two pins. Cut out skirt and middle cutaway section A
*To make a fuller overskirt, enlarge the central cutaway pattern, and measure the skirt from that as before.
2. Hem front edges of skirt. Leave bottom edge of skirt un-hemmed for now.
Sleeves
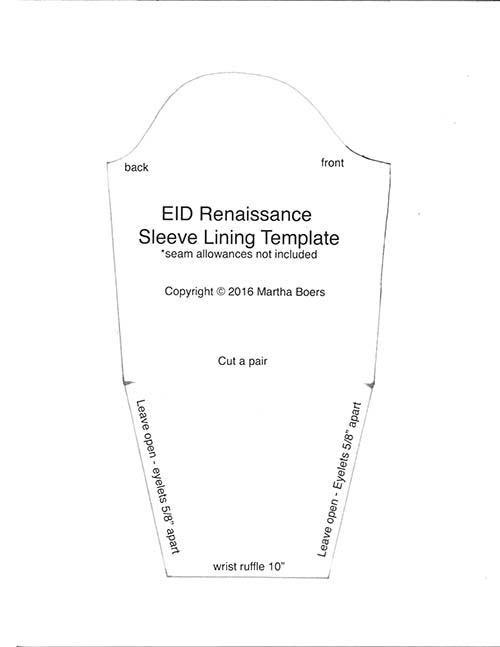
*Note: I will be using the construction photos from the SD version, however the sleeve patterns are a little different. The SD sleeve patterns allow for an overlap of the seams so the sleeves below the elbow can be done up with snaps, with just a ribbon tie at the wrist. The EID lower sleeve pattern differs in that the sleeve is a closer fit and will be laced up through eyelets. So the EID pattern has 'straight' sides and does not have that 'bump' on the lower half like the SD pattern. Please try ignore that detail in the photos.
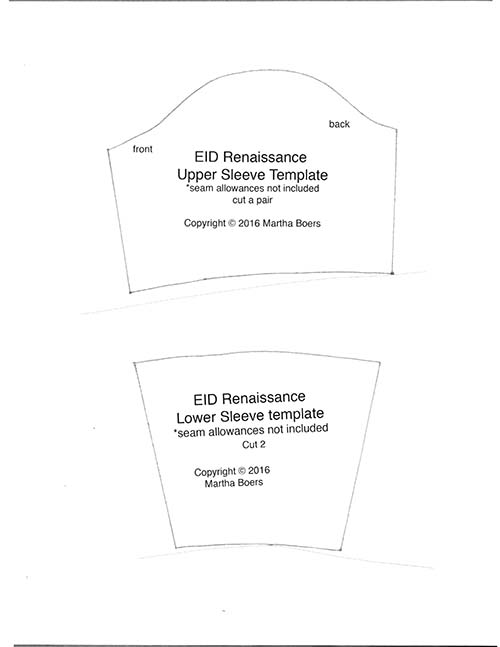
1. Cut out all the sleeve pieces; cotton lining, cotton puffs, and brocade upper and lower sleeves. *The elbow puffs can be cut wider if a fuller puff is desired. Use FrayCheck along all edges.
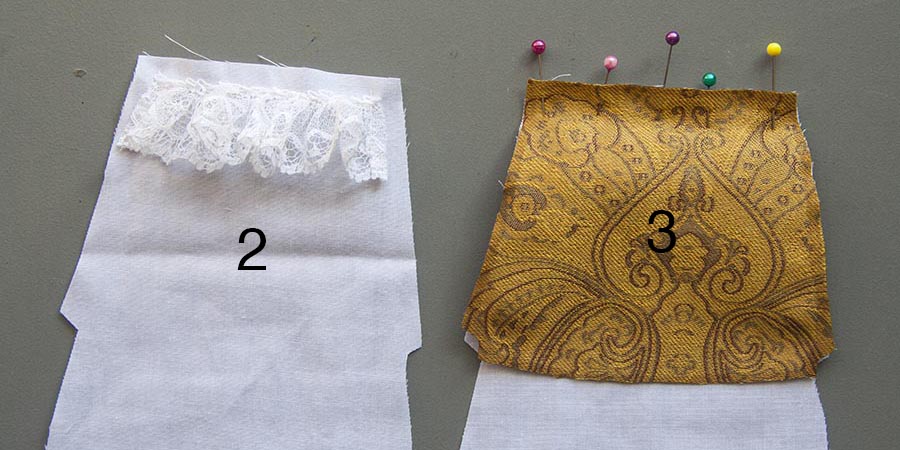
2. Hem both ends of a 10" length of lace. Gather and stitch lace inside seam allowances of sleeve lining at wrist (see 2 below)
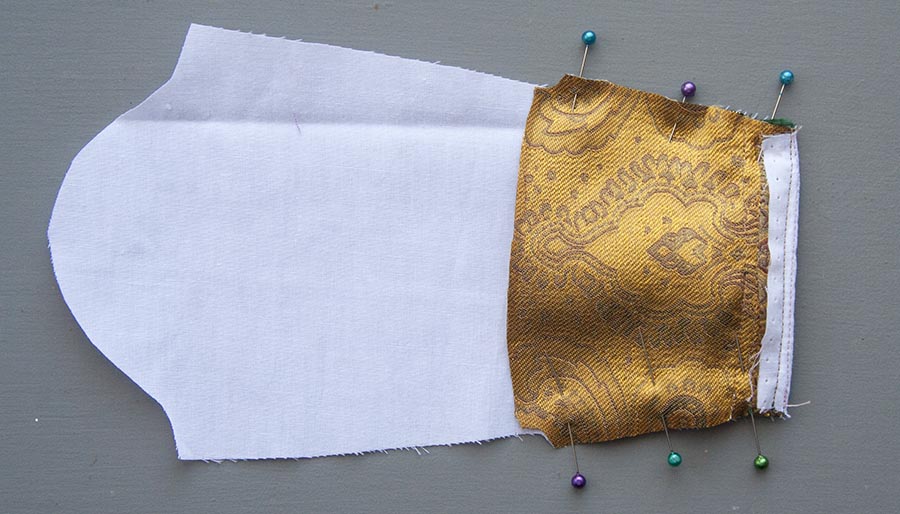
3. Pin lower sleeve right sides together over bottom of sleeve. (see 3 below) Sew straight across wrist width.
1. Cut out all the sleeve pieces; cotton lining, cotton puffs, and brocade upper and lower sleeves. *The elbow puffs can be cut wider if a fuller puff is desired. Use FrayCheck along all edges.
2. Hem both ends of a 10" length of lace. Gather and stitch lace inside seam allowances of sleeve lining at wrist (see 2 below)
3. Pin lower sleeve right sides together over bottom of sleeve. (see 3 below) Sew straight across wrist width.
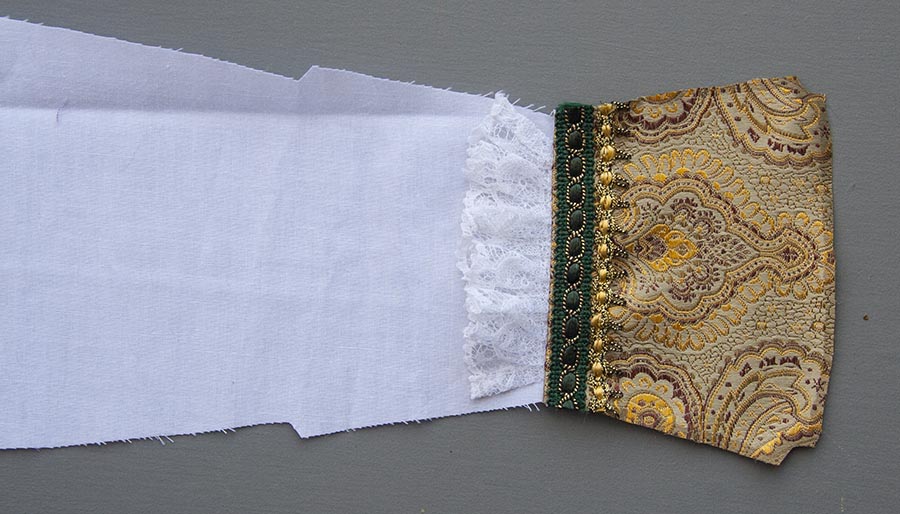
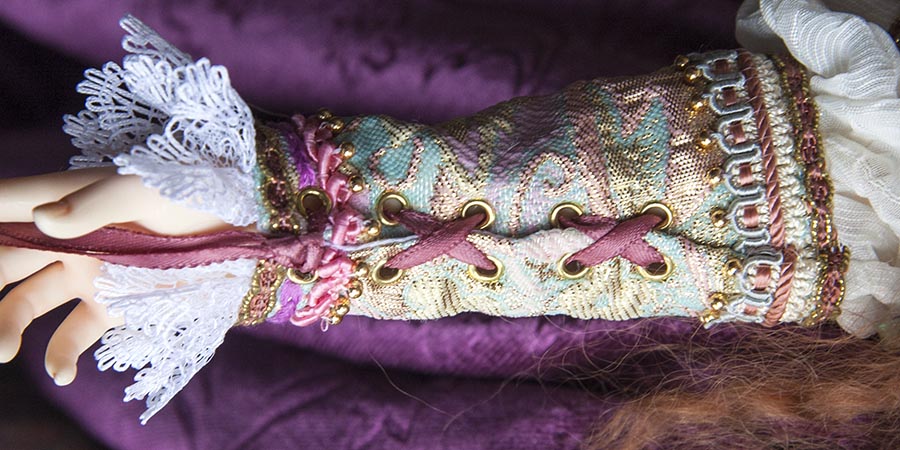
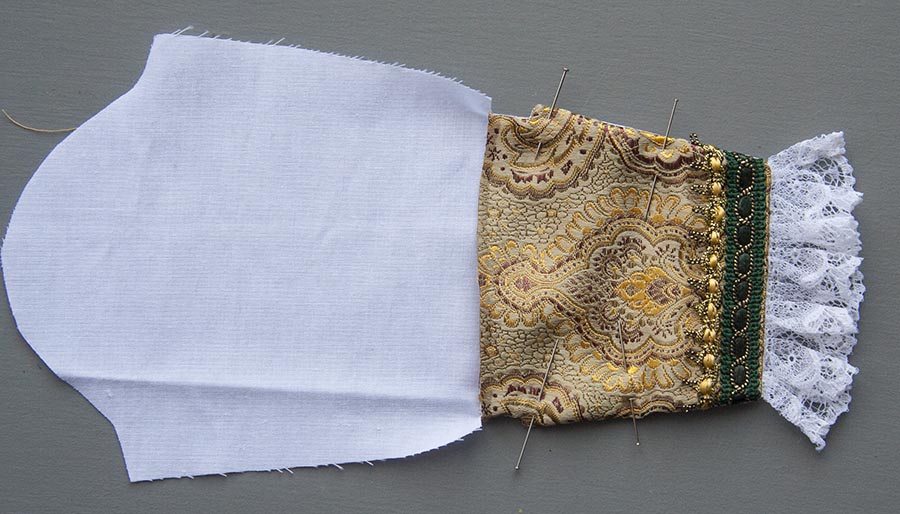
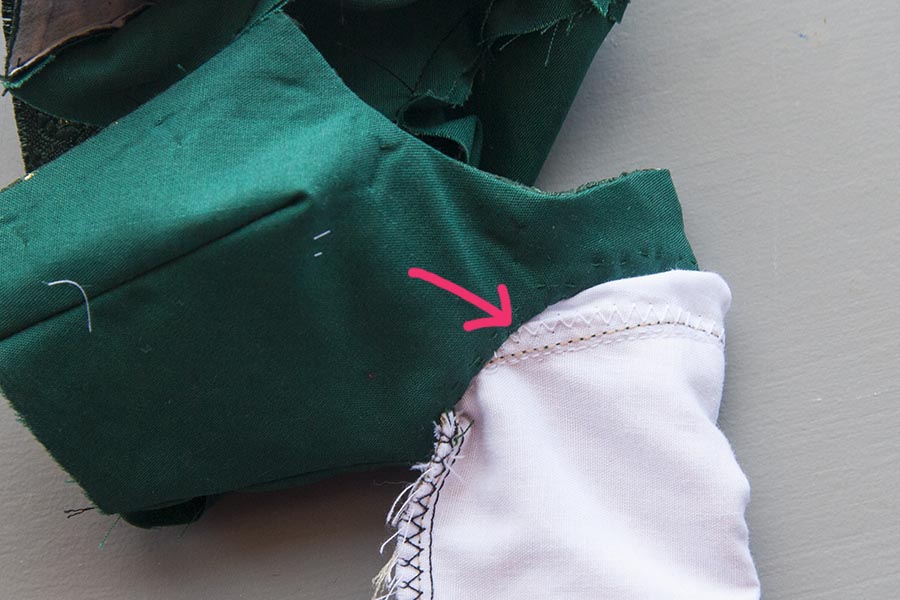
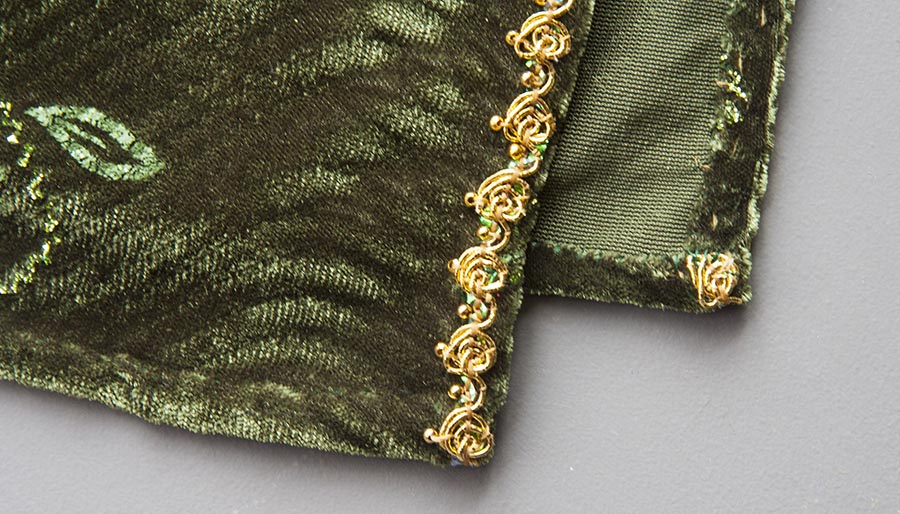
4. Press brocade section open flat, with raw edges underneath. Stitch trims across wrist end of brocade lower sleeve
*Important! The sleeve in the photo above is from the SD Tutorial, and trims were sewn close together at the wrist end
of the sleeve. But In order to insert eyelets into the EID sleeve later, it's important to space any trims at the wrist far
enough apart to accommodate the eyelets, as in the photo below....
of the sleeve. But In order to insert eyelets into the EID sleeve later, it's important to space any trims at the wrist far
enough apart to accommodate the eyelets, as in the photo below....
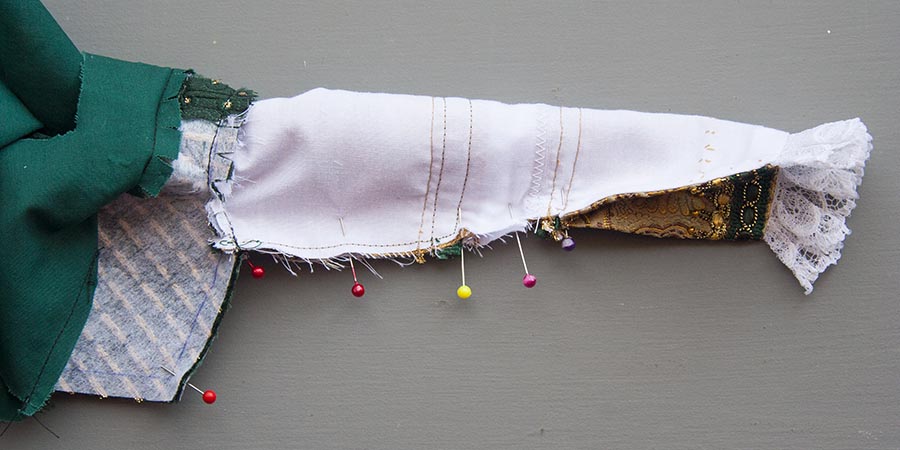
5. Fold lower sleeve section back over lining, being careful to push lace out of the way so it won't be caught in seams.
6. Stitch side seams to mark on pattern. Clip seams and turn lower sleeve right side out. Pin and press flat.
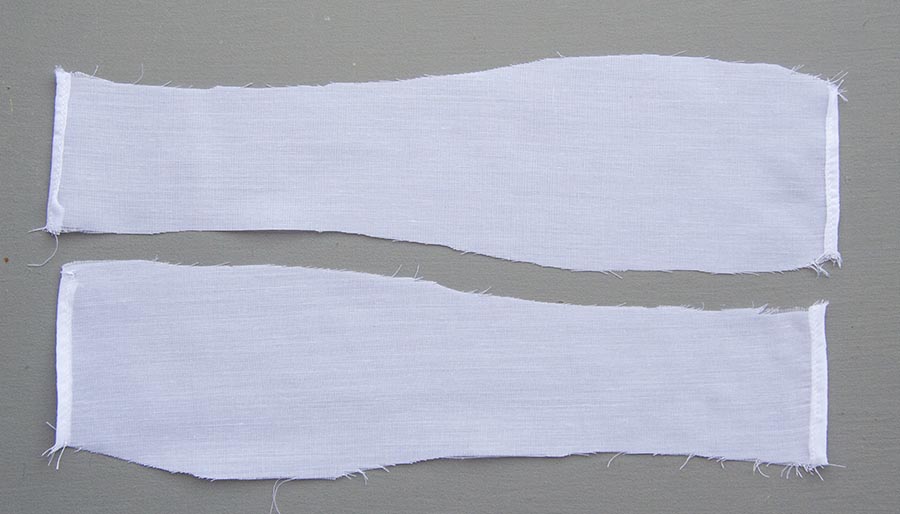
7. Hem outer edges of white elbow puffs
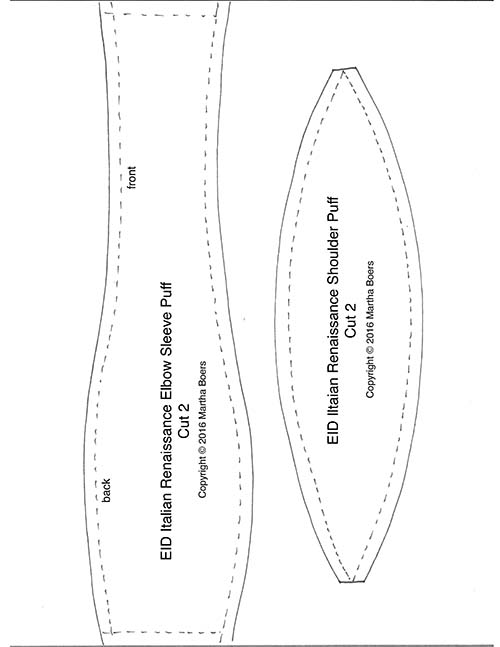
8. Gather one long edge of each elbow puff onto the two upper sleeve pieces, between the side seam allowances, with right sides together. Remember that the two puff pieces are a "pair", with the narrower sections going in the inside of the elbow, and the wider section at the outer part of the elbow, so they need to be sewn onto the upper sleeve pieces correctly - in opposite directions. Zig-zag the raw edges. (see 8 below)
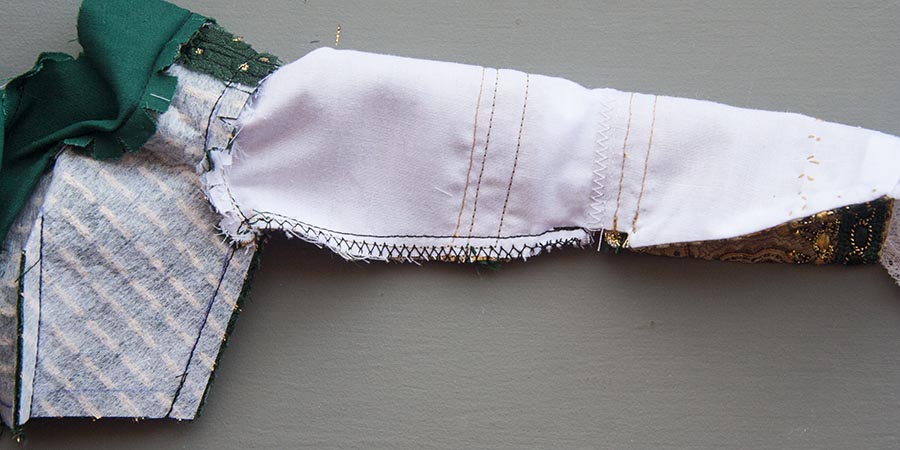
9. Gather the other edge of the elbow puff onto the lower sleeve, between the seam allowances, with right sides together. Zig-zag raw edges.(see 9 below) Bottom sleeve in photo shows sleeve with upper sleeve and puff flipped up into position.
9. Gather the other edge of the elbow puff onto the lower sleeve, between the seam allowances, with right sides together. Zig-zag raw edges.(see 9 below) Bottom sleeve in photo shows sleeve with upper sleeve and puff flipped up into position.
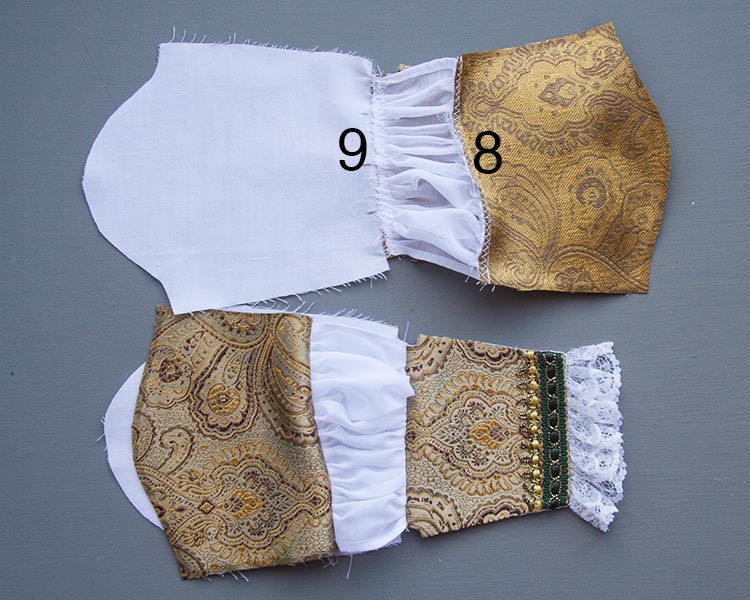
10. Pin upper sleeves into position onto lining and stitch around edges. Sew trims above and below elbow puffs if desired.
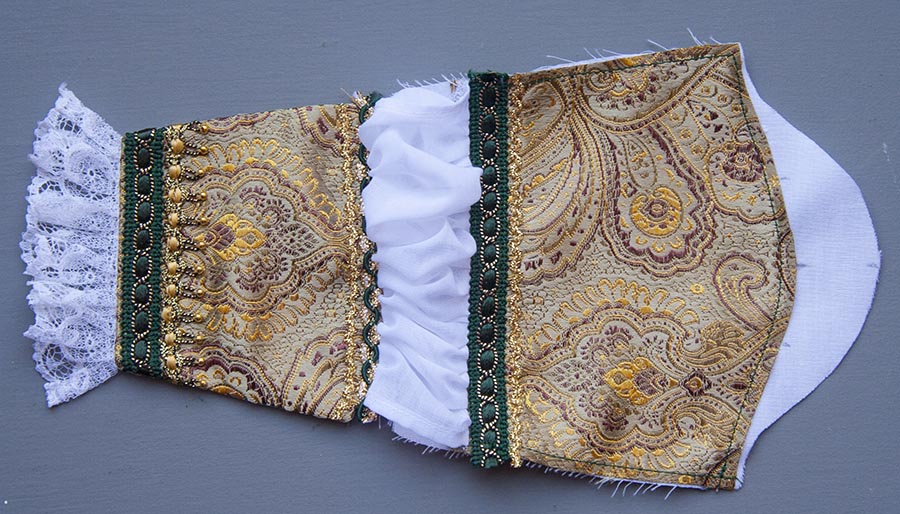
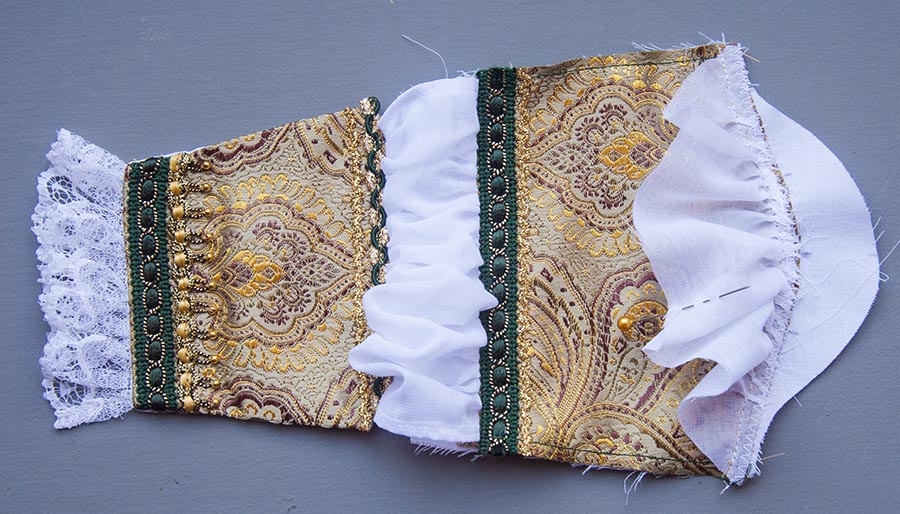
11. Gather shoulder puff onto top of upper sleeve brocade, and zig-zag raw edges. If you'd like to add beading to the trim at the wrist, now would be a good time to do it. I stitched small round gold beads on the loops of my trim. Any beading higher up on the sleeves will need to be done later, or the beads will get in the way of the sewing machine stitching.
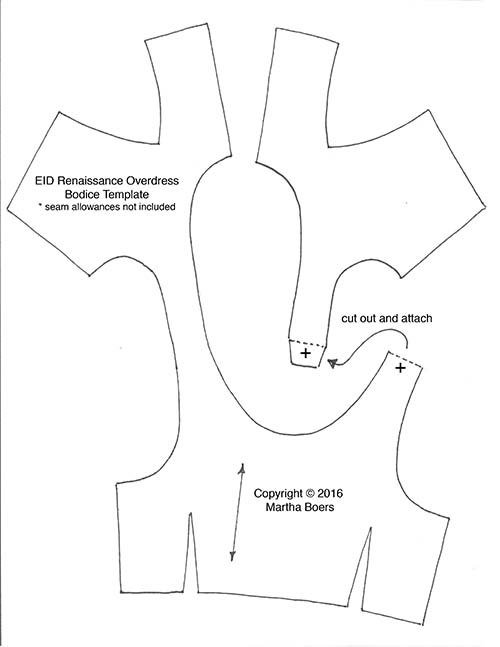
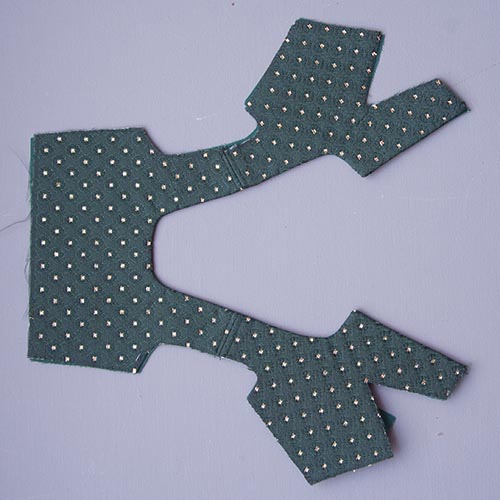
12. Trace the Overdress Bodice Template onto the non-sticky side of medium weight iron-on interfacing. Add seam allowances and cut out. Press interfacing onto the wrong side of your bodice fabric. Cut it out. FrayCheck all the edges. *Note; there wasn't a big enough piece of the green brocade I chose for the bodice in the next photo, so I had to cut the bodice template pattern at the shoulders and cut my bodice in three pieces, sewing them back together at the shoulders, and top-stitching the seams flat)
Cut out lining, and with right sides together, sew along the front opening edge, around the neckline, and down the other front opening edge. Clip edges and turn right side out. Press.
Cut out lining, and with right sides together, sew along the front opening edge, around the neckline, and down the other front opening edge. Clip edges and turn right side out. Press.
13. Sew bodice darts, and lining darts. Fold lining out of the way, and then gather top of shoulder puff into bodice armhole, paying special attention that the larger parts of the sleeve elbow puffs correspond to the bodice back. Ease top of sleeve lining into armholes.
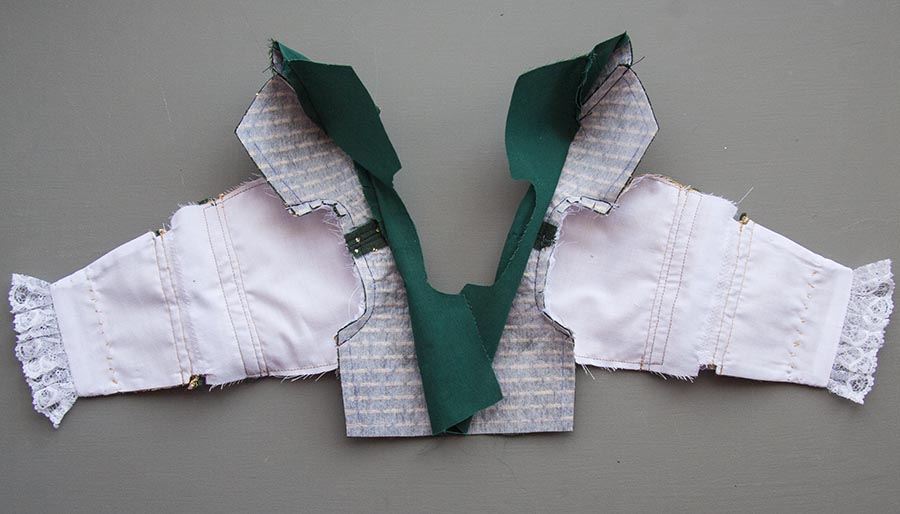
14. Clip armhole seams. Pin bodice underarm and upper sleeve.
15. Stitch underarm seams, clip at underarm, and zig-zag just the sleeve seam. Press bodice seam open.
16. Stitch underarm seams of lining. Press open.
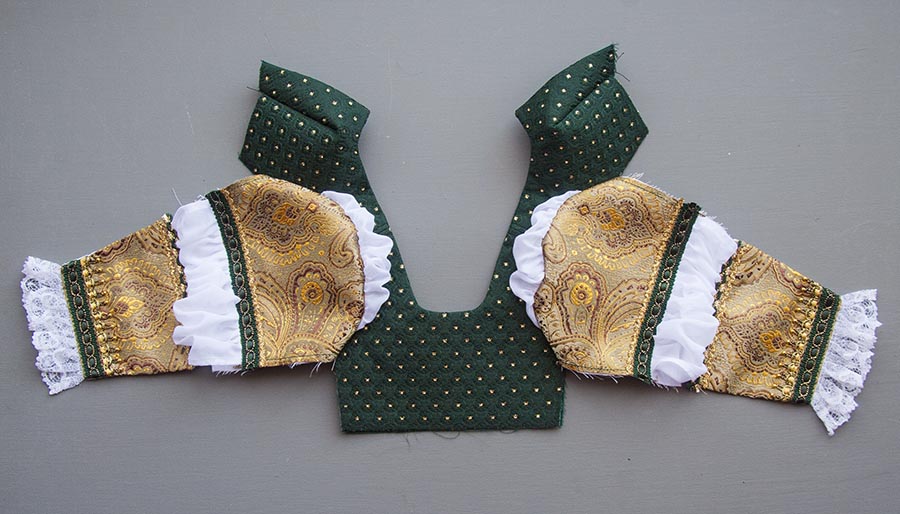
17. Clip lining armhole seam allowance, fold in to inside. To make the next step easier, baste the clipped edge of the armhole in with a matching thread. Then turn the lining right side out, and insert bodice sleeve into position. Hand stitch the lining around the armhole.
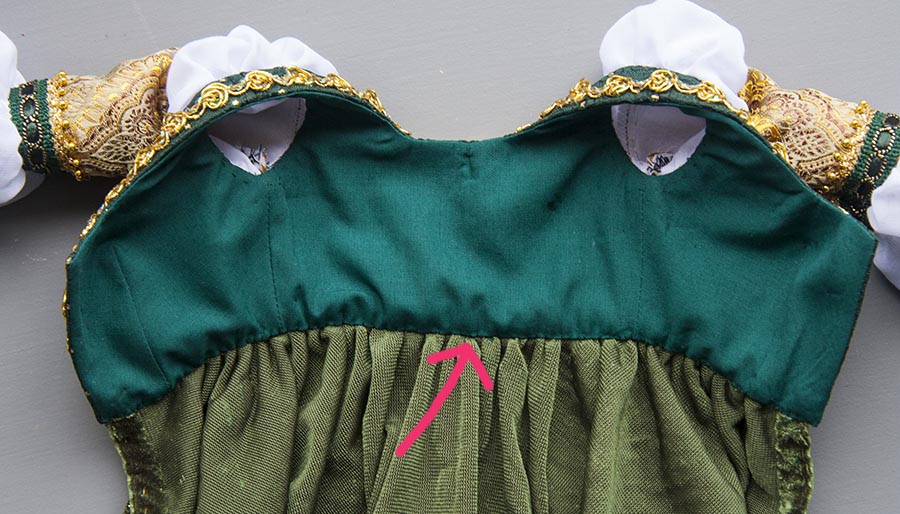
18. Turn bodice right side out. Time to attach the skirt. Using the same technique as explained for the underdress, divide the bottom edge of the bodice into eights. Divide the top of the skirt edge into eights as well, and match up the pins. Pleat the skirt fabric onto the bodice, securing with pins. Hand baste, then machine stitch.
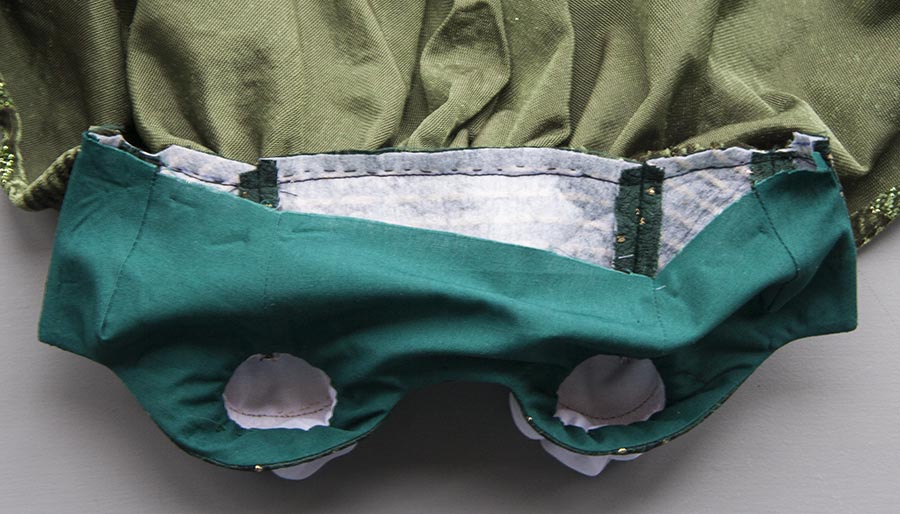
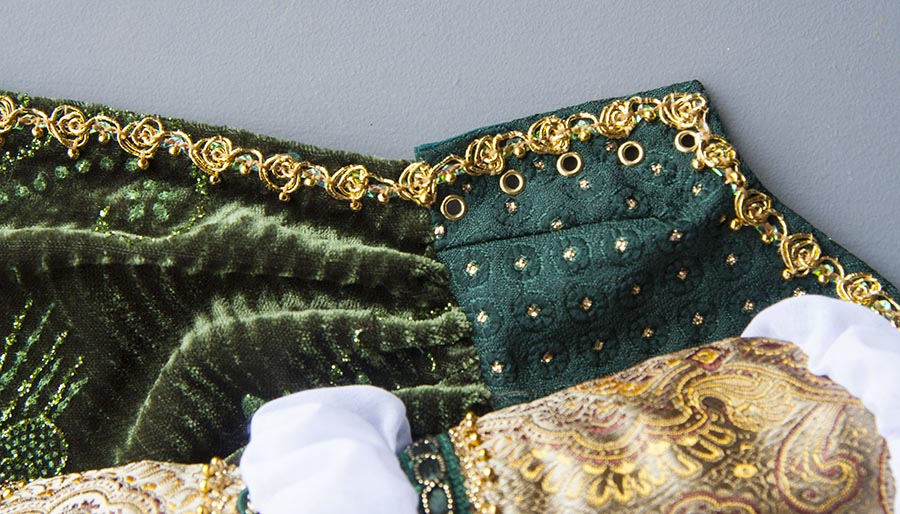
19. The bodice will lace up through eyelets, so in order to minimize the bulk where the eyelets will be inserted, and make it easier to insert them, I clip away some of the seam allowance around where I expect the eyelets to go....
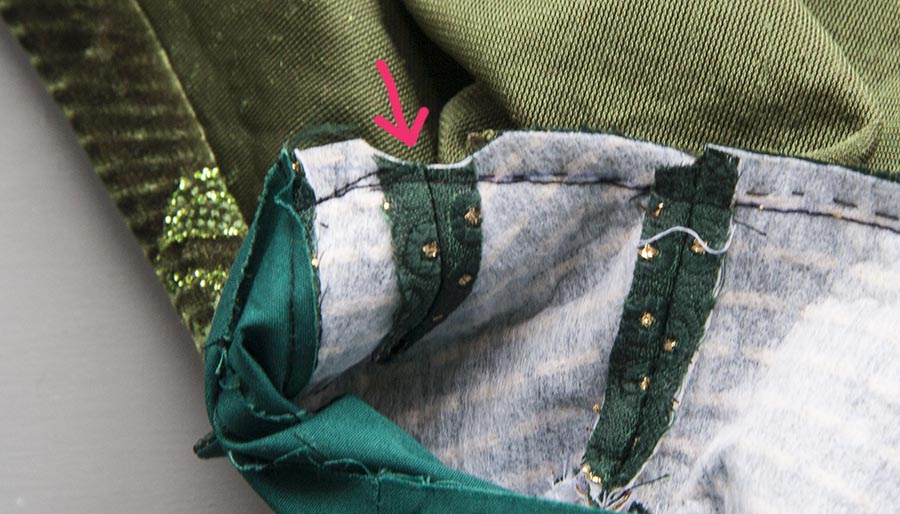
20. After clipping the seam edges of the bodice and lining, fold under the bottom edge of the lining, and hand-stitch into position
21. Hand-stitch trim around front edge opening of dress. Then insert eyelets.
23. Hem the skirt by hand
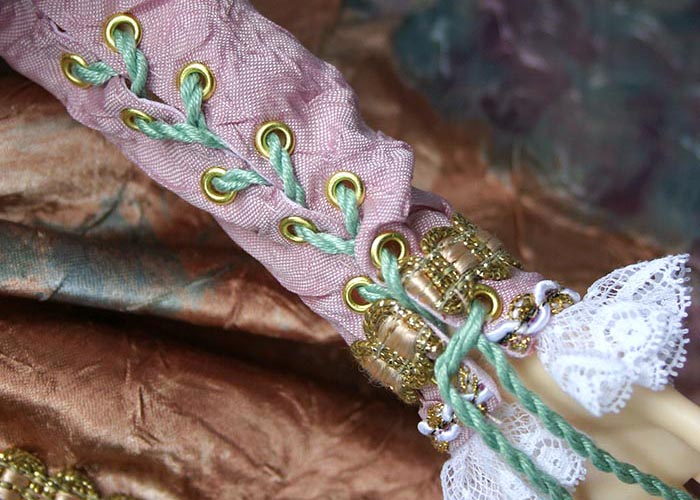
24. Insert eyelets in lower sleeves, and lace with narrow ribbon
25. To give the underskirt some more fullness, I sewed ruffled petticoats out of white cotton edged with lace. They aren't historically accurate - they would never have 'wasted' lace on underwear. There are no patterns or instructions for the petticoats since they are easy enough to figure out.
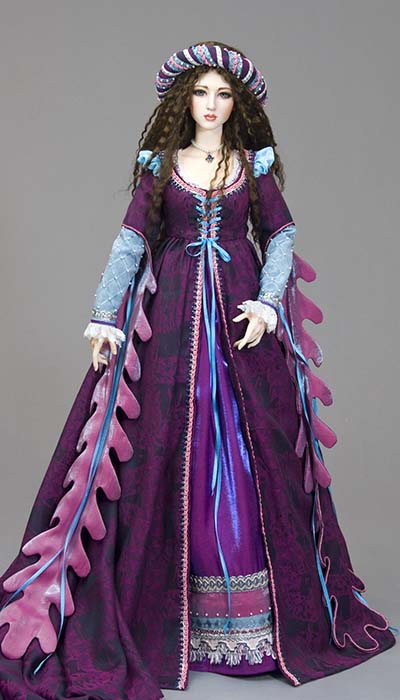
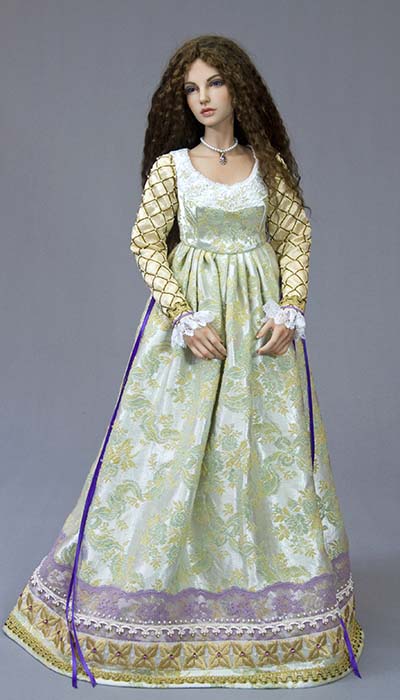
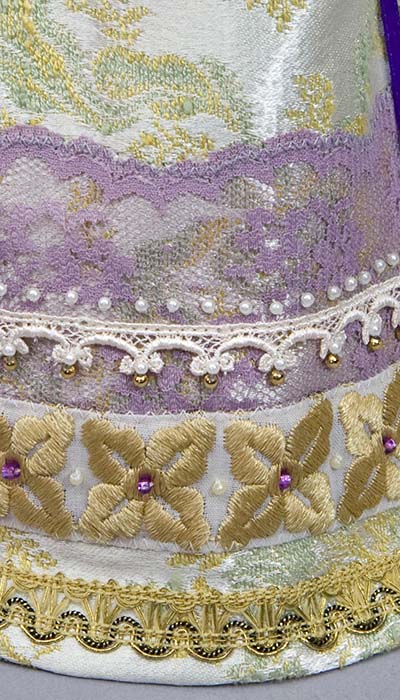
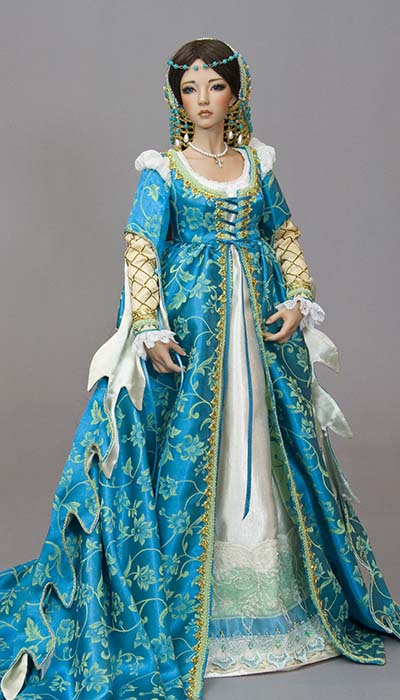
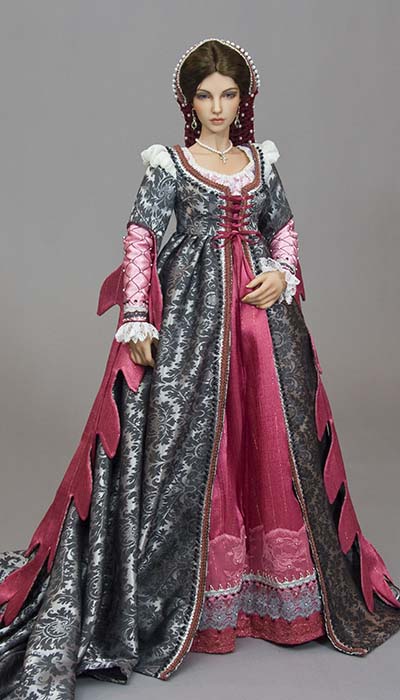
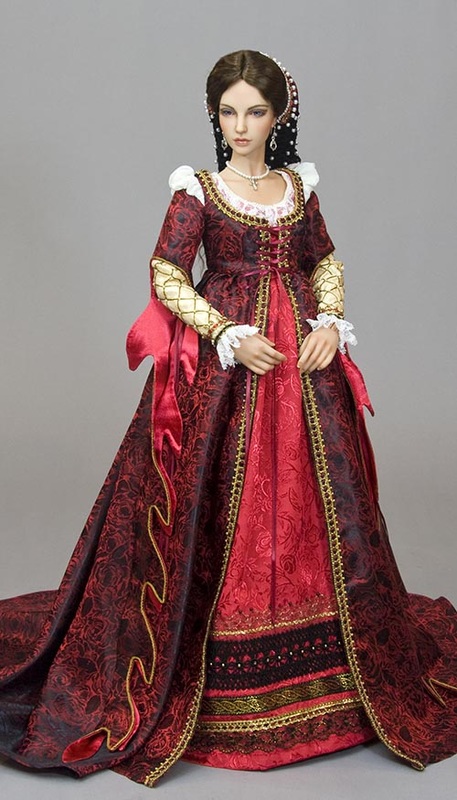
Dagged Sleeve Variation
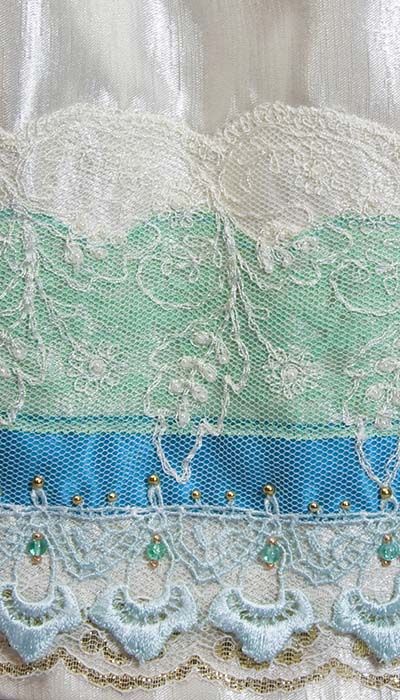
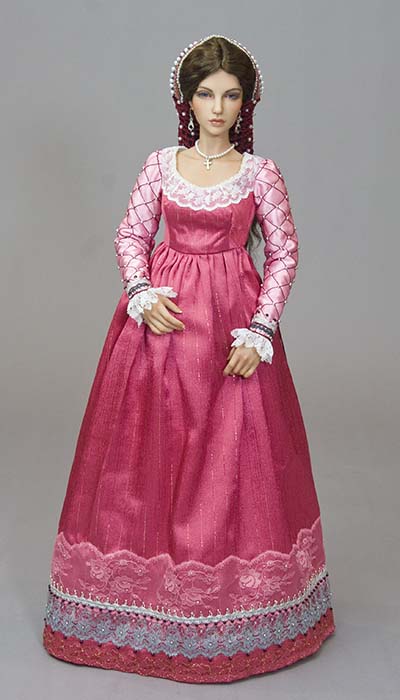
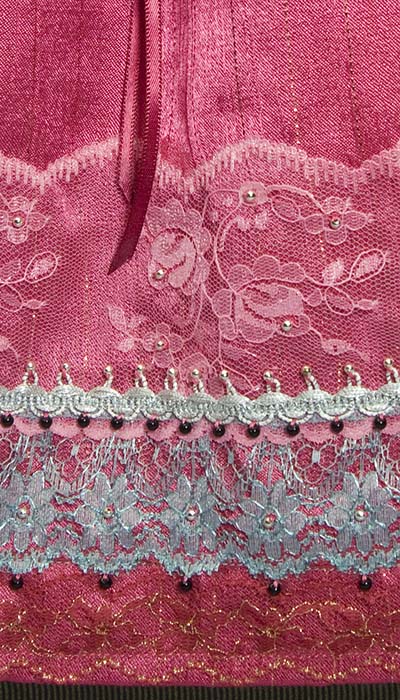
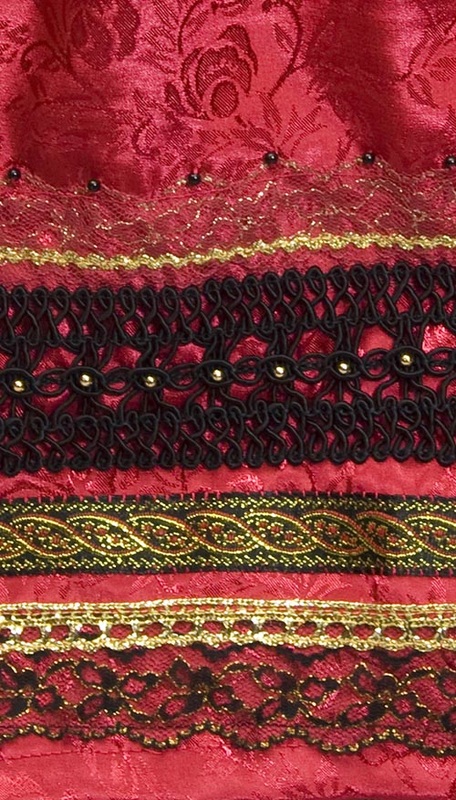
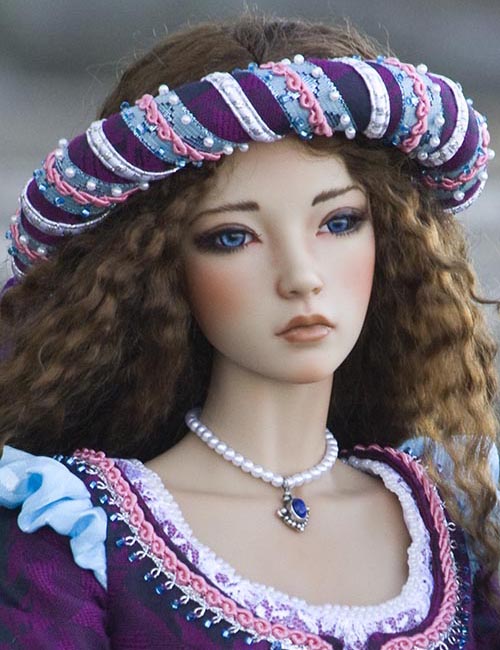
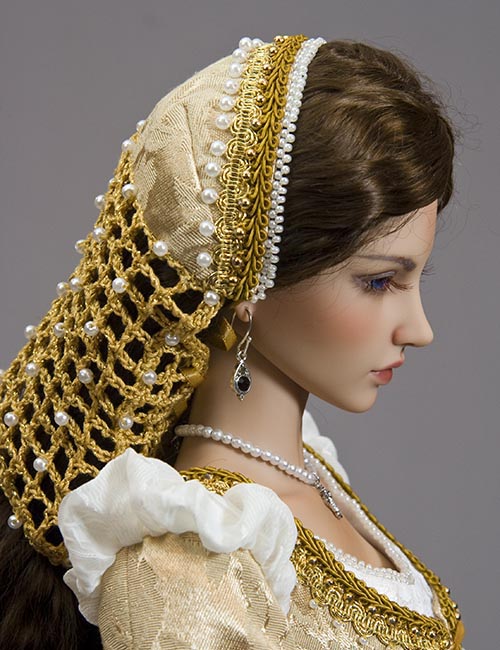
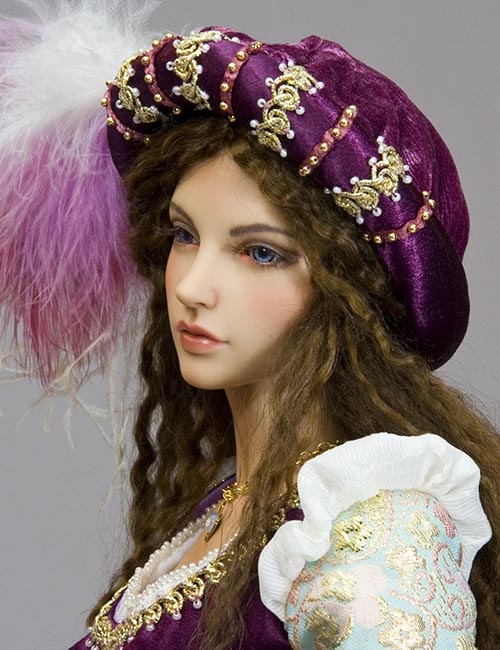
These were the very first Renaissance-style gowns I made for the EIDs, and they are constructed a little differently. The main dress fabrics are soft brocades, instead of velours. The basic sleeves are attached to the underdress, and don't have any puffs at the elbow or shoulders. The dagged over-sleeves with the shoulder puffs are part of the overdress. The underskirts were also heavily embellished with rows of lace, trims, and beading.... See several examples of my colour combinations below....
Elfdoll Hazy, on Soom Super Gem body
|
Iplehouse SID Asa
|
|
|
|
|
|
|
|
|
|
|
|

|
|
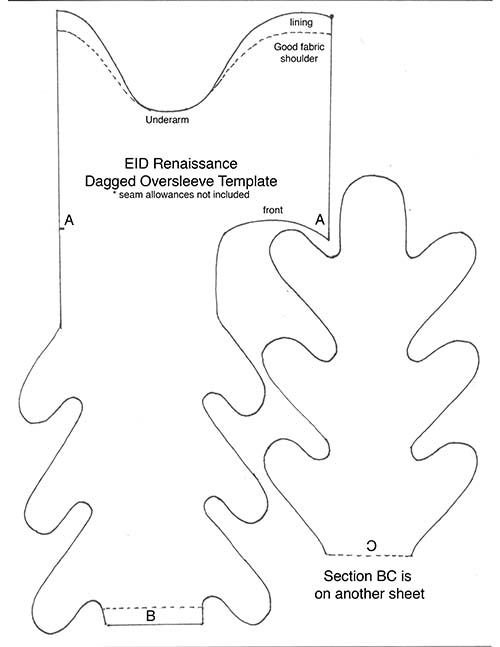
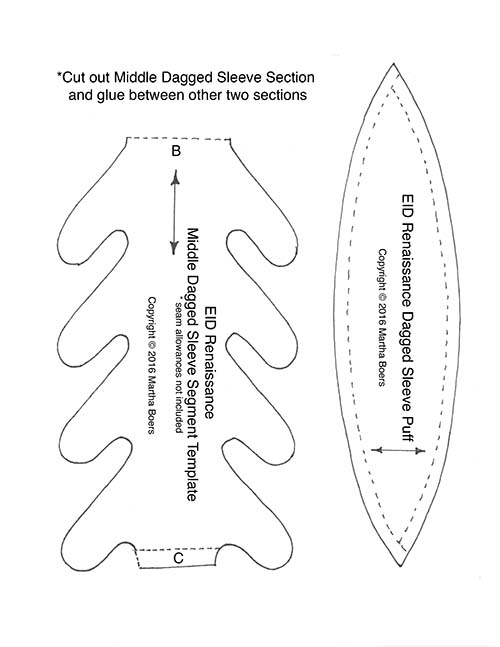
Dagged Sleeve Pattern
Just click on any of the patterns below to download the full-size three-page pattern pdf.

|
|
|
Dagged Sleeve Variation Instructions
*Important - The overdress with the dagged sleeves is considerably more complicated to make than the Overdress in the Tutorial above. The seam in the dagged sleeves does not correspond to the underarm seam of the bodice. So the sleeves need to be hand-sewn into the armholes after the bodice underarm seams have been sewn. I don't have any 'under construction' photos to help with the directions, so I'm hoping that I can explain the process verbally.
1. Print out pdf for Renaissance Gown (at beginning of Tutorial) and the Dagged Sleeve Pattern pdf. Cut out the dagged sleeve sections and glue them together.
2. Make the bodice of this underdress, basically following the directions for the Overdress bodice above, and using the Sleeve Lining Template as the pattern for both the sleeve lining, and the sleeve itself. The only difference in the instructions will be that the opening in this bodice is at the back, whereas the opening in the overdress above is in the front. The sleeve is sewn in exactly the same way. Just remember to leave spaces between the trims at the wrist to allow room for eyelets.
3. Trace the Overdress Bodice Template onto the non-sticky side of medium weight iron-on interfacing. Add seam allowances and cut out. Press interfacing onto the wrong side of your bodice fabric. Cut it out. FrayCheck all the edges.
Cut out lining, and with right sides together, sew along the front opening edge, around the neckline, and down the other front opening edge. Clip edges and turn right side out. Press. Sew darts, and underarm seams of bodice fabric and lining fabric separately. FrayCheck armholes, let dry, clip armhole seams.
4. Trace a pair of Dagged Sleeves onto the wrong side of the lining fabric. Mark 'A'. Do not cut out yet! Pin the lining fabric right sides together onto the dress fabric. Cut out sleeves through both layers of fabric, remembering to add the seam allowance as you go.
Do NOT remove the pins! *Note that the dress fabric does not go as high up at the top of the sleeve as the lining fabric does. Trim back the dress fabric to correspond to the line on the pattern top.
5. Leaving the entire dagged section of the sleeve pinned together, remove pins from the upper section of the sleeve pieces. With right sides together, sew the seams from the top of the sleeve down to 'A', on both the sleeve and the lining, forming a tube at the top of both. Insert the lining 'tube' into the sleeve 'tube', with right sides together, and finger-pressing the just-sewn seams open, pin the bottom edge of sleeve 'tubes' together. It should now resemble an inside-out hanging sleeve.
6. Slowly and carefully, sew the sleeve to the lining, using the traced line on the lining as your sewing line, going in and out along the edges of all the dagging. Carefully clip all the curves. There's a LOT! *The closer together the clipping, the smoother the curves will be when the dagging is turned right side out. Now turn the sleeve right side out, working carefully to turn each dagged section right side out neatly. Insert pins to help hold things flat. Once the entire sleeve has been turned right-side-out, press it. * To help keep the dagged strips flat, as well as to add a bit of embellishment, I embroidered a chain-stitch line all the way around the edge of the sleeve on the good side, being careful to not stitch through the lining.
7. Fold the upper sleeve tube flat, with the highest point (centre of shoulder) on one side and the lowest (centre of underarm) on the other. Mark those points with pins. To make the shoulder puffs, gather one edge of each fabric strip onto the top of the outer sleeve (through both layers) below where the sleeve fabric was cut a bit shorter (in step 4). The middle of the puff (at it's widest) goes at the top of the sleeve at the top of the shoulder, and the points taper into the lowest point of the sleeves - the underarms. Gather the tops of the puffs onto the tops of the sleeve linings.
8. With over-sleeve right side out, and bodice inside out, insert top of sleeve into arm hole with right sides together, matching the top of the sleeve to the shoulder on the bodice, and the underarm of the sleeve to the underarm of the bodice. Check to make sure you have the correct sleeve in the correct armhole. *The vertical seam on the top of the sleeve goes to the outside. Ease the sleeve to fit into the armhole opening of just the dress bodice (not the lining) and baste into place. If possible, stitch over basting line by machine. Otherwise hand sew securely. Clip seam allowances. With bodice and sleeves inside-out, fold the seam allowance of the bodice lining to the inside (as in step 17 above), baste edge, slip over inside-out dress sleeve, pin lining into place around sleeve, and hand-stitch lining into place. Turn right side out.
8. Attach skirt and finish as in steps 18 to 23 above.
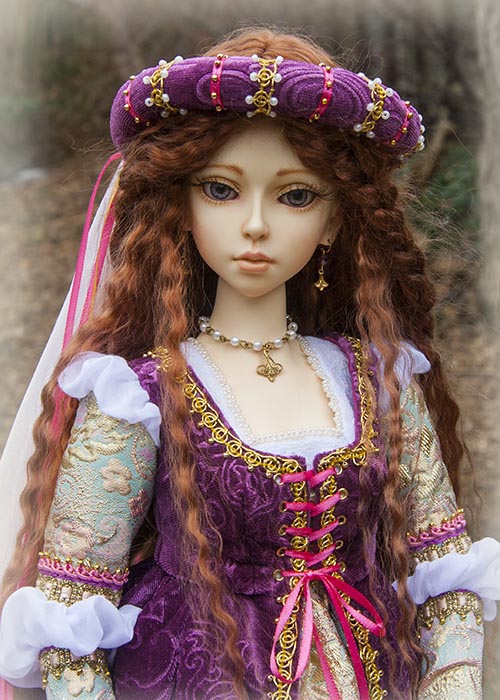
Congratulations! You are done!! Now it's time to put the entire costume on your doll, lace it up, and admire your handiwork!
To make a hat or headdress to go with your doll's new dress, check out the Renaissance Hats Tutorial!
1. Print out pdf for Renaissance Gown (at beginning of Tutorial) and the Dagged Sleeve Pattern pdf. Cut out the dagged sleeve sections and glue them together.
2. Make the bodice of this underdress, basically following the directions for the Overdress bodice above, and using the Sleeve Lining Template as the pattern for both the sleeve lining, and the sleeve itself. The only difference in the instructions will be that the opening in this bodice is at the back, whereas the opening in the overdress above is in the front. The sleeve is sewn in exactly the same way. Just remember to leave spaces between the trims at the wrist to allow room for eyelets.
3. Trace the Overdress Bodice Template onto the non-sticky side of medium weight iron-on interfacing. Add seam allowances and cut out. Press interfacing onto the wrong side of your bodice fabric. Cut it out. FrayCheck all the edges.
Cut out lining, and with right sides together, sew along the front opening edge, around the neckline, and down the other front opening edge. Clip edges and turn right side out. Press. Sew darts, and underarm seams of bodice fabric and lining fabric separately. FrayCheck armholes, let dry, clip armhole seams.
4. Trace a pair of Dagged Sleeves onto the wrong side of the lining fabric. Mark 'A'. Do not cut out yet! Pin the lining fabric right sides together onto the dress fabric. Cut out sleeves through both layers of fabric, remembering to add the seam allowance as you go.
Do NOT remove the pins! *Note that the dress fabric does not go as high up at the top of the sleeve as the lining fabric does. Trim back the dress fabric to correspond to the line on the pattern top.
5. Leaving the entire dagged section of the sleeve pinned together, remove pins from the upper section of the sleeve pieces. With right sides together, sew the seams from the top of the sleeve down to 'A', on both the sleeve and the lining, forming a tube at the top of both. Insert the lining 'tube' into the sleeve 'tube', with right sides together, and finger-pressing the just-sewn seams open, pin the bottom edge of sleeve 'tubes' together. It should now resemble an inside-out hanging sleeve.
6. Slowly and carefully, sew the sleeve to the lining, using the traced line on the lining as your sewing line, going in and out along the edges of all the dagging. Carefully clip all the curves. There's a LOT! *The closer together the clipping, the smoother the curves will be when the dagging is turned right side out. Now turn the sleeve right side out, working carefully to turn each dagged section right side out neatly. Insert pins to help hold things flat. Once the entire sleeve has been turned right-side-out, press it. * To help keep the dagged strips flat, as well as to add a bit of embellishment, I embroidered a chain-stitch line all the way around the edge of the sleeve on the good side, being careful to not stitch through the lining.
7. Fold the upper sleeve tube flat, with the highest point (centre of shoulder) on one side and the lowest (centre of underarm) on the other. Mark those points with pins. To make the shoulder puffs, gather one edge of each fabric strip onto the top of the outer sleeve (through both layers) below where the sleeve fabric was cut a bit shorter (in step 4). The middle of the puff (at it's widest) goes at the top of the sleeve at the top of the shoulder, and the points taper into the lowest point of the sleeves - the underarms. Gather the tops of the puffs onto the tops of the sleeve linings.
8. With over-sleeve right side out, and bodice inside out, insert top of sleeve into arm hole with right sides together, matching the top of the sleeve to the shoulder on the bodice, and the underarm of the sleeve to the underarm of the bodice. Check to make sure you have the correct sleeve in the correct armhole. *The vertical seam on the top of the sleeve goes to the outside. Ease the sleeve to fit into the armhole opening of just the dress bodice (not the lining) and baste into place. If possible, stitch over basting line by machine. Otherwise hand sew securely. Clip seam allowances. With bodice and sleeves inside-out, fold the seam allowance of the bodice lining to the inside (as in step 17 above), baste edge, slip over inside-out dress sleeve, pin lining into place around sleeve, and hand-stitch lining into place. Turn right side out.
8. Attach skirt and finish as in steps 18 to 23 above.
Congratulations! You are done!! Now it's time to put the entire costume on your doll, lace it up, and admire your handiwork!
To make a hat or headdress to go with your doll's new dress, check out the Renaissance Hats Tutorial!
|
|
|
Copyright © 2016 Martha Boers
All Rights Reserved
