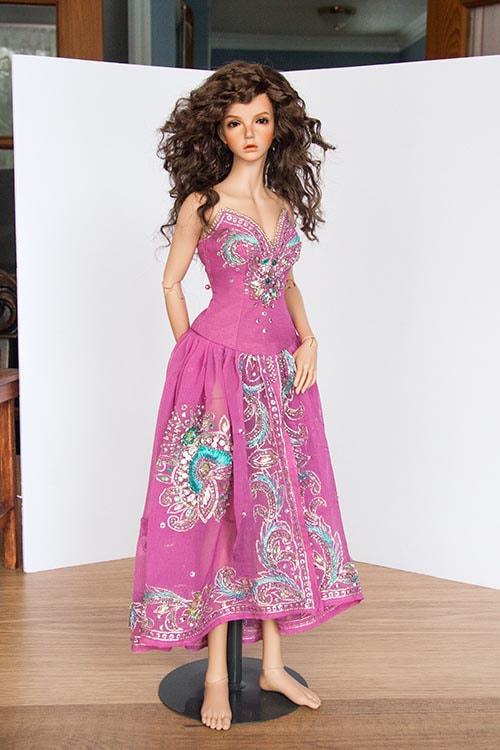
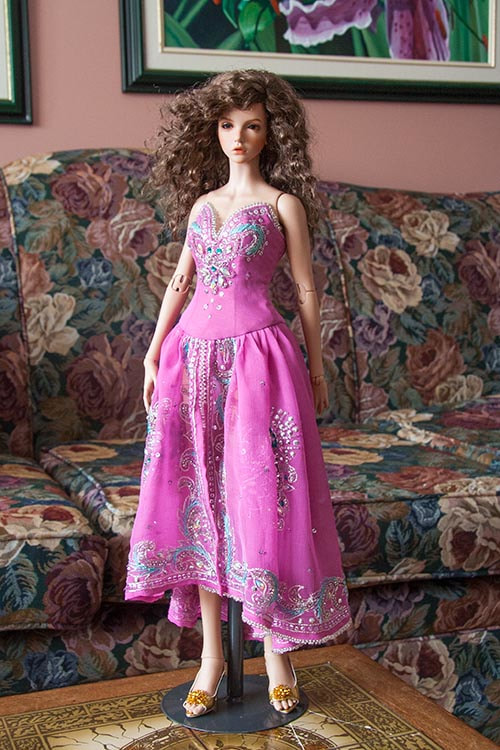
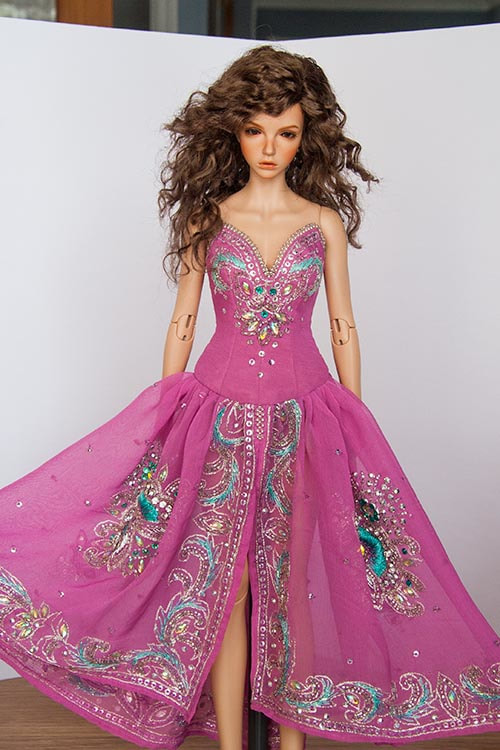
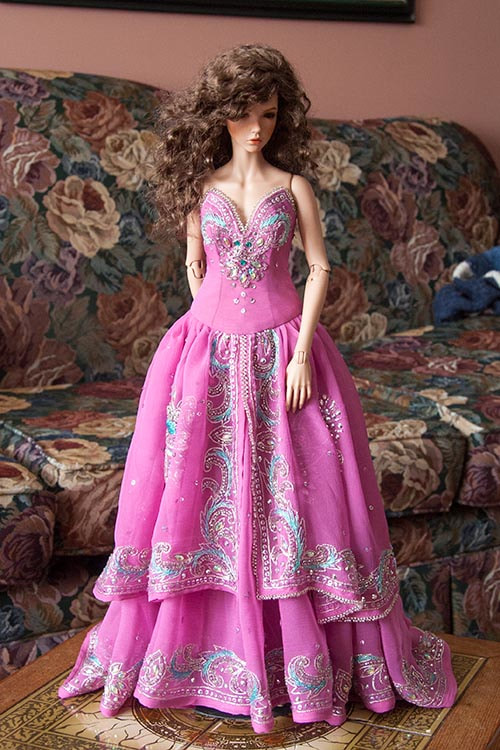
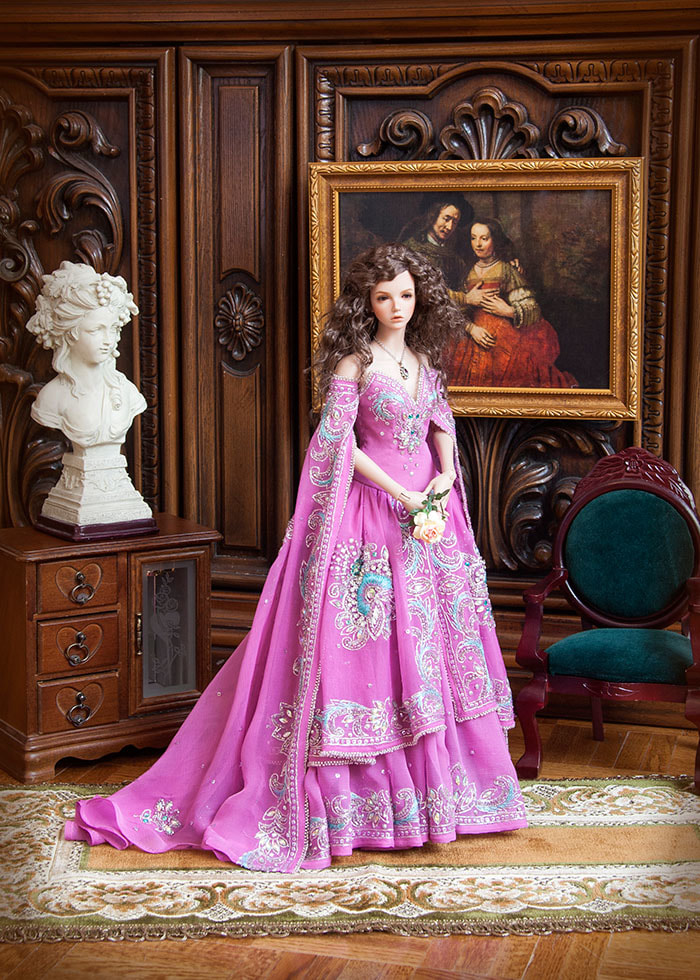
Bianca's Pink Sari Gown
a Creative Journey
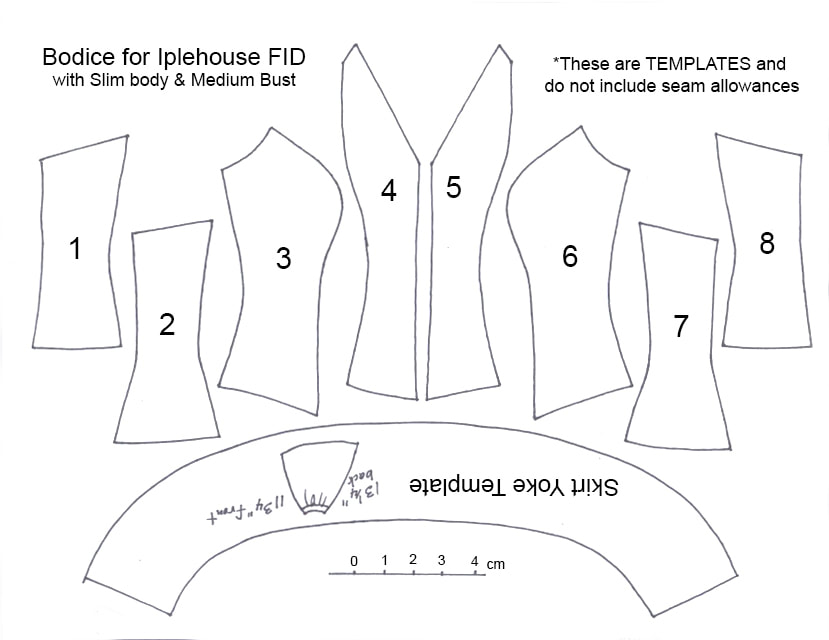
*the Pattern pdf for the simple bodice is available further down
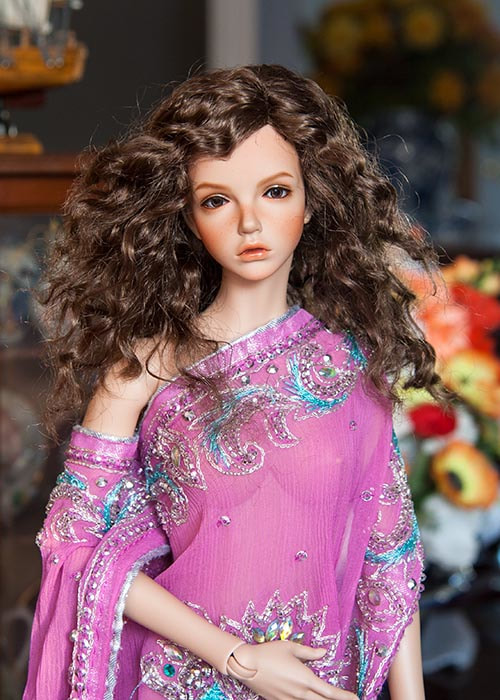
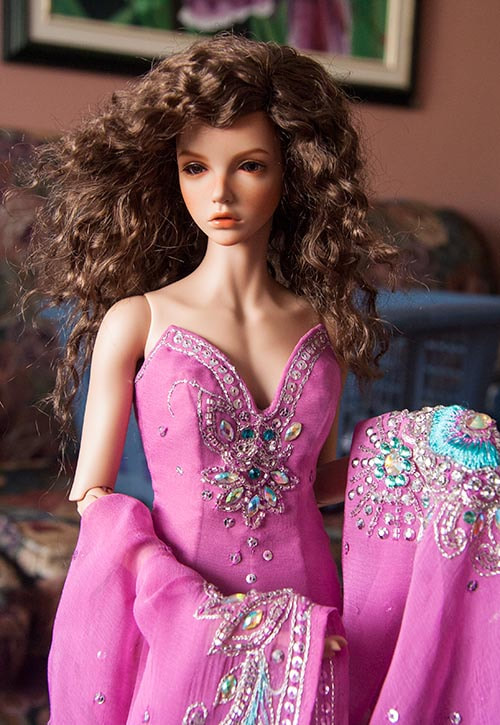
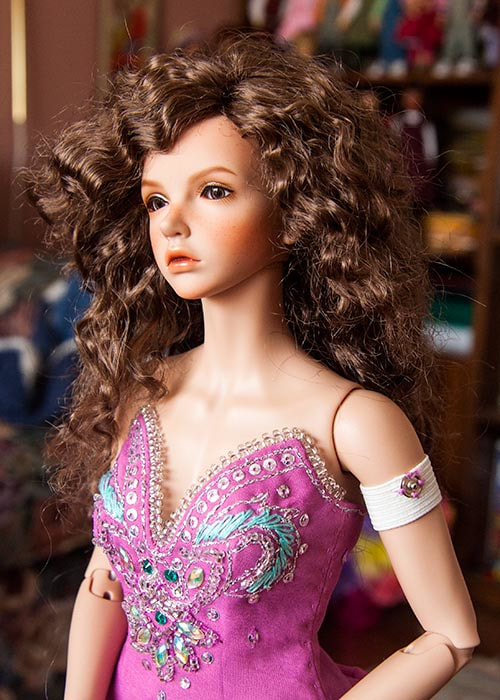
Bianca arrived January 17th, 2018. What could I say?? She was gorgeous, just like her promo photos on the Iplehouse site. I only had three wigs her size, so gave her the Brown/Black Ellowyne Rose, and I wrapped her in the sari which I had bought specifically to make something out of for her....
Bianca arrived January 17th, 2018. What could I say?? She was gorgeous, just like her promo photos on the Iplehouse site. I only had three wigs her size, so gave her the Brown/Black Ellowyne Rose, and I wrapped her in the sari which I had bought specifically to make something out of for her....
I've been struggling with how to make a dress for Bianca out of the old pink sari that I draped around her the day she arrived. She looked so beautiful the way I'd draped her, but I couldn't figure out how to create something similar in an actual dress....
February 5 - I washed the sari, and it shrank, just like the really thin ones usually do, but we steamed it back into shape. Then I set to work trying to redesign the bodice pattern that I'd made for Miho, so that I could place the edge of the sari along the top edges....and made another test sample.....
February 5 - I washed the sari, and it shrank, just like the really thin ones usually do, but we steamed it back into shape. Then I set to work trying to redesign the bodice pattern that I'd made for Miho, so that I could place the edge of the sari along the top edges....and made another test sample.....
*To download the pattern pdf, click on the pattern image below...
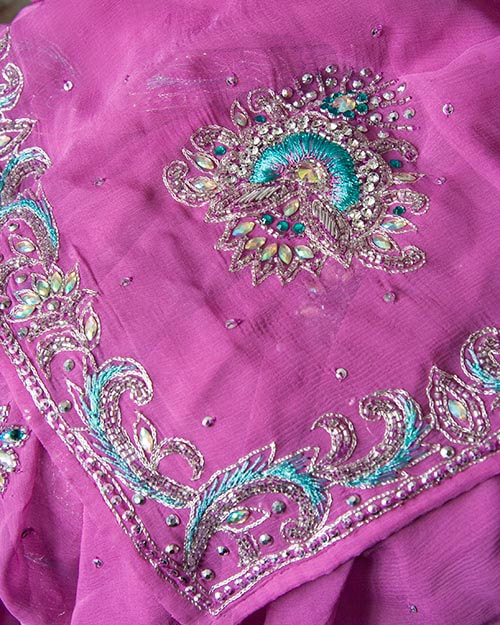
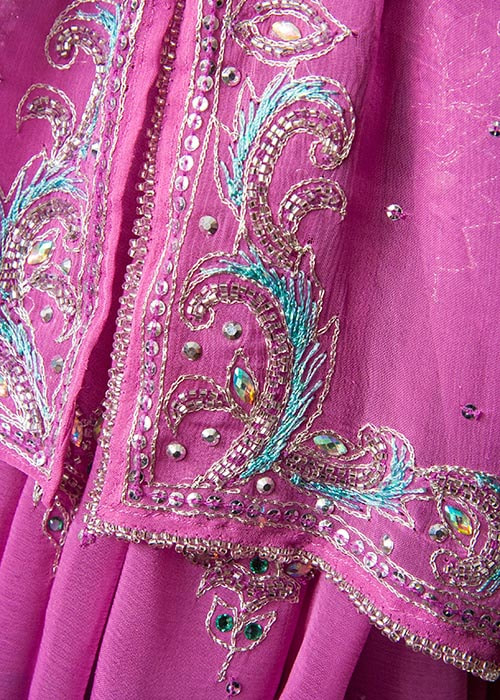
The bodice was looking good, but then when i tried to cut the top skirt layer out of the sari, I realized that the edging of the sari was going to be far more difficult to work with than I had imagined. The beads were sewn on, and I knew I could remove those and resew them back on later. But there were a LOT of tiny jewels, and they were tightly glued on. When I tried to pull them off, the fabric just came with them, leaving a hole. So that wasn't going to work. And there were way too many jewels in the border to fit the bodice patterns in-between. ...
Which basically left me with just two options; to make the bodice and embroider the entire matching design on it by hand; or make the bodice, hand sew one of the 'medallions' to the front, and embroider just the top edge to match. So now I have to find some silver embroidery thread and some tiny silver sequins. Very tiny sequins, about half as wide as the regular smallest ones.
Bianca's Bodice
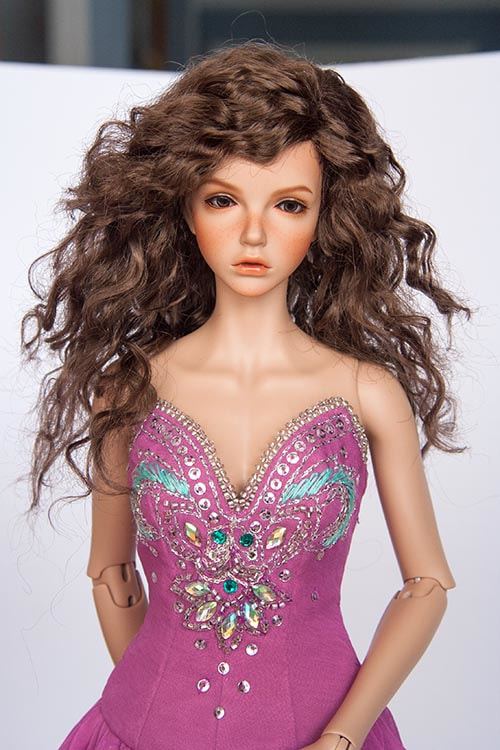
February 6 - I finally got the final design idea for Bianca's gown yesterday, so started working on her bodice. I had hoped that I could use the actual sari edge along the top of her bodice but that proved impossible. So next idea was to try fit one of the big corner medallions over the bodice front, but it was too big. It was becoming clear that I was going to have to do most of the bodice embellishment by hand, trying to embroider something matching the sari edging.
Third idea was to make the basic bodice front out of cotton, reinforced with iron-on interfacing, and then 'drape' a piece of the sari fabric with one of the smaller medallions over it, with the medallion right in the middle. Anything to reduce the amount of embroidery I was going to have to do.
That worked, and I sewed the bodice together, and then sewed in the lining. Next step was to embroider the top edge of the bodice with silver thread and sequins, matching the edge of the sari, and then to start embroidering more matching designs to embellish the bodice....
It was very challenging work, because the only silver thread I had was a triple ply 'thread' made up of a silver thread and two super fine 'filaments', and I had to adjust something with every stitch.
The original silver embroidery was done in a tiny chain stitch, and my silver chain stitching wasn't anywhere as neat. But with my lousy eyesight, I just had to accept that this was the best I could do anymore. I noticed it wasn't 'perfect', but would it matter when the gown was finished, when there will be so much more to look at?
The right side was coming along nicely, but then came another huge challenge - making the left side in a mirror image of the right. I decided it would be better to catch up on the left before proceeding further with the right. It would probably be easier to make a mirror image working just one small step at a time.
Progressing on Bianca's Gown
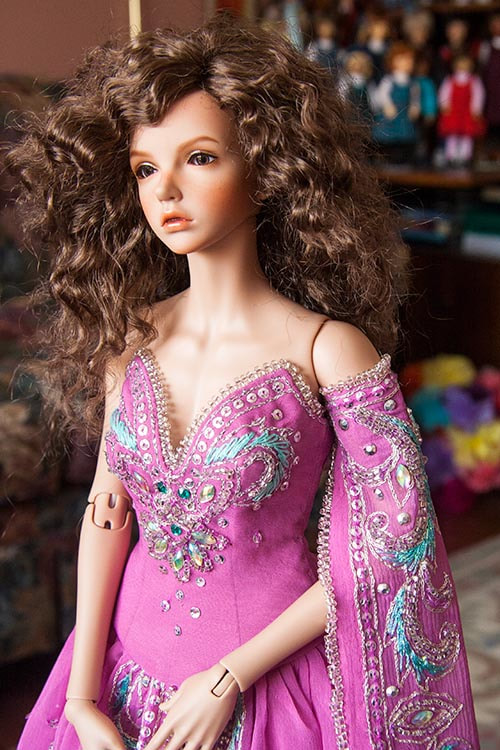
February 8 - I was very happy with how Bianca's gown was coming along. I decided to bead the upper edge of her bodice, after embellishing it with matching embroidery, and finished that the next day....
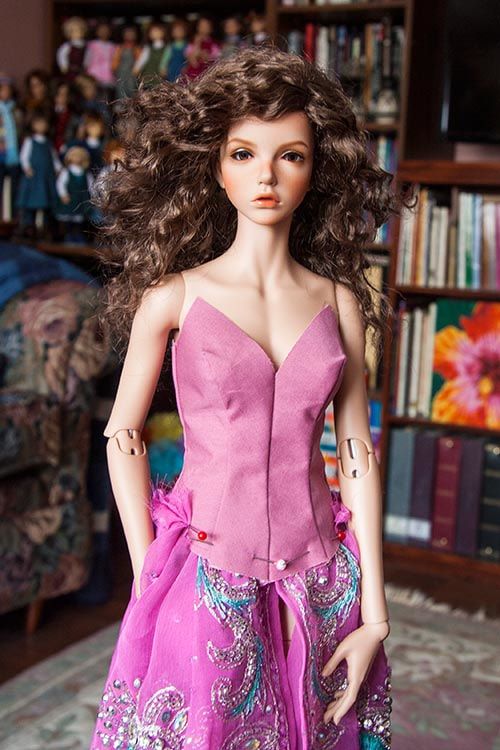
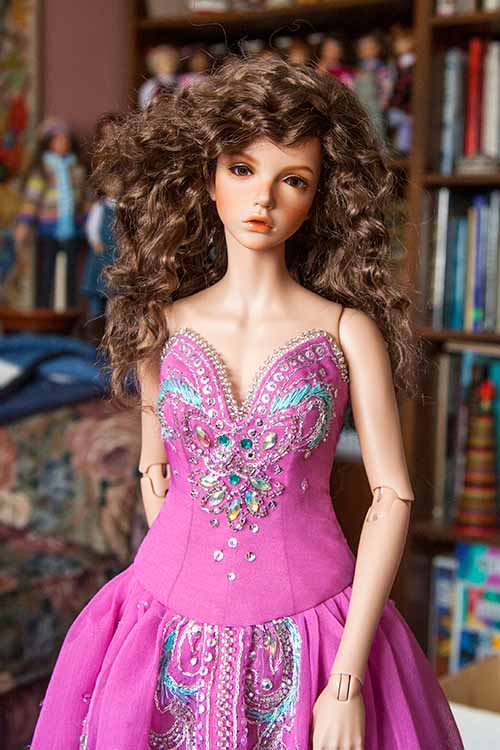
Then I sewed on the shorter, main skirt. I decided to bead the entire edge, starting at the middle front, going down, and working my way all the way around. It's taking me awhile, but I like the way the beading gives the skirt some weight so it hangs better.... and it's something mindless to do in the evenings while listening to the TV.....
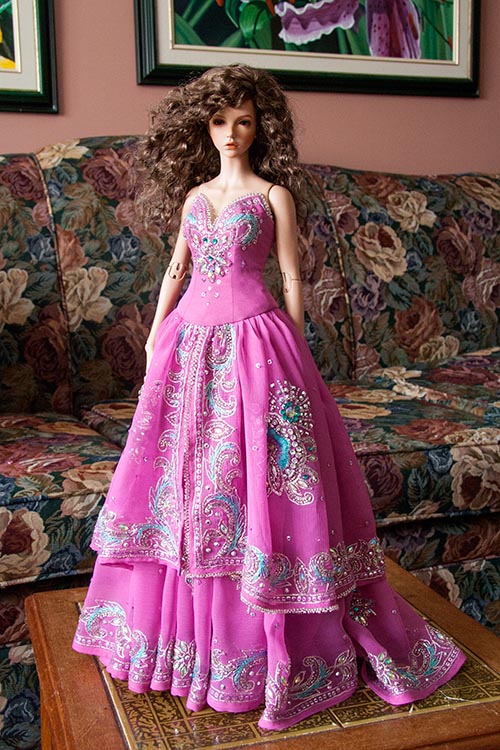
The intention is for this outfit to serve multiple purposes by mixing and matching the various layers. The main dress can be worn alone (with a slip I have yet to make). And I see that I really need to get her some silver shoes - I only have black and gold ones, and neither will do....
Yesterday I made the long underskirt. The top of the skirt is designed with a 'yoke', so that the skirt fabric can be pleated at her hip level instead of adding way too much bulk at her waist. That's a useful design element, since I had three yards of the beautifully edged sari fabric for the skirt...
The next step will be designing some long hanging sleeves - or an off-the-shoulder cloak - from the two remaining sari corners. The biggest challenge will be figuring out a way to keep them/it up, because I'm afraid that if I connect them to the top of the bodice, the weight might pull it down. And we can't have that.
Hanging Sleeves
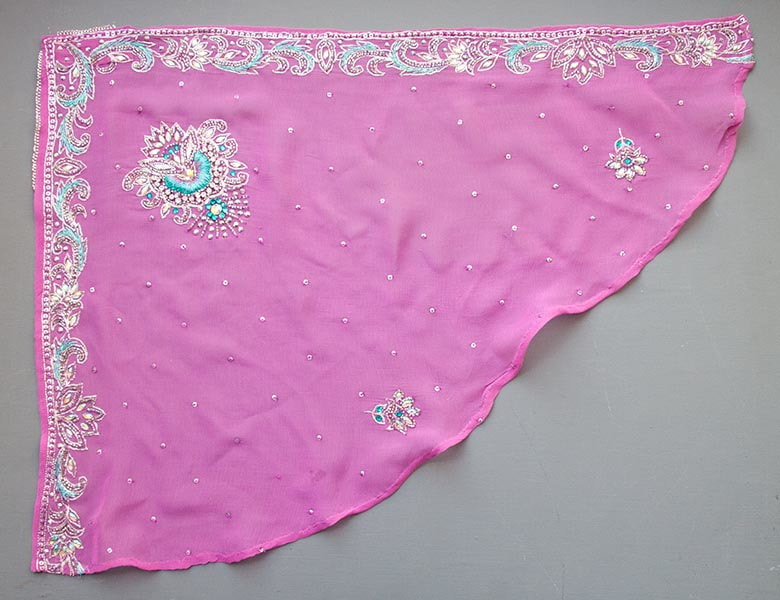
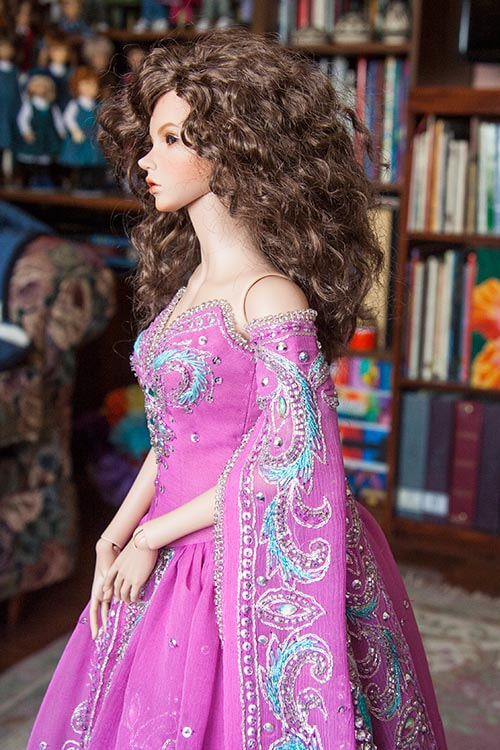
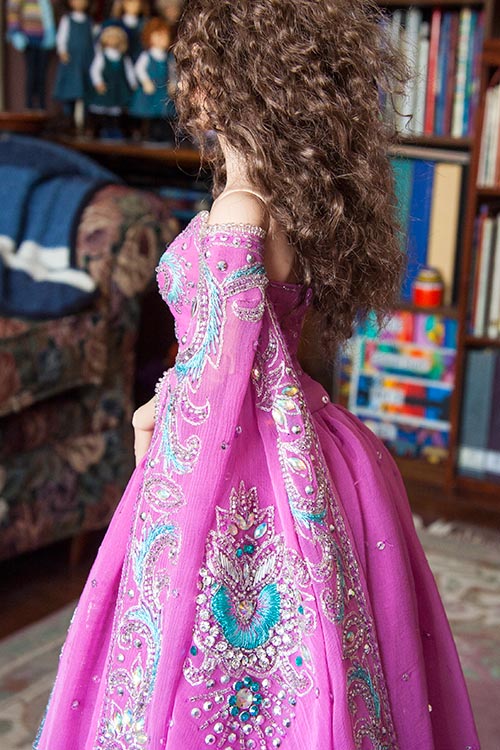
February 14 - I decided to make 'hanging sleeves' out of the last two corners of the sari. The 'corners' are where I want the tops of the sleeves to be. This is what they ended up looking like. The shorter finished edge will be at the front, and the longer edge will drape down the back.
The fabric is so fine and flimsy, that I found it almost impossible to make a nice rolled hem along the bottom curved edge. So I applied Fray Check to that edge, and let it dry. That stiffened the edge, giving it much more 'body', and I was able to pin and hand-sew the hem.
The fabric is so fine and flimsy, that I found it almost impossible to make a nice rolled hem along the bottom curved edge. So I applied Fray Check to that edge, and let it dry. That stiffened the edge, giving it much more 'body', and I was able to pin and hand-sew the hem.
But then I had to figure out a way to make the sleeves stay up. They wouldn't be able to stay up on their own, and I couldn't attach them to the bodice, because the weight would pull it down.
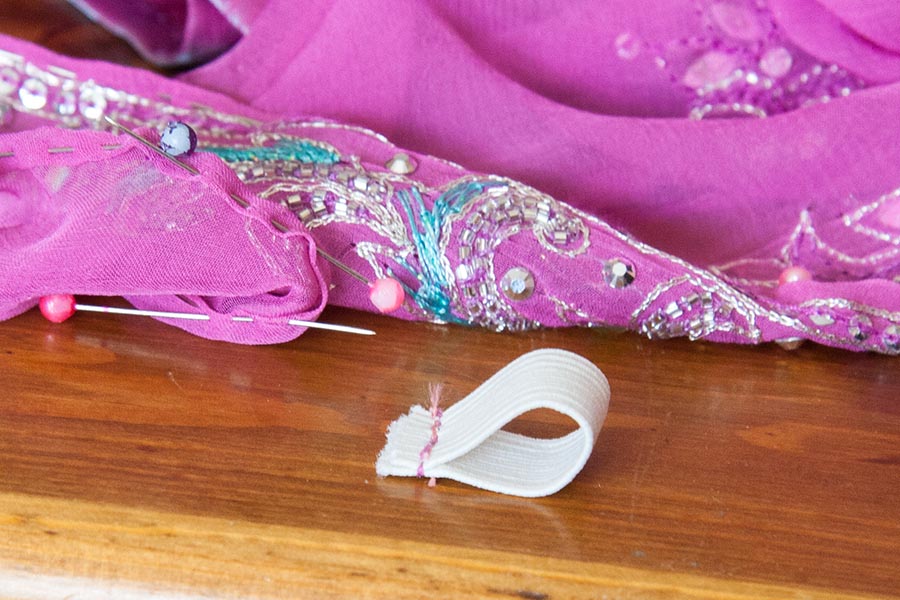
Then I thought maybe an 'armband' of wide elastic might work. I tried making one with a snap closure but it made for a big, unsightly bulge. So I ended up with a simple loop of 1/2" elastic....
Then I thought maybe an 'armband' of wide elastic might work. I tried making one with a snap closure but it made for a big, unsightly bulge. So I ended up with a simple loop of 1/2" elastic....
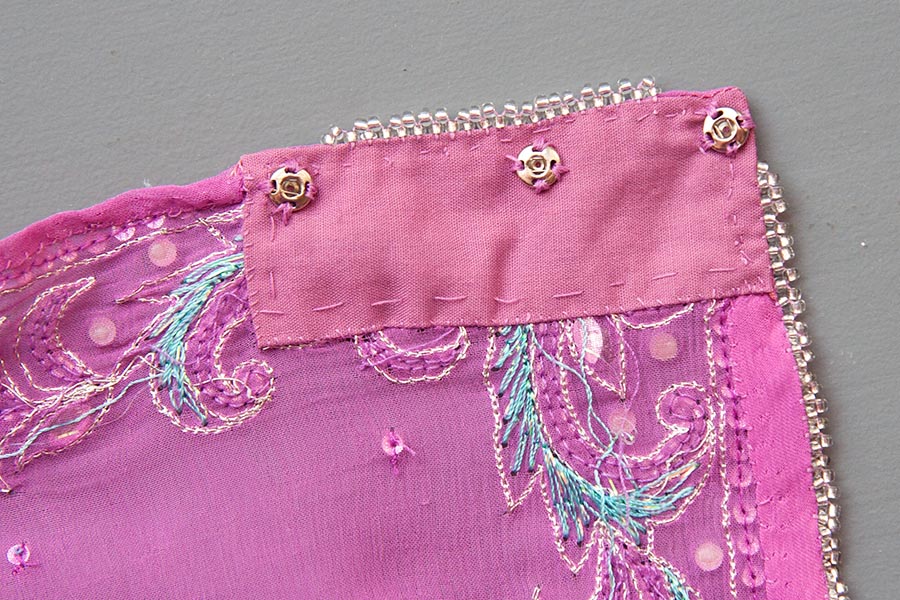
The next step was to prepare the tops of the sleeves. I added a small rectangle of cotton fabric to the upper corners to provide something a bit stronger to sew the snap fasteners to. I measured where on the elastic armband they needed to go, and sewed them on - a bit below the edge in order to hide the elastic - choosing snaps that fit rather tightly together, as they need to have a good grip that wouldn't just undo later.
After sewing down the raw edges of the elastic seam and sewing on the snaps, I put the elastic armband on Bianca.
It's not the easiest thing to get on, since it needs to fit rather tight....
It's not the easiest thing to get on, since it needs to fit rather tight....
...and with the upper sleeve edge snapped into place....
I was in the process of beading the front edge, and had already beaded the top. I did not sew any beads on the edges where they would be under her arm, because they are glass beads, and I was afraid they might end up scratching her resin. The sleeves hang down to the ground.
Once I was done both sleeves I took some full-length photos.
Copyright © 2018 Martha Boers
All Rights Reserved
All Rights Reserved
