Naomi's Wedding Gown
With Baron and Naomi's wedding coming up some time this summer, I started work on Naomi's wedding gown. Even though the wedding was still a long way off, there would be lots to make beforehand, and I figured I'd start with the wedding gown, since it's the most important.
I had originally thought something in light blue or pale green, in an Italian Renaissance style like Lucretia wore in 'the Borgias' series a few years back. But when I went through my fabrics, there wasn't anything useful in those colours.
But a pale yellow sari jumped out at me....
I had originally thought something in light blue or pale green, in an Italian Renaissance style like Lucretia wore in 'the Borgias' series a few years back. But when I went through my fabrics, there wasn't anything useful in those colours.
But a pale yellow sari jumped out at me....
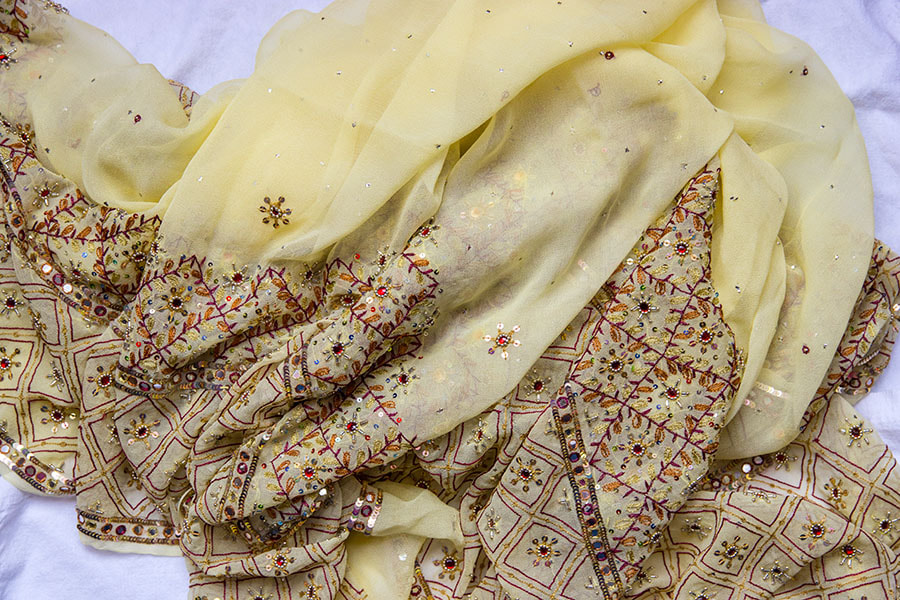
I had always envisioned that sari to become an underskirt for an Elizabethan costume, but figured I'd probably never get to it. So okay, it was decided...the wedding gown was going to be 'gold'.
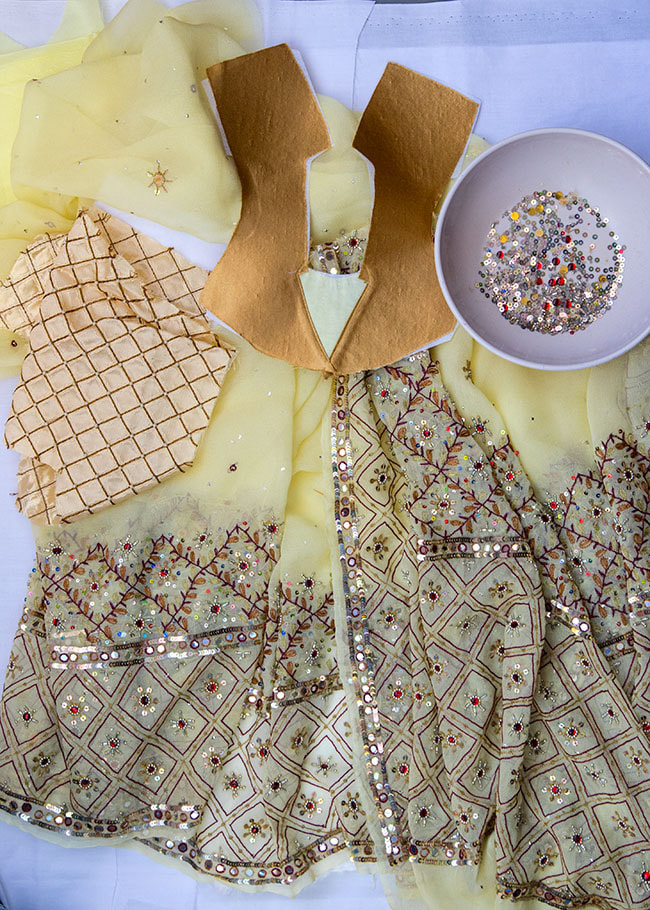
The gown would be made using my FID Renaissance Ladies pattern. I went through my stash looking for other fabrics to support the colour choice, and laid them out, and started on the bodice....
The gown would be made using my FID Renaissance Ladies pattern. I went through my stash looking for other fabrics to support the colour choice, and laid them out, and started on the bodice....
Now, saris may be gorgeous on the right side, but are a mess of threads on the wrong side, so to hide that I'd need to line the semi-sheer sari with some very light cream cotton. It was a bit of a challenge, since both fabrics were very fine, and very slippery, and every seam needed to be hand-basted first before any machine stitching. Thankfully my sewing machine didn't mind stitching through sequins, but it drew the line at going anywhere near any beading, so those areas had to be done by hand. It took me a week to prepare an underskirt and overskirt.
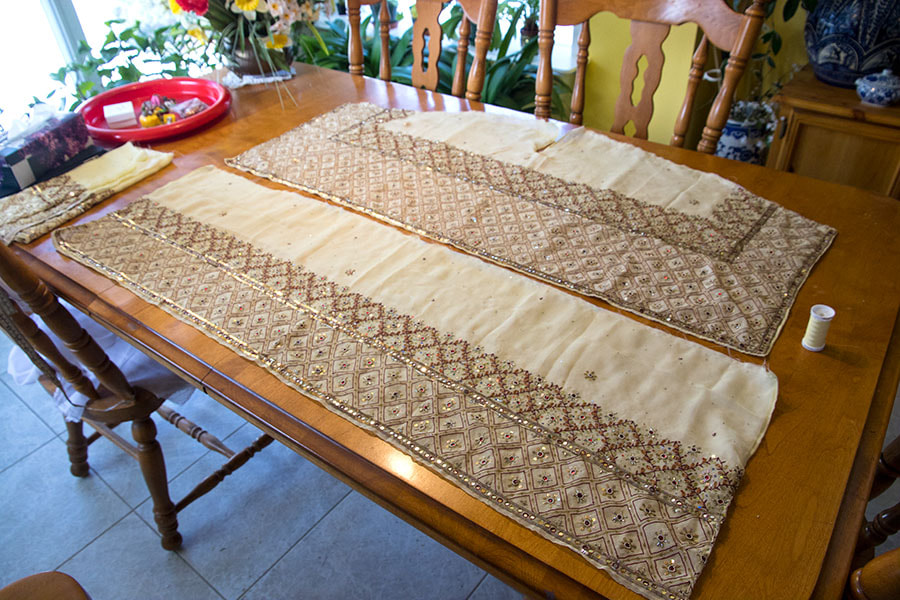
There was enough sari fabricate make two identical gowns, so I decided to make two. Which meant lining a second set of skirts. The overskirts were cut from the narrower ends of the sari so the embroidered and beaded design would go up both sides of the over-skirt front opening. The two lengths of fabric left after cutting off the ends, would become the under-skirts...
There was enough sari fabricate make two identical gowns, so I decided to make two. Which meant lining a second set of skirts. The overskirts were cut from the narrower ends of the sari so the embroidered and beaded design would go up both sides of the over-skirt front opening. The two lengths of fabric left after cutting off the ends, would become the under-skirts...
the Under Dress
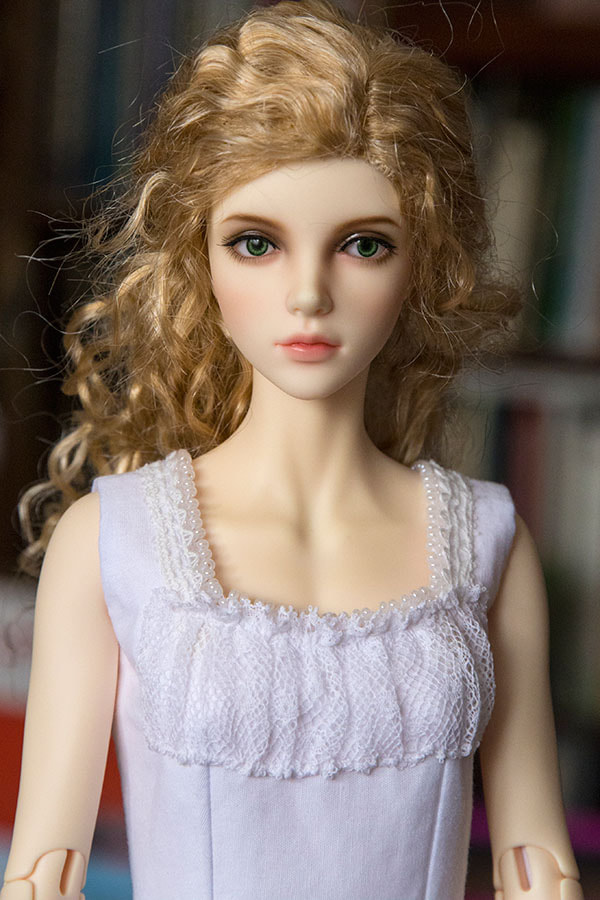
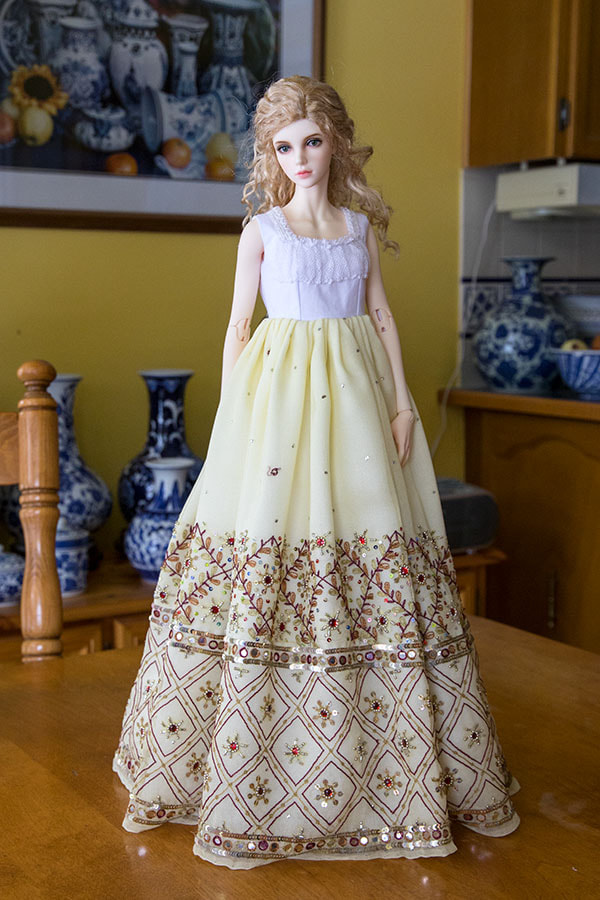
I finally finished the first under-bodice. It had a picot beaded neckline of tiny cream pearls, and hand-sewn lace 'ruffles'. I basted on the underskirt, and was ready to machine stitch it....but I was too excited and had to take some photos.
I'm was using Yvette as my model, since she didn't have any body blushing, so wouldn't suffer any accidental damage.
I'm was using Yvette as my model, since she didn't have any body blushing, so wouldn't suffer any accidental damage.
|
|
The overskirt was cut considerably longer so there would be a train in the back. I pinned it into place, and slipped on the basic gold over-bodice to see how it would look....

The main bodice was still very plain. I couldn't do any embellishment on it until I sewed the sleeves into the armholes, and I hadn't even started to figure those out yet....

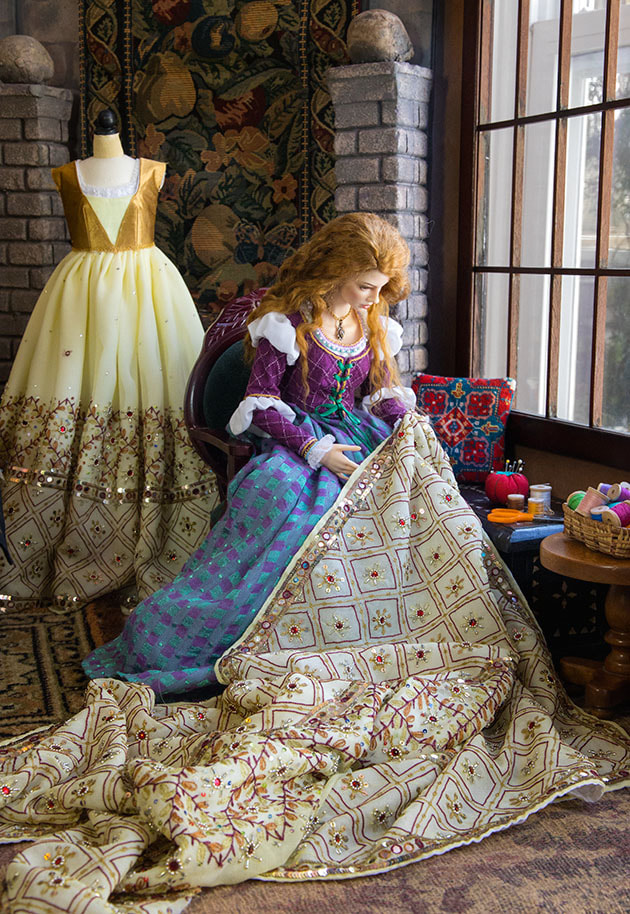
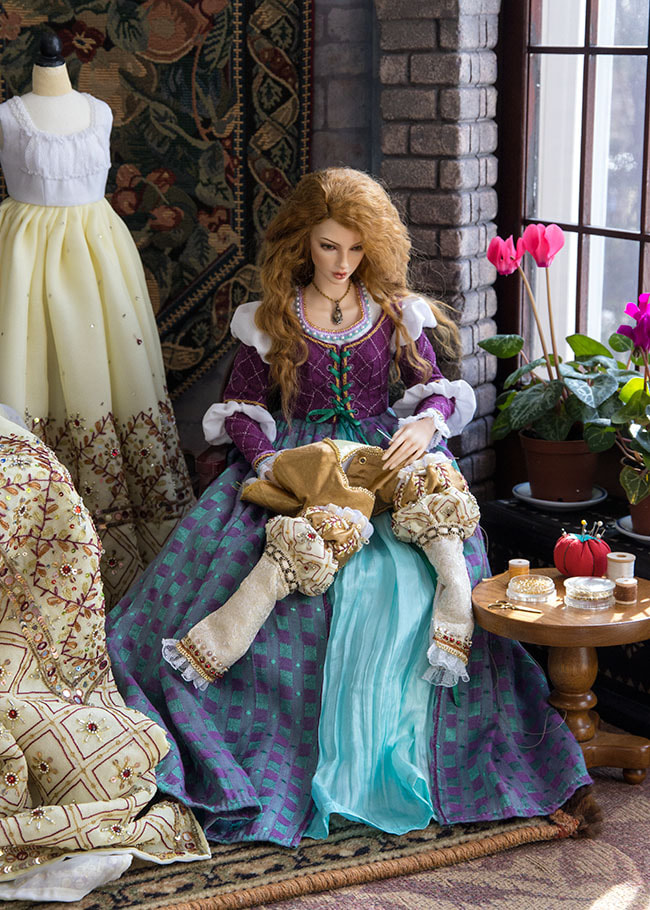
Working on Her Wedding Gown
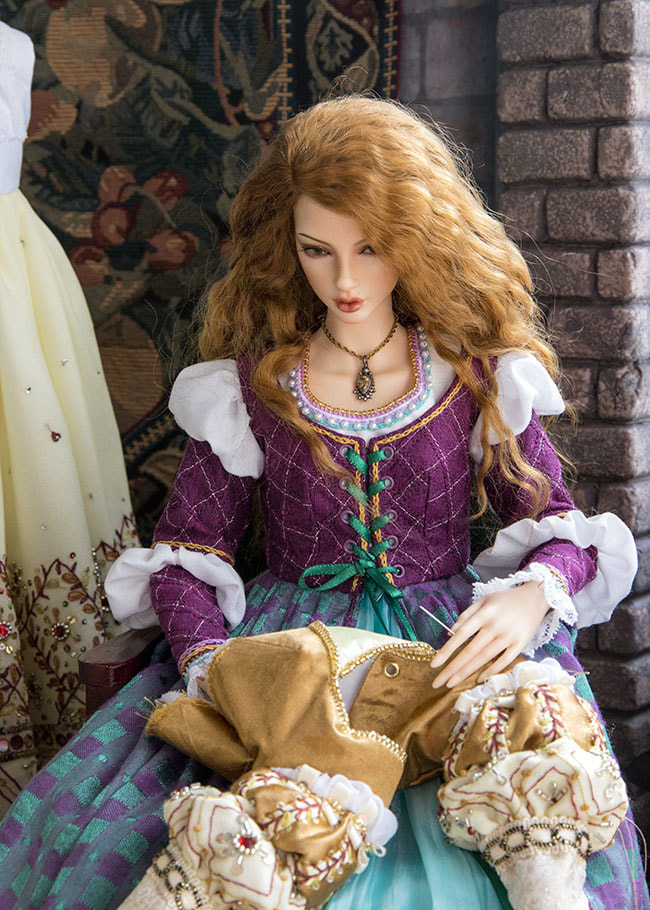
Before I got much further, I had the idea to shoot some photos of Naomi working on her wedding dress...
the Sleeves
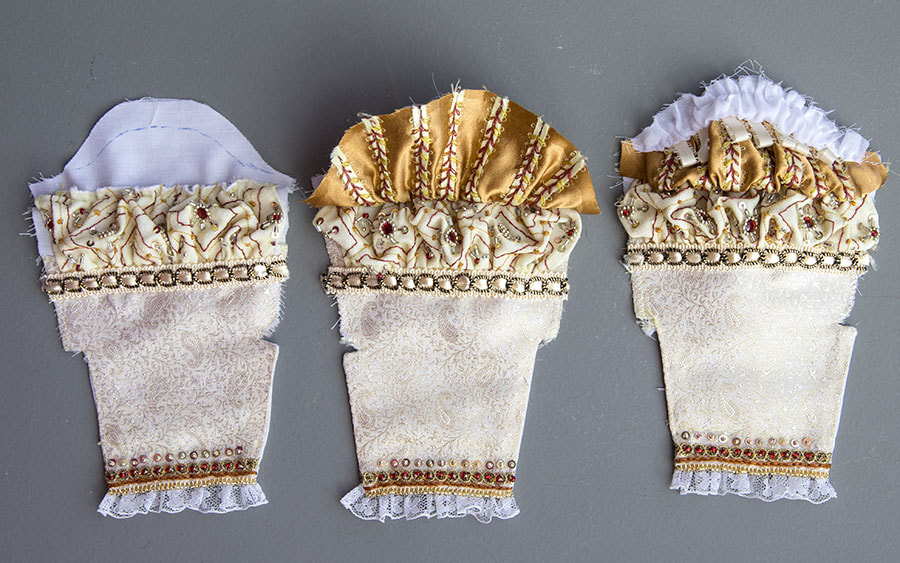
After making the underdresses, petticoats, and lining the overskirts, it was time to address the sleeves for the over bodice. Each sleeve would be made up of at least three parts; the basic sleeve, an embroidered gold satin puff, and an embroidered puff of the fine sari skirt fabric...
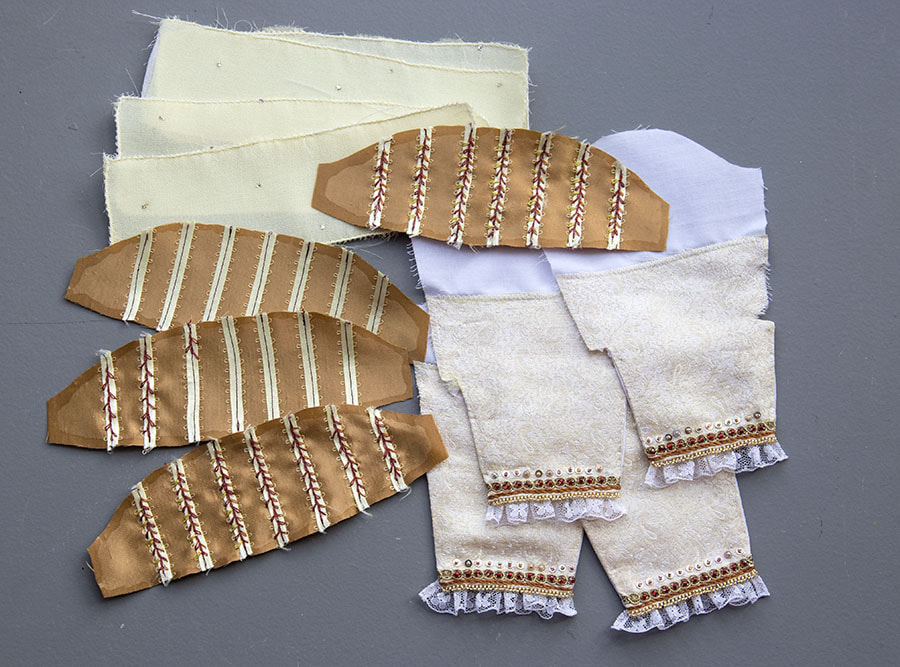
The wrist edges of the sleeves were finished first. I originally used a different gold trim, changed my mind about it, so had to pick everything apart in order to add the new trim and the narrow lace ruffles. The reworked version looked so much better....
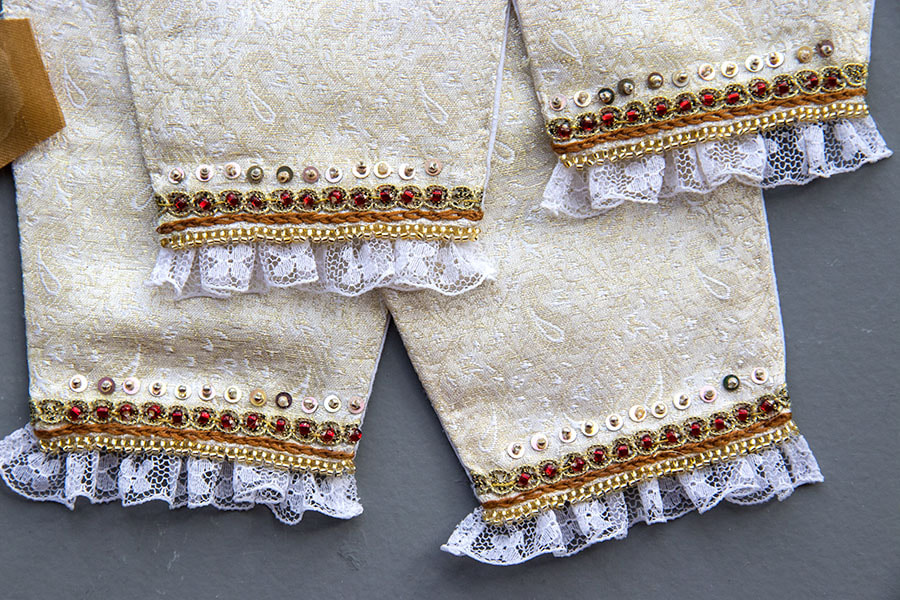
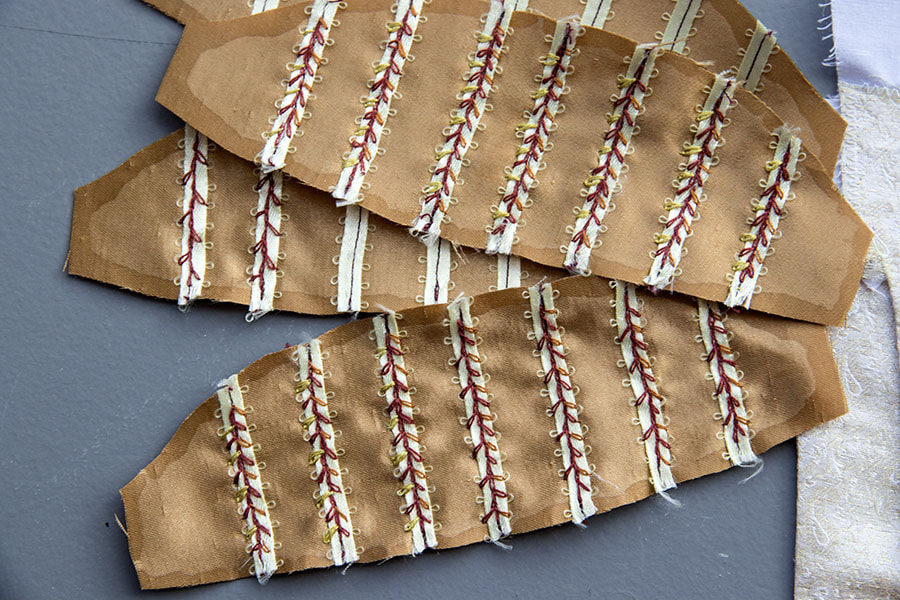
The most time-consuming part was embroidering a vine motif along all the pale yellow satin ribbons I'd sewn onto the gold puffs. The embroidery was intended to mimic the vines embroidered on the sari fabric. Each puff took three evenings to embroider...
I don't usually have a plan for exactly what I'm going to use, so will lay out the parts every now and then to decide what direction to go in.....
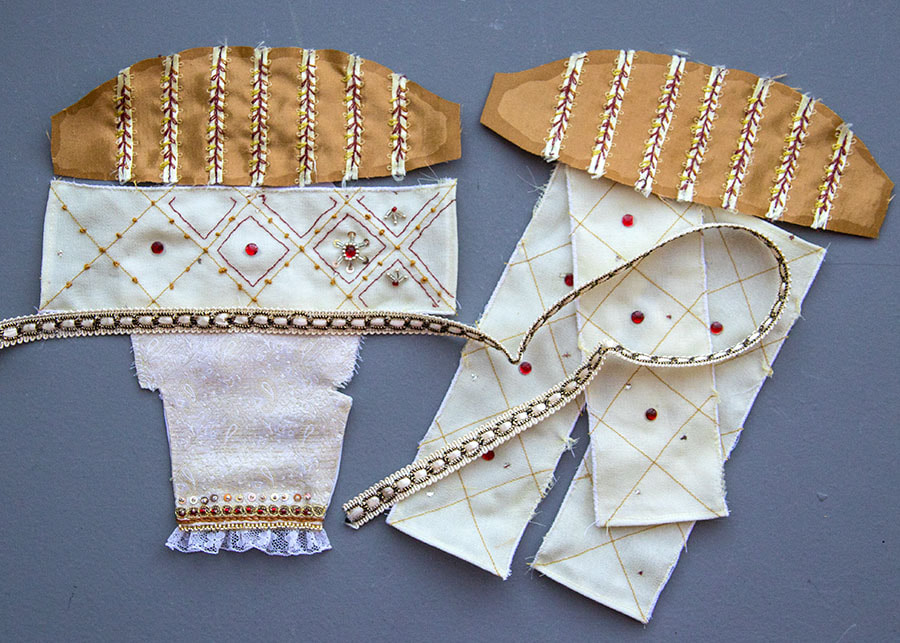
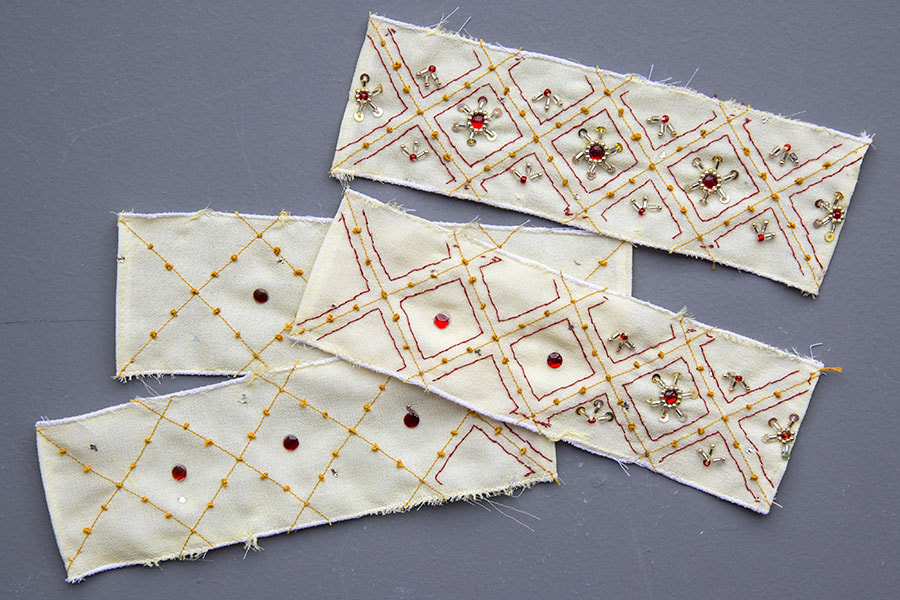
The pale yellow puffs are meant to mimic the pattern on the bottom of the skirts. I made the first four out of the sari fabric, lined with a sheer cotton, and had hoped to use a fancy stitch on my sewing machine to do the diamond patterns, but it was a disaster and I had to throw them out and start all over from scratch. This second set still has the pale yellow sari fabric, but it's lined with regular white cotton. And all the lines had to be embroidered by hand....

Making progress on the embroidery and beading....
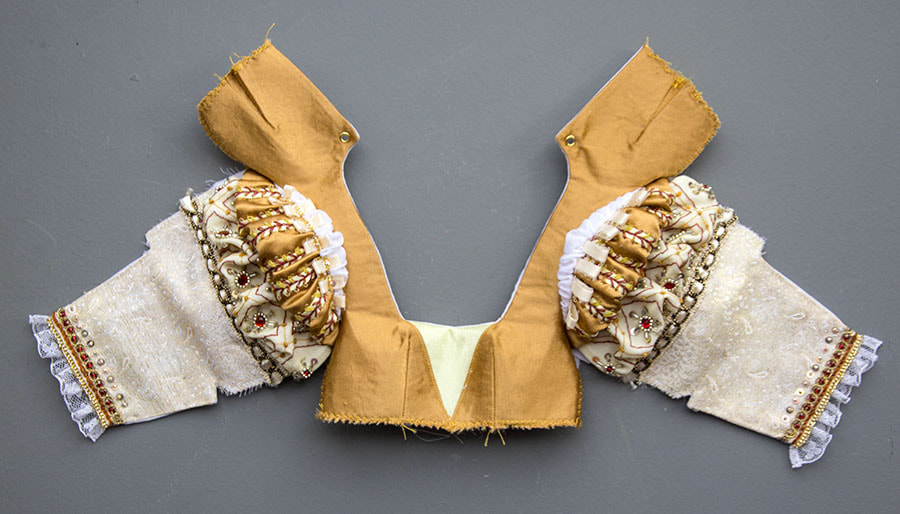
With all the puffs finally finished it was finally time to start building up the sleeves. First the pale yellow puffs were basted in place, along with the cream trim, then it was stitched on the machine. I like to baste every single row because I want everything to sew perfectly on my machine, and I don't trust only using pins. It may be a lot of extra work, but the result is always worth it.
After gathering the gold puff near the top, I added seven loops of pale yellow picot ribbon, and then a row of gathered white muslin to represent the 'chemise puffs'....
After gathering the gold puff near the top, I added seven loops of pale yellow picot ribbon, and then a row of gathered white muslin to represent the 'chemise puffs'....
A bodice with the sleeves sewn in....
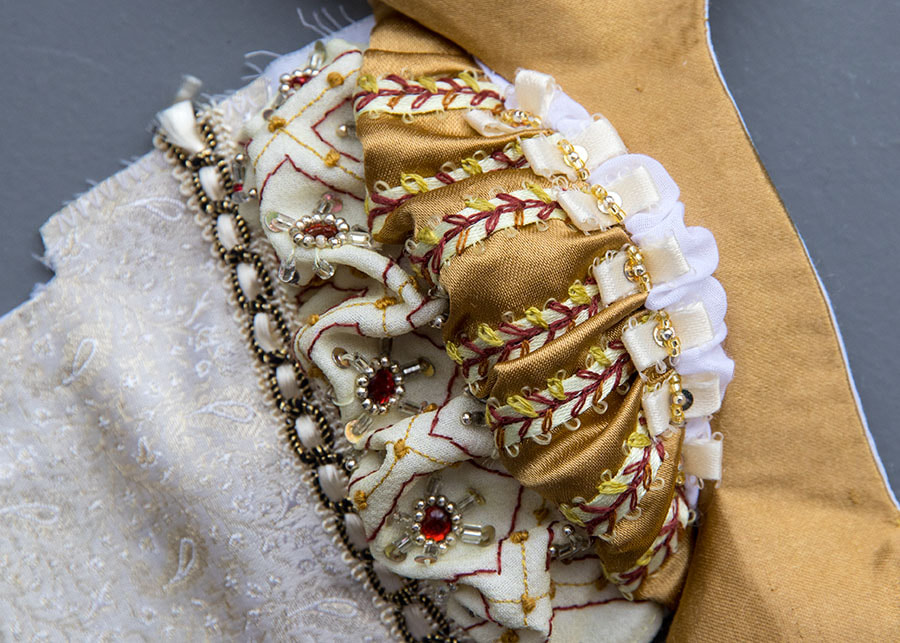
Close up detail of upper sleeve....
And Bianca checking the fit of an unfinished bodice, over the underdress....

I prefer to do as much embellishing of the bodice before the skirt gets sewn on, as it's a lot easier to handle without all the skirt fabric getting in the way. But I could only take beading so far, and kept it well back of the seam lines, because my machine hates sewing over beads. Anyways, even though things were finally starting to take shape, there was still a lot to do.
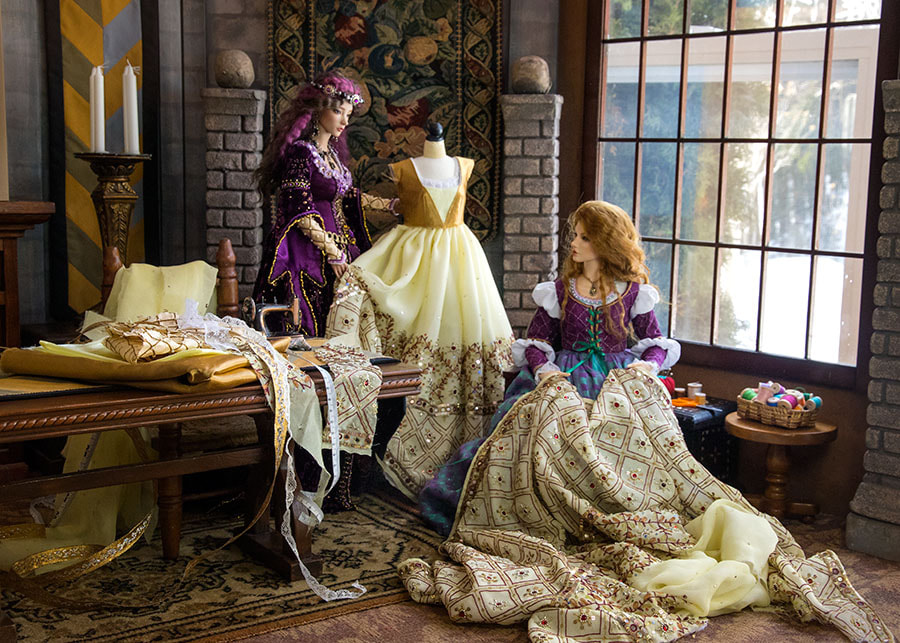
Working on the Bodice
Another photo shoot with Naomi working on her dress....
|
|
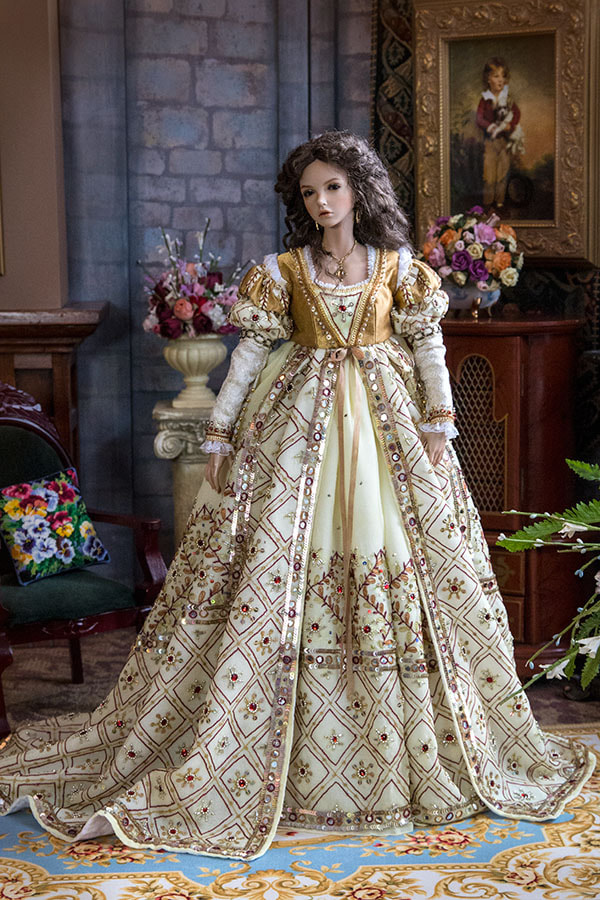
Finished at Last
I finished the first of the two wedding gowns, so then the most important dress for Naomi's wedding was ready. I actually made two identical gowns, one for Naomi and one for a friend's Bianca. So I used Bianca as my model....

|
|
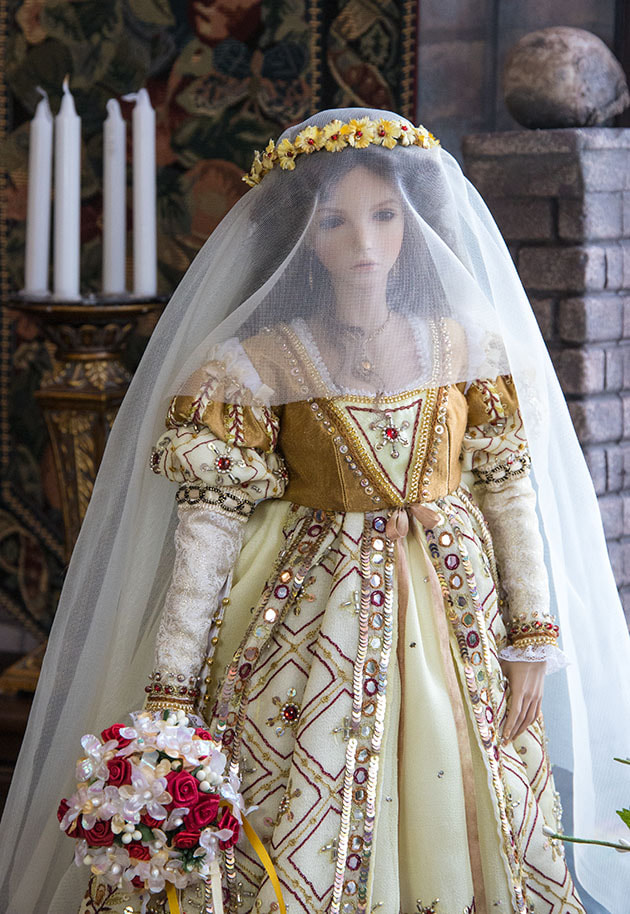
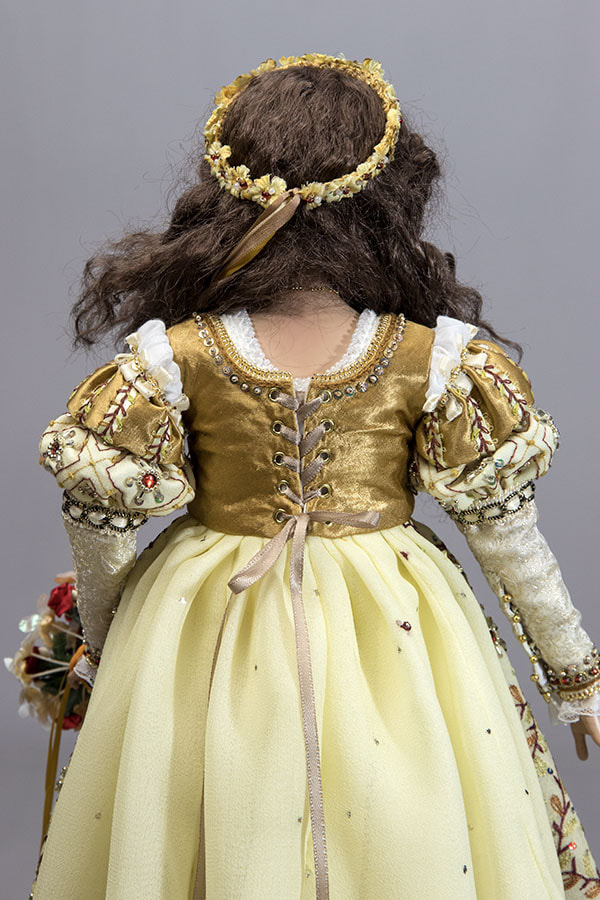
The flower wreath was made by sewing small yellow flowers onto a crocheted head band, and the veil was just a large oval of cream coloured nylon tricot.

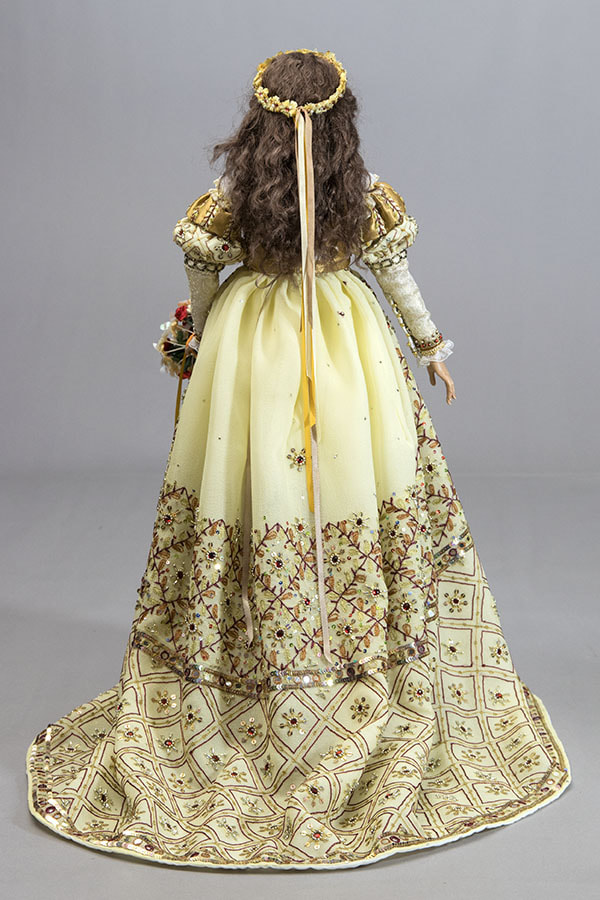
The back of the gown...
|
|
When I was finished the second gown I couldn't resist trying one on Naomi and taking some studio photos of the two ladies together
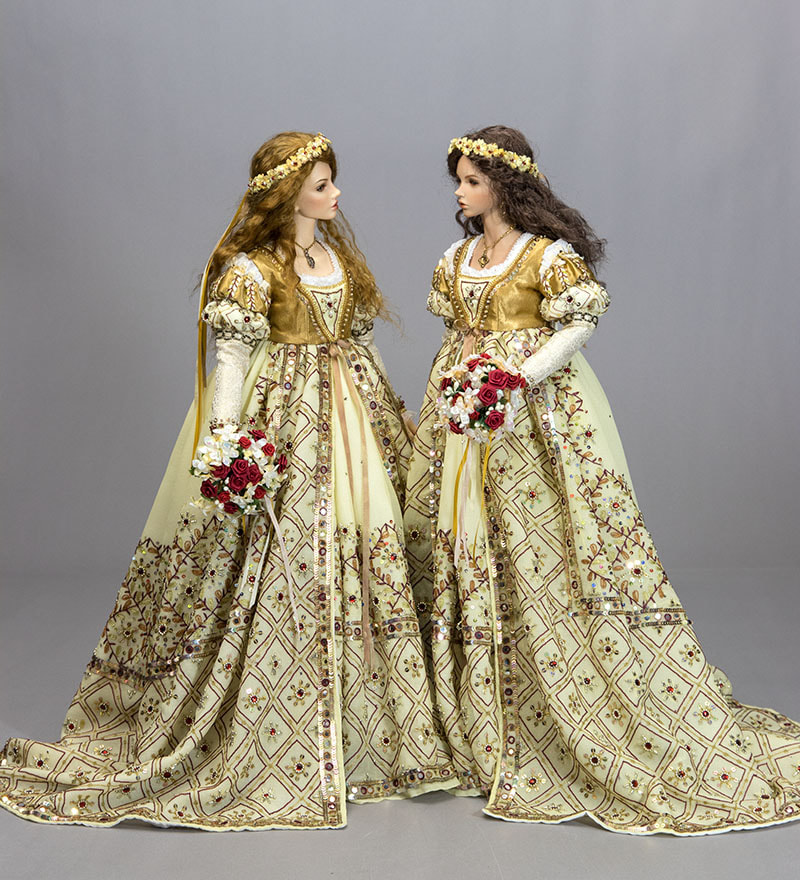
The two dresses are almost identical, however there are some difference. The overskirt of Bianca's gown was lined with white curtain sheers, as opposed to the fine white cotton of Naomi's overskirt (I ran out). So the skirt on Naomi's dress drapes better.
Naomi's skirt is bulkier at the waist since I gathered the entire width of the skirt fabric into the bodice. It seemed a bit bulky to me, so for Bianca's gown I first sewed six big darts into the top edge of the over skirt, cut away the excess, and zig-zagged the raw edges. That reduced the amount of fabric needing to be gathered into the bodice, and gave a slimmer look.
The two bodice fronts aren't exactly the same either. Naomi's front 'triangle' is a bit longer. I'd also made the two sets of sleeve wrist openings overlap differently. Bianca's were done correctly, and I wasn't happy with Naomi's, so picked off the snaps and beads, and reworked the sleeve openings so they would overlap correctly.
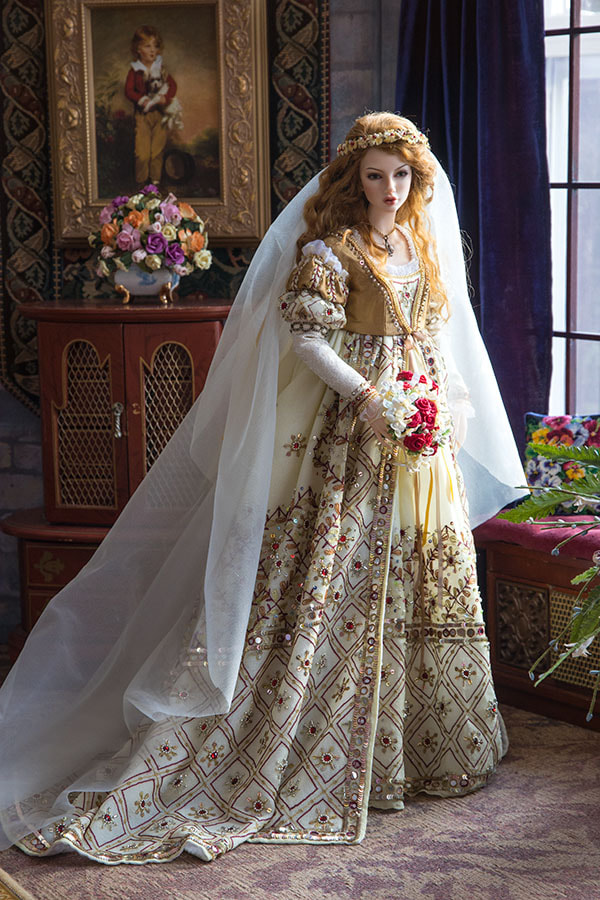
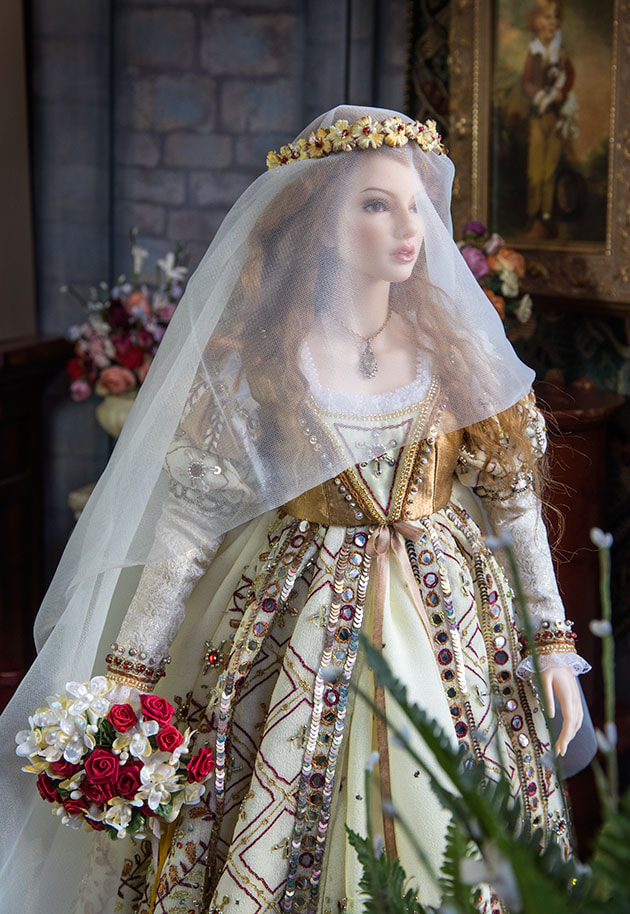
Naomi in her Gown
Finally, the bride ready for her wedding...
Copyright © 2022 Martha Boers
All Rights Reserved
