the Mirror Queen, a Creative Journey
* the Pattern pdf is available at the very end
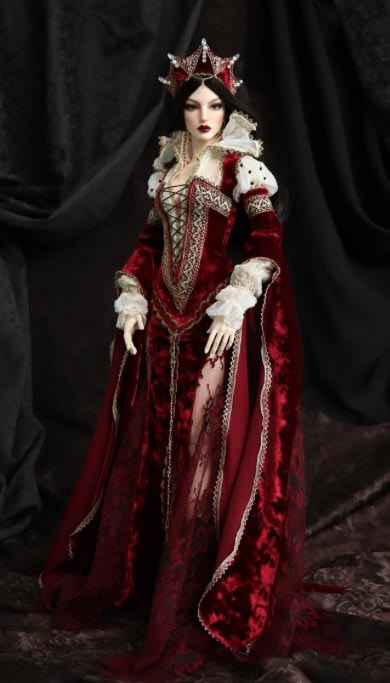
I've been in love with this gorgeous gown made by SartoriaJ for the bigger SD dolls....
I've been in love with this gorgeous gown made by SartoriaJ for the bigger SD dolls....
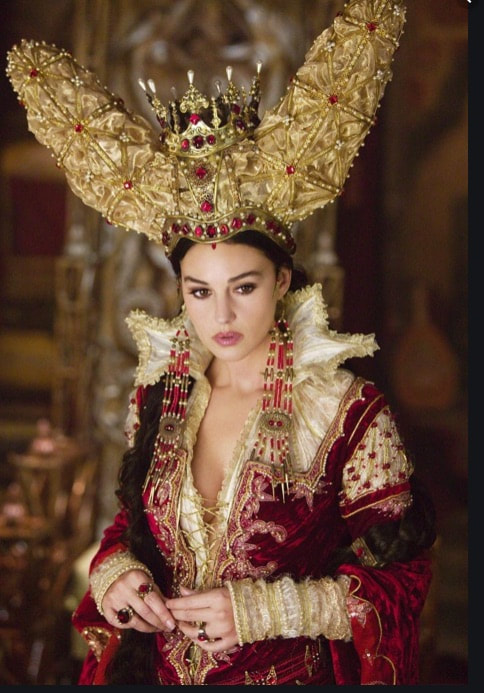
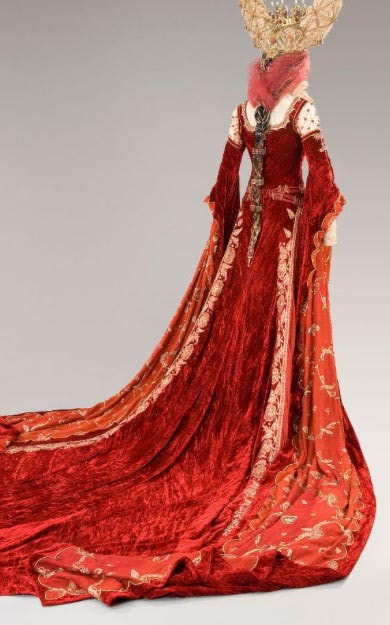
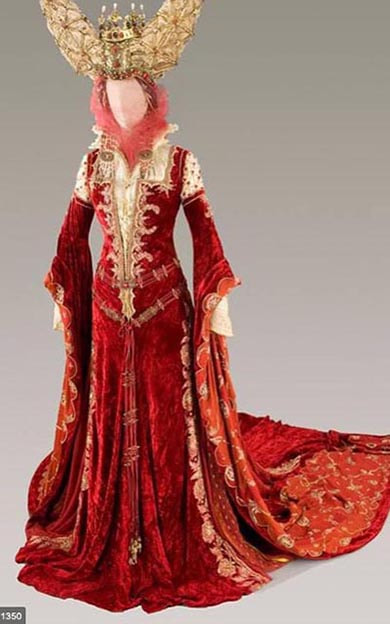
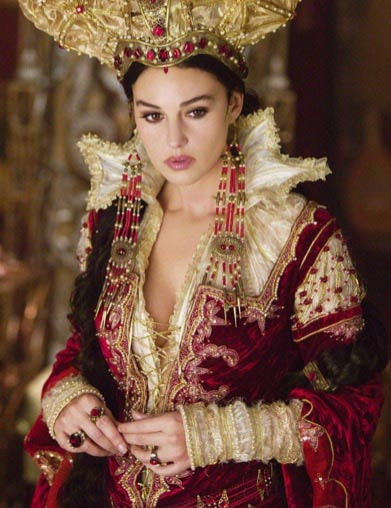
It was based on the costume worn by the Evil Queen in the movie the 'Brothers Grimm'....
Well, I've decided to try make something inspired by it for my Raccoon Monica. It will not be an exact duplicate, but something 'inspired by it', as I'm severely limited by the fabrics and trims available. Plus I'm working for a much smaller doll.
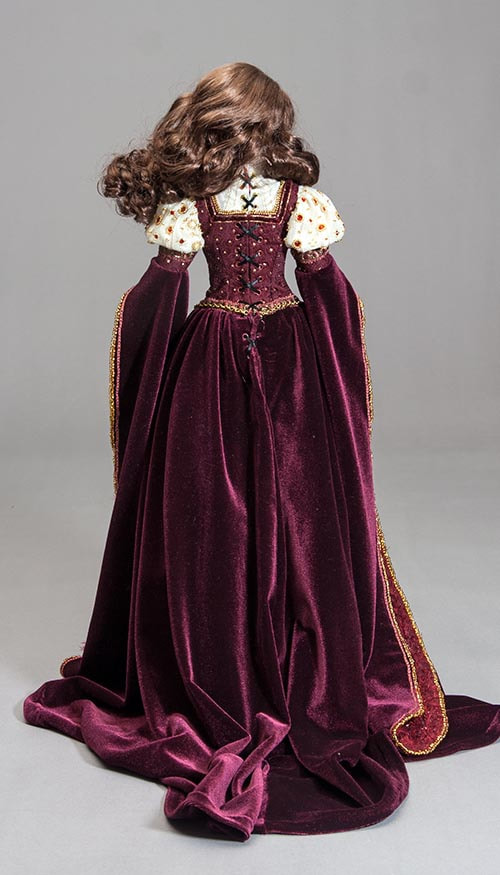
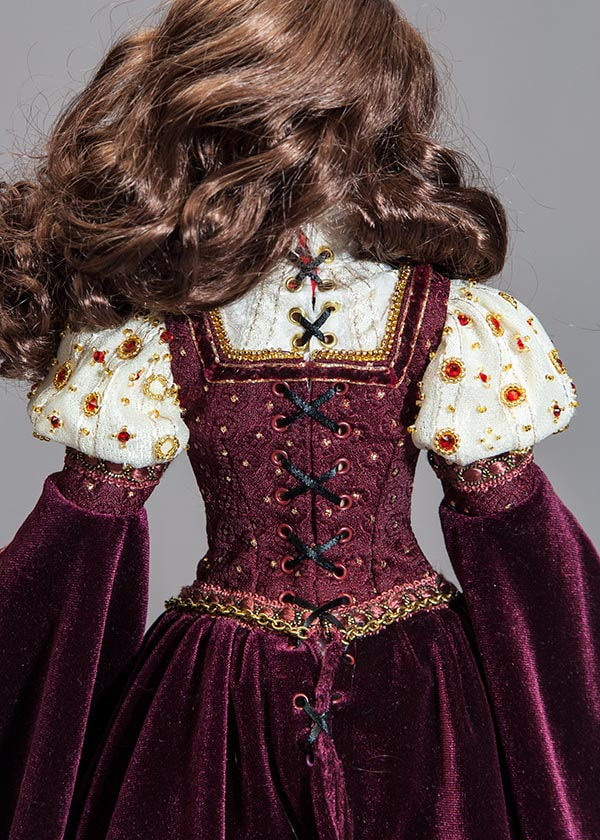
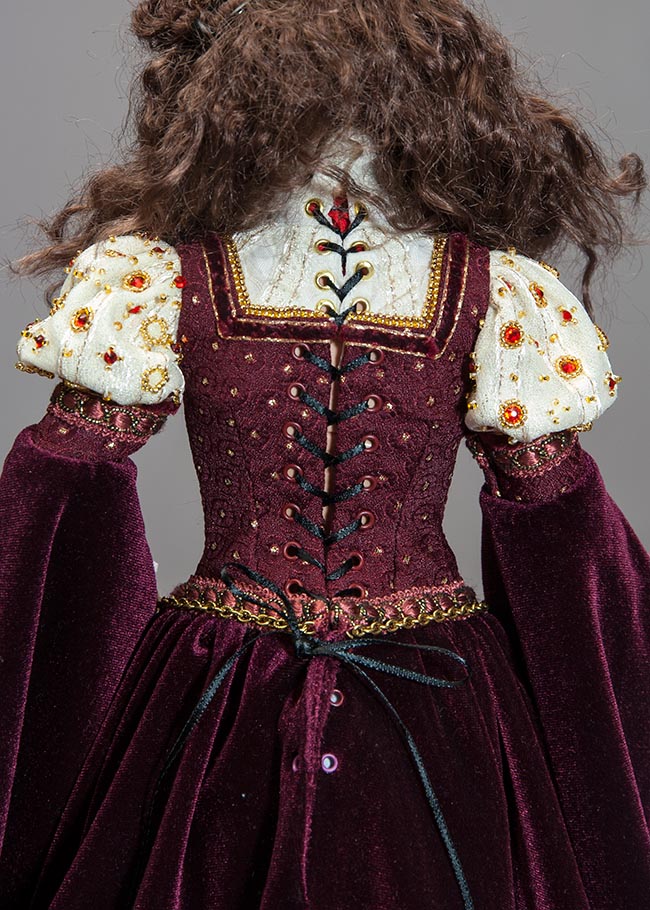
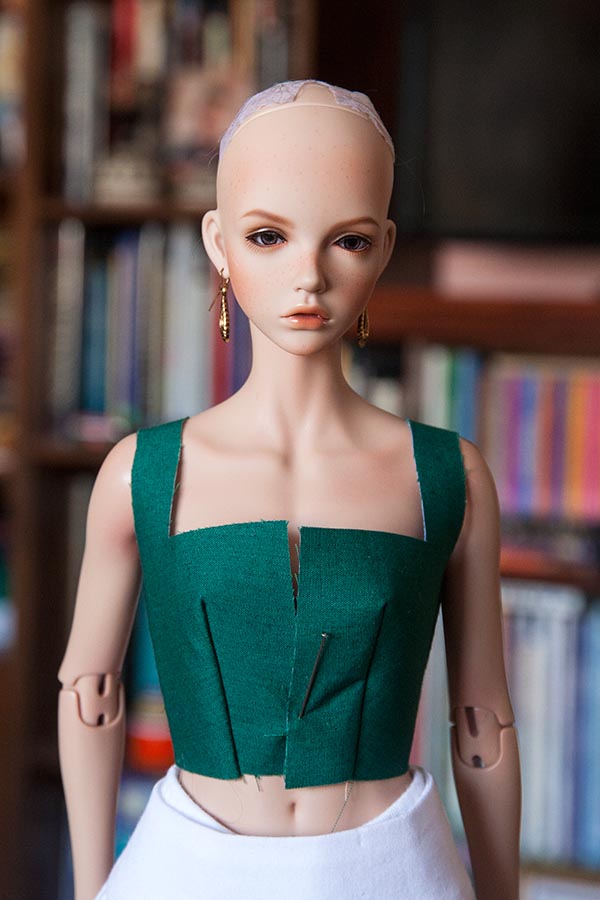
The Raccoon ladies are a bit slimmer than the Iplehouse Slim FID ladies, but I want the costume to fit both, so I'm using Bianca as my model. I'm going to make the gown lace up the back. For the FIDs the two back sides will butt against each other, and for the Raccoon ladies they can overlap.
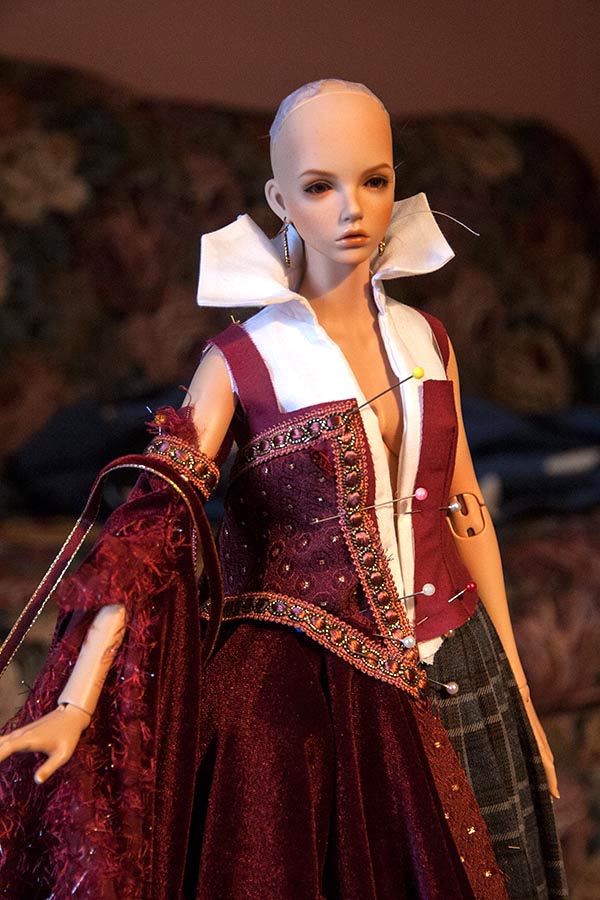
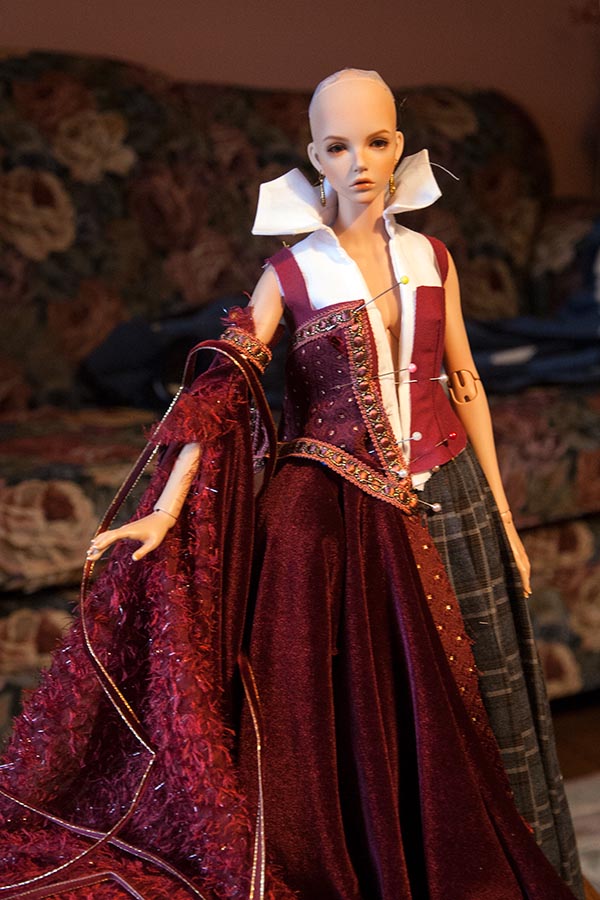
So I've been making patterns for the inner and outer bodices, and have sewn test versions from cotton. So far so good. Then I loosely pinned on some trims to see what I like best.....
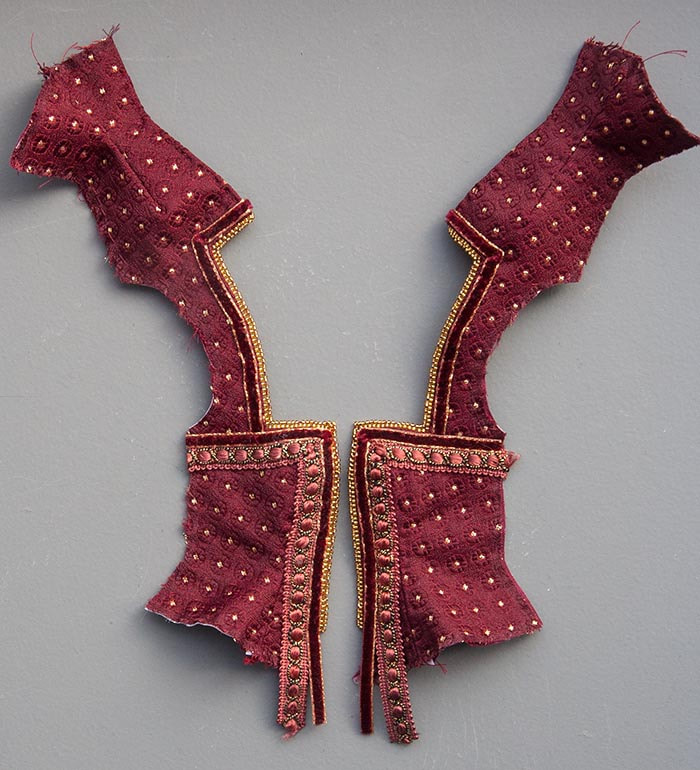
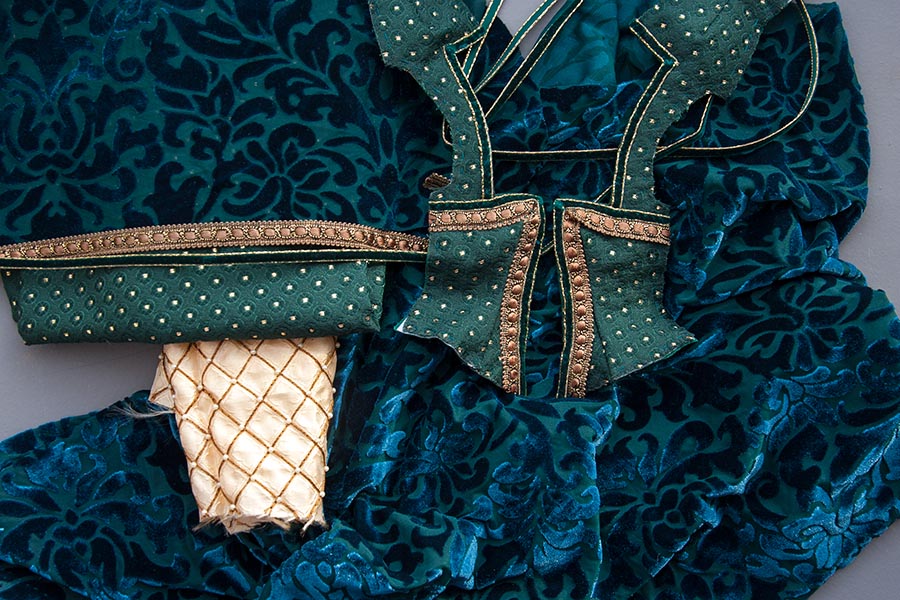
I've decided to use the last bit of the red brocade, with the gold dots, that I used for Baron's tunic. it looks in better scale than using velour for the bodice. Velour would have been comparable to making a human size bodice out of carpeting, at least on this size doll.
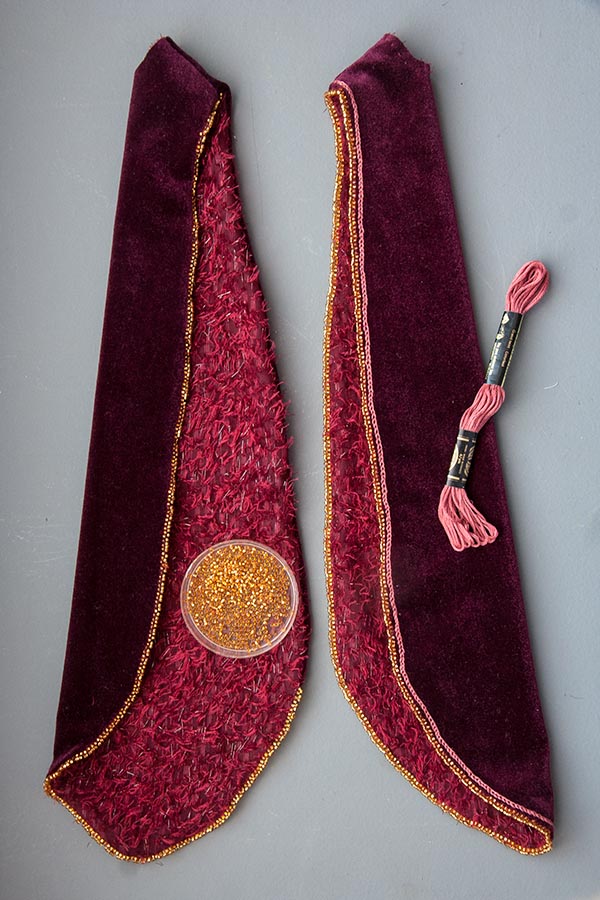
I tried to find a wine, with gold patterned fabric, for the sleeve linings, but couldn't. I bought a wine tulle with magenta and red sparkle dots, and found a wine floral lace, but neither was going to work. Then I found a thin wine sheer in my stash, which had 'fuzzies' all over. It seemed like the perfect thing, giving both some texture and suggesting 'fur', but not on an overwhelming scale.
I've decided against sewing gold metallic trim on the edges, since it would make everything too stiff. Instead I'll picot bead ALL the edges with tiny gold beads. That way I'll get the detailing, but without the stiffness, and the weight of the beads will help with the draping.
The next step is to cut the bodices out of the good fabric. I have to be very careful, since there's only a very small amount of either one of the fabrics that I've chosen, especially the cream with gold sheer for the inner bodice and collar.
Making the Collar
I had been struggling with the pattern and what fabric to use for my Monica's inner bodice and collar. This is the inspiration I'm basing her costume on....
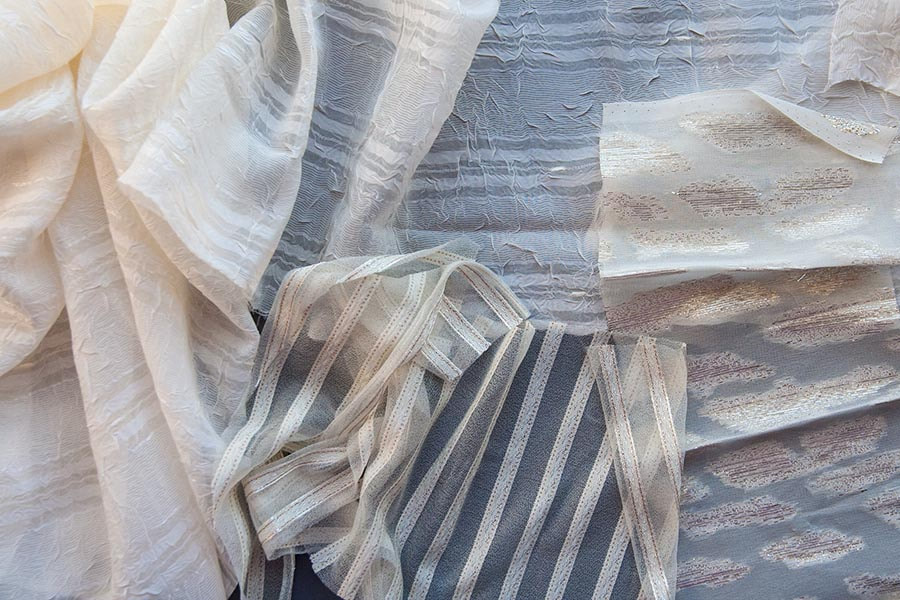
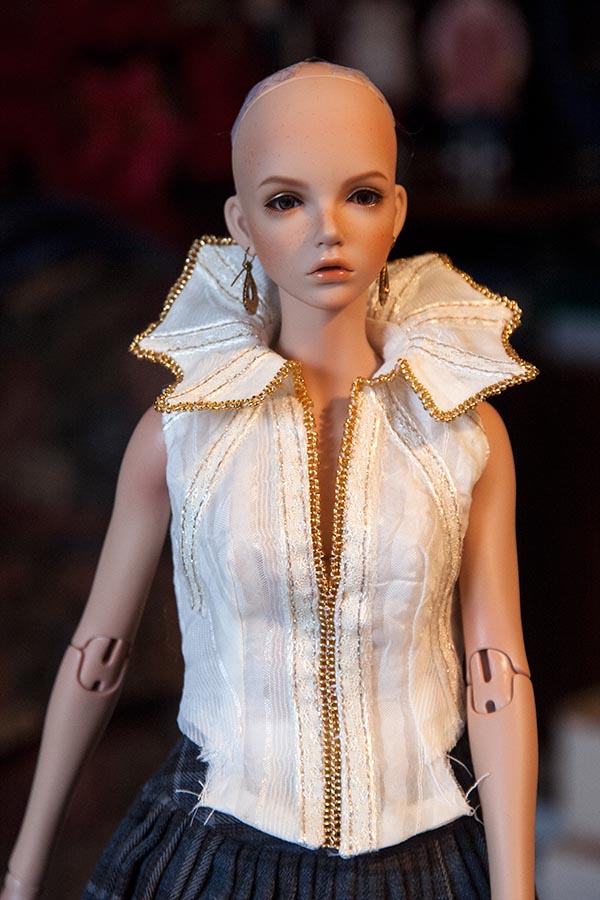
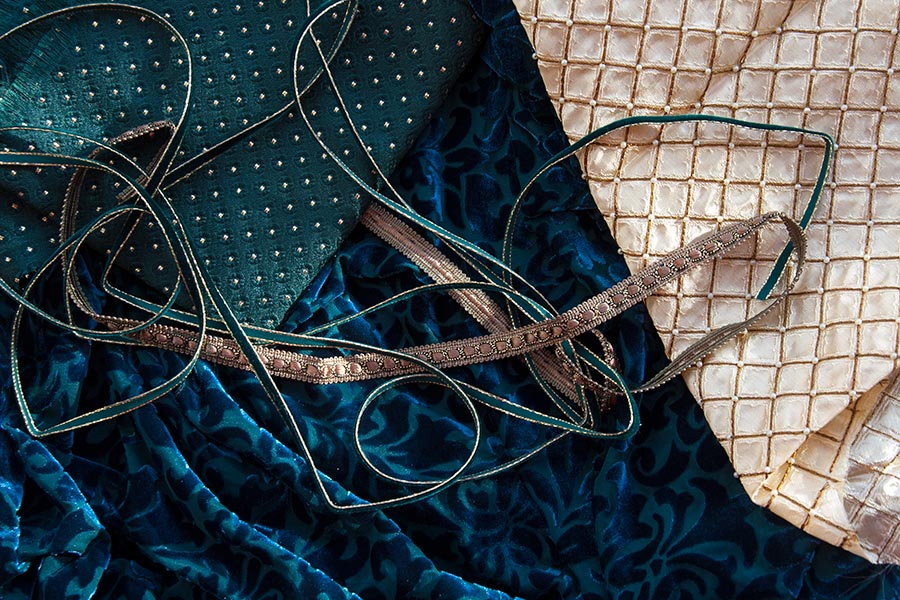
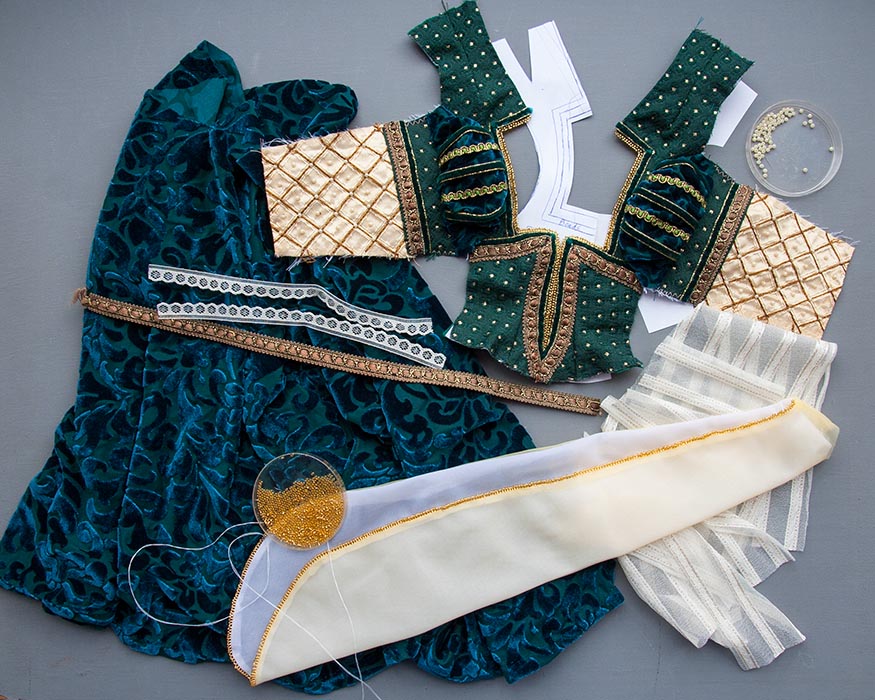
It's clear that her inner bodice is gathered at the neck, but I couldn't figure out how to do that on such a small scale. The choice of fabrics was also eluding me. I wanted something in cream, that was a bit 'sheer', and possibly with a bit of a pattern in it, so ended up with these three....
There wasn't enough of the one on the far right, and I couldn't get the striped one to work with the stripes going in the right direction all flaring out from the neck, so ended up choosing the crinkly cream curtain sheers. I ironed as much of the crinkle out of it as I could, then traced my patterns onto it and cut it out, leaving the lining pinned to the 'right' side, since it was impossible to tell which was the right side, and I didn't want to get confused later trying to match the linings to the right sides later.
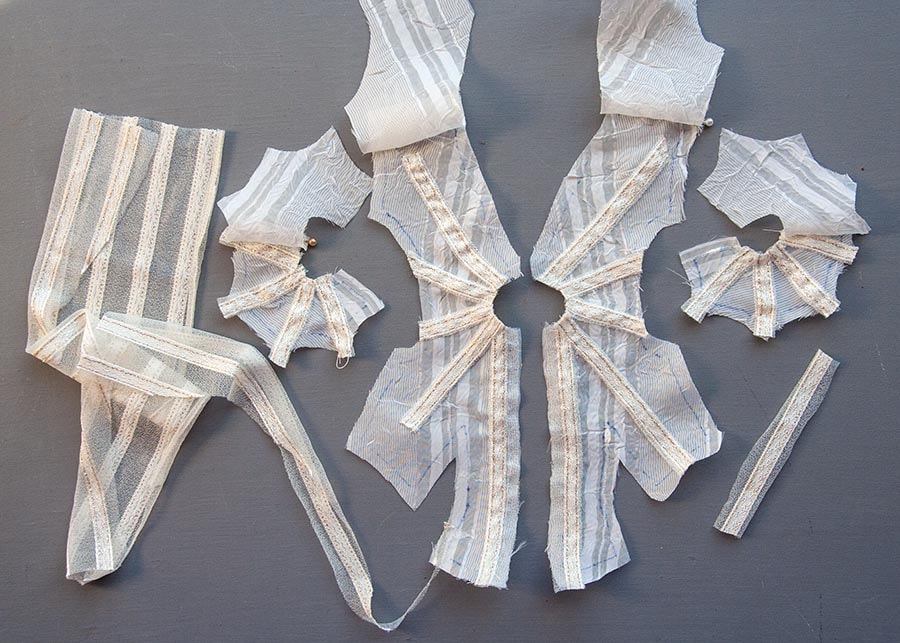
Then it occurred to me that I could cut up the cream and gold striped fabric, and baste it onto the actual collar and bodice fabric to simulate the gathers of the original. So I spent three hours last night hand-basting the strips onto the collar and bodice sections, then a whole five minutes this morning machine sewing over the basting. It might seem like a big waste of time to some, doing all that basting, but with something this small and flimsy it's important to go slowly, one small step at a time. And I'm a perfectionist....
Then it occurred to me that I could cut up the cream and gold striped fabric, and baste it onto the actual collar and bodice fabric to simulate the gathers of the original. So I spent three hours last night hand-basting the strips onto the collar and bodice sections, then a whole five minutes this morning machine sewing over the basting. It might seem like a big waste of time to some, doing all that basting, but with something this small and flimsy it's important to go slowly, one small step at a time. And I'm a perfectionist....
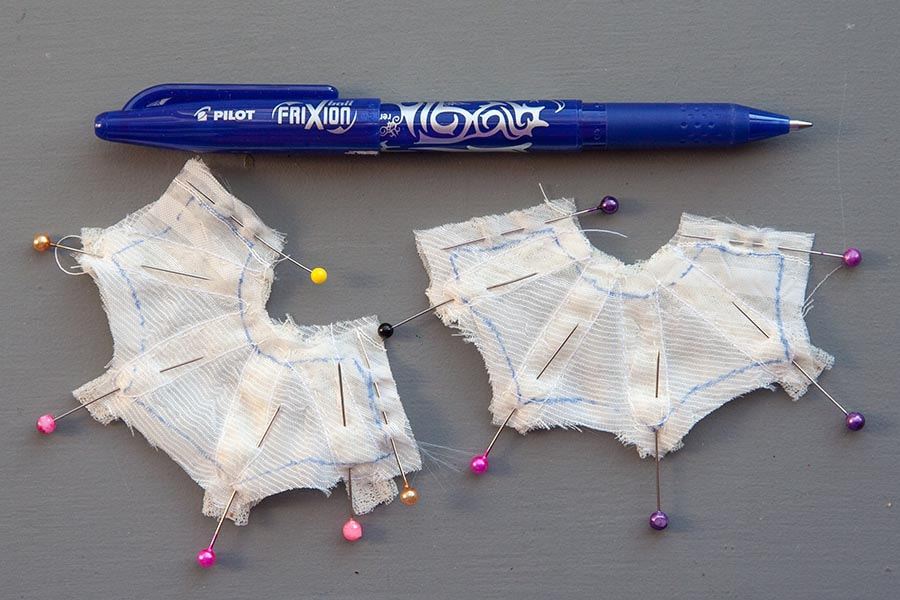
I couldn't press anything yet at this point, since I'd traced my patterns with a pen whose ink disappears with heat. I find it so much easier, and so much more accurate to trace my pattern templates onto the wrong sides of fabric and then sew on that line, but with light coloured fabrics one can't use a regular pen or pencil. I use a Pilot FRIXION. The first one was a gift from a friend. It's perfect for tracing templates onto light coloured fabrics, because it will disappear when you iron it after sewing. When that pen ran out, I found more in the Walmart stationary department....
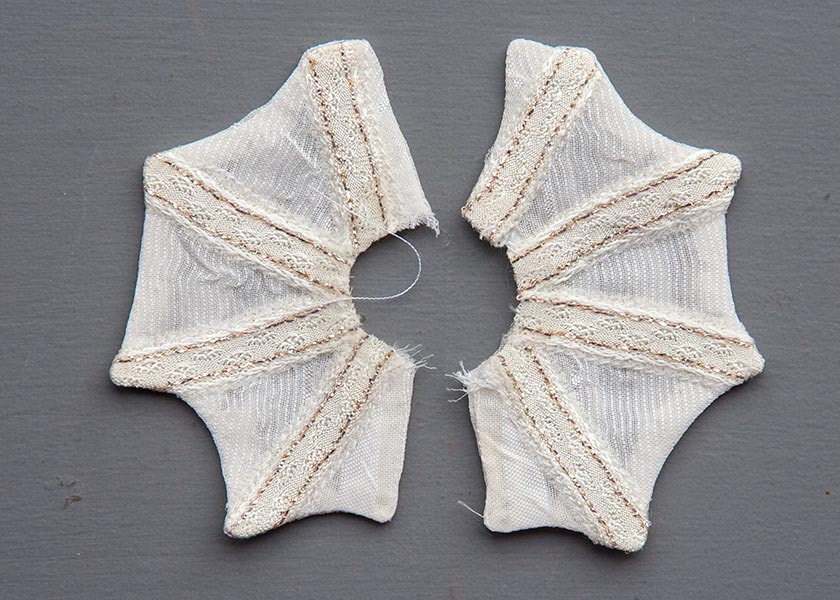
So I pinned the right sides of the collar together, and very carefully machine stitched it together with a small stitch. Then after clipping the corners, turned them right side out, and pressed them.
They might not look very 'pointy', but remember the collar is barely an inch wide, so is much smaller than the photo suggests. They will look much better after I bead the edges, but first I have to attach a neck band to the collar, then sew that into the bodice, and that's always one of my least favourite things to do, especially with something so small and flimsy. And there's TWO of them!
They might not look very 'pointy', but remember the collar is barely an inch wide, so is much smaller than the photo suggests. They will look much better after I bead the edges, but first I have to attach a neck band to the collar, then sew that into the bodice, and that's always one of my least favourite things to do, especially with something so small and flimsy. And there's TWO of them!
Progress on Monica's Gown
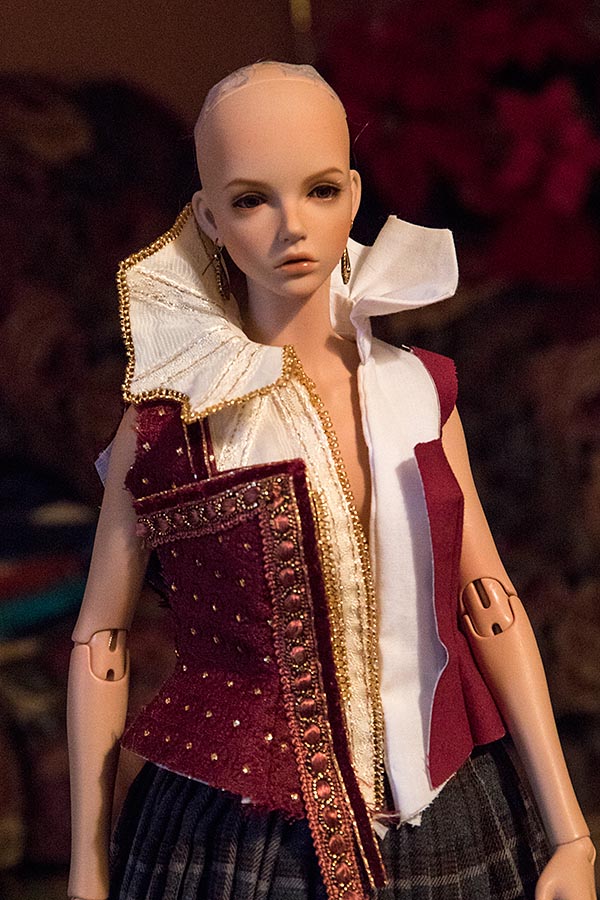
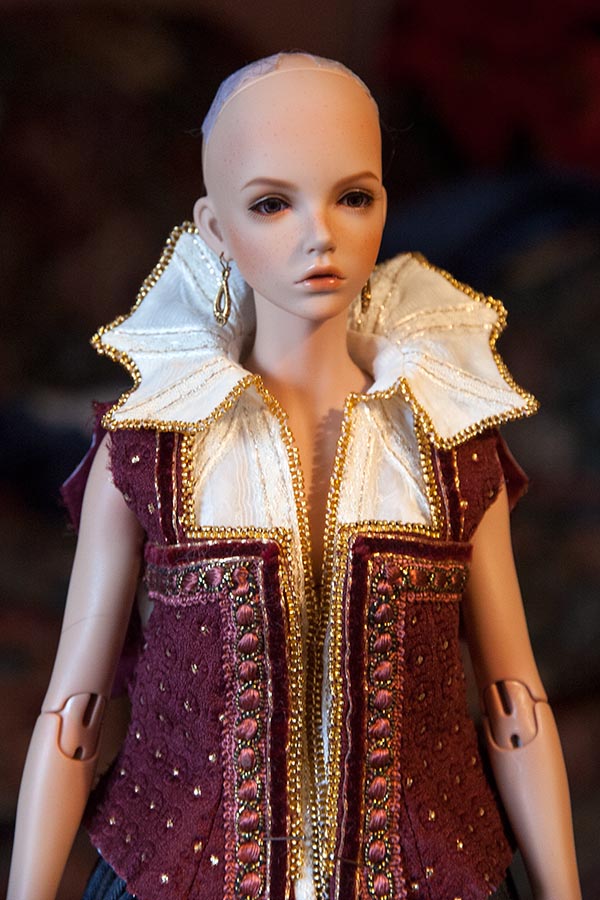
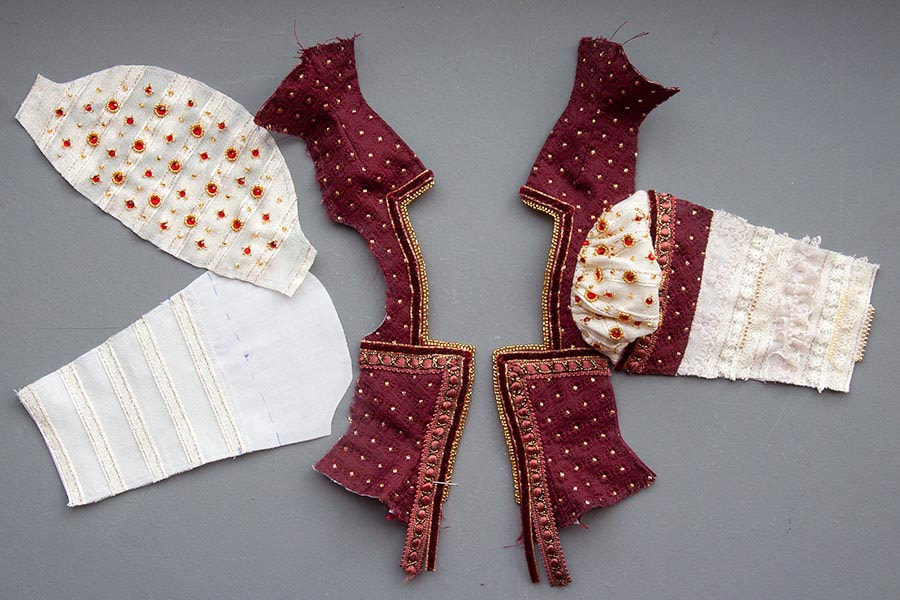
I made the mistake of zooming ahead on just one side. By 'mistake', I mean, it's so much better to work on BOTH sides in tandem so they are done together. Anyways, I took a photo of Bianca with the test bodices on one side and the partially completed final bodice halves on the other...
Then it was back to square one with beading the second side of the inner bodice. I beaded around the edge to about halfway down the front, when I started beading the two sides together, because my girl doesn't want cleavage showing down to her waist.....
Then I had to sew the trim and bead the edges of the second over-bodice section. The lower front trim isn't finished because it won't get done until after the skirt gets sewn on...
Then tried it on loosely over the inner-bodice. I can't sew up the underarm seams until after I do the sleeves, and those are next....
The sleeves will be the most complicated part of the entire costume. I do most of the figuring out of how I'm going to make something, well before I draft any patterns or cut any fabrics. I had to decide if I wanted tight-fitting sleeves that would require removing her hands to get them on, or to leave them open from the elbow down, and insert eyelets to do them up with lacing. Tight sleeves would be more accurate, but I'm not a big fan of having to remove the doll's hands in order to dress them. So lacing it's going to be.
The sleeves will be made up of four individual sections; a puffy upper sleeve embellished with beads and jewels, an upper sleeve band to match the bodice, a fancy cream fabric lower sleeve, and huge hanging sleeve. The first three will get built up onto the sleeve lining, and after the sleeve and underarm seams are sewn, the over sleeves will get added. So first will be the upper sleeve puffs.
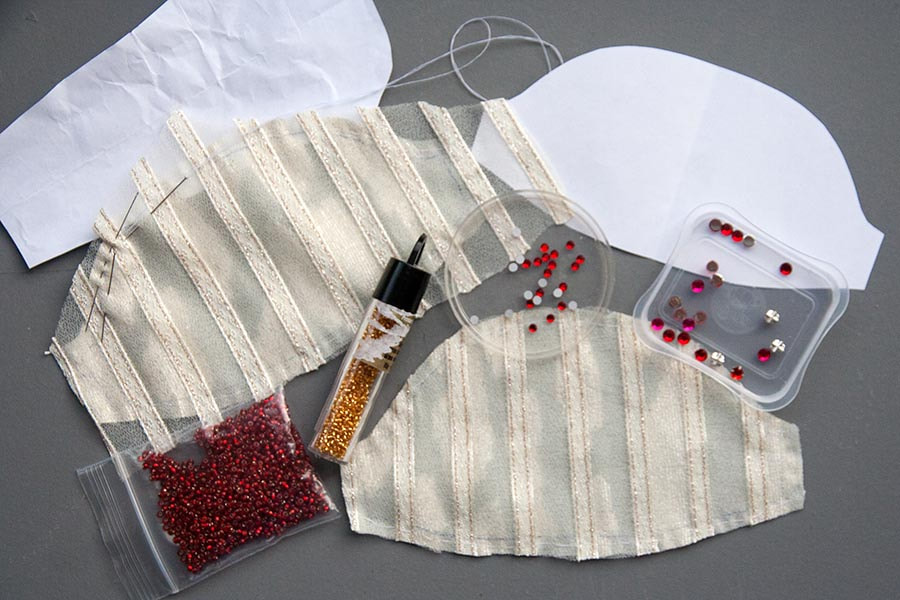
I had a bit of a nice sheer, cream fabric with gold threads woven in it, but it was too flimsy to embroider gold lines onto, so I got some cream tulle to help support it. But then I saw the scraps of cream striped fabric with the gold lines already in it. So, forget the tulle, and baste that striped fabric over top instead.
I checked out the situation with my red rhinestones, and didn't have nearly enough in my stash, so off we went to Michaels with some 50% off coupons to buy some more. I need to glue them all on today, so I can bead around them tomorrow.
Jewelled Sleeves
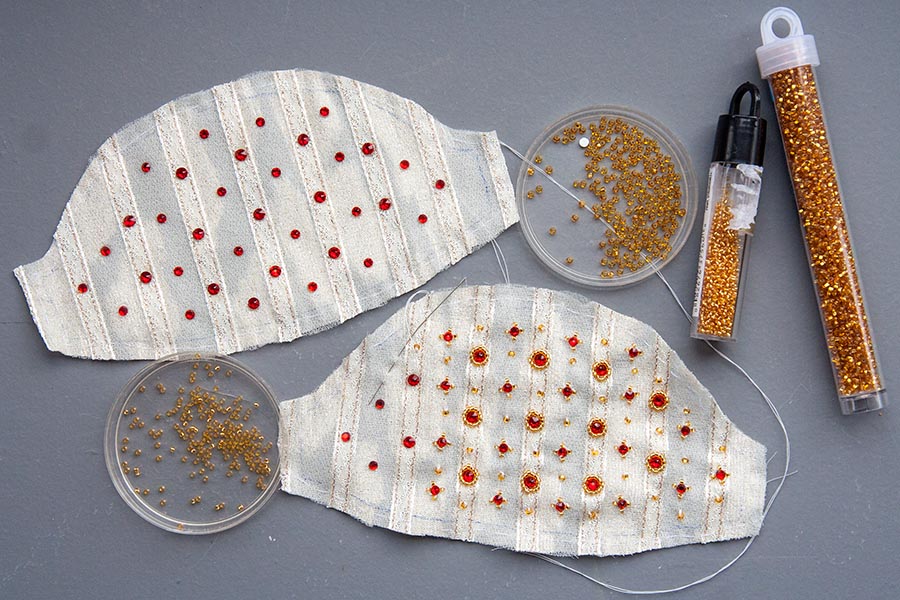
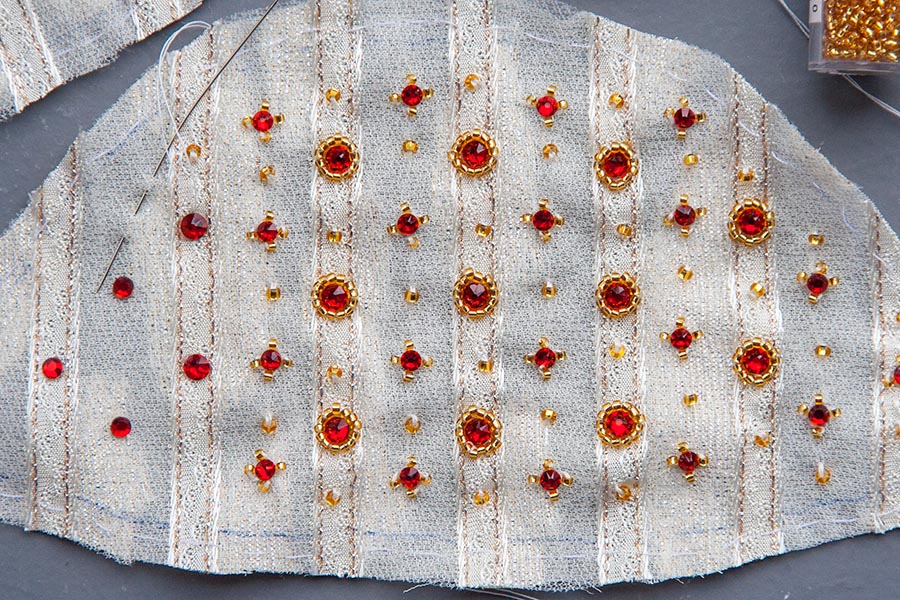
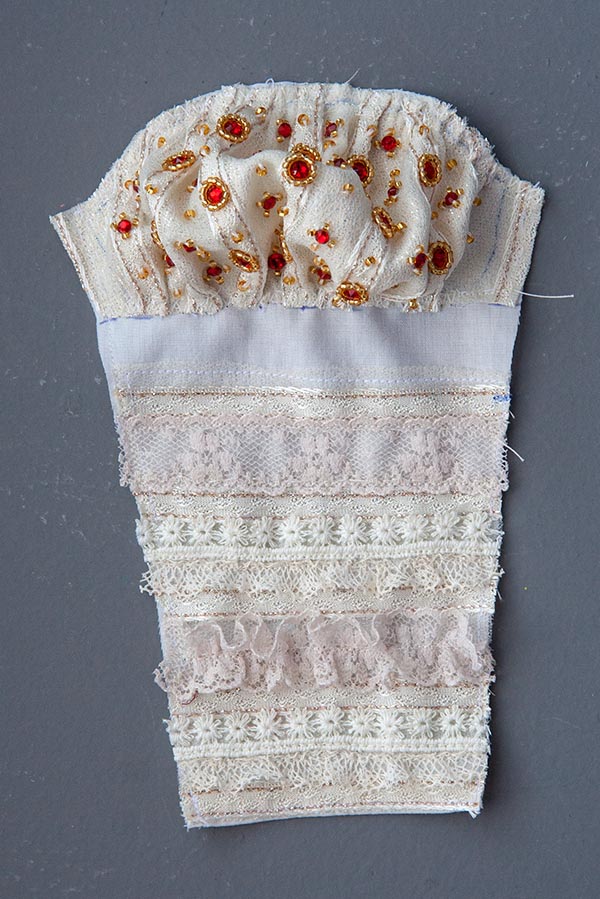
Today I'm working on beading the small puffy sleeves which will be at the top of Monica's sleeves. I bought some red rhinestones and glued them all into place last night, so they'd be ready today. Now I have to bead around them to simulate a gold jewellery setting....
Taking a closer look....
The beads are very small, and are hard on the eyes, but I'm almost done the first sleeve.
Oh, and I changed my mind about the main sleeves yet again. I made a test sleeve to see how far up there would need to be lacing, and decided that with her arms being so slender, the eyelets and lacing would take up too much space, so decided to do away with the lacing idea, and make a slender sleeve sewn down to the wrist, and I'd just have to remove her hands to get them on. So now Bianca has paper clips instead of hands.
Oh, and I changed my mind about the main sleeves yet again. I made a test sleeve to see how far up there would need to be lacing, and decided that with her arms being so slender, the eyelets and lacing would take up too much space, so decided to do away with the lacing idea, and make a slender sleeve sewn down to the wrist, and I'd just have to remove her hands to get them on. So now Bianca has paper clips instead of hands.
Adding Texture
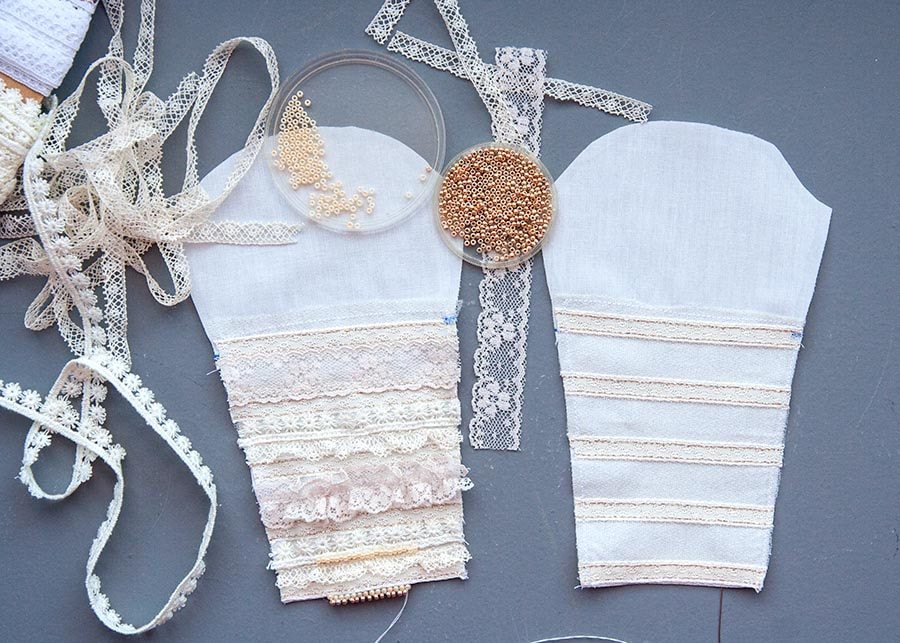
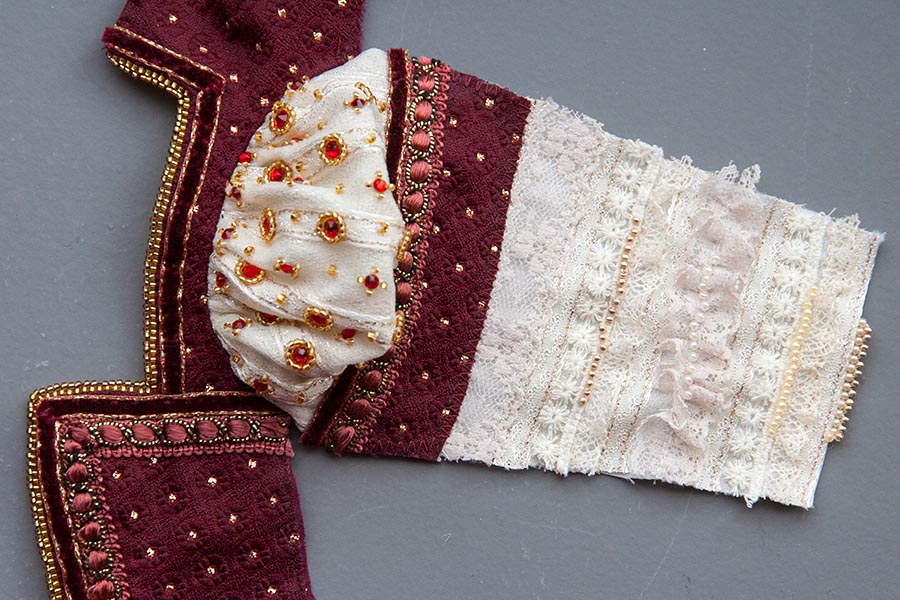
So I've started building up the sleeves. The original doesn't have all the puffs and ruffles like the doll version, so I'm trying to stick more to the original, and am building up rows of texture with narrow cream laces, some applied flat, and others gathered a bit....
It's a lot easier to do the beading while the sleeve is still flat, but I can only bead in the middles since my machine won't like the beads too close to the seam. I suppose I could change the foot on the needle, but I'm too lazy for that, so I'll just have to finish the beading after the sleeve is sewn.
One Sleeve In
So, against my better judgement, I went ahead with the one sleeve, finishing it off as far as I could, and then sewed it into one of the bodice halves. I should have been working on both sleeves in tandem, but was too excited to see how it would turn out, so just zoomed ahead with one....
Taking a closer look....
Then I sewed the underarm and sleeve seam.....and tried it on....
It's looking really good, and now I feel like cutting out the skirt and over-sleeves, but I really should do the second sleeve first. And that's what I meant about ignoring my better judgement, since it's rather hard to go right back to the beginning on the second sleeve now. Sigh.....maybe I can do both at the same time, and alternate between the two, since the skirt and over-sleeves have very, long hemlines - and there's lots of basting involved. Good idea!
And in case anyone is wondering why Bianca is still wearing her thick plaid skirt with petticoat underneath, it's to help me keep in mind that I needed to make her bodice wide enough to work with all those layers. I've made the mistake of making a skin-tight bodice before, only to have it end up with a big gaping space at the back after inserting the skirt. It's so easy to forget that the bulk of the skirt will add to the circumference at the bottom of the bodice, especially if the top of the skirt ends up inserted inside the bottom of the bodice, which is how I always do it. So it's important to think ahead and make the bodice wide enough right from the start, to compensate for all that extra fabric.
And in case anyone is wondering why Bianca is still wearing her thick plaid skirt with petticoat underneath, it's to help me keep in mind that I needed to make her bodice wide enough to work with all those layers. I've made the mistake of making a skin-tight bodice before, only to have it end up with a big gaping space at the back after inserting the skirt. It's so easy to forget that the bulk of the skirt will add to the circumference at the bottom of the bodice, especially if the top of the skirt ends up inserted inside the bottom of the bodice, which is how I always do it. So it's important to think ahead and make the bodice wide enough right from the start, to compensate for all that extra fabric.
the Queen's Sleeves
Monica's gown isn't going very quickly this week with it being December 24th, and all the Holiday preparations going on. The second inner sleeve is slowly taking shape....
The first over-sleeve is finished. The beading took three nights to do, and the embroidery another. I'm on day three of the second sleeve, but it's nowhere near done....
I doubt there will be much time to work on them the next few days, with it being Christmas and all, but there should be time later this week. I'd really like to get this gown done.
A Queen for Lawrence
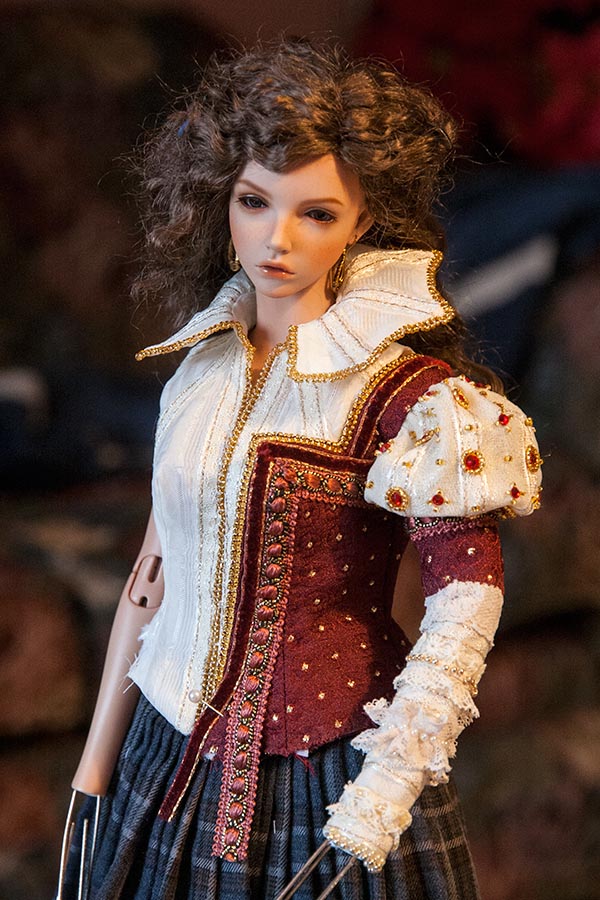
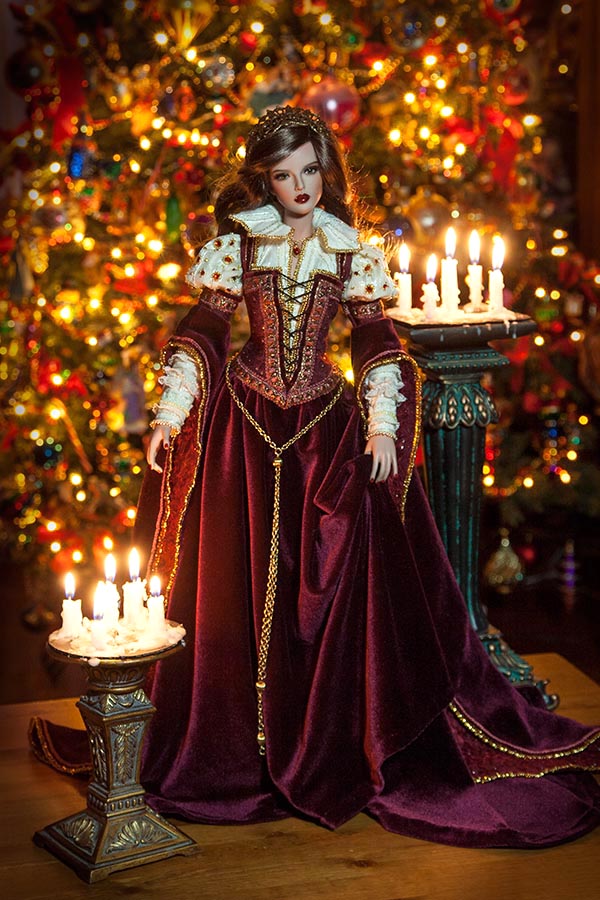
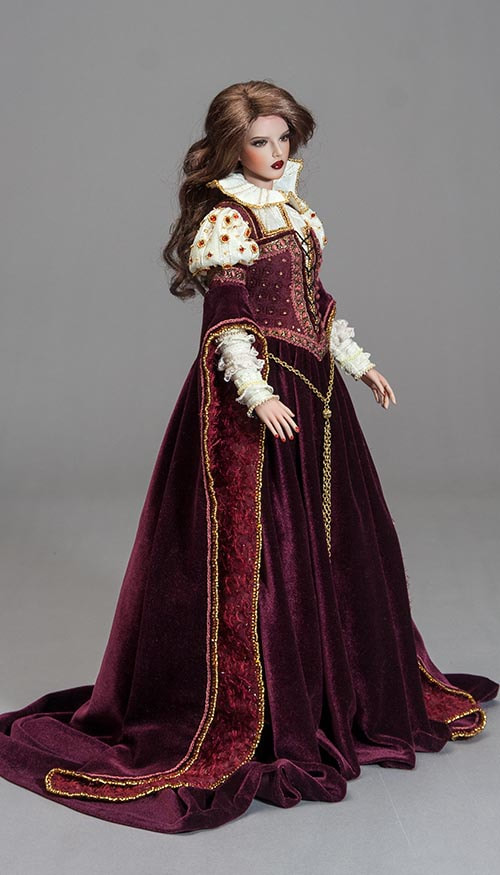
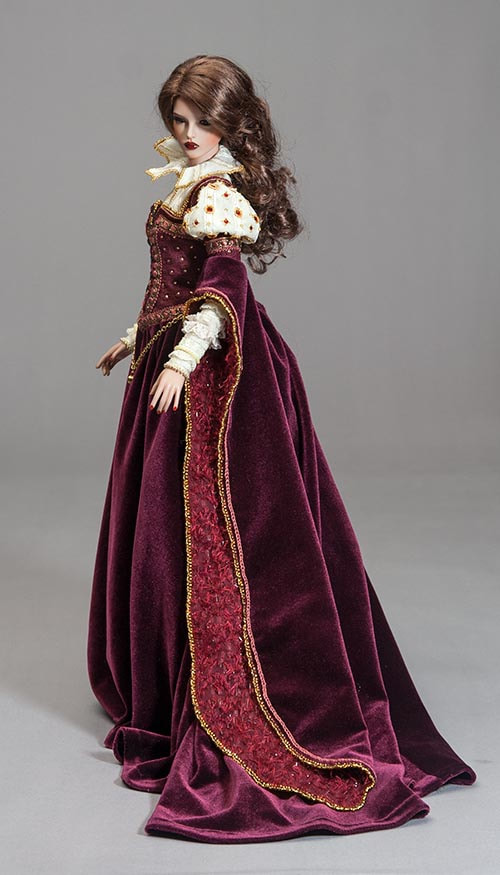
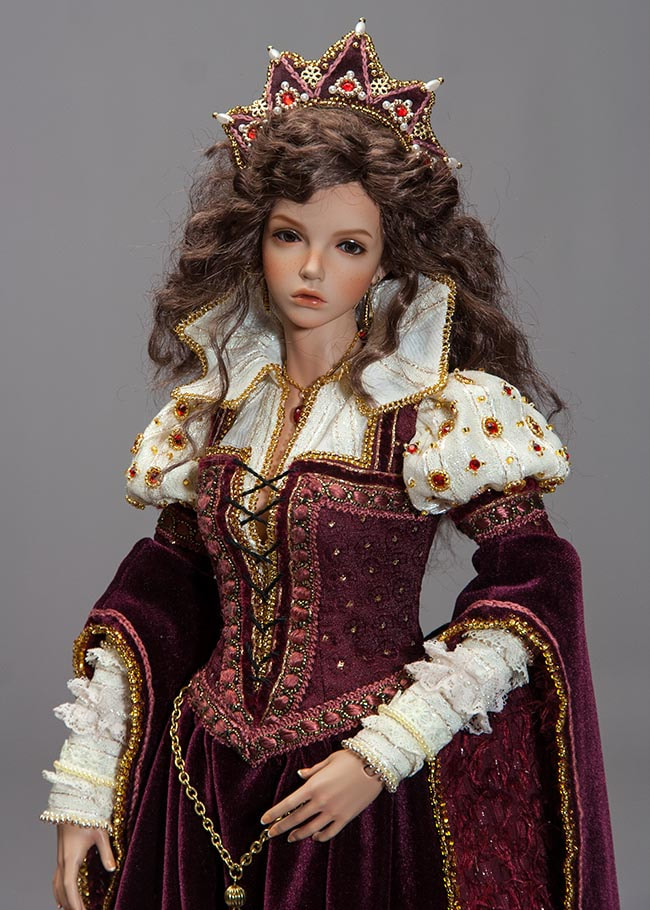
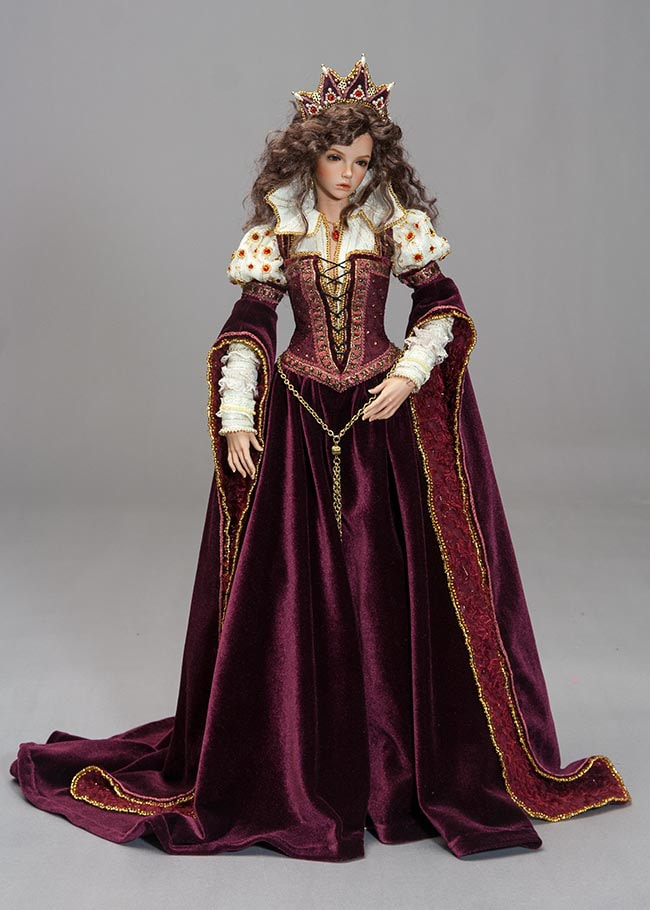
It's the day after Christmas, so guess what I've been doing all day? Finishing Monica's gown. All the pieces were so close to being done two days ago, that today I just worked on it the whole day until I was finished.
And of course that meant taking a photo....
And of course that meant taking a photo....
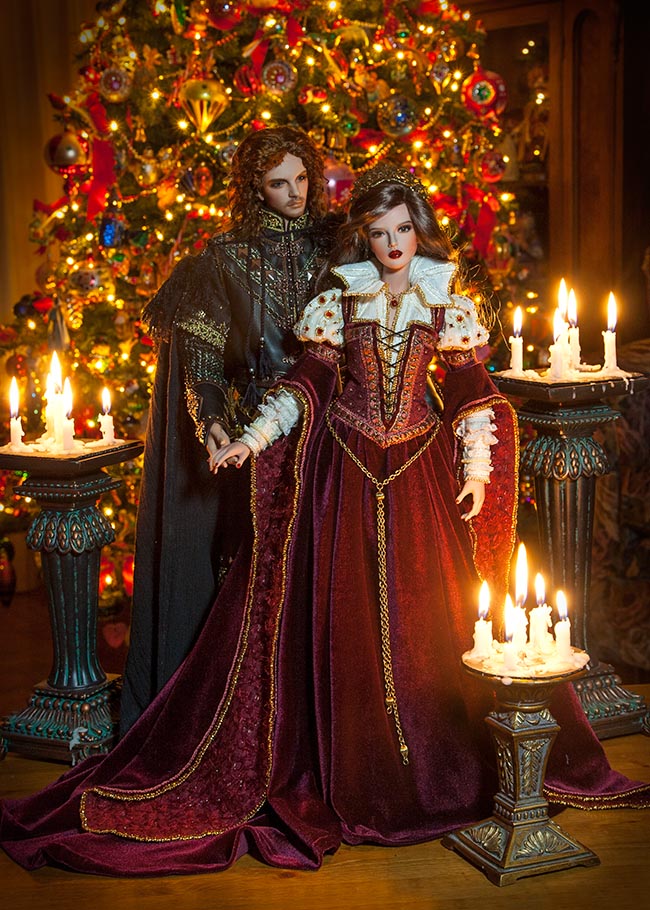
It was rather challenging to put all together, but I'm pretty happy with it. I was surprised that the gown fit Monica as well as Bianca in exactly the same way. No back overlap required. Only the sleeves are a bit tight for Monica, and she has trouble bending her elbows. But then, queens don't exactly have to do much, so it will likely not be a problem. Especially not after she gets her new hands. I bought her a pair of the IH Fantasy FID hands with the long nails, which will get painted the same dark red as her lips and gown.
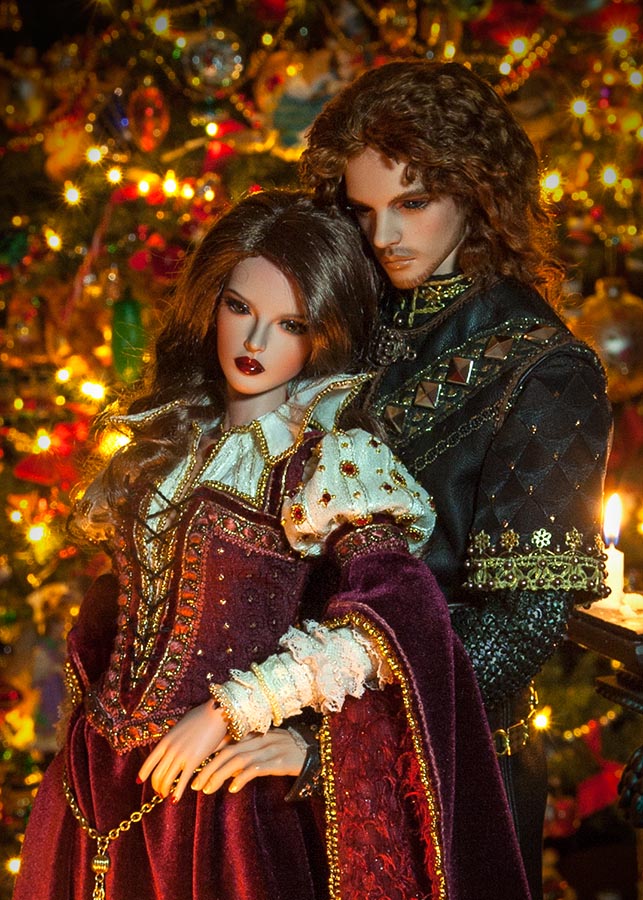
I think she's gorgeous, and it would seem that Lawrence agrees.....
I think she's gorgeous, and it would seem that Lawrence agrees.....
I'm totally in love with the Fashion size dolls. It's probably a good thing they are only a recent development in the BJD world, or I'd probably never have gotten into all the smaller dolls, and the stories with them.
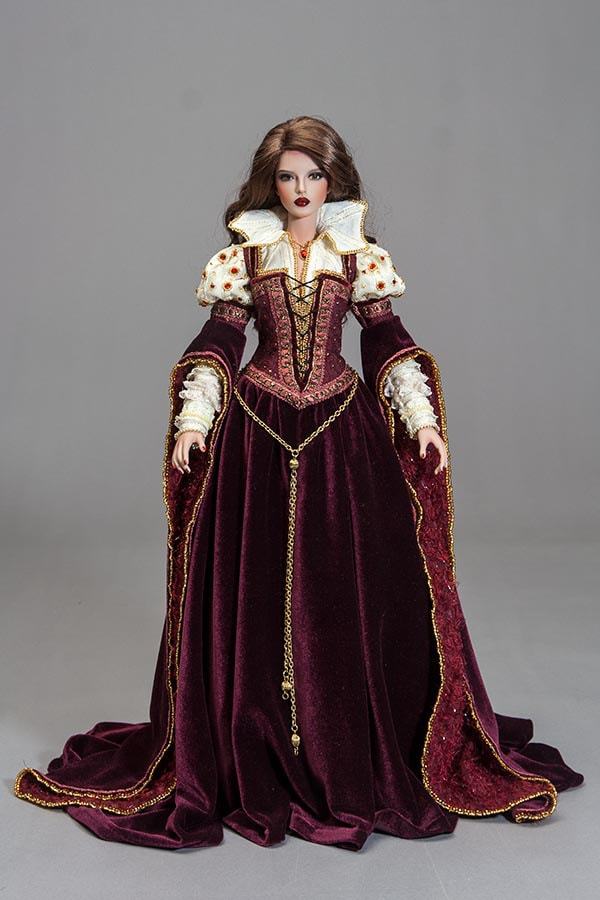
Studio Shots
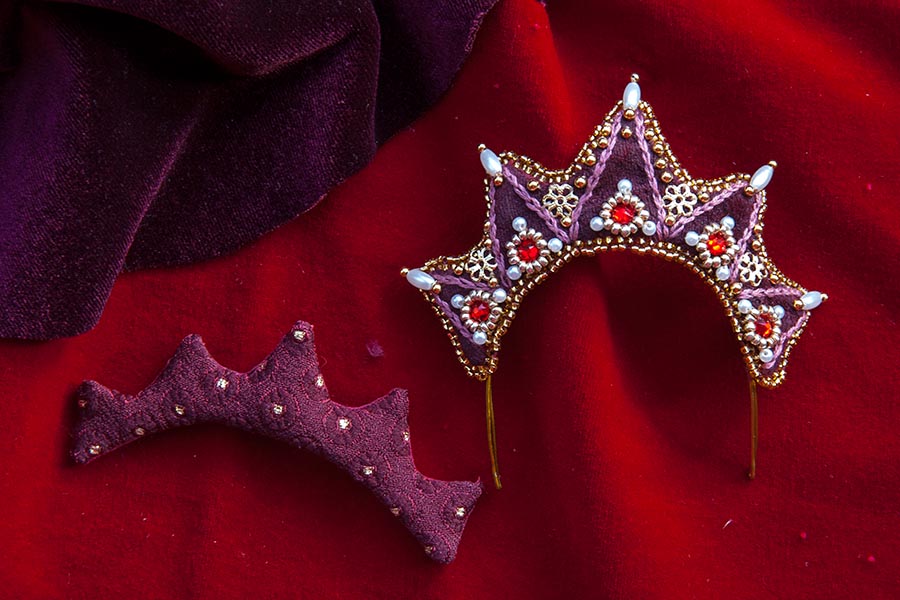
And finally, I made her a tiara...
The gown on FID Bianca...
Just Patterns
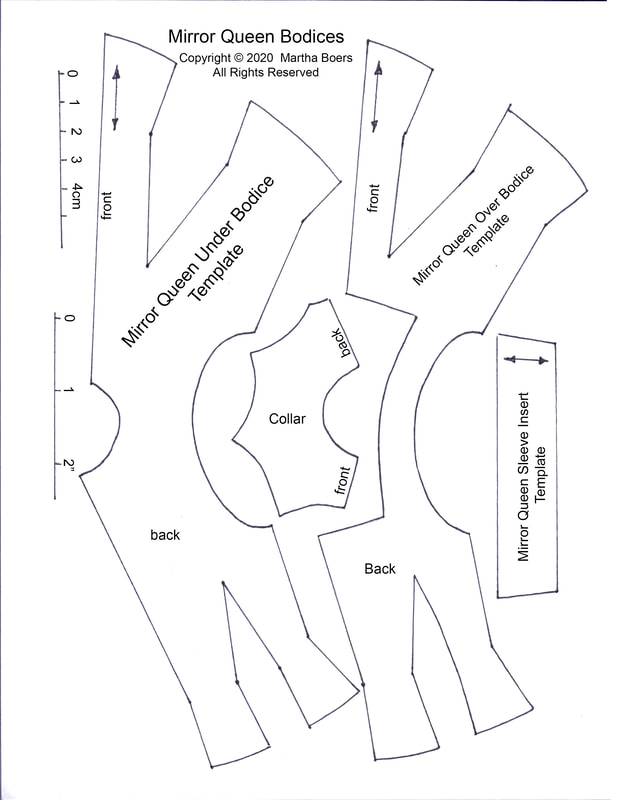
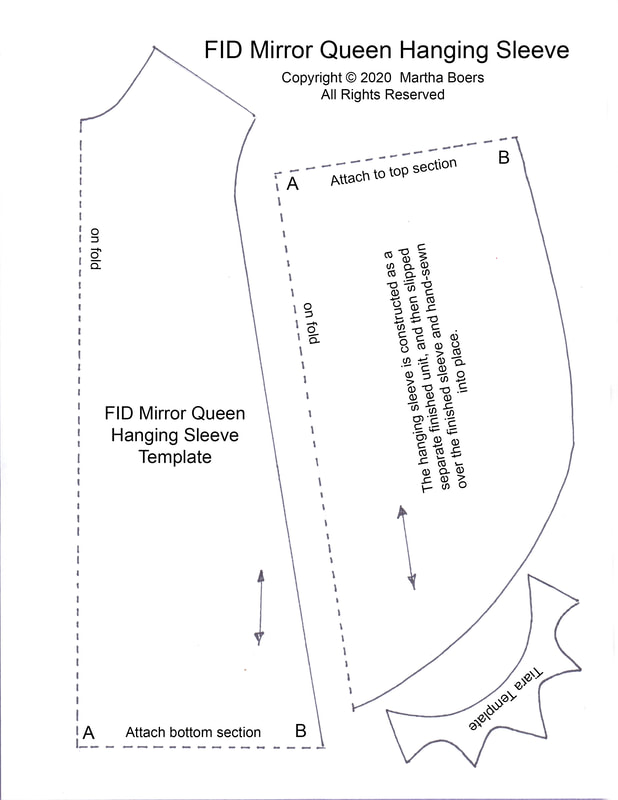
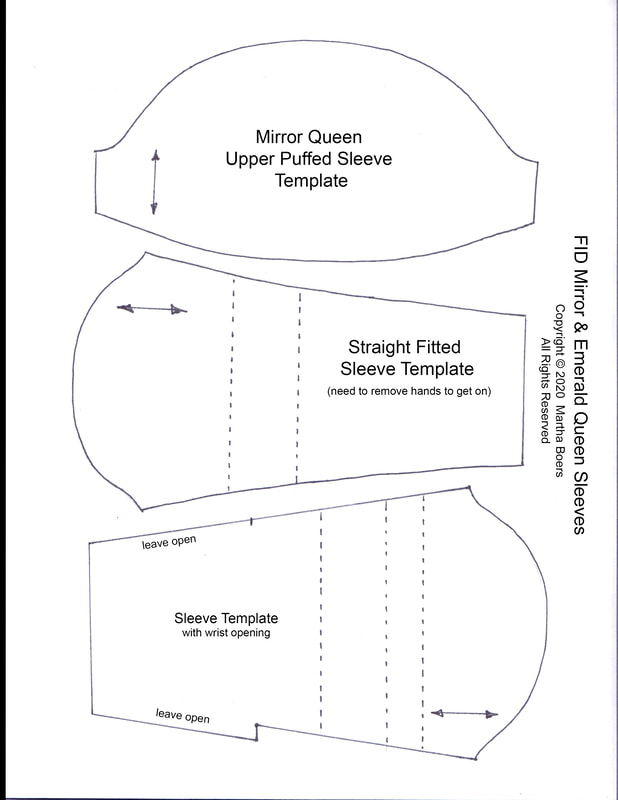
These patterns and templates are intended for more experienced sewers. There are no instructions, so you are on your own, although the under construction photos in this 'Creative Journey' may help.
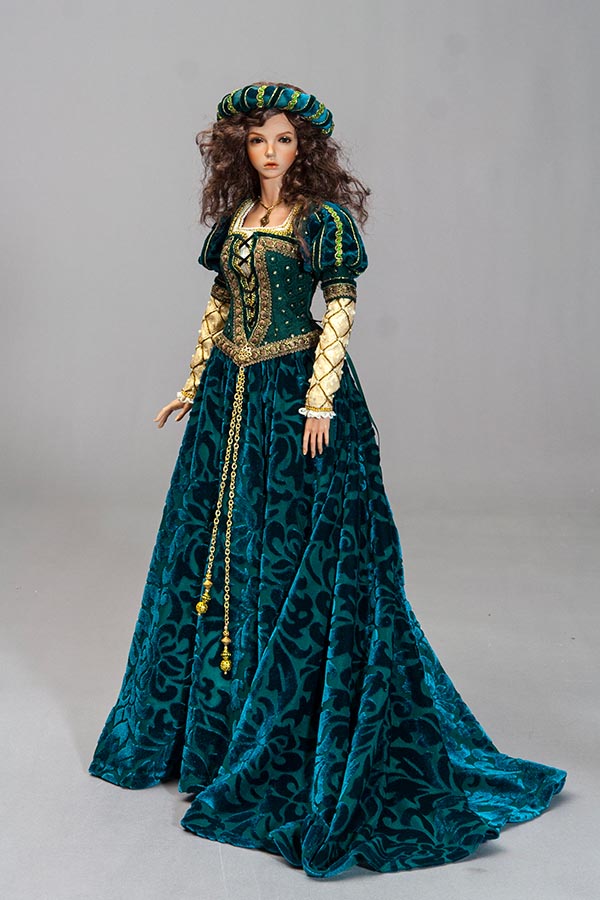
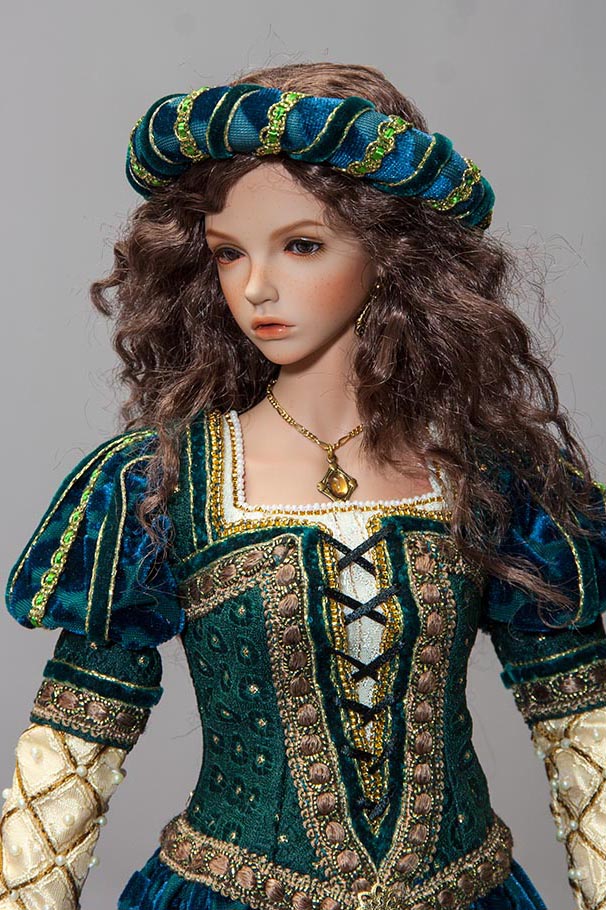
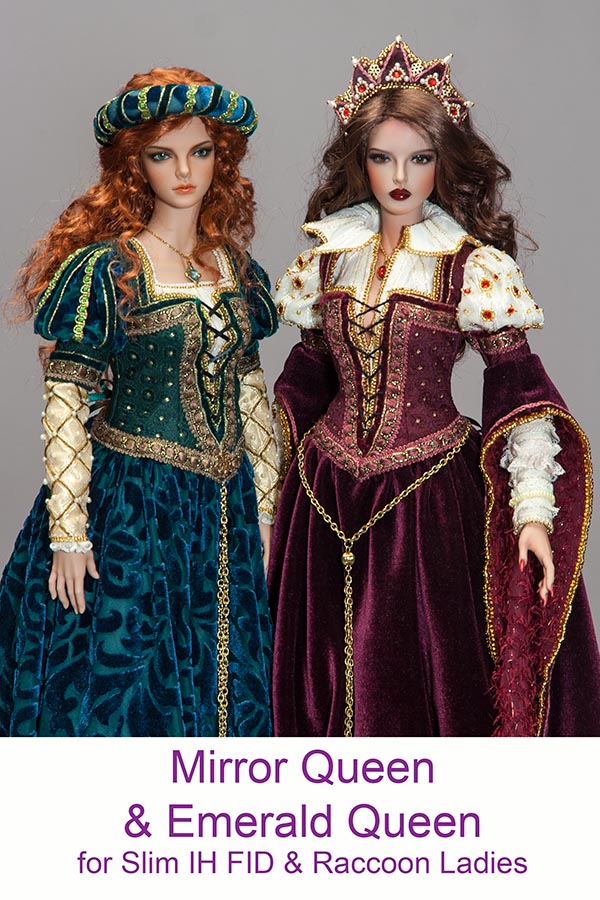
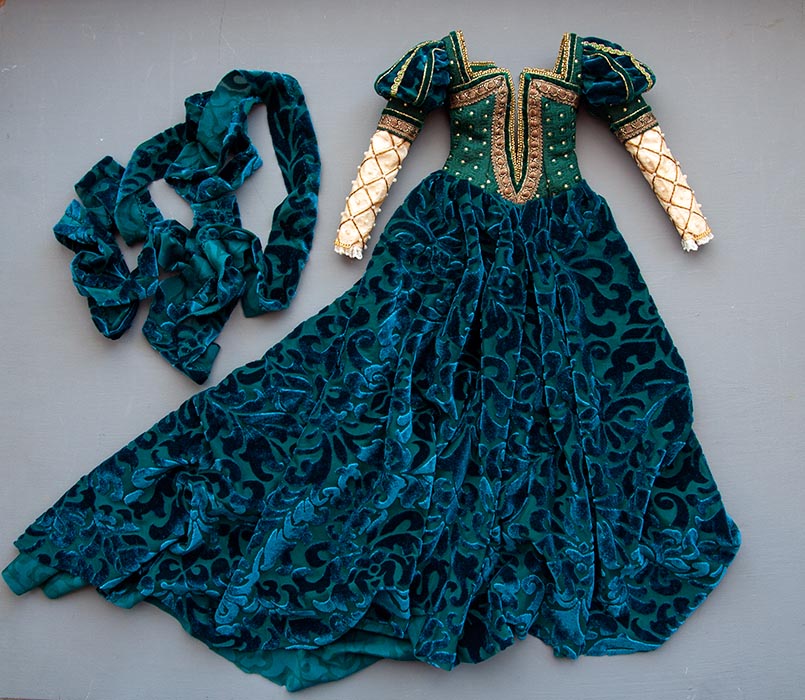
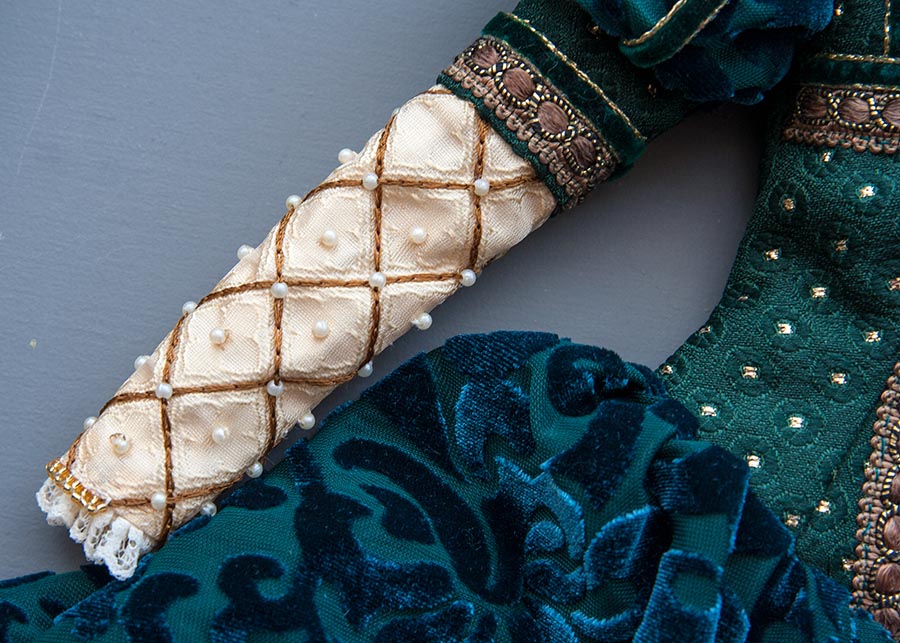
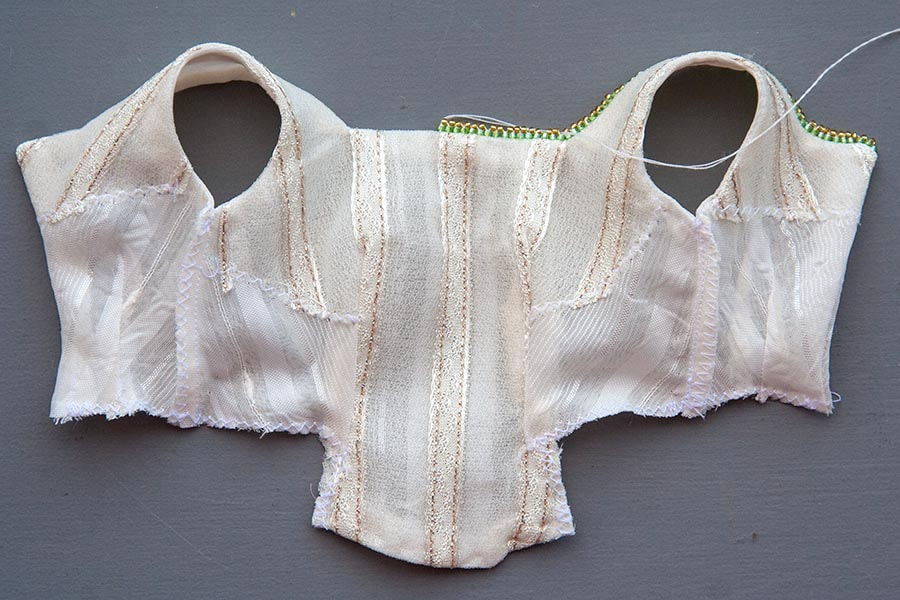
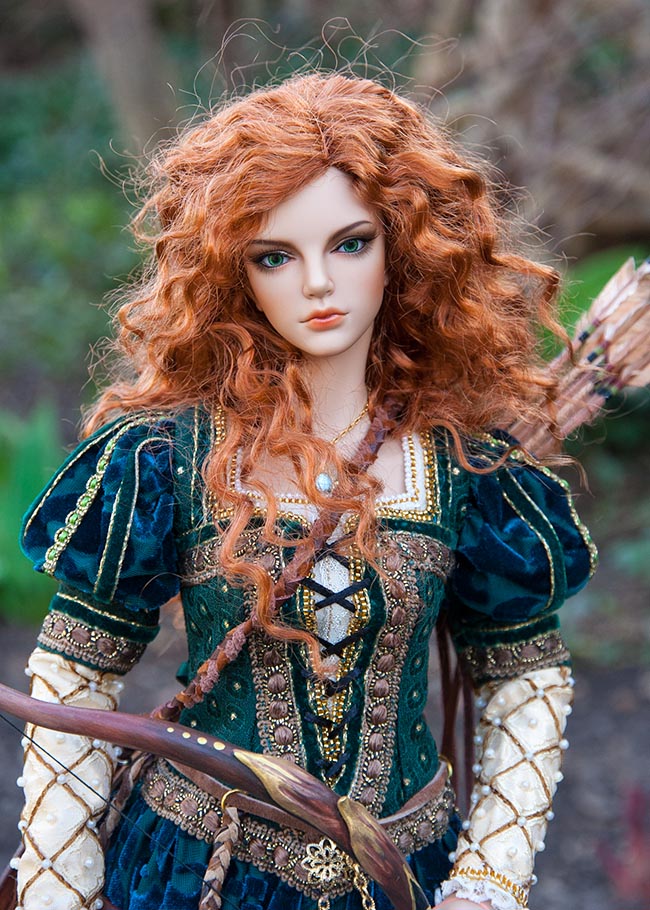
A few months later I made a similar green version entitled the 'Emerald Queen'. It has the same over bodice, but a different under bodice and different sleeves.
A few months later I made a similar green version entitled the 'Emerald Queen'. It has the same over bodice, but a different under bodice and different sleeves.
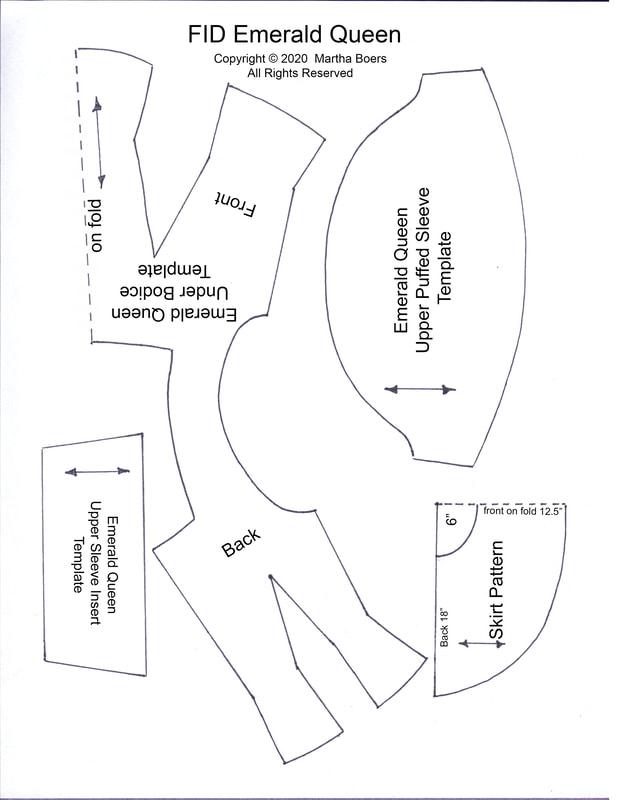
To download Pattern pdf, click on image below..
There are four pages in the pdf. Note, pieces marked 'Pattern' include seam allowances. Pieces marked 'Template' are meant to be traced onto the wrong side of your fabric. The traced lines become the sewing lines. Remember to add the seam allowances
Under Construction Photos for the Emerald Queen
Choosing the fabrics and trims....
Checking the fit of the bodice pattern...
Working on the over bodice and sleeves...
Completed sleeves sewn into over bodice. The semi-sheer tricot hanging sleeves were later rejected, and ended up on another gown.
The finished over-dress was way too long, so I had to cut a length off and hand-stitch the hem all over again...
Close up look at one of the sleeves, with a few beads still needing to be added....
The inner bodice. I changed the pattern afterwards so it would be easier for others to sew into the over bodice.
Copyright © 2020 Martha Boers
All Rights Reserved
