Making Miniature Cakes
Copyright © Martha Boers 2015. All Rights Reserved
This tutorial is not intended to take you step by step through the making of any one particular cake,
but rather goes through the basics, and then shares what I did for each of my own doll cakes.
This tutorial is not intended to take you step by step through the making of any one particular cake,
but rather goes through the basics, and then shares what I did for each of my own doll cakes.
Miniature Cake Basics
1. First of all decide what kind of cake you'd like to make. Hopefully you won't feel compelled to try copy one of mine, but will come up with an idea of your own. For inspiration Google 'Birthday Cakes', or 'Girl's Birthday Cakes', or whatever kind of cake you'd like to make, and there will be dozens of pictures to help inspire you. Decide what you'd like to make.
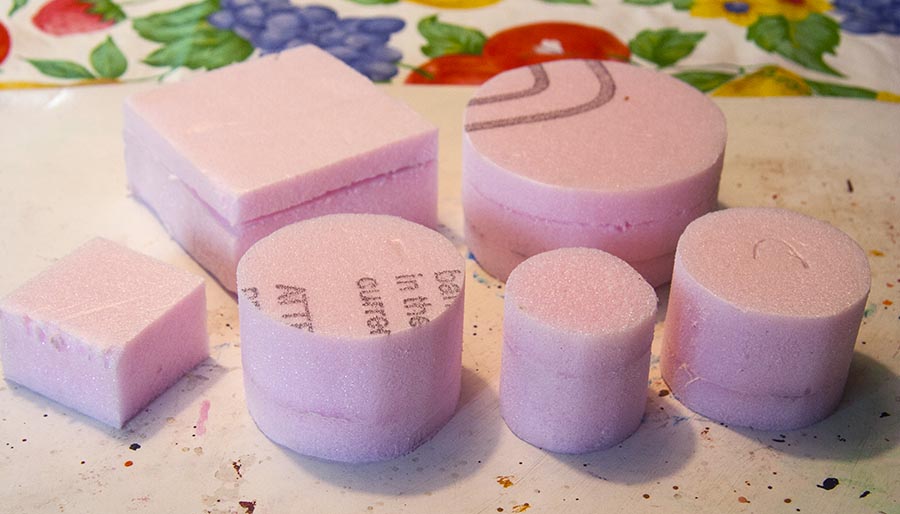
The first step is to cut the basic cake shapes out of styrofoam. I use pink insulation styrofoam. *IMPORTANT - if you are intending to make your cake 'icing' and 'decorations' out of polymer clay and need to bake the 'cake' in the oven, DO NOT use styrofoam as a base, as styrofoam lets off dangerous fumes when baked. For cakes with polymer clay 'fondant', use a wooden base - which I will cover later. For now we are focusing on cakes with styrofoam bases, covered with air-dry 'icing'.
If the styrofoam isn't thick enough, cut a second layer and glue them together - as many of the cakes below. Let glue dry.
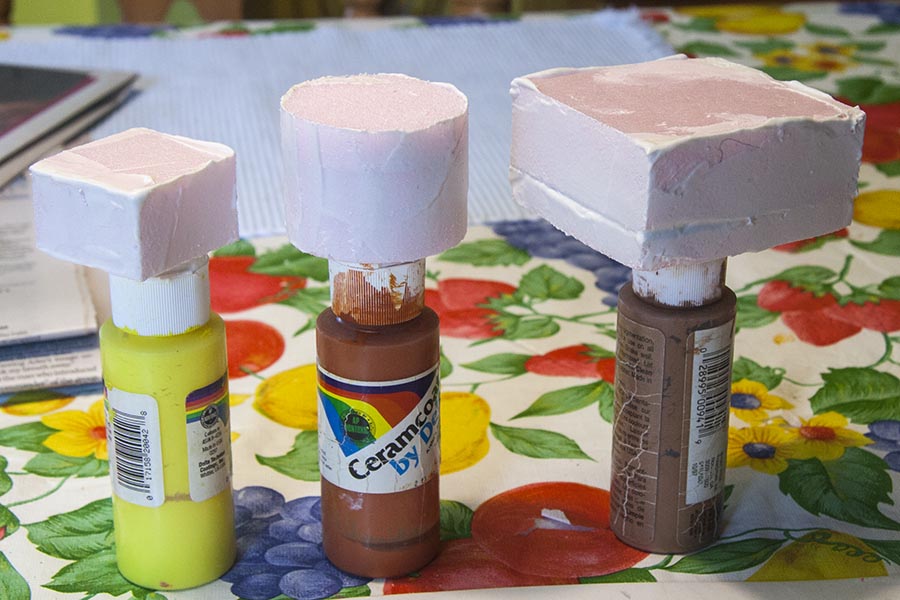
2. Cover sides of cake with thinned drywall compound. I only cover the sides at first, since it's impossible to hold the cake if I do the whole thing at once. This first layer is mostly to fill cracks and any unevenness. I use drywall compound, but it's also possible to use poly-filla, or other crack filler, or even thinned Paperclay. Elevate the cakes to dry.....
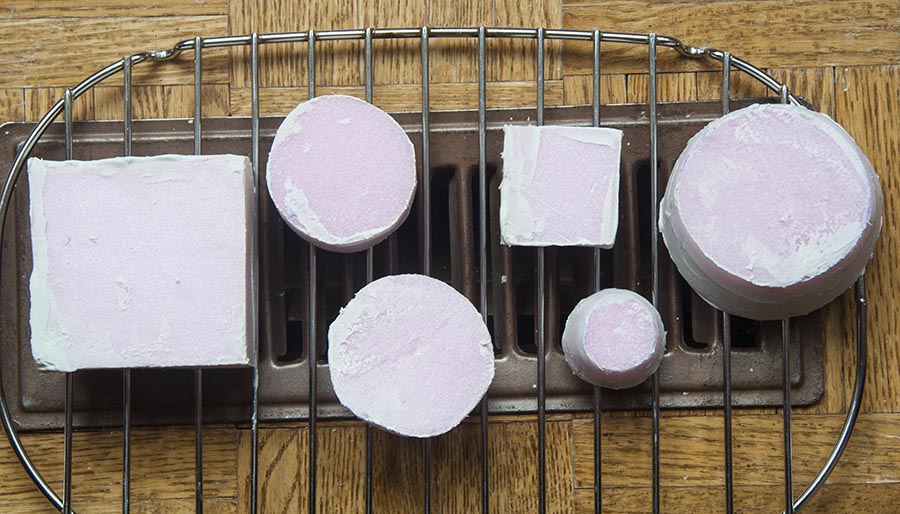
..or place on wire racks over heating ducts. In winter when the furnace is on the cakes dry very quickly....
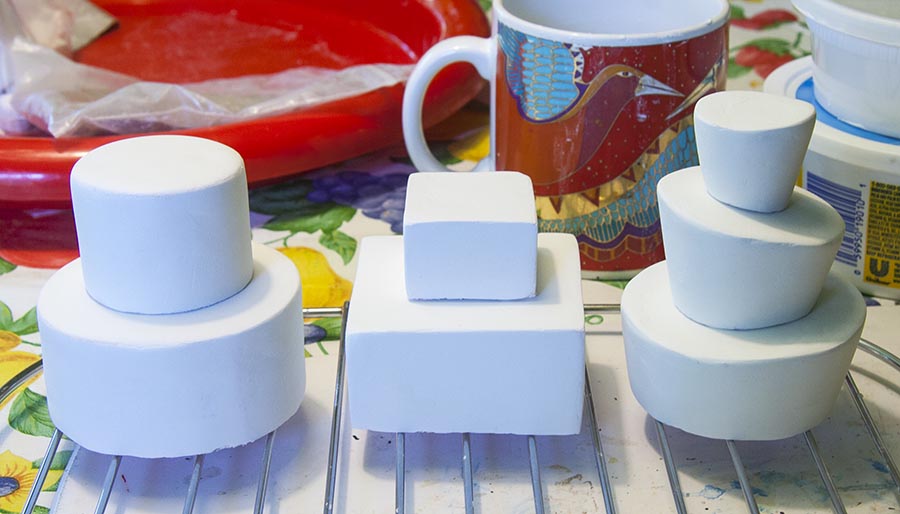
3. When the crack filler has dried, sand the edges smooth, and apply another fresh layer, smoothing with a knife. Let dry, and sand again. Apply crack filler on top smoothing as much as possible. Let dry, and sand perfectly smooth. This make take a few layers.
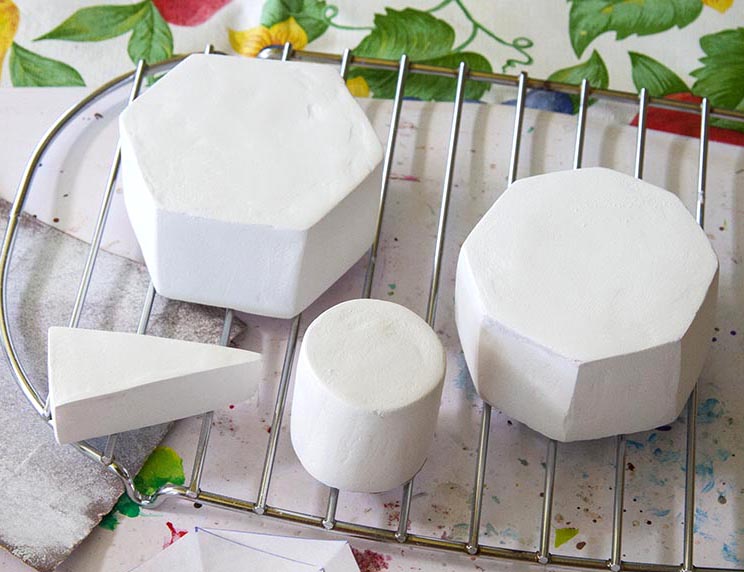
Here's what the covered styrofoam cakes should look like when they are ready to decorate....
Here's what the covered styrofoam cakes should look like when they are ready to decorate....
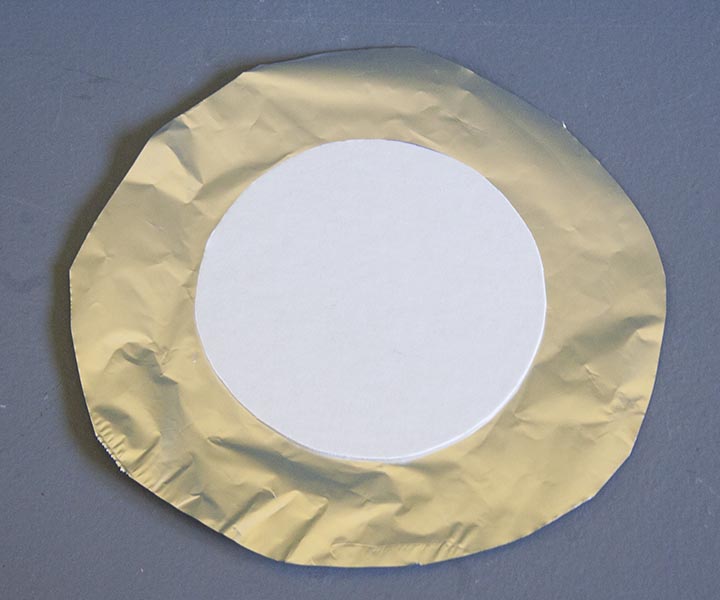
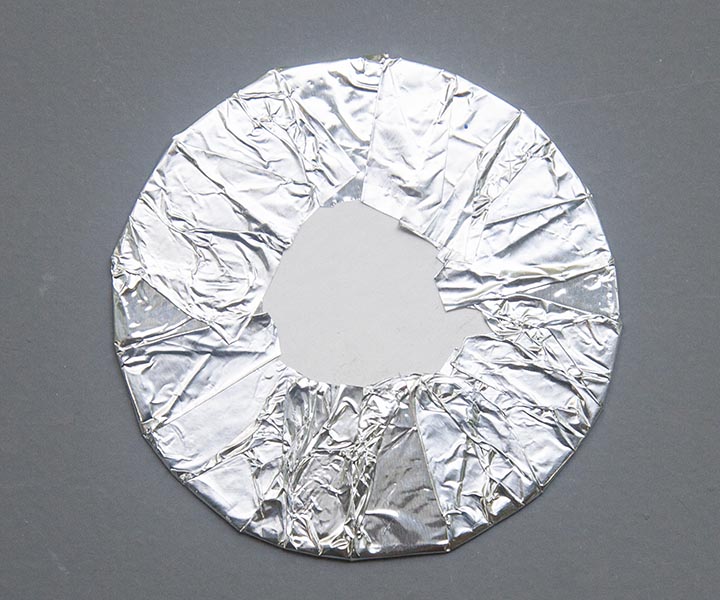
4. To make the cake base plate, cut out a cardboard circle or square that is 1/2" or 1 cm wider all around the bottom of the cake. Lightly smear cardboard with glue, glue onto aluminum foil. Trim foil to approx. 1" wider than cardboard plate. Smear lightly with glue, and fold foil smoothly onto plate.
Wedding Cake
|
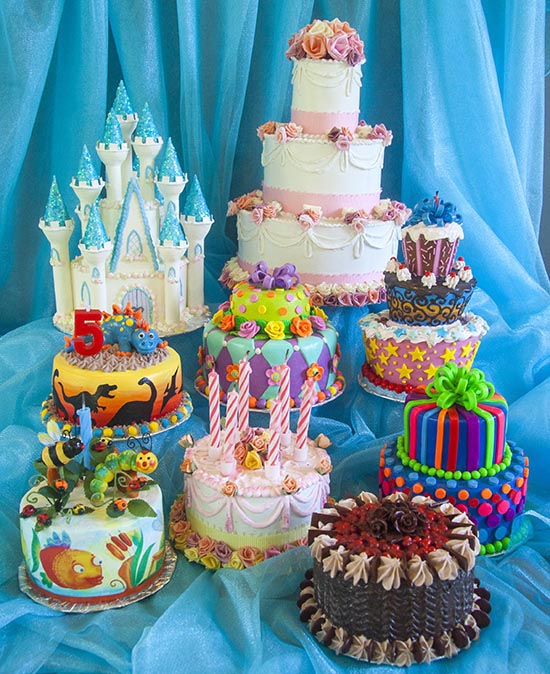
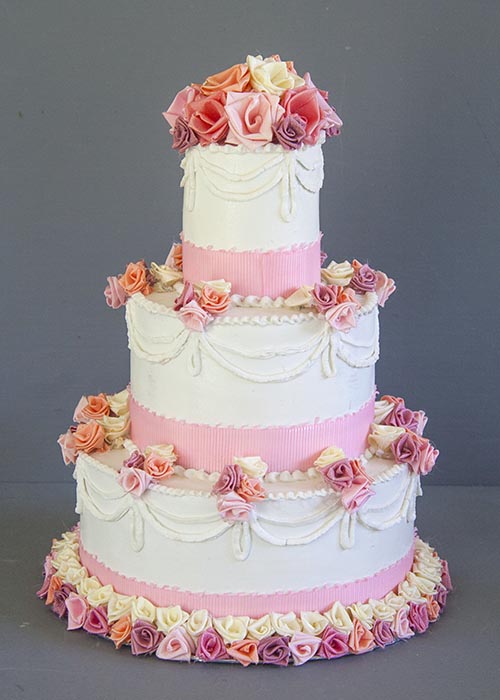
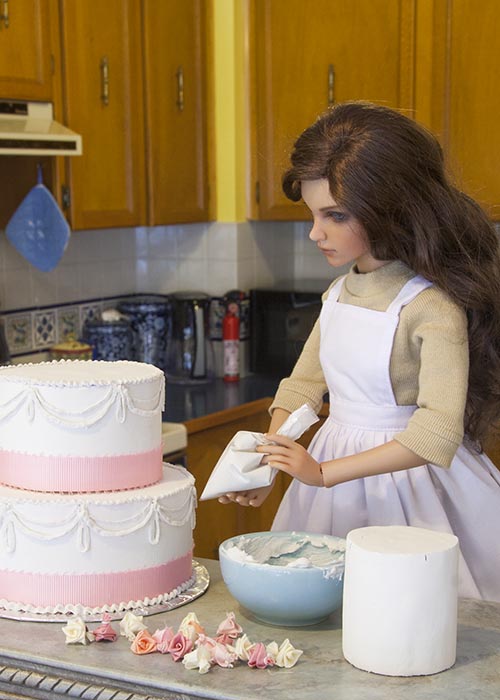
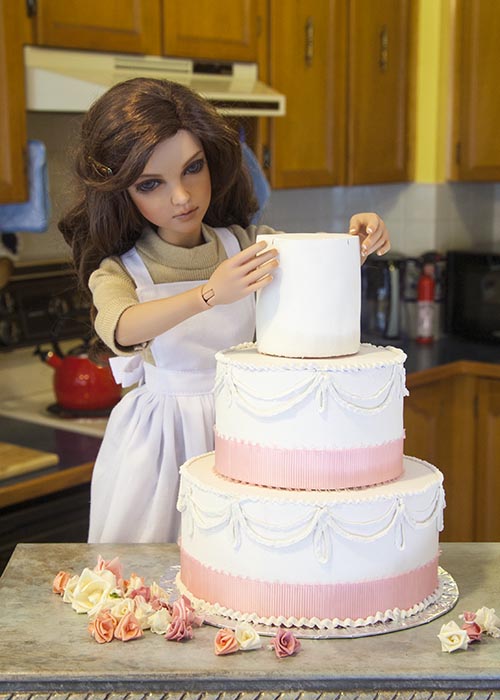
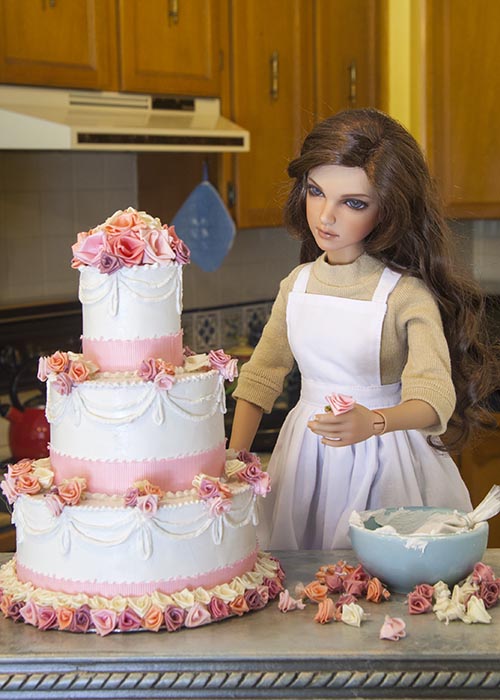
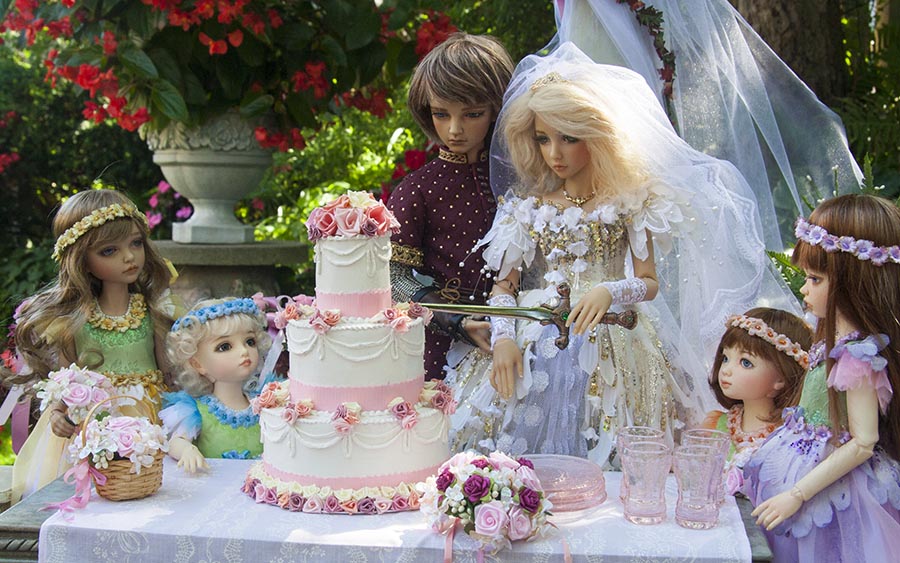
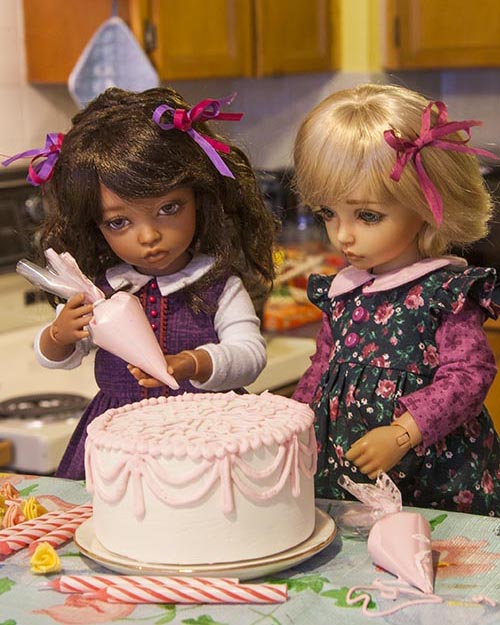
This wedding cake was the very first cake I made. The three layers are pink styrofoam circles covered with drywall compound, and sanded smooth. The layers were hot-glued onto a prepared 'plate' and onto each other. Pink ribbon was glued around the base of each layer with white glue. For the 'decorative icing' work I thinned some drywall compound with a bit of water, made a tiny hole in the corner of a small plastic bag, and used that to pipe the 'icing' onto the cake. It was a bit awkward to use, and the result was rather uneven, so all piping on later cakes was done with real cake decorating nibs. After allowing the drywall compound to dry thoroughly, I brushed on two layers of matte water-based varnish. Then hot-glued all the ribbon roses into place. Base is 14 cm (5.5") height is 20 cm (7.5") I took 'under construction' photos of my Leona 'making the cake' |
Byuri's Birthday Cake
|
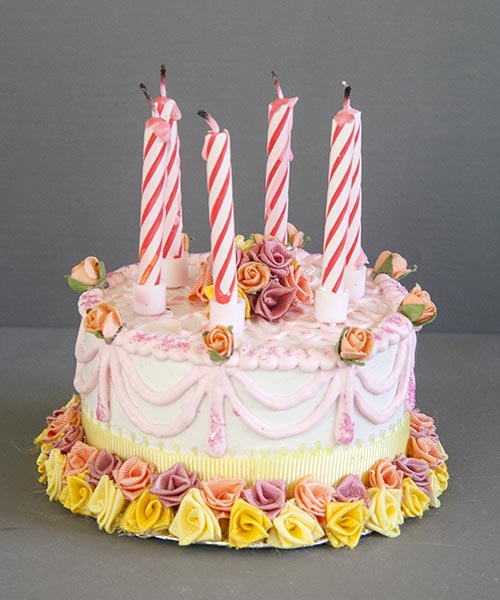
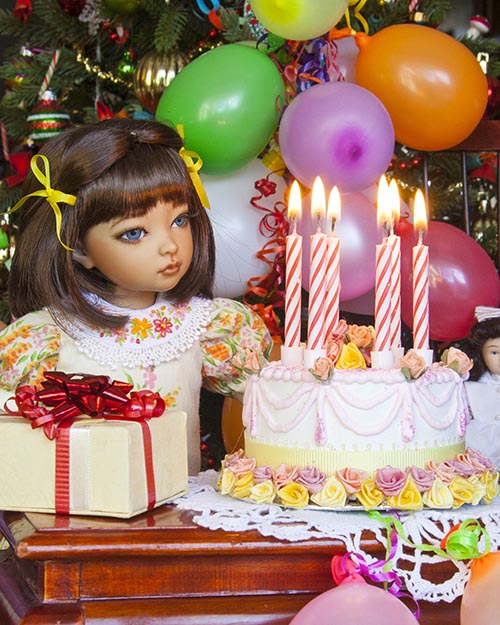
I was in a hurry, so this cake was just a single-layer version of the Wedding Cake above, and made the same way.
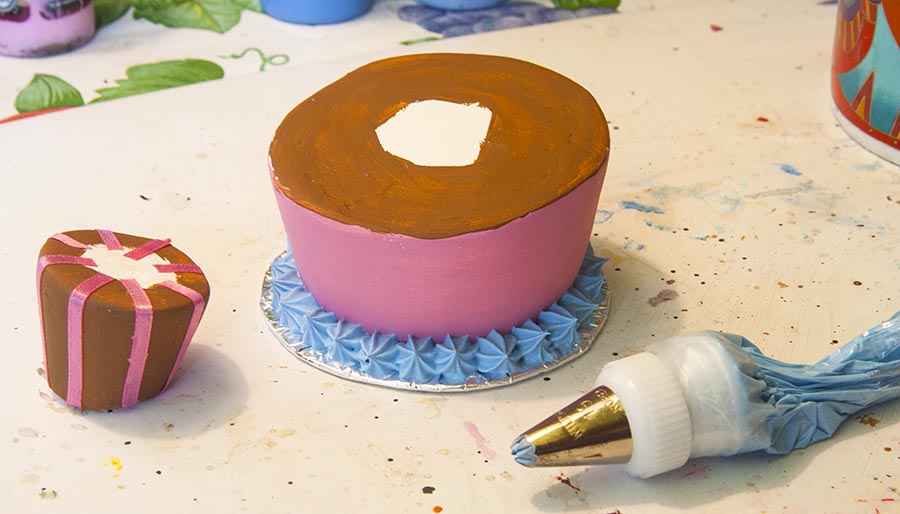
The cake is pink styrofoam covered with drywall compound. The pink 'icing' is slightly thinned drywall compound tinted pale pink by mixing in a little acrylic paint. This time I did the piping with proper cake decorating piping tools, so the 'icing' is a lot nicer than it was on the wedding cake. I used a decorating nib and a coupler, and a small sandwich bag. I cut a small hole in the corner of the bag, inserted the base of the coupler, put on the decorating nib, and screwed on the nib holder. Then wrapped the base of the coupler with a length of tape, to help guide the 'icing' from the wide bag into the coupler. After the icing was thoroughly dry, I brushed on two layers of matte varnish, and added a touch of pink glitter. Ribbon roses are attached with hot glue. Roses around top edge of cake are paper roses. Base plate is 9 cm (3.75") Cake height is 6 cm (2.25") not including candles. |
Lisa's Birthday Cake
|
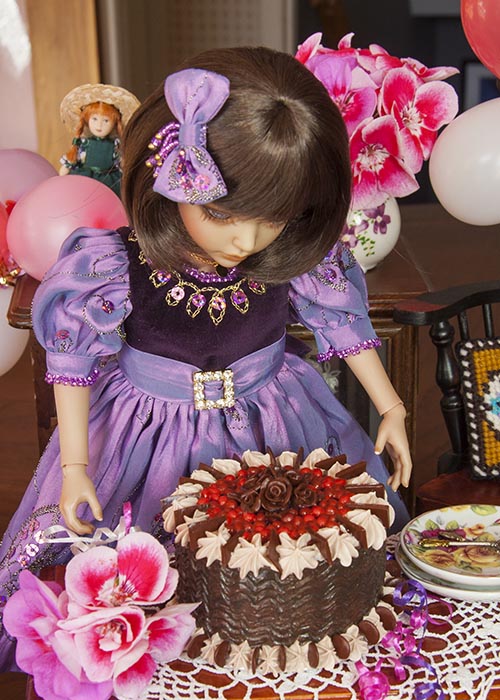
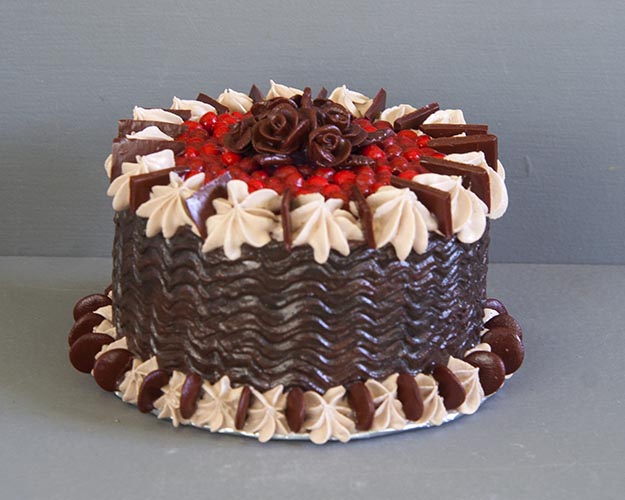
For Lisa's birthday I wanted something a little more elegant, so decided to make a Black Forest Cake.
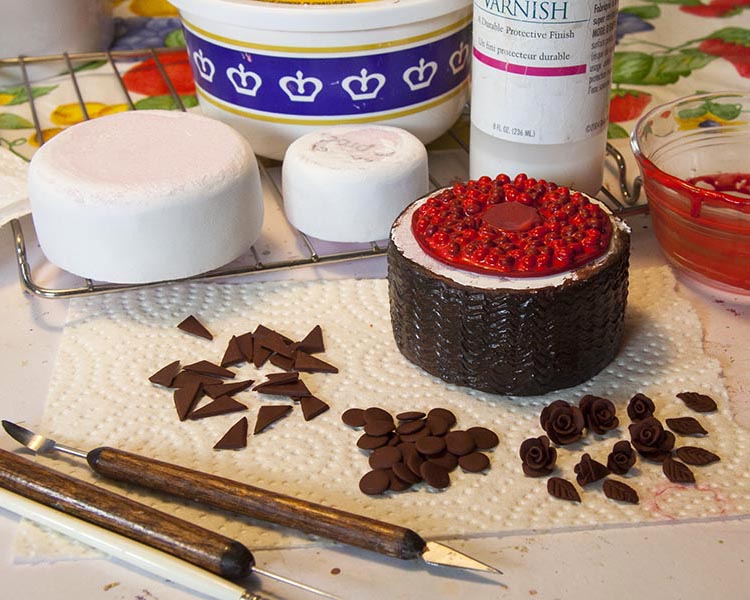
The cake base is pink styrofoam covered with drywall compound. To create the textured 'chocolate icing', I applied a thicker layer of plain white drywall compound and used a knife with a serrated edge to create the wavy texture. After it was throughly dry I painted it a dark chocolate brown, and gave it a bit of a shine with satin varnish. The cherries were individually made from several shades of red polymer clay, and piled onto a red polymer clay circle. Note the raised middle section intended for the chocolate roses. I shaped 'chocolate' roses and medallions out of dark brown polymer clay. All the polymer clay items were baked on a paper-towel in my 'polymer clay baking tray'. The styrofoam cake did NOT go into the oven. After cooling, the disk with cherries was hot glued onto the top of the cake. I mixed a little red paint into some gloss varnish to brush over the cherries. For 'mocha icing' I thinned and tinted some drywall compound and piped it on with a small star nib. After drying, the cherries and chocolate were varnished with satin water base varnish. Base plate is 8cm (3.25") Cake is 5.5cm (2.25") to top of roses |
Erzulie's Birthday Cake
|
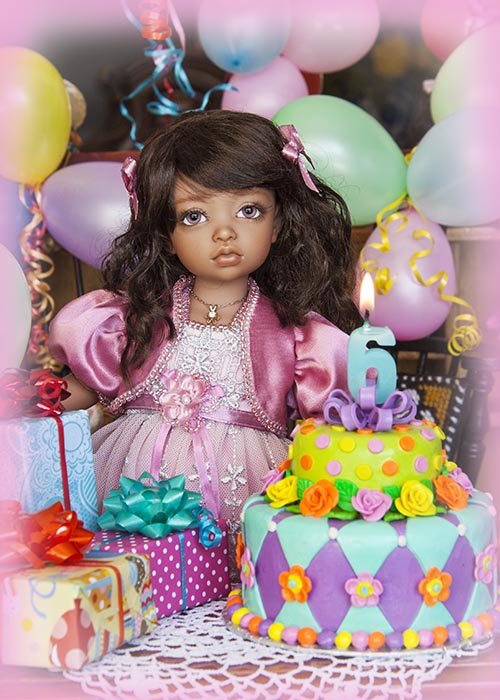
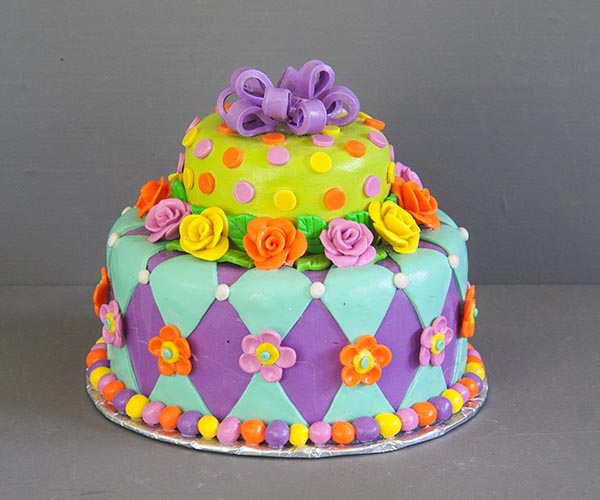
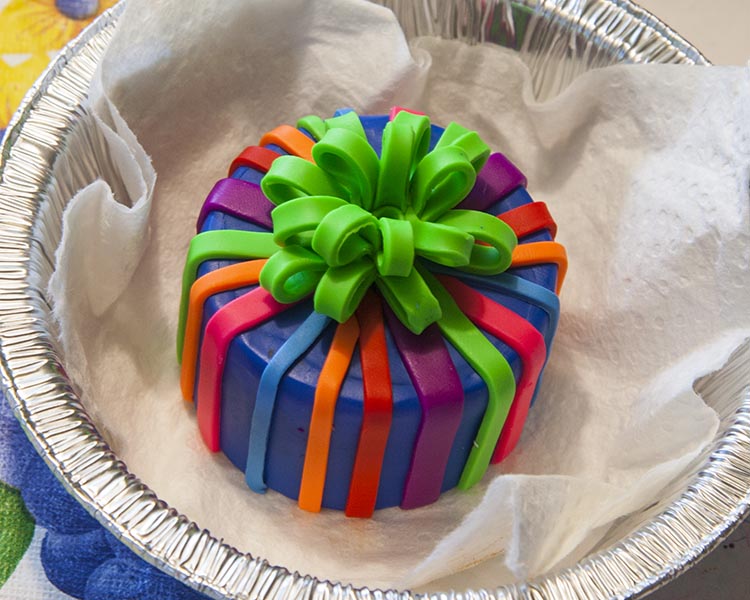
For this cake I wanted a colourful cake with the look of fondant decorations. I originally made the two layers out of styrofoam - see them in the Black Forest construction photo above. But after experimenting with Aves Apoxy Sculpt for the diamond designs on the bottom layer, I decided it just wasn't going to look right, and that I really needed to make it out of polymer clay. But Styrofoam can't go in the oven. So Jan shaped a new bottom cake out of wood, and I covered it with lavender polymer clay and added the turquoise diamonds. The wood wasn't covered with anything, so the polymer clay did not stick to it when it baked. It cracked and broke in several places, and I had to insert glue into the spaces to glue it back together.
The flowers, bow, dots and round balls were formed from polymer clay and baked as per instructions. Polymer clay dots are punched out using straws as in my 'Button Tutorial'. The flowers on the bottom tier are made out of five clay dots with another dot in the middle. I used a round tooth pick to poke a hole through the centre of the polymer clay bow, so that later, at party time, I could insert a 'toothpick candle' into the bow. The top cake layer is styrofoam and did not go in the oven. It was painted light green, then hot glued on top of the baked wooden layer. Dots were glued on with white glue. Base plate is 10 cm (4") height to top of bow is 8.25 cm (3.25") |
Mr. Ropuha's Birthday Cake
|
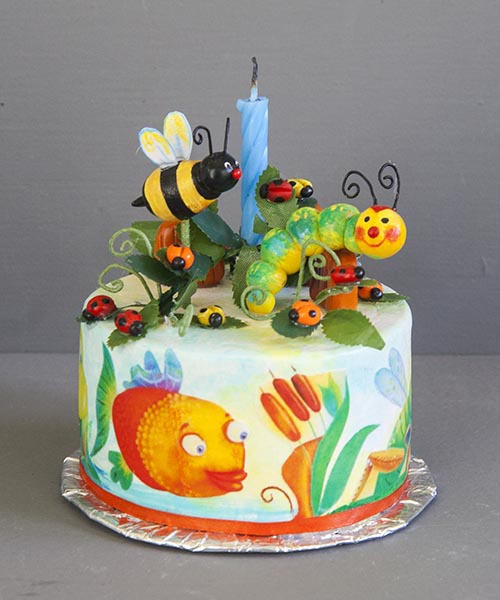
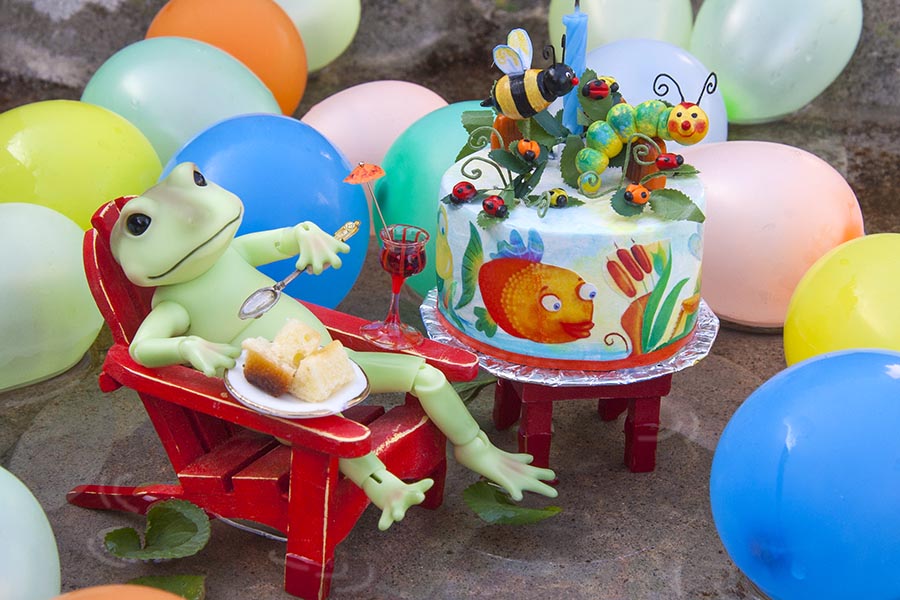
This cake is a miniature version of the 'Ten Little Lady Bugs' cake my sister made for my grandson's first birthday. The cake is pink styrofoam covered with drywall compound. The cake was tinted lightly with blue and yellow watercolours. The figures around the cake are photos taken of the actual book pages (Ten Little Lady Bugs), shrunken to the correct scale, then printed in colour and carefully cut out. They are glued around the cake with white glue. Details are added with pencil crayons. A narrow orange ribbon is glued around the bottom of the cake. The bugs on top are sculpted from polymer clay with details painted on afterwards, The bee's wings are paper, coloured with pencil crayon. Everything is varnished with matte varnish. Base plate is 8.5 cm (3.25") wide. Height to top of cake is 4 cm (1.65"), and 8.5 cm (3.25") to top of candle |
Ringo's Dinosaur Cake
|
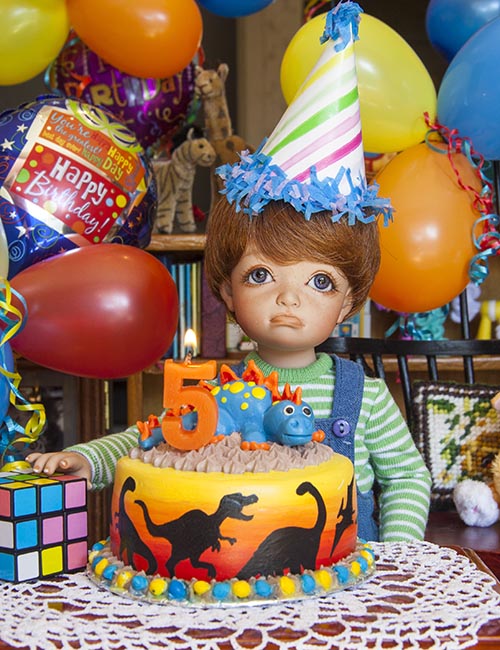
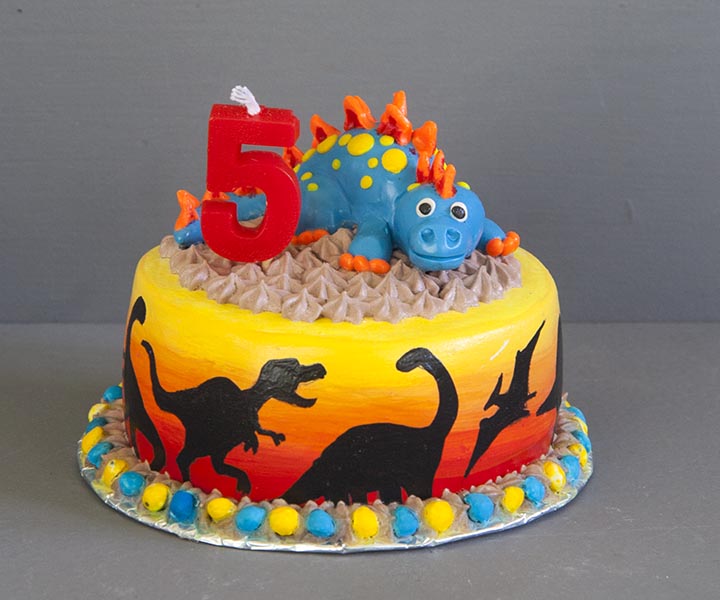
The cake is pink styrofoam covered with drywall compound.
The cake sides are painted like a sunset, blending from red to yellow. I drew on the tiny dinosaurs with a pencil, then painted them with black paint. The dinosaur on top is sculpted of polymer clay, over an aluminum foil base (to reduce the amount of clay needed) The 'mocha icing' is drywall compound, thinned slightly with a bit of water, and tinted with a bit of brown paint. I piped stars all over the top of the cake, and positioned the dinosaur on top. I piped a rim of stars around the base of the cake, then pressed tiny, real, yellow and blue candy-coated chocolate chips alternating around the base. (always start patterns like this at the back of the cake where it won't matter if they don't end up matching up). Unfortunately the candy coating on the chocolate chips bled into the drywall compound - especially the blue ones - so I won't be using them again. Everything is protected by a coat of satin varnish. Base plate is 8 cm (3.5") wide. Height to top of dinosaur is 6.5 cm (2.6") |
Peach's Castle Cake
|
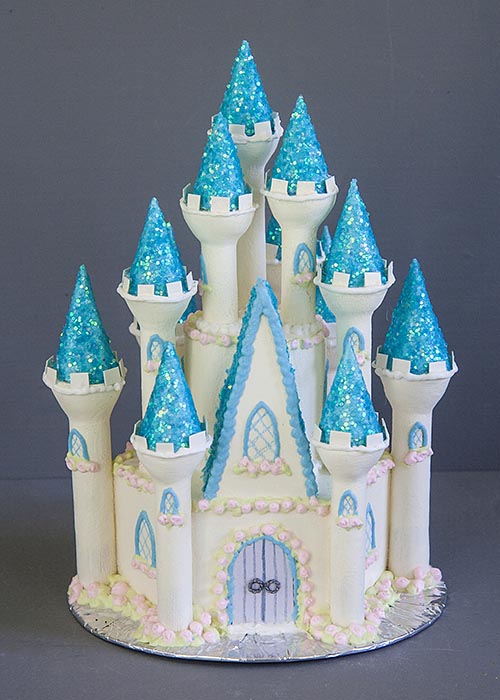
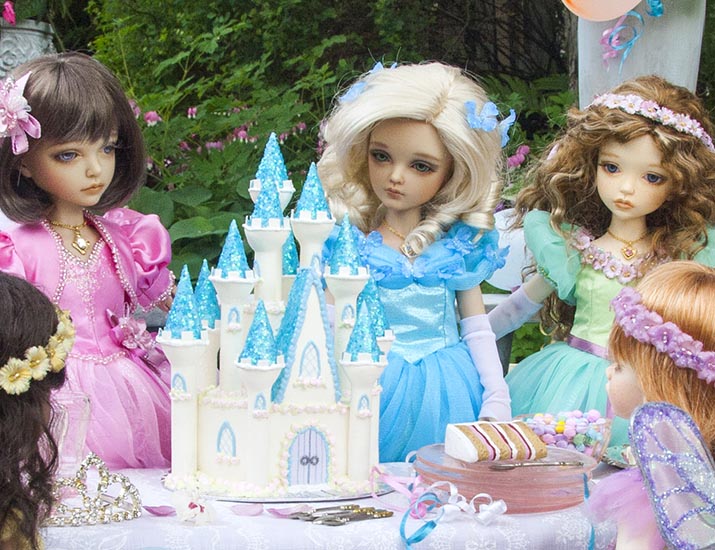
This cake was inspired by Wilton's Romantic Castle Cake Kit. The three 'cake' parts - hexagon, smaller circle, and triangle - are all of pink styrofoam covered with drywall compound. The towers are lengths of wooden dowel. I glued a small cardboard disk on top, then filled in the area below it with paper clay, tapering to the dowel. The pointy roofs are small paper cones filled with paper clay, painted blue and covered with glitter. Door is cardboard. Windows (and door detail) are drawn with pencil crayons. Windows are outlined with blue-tinted drywall compound using the decorator tip with the smallest hole. Leaves and roses are tinted drywall compound. The 'roses' were just pointy blobs, but after about 20 minutes the drywall compound had dried a bit, so i went back and pressed in the centres with my finger, to create a 'rose'. Battlements are white cardboard attached with hot glue, which was rather messy, so i had to pipe a fine white line around the base of the battlements on each tower. Base plate is 11 cm (4.25") wide. height to top of tallest tower is 16 cm (6.4") |
Tillie's Cake
|
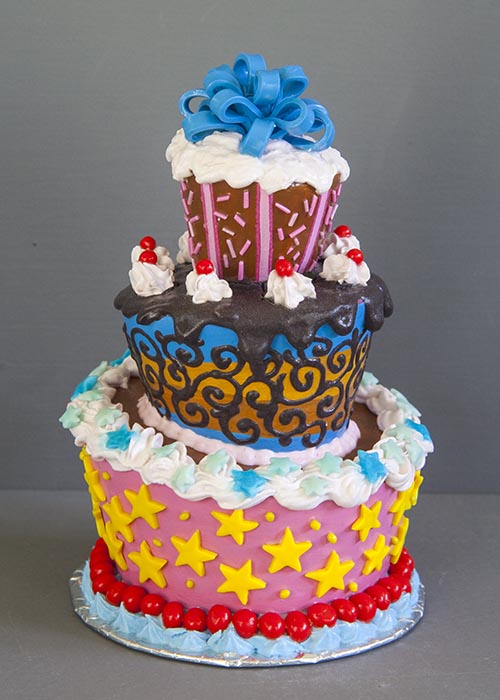
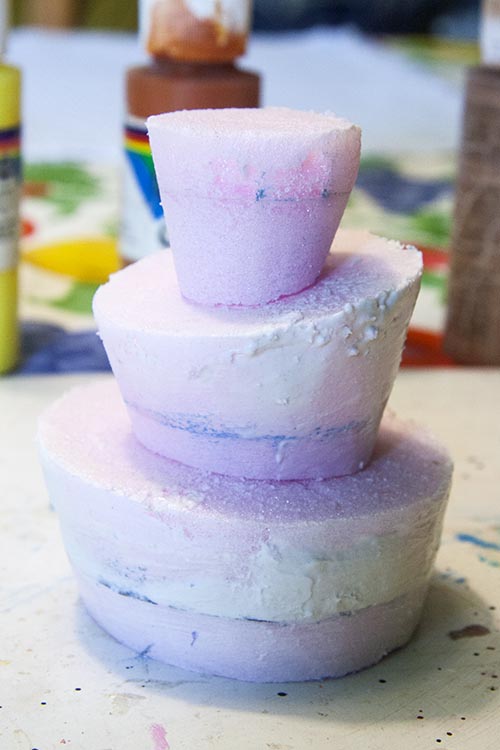
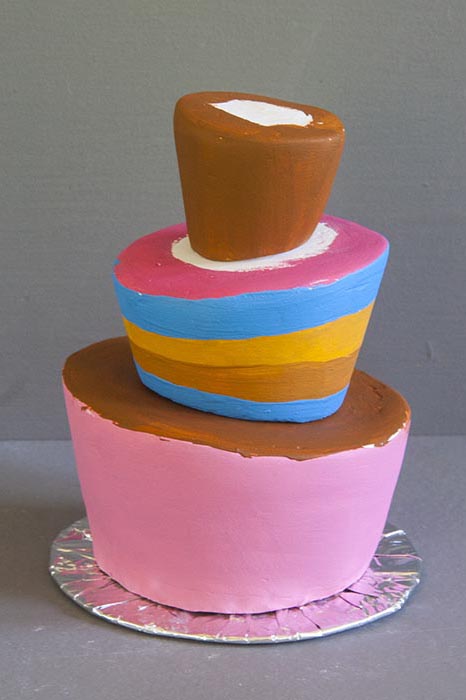
For this cake I wanted a whimsical, off-kilter look, so the three styrofoam tiers were shaped with tapered sides and angled tops and bottoms.
Layers were covered with several layers of drywall compound, sanded between each additional layer.Each cake was painted separately with an 'icing' base coat. The bottom tier has stars of polymer clay, and red cherries at the base, all baked separately and glued on. The blue stars on the upper edge are real sugar sprinkles, which unfortunately absorbed the moisture from the drywall compound 'icing' and became soggy. The colour also bled, but they fortunately did eventually dry out. So, no more real sprinkles on doll cakes. The second tier was piped with thinned drywall compound tinted with dark brown acrylic paint to simulate 'chocolate'. The top of this layer was covered with more 'chocolate icing', which was allowed to spill over the sides. The pale pink rosettes are drywall compound, topped with a red polymer clay cherry (baked separately) The top layer has ribbon trim simulating 'fondant', but it went transparent when i varnished it, so I added a stripe of opaque paint. The 'sprinkles' and bow on top are polymer clay, baked separately. Base plate is 8 cm (3.25"). Height is 12.5 cm (4.75") |
Efreet's Birthday Cake
|
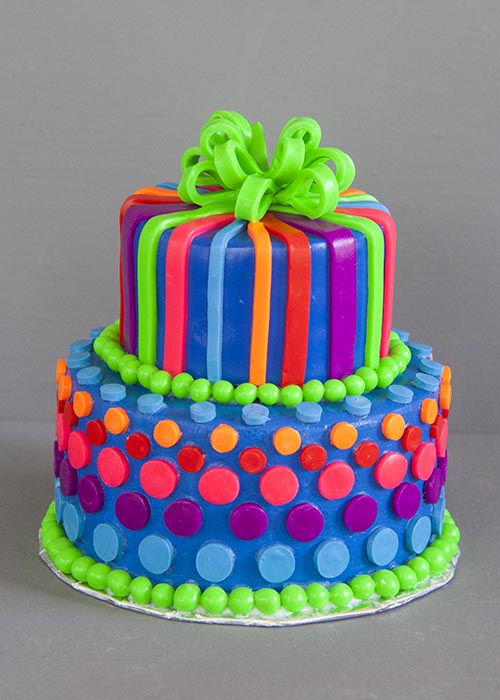
For this cake I wanted something bright and colourful for a boy - something to suggest 'fondant' decorations. Since the look of 'fondant' works best when made out of polymer clay, it meant the top layer could not be made out of styrofoam since that lets off poisonous fumes if baked in the oven.
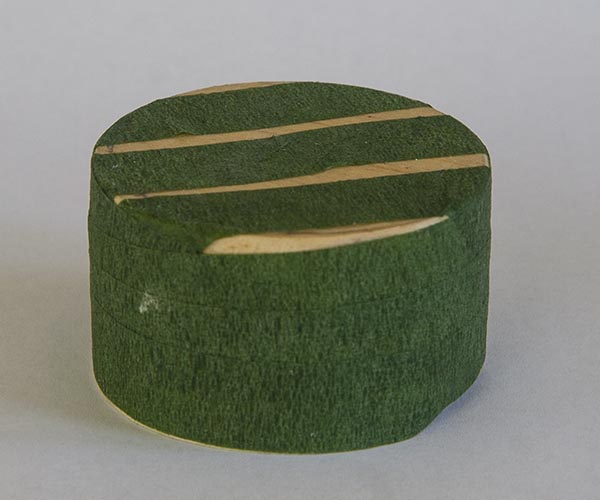
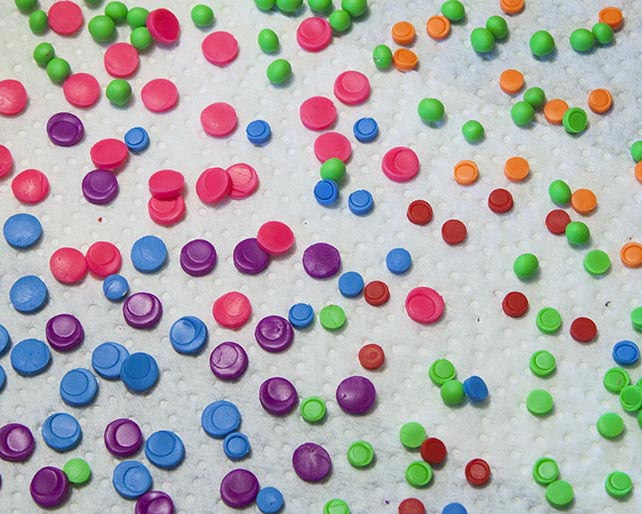
The top layer is wood, but the last time I tried a wooden cake covered with polymer clay (Erzulie's cake) the polymer clay did not adhere to the wood, so this time I tried gluing florist tape around the wooden cake shape first. That worked much better. However, the bottom layer is pink styrofoam. It won't be baked. Just the polymer clay circles and balls get baked separately, and then get glued on after the cake is painted. To cut the circles out of polymer clay I used drinking straws of different sizes. McDonald's ones are the biggest. I cut the straw to about 2-3" long, and use it to cut a circle. The polymer clay circle usually stays inside the straw, so I use a longer, narrower straw to push the polymer clay circle out onto a paper towel covered baking sheet. The straw used to push the circle out leaves a circular dent on the polymer clay, but I just make sure to glue that side down onto the cake. The cake is finished with a coat of matte varnish. Base plate is 9 cm (3.5") wide. Height to top of bow is 9.5 cm (3.75") |
Copyright © 2015 Martha Boers
All Rights Reserved
