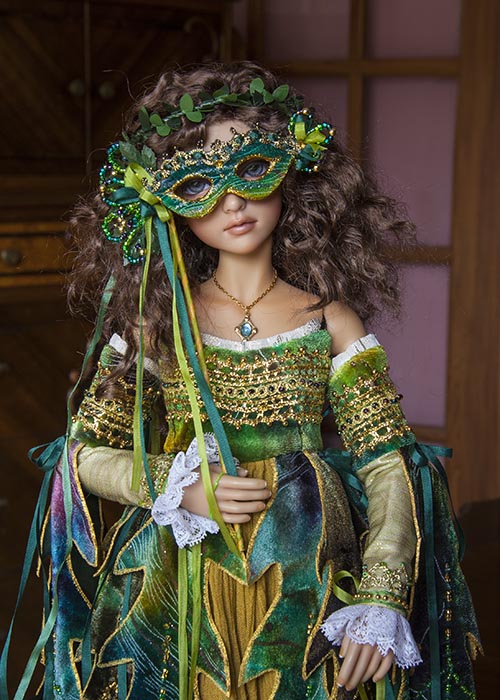
Make a Mardi Gras Mask
Make a fancy mask to go with your doll's most elaborate outfit. Whether it be for Mardi Gras or
for a Masquerade, your girl will be the 'belle of the ball' with one of these masks!
for a Masquerade, your girl will be the 'belle of the ball' with one of these masks!

Updated Mask Tutorial
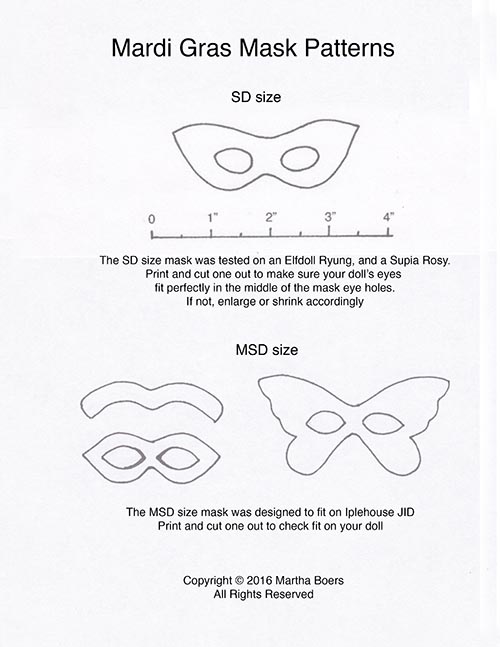
When I needed four fancy MSD-size masks in 2016, I decided to update this tutorial and include all the patterns
for the MSD-size masks as well as the SD mask from the original tutorial. They are all made exactly the same way
for the MSD-size masks as well as the SD mask from the original tutorial. They are all made exactly the same way

Materials
- white cardboard - scissors
- 4" x 2" fabric for front of mask - Fray Check
- 4" x 2" felt for back of mask - white glue
- 1/8" wooden dowel 9" long (for SD size mask. Need a thinner dowel for MSD size masks)
Embellishments
- 4" decorative trim for top of mask - hot glue gun
- gold glitter dimensional fabric paint - 1/8" ribbons to compliment fabric
- matching coloured feathers fluffs - tiny ribbon roses or silk flowers (optional)
- 30 gauge wire & pliers - assorted seed beads in complimentary colours
Instructions
*Please read instructions carefully before starting
1. Click on pattern image below to download the mask pattern pdf.
|
1. Print the pattern and cut out desired mask(s). Check to make sure the eyeholes fit over your doll's eyes.
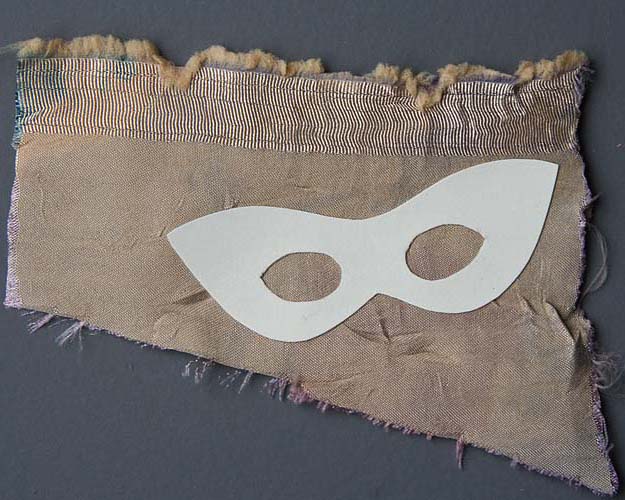
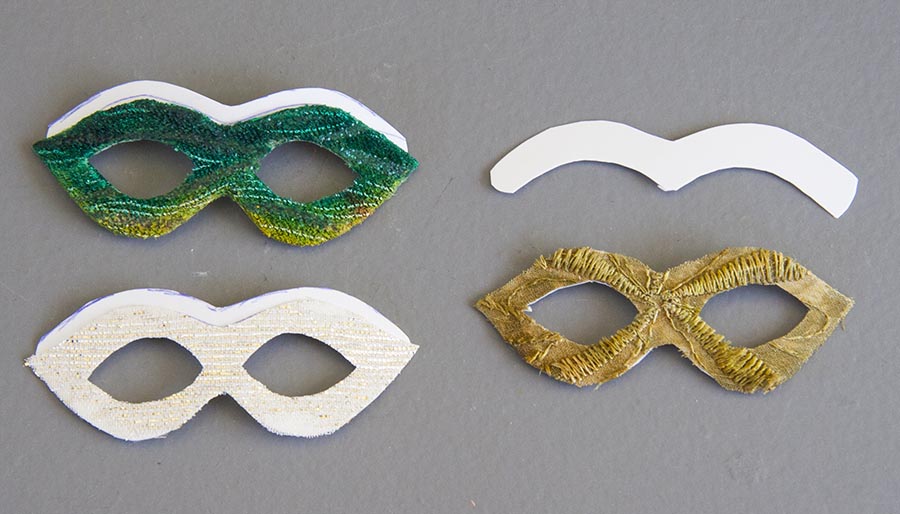
Trace pattern onto white cardboard and cut out. *You can cut out the eye holes now, or wait until the cardboard is glued onto the fabric. and cut out both layers at once.
Trace pattern onto white cardboard and cut out. *You can cut out the eye holes now, or wait until the cardboard is glued onto the fabric. and cut out both layers at once.
2. Smear a thin layer of white glue on cardboard mask and press onto wrong side of fabric. Let dry.
|
|
3. Apply Fray Check around all mask edges. Let dry.
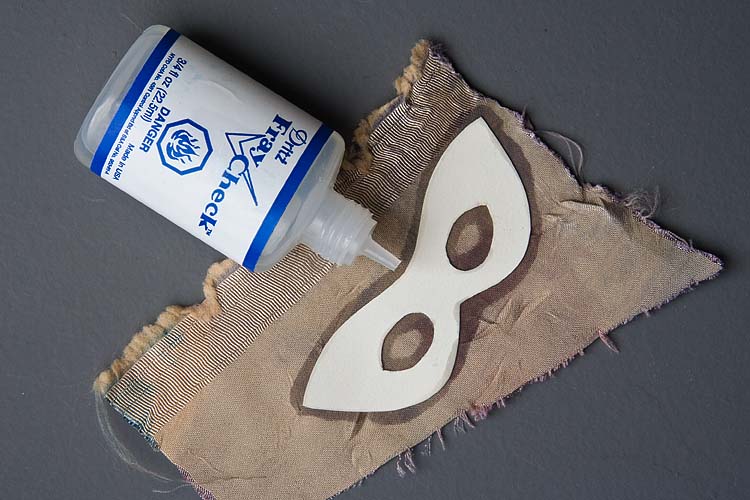
4. Cut away fabric.
|
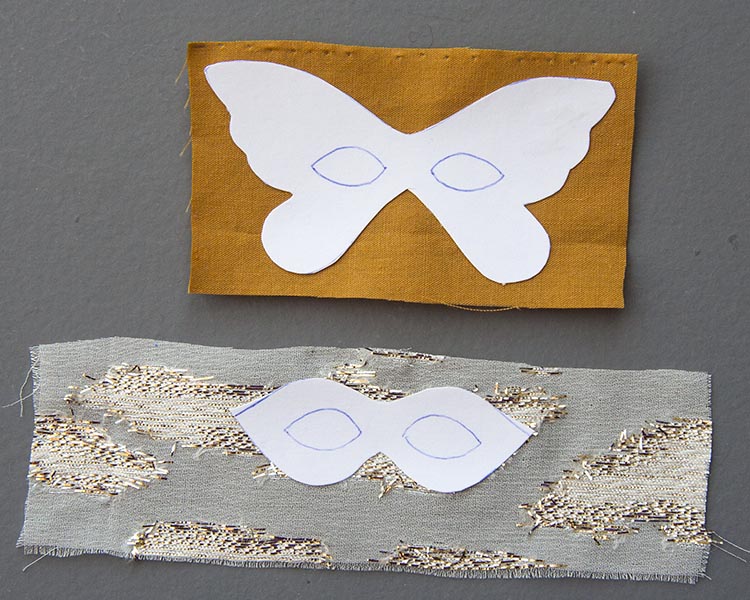
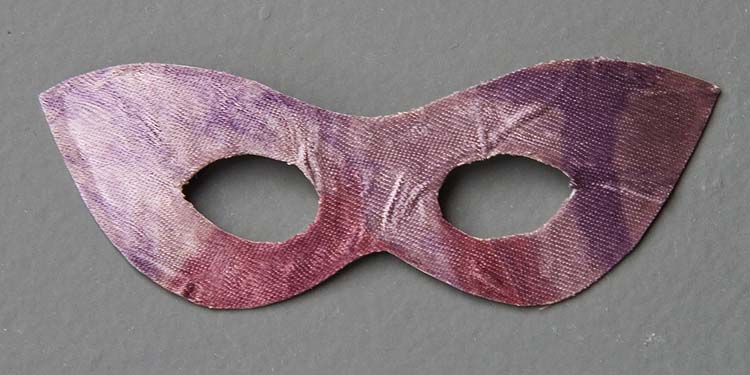
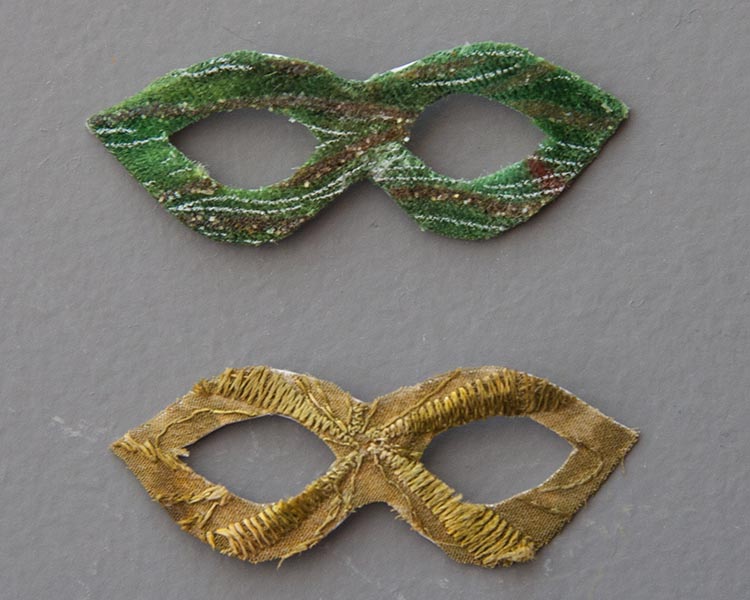
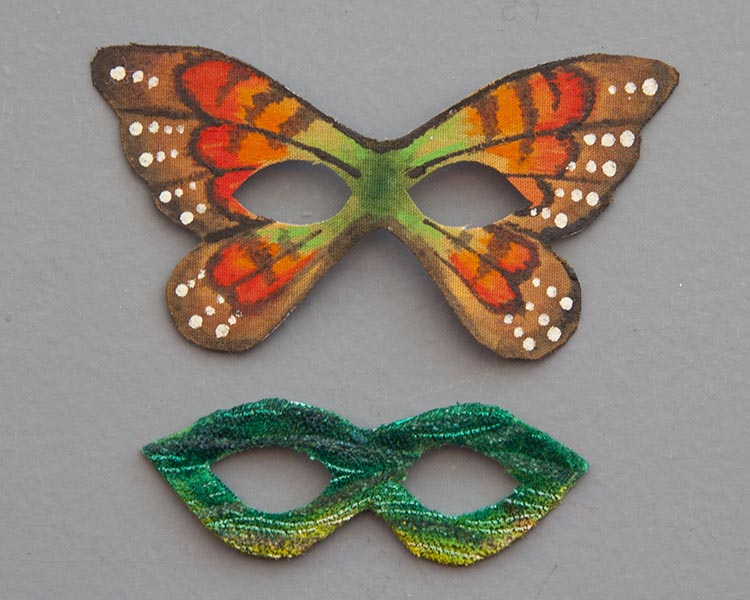
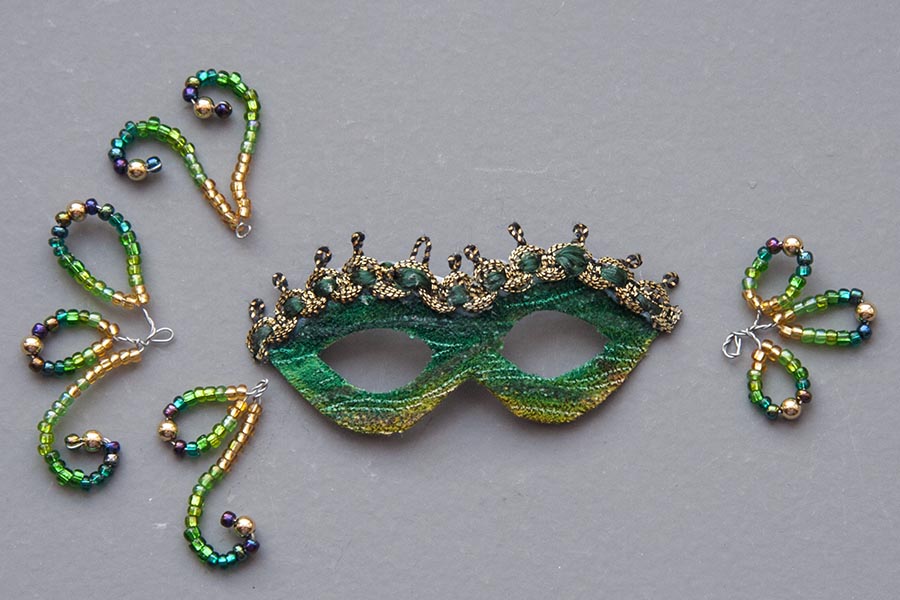
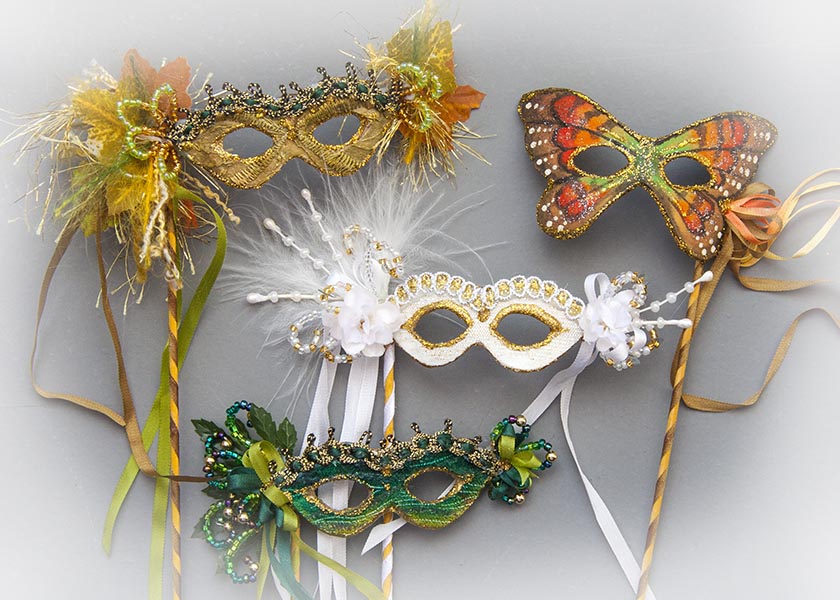
Two of the MSD size masks below
|
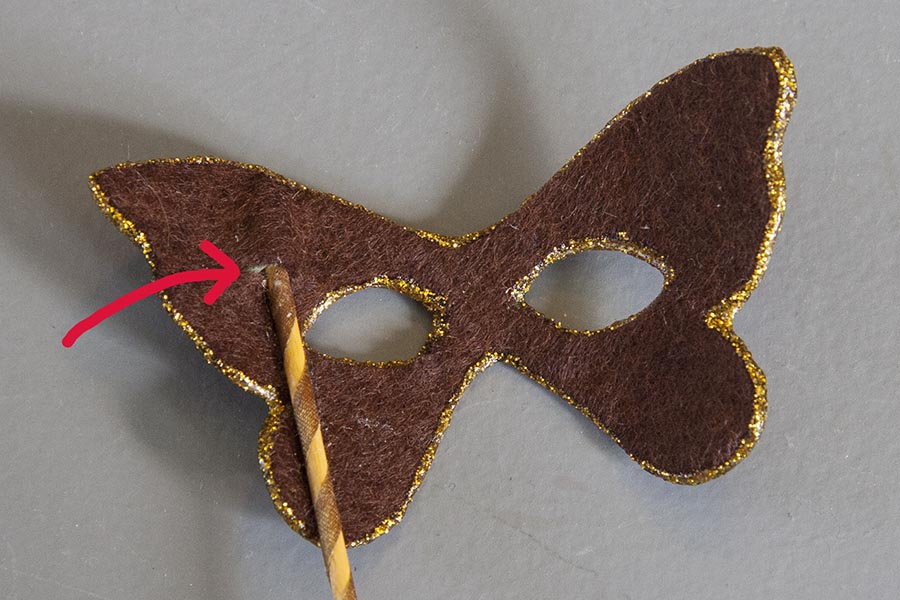
Butterfly mask & green velour mask have been painted
|
|
|
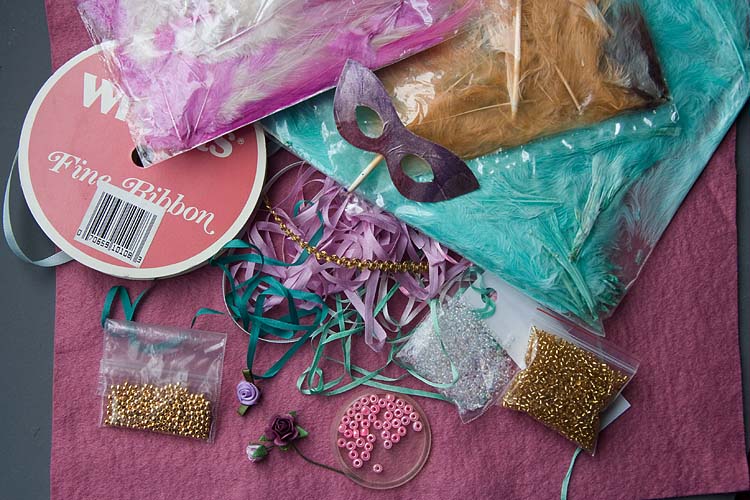
5. Gather ribbons, feathers, beads & trim to match mask colour scheme
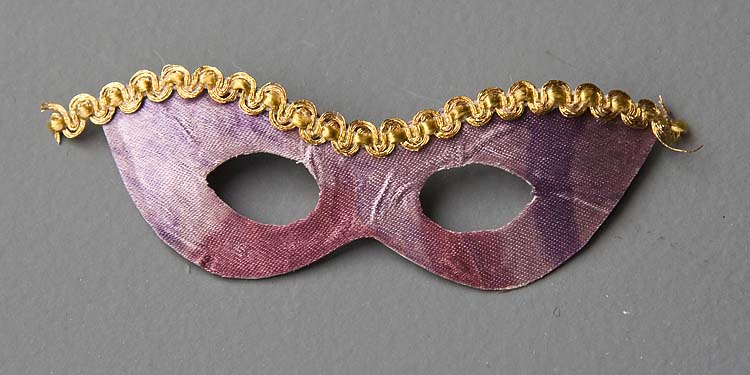
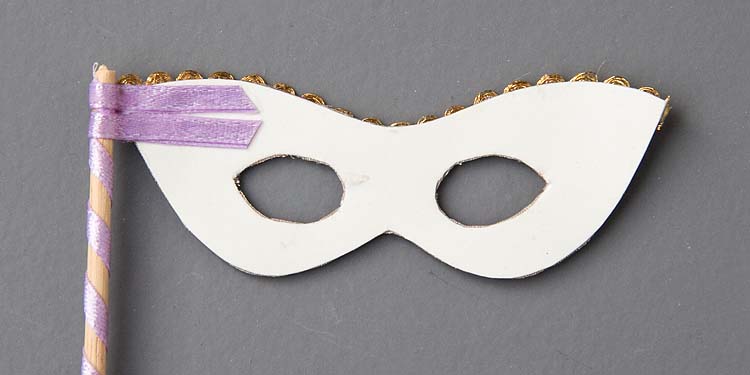
6. If making the SD size mask glue trim along top edge of mask with white glue. Trim ends and apply dot of white glue to seal ends.
|
|
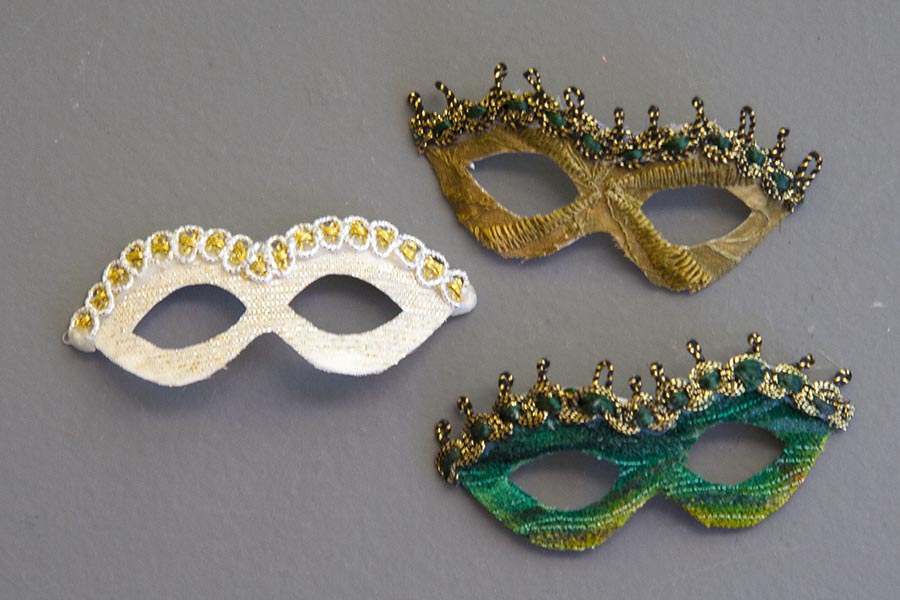
7. If you want to add a trim to the top of an MSD size mask, you will need to add an "eyebrow" section to the top of your mask. Cut it out of cardboard and glue it to the upper back of your mask.
7a. Then carefully glue trim to top of mask. *Tip - a glue gun works better to glue the trim onto this smaller size mask. *Start in the middle and work outward towards the sides. Trim off any excess trim, and seal with a spot of white glue. Let dry.
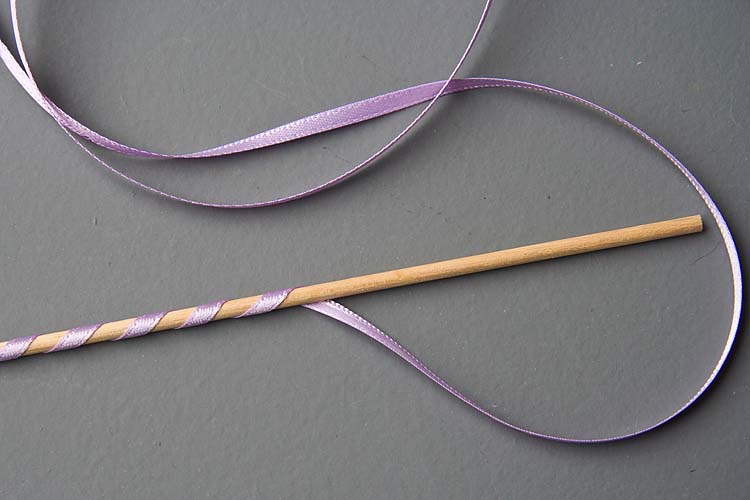
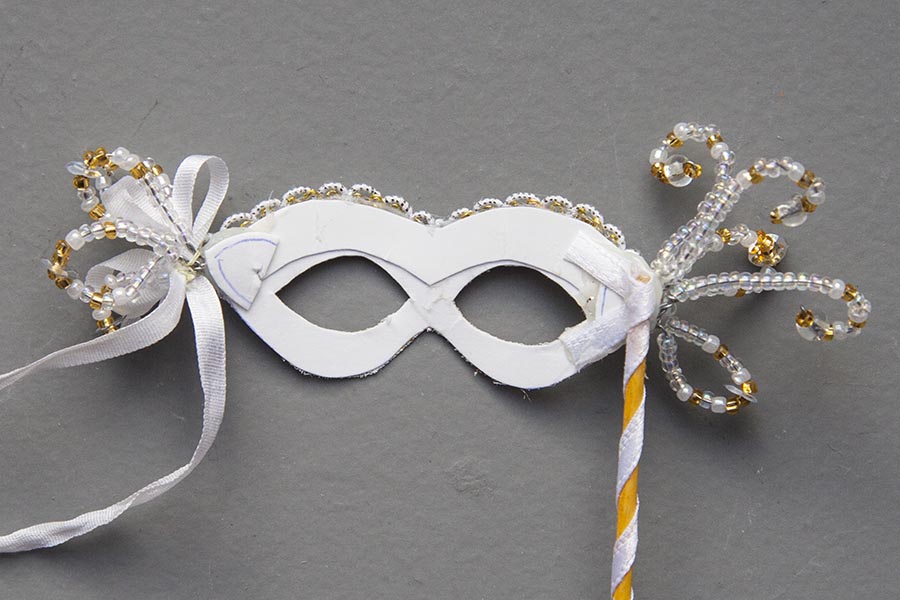
8. Glue ribbon in spiral along length of dowel
|
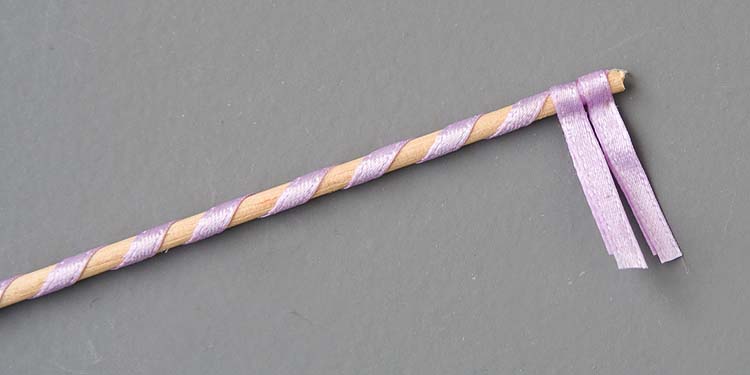
9. For the larger SD size mask, cut two 2" pieces of ribbon and glue tight around top of dowel |
For MSD size masks, the eye holes are too close to the edge where the dowel will be glued, so the ribbons need to be cut shorter and glued on at an angle
|
|
|
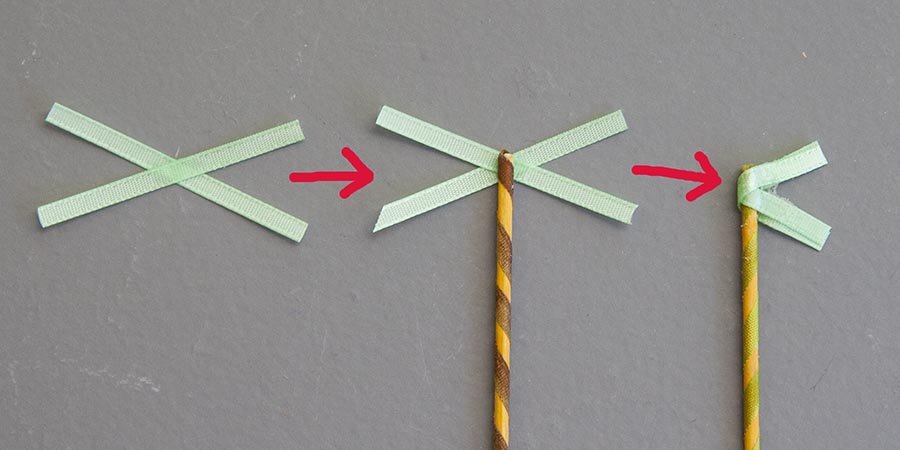
10. Glue ribbons onto back of mask - unless you want to add wired bead spirals to both sides of MSD size mask. Then wait to step 20
Now we will make the wired bead spirals;
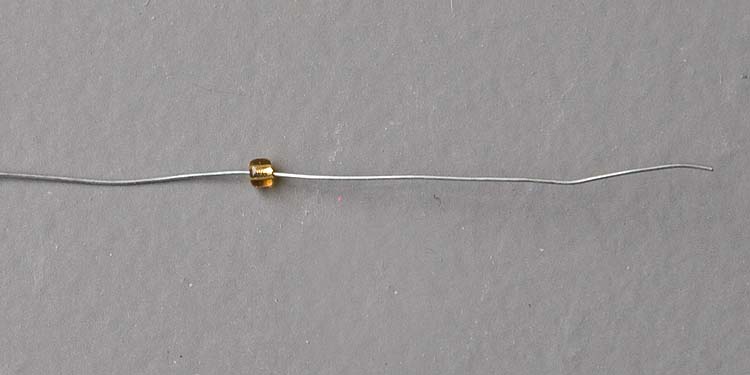
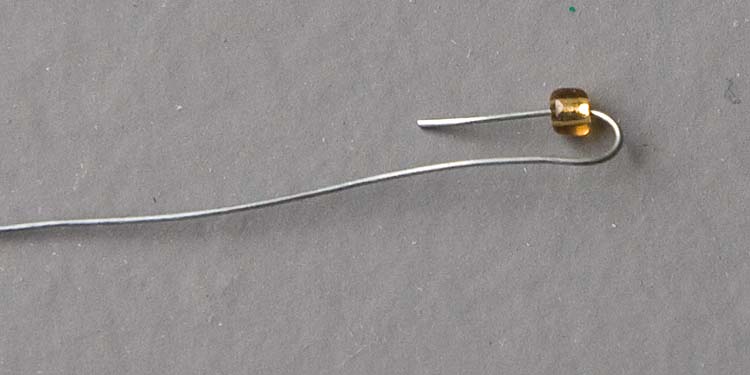
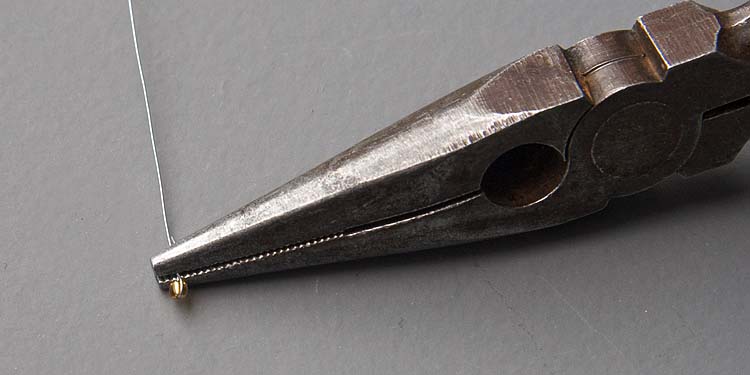
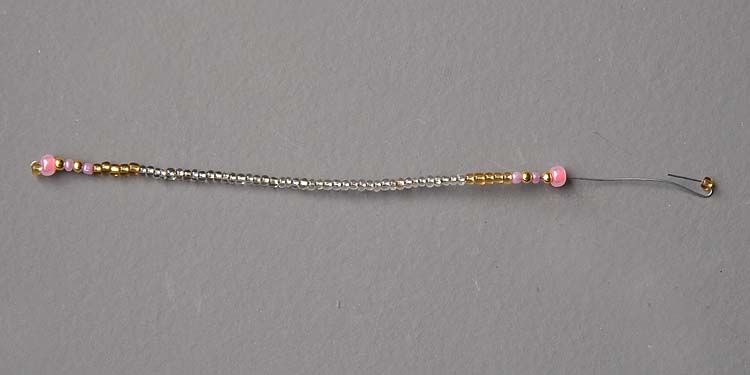
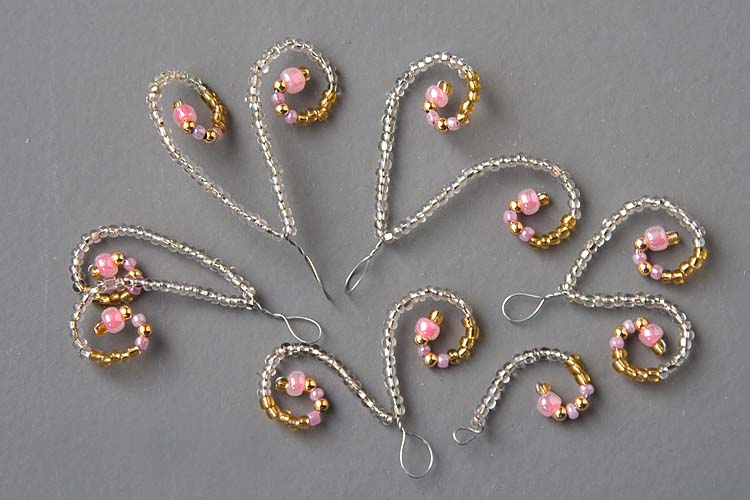
11. Cut 6" length of wire, pick up one small seed bead, and bend wire back. Pinch wires tight with pliers
|
|
|
|
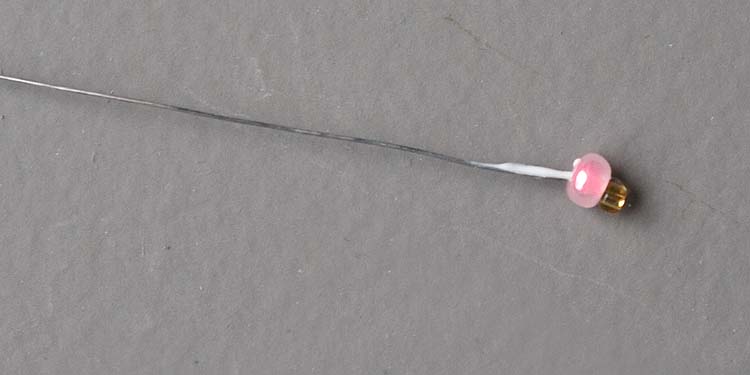
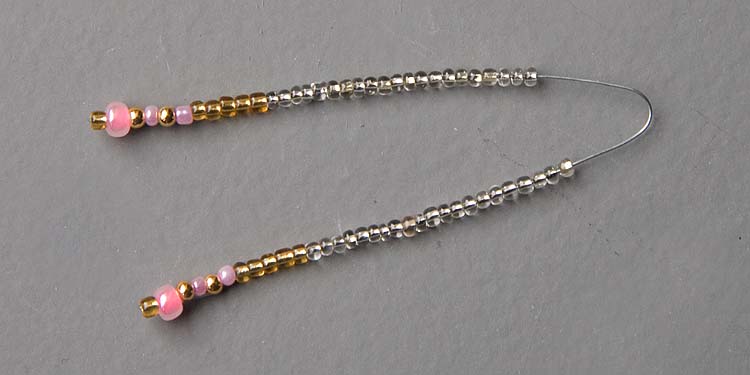
12. Apply glue to bent-back wire, and thread larger bead over both wires. |
13. Pick up a few more beads and thread over double wires. Pick up no more than 30 tiny beads. |
|

|
|
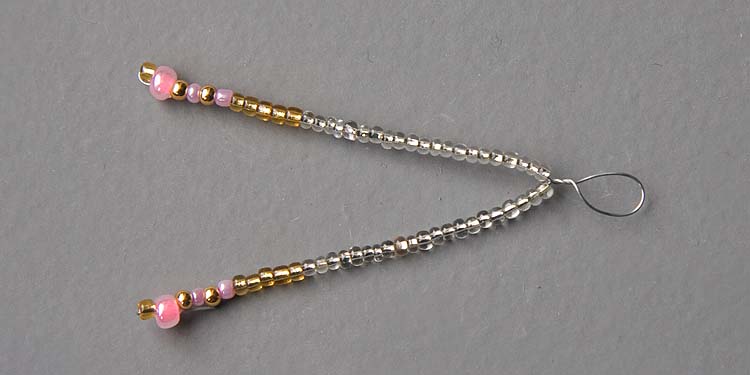
14. Now repeat your bead pattern in reverse. Pick up the final bead and bend wire back tight with pliers. |
15. Apply glue to double wires, push beads over double wires, divide beads in half, bending wire in middle. |
|
|
|
17. Twist wire into loop. |
18. Bend both ends into a spiral. |
|
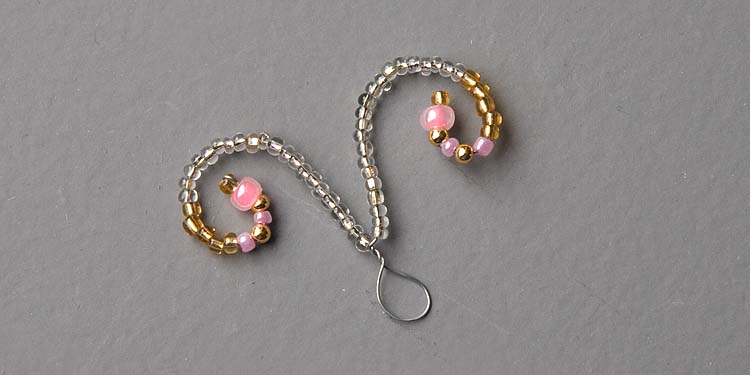
|
19. Make several more double beaded spirals just like this one. To make larger spirals, cut two 6 3/4" long wires for 35 beads on each end, and 7 1/2" wires with 40 beads on both ends. To make a single spiral, cut a 3" length of wire, bend end over one bead, thread the same pattern of beads as in previous steps, then make loop at wire end to keep beads from falling off, and bend wire into a spiral. You can also make beaded loops.
|
|
All the embellishments are ready to put on the white mask....

|
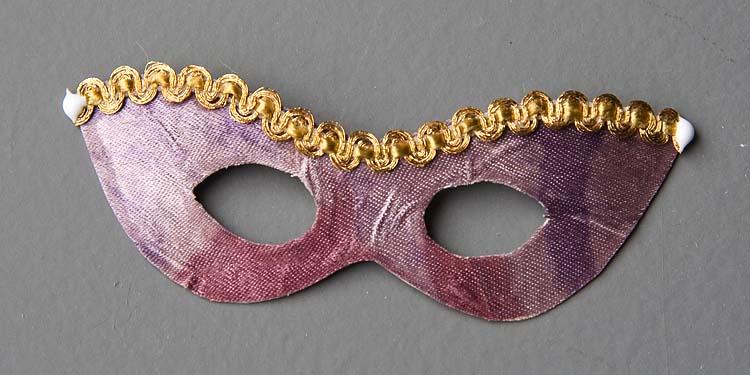
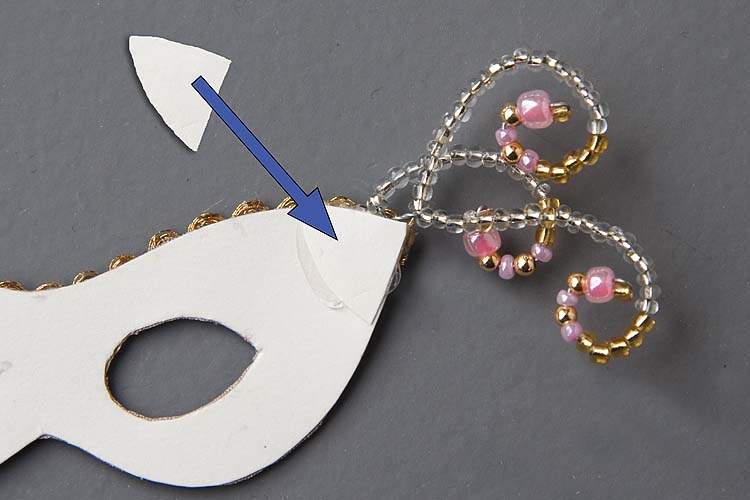
20. Cut two tiny triangles of white cardboard, the same size as the outer ends of your mask. Use hot glue to attach beaded spirals and loops to back corners of mask. Immediately press white cardboard triangle over hot glue to cover. |
*Note - the small MSD size mask below did not have the stick glued on until AFTER the wired loops with cardboard triangle had been glued on first. |
|
|
|
21. Cut out felt mask backing 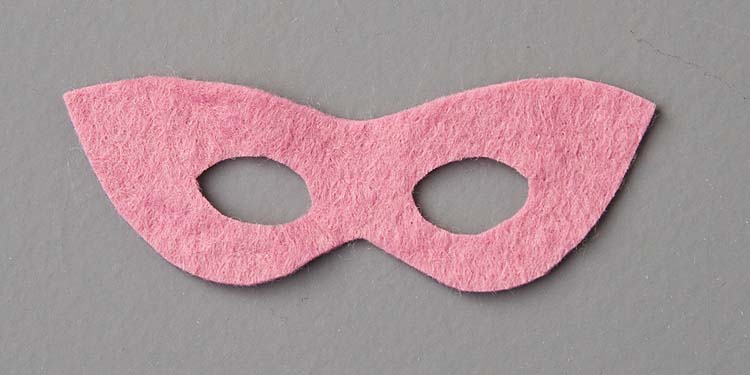
|
22. Smear back of mask with white glue, and attach felt 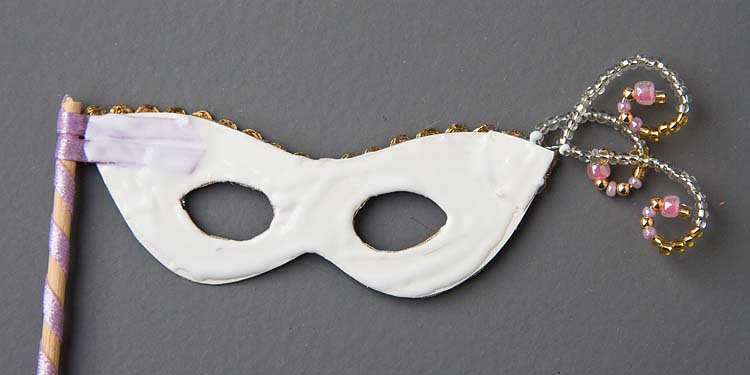
|
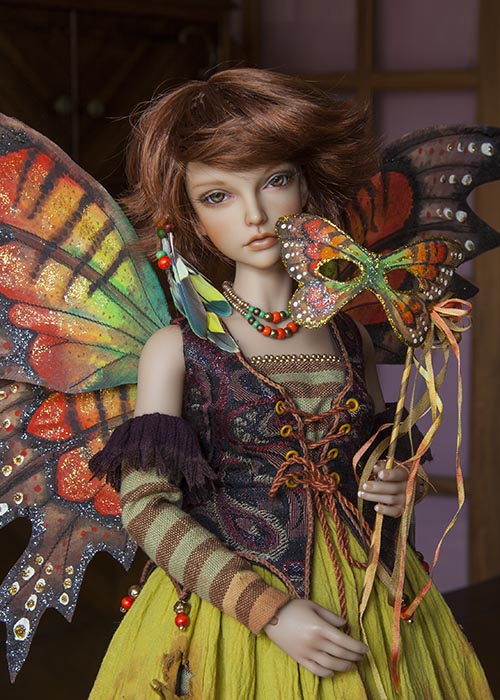
23. For the butterfly mask, the ribbons at the top of the stick had to be glued on a little differently, and the stick wasn't on the edge of the mask, so I cut a small hole in the felt for the stick to go through.
24. After gluing on the felt, carefully squirt a line of glitter paint along all the outer mask edges, and eyehole edges. Let dry.
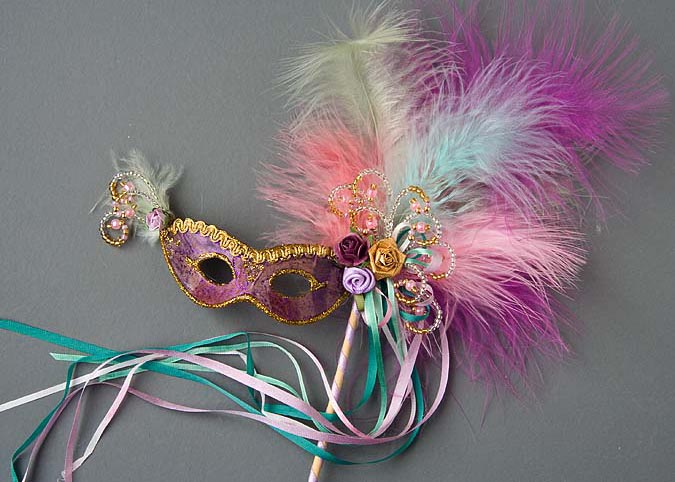
Embellish the masks with ribbons and feathers as desired....
|
|
Copyright © 2011 Martha Boers
All Rights Reserved
All Rights Reserved
