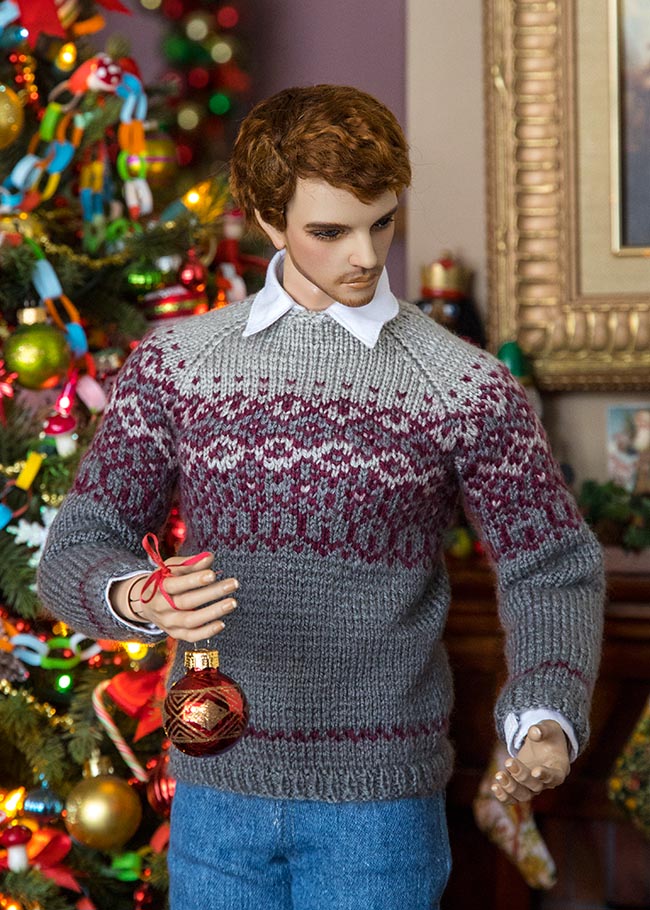
Knit a Sweater for a Fashion Size Guy
These are the basic instructions I use to knit a sweater for my Iplehouse Fashion sized guy.
They will fit both the Muscle and model body.
They will fit both the Muscle and model body.
|
|
|
I use 2mm double point, steel sock needles, and I wrap a little elastic band around one end to help prevent the stitches from slipping off.
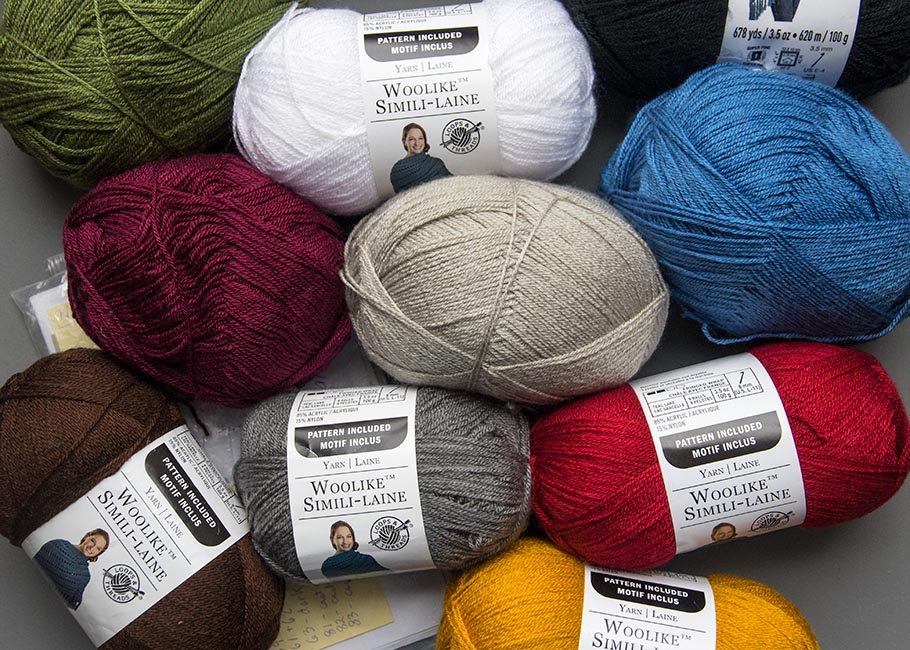
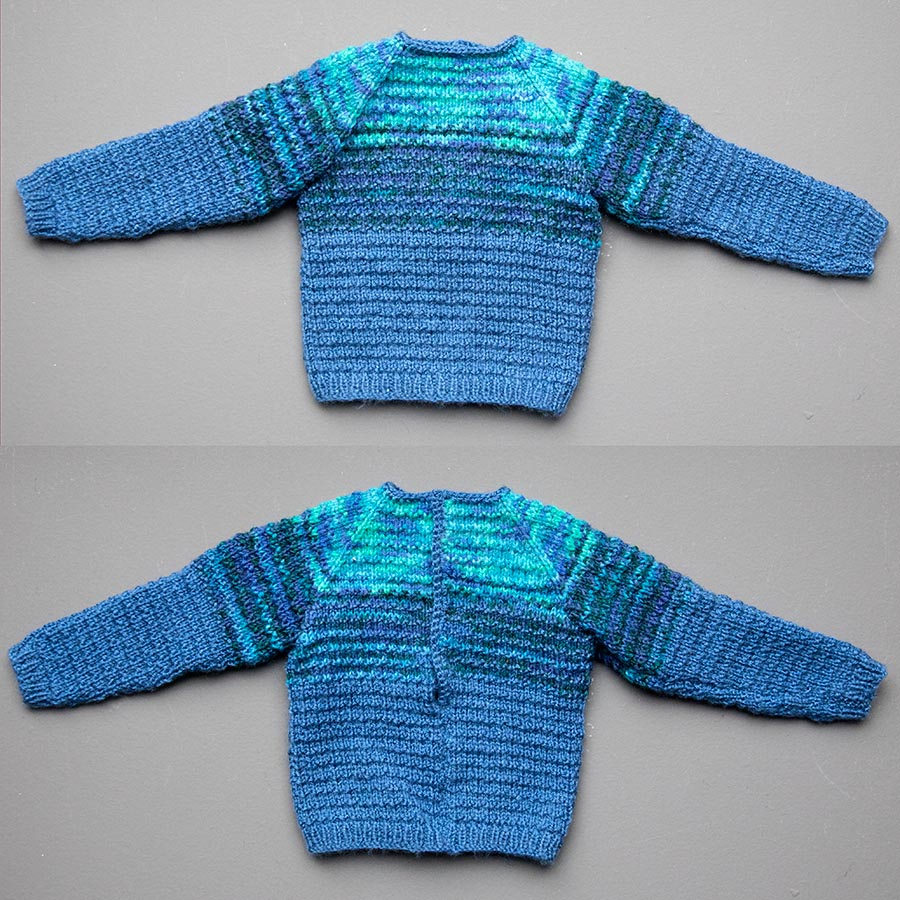
All three sweaters were knit from Loops & Threads Woolike Simili-Laine yarn which I purchased at Michael’s in Canada.
The gauge to knit a 10 x 10 cm square is 32 stitches by 42 rows.
All three sweaters were knit from Loops & Threads Woolike Simili-Laine yarn which I purchased at Michael’s in Canada.
The gauge to knit a 10 x 10 cm square is 32 stitches by 42 rows.
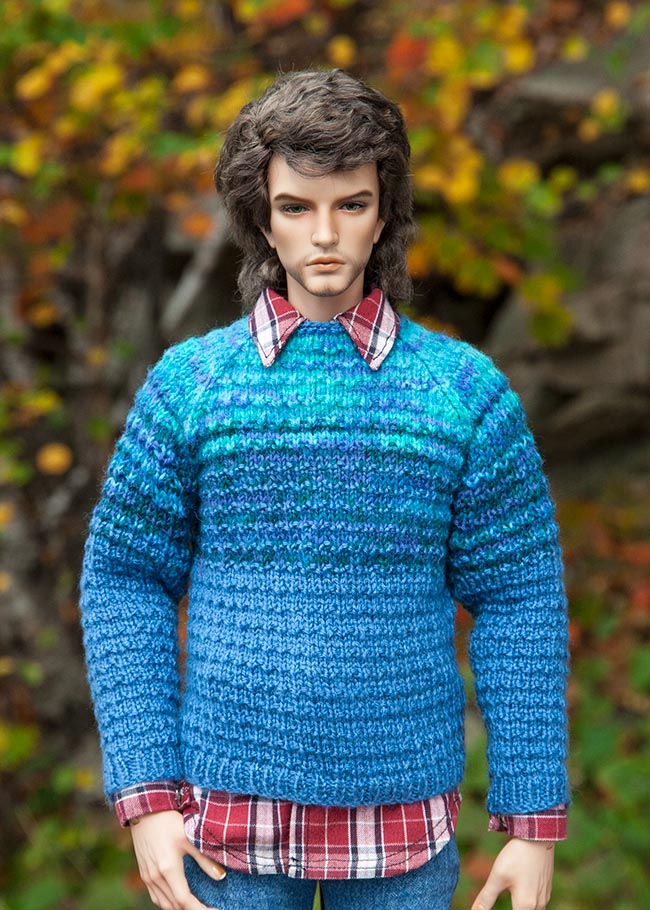
The top of the blue sweater was knit with various sock yarns with the same gauge
Sleeves
Cast on 26 stitches
Rows 1 – 6 – K1 P1 ribbing, or K2 P2 ribbing
Row 7 – increase 1 stitch at each end and 1 in middle (29 sts)
Proceed with stockinette stitch (knit one row, purl the next, repeat)
Row 17 – increase 1 stitch at both ends (31 sts)
Row 27 – increase 1 stitch at both ends (33 sts)
Row 37 – increase 1 stitch at both ends (35 sts)
Row 47 – increase 1 stitch at both ends (37 sts)
Row 57 – increase 1 stitch at both ends (39 sts)
Row 81 – cast off (loosely) first 5 stitches at beginning of row
Row 82 – cast off (loosely) first 5 stitches at beginning of row
Row 83 – cast off first stitch at beginning of row, and knit last 2 stitches together (27(sts)
Make second sleeve
Body of Sweater
Cast on 102 stitches
Rows 1-6 - K1 P1 ribbing, or K2 P2 ribbing
Row 7 increase 1 stitch in the middle
Proceed with stockinette stitch (knit one row, purl the next, repeat)
Row 75 – create the armholes – knit 21 stitches, cast off next 10 sts loosely, knit next 40 sts, cast off next 10 sts loosely, knit last 21 sts.
Row 76 – add sleeve stitches – purl first 21 sts, slip marker onto needle, purl the top of the first sleeve, add marker, purl center 40 sts, slip on marker, purl second sleeve, slip on marker, purl last 21 sts.
Row 77 – Knit across
Row 78 – purl across
Row 79 – Start raglan - Knit 19 sts, knit next 2 sts together (last 2 before marker), slip marker, knit next 2 stitches together, knit across sleeve, knitting last 2 sts before marker together, slip marker, knit first 2 sts together, knit across sleeve, knit last 2 stitches before marker together, slip marker, knit first 2 stitches together, knit to end
Row 80 – purl
Continue with raglan pattern knitting the 2 sts on either side of the markers together, until the stitch count of the individual sections are: 9 – 4 – 16 – 4 – 9. Or for a more open neckline, cast off two rows earlier when stitch count is: 10 - 6 -18 - 6 - 8.
Cast off loosely.
Finishing
I finish the back opening and neck edge with crochet.
Start at upper back corner of sweater opening and single crochet down the edge, making a single crochet in every second row of knitting. At the bottom, chain 1, then single crochet into all the single crochets back up to the top. Crochet 3 single crochets in top stitch for corner, then single crochet in every cast off stitch along the neckline, 3 single crochets on the last corner neck stitch, single crochet down the second back opening in every second knit row. At bottom chain 1 and single crochet back up.
Stitch two back flaps over top of each other, and work away threads. Sew on snaps.
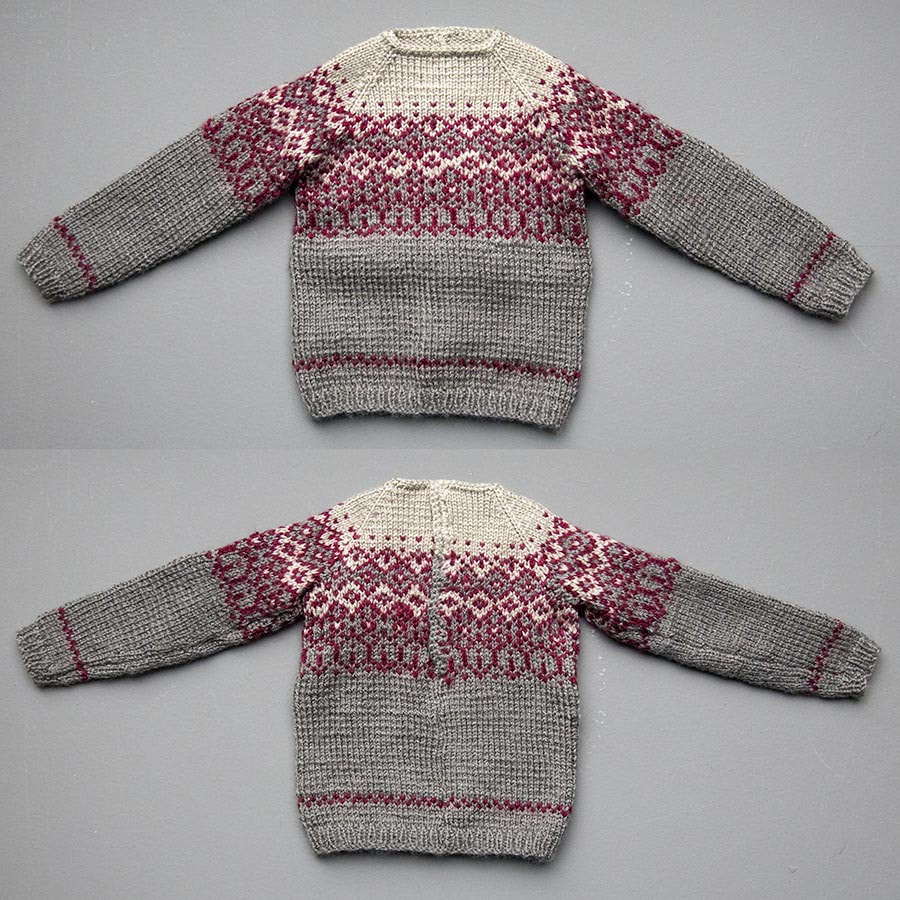
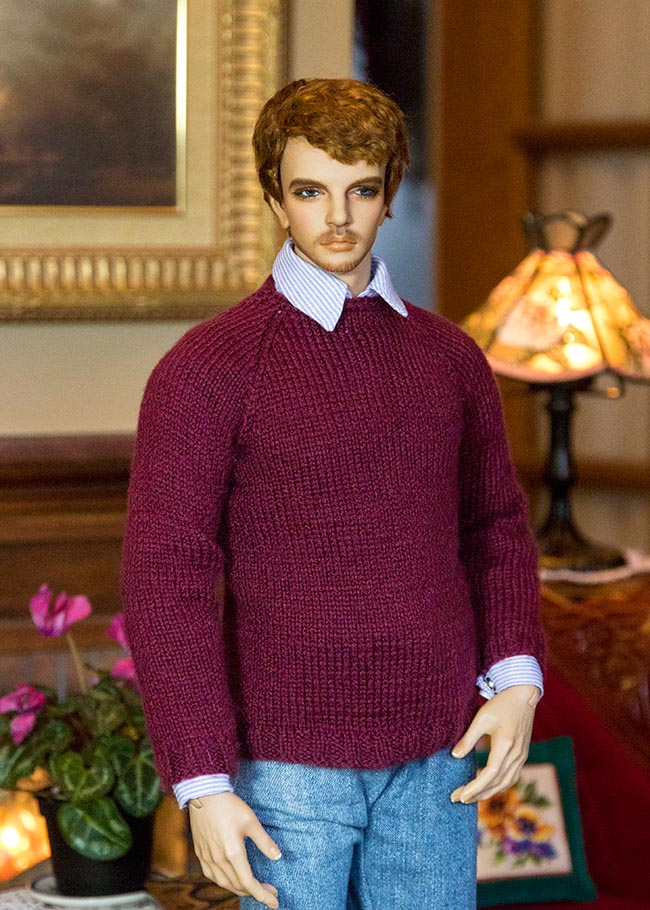
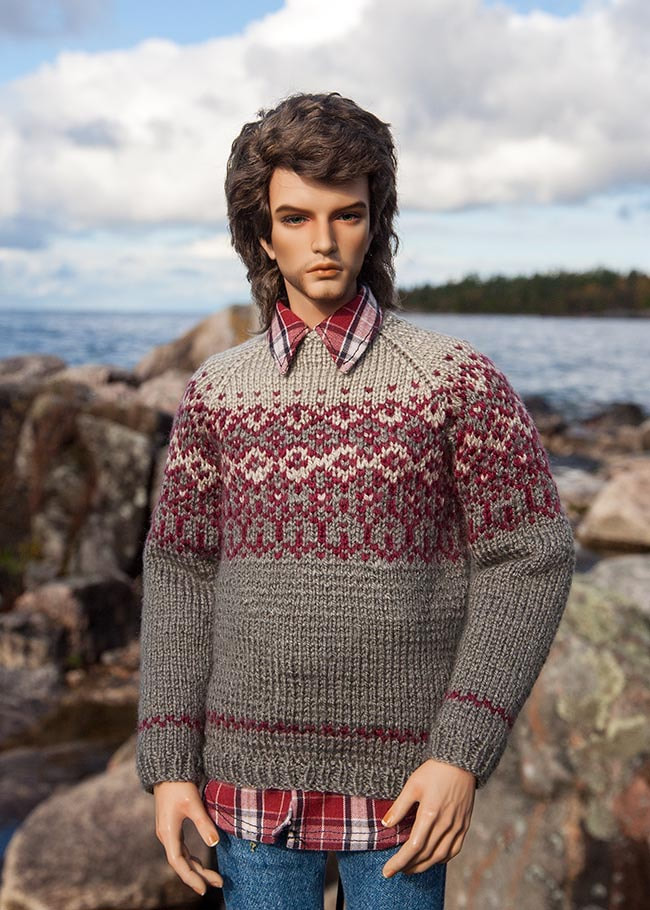
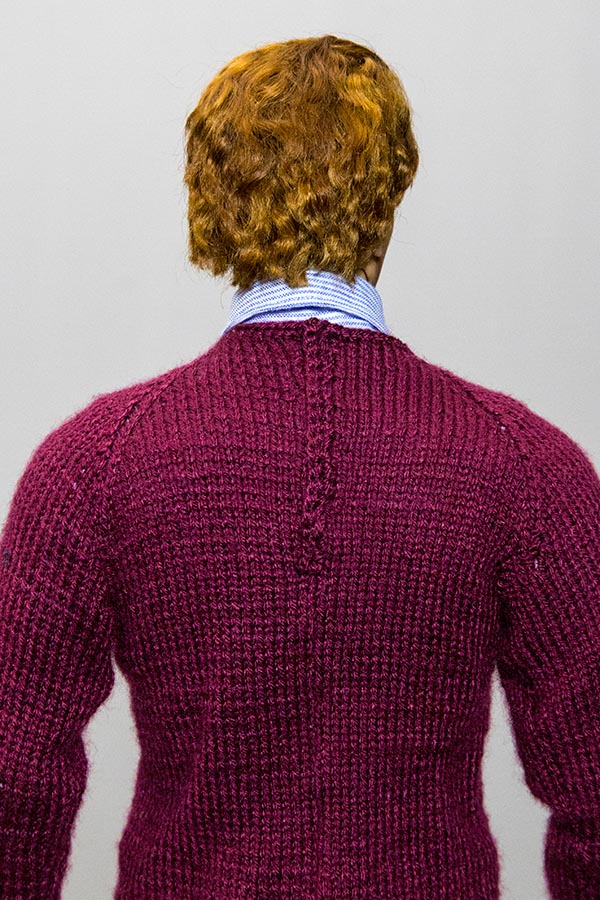
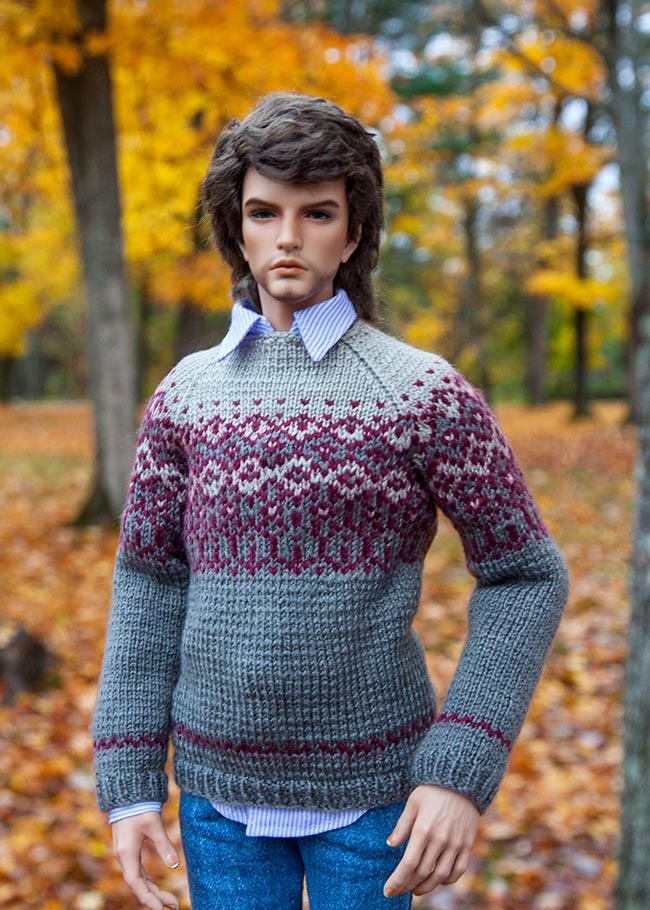
This is my basic pattern and it can be altered and knit with whatever stitch one desires. But keep in mind that too tight a stitch will make the sweater too small for the Muscle body. Especially when knitting a pattern like the gray sweater with the wine pattern, which has multiple threads. I did my best to pass the different coloured threads loosely on the wrong side but it still made the sweater less stretchy. It fits nicely on Baron, who has the slimmer Model body, but it was a tight squeeze for Lawrence who has the Muscle body.
|
|
I first designed the repeat pattern on graph paper, and the sweater was knit in a variation of it.
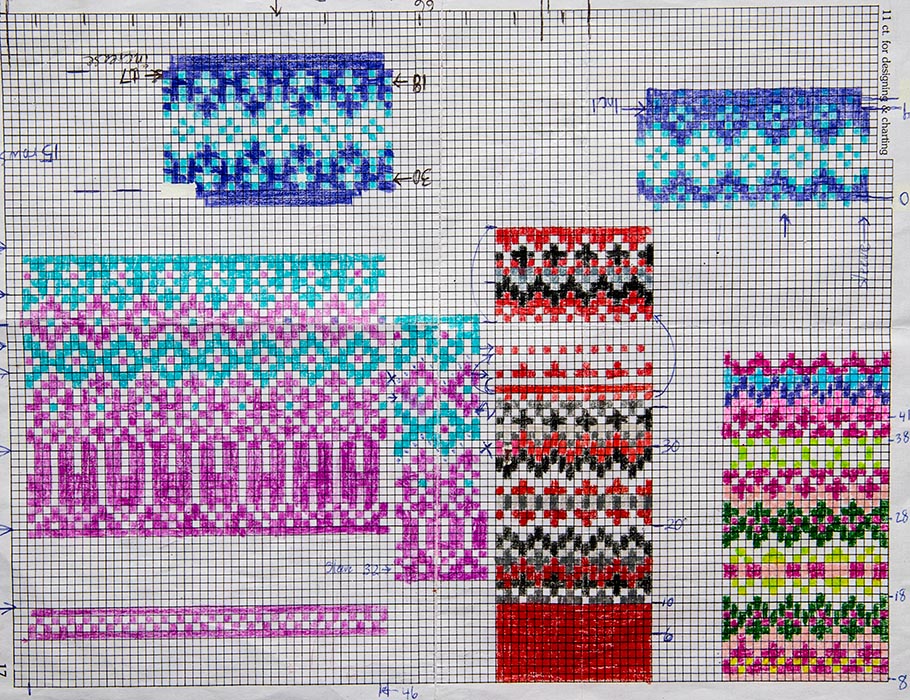
*It is important to end the sleeve tops and body of the sweater at the same row of the pattern, before continuing on the yoke.
The blue sweater was knit in Fleck Stitch…
Row 1 (right side) – Knit
Row 2 (back side) – Purl
Row 3 (right side) – K1, P1, repeat
Row 4 (back side) - Purl
The blue sweater was knit in Fleck Stitch…
Row 1 (right side) – Knit
Row 2 (back side) – Purl
Row 3 (right side) – K1, P1, repeat
Row 4 (back side) - Purl
*Click to download just the written Knitting Instructions
Copyright © 2023 Martha Boers
All Rights Reserved
