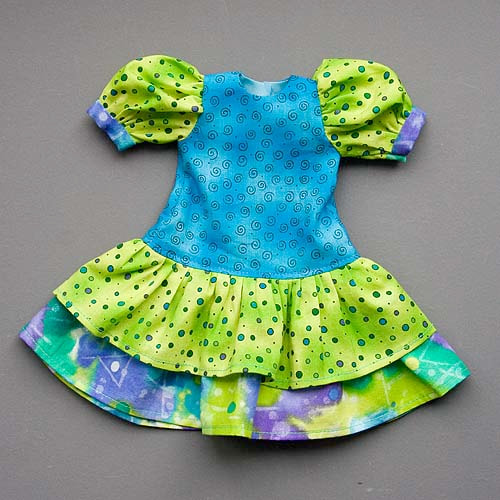
Easy KID Dress Pattern
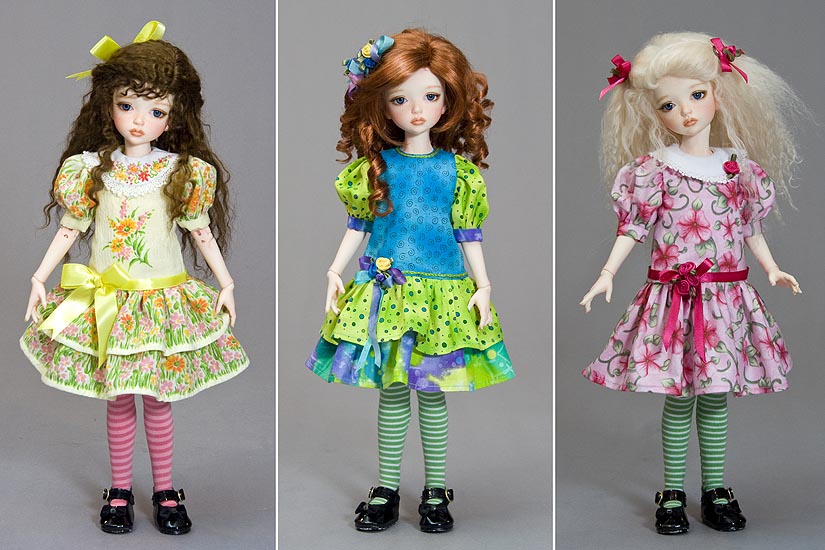
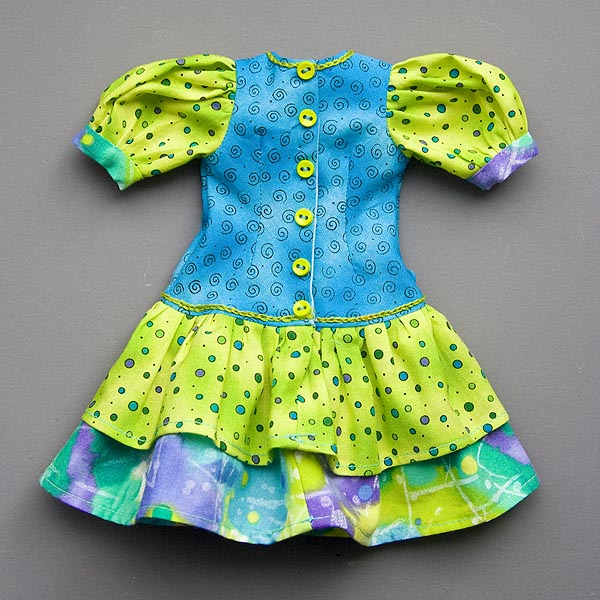
This pattern was designed for Lonnie, my Iplehouse KID, and includes a simple dress with
puffed sleeves, and tights. The basic dress design and construction is very simple allowing for
endless possibilities for enhancement.
KID measurements are; height 34.5 cm, neck circumference 6.8 cm, shoulder width 7 cm, chest circumference 14.9 cm, waist 13.5 cm, hips 17.8 cm, thigh 10 cm, ankle 4.5 cm.
The pattern will also fit other dolls with similar measurements.
* to download pattern PDF, click on center pattern image below
|
|
|
Materials
Fabrics, with matching coloured thread. Sewing needle, pins, Fray Check, snap fasteners, tiny buttons, and embellishments.
For collar, optional narrow lace. For tights, stretchy cotton jersey, and elastic.
For collar, optional narrow lace. For tights, stretchy cotton jersey, and elastic.
Instructions
*Please read through instructions completely before beginning.
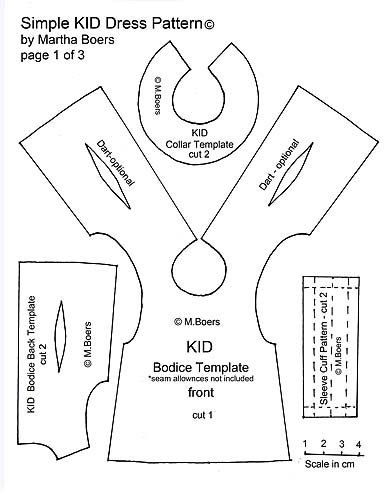
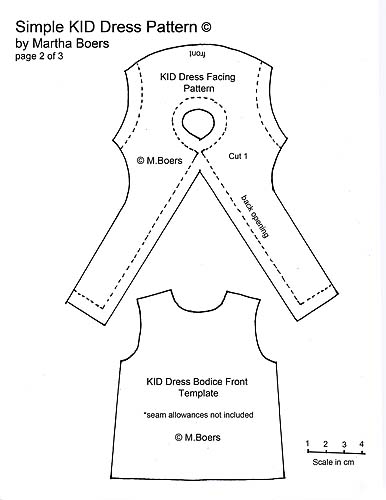
Print and cut out paper patterns. *Important: please note that some of the pattern pieces are Templates and are intended to be traced onto the back of the fabric to create the sewing line, and there are no seam allowances included on those pieces. There are also two options for the bodice. I've provided a one-piece pattern template with both front and back attached at the shoulder, and separate back and front templates
There are also no skirt patterns, just measurements.
The longer skirt is 4" long by 24"wide. The shorter skirt is 2 3/4" long by 22" wide
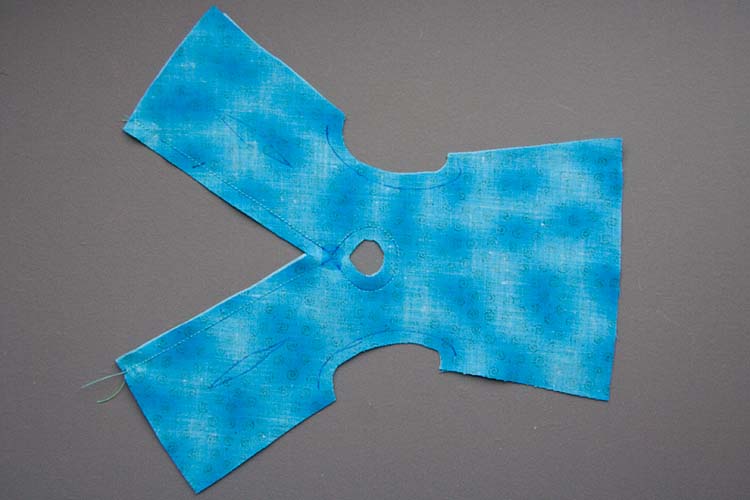
1. Choose your bodice pattern template (I'm using the one-piece template) and trace onto back of fabric with pencil (I used a pen, but it can bleed when Fray Check comes in contact with it) Cut out bodice fabric, remembering to add seam allowance. Cut out facing. Apply Fray Check to edges of facing that don't have seam allowances. Let dry, then zig-zag over those edges. (Sorry, I don't have a photo to illustrate this step, as I was originally going to sew a full lining in the dress - and started doing so - but decided it would be considerably easier for beginners to just use a facing. See photo in step 3) With right sides of bodice and facing together, sew up one side of back, carefully around neckline, and down other back side. Apply a dot of Fray Check to the upper back corners. Let dry.
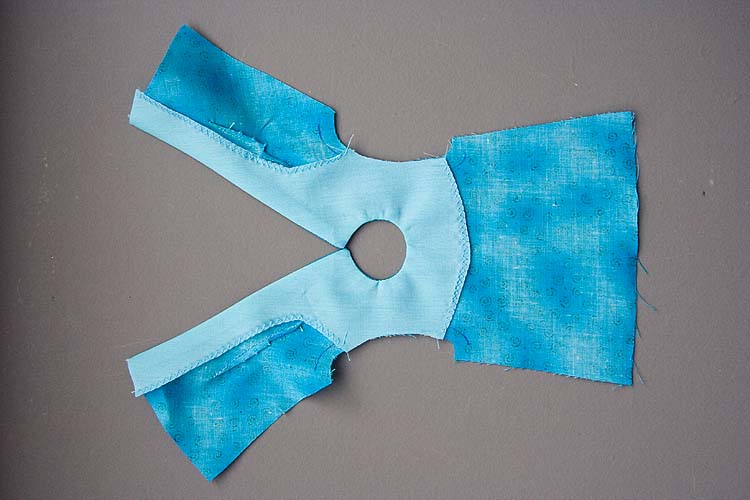
2. Carefully cut between upper back corners, and clip around neckline as shown.

3. Turn right side out and press. Sew darts. *Note, darts are optional. I put them in to give a more slender silhouette,
but you can choose not to include them. Press darts if you have included them.
but you can choose not to include them. Press darts if you have included them.
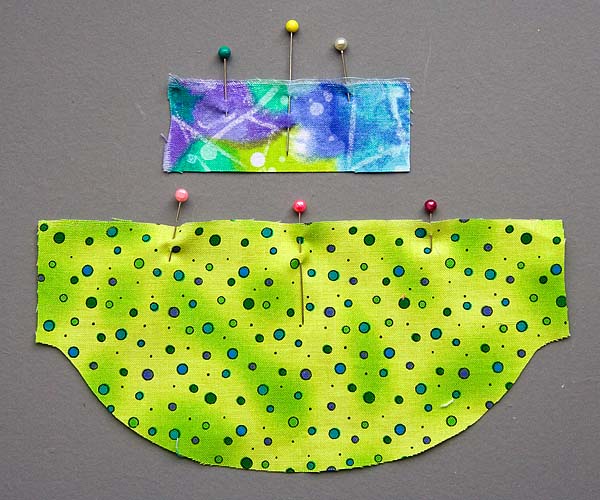
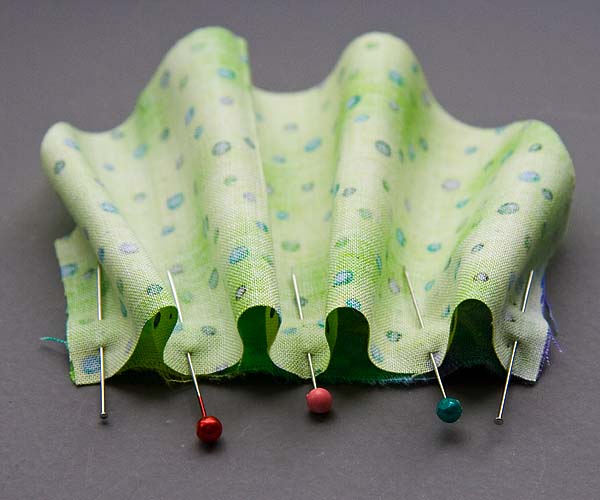
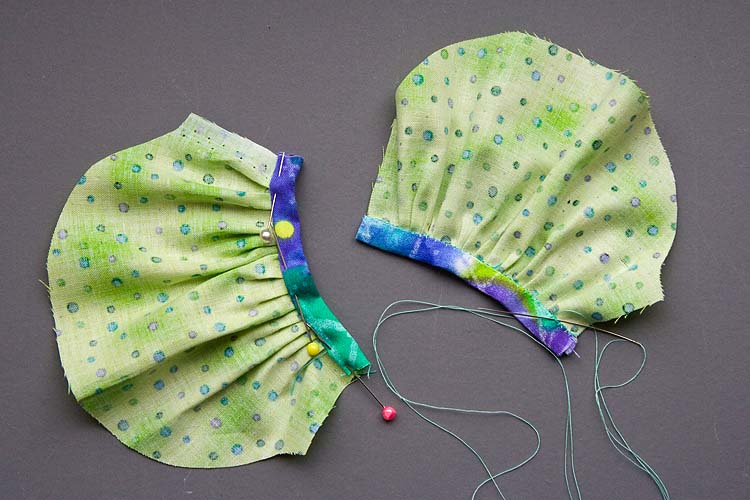
4. Gather sleeves onto cuffs. *Tip - to gather more evenly, divide the width of the sleeve edge and the cuff into quarters
- fold in half, and then in half again, and mark the folds with a pin. Then match up the pins, and sew.
- fold in half, and then in half again, and mark the folds with a pin. Then match up the pins, and sew.
|
|
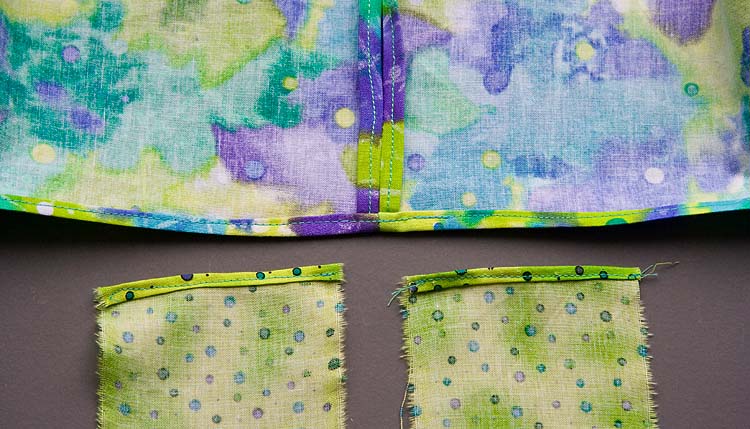
5. Fold cuff fabric up and over raw sewn edge and pin. Hand sew in place. Press cuffs.
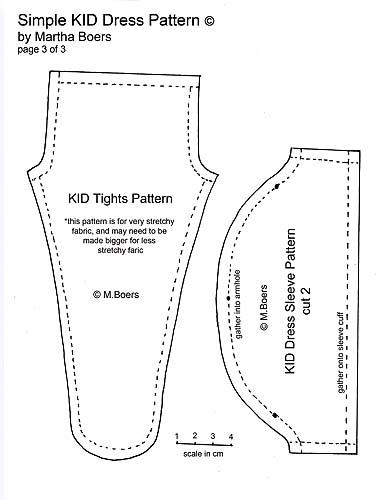
6. Gather and sew sleeves into armhole, then zig-zag raw edges.
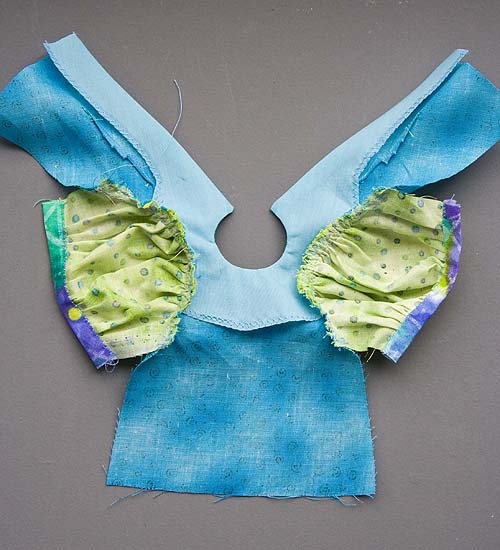
7. Pin, then sew underarm and side seams. Clip at armpit. Zig- zag raw edges. Turn right side out.
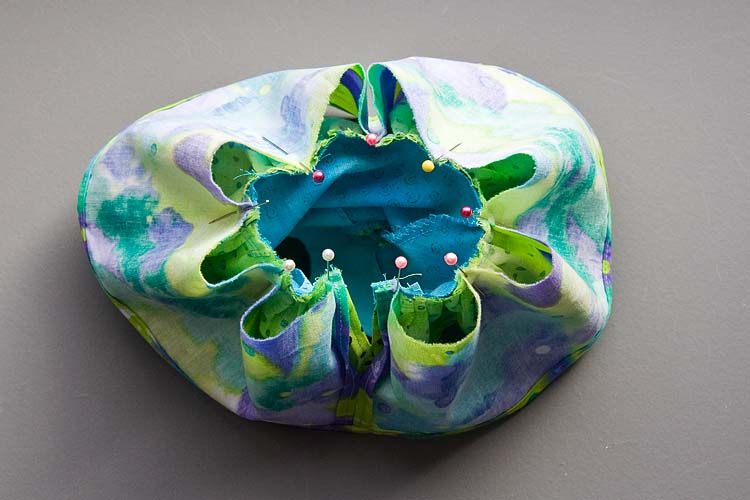
8. Sew rolled seam along back edges of skirt. With right sides together, sew skirt back halfway up from bottom.
Sew rolled hem along bottom of skirt. Repeat for second skirt. Press.
Sew rolled hem along bottom of skirt. Repeat for second skirt. Press.
9. If you are making a dress with two skirts, sew the shorter one onto the bodice first. Divide the bodice bottom edge and skirt upper edge into eighths by folding, and mark with pins. Match up pins. Sew skirt onto bodice gathering to fit.
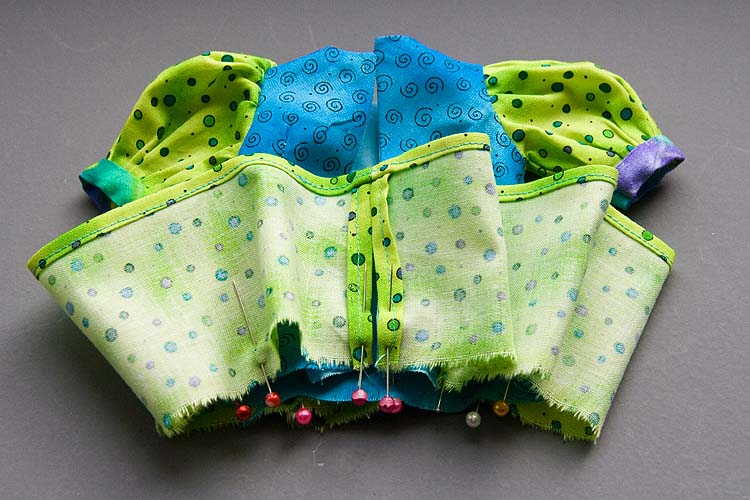
10. Repeat with second, longer skirt.
11. Zig-zag raw edges to finish.

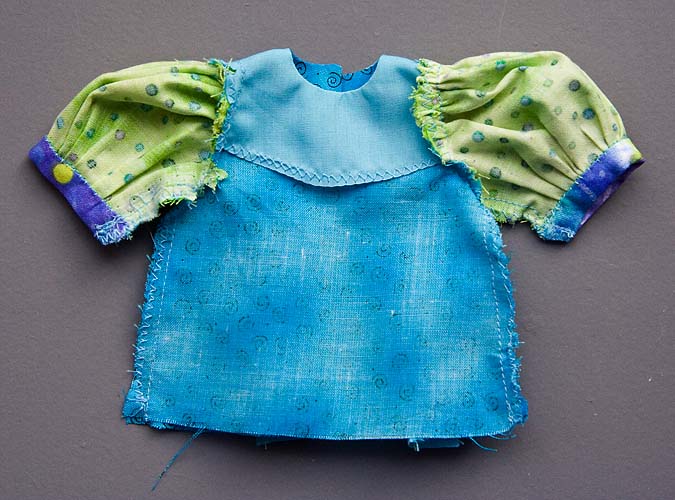
12. Turn dress right side out, and top-stitch along bottom of bodice to hold gathered skirt seams neatly up in base of bodice.
13. Embellish dress. I used chain-stitch with green embroidery floss to trim the neckline and along skirt.
For instructions on how to do chain stitch, see Tutorials page.
For instructions on how to do chain stitch, see Tutorials page.
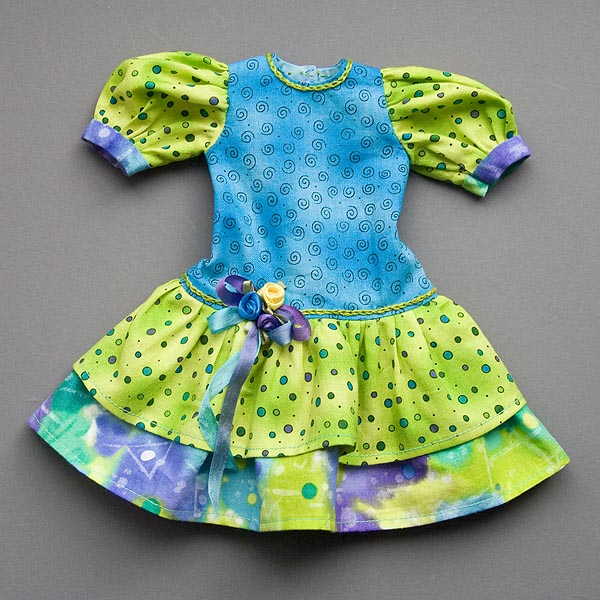
14. Sew snaps along back opening, and finish with tiny buttons.
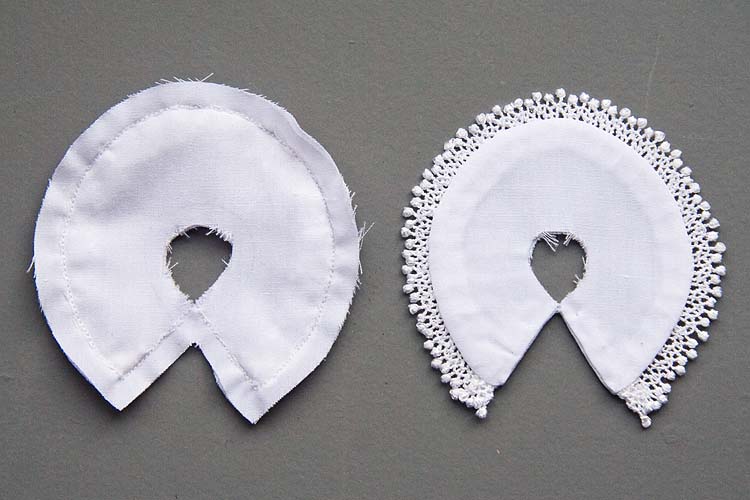
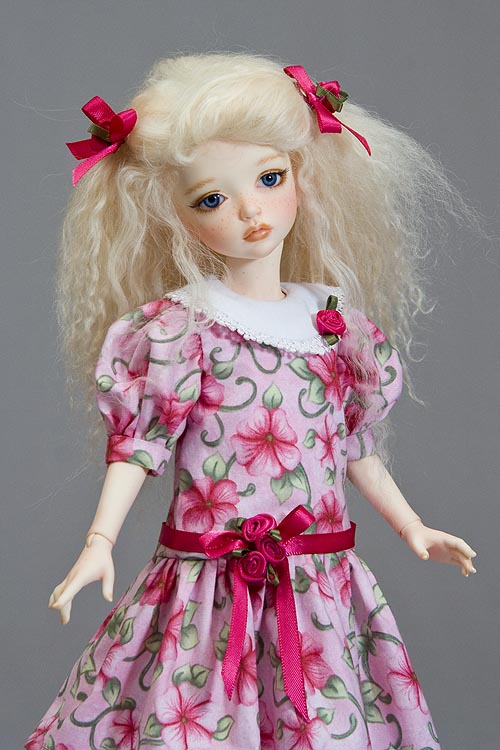
Optional Collar
Trace collar template onto back of fabric. Cut out two, remembering to add seam allowances. Hand-baste narrow lace along right side of one collar piece. With right sides together, stitch around edge of collar. Clip curves and turn right side out. Press. Insert finished collar between dress bodice and facing in step 1 of instructions above, and sew through all layers.
Tights
Follow the instructions for BID tights in Simple BID Dress Tutorial.
*Important Note: The KID tights patterns are designed for a very stretchy tricot fabric. If your tricot is not very stretchy, you will need to adjust the pattern by adding to the length and width. The pink striped tights with the yellow sample dress, were the perfect fabric for the tights pattern, whereas the green stripe from the other two sample outfits was not nearly stretchy enough, so I had to add quite a bit to the length at waist and toe, as well as add to the width.
*Important Note: The KID tights patterns are designed for a very stretchy tricot fabric. If your tricot is not very stretchy, you will need to adjust the pattern by adding to the length and width. The pink striped tights with the yellow sample dress, were the perfect fabric for the tights pattern, whereas the green stripe from the other two sample outfits was not nearly stretchy enough, so I had to add quite a bit to the length at waist and toe, as well as add to the width.
|

|
Copyright © 2013 Martha Boers
All Rights Reserved
All Rights Reserved
