Country Ruffles ©
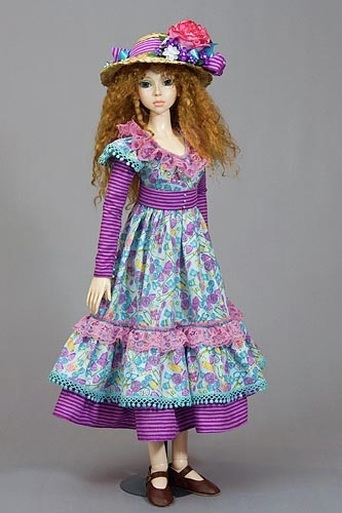
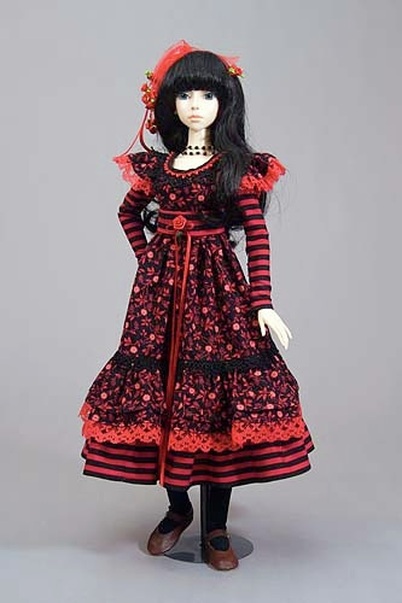
My Country Ruffles pattern was designed to fit Ryung by Elfdoll.
Her measurements are; Height 58cm, Head circumference 8 1/4", Neck circumference 9cm, Bust 25cm, Waist 18.5cm,
Hips 26cm, Shoulder width (torso only) 8cm, Arm length 15cm, Leg length 28cm
The patterns will fit other SD-size dolls with similar measurements.
Her measurements are; Height 58cm, Head circumference 8 1/4", Neck circumference 9cm, Bust 25cm, Waist 18.5cm,
Hips 26cm, Shoulder width (torso only) 8cm, Arm length 15cm, Leg length 28cm
The patterns will fit other SD-size dolls with similar measurements.
Patterns
To download a PDF with full-size, ready-to-print patterns click here: Country Ruffles Pattern
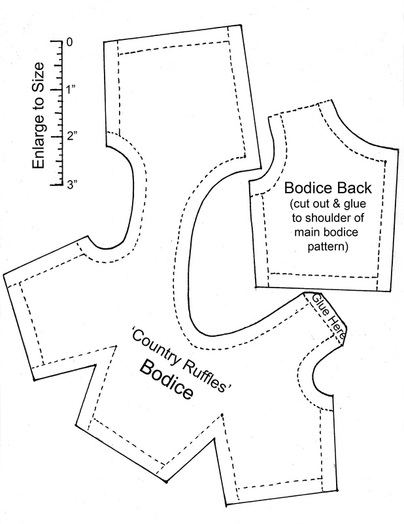
Cut out the patterns and glue the bodice back onto the main bodice pattern piece.
Cut out the patterns and glue the bodice back onto the main bodice pattern piece.
*Since all ball-jointed
dolls have different bodies, often with very different body proportions, it would be wise to make a sample bodice in muslin
first, to check for fit, and make any necessary adjustments to the pattern. The instructions are very basic and assume the sewer has
some sewing skills. The sleeves are tight-fitting and made from a non-stretch fabric, so to accommodate fitting
over the hand, the sleeve is open up to the elbow and closed with snaps.
You will need half a metre of the main dress material, and a quarter metre of the accent striped fabric.
You will need half a metre of the main dress material, and a quarter metre of the accent striped fabric.
Instructions
1. In addition to cutting out all the patterns from fabrics, cut the following:
- skirt - 9 1/2" x 33 1/2"
- same-fabric ruffle - 4 1/4" x 68" (sew two strips together)
- contrasting ruffle - 4 1/4" x 60" (sew two strips together)
- waistband - 2 5/8" x 10 1/2"
2. Pin bodice to lining, right sides together, and sew up center back, along neckline, and down back. Clip curves; turn right side out and press. Sew darts.
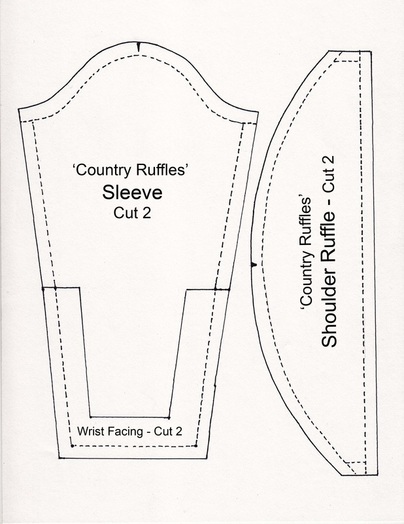
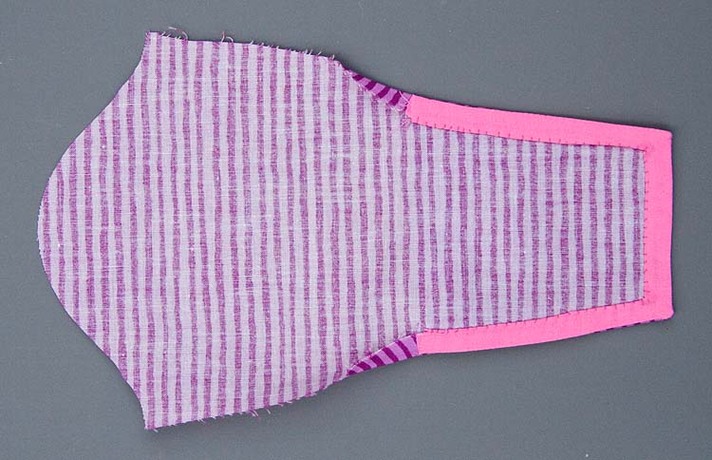
3. Sew sleeve facing to sleeve, clip corners, turn and press. Clip inside corners at wrist, turn fabric under, and hand-stitch as invisibly as possible.
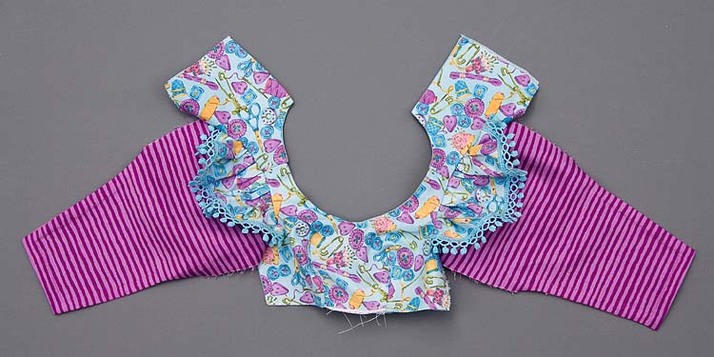
4. Sew
shoulder ruffle, edge with lace, then baste into armhole. Baste sleeve into
armhole, then machine stitch through all layers. Clip and zig-zag edges. Turn
bodice inside out and sew underarm and sleeve seams. Sew lace ruffle around
neckline.
5. Prepare
ruffles by sewing back seams together, then hemming with a rolled edge. Sew
lace onto self-fabric ruffle. Sew seam along back of skirt and sew the two
lower back edges together.
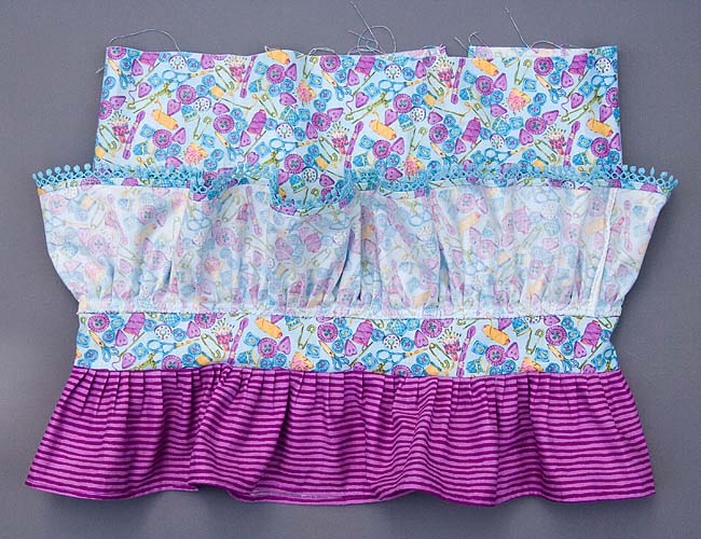
6. Sew contrast ruffle onto bottom of skirt. With ruler and pencil draw a line 1 5/8" above the ruffle seam on the right side. Pin same-fabric ruffle with right sides together above the pencil line and sew as shown in photo below.
6. Sew contrast ruffle onto bottom of skirt. With ruler and pencil draw a line 1 5/8" above the ruffle seam on the right side. Pin same-fabric ruffle with right sides together above the pencil line and sew as shown in photo below.
7. Press
ruffle downward, and sew a lace ruffle just above fabric ruffle. Sew skirt onto
bodice. Sew snaps and decorative buttons up back opening and along lower
sleeves.
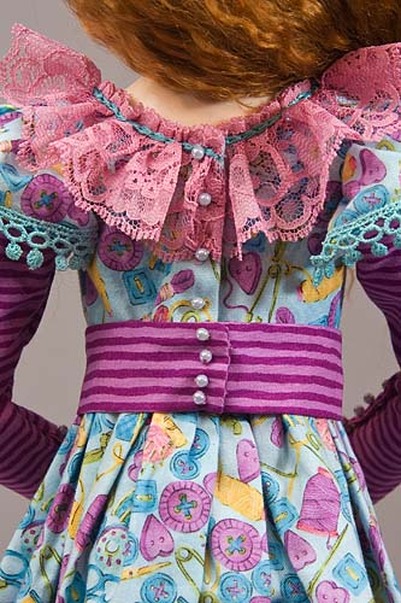
8. Make waistband by folding strip lengthwise and sewing one end and along side. Turn right side out, tuck in raw end, hand-stitch closed, and sew on snaps.
8. Make waistband by folding strip lengthwise and sewing one end and along side. Turn right side out, tuck in raw end, hand-stitch closed, and sew on snaps.
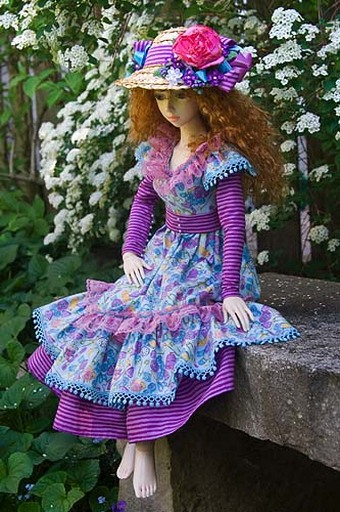
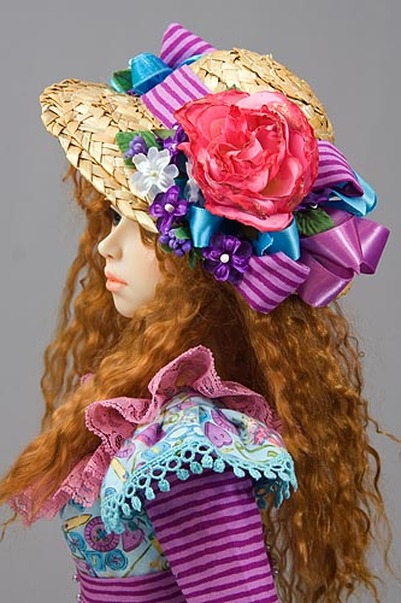
To make a matching hat, buy or make a straw doll hat, and sew a hatband and make bows from leftover dress fabric. Embellish with matching coloured satin ribbons and fabric flowers.
A second prototype made with entirely different fabrics and trims, gives a whole new look.
Copyright © 2010 Martha Boers
All Rights Reserved
