Behind the Scenes 2020 - Part 2
Taking a look at the set-ups for some of my photo shoots this year - when I remembered to take them
In the order they were taken...
In the order they were taken...
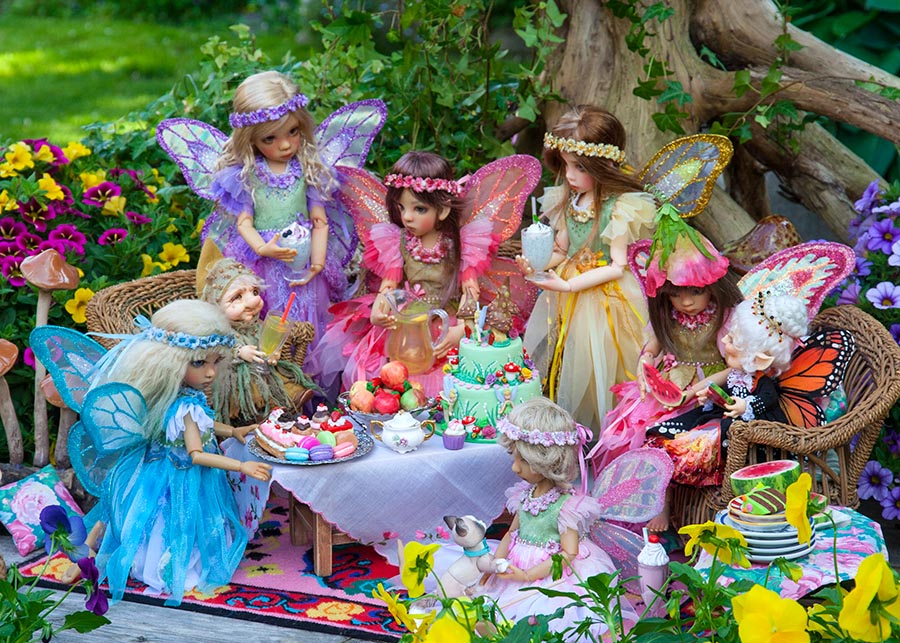
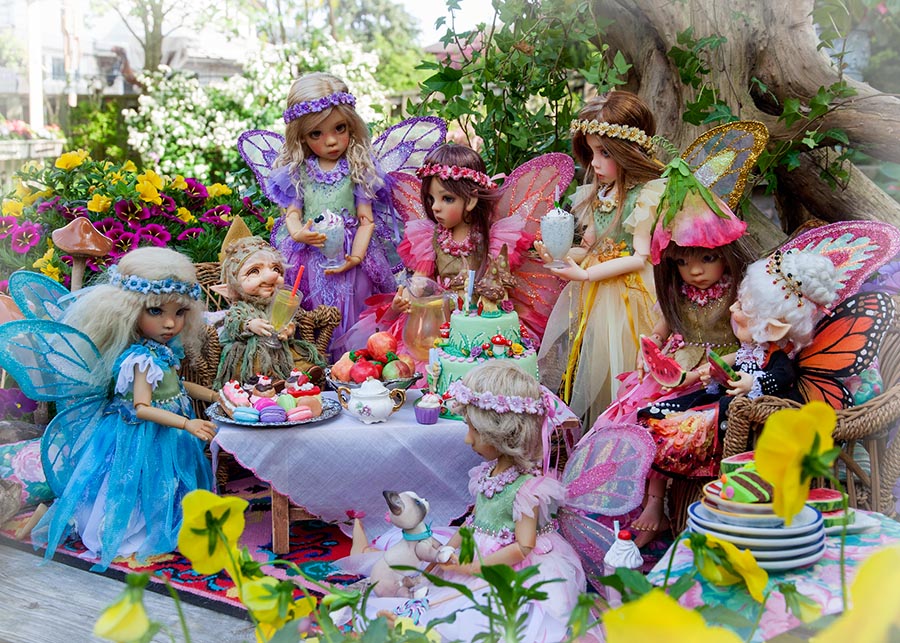
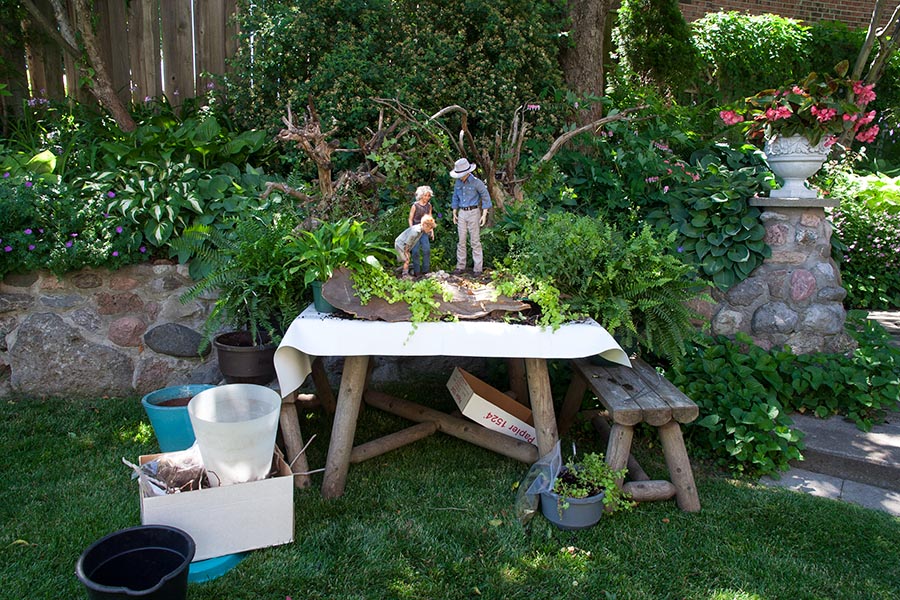
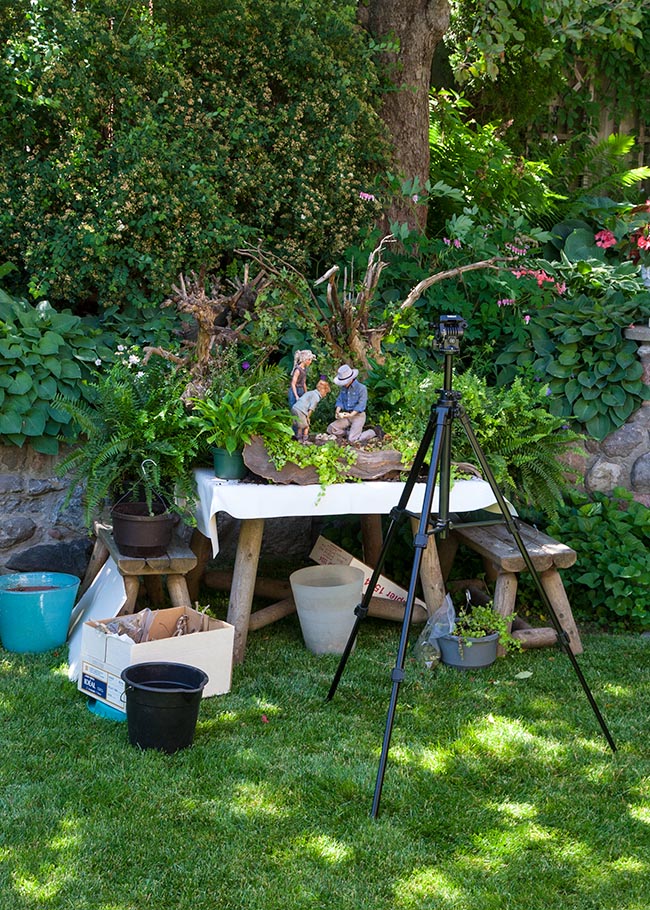
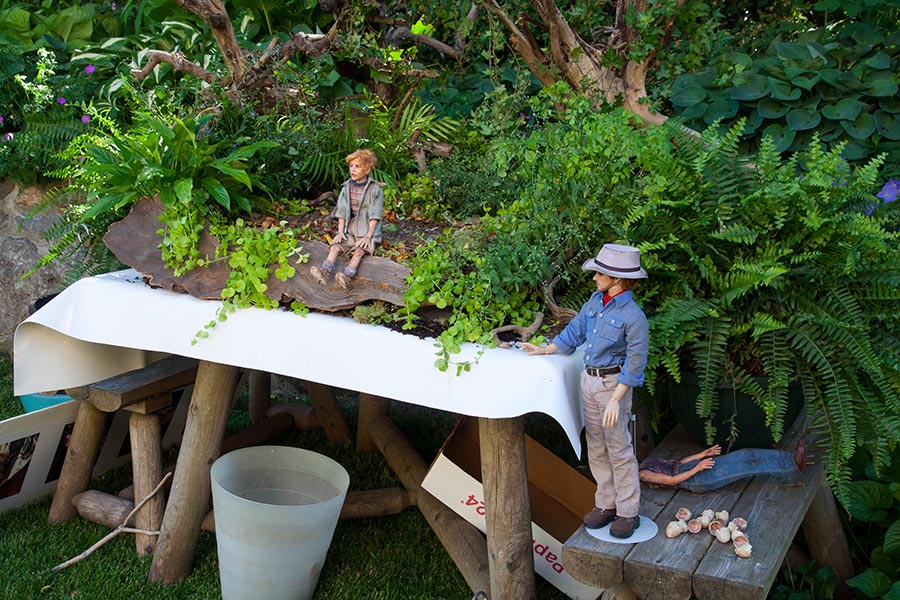
Making a Fairy Garden
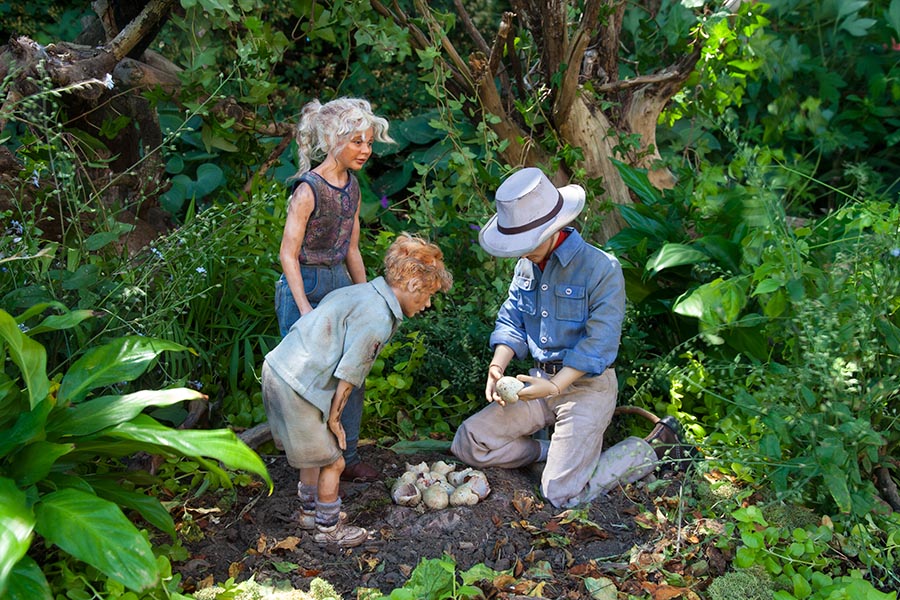
Some behind the scenes shots of the set-up for the Fairy Picnic photographed in June...
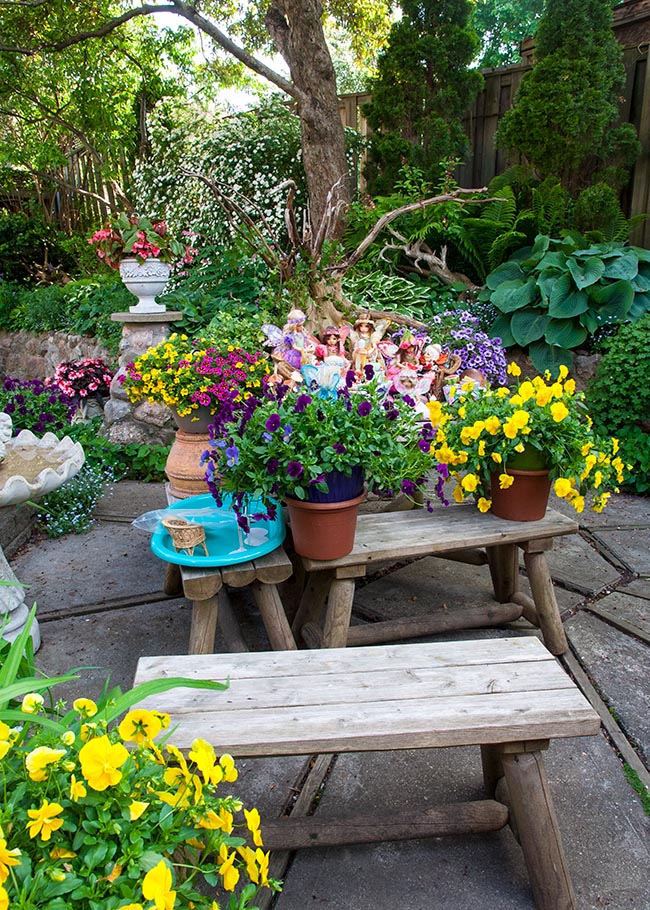
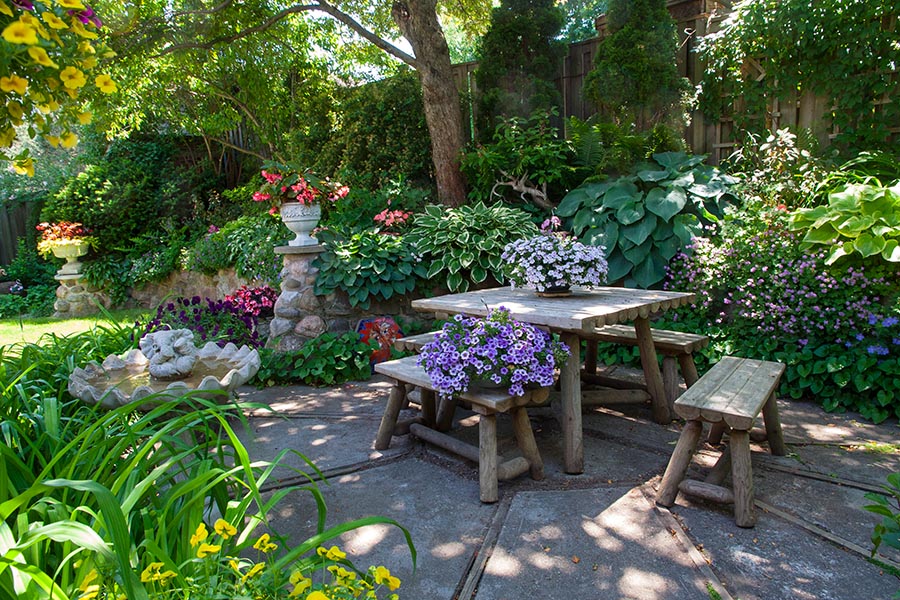
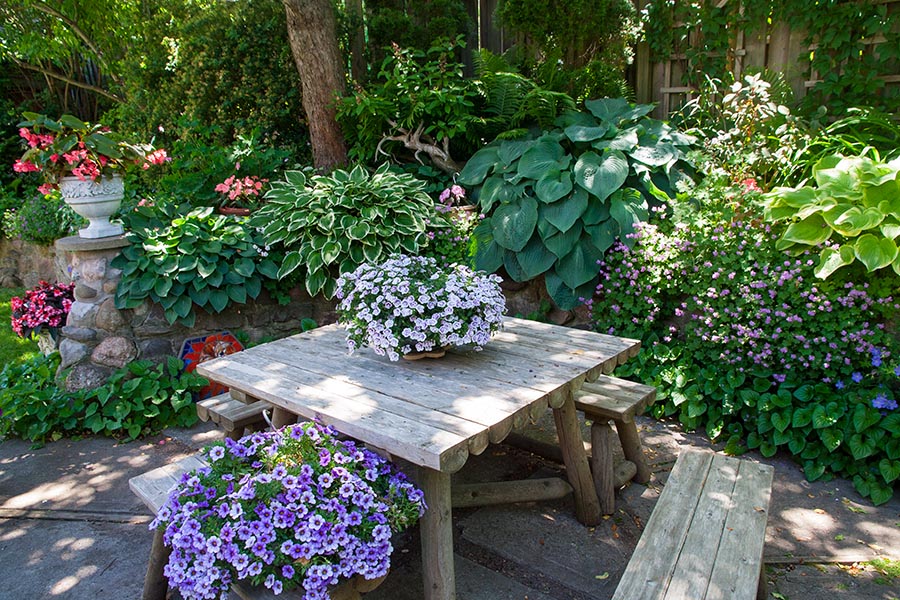
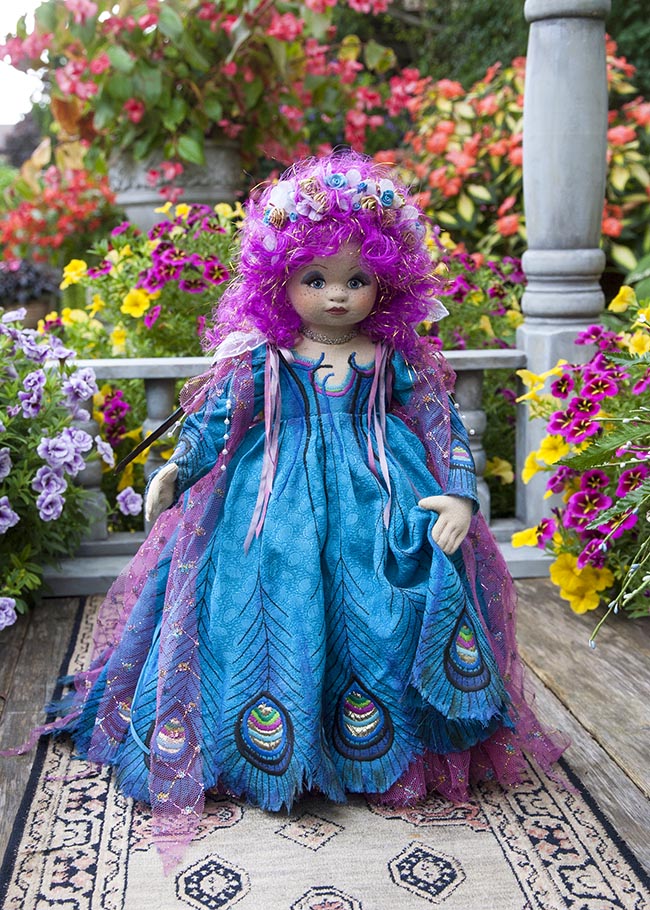
My favourite place to take photos outside is on the patio table. The plants in my garden are mostly all way too big out of scale, so setting up on the table, raises the dolls, making it easier for me to work with and photograph them, plus it makes the plants in the background look better to scale...
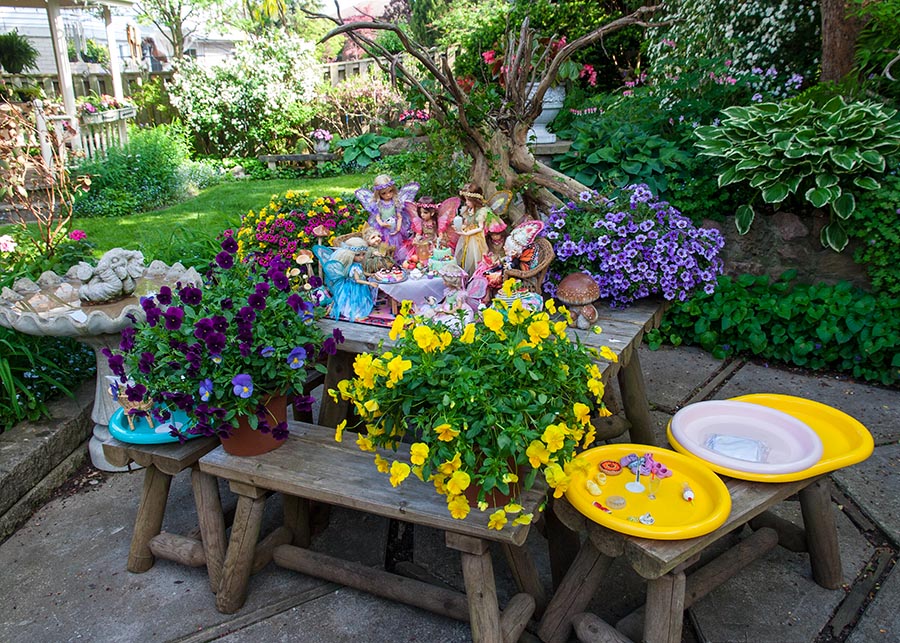
The hanging baskets of flowers get set in the background and around the sides raised on pots on benches. The dolls and props get brought out on trays to help minimize how many times I have to go in and out. Then I sit down and take the photos.....
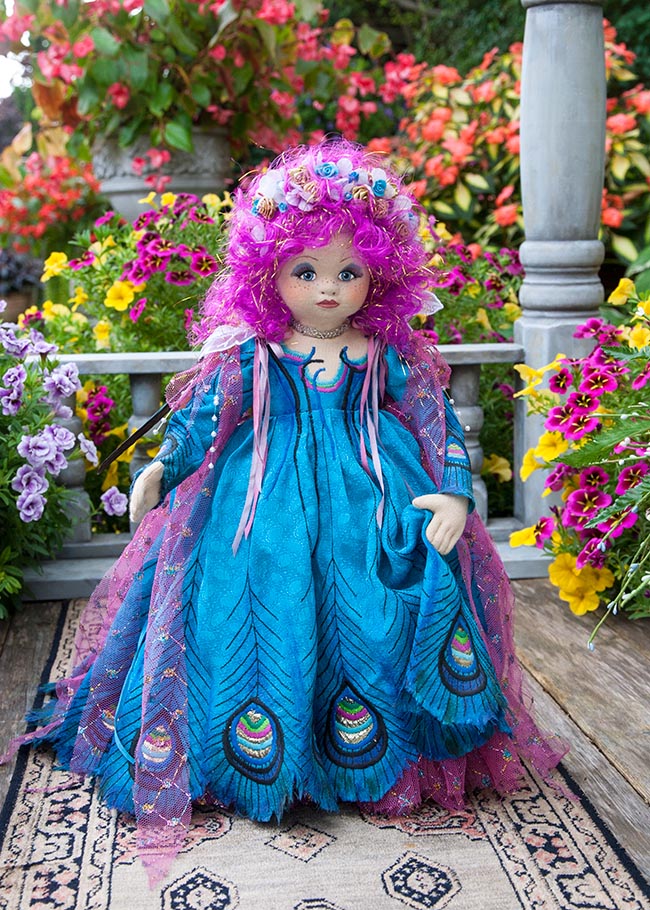
Moving a bit to one side can change the lighting, and the whole feel of the picture. I also got down a little lower at the doll's eye level for this next one....
Storage
Someone asked how and where I store my vast collection of doll furniture and props, so I thought I'd take some photos.
First the furniture and bigger stuff. It all started out on just two book shelf units in the basement, which it quickly outgrew, so Jan made extra shelf extensions in between.
First the furniture and bigger stuff. It all started out on just two book shelf units in the basement, which it quickly outgrew, so Jan made extra shelf extensions in between.

And that isn't even all of it. There's more horses and doll-size carpets along another wall, and the fireplace and main china cabinet are permanently stored in the dining room.
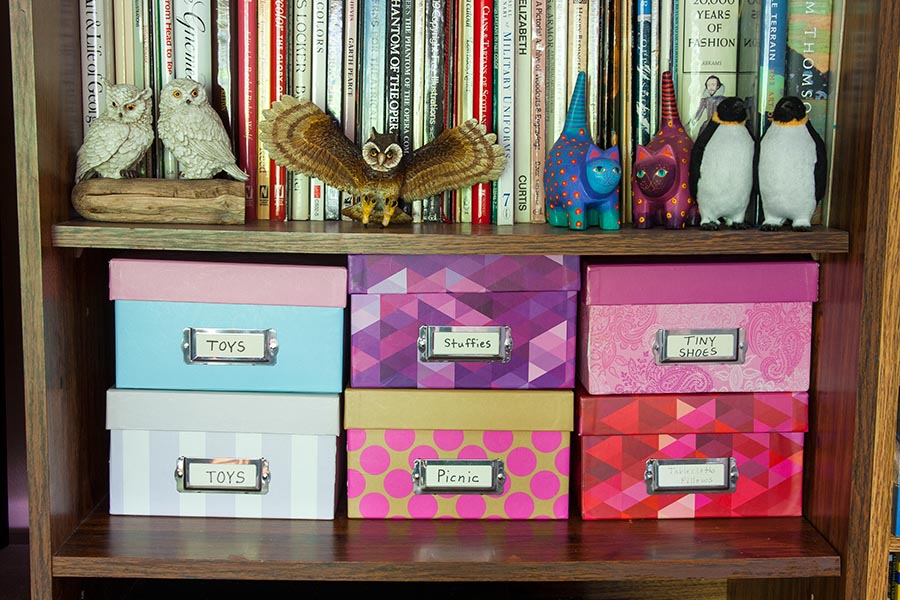
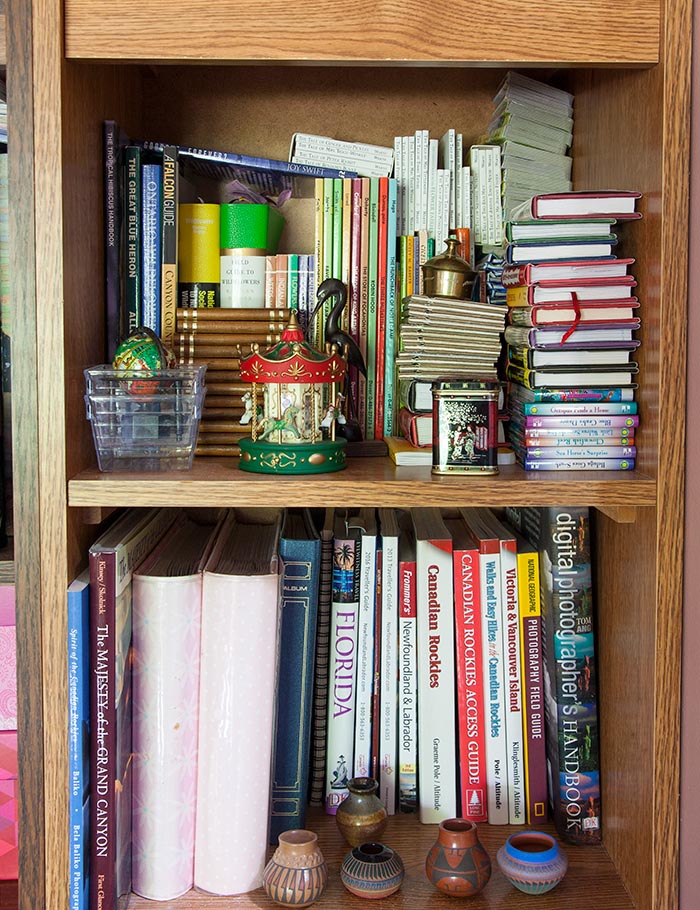
All my smaller props are sorted and stored in labelled photo boxes. The most often used ones are in plain sight on a main floor bookcase shelf....
All my smaller props are sorted and stored in labelled photo boxes. The most often used ones are in plain sight on a main floor bookcase shelf....
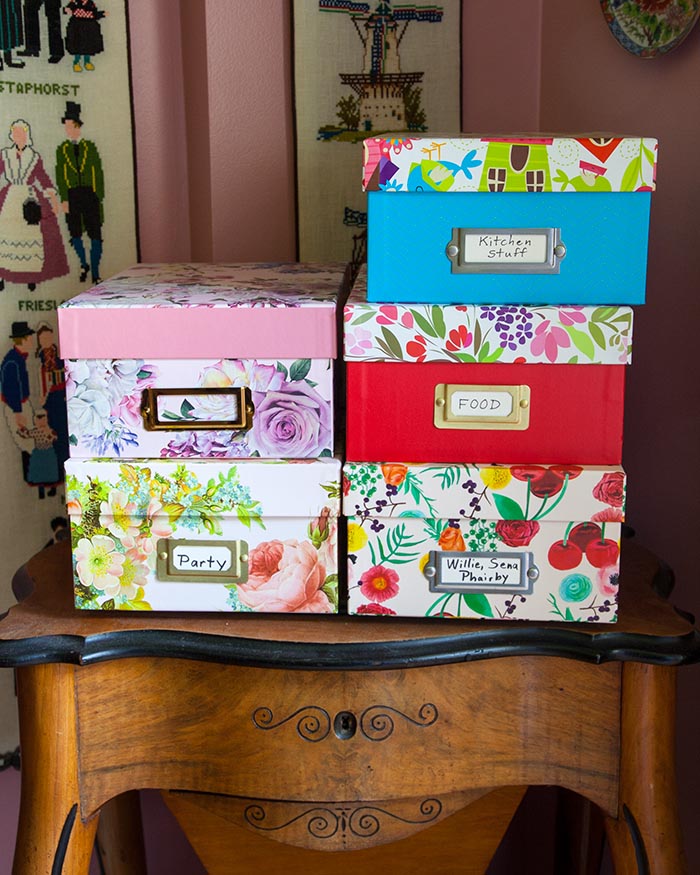
..or stacked on my Mom's sewing table in the corner of the dining room...
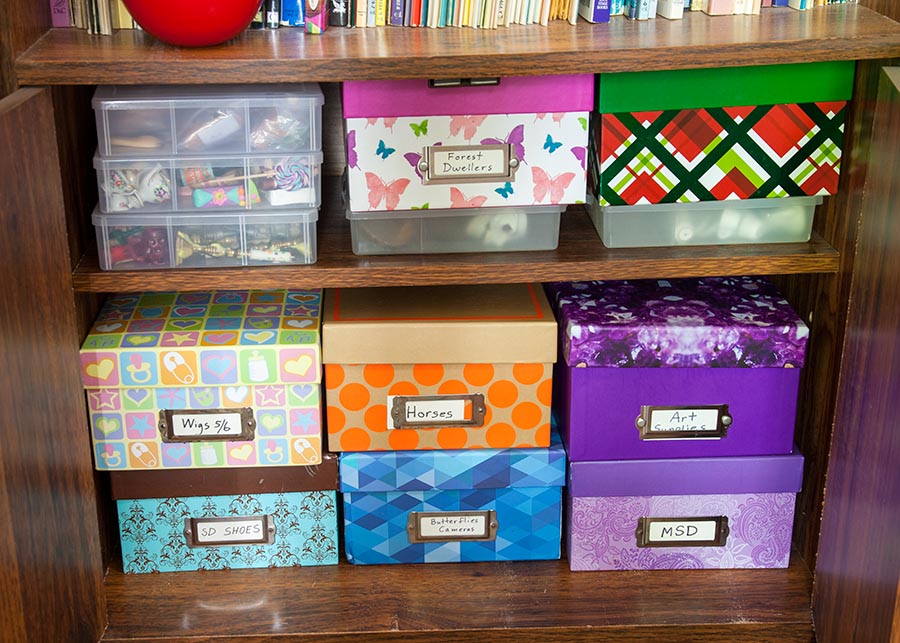
..and there's more behind doors at the bottom of a living room bookcase. The clear compartmented boxes contain things like tiny dished, plates, cutlery, small food items, and one of the boxes contains extra hands and feet - all in labelled baggies....
There's a row of pets and other bigger props lined up above my contemporary BIDs and whatever dolls happen to be standing on the drop-down bar (which is full of patterns, laces and trims)
One of the top shelves in the book case has been taken over with stacks of doll books....
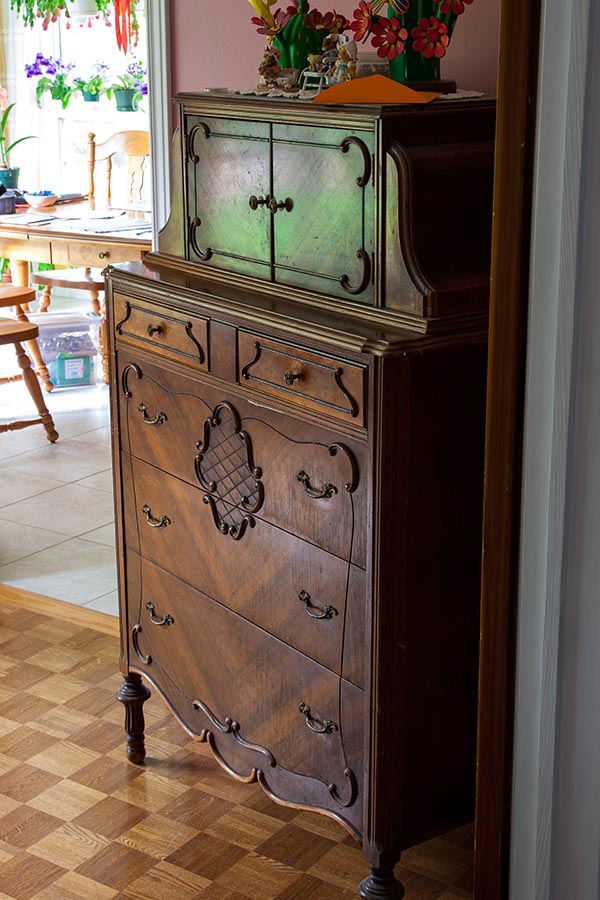
..and this dresser in the dining room is full of doll-related stuff too. The top big drawer is full of miscellaneous props. The next big drawer down, is full of bigger size 9 wigs, and the bottom drawer is full of bags of mohair for making wigs....
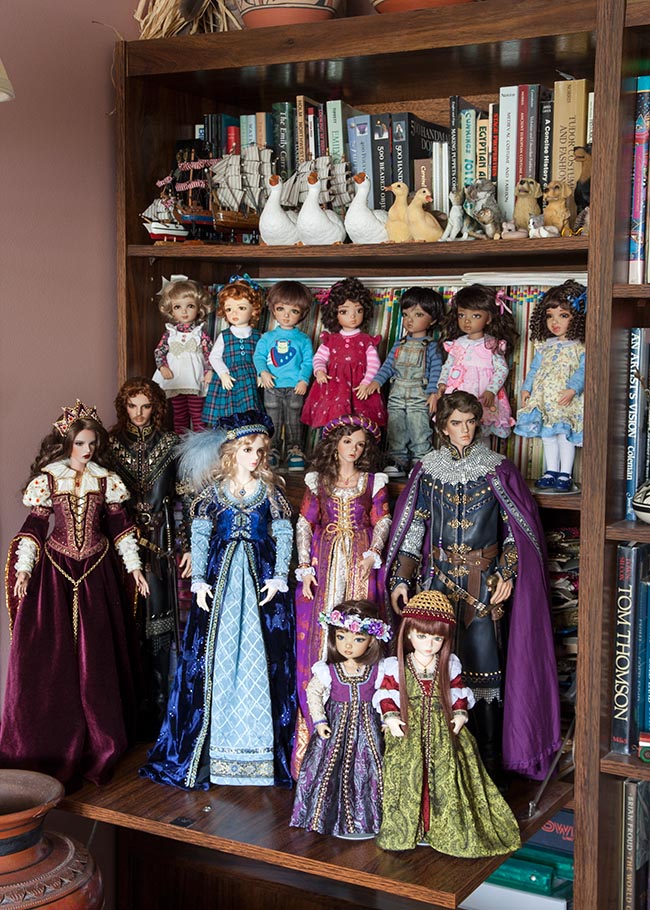
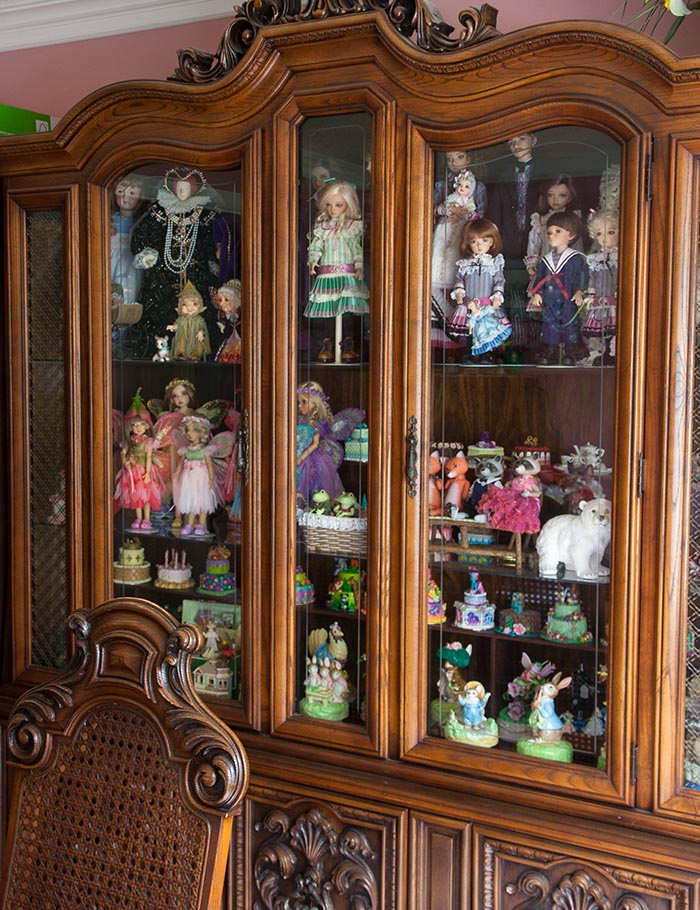
The fine china moved out of the dining room china cabinet years ago. Now it houses an old music box collection, some old dolls, my family of Victorian bjds, the smaller Kaye Wiggs bjds, all the Whispering Grass Forest Dwellers, and rows of birthday cakes, and miniature china tea sets,displayed on narrow shelves along the back wall...
So, technically, I'm living in a 'doll house'.
And yes, I do know exactly where everything is.
And yes, I do know exactly where everything is.
A Summer Wedding
An Iplehouse FID doll group was having a wedding photo challenge, so I dressed Baron and Grace for some wedding portraits. I set up on the patio table in late afternoon when it was in the shade...
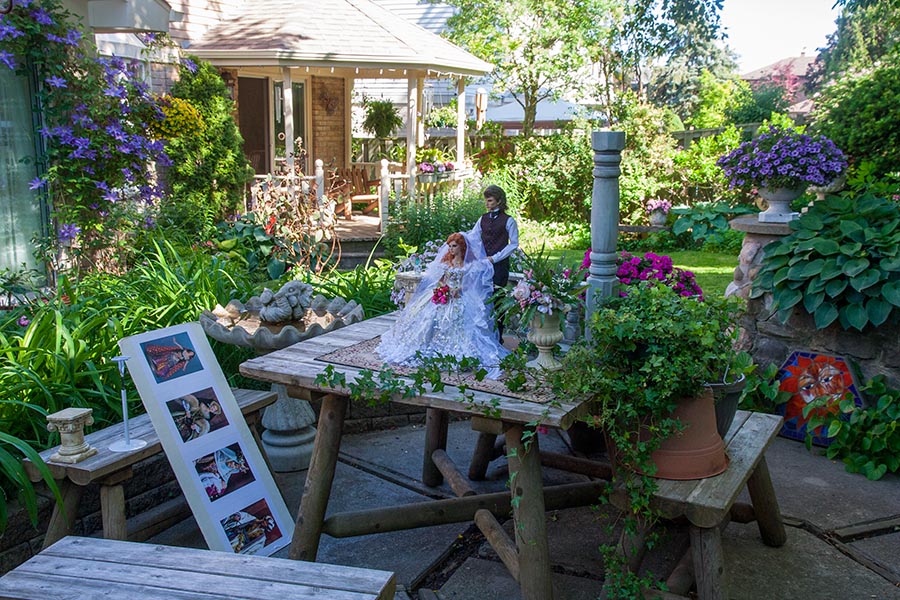
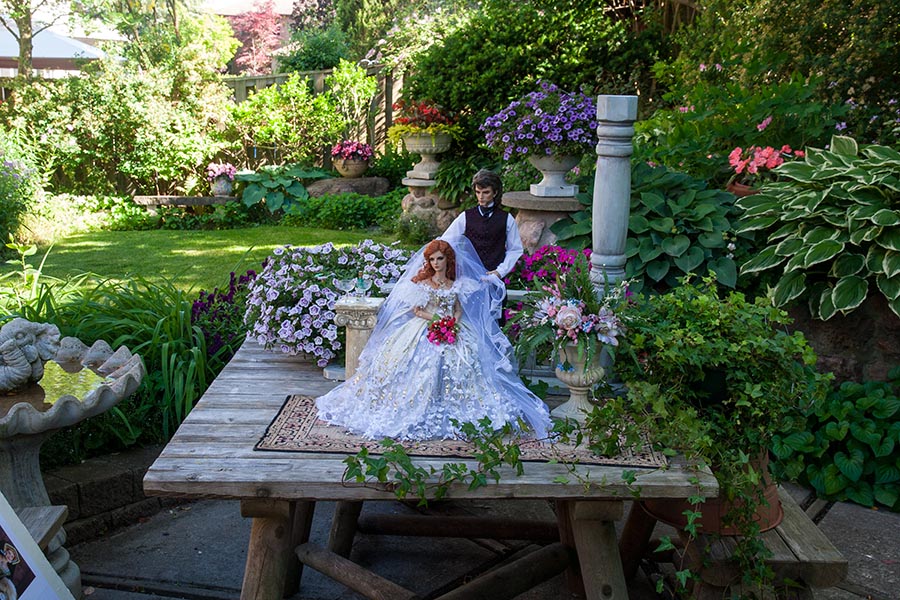
Because the scene was technically back-lit, I had to use my white card to bounce light onto their faces.
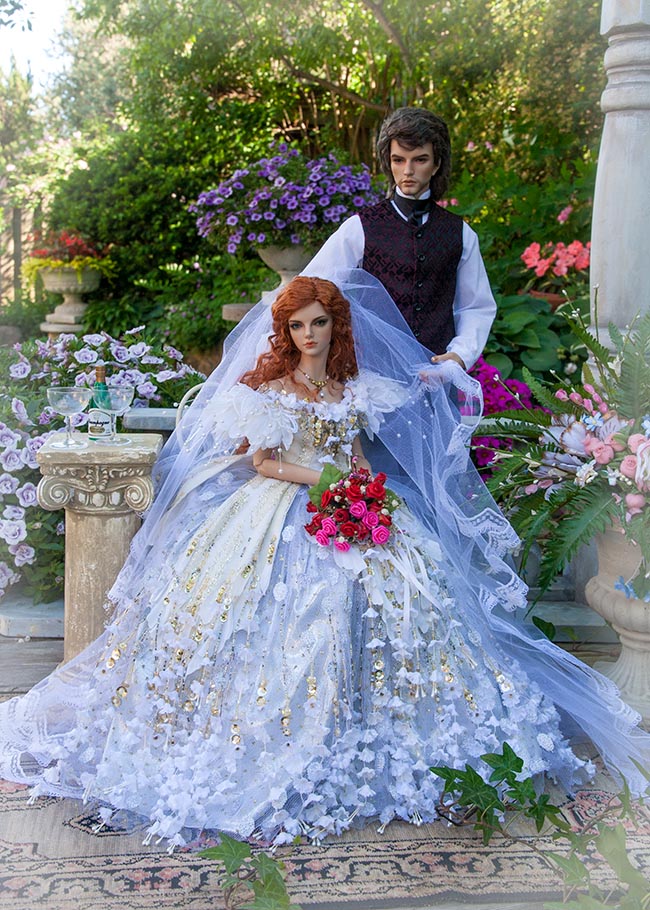
One of the final photos, taken down at the doll's eye level...
One of the final photos, taken down at the doll's eye level...
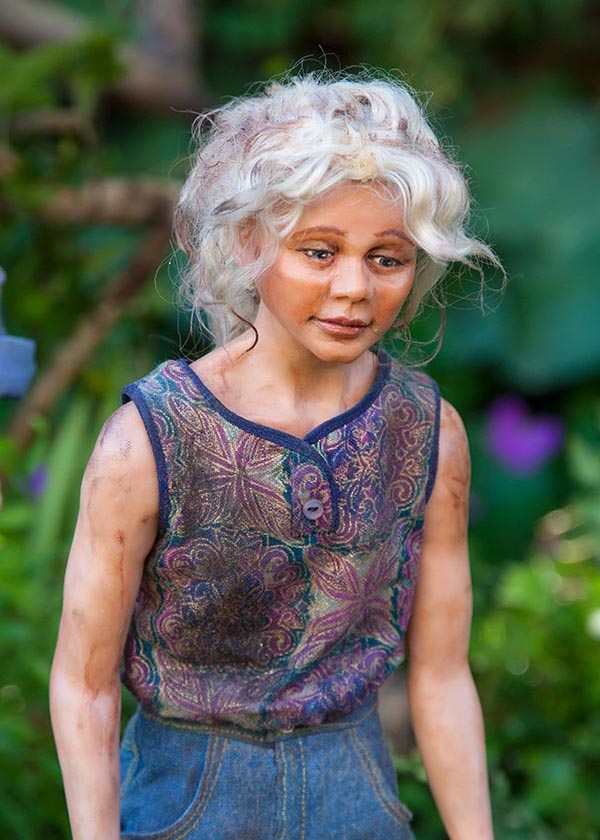
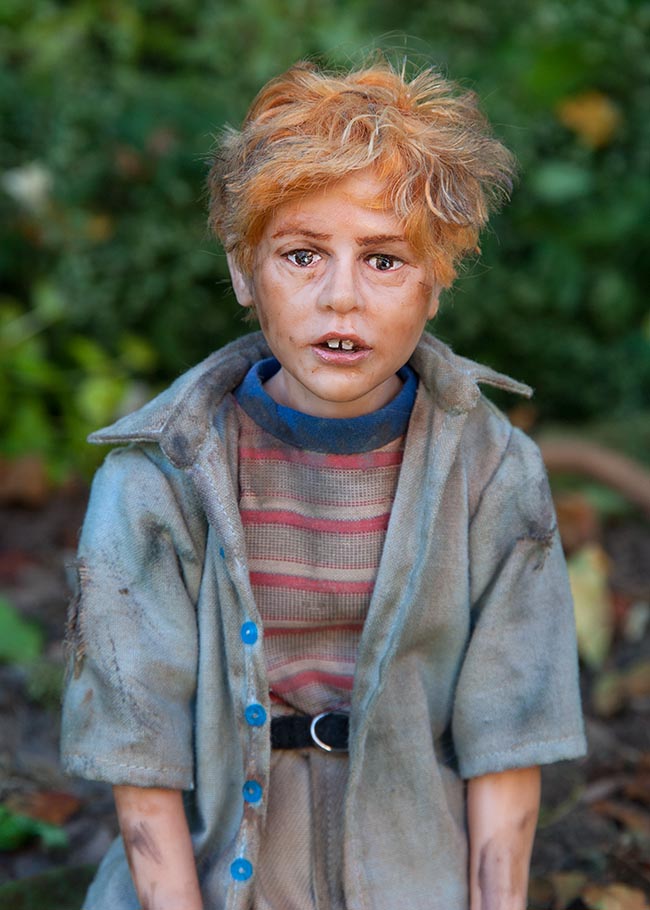
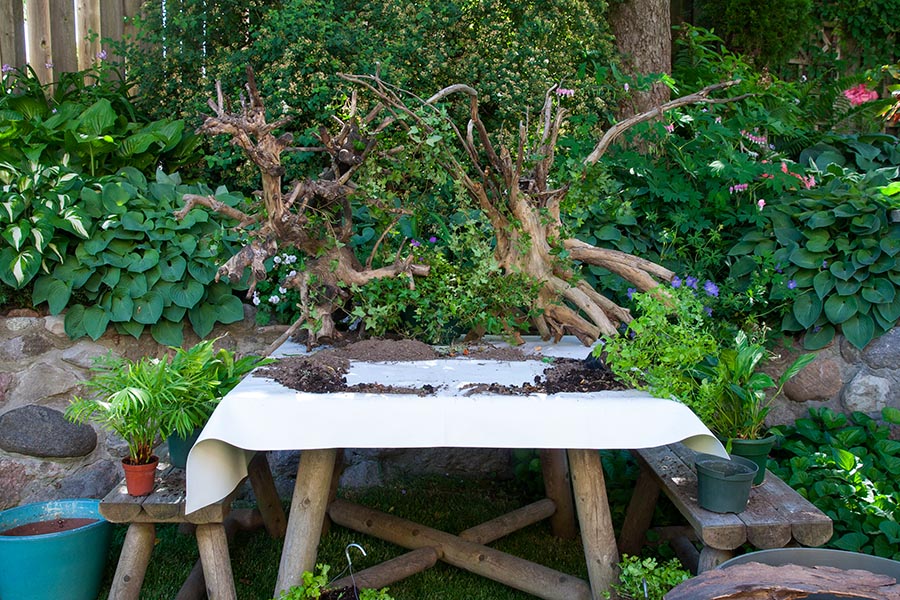
Faking a Jungle
I had been looking around my backyard to see what would be the best place to set up a 'jungle' for the Jurassic Park photo shoot. The plan was to set up a jungle on my patio table, so it would be easier to position the dolls and take photos....
I thought maybe the 'green' corner under the crabapple tree might work as a background, but the hostas there are huge, with leaves even bigger than Lawrence, and I wouldn't want them showing in the background through the jungle....
Then I thought of moving the table onto the grass in front of the bridal wreath bush where the hostas have much smaller leaves.....

So we moved the table onto the grass there, and removed the pots with the colourful flowers. I covered the table with a big sheet of vinyl, then positioned two big tree roots on the end of the table, and created a raised section to pose the dolls on, and hide the pots of five leafy houseplants, then positioned two giant ferns on either side. Then I dumped a lot of dirt, on and around the raised platform, into which I planted some almost finished forget-me-nots, and a lot of creeping Jenny temporarily dug out of two hanging pots full of them Then sprinkled the scene with bits of driftwood and some leaves fallen from the crabapple trees.....
The tree overhead created shade, but the sun managed to shine through the leaves, adding to the realism....
The kids were not posable, so they took turns sitting on the edge for some portrait shots....
|
|
Then everything had to be cleaned up and put back where it belonged....
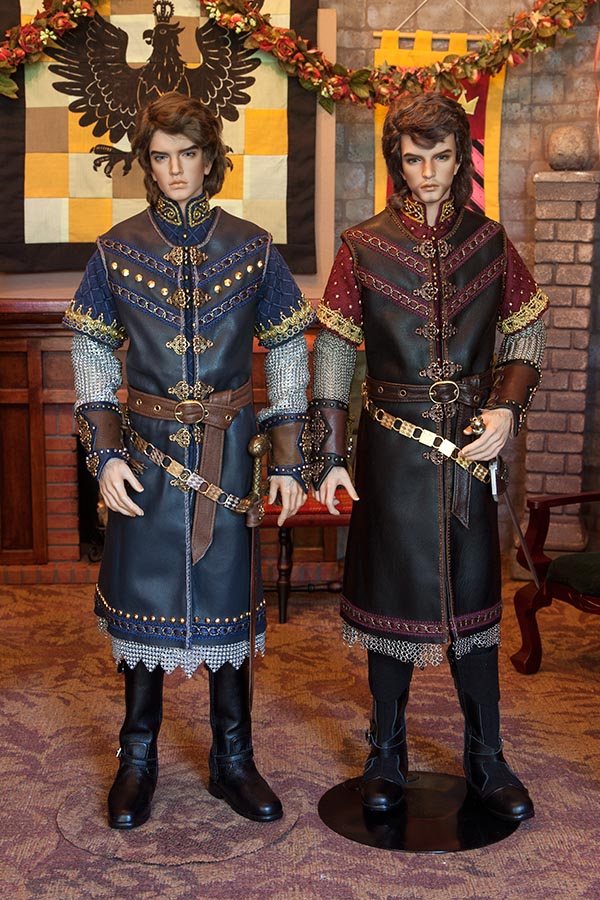
David's Birthday
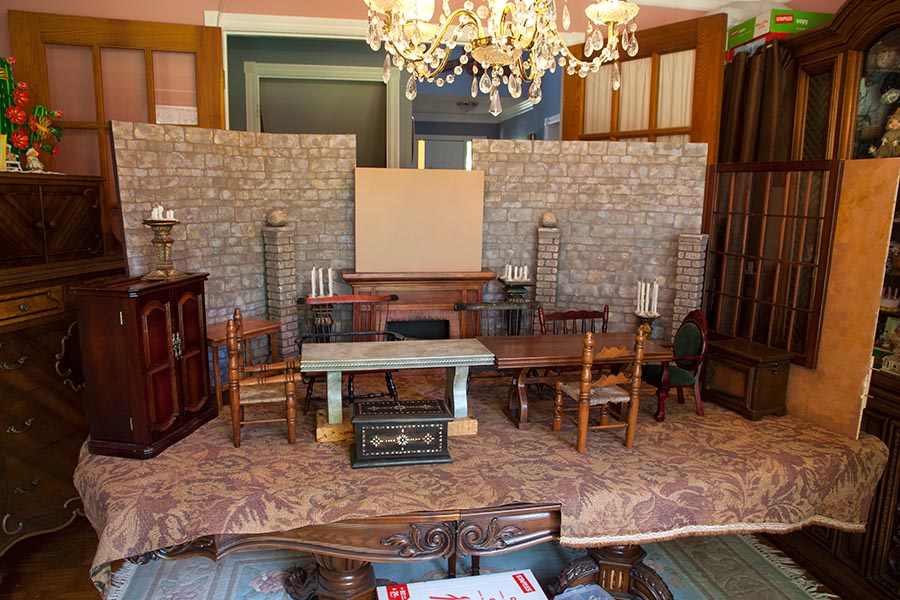
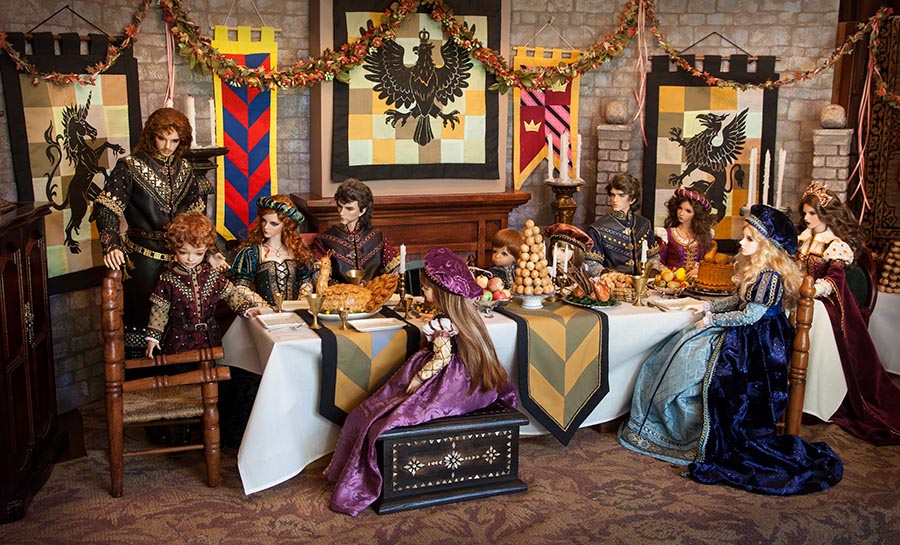
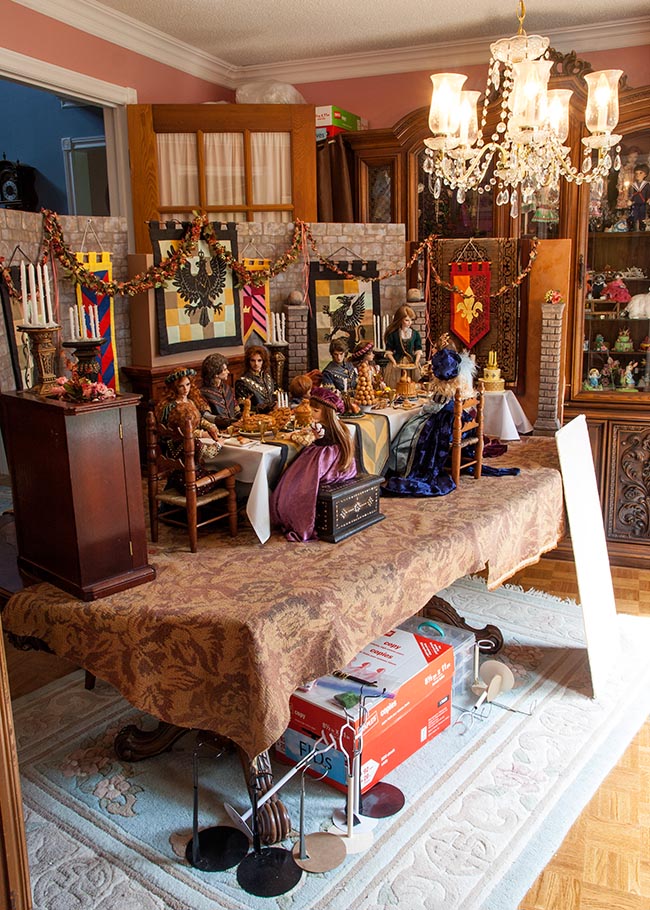
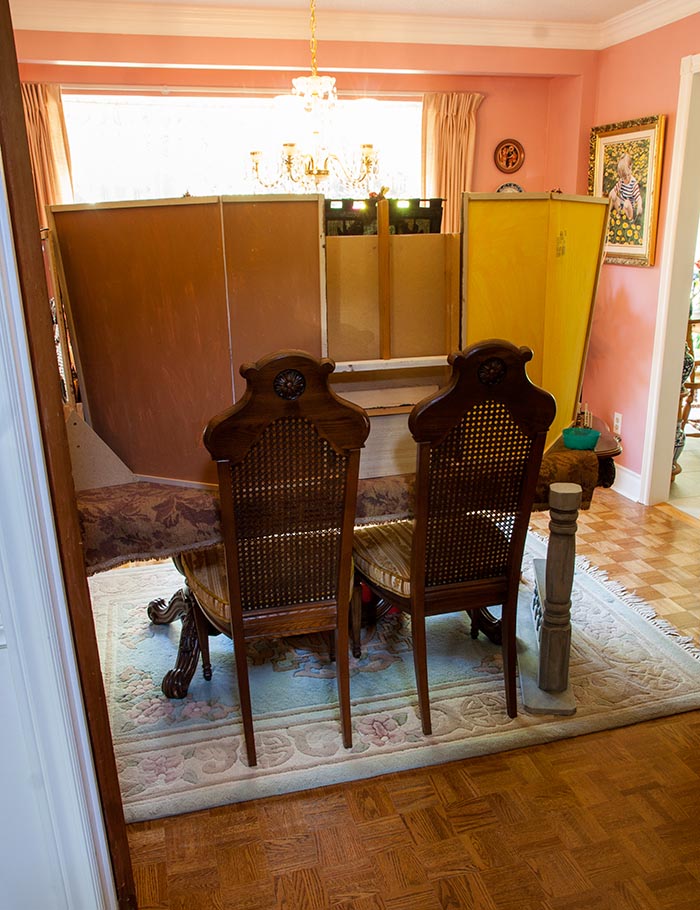
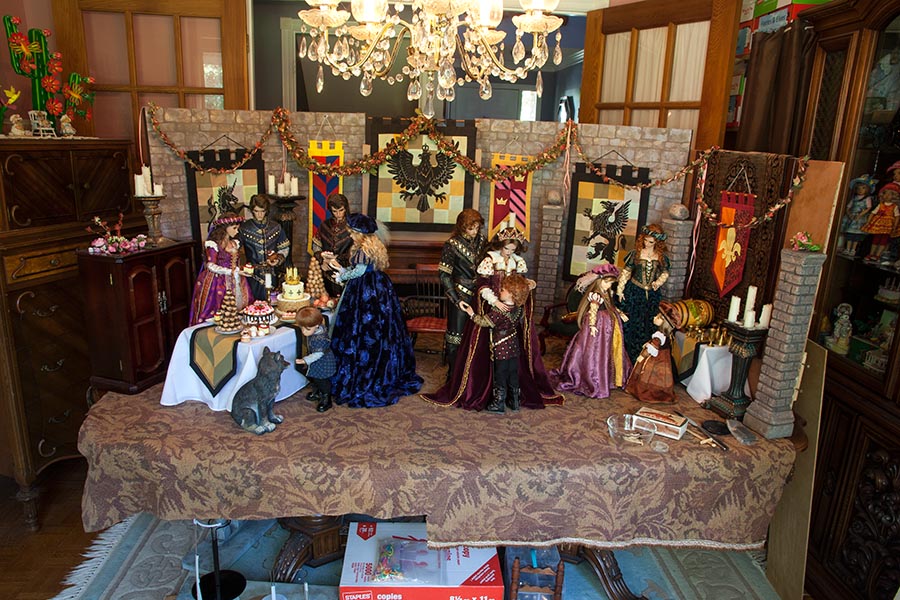
Thought I'd share photos of the setting up of the castle dining hall in my dining room.
My table, how it looks when it's not being used as a photo studio....
My table, how it looks when it's not being used as a photo studio....
I knew I would need a lot more space than usual, so the tables turned, and an extra leaf put it.
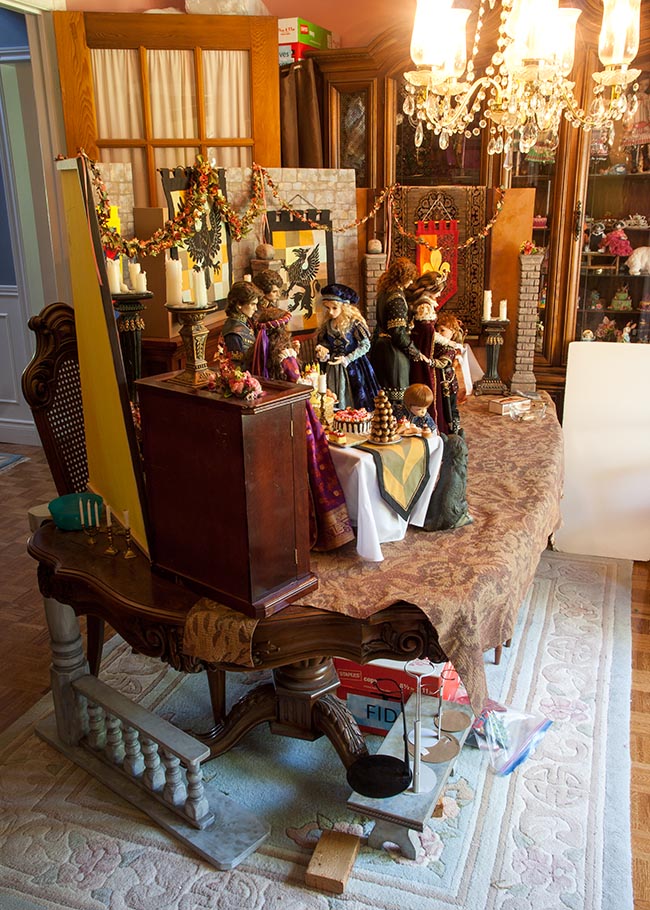
Then after covering the table with a fabric 'flooring', the bare bones walls and furniture were added. I put the most period appropriate seats in the front where they'd be seen. The ones in the back would be hidden by the dolls, so don't matter...
Then after covering the table with a fabric 'flooring', the bare bones walls and furniture were added. I put the most period appropriate seats in the front where they'd be seen. The ones in the back would be hidden by the dolls, so don't matter...
Then with wall hangings....
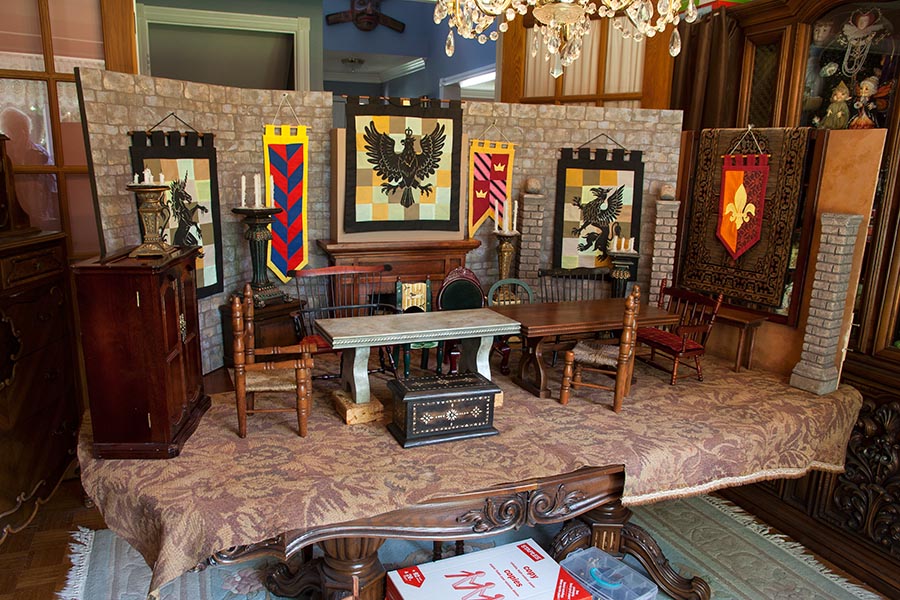
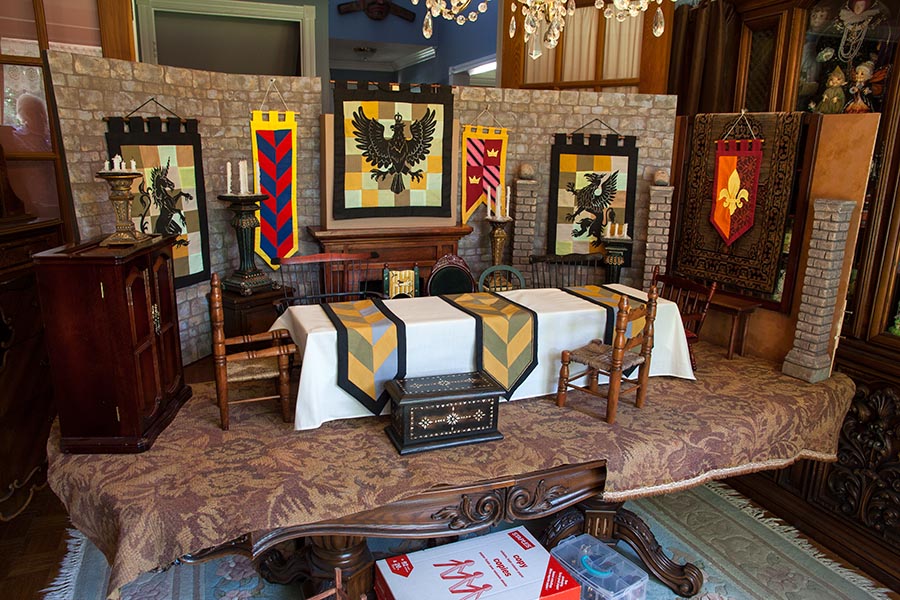
Then I covered the two tables with one long board, so it would look like one very long table, and sewed a table cloth.I draped some of the wall hangings over the table to help break up all the whiteness of the tablecloth....
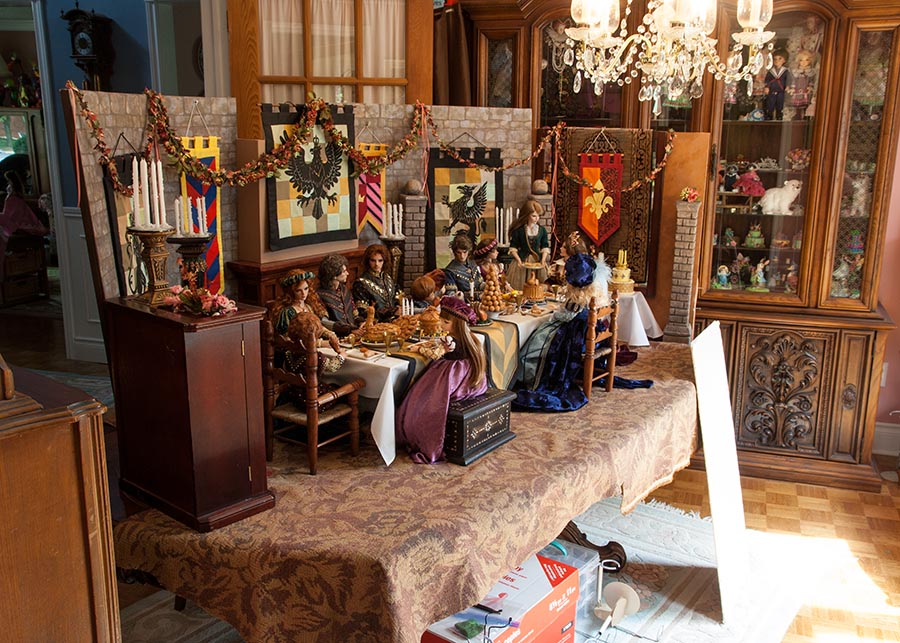
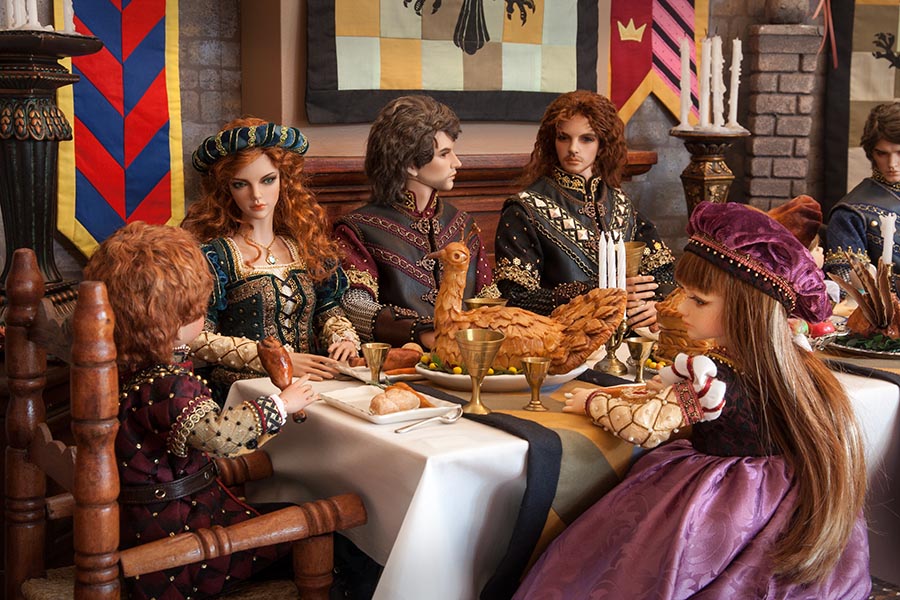
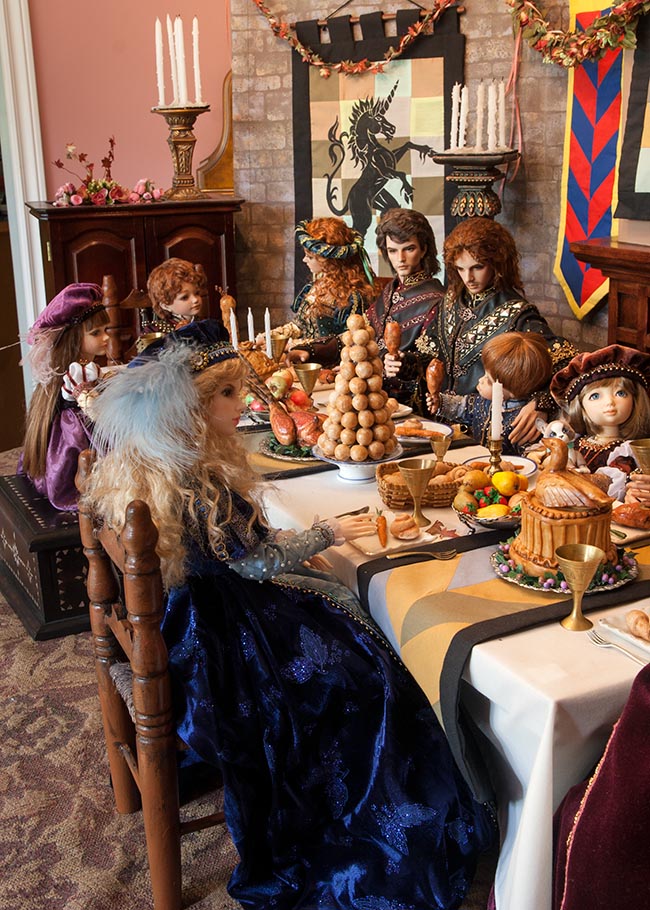
The scene with all the food and dolls....
When I wanted to take a photo of David's end, the pink wall and white doorframe beyond the 'stone wall' looked unsightly, so Jan rotated the carpet some, so the wooden cabinet on that wall would fill in the background instead....
|

|
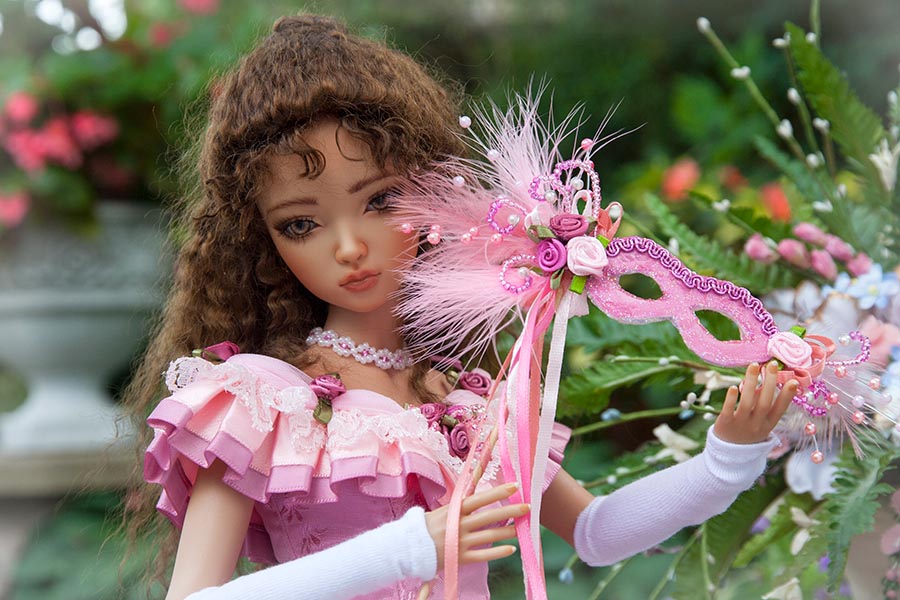
Iris in Pink
With my spinal arthritis I need help with photography these days, especially with bringing stuff outside. It also helps having someone hold the white card to bounce light onto the doll, since the main light source - the bright cloudy sky - is behind her....
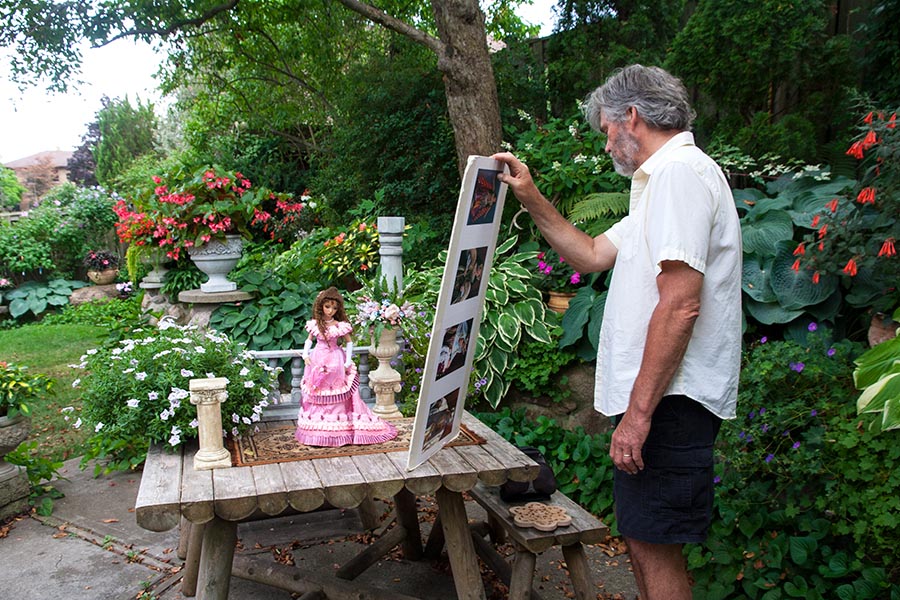
Another thing to take note of is that these photos were taken from above. At this angle the doll clearly looks like a 'doll', and the big urn behind her looks disproportionately huge......
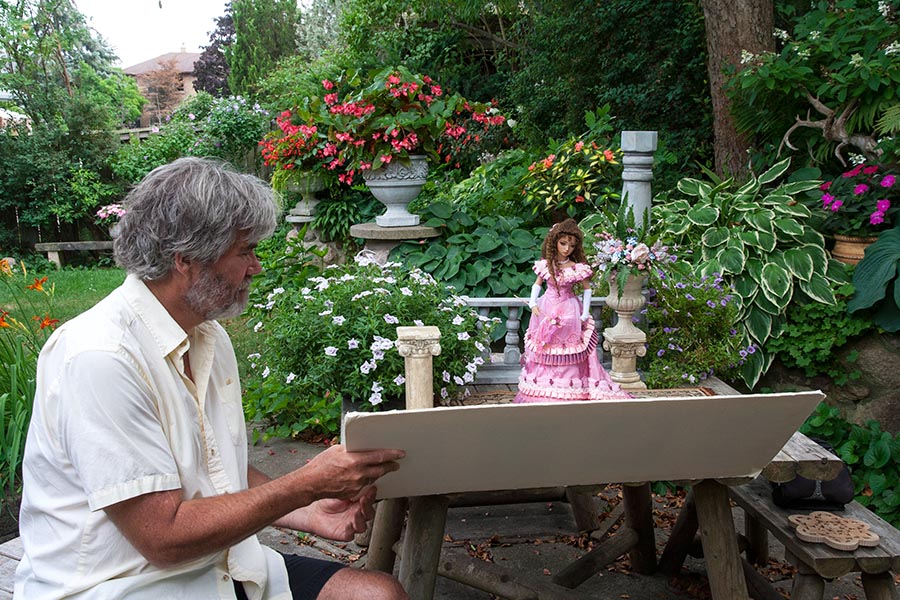
Now the actual photo, taken at the doll's eye level, with a short depth of field....
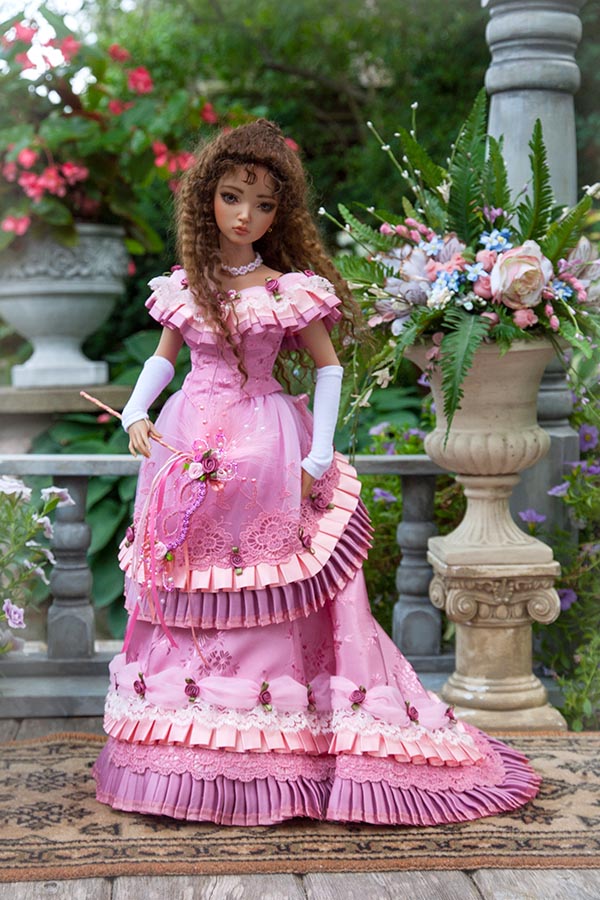
The closer I get to the doll, the smaller the urn in the background becomes....
Hiding Doll Stands
I always use doll stands to support my dolls in photos, and have gotten creative at making them disappear. So far I've managed to mostly hide the big black bases of the guy's stands, either under the edge of a carpet, or behind a lady's skirt.
But I need to shoot a scene with just the guys, so there was no way to hide all their bases. I had been using a brown paper circle to cover Lawrence's base, but I didn't want three of them in the photo. They would stand out way too much. So I got the idea to cut a bit off the corners of the big sheet of upholstery fabric that I use for the castle flooring.
I traced the base onto paper, added about an inch all the way around, made a paper pattern to determine where the vertical support should go, drew where the hole should go, smeared the back side with white glue, and cut the 'U' shape out after it had dried. I also used FrayCheck around the outer edges.....
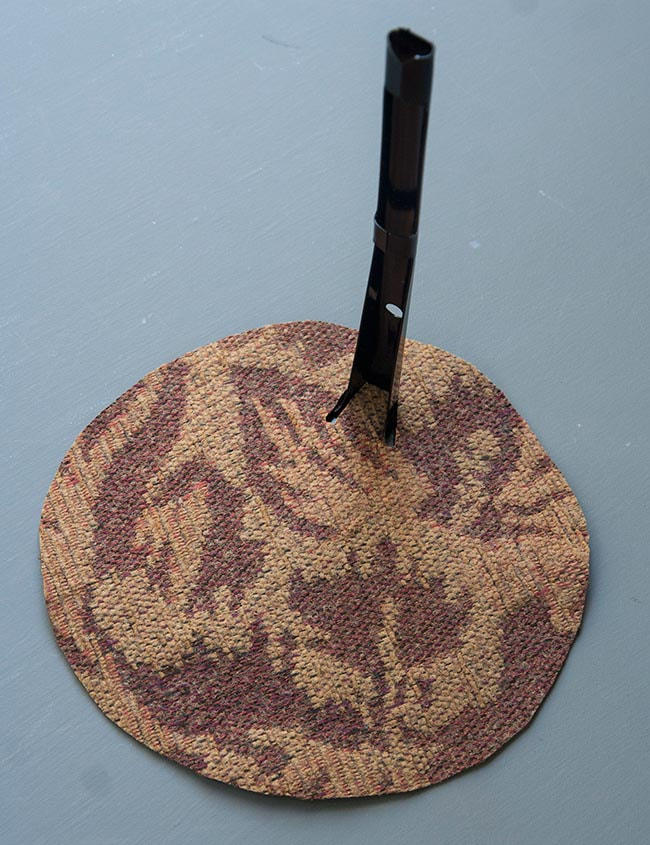
Then I took a photo of two guys, one with the base covered, and one without, with the vertical supports hidden behind their legs. Even though there was no bothering to try match the woven pattern, the fabric circle was barely noticeable. A bit of Photoshop afterwards would make them completely invisible.
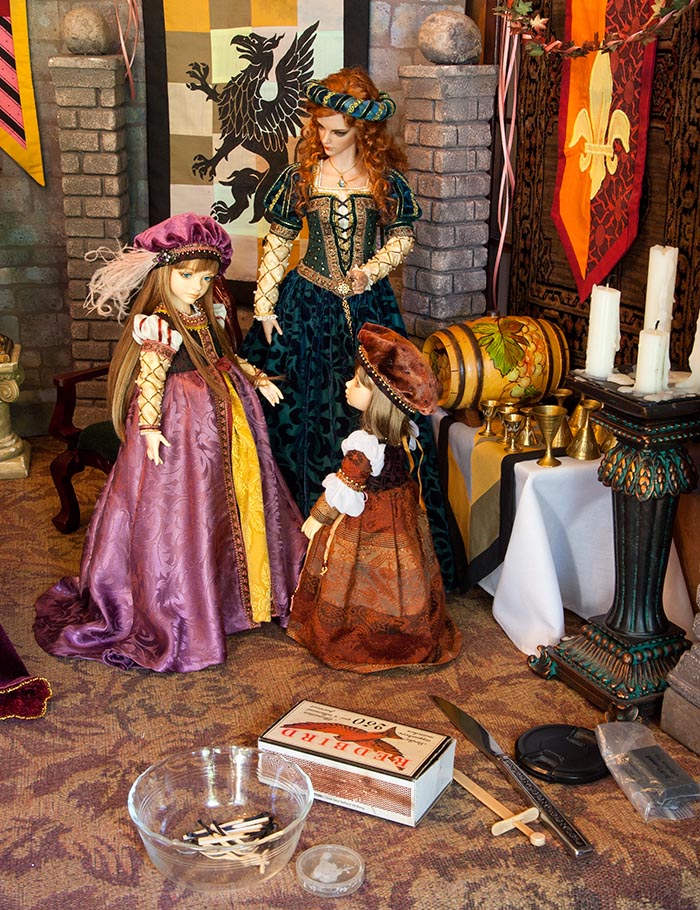
More from David's Birthday
I had the castle interior set up on my dining room table for over a month as I shot all the different scenes. This is what it looked like from the back, as we walked past in the hall...
The view from the kitchen doorway....
The castle with three separate scenes set up simultaneously....
The girls with some of my stuff in the way; the box of matches to light the candles before shooting each scene, and a bowl to throw the spent matches into; a little container of eye putty to help dolls hold onto things; an extra camera battery, lens cap, and a knife to tighten the screw for the tripod connector on the bottom of the camera each time it got loose; and Ringo's sword....
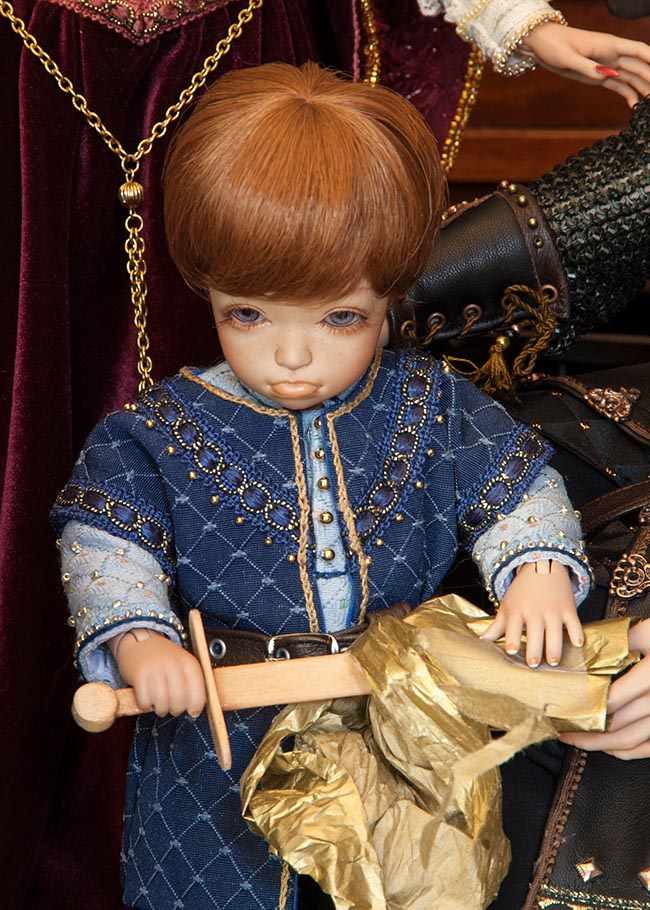
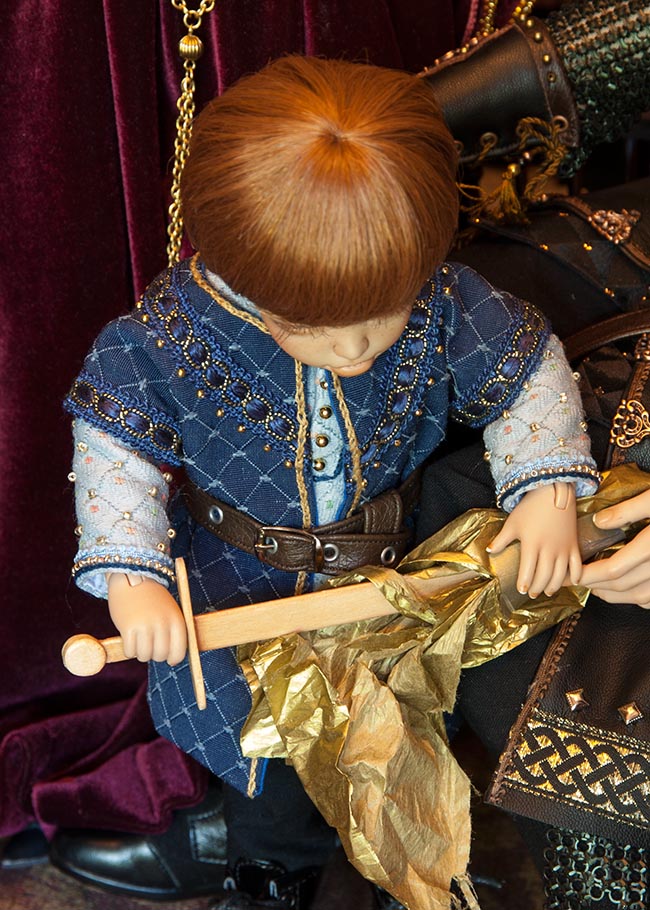
And one final photo tip from the series, about getting around a doll's permanent facial expression.
I had shot a close up of Ringo unwrapping his sword, but with his permanent pout, he looked 'distracted' or 'disappointed', so I had to reshoot from a higher angle in order to get across the feeling I was after....hence the sword wrapping is different since I reshot the next day and the sword had already been unwrapped, so I had to put the wrap back on, and of course it's not possible to do that in exactly the same way as before. Not that anyone would notice.
I had shot a close up of Ringo unwrapping his sword, but with his permanent pout, he looked 'distracted' or 'disappointed', so I had to reshoot from a higher angle in order to get across the feeling I was after....hence the sword wrapping is different since I reshot the next day and the sword had already been unwrapped, so I had to put the wrap back on, and of course it's not possible to do that in exactly the same way as before. Not that anyone would notice.
|
|
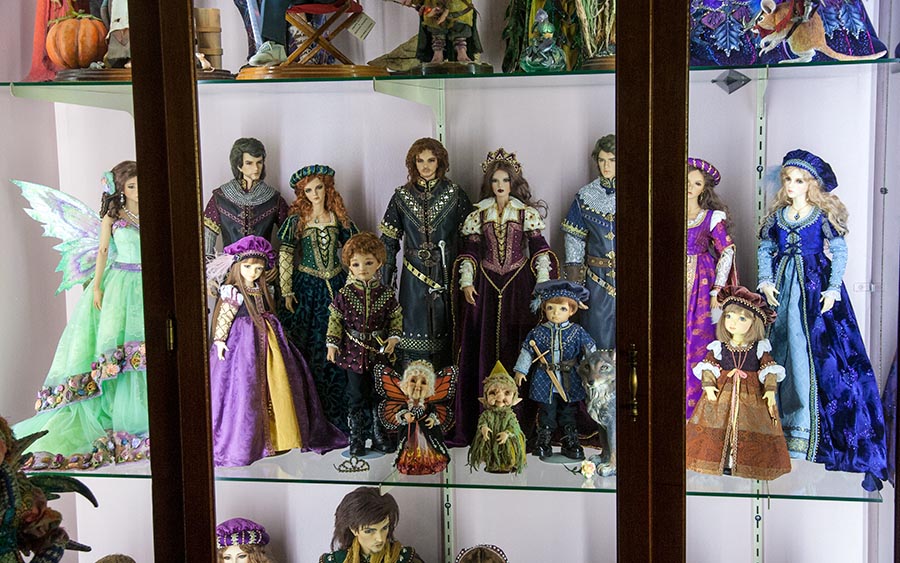
So now, with the party over, the entire family has moved into my display case....
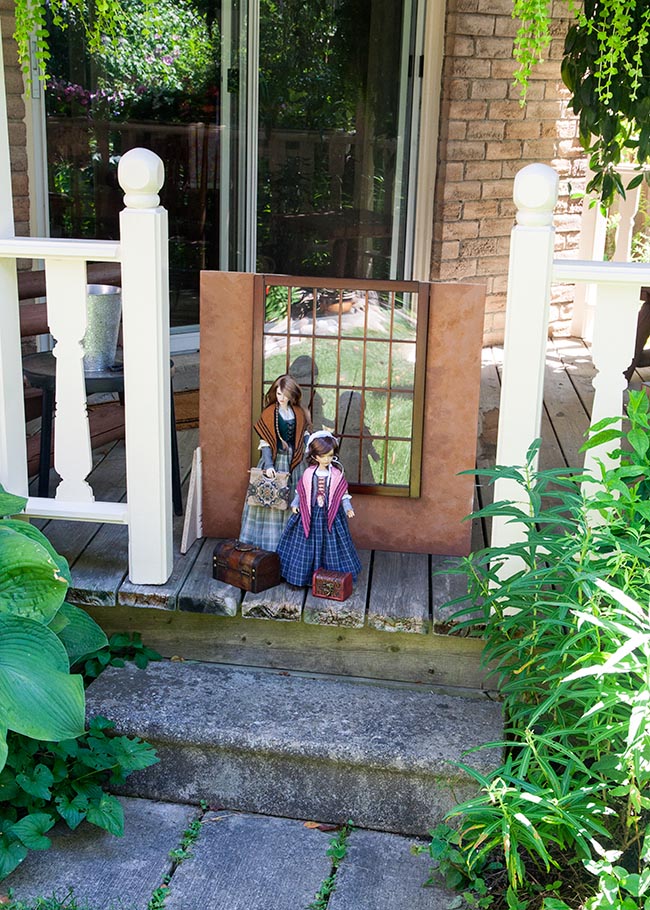
Lisa & Rosie
I wanted to try create the impression that they were waiting at a station, so brought out the 'window' and stood it on the porch, when it was still in the morning shade. The plexiglass in the window reflected the backyard, or was totally transparent....
|
|
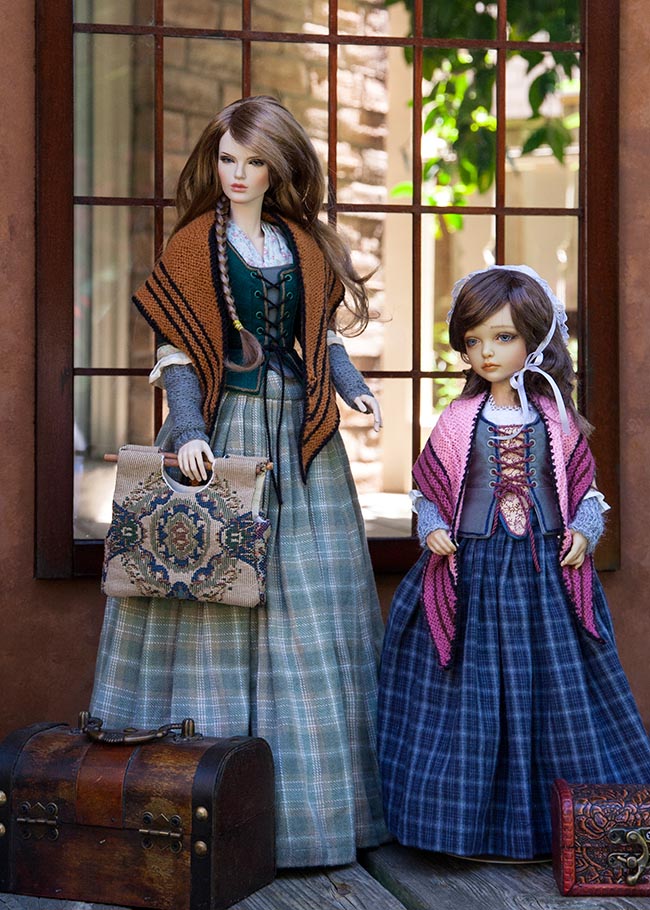
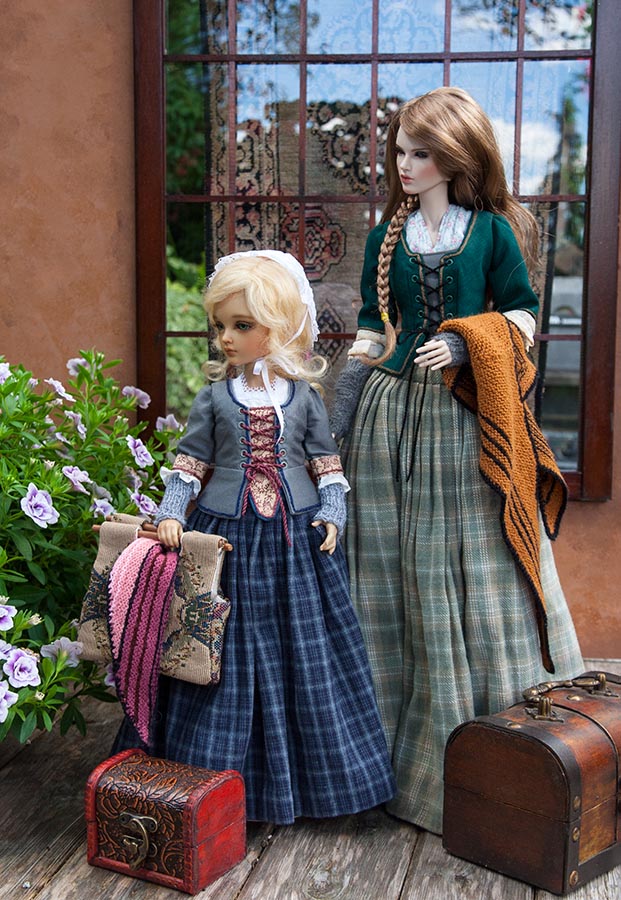
Later in the afternoon shade, on the patio table, I tried again with a different KID, and with something hung in the window so it wasn't transparent. I thought it worked better.
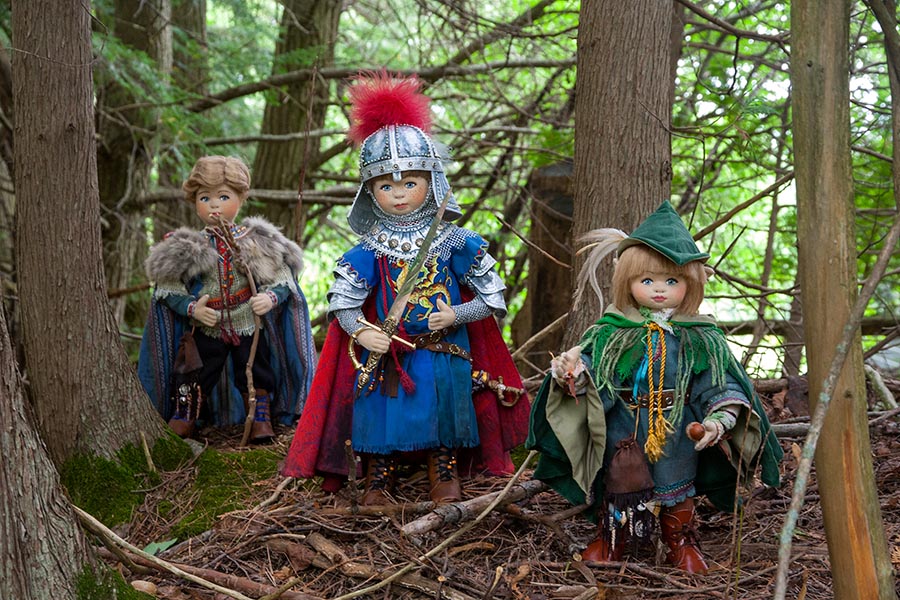
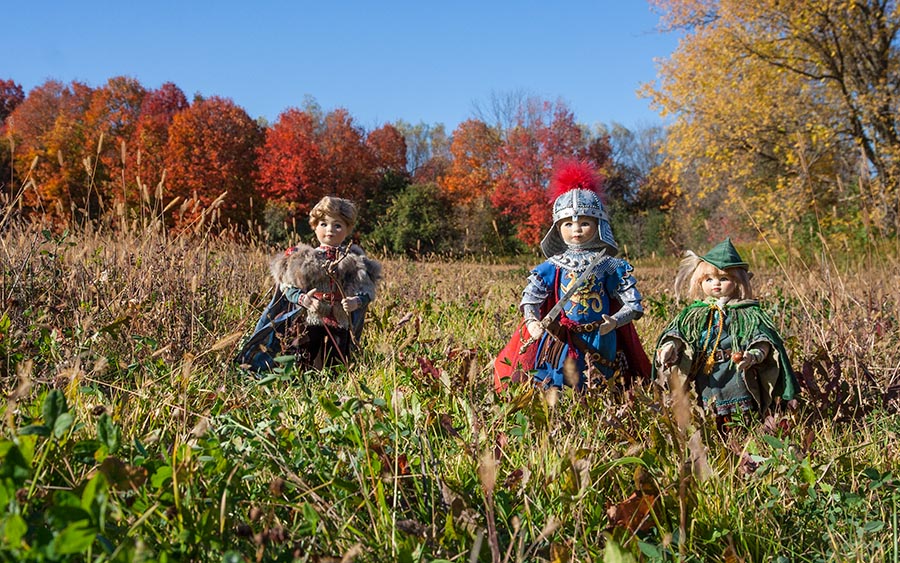
the Magic Talisman
I wanted to take some nice photos of some cloth dolls that I'd made over 30 years ago. They were made to represent characters in a story my sister and I did together. I wanted to try recreate the feel of some of the photos in the story.
So, first with the three main characters going through the woods....
So, first with the three main characters going through the woods....
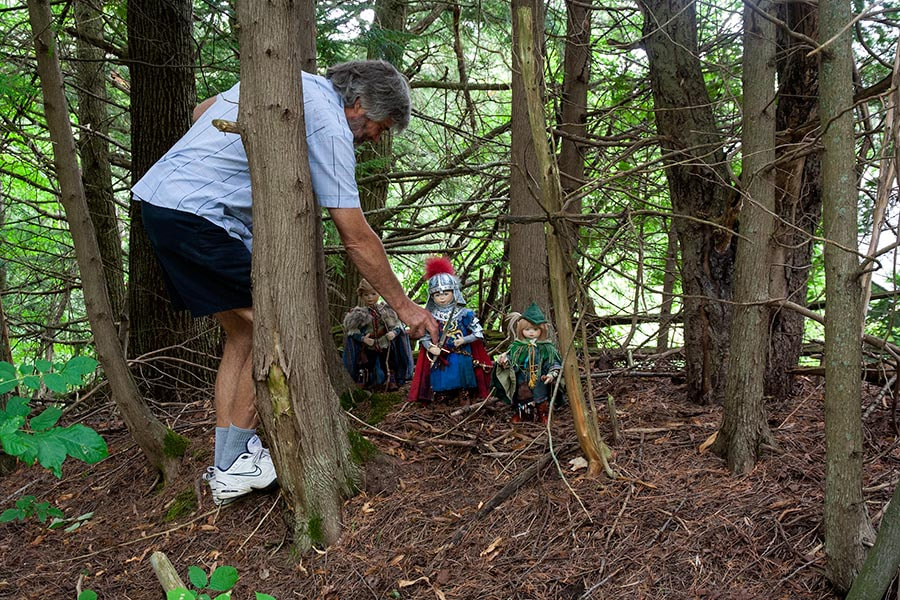
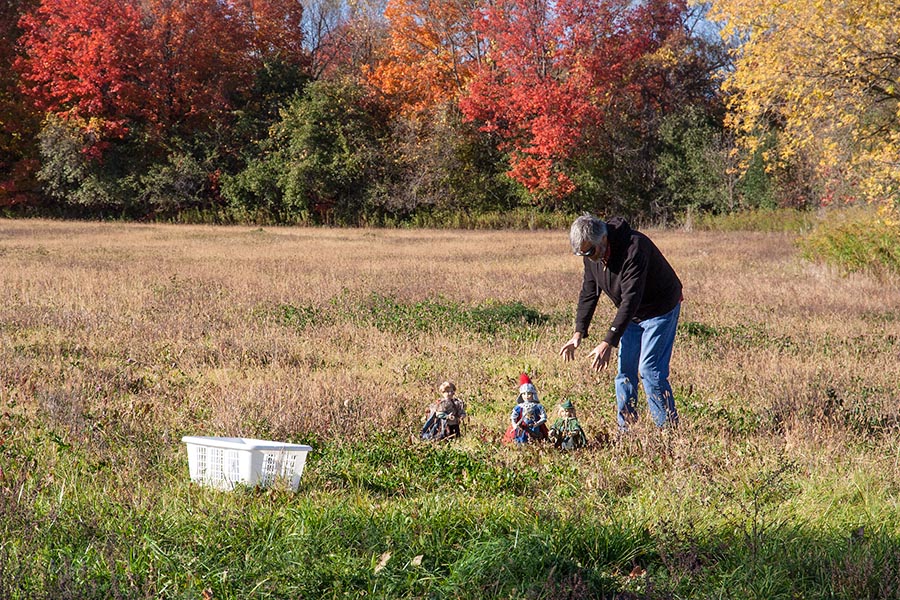
Then Jan reaching in to pack them up....
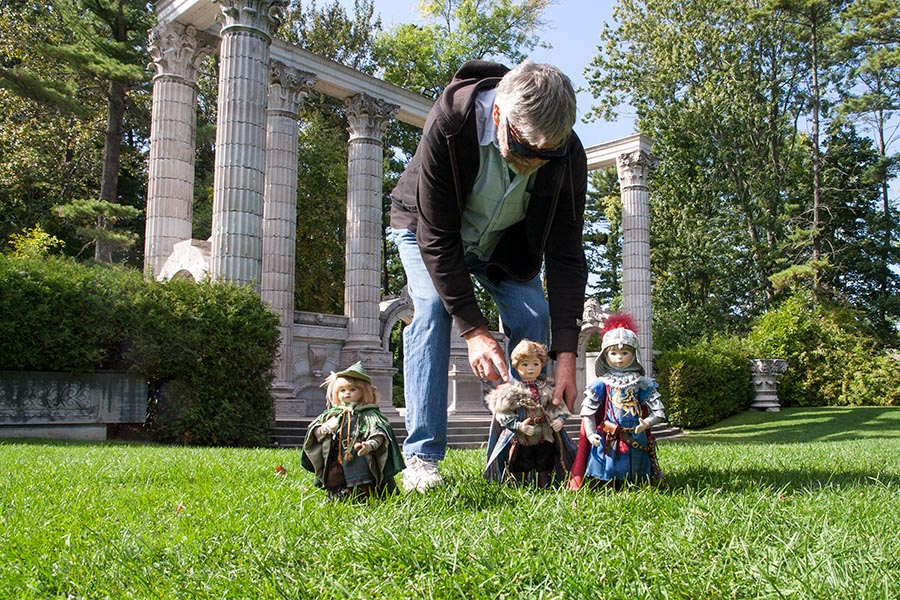
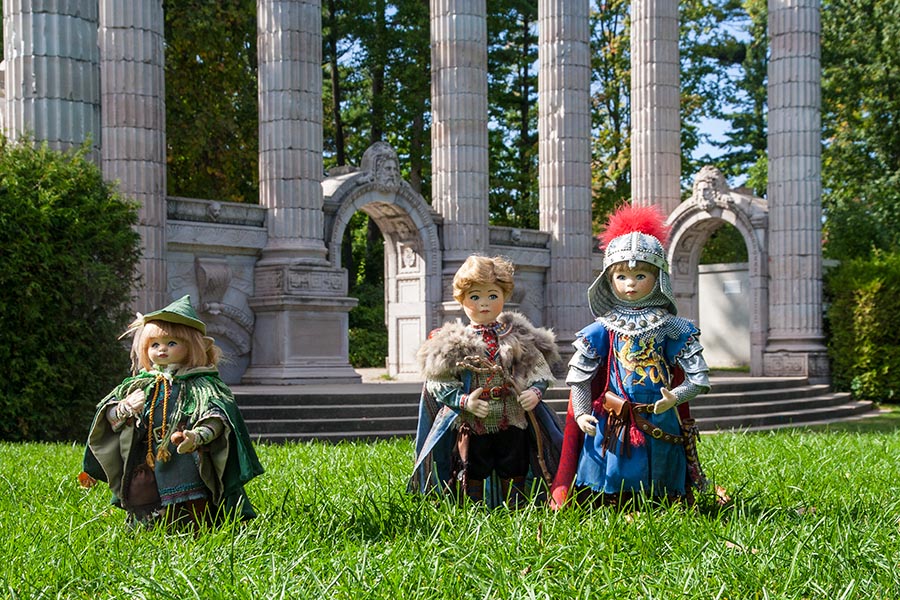
We took the dolls to the Ruins Gardens a couple of times. I had to lay down on the ground to take the picture, so had to ask Jan to make any small adjustments....
I took some photos of the good sorceress on my patio table, but the bright sky was behind her, so her face was dark in the photo (left), until I used a white card to bounce more light into her face (right)
|
|
We took the dolls to a field out in the country so they could continue on their adventure. I was laying on a tarp down on the ground in order to get the right angle for the photo....
Cleaning up time....
*Continued in Part 3
Copyright © 2020 Martha Boers
All Rights Reserved
