Behind the Scenes 3
More behind the scene sneak peaks at how the photos were taken...
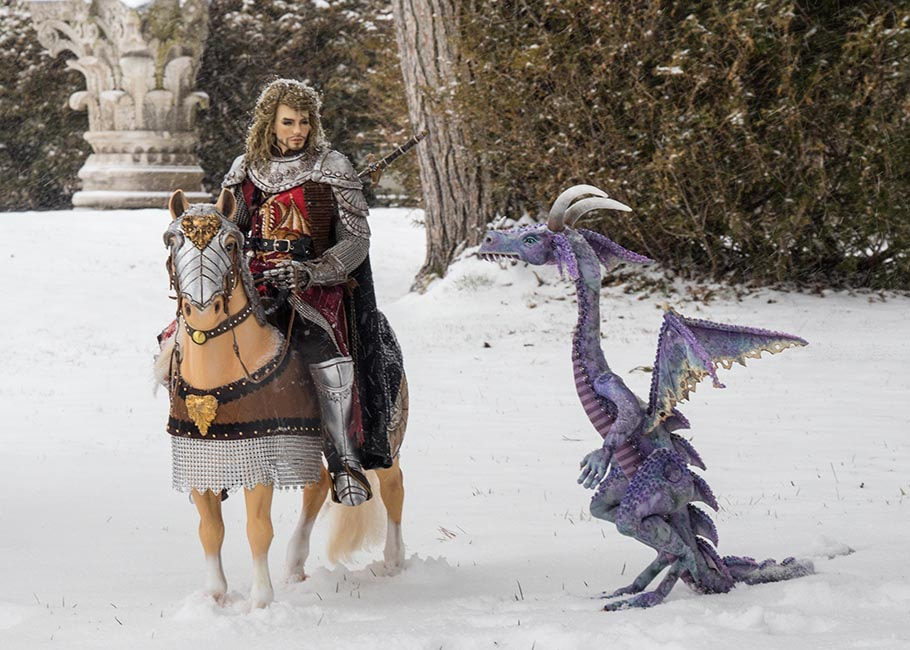
Matias in the Ruins
We hadn't had a decent snowfall all winter. Every time there was a 'storm' in the forecast, it would start in the evening after dark, and it would look gorgeous outside when we went to bed. But in the night it would turn to rain, and in the morning it would be a totally washed out mess.
So, on March 22nd another storm was forecast, and it was supposed to start in the morning for a change, and it did. Big soft flakes started falling at dawn, and actually stayed on the ground. We were expecting several centimetres before it was over, and it looked like the perfect snowfall for some doll photos. I'd wanted to take photos of Matias and his horse in the snow, so I packed them up, and off we went to the Guildwood Ruins Garden.
As we arrived, the softly falling snow turned into a blizzard, and the place was deserted. But we weren't deterred. We trudged through the snow to the first place I had in mind for some photos. That ruin had a nice, raised, stone railing on which to stand Matias and his horse, so I posed them on it, and started taking photos.
When taking photos in the snow it's always important to take more than one, because you never know when a snowflake or three will streak in front of your subject's face. Like here...
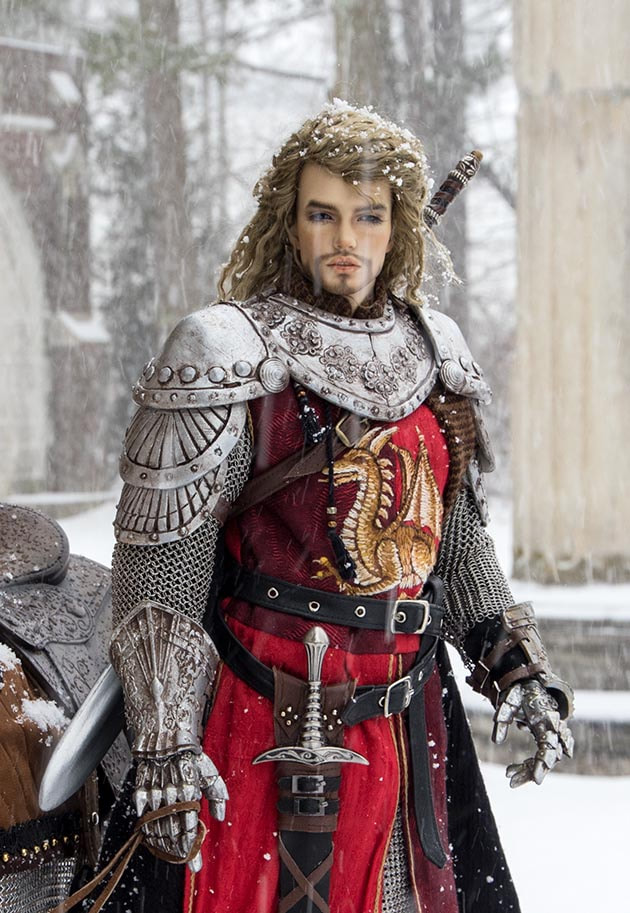
It's fine if there are streaks of snow anywhere else, as it adds to the reality of the storm, just as long as there aren't any streaks across the middle of the subject's face....

Then I wanted to take some photos over at my favourite spot between two large pillars with the Greek Theatre in the background. It meant posing Matias on his horse on the ground, along with the dragon. The spot was somewhat sheltered by some tall trees, so the snow wasn't coming down quite as hard. But it was windy, and very cold.
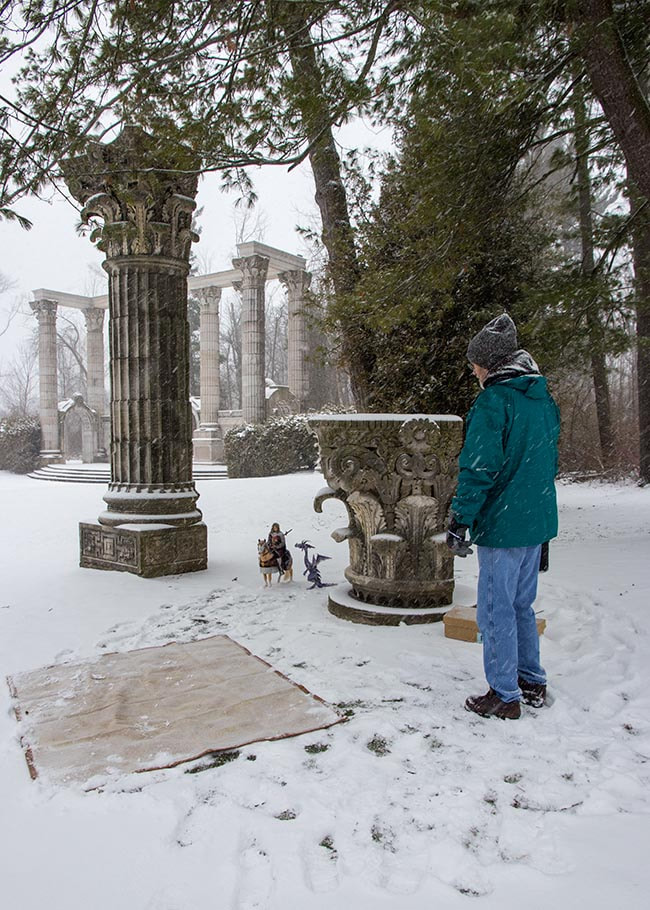
I knew I'd wanted to take photos in this spot, and that meant getting down on the ground, so we'd brought along a tarp for me to lay down on. The best doll photos are always taken level at the doll's eyes, so that meant laying flat on the ground. It's the only way to get a photo like this....
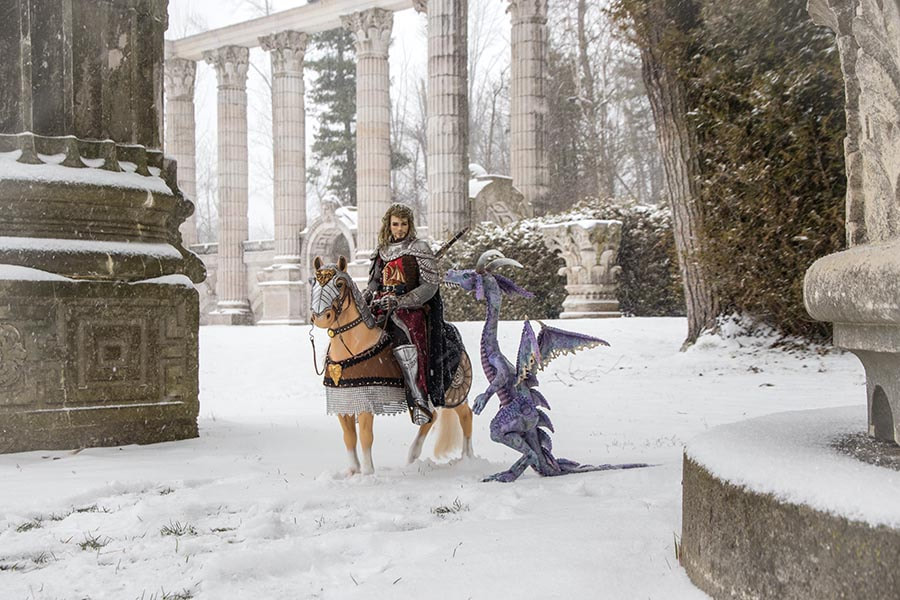
Then it's just a matter of zooming in for some closer shots...
...and squirming around on the tarp foo get a different angle....
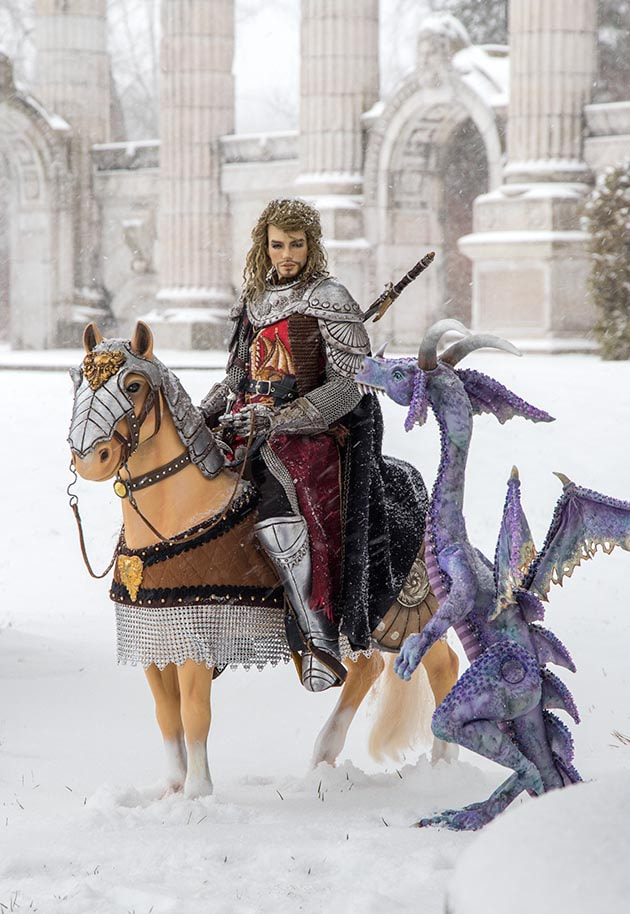
I love taking photos in the snow, especially while it's actually snowing, as it gives a certain, magical, quality to the scene. Almost like a fantasy painting. I had wanted to take some photos of the ruins as well, but my fingers were in severe pain from the cold (even though I was wearing mittens) so we just left. In the end I was thrilled with the photos, and was glad we'd made the effort.
Star Wars
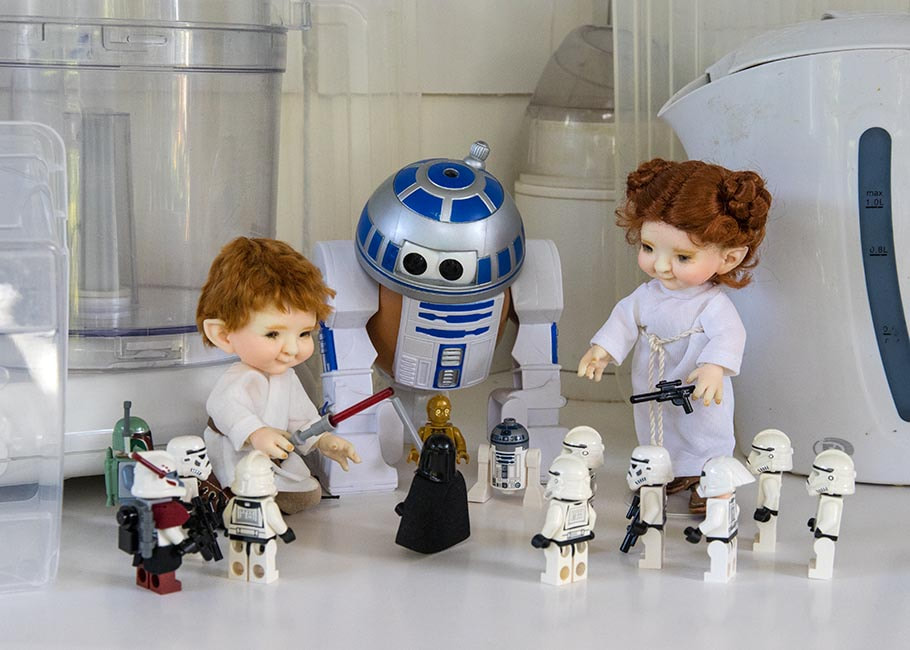
I was busy taking some additional photos for the May section of the Special Days book we were working on, and I asked our son if I could borrow his R2D2 Mr. Potato Head for the May cover page, as well as some of his Lego mini figures for a new Star Wars Day photo. I was originally going to have some modern kids playing with the mini figures, but then a new idea presented itself..
When I had altered the commercial wig for Emily's butterfly fairy photos, my sister called it a 'Princess Leia' wig, which got me thinking about making her and Avery tiny Star Wars costumes. Then I needed some kind of set to suggest the inside of a space ship, so used the white backs of some foam core walls for the background, and then positioned some white kitchen appliances, and clear plastic lids and containers, on the white bristol-board floor on my kitchen table....
When I had altered the commercial wig for Emily's butterfly fairy photos, my sister called it a 'Princess Leia' wig, which got me thinking about making her and Avery tiny Star Wars costumes. Then I needed some kind of set to suggest the inside of a space ship, so used the white backs of some foam core walls for the background, and then positioned some white kitchen appliances, and clear plastic lids and containers, on the white bristol-board floor on my kitchen table....
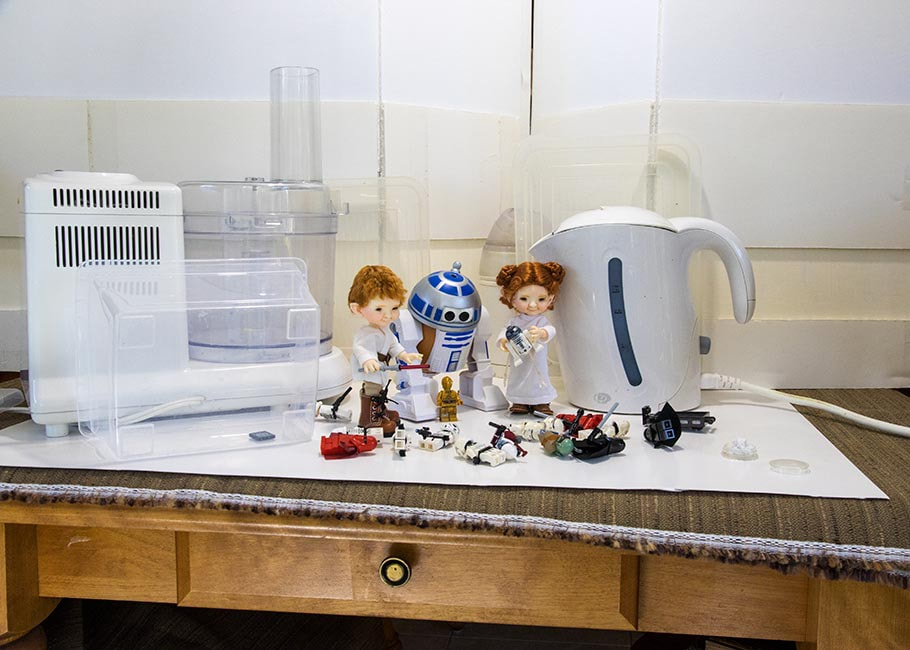
Then I could just sit on a chair to take close up photos...
the Escape
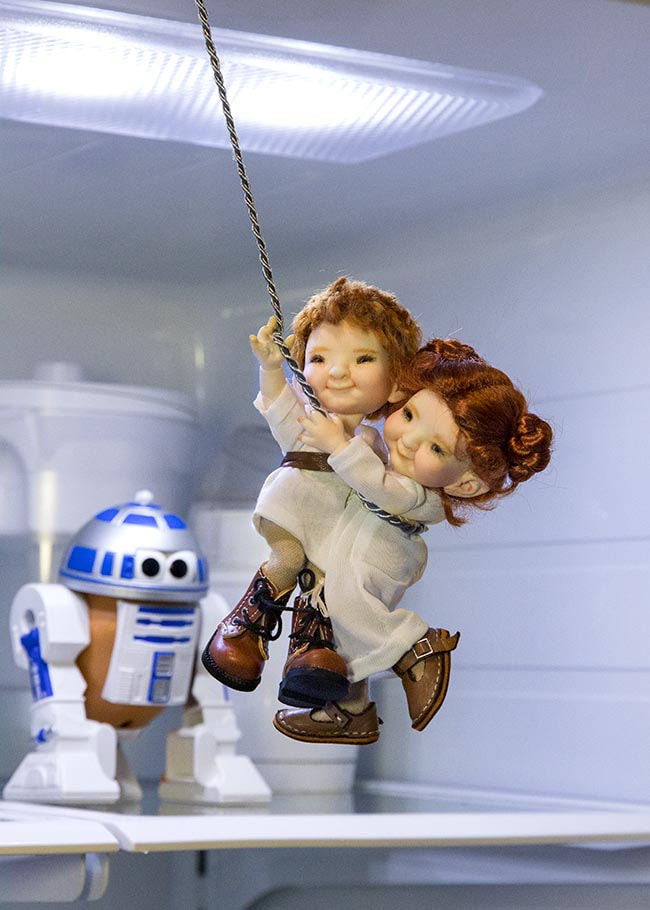
When I told my sister I was making little Luke and Leia costumes she asked if I was going to have them swinging over a cliff. Well that got me thinking. The scene she had in mind took place inside a star destroyer, and I started looking around to see what, if anything, in my house could double as the inside of a star destroyer. My refrigerator!!
So I cleared out the top two shelves, and put in some small white appliances for 'architectural' interest. I positioned the two dolls together and tied a cord around Emily's waist, then suspended them from the handle of the cupboard above the fridge. A second thread tied to the other cupboard handle prevented them from spinning. At one point I needed that thread shortened but couldn't undo the knot, so I asked Jan if he could just hold the thread a little higher, so hr got up on a chair...
So I cleared out the top two shelves, and put in some small white appliances for 'architectural' interest. I positioned the two dolls together and tied a cord around Emily's waist, then suspended them from the handle of the cupboard above the fridge. A second thread tied to the other cupboard handle prevented them from spinning. At one point I needed that thread shortened but couldn't undo the knot, so I asked Jan if he could just hold the thread a little higher, so hr got up on a chair...
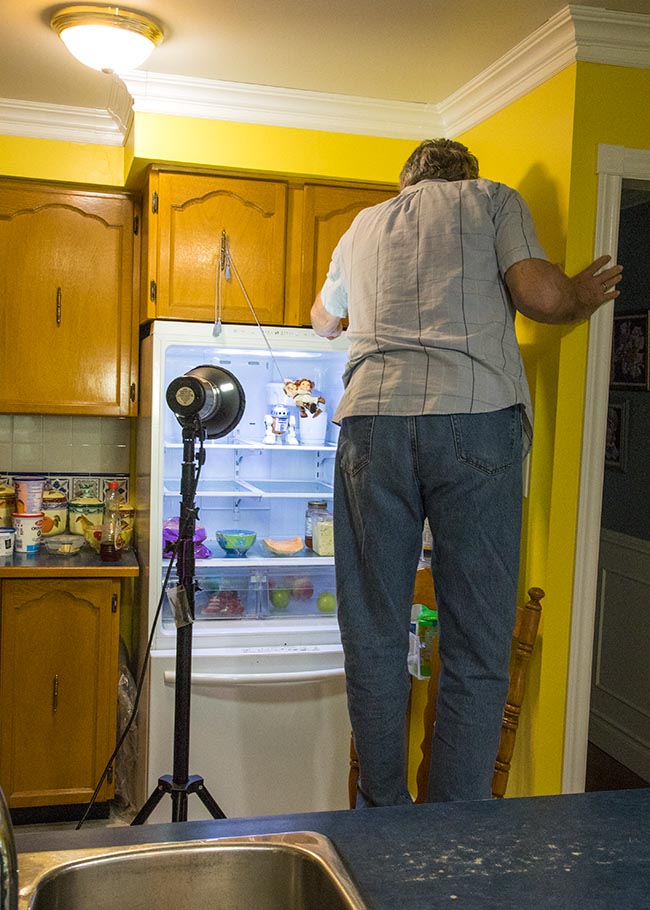
Because the dolls were actually outside the fridge, they needed the photography light on them so they wouldn't just be silhouettes against the bright fridge interior behind them.
Naked Gardening
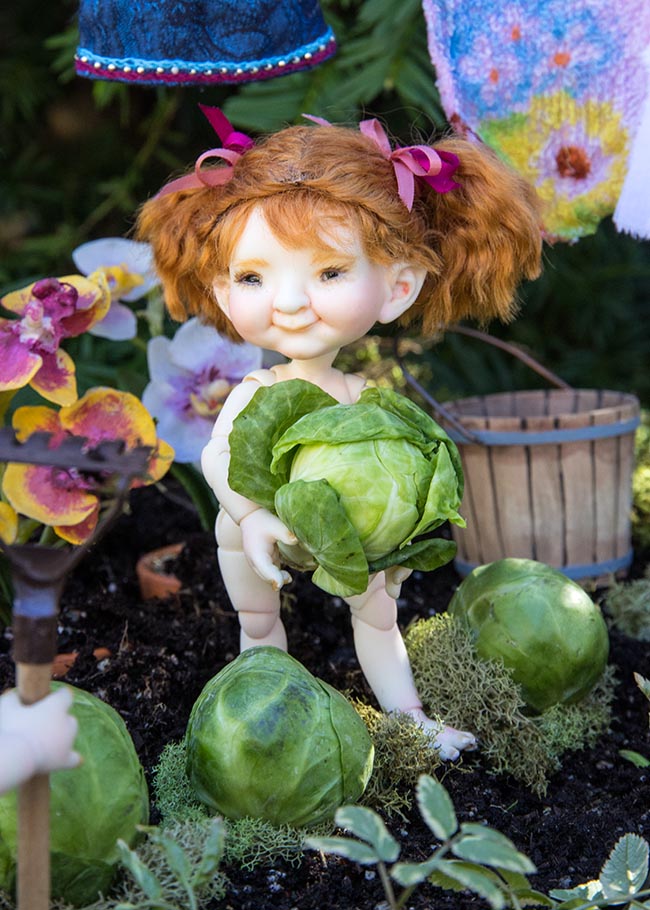
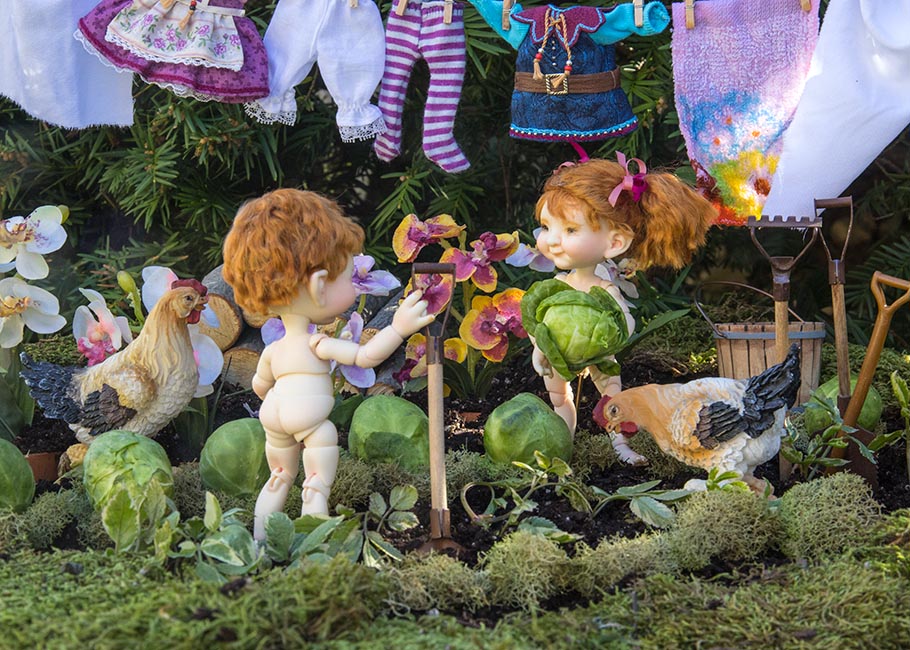
I thought it would be fun to take a photos for Naked Gardening Day using the Avery twins, as they were the only dolls who wouldn't mind the indignity of being photographed naked. But where to create their garden? My spring garden is no place scale-wise for photos with such tiny dolls, the tulips being at least four times as high as the dolls, so I had to come up with something else. The large garden urn was empty of plants, with just the yew in the background, so it seemed perfect. I smoothed out the dirt, surrounded the edge of the urn with dried moss, put up a clothesline, and 'planted' rows of tiny orchids, goutweed, and moss.
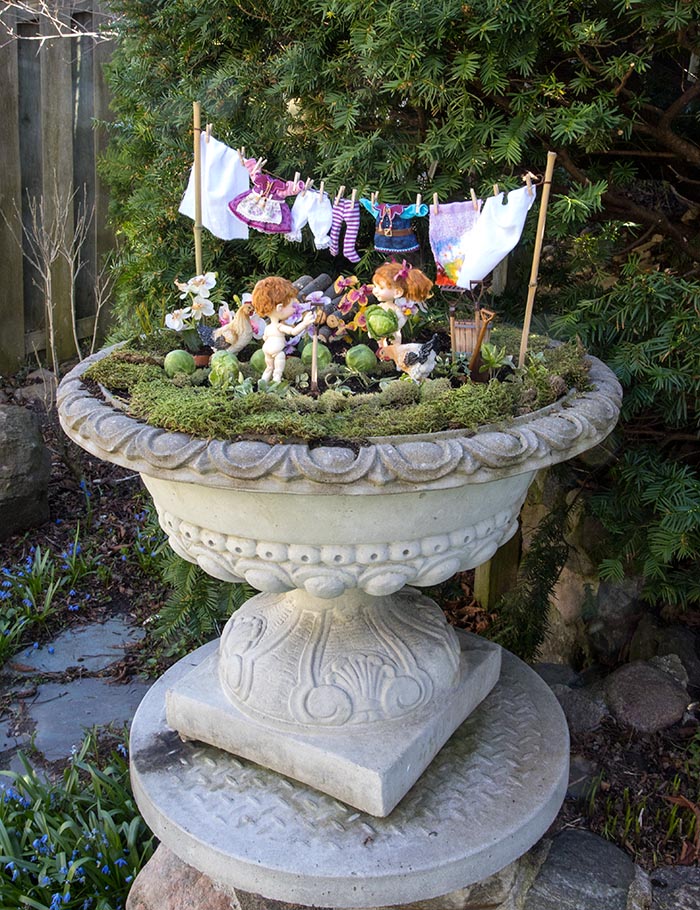
And to represent 'cabbages' I used Brussels sprouts, carefully placing them on bits of moss so they wouldn't touch the dirt.
Willie & Winston
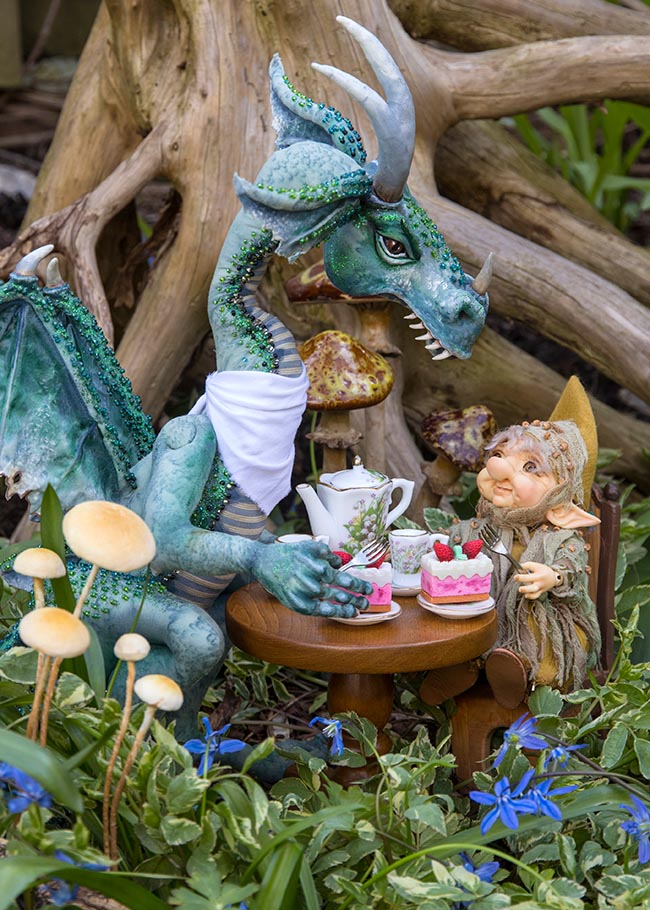
I had wanted to take some photos of Winston and Willie having tea in the Scillas in our backyard grass, but it just wasn't working out to my satisfaction. Taking photos on the ground was getting way too difficult for me, so I moved them to the upper garden instead, somewhere with just short plants, and positioned an old tree root behind them to hide the ugly fence...
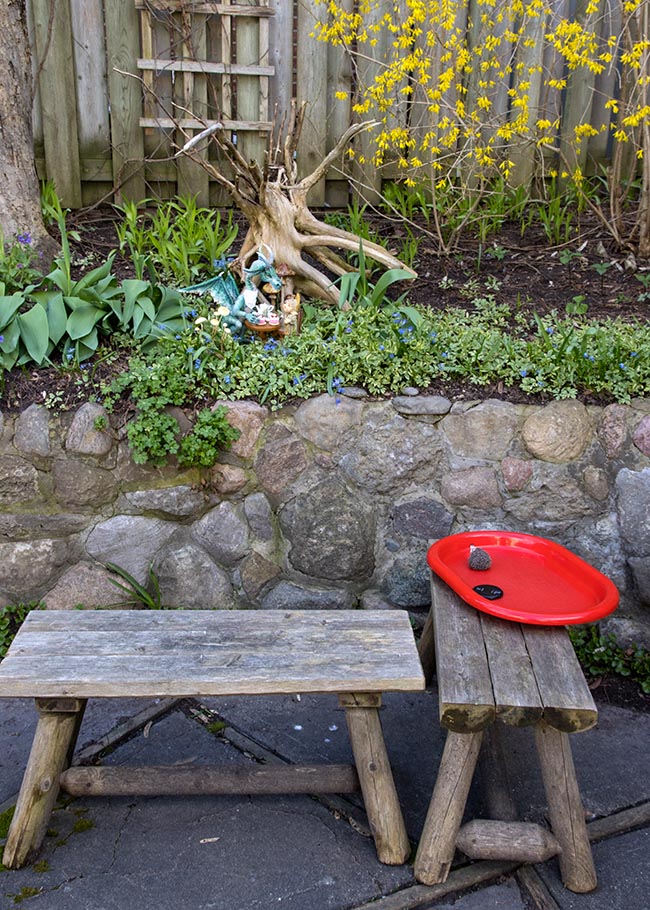
Then I could sit on a bench to take the close ups...
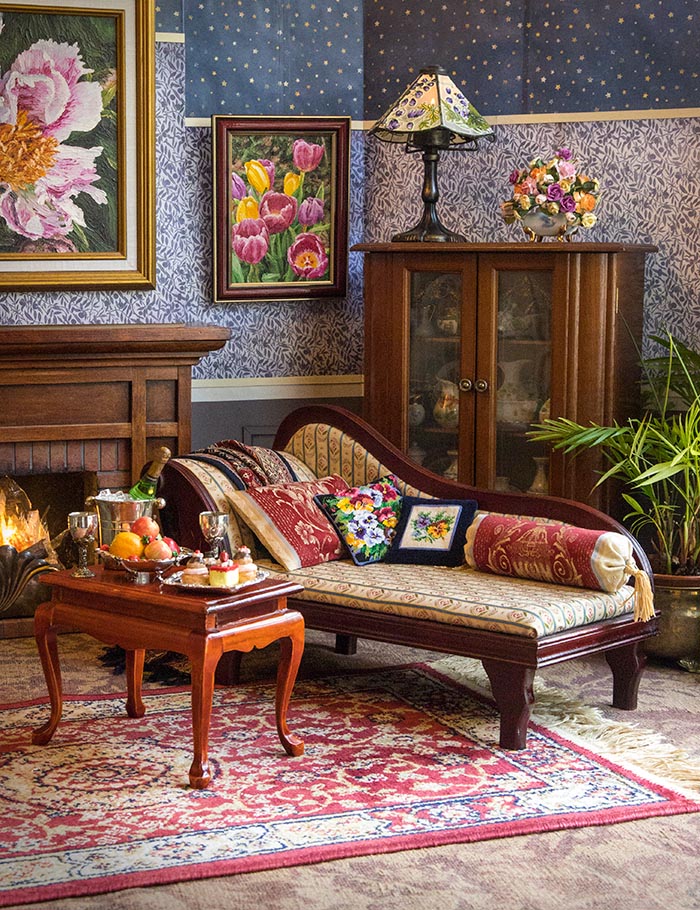
New Furniture
Tat the end of April I went to the Greater Toronto Area Doll Show. There's only two shows every year that are within driving distance, and it's always exciting to go and see if there's anything interesting I can use for my dolls. Some years there's nothing, but this year I hit the jackpot. I was especially thrilled to come across two pieces of MSD size furniture, and took a quick photo when I got home...
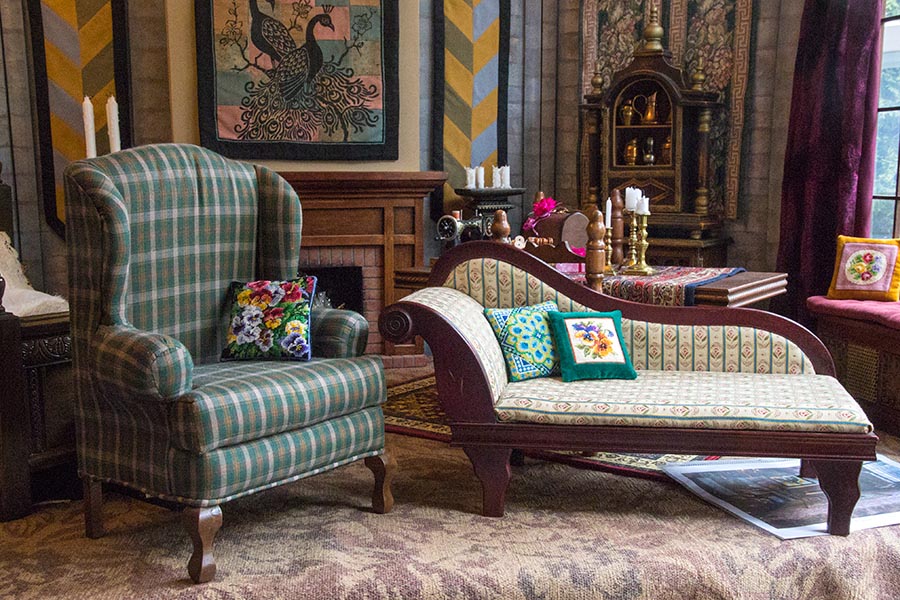
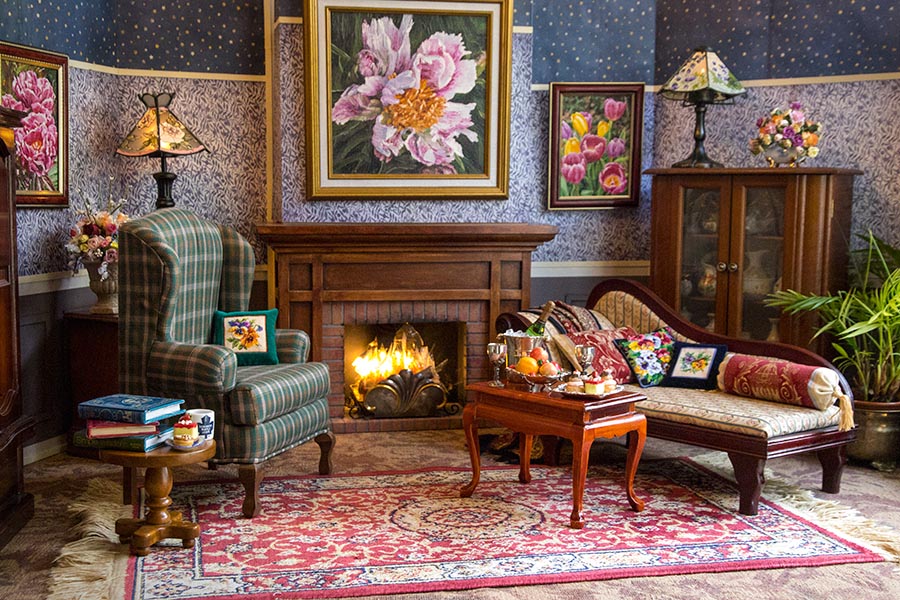
The two new pieces of furniture needed their own room setting...so I put one together...
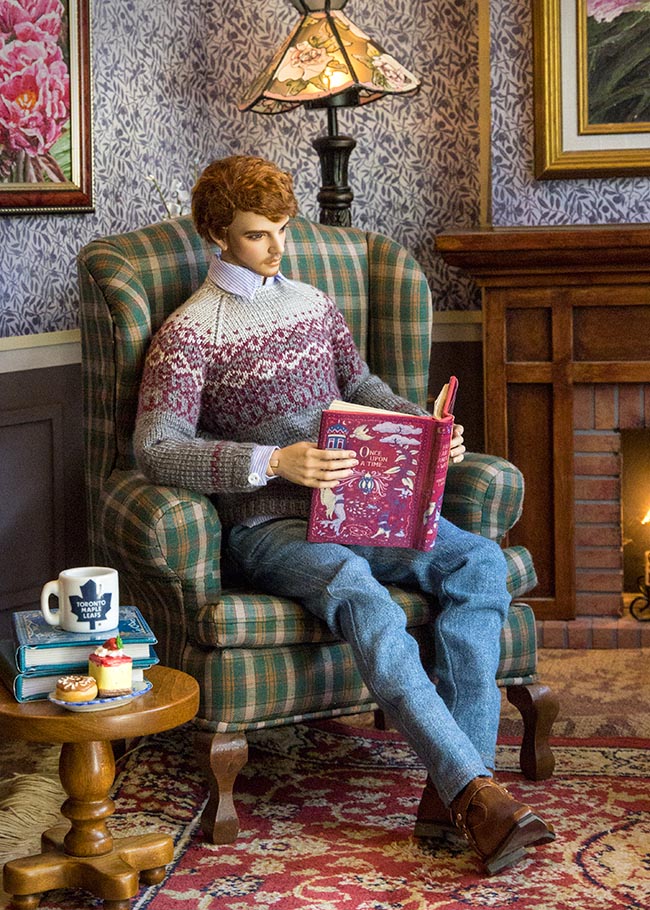
Lawrence, who just happened to be in contemporary garb at the time, volunteered to try out the chair...
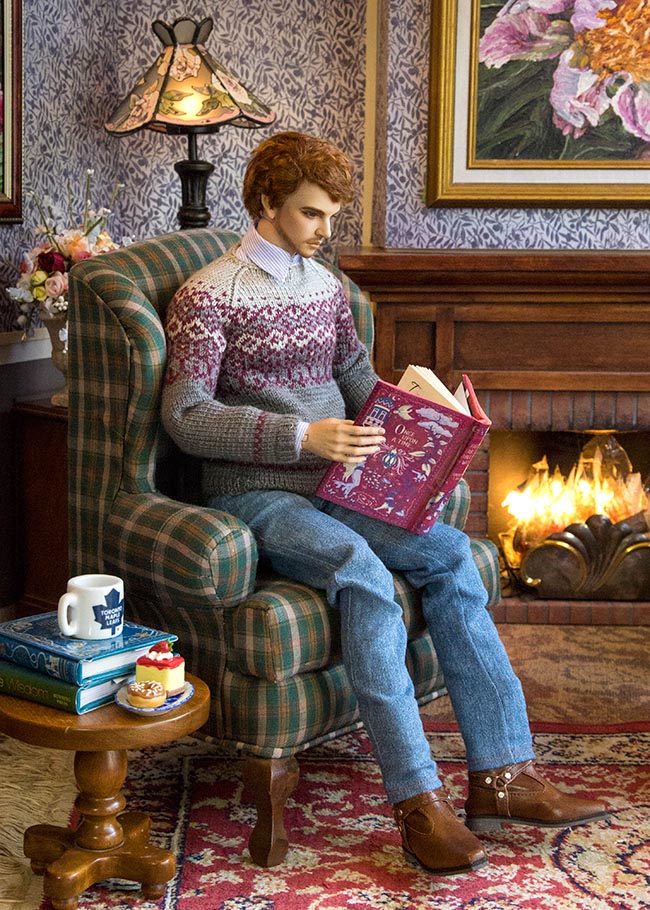
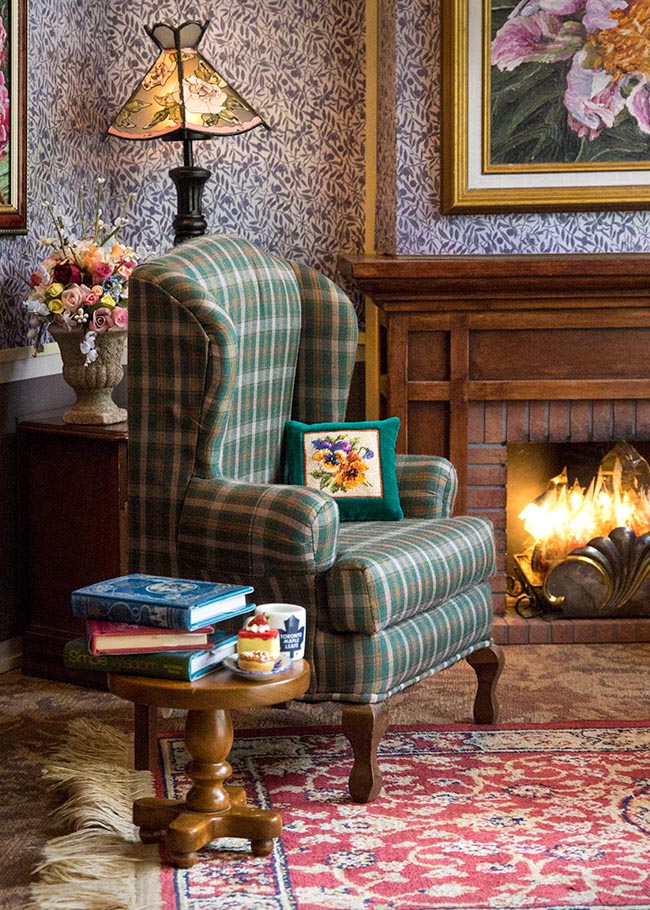
I took a photo and thought it looked so wrong. Unlike a human, he didn't have the weight to press down on the seat cushion, so was sitting high and dry ON top of the cushion, as opposed to comfortably IN the chair. So I was determined to do something about it.
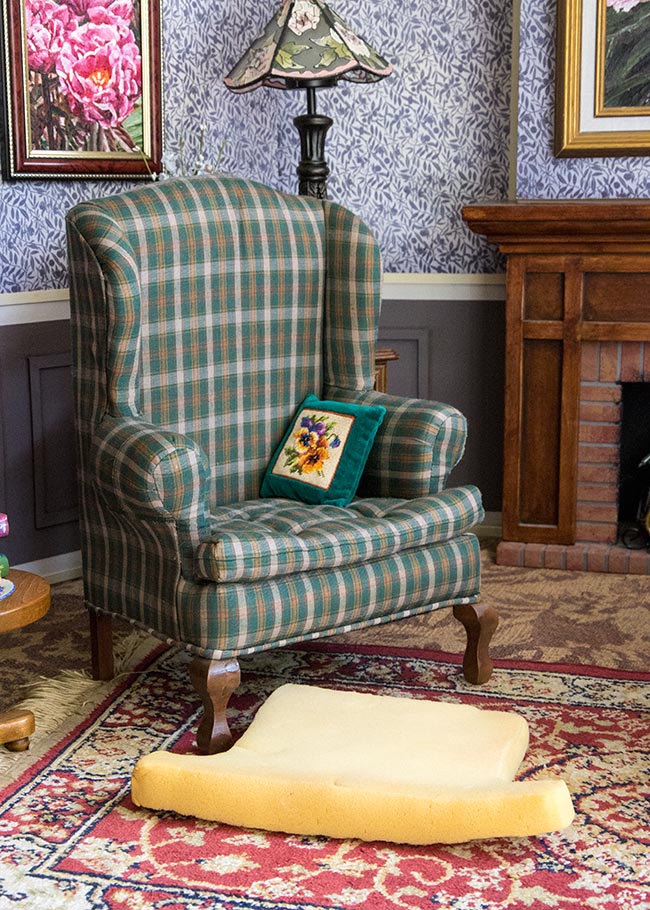
Thankfully the seat cushion was loose, and quite well made. I unpicked the back seam, removed the foam cushion, then sliced the foam much thinner - to less than half. Then I stitched a wide tuck into the edge of the cushion cover, inserted the thinner foam back in and stitched the opening closed. I also added some tufting to help shape the cushion even more...
Thankfully the seat cushion was loose, and quite well made. I unpicked the back seam, removed the foam cushion, then sliced the foam much thinner - to less than half. Then I stitched a wide tuck into the edge of the cushion cover, inserted the thinner foam back in and stitched the opening closed. I also added some tufting to help shape the cushion even more...
Then Lawrence could finally get comfortable. His elbow could rest on the armrest, and the shaping from the cushion tufting gave the impression that he had some substantial weight as he sat IN the chair. All the work had definitely been worth the effort.
Copyright © 2024 Martha Boers
All Rights Reserved
